This might help you guys.
This is a word for word copy from 205 gti drivers forum. I read it and thought maybe it could be pinned as it's very detailed and quite enlightening!
Pepare for some long reading:
Many, many people confuse wax with polish and the 2 perform completely different functions - a POLISH is in short an abrasive, which will either 1) remove old, “dead” paint, revealing fresh paint beneath or 2) fill in scratches and swirl marks/holograms using a combination of oils and chemicals to fill the scratch and also to round off the edges, muting the defect’s appearance.
WAX is a generic term, and can refer to both carnauba and synthetic waxes. These products are usually non-abrasive and do not clean your paint, they simply protect it against the elements.
To confuse you further still, there are also “glazes” and “cleaner waxes” – more on this in a sec….
POLISHING
As most people opt for hand polishing (and let’s face it, nowt beats a good hand job..), I’ll concentrate on how to achieve the best results using easy to obtain products and simple to learn methods. I’ve provided an appendix later on listing the right products for the job)
There are 2 absolute rules to remember here so pay attention 007.
1. ALWAYS start with the least aggressive product – remember, you can always remove more paint, but
once it’s gone, it’s gone and you can’t replace it without repainting.
2. 99% technique, 1% product – if you simply slap an expensive product onto the car without any real
knowledge, you’ll achieve very little improvement. Prepare the paint properly and concentrate on your
technique – this will give you the right results!
”it’s not what you’ve got, it’s the way that you use it” (been my excuse for years now)
Firstly, you need to know how to evaluate your paint and determine what the problem is, otherwise you’ll spend a lot of blood & sweat for nothing – not to mention your other half’s tears when you’re spending a lot of time in the garage engaging in rapid hand movements!
You also need the right tools for the job – I’d suggest a few microfibre towels & applicators and some foam applicators.
Here’s how to determine what the problem is and the best route to rectify it.
Oxidisation – this is caused usually by exposure to sunlight and extreme conditions. Most modern paint finishes have UV blockers built in to minimize the effects of exposure to the elements, but older paints tend not to.
Features – colour fading, spots appearing, milkiness to paintwork
Remedy – the dead paint on the surface needs to be removed and the fresh paint beneath. Use a mild polish initially such as Poorboys Professional Polish or Meguiars Deep Crystal Stage 1.
(You can use either a foam or microfibre applicator for applying the polish. I find that the microfibre ones work better as they’re slightly more aggressive and give the product a bit more bite).
ALWAYS follow the product instructions – you’ll usually need to use a bit of elbow grease to work the polish into the paint and remove the defect. Remove with the microfibre towel and then protect with wax or sealant.
Swirl Marks – look at your car in either direct sunlight (you know, that bright, hot thing which occasionally appears in the sky over here…) or use a halogen worklight – you’ll see lots of tiny circular scratches. These are caused by either 1) car washes (think nylon bristles rotating around and around on your paint), 2) incorrect use of a buffer (think apprentice with a big heavy rotary mop) or 3) poor washing techniques (think you, grubby yellow sponge etc etc…..)
If swirls are mechanically present (i.e. buffer or carwash) then it’s unlikely you can remove them by hand and I’d usually suggest you find a friendly and professional valeter who will machine polish your car – TIP; always use someone recommended by a friend as there are a few bad valeters out there!
Features – tiny scratches usually only visible in bright sunlight or artificial lighting. Appearance is similar to cobwebs or long swirly scratches/scuffs.
Remedy – the swirl either needs to be removed (usually buffer only) or filled in. to achieve this, you need to use a product that will fill the swirl and also round off the edges to stop light reflecting and enhancing the defect. Again, use a mild polish specifically for swirl marks, such as Meguiars Scratch.
Scratches – can come from a variety of sources really! Poor parking (by you or the idiot who thought a Discovery would fit in that space next to you…), psychotic ex and a key and so on – the list is endless.
Features – errr, how long have you got?! Can be anything from a small scuff to a deep scratch.
Remedy – firstly, rub the scratch with your fingernail. If you can feel it, then even machine polishing may not remove and you need to look at wetsanding or repainting. If not, then you may be able to do something to improve matters. Start by cleaning as much of the area as you can – use paint cleaning clay, tar remover even meths to clean up the scratch as in many cases whatever had contact with the paint will leave residue on the paint, making the damage appear a lot worse.
Use any of the products previously listed to remove as much of the scratch as you can.
WAXING
Now that you hopefully have paintwork mintier than a Polo (come on, this is a long guide!), you need to protect it. Polishing will improve your paint and remove/hide defects but it won’t protect so you need either a wax or sealant – or both if you’re a bit strange and obsessive like me.
Firstly wax – when I say “wax”, I’m talking about paste waxes in tins/tubs and made from carnauba. This is a natural wax (grows on trees, dunnit?!) and is refined from its natural state (solid and dense) to a workable paste form, using in most cases a variety of chemicals and solvents to soften it.
The general thinking is that the higher carnauba content, the greater protection the wax will offer – there’s a Zymol/Swissol school of thought which I don’t (and won’t) subscribe to, which tells you all about how their waxes contain “natural” ingredients – Jeez, I want to wax my car with the stuff, not serve it as part of a 5 course dinner!!!! I’d suggest you Google your way to either company to read more – just please, please don’t get taken in!
Examples of good carnauba waxes include P21S, Pinnacle Signature & Souveran (the most expensive I’ve bought at around £40 a tub but well worth it), Poorboys Nattys & Collinite (the latter being the exception to the durability rule – this stuff lasts for bloody ever!)
Apply using a foam applicator pad and remove with a microfibre towel. A good tip is to have a spray bottle filled with distilled water handy. If your wax goes streaky, simply spritz and wipe. If you want to get a bit silly, chill the distilled water in the fridge – gives an even deeper shine!
In my experience, MOST carnauba waxes simply add a bit of bling to your paint and some protection – most last maybe 8 weeks and then they’re finished, which is where synthetic sealants come in…..
Basically, these are manufactured waxes – no natural ingredients and usually created by a bunch of clever blokes in white coats in a secret underground laboratory guarded by Page 3 Girls wearing Nurses’ uni……..hang on, getting a bit carried away (that’s what sniffing wax does to you)
They are manufactured to provide much longer lasting protection for your paintwork and can be both acrylic or polymer based. There’s a lot of fancy science involved here (and maybe a few Page 3 Girls….s*it, off I go again, sorry) which I don’t claim to understand but virtually all of these products will last 6 months plus. Some of them also use chemical cleaners to remove/reduce defects and also protect and I class these as cleaner waxes (clever, innit?!)
Examples of pure sealants are Poorboys EX-P, Menzerna FMJ, Wolfgang, Zaino Bros
Examples of cleaner waxes are Autoglym Super Resin & Klasse All In One/Carlack 68. you can then add a pure sealant on top – Autoglym Extra Gloss or Klasse Sealant Glaze – in layers to build up ever more protection
In terms of application, simply use a foam applicator and wipe the sealant on, again following instructions. The main rule here is keep it thin – thick coats are a bugger to remove and have never been proven to add any durability, if anything you’re just wasting money and effort!
Some sealants work a panel at a time, others half or whole car. Some work in sunshine but generally most are better applied out of direct sunlight. Wipe with a microfibre towel and you’re done.
You CAN use both to give you both durability and looks – simply apply your synthetic sealant first, buff off and then apply a wax over the top. Klasse All in One with a couple of layers of Sealant Glaze and a couple of coats of P21S works really nicely and will stay looking good too.
If you car’s a second car and usually garaged, then you don’t need to worry so much about sealing as you can concentrate on looks alone and that’s where glazes come into their own…
A glaze is, to me, a VERY mild polish and usually very rich in oils which give gloss & depth to your paint. It will not remove defects but will hide anything minor. If used after polishing, it will add a huge amount of glossiness and reflection to the paint. Waxing simply enhances this.
Paint Cleaners also fall into the same category – again, mild chemical cleaners that can be used as a final step during polishing, prior to sealing/waxing. I don’t use these that often as they tend to be used more by the concours brigade.
Glazing is painfully easy – my easy favourite is Clearkote Vanilla Moose Wax hand Glaze (can be applied by hand or machine) that can be applied via a microfibre pad and buffed with a microfibre towel in minutes.
So there you go, a brief guide to perfect paintwork!
I’d emphasise that perfecting my technique has taken some years and lots of reading and experimenting. This is NOT something you’ll learn overnight and it should really come with a Health Warning as it can get unhealthily obsessive (as anyone who’s seen my 205 will probably agree….)
Here’s an appendix of what’s what to help you.
POLISHES
Poorboys Professional Polish & Super Swirl Remover range*
Meguiars Deep Crystal Stage 1 & Professional range*
Menzerna Intensive/Final & PO85RD
Optimum polish/compound
WAXES
P21S
Poorboys Nattys/Nattys Blue
Pinnacle Signature/Souveran
Collinite (various)
CLEANER WAXES
Autoglym Super Resin
Klasse All in One
Carlack 68
Poorboys Polish with Carnauba
Meguiars Gold Class/NXT** & pro range
GLAZES & PAINT CLEANERS
Clearkote Vanilla Moose Wax Hand Glaze
P21S Gloss Enhancing Paint Cleaner
Meguiars Deep Crystal Stage 2
* Most “professional” ranges are better suited to machine application including the SSR line-up
** NXT & Gold Class both have very mild cleaners present
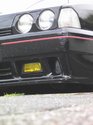
sticker placement
-
Captain Slow

- Confirmed BX'er
- Posts: 84
- Joined: Thu Jun 01, 2006 4:38 pm
- Location: Hythe
-
Cornishbx16v
- BXpert
- Posts: 403
- Joined: Wed Oct 05, 2005 3:41 pm
- Location: Cornwall
- Contact:
reads very much like its one of 'lord mince's' guides of deatiling world!
Its all very easy to spend hundreds of pounds on polishes, glazes and wax's but if you dont know what your doing with them there is very little point!
i have alarge selection of many products i use either by hand or by rotory polisher (not a cheap halfords job! this is a proper trade one!), the trouble is if you dont know what your doing with them its a lot easier to mess it up than to get good results!
for the most people its a case of use what your comfy using! if turtle wax gives you good results then keep using it!
if you want to get technical then i can post up 'the guide to polishes and cleaners' which explains about the content levels and useability of products!
Pure carnuba is that hard that you could have your drive way made from it! when products say made with 100% pure carnauba then its only a small percentage of actual pure wax! most of it is oil! some of the higher end waxes need warming up to actually make them soft enough to be used!
also the more wax content you have the higher the chances of leaving unsightly wax reflections on the paint work! (often called hologramming)which is why a lot of common polishes contain a high level of silicone to remove traces of the wax on the panels afterwards!

AG
haha 
I thought everyone knew that a polish was for polishing and a wax was for waxing!
Anyone who has been around will tell you Farcela have been making he best cutting compounds for donkeys years and as Sleepy said ages ago G3 followed by a good polish will work wonders.
Best plan is to seal it with a good wax afterwards for added protection.
T-cut is ok for general use but there are so many generic brands these days.
Cheers
Luke
-
M
-
Philip Chidlow
- Over 2k
- Posts: 11594
- Joined: Fri Oct 07, 2005 1:08 pm
- Location: Chelmsford, Essex
- x 25
What's the recommended way to get the satin black bits cleaned up and nice. You know around the door windows and rear number plate...
Mine always seem to be all fingerprinty and getting a uniform finish to this sort of paint seems impossible. As it is I'd like to touch in the minor scratches but in order to make them blend in I'd have to use grey paint

Should I T-cut this black 'paint' - or do I risk revealing the shiny white primer underneath.
And what's best for the door mirrors and other 'black' bits...
Any tips?
Mine always seem to be all fingerprinty and getting a uniform finish to this sort of paint seems impossible. As it is I'd like to touch in the minor scratches but in order to make them blend in I'd have to use grey paint
Should I T-cut this black 'paint' - or do I risk revealing the shiny white primer underneath.
And what's best for the door mirrors and other 'black' bits...
Any tips?
• 1992 Citroen BX TZD Turbo Hurricane
• 2006 Xsara Picasso 1.6 16v
• 2006 Xsara Picasso 1.6 16v
-
tim leech
-
Cornishbx16v
- BXpert
- Posts: 403
- Joined: Wed Oct 05, 2005 3:41 pm
- Location: Cornwall
- Contact:
the bl;ack bits arround the windows are meant to be satin black as such! and as such can be a real pain! one way to do them is to apply silicone spray to a rag and wipe it over them then wipe off with a different cloth! This is not ideal but does the job!
the best is as tim said and get them resprayed!! alot easier hahah!
the machine polisher i use works at anything from 800- 2000rpm (typically i use it around 12-1500) although they are not really advised for anyone with no experience as they can in the wrong hands go through the paint! but if you fancy a go then type in polisher / sander into ebay and youcan pick up some basic ones for around £40! (if you do drop me a pm and i'll let you know whats best for use with them etc!!) although the pads woith the ones off ebay arnt up to much!
by hand your best off using the G3 with a good soft rag or polishing sponge etc and also use a small spray of water on the panels too to help the compound move around the panel easier!! best to do with small panels at a time and wipe off then when your happy dop the next panel! when your done you will need ot put some polish on it to protect the paint and if your totally happy then a couple of coats opf polish and a coat of wax would be good! its hard yakka and your shoulders will be saw by the end of the car but its definately worth it!
as for 'oggies' the bakers down the road from me makes them that big that two will only just fit on a baking tray and there 4" thick!! now they are hard going! never yet have i been nbeaten by a pasty but that was close!