Fixing the height corrector linkages

BX Tech talk
Post Reply
User avatar
Aerodynamica
BXpert
Posts: 793
Joined: Sat Jun 07, 2008 11:43 pm
Location: Glasgow

Fixing the height corrector linkages

Post by Aerodynamica »

After doing the job on my CX and previous GSA, I set about repairing the height corrector linkages to make the legendary self leveling working up to scratch.

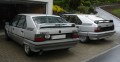
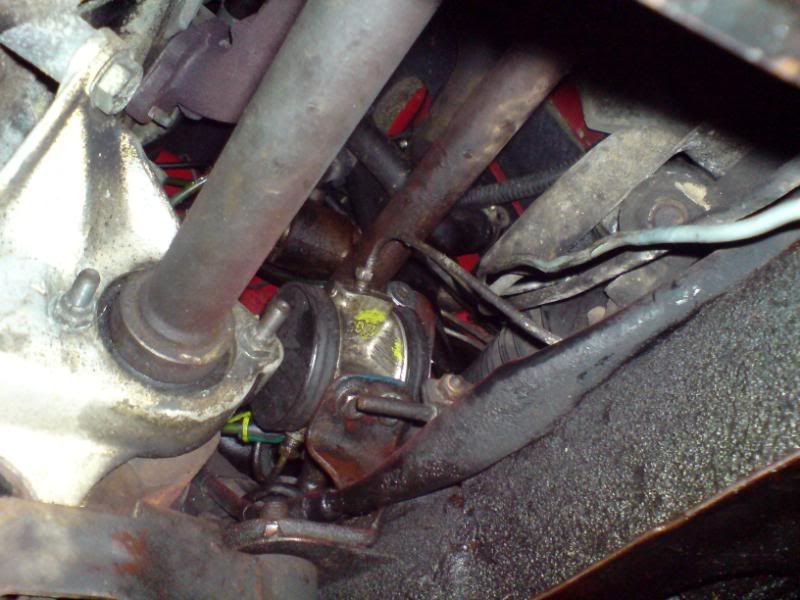
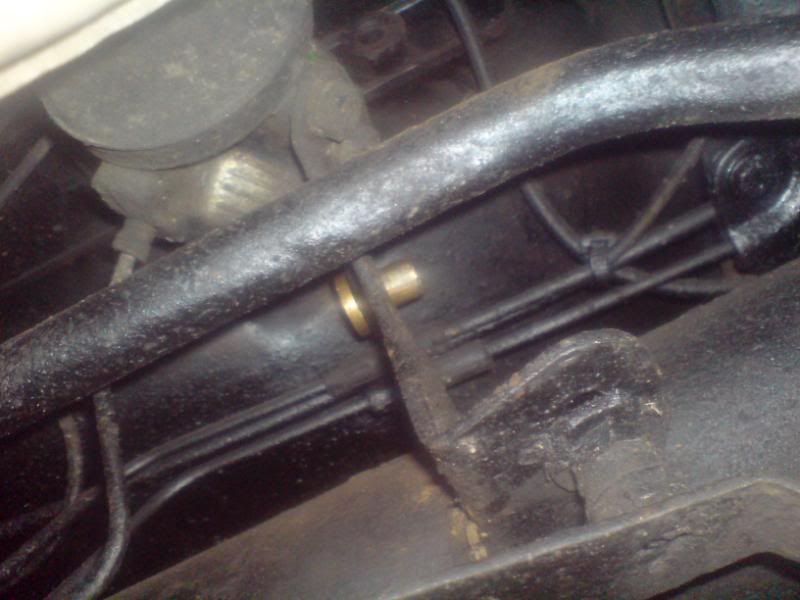
The linkage comes off easily on the BX and CX, the GSA is a different arrangement. Here's the BX rear corrector linkage:
Image
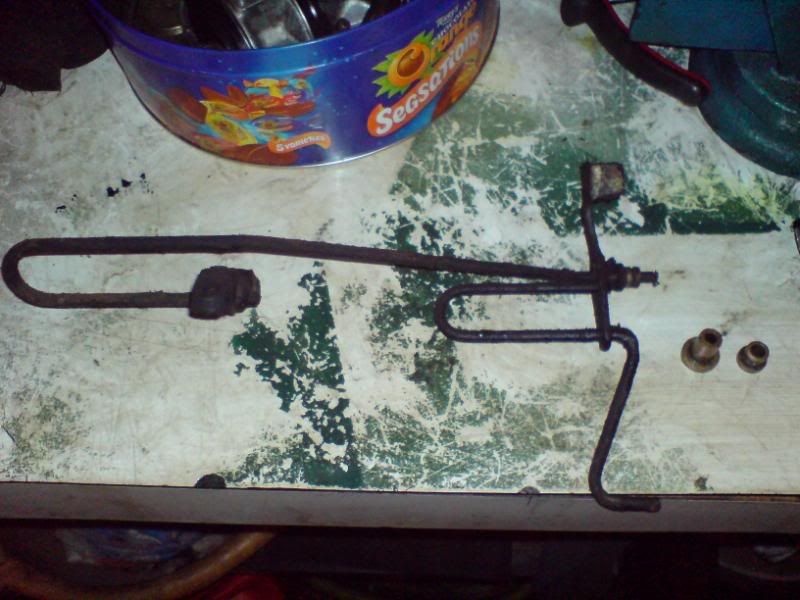
On the left is the familiar clamp to the anti roll bar and at the other end is a brass bushing that fits into the sub frame. This bushing wears over the years and gives excess play. Worse, the rod of the linkage wears in the bush giving more free pay. Add to that a sludgy height corrector it'll cause suspension that's too high some times and too low at others (also makes the intermediate height position a bit vague) Also in the picture is the modified brass bushing I had made with closer dimensions to fit the sub frame and to use a different part of the linkage rod to bear onto. There's also a spare original type bush pictured.

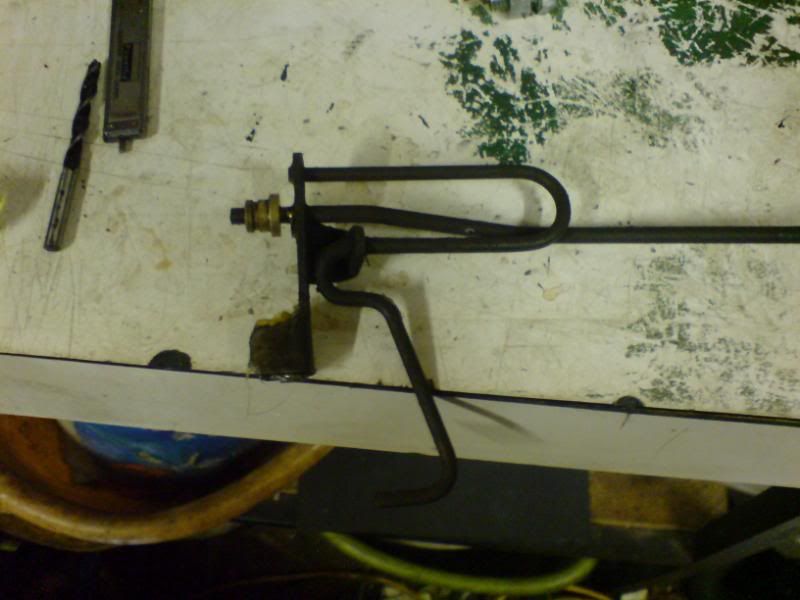
Here's the worn bush - can just make out the worn area (shiniest bit)
Image

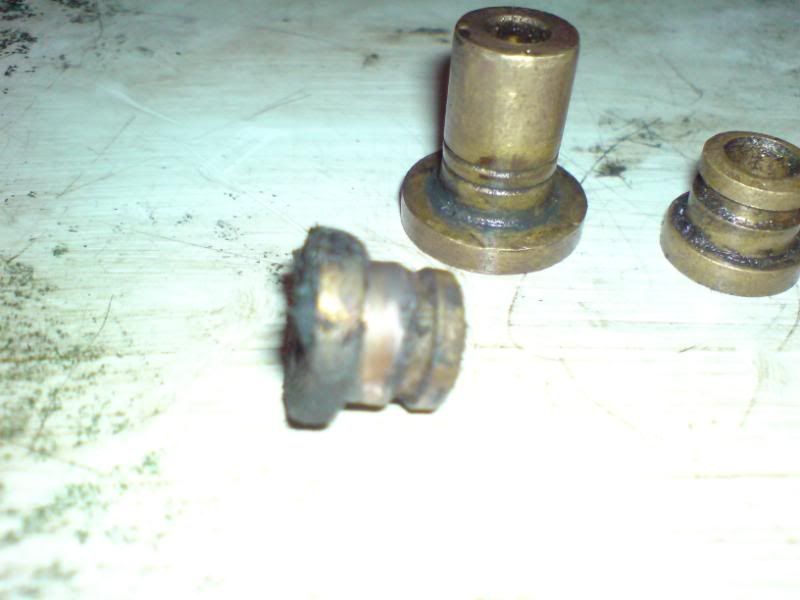
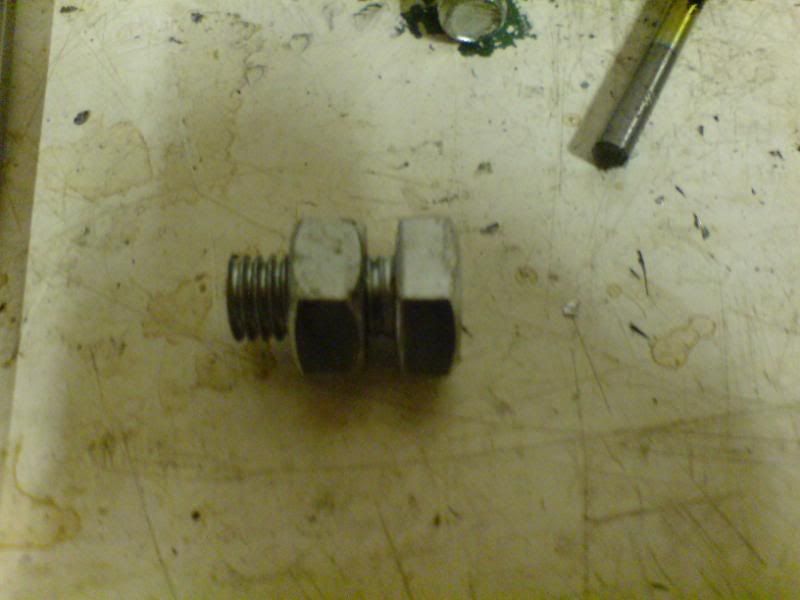
Here, the rod end part and the bush.
Image
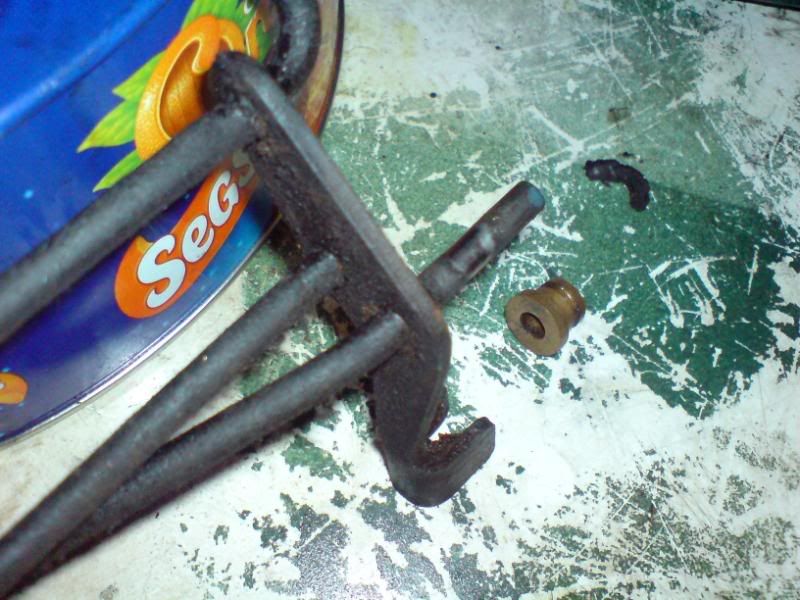
If you look at the rod there's a wee blue paint mark on the end and about 1/2" in from that you can see the corresponding wear on the steel rod. My new bushing attempts to get the rod to pivot on a different unworn area nearer the blue paint.

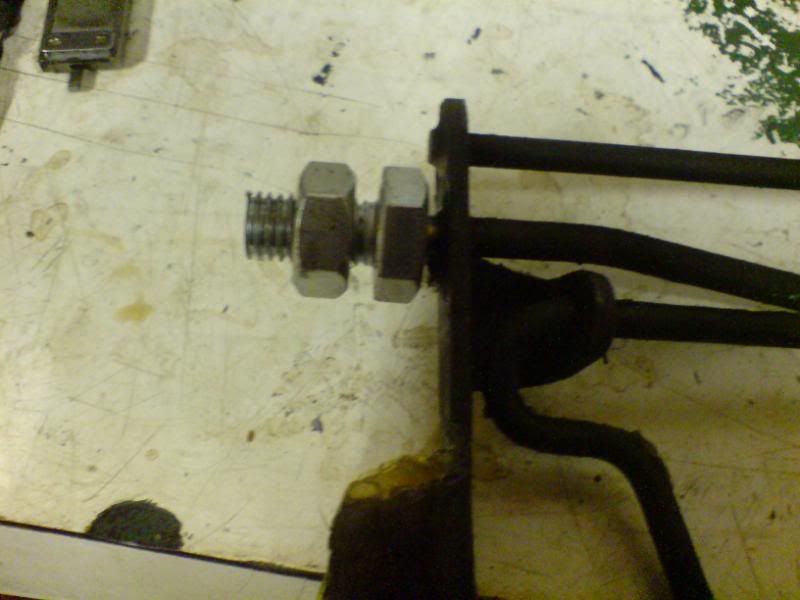
Here's the new bush fitted in the subframe, on this and the old one there's a steel clip secures it in the bush's groove - I made the groove slightly closer to the subframe so it was tighter but it wasn't needed as the new bush was a stiff press fit in the sub frame.
Image
And here with the linkage back in place and plenty of grease in the bush and the fork that fits onto the ball joint on the corrector unit.
Image

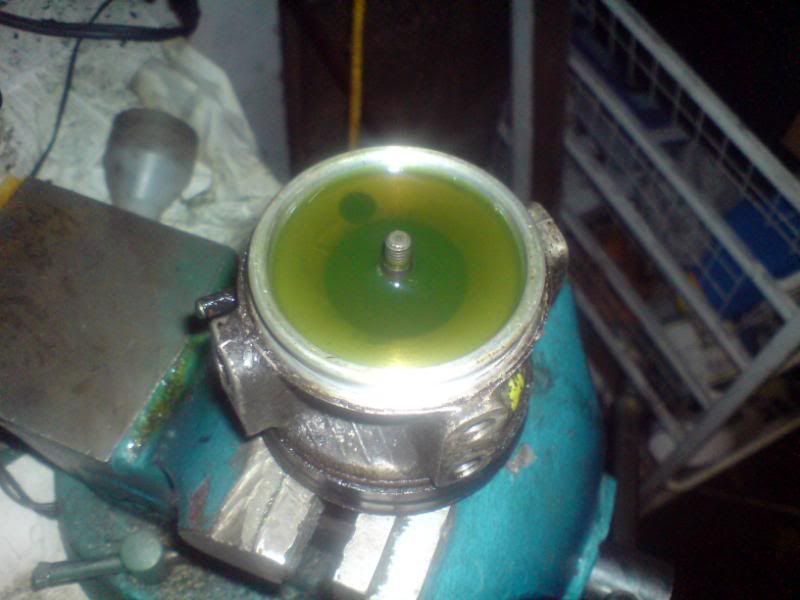
Height corrector had been full of black LHM
Image

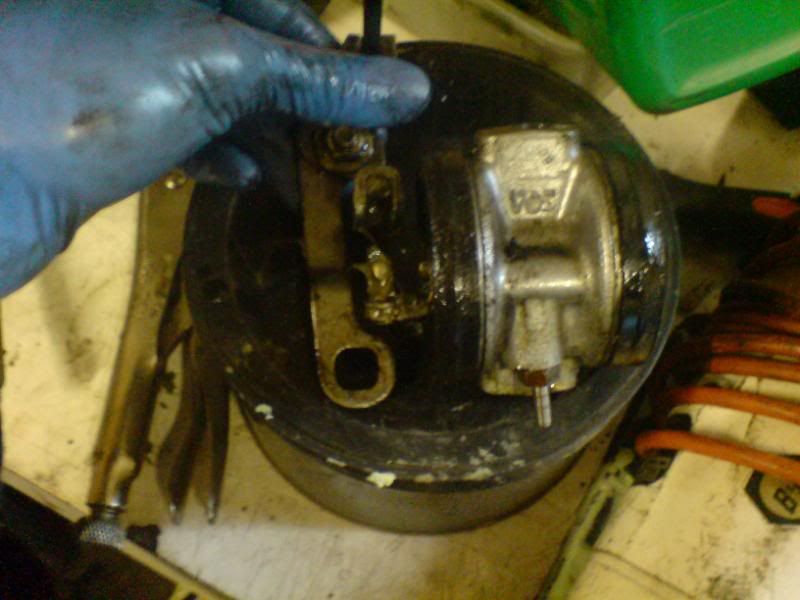
The ball joint of the corrector can wear too as can the fork end of the linkage lever on the rod above. These can be fixed too. The ball of the corrector can be carefully turned in its fixing using some good grips and a vice. It only needs a slight turn to move the worn flats away. The fork end has corresponding wear, the excess gap can be reduced after doing the previous ball join fix by taking the newly fixed ball joint and fitting it in the fork while on the bench - then getting your mole grips or vice to squeeze the fork around the ball - it'll bend that tiny amount needed while leaving the tiny clearance necessary not to jam up.
Here's the ball and fork just apart for the CX front corrector and linkage
Image

All back together, reset the normal ride height and welcome to factory spec suspension again!
Graeme M

CX 2400 Pallas LPG
2CV6 dolly (SORNed)
Mk1 Xantia 1.9TD SX

'c'est hydropneumatique'
User avatar
Way2go
Over 2k
Posts: 7279
Joined: Fri Jan 13, 2006 3:15 pm
Location: RCoBerkshire
x 2

Post by Way2go »

Very useful info - I need to check whether this bushing is the root of my BX ride & sluggish rise problems.
Thanks for the pictures. :D
1991 BX19GTi Auto
User avatar
TB2
BXpert
Posts: 320
Joined: Sat Apr 28, 2007 3:31 pm
Location: Switzerland
x 1

Post by TB2 »

Reviving this thread, as I'm trying to do this right now. Great job on the pictures, at least I know what to do - once I get it out.

Problem is, I can't get out the height corrector. I've spent more then 3 hours cramped under the car fiddling with a spanner but I can't remove the one hydraulic hose that feeds the height corrector. Not the one leading to the struts, the other one. I was able to remove the two retaining bolts and the hydraulic pipe going to the struts, but this other one is killing me! So frustrating... Theres' a huge bundle of cables and all kinds of stuff all around and no space at all to turn the spanner. Also, the screw is very rusty and all I seem to do once I manage to catch the bolt is grind the edges off. Horrible job this!

Well, not sure if can be helped in any way - I just need to try again, maybe take the RH wheel off and the plastic covers, but still access is horrible...
Carl

1989 TRD "Entreprise" Turbo Diesel
1989 16 Valve
---
Parts needed:
- One black leather headrest.
- FDV overhaul kit (95.669.034)
Please contact me through PN if you have any of this.
User avatar
Aerodynamica
BXpert
Posts: 793
Joined: Sat Jun 07, 2008 11:43 pm
Location: Glasgow

Post by Aerodynamica »

I was able to remove the two retaining bolts and the hydraulic pipe going to the struts, but this other one is killing me! So frustrating.
- there are actually TWO pipes on the other (hard to reach) side making 3 in total. The easy one to feed the struts, then the 2 on the other side of the corrector, one it the high pressure from the security valve and the other is the pressure return pipe from the corrector valve.

I am not certain if your car being a Mk2 has extra plastic covers/ things in the way (but I wouldn't be surprised :roll: ) but on mine, I found that I could get a spanner into the furthest forward pipe at a long reach and unwind it in careful and annoyingly small turns. The third pipe that's beside this one, it is the return and it joins straight onto the rubber return pipe junction 'octopus'. I found that you can't undo this pipe using the spanner but you can LOOSEN it. If you loosen it then remove the 2 mounting bolts, remove the corrector linkage (one 11mm bolt and pull along anti roll bar then turn 90? and route it out) and then remove the other two easier pipes it leaves the corrector disconnected from everything except this last return pipe that is now loosened.

There is enough room around the corrector now to hold the pipe union still and rotate the corrector itself to unwind it off the pipe.

This worked for me! Be careful not to put too much force/tugging on the rubber pipe as this might very well split or split the octopus.
Graeme M

CX 2400 Pallas LPG
2CV6 dolly (SORNed)
Mk1 Xantia 1.9TD SX

'c'est hydropneumatique'
User avatar
TB2
BXpert
Posts: 320
Joined: Sat Apr 28, 2007 3:31 pm
Location: Switzerland
x 1

Post by TB2 »

Thanks for all the advice. Unfortunately I have yet to manage to get this feeding pipe off.

Image

After another hour of fiddling, I had completely obliterated the screw which holds the pipe in place, I can't believe how very DAFT these screws are made. Utterly weak metal, abysmal quality. It's so stupid that they are actually hollow at the top end, more hollow then necessary. Why did they do that? :|

Image

What you can't see on the picture is that I actually managed to split the screw in half somehow at the top, so besides being completely round instead of 6-edged, it's also split. So there's no way I'll get it off, and as there is no space at all to do it using calipers, I thought of undoing the pipe at the other end, at the LH octopus, where I actually have quite decent access from the wheel arch. I think the pipe would lift out nicely together with the height corrector. But guess what, the screw came off without problems, but the pipe is stuck in the octopus, can't get it out, not with all the force I was able to apply. :|

Image

I'm exhausted, I'll give it another try in the evening maybe. I was able to remove the linkage, the bush is still in though, hidden behind the height corrector.

So either I've got two left hands, being unable to complete this task, or I'm just having bad luck :|
Carl

1989 TRD "Entreprise" Turbo Diesel
1989 16 Valve
---
Parts needed:
- One black leather headrest.
- FDV overhaul kit (95.669.034)
Please contact me through PN if you have any of this.
User avatar
Aerodynamica
BXpert
Posts: 793
Joined: Sat Jun 07, 2008 11:43 pm
Location: Glasgow

Post by Aerodynamica »

Erk! you're doing well.
But guess what, the screw came off without problems, but the pipe is stuck in the octopus, can't get it out, not with all the force I was able to apply.
The pipe that connects to the octopus IIRC also has a 8mm hex nut to the corrector so you should be able to loosen it with the spanner and then unwind the corrector off it but leave the connector still in the rubber hose of the octopus.

Also, one bit of misleading info I put in this thread about the brass bush: the bush itself is a sloppy fit in the hole through the subframe. The little clip is rubbish at securing it - it doesn't at all actually. Even with the modified brass bush at the top ^^ of this thread I found that after short time it too was loose.

I then decided to make a cruder but much more effective replacement bush out of a M10 machine bolt, cut short and with a series of carefully stepped holes through the center - the outside hole is large at 7- 7.5mm tapering down inside to about 5.6mm minimum. A pillar drill is used to drill the M10 bolt through.

This replaces the brass bush and with a M10 nut, it can be firmly secured in the subframe unmovable. Being a 10mm nut in a 11mm hole, you can also move it a bit to get it in the best position before tightening the nut.

Image

Image
Image

Image

You can see it in place in the subframe here just beyond the corrector. (linkage is not fitted in this pic)
Image

Also, when you do get the corrector off and it comes to dismantling it - be careful not to cut the inner rubber diaphragms when the clamp-ring thing is being prized off. If there is a hole in it it'll drip LHM!
Graeme M

CX 2400 Pallas LPG
2CV6 dolly (SORNed)
Mk1 Xantia 1.9TD SX

'c'est hydropneumatique'
User avatar
TB2
BXpert
Posts: 320
Joined: Sat Apr 28, 2007 3:31 pm
Location: Switzerland
x 1

Post by TB2 »

That's some pretty ingenious engineering with that replacement bush you made! Got to try that out. I managed to remove the linkage and that bush which was indeed quite lose.

Although after another 2 hours in the garage, I still haven't managed to get off that screw. I've put the car up higher in the highest slot of the axle stands, quite a bit of room now. But still no luck removing that screw. Tried a kitchen bottle top remover, didn't work. But I managed to loosen the second screw which is the one you can't actually remove, just as you pointed out. At least it was no problem loosening it! Every small success counts ;)

On that matter, I actually have 3 pipes on the other side, not just 2, making it 4 in total. So besides the two screwed in pipes there's another rubber one at the top which is just stuck in. I have no clue how to remove it, tried to pull on it firm but gently, but it's not moving. Any idea how I'm supposed to remove it?

Image

Thanks for all your help!
Carl

1989 TRD "Entreprise" Turbo Diesel
1989 16 Valve
---
Parts needed:
- One black leather headrest.
- FDV overhaul kit (95.669.034)
Please contact me through PN if you have any of this.
User avatar
Aerodynamica
BXpert
Posts: 793
Joined: Sat Jun 07, 2008 11:43 pm
Location: Glasgow

Post by Aerodynamica »

Ah! forgot about the 4th pipe! yes it's the 'leakage return' pipe that is connected to the center of the internal damper of the corrector. The good news here is that it just pulls off - it's just rubber fitted onto a brass tube. It might be stiff to remove but it will come off.

I think that if you can't get the other pipe off (the bad one) you might need to just cut it and replace that pipe.

I was just re reading what you said above. Where you disconnected it at the other 'octopus' (it's actually the 'Security Valve') and the pipe is stuck - I have had that before too on another place. I am certain it will come out if you wriggle it while pulling it with something grippy like pliers.

Man, that's one stubborn pipe.

I'm sure the pipe will come out if you 'go to town' on it. Just keep tugging at it under the wheel arch on the LH side.
Graeme M

CX 2400 Pallas LPG
2CV6 dolly (SORNed)
Mk1 Xantia 1.9TD SX

'c'est hydropneumatique'
User avatar
Aerodynamica
BXpert
Posts: 793
Joined: Sat Jun 07, 2008 11:43 pm
Location: Glasgow

Post by Aerodynamica »

That's some pretty ingenious engineering with that replacement bush you made!
-nah, not really! it's quite crude but it does work better than the original.

Flippin 'eck! I have just noticed that in that photo of mine above^ there is a missing exhaust manifold nut!! I actually just saw it there.

I'll need to have a look at that soonish. How could that come off? And why isn't it leaking? Sorry off topic..
Graeme M

CX 2400 Pallas LPG
2CV6 dolly (SORNed)
Mk1 Xantia 1.9TD SX

'c'est hydropneumatique'
User avatar
DLM
Our Trim Guru
Posts: 1620
Joined: Mon May 16, 2005 6:41 pm
Location: Gosport, Hampshire, UK
My Cars: Historically, lots of BX hatches/estates in the 90s/00s - 16/19i/17td/19d
Recent scruffy diesel n/a estate - "The Red Shed" - is no longer mine.
x 9

Post by DLM »

Being a bit of a pedant (as usual) I'd advise prising the return pipe back from the pipe end if at all possible rather than pulling.It's easy to end up with something else to fix here if the pipe self-destructs in response to a pull.

Access allowing (a big if), gentle pressure with a flat-bladed screwdriver or similar may be enough to move the end of the pipe enough to get a very small spanner or similar behind the pipe end to push with.

It may be that you're replacing the octopus anyway, but if it doesn't need doing at the moment you could save yourself yet more work.

I guess from all this that the height corrector linkage wasn't the cause of the problem you're now tackling.
Back on two wheels and pedal power for the moment.
User avatar
TB2
BXpert
Posts: 320
Joined: Sat Apr 28, 2007 3:31 pm
Location: Switzerland
x 1

Post by TB2 »

I'm giving up. Can't take it anymore...

Tried to remove the screw again today without any luck. The rubber hose is also stuck on so hard that I see no chance of ever getting it off. I'll put everything together again and try and reduce the play on the linkage. Maybe that was the only problem.
Hopefully I haven't broken anything else.

I'll also try and give it a rinse with hydrorincage. If all fails, I'll have to part with it and never touch a citroen again. It seems like I'm too bad a mechanic for a BX :(
Carl

1989 TRD "Entreprise" Turbo Diesel
1989 16 Valve
---
Parts needed:
- One black leather headrest.
- FDV overhaul kit (95.669.034)
Please contact me through PN if you have any of this.
User avatar
Aerodynamica
BXpert
Posts: 793
Joined: Sat Jun 07, 2008 11:43 pm
Location: Glasgow

Post by Aerodynamica »

It seems like I'm too bad a mechanic for a BX
not at all! it's just a stubborn and inaccessible fixing. There are no other cars that are really easier than a BX - it's just that the BX has things like correctors and such that can need attention. On other cars you never look underneath so any problems with anything remain hidden until they break
Graeme M

CX 2400 Pallas LPG
2CV6 dolly (SORNed)
Mk1 Xantia 1.9TD SX

'c'est hydropneumatique'
User avatar
TB2
BXpert
Posts: 320
Joined: Sat Apr 28, 2007 3:31 pm
Location: Switzerland
x 1

Post by TB2 »

Well. I found the time to put everything back together. I can't get the height corrector off, that screw is just busted. One day I'll need to get a replacement pipe from the safety valve to the HC and clip it off.
Basically what I've managed to do with the BX being on stands a whole month is to bust a screw, paint the floor green, clean and regrease the linkage and refit everything. Learned some valuable lessons though.

As bad a mechanic as I am, I actually forgot to refit the screw on that safety valve where I unsuccessfully tried to remove the pipe that goes to the front height corrector so upon starting the car while still on axle stands to check for any leaks, it pissed half a liter of LHM out of it. Well, no harm done. Refitted it, lowered the car, and now it behaves a bit differently, though still not correctly:

It seems like the front now always wants to sit way too high. If I put it in medium, the front is almost all the way up. If I put it inbetween middle and low, it seems to go into the right position, and I tried pushing down the bonnet and it reacted by pushing it back up again. Height corrector seems to do *something* at least. And it still drops really fast as soon as I put it in low. Drops like a stone at the front. At the back it softly glides to the ground.

Now what do I need to do? I drew a lousy picture of how things look:

Image

Where the linkage fits to the rodding of the lever there's a clamp of sorts (where I placed the "A") that holds the rodding in place. Where exactly should it go? I'm guessing that as the front sits too high all the time, the clamp would need to go a little bit further to the back. But how much? I'm unsure about this clamp thing anyway. the linkage has quite a lot of space where it hooks into the rodding (the area marked in pink). Also, I don't know how far to the RH side of the car - towards the HC - I should put the linkage. Now I've just pushed it all the way to the HC but I think it was placed a little bit more to the LH side before. How do I 'calibrate' this thing. And I wonder what was broken anyway.

Oh and a very important question: Would a cure of hydrorincage do any good? Any indications that the HC is glogged/stuck? It seems to move obviuosly...
Carl

1989 TRD "Entreprise" Turbo Diesel
1989 16 Valve
---
Parts needed:
- One black leather headrest.
- FDV overhaul kit (95.669.034)
Please contact me through PN if you have any of this.
User avatar
DLM
Our Trim Guru
Posts: 1620
Joined: Mon May 16, 2005 6:41 pm
Location: Gosport, Hampshire, UK
My Cars: Historically, lots of BX hatches/estates in the 90s/00s - 16/19i/17td/19d
Recent scruffy diesel n/a estate - "The Red Shed" - is no longer mine.
x 9

Post by DLM »

As the height corrector responds correctly to inputs from the anti-roll bar, then I think there's only one thing you can do (NB - I've not done it but see the link below for the calibration theory).

Procedure, measurements and pics are on pages 11/12 of the pdf here http://www.rwbsmith.plus.com/citroen2/Struts/

I'd also check for any wear in the slot on the adjustable control-rod "fork end" (black A in your diag, number 2 in the text), or any bend in the control rod. The first might be problematic, the second can probably be adjusted for.

My guess is that the "fork end" needs to be adjusted slightly in the direction of the front of the car, if the first clearance is as indicated.
Back on two wheels and pedal power for the moment.
User avatar
Aerodynamica
BXpert
Posts: 793
Joined: Sat Jun 07, 2008 11:43 pm
Location: Glasgow

Post by Aerodynamica »

The clamp at point B in your diagram is used to set the height. If it's too high as it sounds, this clamp is loosened while the car stands over an inspection pit or on ramps and the free height is changed by turning the loosened B clamp around the anti roll bar and held until the height starts to change (IIRC: looking rightwards along the anti roll bar, turning the clamp counter clockwise will lower the height.

As for the position R-L of clamp B, I'd say push it first all the way to the right and then back less than 5mm back again. It doesn't actually matter - so long as the rod end is still located in the brass bush and the lever is still moving the ball on the back of the corrector valve. In fact, by replacing the linkage in a -slightly- further right/left point to the original position, you can find that the lever end acting on the corrector ball joint is working on a less worn part of the lever end.

As for part A in your picture - that is the end of the other rod that comes off the lever in the canter of the car. It is not supposed to touch the corrector linkage when it's set to its normal height - it allows the pink rod at 'A' to move forward and back un restricted- that's whay there's lots of space around the rod at A. The loop at A has a single little bolt to allow the loop to be loosened and moved back or forward to achieve near equal clearance for the pink rod at A. But! this is secondary! set the actual free height of the front axle first and once it's in the right height, then set the position of the loop thing at A.

(if the thing at A is badly out and causes the pink rod to bear on one end or the other making the first adjustment, setting the free height difficult, then you should also loosen the bolt down at A but then return to set the height via loosening the clamp at B first.

I hope this helps but keep in touch if it's not clear.
Graeme M

CX 2400 Pallas LPG
2CV6 dolly (SORNed)
Mk1 Xantia 1.9TD SX

'c'est hydropneumatique'
Post Reply