Hopefully you'll then see some water & gunge/crap dribble out. What i normally do is have the sunroof open & poor some water (being careful not to spill any into the car) into the roof drain & then check to see if its then peeing out of the drain tube at the back. If not repeat the suck or blow method & i keep doing this until eventually there is no more crud coming out of the drain tube at the rear or its a continous flow, that'll normally mean its unblocked. I'd do both sides just incase. Hopefully you've got the idea from my rubbish explanation
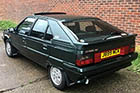
It's here! My 1987 19TRS Auto.
-
MULLEY

- Over 2k
- Posts: 8406
- Joined: Thu Jun 22, 2006 11:10 pm
- Location: Derbyshire
- My Cars: 1999 Xsara LX 2.0HDI (90) Hatch - Fern
2002 C5 2.0 HDI (110) Estate - Jasmine - SORN
2011 Mini Cooper D Clubman - SOLD
2016 Mercedes A180D Sport - Auto refinement
1992 TZD Turbo - Bluebell - SORN
1992 TZD Turbo Estate - SORN
1991 Gti 16V - Blaze - crash damaged, will get repaired - SORN
1990 Gti 8Valve SOLD - looks like it's been scrapped
2002 Mini Cooper S - SOLD - i miss this car
1992 TXD - Scrapped in March 2014
1988 CX 25 GTI Turbo2 - SORN
1996 - AX Memphis 1.5D - Dream - SORN - x 8
Just remove the rear lights, there is an hole which is oblong shaped from memory. Sitting behind this somewhere, it may not be in view is a tube. Best way i've found of getting hold of the tube to lever it through the stupid shaped hole, is to get a screwdriver which has a circular shank (not a square one, as that'll increase the potential damage to the tube), grease the hole to allow the tube to be pulled through easier. Be firm but careful when bending the tube through the hole, what you don't want to do is break the tube. Once its through, either be brave & suck really hard  or take the safe option & blow 1st
Hopefully you'll then see some water & gunge/crap dribble out. What i normally do is have the sunroof open & poor some water (being careful not to spill any into the car) into the roof drain & then check to see if its then peeing out of the drain tube at the back. If not repeat the suck or blow method & i keep doing this until eventually there is no more crud coming out of the drain tube at the rear or its a continous flow, that'll normally mean its unblocked. I'd do both sides just incase. Hopefully you've got the idea from my rubbish explanation
Hopefully you'll then see some water & gunge/crap dribble out. What i normally do is have the sunroof open & poor some water (being careful not to spill any into the car) into the roof drain & then check to see if its then peeing out of the drain tube at the back. If not repeat the suck or blow method & i keep doing this until eventually there is no more crud coming out of the drain tube at the rear or its a continous flow, that'll normally mean its unblocked. I'd do both sides just incase. Hopefully you've got the idea from my rubbish explanation
2002 C5 2.0 HDI Estate - Jasmine - Now SORN
2011 Mini Cooper D Clubman - SOLD
2016 Mercedes A180D Sport - Auto refinement
1992 TZD Turbo - Bluebell - My daily
1991 Gti 16V - Blaze - crash damaged, will get repaired.
1990 Gti 8Valve SOLD - looks like it's been scrapped
2002 Mini Cooper S - SOLD - i miss this car
1992 TXD - Scrapped in March 2014
1988 CX 25 GTI Turbo2 - SORN
1996 - AX Memphis 1.5D - Dream - SORN
I'm not just a username, i'm also called Matthew.
-
electrokid
- 1K Away
- Posts: 1764
- Joined: Fri May 09, 2008 2:14 pm
- Location: Woking
Looks good - all the best with getting all together.
I had some rust bubbles on the nearside rear quarter and I had pretty much ignored them because they didn't seem to get any worse over the 4 years I've owned the car.
Lately I've been fettling... fitting the new front bumper with the foglights and re-spraying bumpers front and rear. Using the airline scarifier on the rust was too brutal and punched the holes right through.
What I found - and this might be the case with yours too - is that the rust holes extended quite close to the square hole that the rear bumper slots into - I was glad to have found that in time to fix it without having to replace the panel.
I wire brushed the inside of the wing with a rotary on an extension drive and covered with Kurust before fitting aluminium mesh on the inside with Isopon followed by Waxoyl spray - then filled from the outside etc. Not a perfect solution but better than letting it rust further.
Cheers,
Brian.
1992 BX19 TGD estate 228K Rusty - SORNed
2002 C5 HDi SX estate
2002 C5 HDi SX estate
-
rayfenwick

- 1K Away
- Posts: 1718
- Joined: Sat Mar 27, 2010 9:16 am
- Location: Kingston upon Hull
- Contact:
Thanks Brian. Brother and I are going to give the car a good going over for rust hopefully at the start of next week. The rotten wing will be replaced, as it is not worth saving. On first inspection the car looks in excellent shape rust-wise, so I'm actually pretty pleased so far, despite the holeelectrokid wrote:Looks good - all the best with getting all together.
I had some rust bubbles on the nearside rear quarter and I had pretty much ignored them because they didn't seem to get any worse over the 4 years I've owned the car.
Lately I've been fettling... fitting the new front bumper with the foglights and re-spraying bumpers front and rear. Using the airline scarifier on the rust was too brutal and punched the holes right through.
What I found - and this might be the case with yours too - is that the rust holes extended quite close to the square hole that the rear bumper slots into - I was glad to have found that in time to fix it without having to replace the panel.
I wire brushed the inside of the wing with a rotary on an extension drive and covered with Kurust before fitting aluminium mesh on the inside with Isopon followed by Waxoyl spray - then filled from the outside etc. Not a perfect solution but better than letting it rust further.
Cheers,
Brian.
Ray
The Fleet (most recent first):
2000 Citroën XM 3.0 24V V6 Exclusive Auto (pre-MOT)
1997 Citroën XM 2.0 TCT Exclusive Auto (for sale)
1979 Citroën CX 2.4 EI Cmatic Prestige (slowly being restored)
1992 Alfa Romeo 164 Lusso 3.0 v6 12v Manual (on the to-do list)
www.citroencarclub.co.uk
The Fleet (most recent first):
2000 Citroën XM 3.0 24V V6 Exclusive Auto (pre-MOT)
1997 Citroën XM 2.0 TCT Exclusive Auto (for sale)
1979 Citroën CX 2.4 EI Cmatic Prestige (slowly being restored)
1992 Alfa Romeo 164 Lusso 3.0 v6 12v Manual (on the to-do list)
www.citroencarclub.co.uk
-
rayfenwick
- 1K Away
- Posts: 1718
- Joined: Sat Mar 27, 2010 9:16 am
- Location: Kingston upon Hull
- Contact:
Well I have been a busy boy. Now that pretty much everything's finished on the XM, I've been doing some more on the BX:
Ignition barrel
This has been removed, and using the barrel kindly donated by Peter Dykes, I've replaced the broken return spring. The job wasn't overly fiddly, and the switch is now working as it should for the first time in a long time apparently...
Rear wiper arm
The arm I got from RxBx is spot on, and currently has a used blade donated by PD. It all works fine, but will be painted and fitted with a new blade prior to the MOT, as will the front, which is completely useless.
Interior
As I'd removed all the plastic bits in order to remove the ignition switch and wiring, I used the opportunity to clean everything in the bath with hot water, washing-up liquid, and some Cif-lemon-type stuff. I did the whole centre console, and cleaned out a huge amount of detritus from underneath it, and the sides of the seats. The remainder of the dash and the door cards got a similar treatment, and the interior looks and smells much better as a result, as do the window switches, the very faded ones having been replaced with 3 very good ones again donated by PD.
Exterior
SWMBO was a great help in going over the whole car with some of the Cif-lemon-stuff and a cloth, and the car is MILES better looking as a result. There's a few little areas of rust that need sorting out, but everything is amazingly good given the age, except for that rear wing, which will be getting replaced in the next couple of weeks. The rear lights kindly donated by Tim are installed now, and other than the rusted wing it's really beginning to look like someone owns it
Stereo & speakers
I've found some nice Blaupunkt 5" dual-concentric speakers I've had kicking around for a while (I originally bought them for my Niva!), and the parcel shelf is already marked out for cutting as soon as brother remembers to bring his jigsaw. The rather nasty wiring that was there for the stereo had the switched live wire for the stereo connected to permanent live, which had the effect of flattening the battery over a few days. I found this out the hard way, and was understandably annoyed. The radio has been removed as a result, and I'll grab the connectors and some wire next time I'm in the scrappies.
Talking of the battery - I want to throttle whoever it was who thought that it was a good idea to take a feed ( I've not investigated what for yet...) from the +ve terminal using a GREEN wire! As I didn't take the battery out, this fooled me into connecting the battery the wrong way round for a few seconds, until the happily smoking alternator pointed out my mistake! Thankfully no harm seems to have been done (alternator seems to be working ok, as does everything else), but....AARRGGHH!!!
 The wire should only EVER be red IMHO, especially considering that car is (almost always) -ve ground. Using a green wire for +ve is just asking for trouble. Sure, it is perfectly safe if you're the only one who works on the car - you know what it's for, but for someone unfamiliar with the vehicle, and who didn't take the battery out.... Anyway, rant over, and thankfully no harm done.
Next jobs
seal the unsealed windows
install the speakers and new wiring for stereo
ascertain if the dry carpet means the sunroof doesn't leak/drains aren't blocked etc, or if it is just teasing me
heater circuit modification
fit stereo surround and wheeltrims when they arrive (thanks guys!)
Finally for tonight...
I'm thinking about removing the spoiler. One reason is that it is almost falling off, and the other is that I don't like it! Thoughts anyone?
Ignition barrel
This has been removed, and using the barrel kindly donated by Peter Dykes, I've replaced the broken return spring. The job wasn't overly fiddly, and the switch is now working as it should for the first time in a long time apparently...
Rear wiper arm
The arm I got from RxBx is spot on, and currently has a used blade donated by PD. It all works fine, but will be painted and fitted with a new blade prior to the MOT, as will the front, which is completely useless.
Interior
As I'd removed all the plastic bits in order to remove the ignition switch and wiring, I used the opportunity to clean everything in the bath with hot water, washing-up liquid, and some Cif-lemon-type stuff. I did the whole centre console, and cleaned out a huge amount of detritus from underneath it, and the sides of the seats. The remainder of the dash and the door cards got a similar treatment, and the interior looks and smells much better as a result, as do the window switches, the very faded ones having been replaced with 3 very good ones again donated by PD.
Exterior
SWMBO was a great help in going over the whole car with some of the Cif-lemon-stuff and a cloth, and the car is MILES better looking as a result. There's a few little areas of rust that need sorting out, but everything is amazingly good given the age, except for that rear wing, which will be getting replaced in the next couple of weeks. The rear lights kindly donated by Tim are installed now, and other than the rusted wing it's really beginning to look like someone owns it
Stereo & speakers
I've found some nice Blaupunkt 5" dual-concentric speakers I've had kicking around for a while (I originally bought them for my Niva!), and the parcel shelf is already marked out for cutting as soon as brother remembers to bring his jigsaw. The rather nasty wiring that was there for the stereo had the switched live wire for the stereo connected to permanent live, which had the effect of flattening the battery over a few days. I found this out the hard way, and was understandably annoyed. The radio has been removed as a result, and I'll grab the connectors and some wire next time I'm in the scrappies.
Talking of the battery - I want to throttle whoever it was who thought that it was a good idea to take a feed ( I've not investigated what for yet...) from the +ve terminal using a GREEN wire! As I didn't take the battery out, this fooled me into connecting the battery the wrong way round for a few seconds, until the happily smoking alternator pointed out my mistake! Thankfully no harm seems to have been done (alternator seems to be working ok, as does everything else), but....AARRGGHH!!!
Next jobs
seal the unsealed windows
install the speakers and new wiring for stereo
ascertain if the dry carpet means the sunroof doesn't leak/drains aren't blocked etc, or if it is just teasing me
heater circuit modification
fit stereo surround and wheeltrims when they arrive (thanks guys!)
Finally for tonight...
I'm thinking about removing the spoiler. One reason is that it is almost falling off, and the other is that I don't like it! Thoughts anyone?
Last edited by rayfenwick on Tue Jun 29, 2010 11:29 pm, edited 1 time in total.
Ray
The Fleet (most recent first):
2000 Citroën XM 3.0 24V V6 Exclusive Auto (pre-MOT)
1997 Citroën XM 2.0 TCT Exclusive Auto (for sale)
1979 Citroën CX 2.4 EI Cmatic Prestige (slowly being restored)
1992 Alfa Romeo 164 Lusso 3.0 v6 12v Manual (on the to-do list)
www.citroencarclub.co.uk
The Fleet (most recent first):
2000 Citroën XM 3.0 24V V6 Exclusive Auto (pre-MOT)
1997 Citroën XM 2.0 TCT Exclusive Auto (for sale)
1979 Citroën CX 2.4 EI Cmatic Prestige (slowly being restored)
1992 Alfa Romeo 164 Lusso 3.0 v6 12v Manual (on the to-do list)
www.citroencarclub.co.uk
-
electrokid
- 1K Away
- Posts: 1764
- Joined: Fri May 09, 2008 2:14 pm
- Location: Woking
I did this yesterday - don't forget that the middle pin on the connector needs to be grounded as per discussions on that thread. There's actually a small track which would be connecting pin 3 to the track to the left if it wasn't for a small hole that has been drilled through it - my suggestion is to solder a small bridge across the hole to make the connection just in case that tiny track was designed to be a fuse.Next jobs
heater circuit modification
The behind-the-dash wiring is fun istn't it - someone had shares in a green-wire-companyfrom the +ve terminal using a GREEN wire!
The one at the front ? I recently fitted the GTi bumper I've had kicking around for 3 years - took the spoiler off (staples ? ? ! !) to respray and never re-fitted it. It looks ok but the front end does look a bit 'taller' or 'more square' - I would guess it would look 'flatter', perhaps a bit more 'racey' with it fitted. The angle of attack of the the front air dam has slight effects on handling and fuel consumtion - facing forwards (with the spoiler) will create more vacuum under the car - slightly better high speed cornering but slightly detrimental to fuel consumption - facing backwards (without the spoiler) has the opposite effect. The BX handles very well anyway of courseI'm thinking about removing the spoiler.
1992 BX19 TGD estate 228K Rusty - SORNed
2002 C5 HDi SX estate
2002 C5 HDi SX estate
-
rayfenwick
- 1K Away
- Posts: 1718
- Joined: Sat Mar 27, 2010 9:16 am
- Location: Kingston upon Hull
- Contact:
That sounds a sensible precaution, and I'll do the same.electrokid wrote:my suggestion is to solder a small bridge across the hole to make the connection just in case that tiny track was designed to be a fuse.
I don't mind it so much in such a situation, but a green wire coming from a battery terminal? That doesn't immediately make me think +ve... Ok, so I'll never make that mistake again, but even so it's damn annoying..electrokid wrote:The behind-the-dash wiring is fun istn't it - someone had shares in a green-wire-company
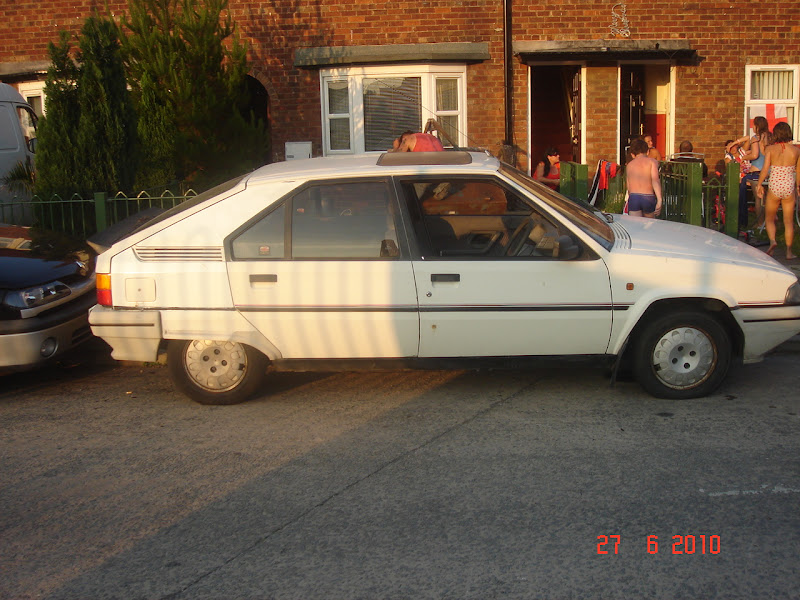
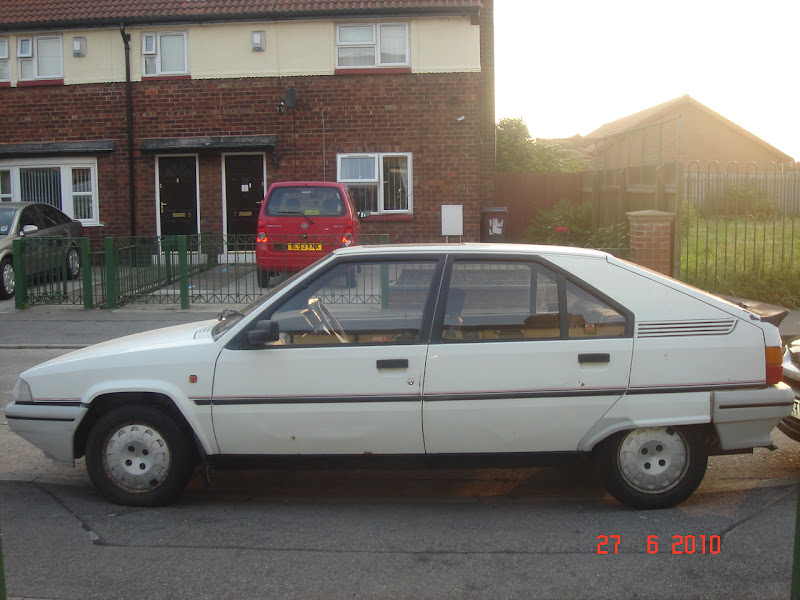
No, the big rubber one at the back, like the blue one in this photo of Roverman's (which I hope he won't mind me using here...) which illustrates the 3 types of rear spoiler (are there more?)electrokid wrote:The one at the front ?
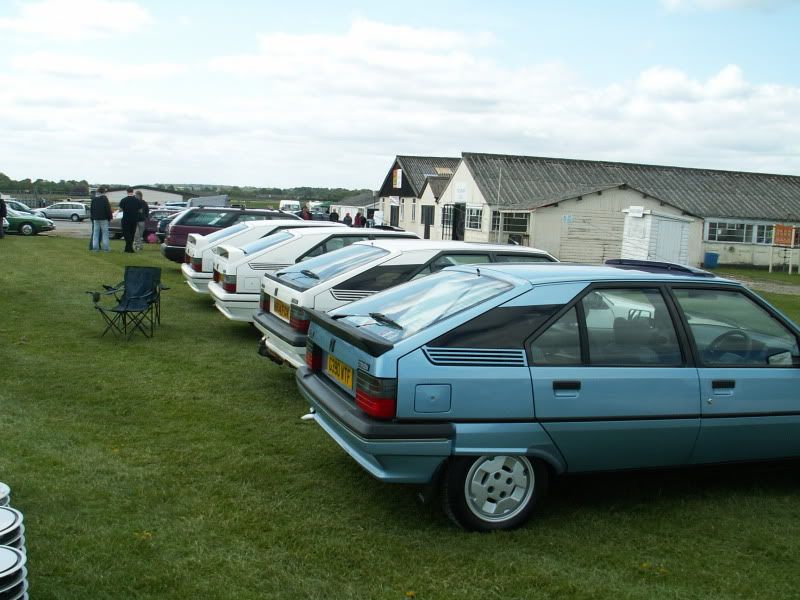
The blue one has the same rubber spoiler as mine, the white one next to it has the integrated spoiler (which is hidden by the big rubber one), and the 2 furthest away have the GTi/babywalker/pram handle etc spoiler.
I like the neatness and purity of shape of the integrated spoiler, and this is what tempts me to remove it...

Last edited by rayfenwick on Sat Jul 17, 2010 3:02 am, edited 1 time in total.
Ray
The Fleet (most recent first):
2000 Citroën XM 3.0 24V V6 Exclusive Auto (pre-MOT)
1997 Citroën XM 2.0 TCT Exclusive Auto (for sale)
1979 Citroën CX 2.4 EI Cmatic Prestige (slowly being restored)
1992 Alfa Romeo 164 Lusso 3.0 v6 12v Manual (on the to-do list)
www.citroencarclub.co.uk
The Fleet (most recent first):
2000 Citroën XM 3.0 24V V6 Exclusive Auto (pre-MOT)
1997 Citroën XM 2.0 TCT Exclusive Auto (for sale)
1979 Citroën CX 2.4 EI Cmatic Prestige (slowly being restored)
1992 Alfa Romeo 164 Lusso 3.0 v6 12v Manual (on the to-do list)
www.citroencarclub.co.uk
-
Tim Leech
- Over 2k
- Posts: 15579
- Joined: Tue Apr 15, 2008 11:12 am
- Location: Derbyshire
- My Cars: Various
- x 150
Its all down to individual tastes, if you want the spoiler removed you would be much better off getting another tailgate as it will leave 5 largish unsightly holes when you do.
I know what you mean about the clean lines, ive never like the baby walker type (sorry chaps) hence why none of my cars have one but do like the rubber one as it far more subdued, the best imho is the colour coded P2 valver/Hurricane which looks "right".
I know what you mean about the clean lines, ive never like the baby walker type (sorry chaps) hence why none of my cars have one but do like the rubber one as it far more subdued, the best imho is the colour coded P2 valver/Hurricane which looks "right".
Lots of Motors, mostly semi broken....
-
rayfenwick
- 1K Away
- Posts: 1718
- Joined: Sat Mar 27, 2010 9:16 am
- Location: Kingston upon Hull
- Contact:
Absolutely. Vive la difference, I say.Roverman wrote:Its all down to individual tastes
I know what you mean, but given the amount of paint the tailgate needs, I don't think it will make much difference to fill the holes.Roverman wrote:if you want the spoiler removed you would be much better off getting another tailgate as it will leave 5 largish unsightly holes when you do.
What is it with me and series 1 Citroens?Roverman wrote:I know what you mean about the clean lines
Ray
The Fleet (most recent first):
2000 Citroën XM 3.0 24V V6 Exclusive Auto (pre-MOT)
1997 Citroën XM 2.0 TCT Exclusive Auto (for sale)
1979 Citroën CX 2.4 EI Cmatic Prestige (slowly being restored)
1992 Alfa Romeo 164 Lusso 3.0 v6 12v Manual (on the to-do list)
www.citroencarclub.co.uk
The Fleet (most recent first):
2000 Citroën XM 3.0 24V V6 Exclusive Auto (pre-MOT)
1997 Citroën XM 2.0 TCT Exclusive Auto (for sale)
1979 Citroën CX 2.4 EI Cmatic Prestige (slowly being restored)
1992 Alfa Romeo 164 Lusso 3.0 v6 12v Manual (on the to-do list)
www.citroencarclub.co.uk
-
electrokid
- 1K Away
- Posts: 1764
- Joined: Fri May 09, 2008 2:14 pm
- Location: Woking
Keep an eye on it - the alternator is a 3 phase device so 4 of the diodes can pop and it will still continue to charge but using just one phase and so with not so much output - symptoms will show up as lowering charge in stop-start situations / slightly reduced lights after starting then driving with headlamps on. You're probably ok though - the smoke likely came from the winding on the rotor and the diodes are pretty tough.Thankfully no harm seems to have been done (alternator seems to be working ok
Ah - that oneNo, the big rubber one at the back,
1992 BX19 TGD estate 228K Rusty - SORNed
2002 C5 HDi SX estate
2002 C5 HDi SX estate
-
mat_fenwick
- Moderator
- Posts: 7326
- Joined: Tue Sep 20, 2005 4:08 pm
- Location: North Wales
- x 19
Reminds me of when I was trying to jump start the 205 to go to a funeral of all things (flat due to lights on) and my father in law's Xantia had the positive and negative caps the wrong way round! 
Melted the insulation on the main charging wire, killed the alternator and rev counter. Plus we were late! Not the best of days...
Melted the insulation on the main charging wire, killed the alternator and rev counter. Plus we were late! Not the best of days...

1993 1.9 TZD Turbo Estate
1996 3.9 V8 Discovery
1993 VW LT35 campervan
1985 Hyundai Stellar V8
2016 Hyundai iLoad
-
rayfenwick
- 1K Away
- Posts: 1718
- Joined: Sat Mar 27, 2010 9:16 am
- Location: Kingston upon Hull
- Contact:
Yes, it was definitely the winding, but I'll keep an eye on it, just to be sure.electrokid wrote:[Keep an eye on it - the alternator is a 3 phase device so 4 of the diodes can pop and it will still continue to charge but using just one phase and so with not so much output - symptoms will show up as lowering charge in stop-start situations / slightly reduced lights after starting then driving with headlamps on. You're probably ok though - the smoke likely came from the winding on the rotor and the diodes are pretty tough.
No, the big rubber one at the back,
Yes, THAT oneelectrokid wrote:Ah - that one
Ray
The Fleet (most recent first):
2000 Citroën XM 3.0 24V V6 Exclusive Auto (pre-MOT)
1997 Citroën XM 2.0 TCT Exclusive Auto (for sale)
1979 Citroën CX 2.4 EI Cmatic Prestige (slowly being restored)
1992 Alfa Romeo 164 Lusso 3.0 v6 12v Manual (on the to-do list)
www.citroencarclub.co.uk
The Fleet (most recent first):
2000 Citroën XM 3.0 24V V6 Exclusive Auto (pre-MOT)
1997 Citroën XM 2.0 TCT Exclusive Auto (for sale)
1979 Citroën CX 2.4 EI Cmatic Prestige (slowly being restored)
1992 Alfa Romeo 164 Lusso 3.0 v6 12v Manual (on the to-do list)
www.citroencarclub.co.uk
-
rayfenwick
- 1K Away
- Posts: 1718
- Joined: Sat Mar 27, 2010 9:16 am
- Location: Kingston upon Hull
- Contact:
Well, it's been ages since I updated you all on how work is progressing on my 19TRS auto. I've no real excuse, except I've been (rarely) too busy and (mostly) too lazy.  So, here goes:
4 weeks ago everything was going well. Typically for my life however, things began to go mammarically supine:
Headlight Protectors
First was when the postie delivered the headlight protectors I'd bought from Mallion for £20+P&P. I skipped down the stairs with glee to collect them from the postman, joyfully began removing the packaging to find.. you guessed it:
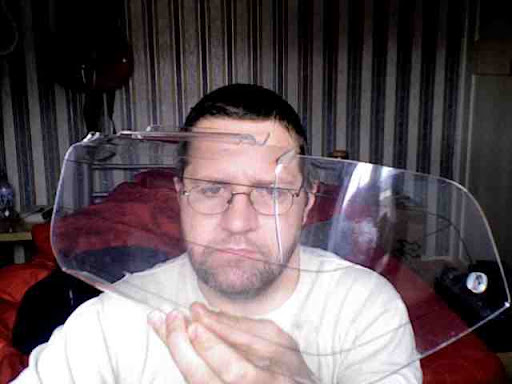
and
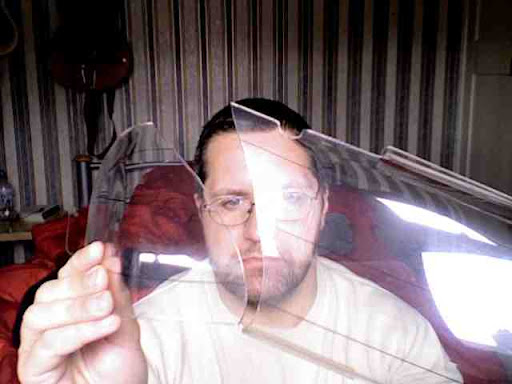
You can see the joy on my face, can't you?
To be fair to Barry he didn't ask me to pay for them once he'd seen how they arrived. But I was still gutted - it was clear that they'd been in really excellent condition before Postman Prat got hold of them. Although Barry had used bubblewrap and brown paper, I wish I'd had the foresight to check that he would stick them in a box - I'd happily have paid the extra postage.
So, let this serve as a warning to anyone selling/buying headlight protectors by post - USE A BOX!
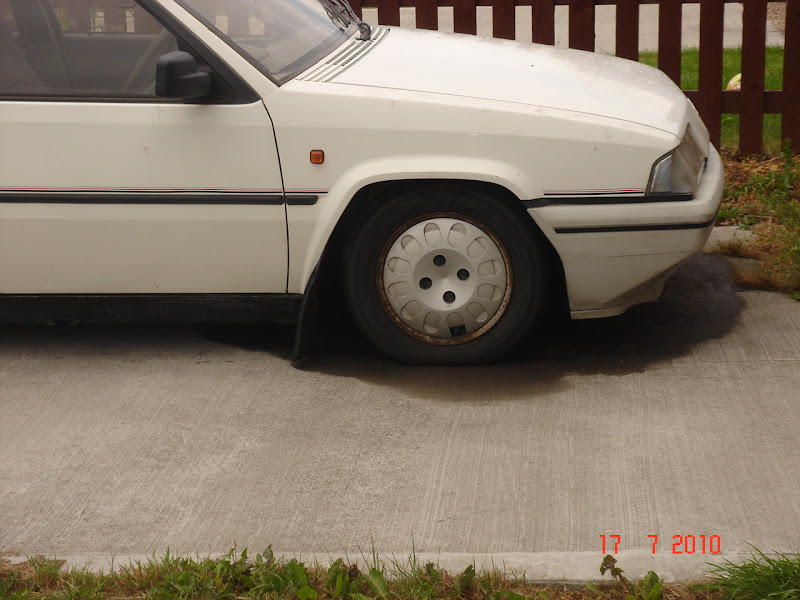
Wheel Trims
Roverman kindly donated some wheel trims to smarten the steel wheels up. I plan to smooth Hammerite the wheels black, and repaint the trims to tidy them up. This should give a nice black line around the silver trim, and that'll do nicely.
Rear wing
As you may recall, this was severely rusted. A replacement panel is the obvious answer, but as this is a rolling restoration that will eventually need a full respray, and as the current budget is tight, Graham suggested that I let him have a go at repairing the damage as at least the car can be MOT'd and driven around for the time being. So I agreed:
Before:
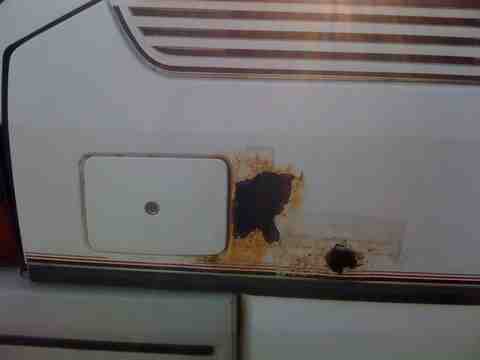
After:
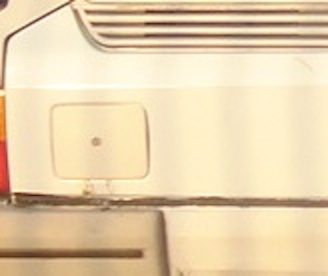
It looks really good. The rubber strip is missing and the adhesive makes it look much tattier in that photo than it does in real life. It'll do for now, that's for sure
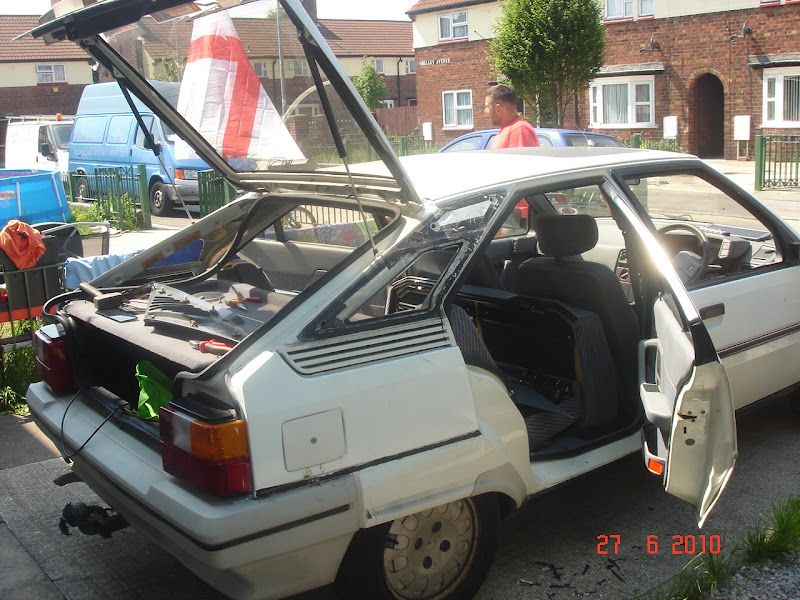
Tailgate Glass
The tailgate glass was held in by only a strip of adhesive on the right-hand side about 8 inches long - it's quite amazing that it didn't fly off when my brother was hurtling down the motorway from Richard's and slam straight into the gorgeous silver Aston Martin DB9 that was behind him for quite a few minutes - try explaining that one on the insurance form!
It didn't take long to remove it, clean everything up and then Tiger Seal it back in. It's now nice and solid <vicar!> and appears to be watertight.
C-Post Panels
Originally my car had the plastic windows in the C posts, but the drivers-side one was all but hanging off, and was an obvious source of water ingression. Similarly to the tailgate glass, there was only a small patch of adhesive at the top corner, so I reasoned that something like a cheesewire-saw would do the job nicely. I didn't have one of those, however. I had Stanley blades, a flexible snap-blade craft knife, and a guitar string <insert G-string joke here>.
Work began ok, and progress was slow, but steady. I was just telling Graham how precious these plastic windows are because most of them are now crazed badly, whereas these were lovely and clear and undamaged when.... it snapped in two. The fscker laughed at me. I said some naughty words. I said more naughty words when Roverman just laughed at me when I asked if replacements were likely. Hmm. Solid C-posts it is then.
This is actually ok, as I much prefer the look of the car with the solid C posts, and that collection of lines and angles around that area always looks very Lamborghini Countach to me. They also make the car (look) more secure, so it wasn't the disaster it could have been. A few emails later and a big box of bits (this time thankfully intact!) arrived from RxBx - thanks Richard! So, the work could begin.
First job was to carefully remove the passenger side plastic window in case someone needed it. That lasted all of about a minute before it decided to break like its brother. This was annoying, but speeded up the removal process, and after a bit of brute force and ignorance (we should adopt that as a stage name...) the panels were removed and ready to prep.
We started by removing all the old adhesive from the panels and the car - oh, and removals of large chunks of flesh and lots of blood too - no matter how much we warned each other to take care with the craft knife, we both ended up cutting ourselves - Graham sliced the tip of his index finger, and I managed a spectacular cut through the top of my left thumb and all the way down the entire nail near the edge. It bled. A lot. So, more naughty words, lots of cold water, dried with a towel, bound together with electrical tape and carried on working. When I got home I superglued it together (otherwise the cut nail would catch on everything) and it has healed so well you almost can't see it now.
Anyway, aside the DIY surgery, the job went well. Add a bit of prep, rust treatment, primer and white spray Graham had in his shed, attach the new interior trim panels et voila:

Of course it's not the right colour, but it's close enough to stop it looking too tatty, and when the rest of the bodywork is done G will get a can or 2 of the proper colour made up at our local suppliers, which will do until it's ready for a respray once replacement passenger-side doors have been sourced.
Spoiler
While the Tiger Seal was out, I removed the rear spoiler, cleaned everything, and then refitted using a good bead of Tiger Seal all the way round. I'm still not convinced I like it, but at least now it won't fall off!
LMH Leak
When I collected the car from Richard there was no sign of any hydraulic problems - no warning lights, car rose smoothly and quickly, and no green stuff underneath when we moved it. Same goes for the drive home - no sign of any trouble. I promised my long-suffering neighbour that it wouldn't cover her drive in any of that nasty green stuff like my CX did when that was parked there. I can only assume the BX overheard this, and took it as some kind of challenge
Sure enough, next morning there was a big wet patch under the engine bay. "I think it's water" I hopefully said. Nope. LHM. No sign of anything shooting out when the engine's running, and a too-slow-to-see drip when it's switched off, so it couldn't be anything high pressure. At first I hoped it was perhaps spilled LHM washing down with the rain from somewhere underbonnet, but it wasn't. A thorough investigation was called for - time to call in the Stig, err, Graham.
After some prodding he's tracked the leak down to a split in the octopus. If anyone has any photos that would help (or if they can point me towards the ones I may have missed on here) and/or tips then I'd be really grateful.
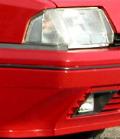
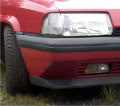
Drivers Headlight
While he was rooting about and getting LHM in the cuts from prepping for the C-post panels, I made myself useful and fitted the replacement headlight kindly donated by Electrokid on the "buy now, pay me back later when you've got something useful that I need" scheme, which is a favourite of mine - especially during this time of fiscal malnourishment, so that's that sorted, although the sidelight bulb holder is a different type, and kept falling out until I modified it with blu-tak
Sunroof Drains
Following Mulley's how-to, I checked the sunroof drains, and they were both free-flowing. There was some rust in the sunroof tray however, so cleaned that up. The sunroof itself is quite rusty underneath, but solid. I'm going to wire brush it, rust treat it, and smooth black Hammerite it.
So where was the water coming from? Well I think it was from the leaky tailgate glass and the barely attached driver-side plastic window on the C-post. Under the rear seat was VERY wet, and I think the water had just run into the footwell from there. Now the tailgate glass and C-post trims are watertight things seem ok so far.
Electrical Bits
This is "my side of things" and while Graham was busy elsewhere I kept myself busy by cleaning all the dash panels, vents etc, and sorting out the interior electrics...
Heater Modification
My relay clicks fine as it was, so that was easy
Plip & Receiver
When Oscar advertised a working plip & receiver I snapped them up. Fitting took all of a minute, and it works fine. Infrared plips are never as good as RF ones, but once I've put new batteries in the plip (or should I say when I remember to buy some new batteries to put in the plip) I'm sure it will be much improved. Either way it is nice to have it for completeness and originality.
ISO Harness For Stereo
First job was the installation of an ISO harness so the replacement stereo would not only plug in, but be fully connected in terms of ignition sensing (no accidentally leaving the stereo on to flatten the battery), dash illumination sensing (so the buttons light/display dims for night use) and all the speaker connections - including the new rear speakers. This didn't take long, and thanks to Mat Fenwick pointing out that both the illumination and ignition are ready for tapping at the LCD dash clock everything works and the wiring is simple.
Head Unit
Having the wiring there won't do any good unless there's something decent plugged into it. I wanted something that sounded good, but a modern "space invaders" head unit would look tacky and out of place. I've been a fan of Blaupunkt for a long time, and as the original head unit was most likely a Blaupunkt this was the way I wanted to go - indeed my CX has the top Blaupunkt system from 79-80, and my XM has the top Blaupunkt system from 1997-8 (as they're both top models - a Prestige and Exclusive respectively).
Of course in 1987 it would have been a cassette based unit, but I wanted CD. Blaupunkt did have CD players back then, but they were rare and hellishly expensive (and still are!), and the CD had to be loaded into a "cartridge" first. I decided to look a few years later, and picked up an early 1990's unit with original box, manual, connectors and 2 keycards on eBay for £10. With its inverse green and black LCD like the dash clock it fits in well aesthetically, and could almost have been there forever:
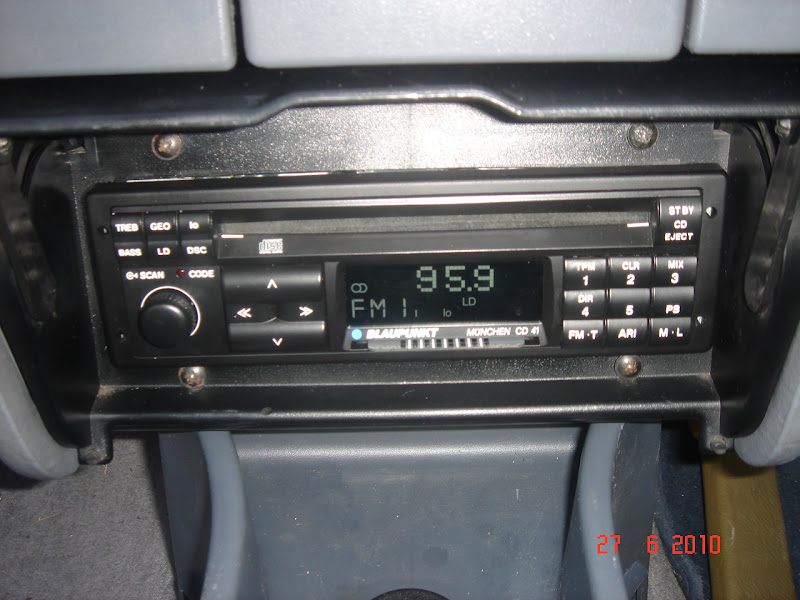
The CD doesn't read discs (something for me to play around with when I have time and the right mood) but the radio sounds great, and my ipod will play fine through an FM transmitter. This is what I'd use anyway, and having the CD working is really only for completeness.
I might change it later if something I like better comes along. The only reason being that it doesn't have RDS (though that was around before CDs..) and it is quite handy (traffic announcements, automatically switching to a stronger signal while you're travelling etc). That said I can live without it no problems.
Front Speakers
With the nice-sounding but poorly fitting Alpines transferred to Graham's Discovery, I used the Philips rear speakers from the XM as fronts in the BX. Mounted behind replacement grilles purchased from Oscar at the same time as the plip (and the radio 'flap', come to think of it..) they look MUCH better. Soundwise they're ok, but I'll replace them with something better eventually.
Rear Speakers
My car didn't come with either rear speakers or dash tweeters originally. I'm going to fit the dash tweeters from my XM when I replace the XM ones, which I'll be doing when I do all the wiring for the Blaupunkt stereo and satnav system - complete with amplifier, (subtle) subwoofer etc. - think quality rather than boom boom chav noises, but I had some barely used Blaupunkt speakers that I'd bought for the Niva that I sold on, and I found I had these left over. A bit of careful measuring and marking, and Graham's jigsaw-ing and they're nicely installed on the parcel shelf.
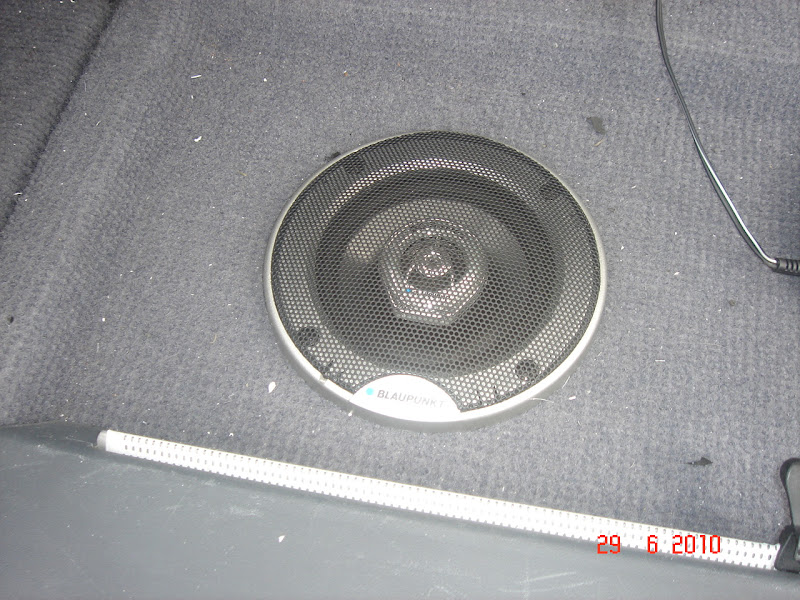
They're a little modern looking perhaps, but don't stick out like a sore thumb. All that remained was running cables nicely and neatly (which gave me the opportunity to remove and clean all the centre console) and the job is done. The overall sound in the car is much better than before, and once the tweeters are in the dash I reckon it'll be great. As I said before, the fronts are a bit weedy, but I'll not be in any rush as it's just me being picky.
Talking of parcel shelves (which we weren't...) one of my clips has broken:
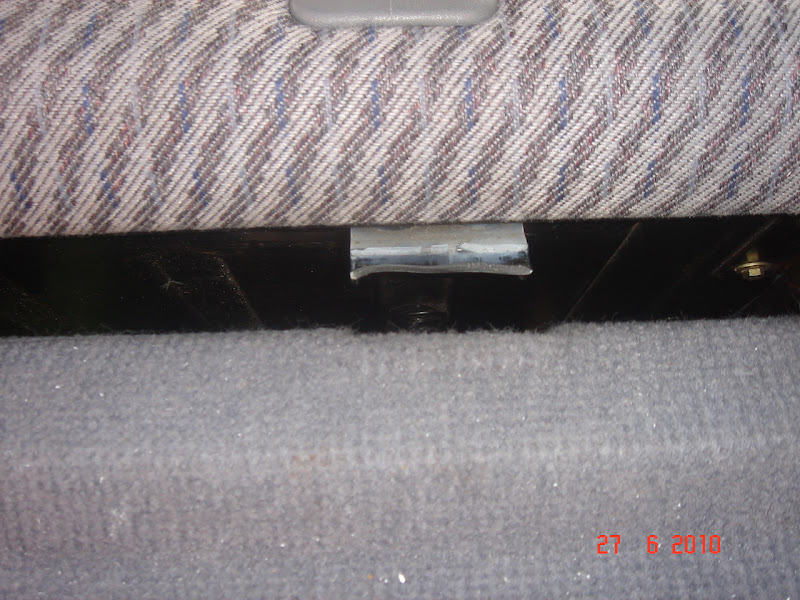
If anyone's got one and they're going to Gaydon on Sunday could they please give it to Richard Oh, and rear headrests, but I know that's a longshot
Anyway, after reading such a long posting you deserve a cuppa - I know I do after writing it
4 weeks ago everything was going well. Typically for my life however, things began to go mammarically supine:
Headlight Protectors
First was when the postie delivered the headlight protectors I'd bought from Mallion for £20+P&P. I skipped down the stairs with glee to collect them from the postman, joyfully began removing the packaging to find.. you guessed it:
and
You can see the joy on my face, can't you?
To be fair to Barry he didn't ask me to pay for them once he'd seen how they arrived. But I was still gutted - it was clear that they'd been in really excellent condition before Postman Prat got hold of them. Although Barry had used bubblewrap and brown paper, I wish I'd had the foresight to check that he would stick them in a box - I'd happily have paid the extra postage.
So, let this serve as a warning to anyone selling/buying headlight protectors by post - USE A BOX!
Wheel Trims
Roverman kindly donated some wheel trims to smarten the steel wheels up. I plan to smooth Hammerite the wheels black, and repaint the trims to tidy them up. This should give a nice black line around the silver trim, and that'll do nicely.
Rear wing
As you may recall, this was severely rusted. A replacement panel is the obvious answer, but as this is a rolling restoration that will eventually need a full respray, and as the current budget is tight, Graham suggested that I let him have a go at repairing the damage as at least the car can be MOT'd and driven around for the time being. So I agreed:
Before:
After:
It looks really good. The rubber strip is missing and the adhesive makes it look much tattier in that photo than it does in real life. It'll do for now, that's for sure
Tailgate Glass
The tailgate glass was held in by only a strip of adhesive on the right-hand side about 8 inches long - it's quite amazing that it didn't fly off when my brother was hurtling down the motorway from Richard's and slam straight into the gorgeous silver Aston Martin DB9 that was behind him for quite a few minutes - try explaining that one on the insurance form!
It didn't take long to remove it, clean everything up and then Tiger Seal it back in. It's now nice and solid <vicar!> and appears to be watertight.
C-Post Panels
Originally my car had the plastic windows in the C posts, but the drivers-side one was all but hanging off, and was an obvious source of water ingression. Similarly to the tailgate glass, there was only a small patch of adhesive at the top corner, so I reasoned that something like a cheesewire-saw would do the job nicely. I didn't have one of those, however. I had Stanley blades, a flexible snap-blade craft knife, and a guitar string <insert G-string joke here>.
Work began ok, and progress was slow, but steady. I was just telling Graham how precious these plastic windows are because most of them are now crazed badly, whereas these were lovely and clear and undamaged when.... it snapped in two. The fscker laughed at me. I said some naughty words. I said more naughty words when Roverman just laughed at me when I asked if replacements were likely. Hmm. Solid C-posts it is then.
This is actually ok, as I much prefer the look of the car with the solid C posts, and that collection of lines and angles around that area always looks very Lamborghini Countach to me.
First job was to carefully remove the passenger side plastic window in case someone needed it. That lasted all of about a minute before it decided to break like its brother. This was annoying, but speeded up the removal process, and after a bit of brute force and ignorance (we should adopt that as a stage name...) the panels were removed and ready to prep.
We started by removing all the old adhesive from the panels and the car - oh, and removals of large chunks of flesh and lots of blood too - no matter how much we warned each other to take care with the craft knife, we both ended up cutting ourselves - Graham sliced the tip of his index finger, and I managed a spectacular cut through the top of my left thumb and all the way down the entire nail near the edge. It bled. A lot. So, more naughty words, lots of cold water, dried with a towel, bound together with electrical tape and carried on working. When I got home I superglued it together (otherwise the cut nail would catch on everything) and it has healed so well you almost can't see it now.
Anyway, aside the DIY surgery, the job went well. Add a bit of prep, rust treatment, primer and white spray Graham had in his shed, attach the new interior trim panels et voila:
Of course it's not the right colour, but it's close enough to stop it looking too tatty, and when the rest of the bodywork is done G will get a can or 2 of the proper colour made up at our local suppliers, which will do until it's ready for a respray once replacement passenger-side doors have been sourced.
Spoiler
While the Tiger Seal was out, I removed the rear spoiler, cleaned everything, and then refitted using a good bead of Tiger Seal all the way round. I'm still not convinced I like it, but at least now it won't fall off!
LMH Leak
When I collected the car from Richard there was no sign of any hydraulic problems - no warning lights, car rose smoothly and quickly, and no green stuff underneath when we moved it. Same goes for the drive home - no sign of any trouble. I promised my long-suffering neighbour that it wouldn't cover her drive in any of that nasty green stuff like my CX did when that was parked there. I can only assume the BX overheard this, and took it as some kind of challenge
Sure enough, next morning there was a big wet patch under the engine bay. "I think it's water" I hopefully said. Nope. LHM. No sign of anything shooting out when the engine's running, and a too-slow-to-see drip when it's switched off, so it couldn't be anything high pressure. At first I hoped it was perhaps spilled LHM washing down with the rain from somewhere underbonnet, but it wasn't. A thorough investigation was called for - time to call in the Stig, err, Graham.
After some prodding he's tracked the leak down to a split in the octopus. If anyone has any photos that would help (or if they can point me towards the ones I may have missed on here) and/or tips then I'd be really grateful.
Drivers Headlight
While he was rooting about and getting LHM in the cuts from prepping for the C-post panels, I made myself useful and fitted the replacement headlight kindly donated by Electrokid on the "buy now, pay me back later when you've got something useful that I need" scheme, which is a favourite of mine - especially during this time of fiscal malnourishment, so that's that sorted, although the sidelight bulb holder is a different type, and kept falling out until I modified it with blu-tak
Sunroof Drains
Following Mulley's how-to, I checked the sunroof drains, and they were both free-flowing. There was some rust in the sunroof tray however, so cleaned that up. The sunroof itself is quite rusty underneath, but solid. I'm going to wire brush it, rust treat it, and smooth black Hammerite it.
So where was the water coming from? Well I think it was from the leaky tailgate glass and the barely attached driver-side plastic window on the C-post. Under the rear seat was VERY wet, and I think the water had just run into the footwell from there. Now the tailgate glass and C-post trims are watertight things seem ok so far.
Electrical Bits
This is "my side of things" and while Graham was busy elsewhere I kept myself busy by cleaning all the dash panels, vents etc, and sorting out the interior electrics...
Heater Modification
My relay clicks fine as it was, so that was easy
Plip & Receiver
When Oscar advertised a working plip & receiver I snapped them up. Fitting took all of a minute, and it works fine. Infrared plips are never as good as RF ones, but once I've put new batteries in the plip (or should I say when I remember to buy some new batteries to put in the plip) I'm sure it will be much improved. Either way it is nice to have it for completeness and originality.
ISO Harness For Stereo
First job was the installation of an ISO harness so the replacement stereo would not only plug in, but be fully connected in terms of ignition sensing (no accidentally leaving the stereo on to flatten the battery), dash illumination sensing (so the buttons light/display dims for night use) and all the speaker connections - including the new rear speakers. This didn't take long, and thanks to Mat Fenwick pointing out that both the illumination and ignition are ready for tapping at the LCD dash clock everything works and the wiring is simple.
Head Unit
Having the wiring there won't do any good unless there's something decent plugged into it. I wanted something that sounded good, but a modern "space invaders" head unit would look tacky and out of place. I've been a fan of Blaupunkt for a long time, and as the original head unit was most likely a Blaupunkt this was the way I wanted to go - indeed my CX has the top Blaupunkt system from 79-80, and my XM has the top Blaupunkt system from 1997-8 (as they're both top models - a Prestige and Exclusive respectively).
Of course in 1987 it would have been a cassette based unit, but I wanted CD. Blaupunkt did have CD players back then, but they were rare and hellishly expensive (and still are!), and the CD had to be loaded into a "cartridge" first. I decided to look a few years later, and picked up an early 1990's unit with original box, manual, connectors and 2 keycards on eBay for £10. With its inverse green and black LCD like the dash clock it fits in well aesthetically, and could almost have been there forever:
The CD doesn't read discs (something for me to play around with when I have time and the right mood) but the radio sounds great, and my ipod will play fine through an FM transmitter. This is what I'd use anyway, and having the CD working is really only for completeness.
I might change it later if something I like better comes along. The only reason being that it doesn't have RDS (though that was around before CDs..) and it is quite handy (traffic announcements, automatically switching to a stronger signal while you're travelling etc). That said I can live without it no problems.
Front Speakers
With the nice-sounding but poorly fitting Alpines transferred to Graham's Discovery, I used the Philips rear speakers from the XM as fronts in the BX. Mounted behind replacement grilles purchased from Oscar at the same time as the plip (and the radio 'flap', come to think of it..) they look MUCH better. Soundwise they're ok, but I'll replace them with something better eventually.
Rear Speakers
My car didn't come with either rear speakers or dash tweeters originally. I'm going to fit the dash tweeters from my XM when I replace the XM ones, which I'll be doing when I do all the wiring for the Blaupunkt stereo and satnav system - complete with amplifier, (subtle) subwoofer etc. - think quality rather than boom boom chav noises, but I had some barely used Blaupunkt speakers that I'd bought for the Niva that I sold on, and I found I had these left over. A bit of careful measuring and marking, and Graham's jigsaw-ing and they're nicely installed on the parcel shelf.
They're a little modern looking perhaps, but don't stick out like a sore thumb. All that remained was running cables nicely and neatly (which gave me the opportunity to remove and clean all the centre console) and the job is done. The overall sound in the car is much better than before, and once the tweeters are in the dash I reckon it'll be great. As I said before, the fronts are a bit weedy, but I'll not be in any rush as it's just me being picky.
Talking of parcel shelves (which we weren't...) one of my clips has broken:
If anyone's got one and they're going to Gaydon on Sunday could they please give it to Richard
Anyway, after reading such a long posting you deserve a cuppa - I know I do after writing it
Last edited by rayfenwick on Sat Jul 17, 2010 1:36 pm, edited 9 times in total.
Ray
The Fleet (most recent first):
2000 Citroën XM 3.0 24V V6 Exclusive Auto (pre-MOT)
1997 Citroën XM 2.0 TCT Exclusive Auto (for sale)
1979 Citroën CX 2.4 EI Cmatic Prestige (slowly being restored)
1992 Alfa Romeo 164 Lusso 3.0 v6 12v Manual (on the to-do list)
www.citroencarclub.co.uk
The Fleet (most recent first):
2000 Citroën XM 3.0 24V V6 Exclusive Auto (pre-MOT)
1997 Citroën XM 2.0 TCT Exclusive Auto (for sale)
1979 Citroën CX 2.4 EI Cmatic Prestige (slowly being restored)
1992 Alfa Romeo 164 Lusso 3.0 v6 12v Manual (on the to-do list)
www.citroencarclub.co.uk
-
Philip Chidlow
- Over 2k
- Posts: 11594
- Joined: Fri Oct 07, 2005 1:08 pm
- Location: Chelmsford, Essex
- x 25
A great write up.
Sadly the pictures aren't displaying properly - is anyone else having this problem?
Sadly the pictures aren't displaying properly - is anyone else having this problem?
Last edited by Philip Chidlow on Sat Jul 17, 2010 9:46 am, edited 1 time in total.
• 1992 Citroen BX TZD Turbo Hurricane
• 2006 Xsara Picasso 1.6 16v
• 2006 Xsara Picasso 1.6 16v
-
electrokid
- 1K Away
- Posts: 1764
- Joined: Fri May 09, 2008 2:14 pm
- Location: Woking
It doesn't matter how this is phrased - it still makes me think about Konnie Huq - which is good - thanksmammarically supine
Never seen these - but are they polycarb or acrylic? Reason for question - acrylic is strange stuff - I normally suggest cleaning practically everything with IPA - but acrylic is a no-no - IPA seems to release some of the strains within the material and you end up with a crazed mess - usually almost as strong but definitely a mess !Originally my car had the polycarbonate windows in the C posts
What goes around, comes around"buy now, pay me back later when you've got something useful that I need" scheme, which is a favourite of mine
Good to hear of your progress Ray
1992 BX19 TGD estate 228K Rusty - SORNed
2002 C5 HDi SX estate
2002 C5 HDi SX estate