Wooscary's TZD 1993
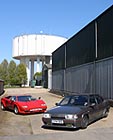

The birds in the trees above where I park have been doing their thing, so a good scrub was required today.
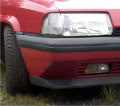
And by the time I'd finished it was dark, so out came the tripod.
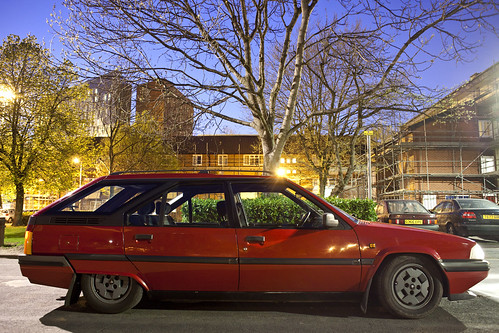
3b by Wooscary, on Flickr
And by the time I'd finished it was dark, so out came the tripod.
3b by Wooscary, on Flickr
Martin
1993 red BX 17 TZD 300000 miles.
http://www.herearephotos.co.uk
http://wilsonsthings.tumblr.com/
1993 red BX 17 TZD 300000 miles.
http://www.herearephotos.co.uk
http://wilsonsthings.tumblr.com/
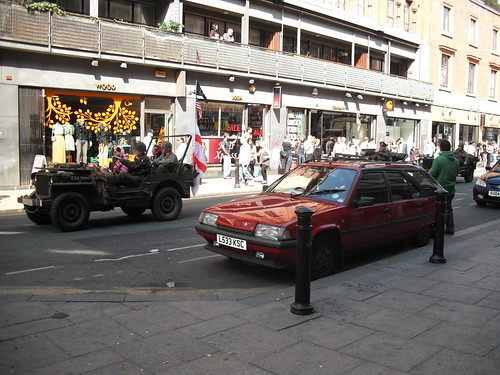
DSCF0048 by Wooscary, on Flickr
Getting mixed up in a parade today.
Jobs for the next week:
oil and filter
fuel filter (is this a pretty simple task?)
tension HP belt (possible replace? I'm still not sure how the tensioner works)
Exciting.
Martin
1993 red BX 17 TZD 300000 miles.
http://www.herearephotos.co.uk
http://wilsonsthings.tumblr.com/
1993 red BX 17 TZD 300000 miles.
http://www.herearephotos.co.uk
http://wilsonsthings.tumblr.com/
-
Mothman
Nice motor bud and its ideal weather to be working on her as i have with mine today.
Fuel filter easy, just make sure you pack a lot of rags etc around it to prevent any spills of diesel. This can drip onto the clutch causing it to slip. Found out the hard way when i did this the first time myself.
The HP belt needs to be really tight, however it may be beneficial to replace it as even one that looks good can have missing teeth as i found out recently. They are not expensive and worth doing. Not difficult either.
And red is a great colour too.
Andy
-
MULLEY

- Over 2k
- Posts: 8406
- Joined: Thu Jun 22, 2006 11:10 pm
- Location: Derbyshire
- My Cars: 1999 Xsara LX 2.0HDI (90) Hatch - Fern
2002 C5 2.0 HDI (110) Estate - Jasmine - SORN
2011 Mini Cooper D Clubman - SOLD
2016 Mercedes A180D Sport - Auto refinement
1992 TZD Turbo - Bluebell - SORN
1992 TZD Turbo Estate - SORN
1991 Gti 16V - Blaze - crash damaged, will get repaired - SORN
1990 Gti 8Valve SOLD - looks like it's been scrapped
2002 Mini Cooper S - SOLD - i miss this car
1992 TXD - Scrapped in March 2014
1988 CX 25 GTI Turbo2 - SORN
1996 - AX Memphis 1.5D - Dream - SORN - x 8
If your fuel filter is in a black cylinder housing that has 4 allen key bolts on top, then i'd recommend doing the following.
Undo the 4 bolts but only undo it enough so that the plastic top can be wiggled to get a little air into it. At the bottom of the cylinder there is a plastic bleed screw which sits at the front of the cylinder, make sure you have a plastic pipe attached (i used some aquarium air tubing). Twist it so that it will allow fuel to flow out. I usually have a glass jar on the floor that the tube goes into so that i can collect the rather expensive diesel as quite a bit will come out.
I place some rags around the top of the filter housing just beneath the lid incase of spillage. If you try to remove the top off, it'll just piss out loads of diesel. What i've found works best is to gently wiggle the top & then push down firmly on the top to get the diesel flowing out of the filter housing, keep doing this until it becomes difficult for anymore to flow out. At that stage it should be straightforward to remove the top without spilling much apart from a few drops. Again the filter inside is probably got some in, so i just pull it up & then place it at an angle in the filter housing with it standing proud of the housing so that any remaining diesel goes back into the housing. Then remove, simples eh
Not sure if anyone has a better technique
2002 C5 2.0 HDI Estate - Jasmine - Now SORN
2011 Mini Cooper D Clubman - SOLD
2016 Mercedes A180D Sport - Auto refinement
1992 TZD Turbo - Bluebell - My daily
1991 Gti 16V - Blaze - crash damaged, will get repaired.
1990 Gti 8Valve SOLD - looks like it's been scrapped
2002 Mini Cooper S - SOLD - i miss this car
1992 TXD - Scrapped in March 2014
1988 CX 25 GTI Turbo2 - SORN
1996 - AX Memphis 1.5D - Dream - SORN
I'm not just a username, i'm also called Matthew.
Cheers Andy and Mulley for the advice.
That all makes sense to me, it is the type in the black cylindrical housing. Do I have to worry about air in the fuel lines or anything (I seem to remember someone telling me this?). Also, I assume the fuel filter is a disposable one rather than one you clean out, if even such a thing exists?
Might have a go tomorrow, what's the milage rating on fuel filters?
I've got a new HP belt so definitely plan on fitting, just still can't for the life of me figure out how the tensioner works, but everyone claims it's dead simple, so I've probably just been looking at it for too long.
Martin
1993 red BX 17 TZD 300000 miles.
http://www.herearephotos.co.uk
http://wilsonsthings.tumblr.com/
1993 red BX 17 TZD 300000 miles.
http://www.herearephotos.co.uk
http://wilsonsthings.tumblr.com/
-
MULLEY
- Over 2k
- Posts: 8406
- Joined: Thu Jun 22, 2006 11:10 pm
- Location: Derbyshire
- My Cars: 1999 Xsara LX 2.0HDI (90) Hatch - Fern
2002 C5 2.0 HDI (110) Estate - Jasmine - SORN
2011 Mini Cooper D Clubman - SOLD
2016 Mercedes A180D Sport - Auto refinement
1992 TZD Turbo - Bluebell - SORN
1992 TZD Turbo Estate - SORN
1991 Gti 16V - Blaze - crash damaged, will get repaired - SORN
1990 Gti 8Valve SOLD - looks like it's been scrapped
2002 Mini Cooper S - SOLD - i miss this car
1992 TXD - Scrapped in March 2014
1988 CX 25 GTI Turbo2 - SORN
1996 - AX Memphis 1.5D - Dream - SORN - x 8
I think it only needs changing once a year, but they are only a few quid so what i tend to do is change it when i service the car every 6k & pop a new one in & then clean the old one to re-use unless its very dirty in which case it gets skipped.
No need to worry about air in the fuel lines, when you've put the replacement filter in & you've tightend the top back on the housing, to your left nr the cambelt covers should be a pipe with a bulb on it, keep squeezing that until it becomes firmer to press. This is priming the pump by manually forcing fuel through the filter housing into the pump. If you forget your car will cough badly or wont even start as there'll be hardly any fuel with plenty of air, how do i know this
No need to worry about air in the fuel lines, when you've put the replacement filter in & you've tightend the top back on the housing, to your left nr the cambelt covers should be a pipe with a bulb on it, keep squeezing that until it becomes firmer to press. This is priming the pump by manually forcing fuel through the filter housing into the pump. If you forget your car will cough badly or wont even start as there'll be hardly any fuel with plenty of air, how do i know this
2002 C5 2.0 HDI Estate - Jasmine - Now SORN
2011 Mini Cooper D Clubman - SOLD
2016 Mercedes A180D Sport - Auto refinement
1992 TZD Turbo - Bluebell - My daily
1991 Gti 16V - Blaze - crash damaged, will get repaired.
1990 Gti 8Valve SOLD - looks like it's been scrapped
2002 Mini Cooper S - SOLD - i miss this car
1992 TXD - Scrapped in March 2014
1988 CX 25 GTI Turbo2 - SORN
1996 - AX Memphis 1.5D - Dream - SORN
I'm not just a username, i'm also called Matthew.
2011 Mini Cooper D Clubman - SOLD
2016 Mercedes A180D Sport - Auto refinement
1992 TZD Turbo - Bluebell - My daily
1991 Gti 16V - Blaze - crash damaged, will get repaired.
1990 Gti 8Valve SOLD - looks like it's been scrapped
2002 Mini Cooper S - SOLD - i miss this car
1992 TXD - Scrapped in March 2014
1988 CX 25 GTI Turbo2 - SORN
1996 - AX Memphis 1.5D - Dream - SORN
I'm not just a username, i'm also called Matthew.
Ha ha, excellent. Yes, I'm aware of the bulb primer, after becoming very confused about the car not starting. My girlfriend had been using the car and likes to not put fuel in it, it would appear. Of course it was my fault actually. 
Cheers.
Cheers.
Martin
1993 red BX 17 TZD 300000 miles.
http://www.herearephotos.co.uk
http://wilsonsthings.tumblr.com/
1993 red BX 17 TZD 300000 miles.
http://www.herearephotos.co.uk
http://wilsonsthings.tumblr.com/
Just renewed the insurance. I need a lie down now.
Martin
1993 red BX 17 TZD 300000 miles.
http://www.herearephotos.co.uk
http://wilsonsthings.tumblr.com/
1993 red BX 17 TZD 300000 miles.
http://www.herearephotos.co.uk
http://wilsonsthings.tumblr.com/
How much?
Mark Smith
Is it just me or is everything shit?
1989 BX GTi 16 valve. Blanc Alpine. Completed the Citroen Classic Challenge Ecosse and 1337 miles without a hitch.
2000 XM VSX 2.1 td Auto. Rouge Magenta.
TGD saloon many years ago.
1990 Swift 'Corniche' 12/2 aka BXClub HQ.
Honda Firestorm. Gone, but not forgotten.
2015 Triumph Tiger Explorer XC.
Too much.
I know why though. Bad post code, claim against me four years ago, only held licence for nearly 5 years. It adds up to "argh!".
Anyway, it passed 290000 miles today, this time next year is the major milestone I guess. Fingers crossed.
I know why though. Bad post code, claim against me four years ago, only held licence for nearly 5 years. It adds up to "argh!".
Anyway, it passed 290000 miles today, this time next year is the major milestone I guess. Fingers crossed.
Martin
1993 red BX 17 TZD 300000 miles.
http://www.herearephotos.co.uk
http://wilsonsthings.tumblr.com/
1993 red BX 17 TZD 300000 miles.
http://www.herearephotos.co.uk
http://wilsonsthings.tumblr.com/
Keep it until 2014 and you can get it on classic insurance. £75 fully comp for my 16 valve. Mind you i've been driving for 24 years!
Mark Smith
Is it just me or is everything shit?
1989 BX GTi 16 valve. Blanc Alpine. Completed the Citroen Classic Challenge Ecosse and 1337 miles without a hitch.
2000 XM VSX 2.1 td Auto. Rouge Magenta.
TGD saloon many years ago.
1990 Swift 'Corniche' 12/2 aka BXClub HQ.
Honda Firestorm. Gone, but not forgotten.
2015 Triumph Tiger Explorer XC.
Is it just me or is everything shit?
1989 BX GTi 16 valve. Blanc Alpine. Completed the Citroen Classic Challenge Ecosse and 1337 miles without a hitch.
2000 XM VSX 2.1 td Auto. Rouge Magenta.
TGD saloon many years ago.
1990 Swift 'Corniche' 12/2 aka BXClub HQ.
Honda Firestorm. Gone, but not forgotten.
2015 Triumph Tiger Explorer XC.
Hello
So I'm thinking of tarting the car up a bit, there are a few spots of paint which are delaminating, on the boot lid and a small patch on the roof.
I'm not awful with a spray can, but would anyone advise against me having a go, and any tips?
This bit looks to have had a bit of paint slapped over it.
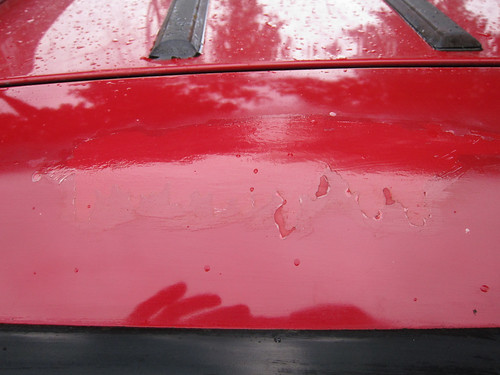
IMG_0775a by Wooscary, on Flickr
This is the flakiest section, how will this sand?
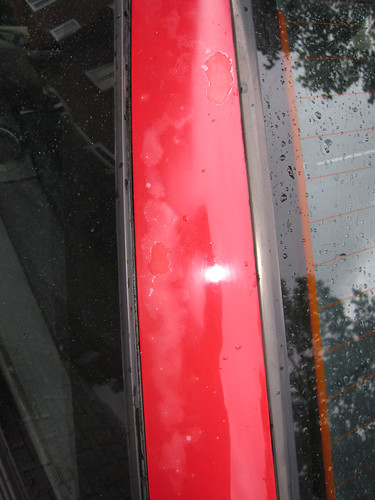
IMG_0778a by Wooscary, on Flickr
This bit not too bad, but might as well do it.
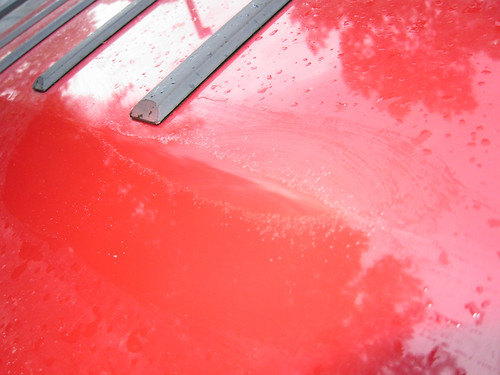
IMG_0779a by Wooscary, on Flickr
Paint code on N/S wing in engine bay right? And so do I take that to a paint mixing place, or is it off the shelf?
Also:
Any ideas what this little fella is doing, what it's for etc?
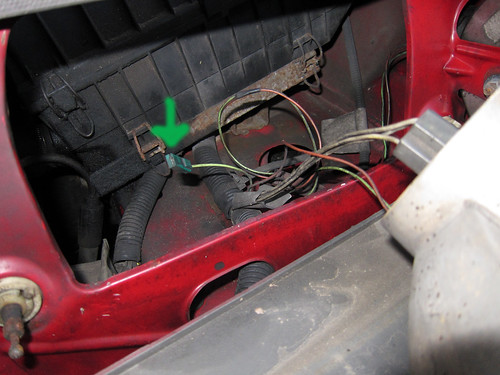
IMG_0780a by Wooscary, on Flickr
Cheers
Martin
So I'm thinking of tarting the car up a bit, there are a few spots of paint which are delaminating, on the boot lid and a small patch on the roof.
I'm not awful with a spray can, but would anyone advise against me having a go, and any tips?
This bit looks to have had a bit of paint slapped over it.
IMG_0775a by Wooscary, on Flickr
This is the flakiest section, how will this sand?
IMG_0778a by Wooscary, on Flickr
This bit not too bad, but might as well do it.
IMG_0779a by Wooscary, on Flickr
Paint code on N/S wing in engine bay right? And so do I take that to a paint mixing place, or is it off the shelf?
Also:
Any ideas what this little fella is doing, what it's for etc?
IMG_0780a by Wooscary, on Flickr
Cheers
Martin
Martin
1993 red BX 17 TZD 300000 miles.
http://www.herearephotos.co.uk
http://wilsonsthings.tumblr.com/
1993 red BX 17 TZD 300000 miles.
http://www.herearephotos.co.uk
http://wilsonsthings.tumblr.com/
-
Tim Leech
- Over 2k
- Posts: 15579
- Joined: Tue Apr 15, 2008 11:12 am
- Location: Derbyshire
- My Cars: Various
- x 150
With paintwork its the preperation work that has much to do with it.
Its a case of rubbing down the areas to be painted so its lovely and flat, ensure you degrease before paint and use good quality primer and top coat. Ive always found warming the paint cans up a bit first (in a bowl of warm water) helps a bit.
Always mask of the areas properly and do it inside in a dry well ventilated garage.
Lots of Motors, mostly semi broken....
-
mat_fenwick
- Moderator
- Posts: 7326
- Joined: Tue Sep 20, 2005 4:08 pm
- Location: North Wales
- x 19
