John Dragon Man's Citroen BX Diesel Estate
-
rutter123
- Over 2k
- Posts: 2695
- Joined: Sun Sep 02, 2012 9:54 pm
- Location: South Lincs
- My Cars: 90 Bx Tzd turbo ven red 295k
74 D Super 5 black
05 Volvo V50 2.0d 180k
65 Peugeot Boxer work van 280k - x 137
Re: John Dragon Man's Citroen BX Diesel Estate
Looks a bit neater than mine which had extended beyond the drain hole on the o/s, there is a lot of skins joined along that part of the bulkhead so its a bit of a patchwork quilt job up into the inner arches and up into the back of the dash, had to recut another drain hole too. Almost impossible to do it with one piece of steel so have patched on top and underneath the arch, its one of those areas that lies undiscovered for many years until its too late.
I'm just in the stages of welding up the rear end of the sills on my red t/d for the MOT and have changed to gasless type fluxed wire on my mig for the first time and it does a neat job dosent seem to blow holes like the previous gassed mix. One side done today other tmrw, maybe.
I'm just in the stages of welding up the rear end of the sills on my red t/d for the MOT and have changed to gasless type fluxed wire on my mig for the first time and it does a neat job dosent seem to blow holes like the previous gassed mix. One side done today other tmrw, maybe.
90 BX Tzd turbo 294k SORN undergoing major surgery
90 BX Tzd turbo estate 46k awaiting surgery
65 Peugeot Boxer Van the new workhorse
52 Toyota Rav4 180k Bulletproof Jap reliability
90 BX Tzd turbo estate 46k awaiting surgery
65 Peugeot Boxer Van the new workhorse
52 Toyota Rav4 180k Bulletproof Jap reliability
- Dragon Man
- BXpert
- Posts: 187
- Joined: Sat Aug 22, 2015 3:45 am
- Location: The East Midlands, Derby
- My Cars: Citroen Dispatch 2.0L HDi 2005
Fiat Panda 4x4 Sisley 1991 - x 6
- Contact:
Re: John Dragon Man's Citroen BX Diesel Estate
hey guys, not been doing much work on the BX. been a little tied up on my days off to go in and work on the car. i did however managed to get a few hours in thursday and saturday morning.
heres a few pictures as i know you like to see this crazy stuff
after undersealing where i can around the front and around the wings, i think its time to get the bumper and wings back on. i am not that fussed about getting the panel gaps perfect as i will be taking them all off again at some point to cavity wax everywhere i can get the waging pipe in!
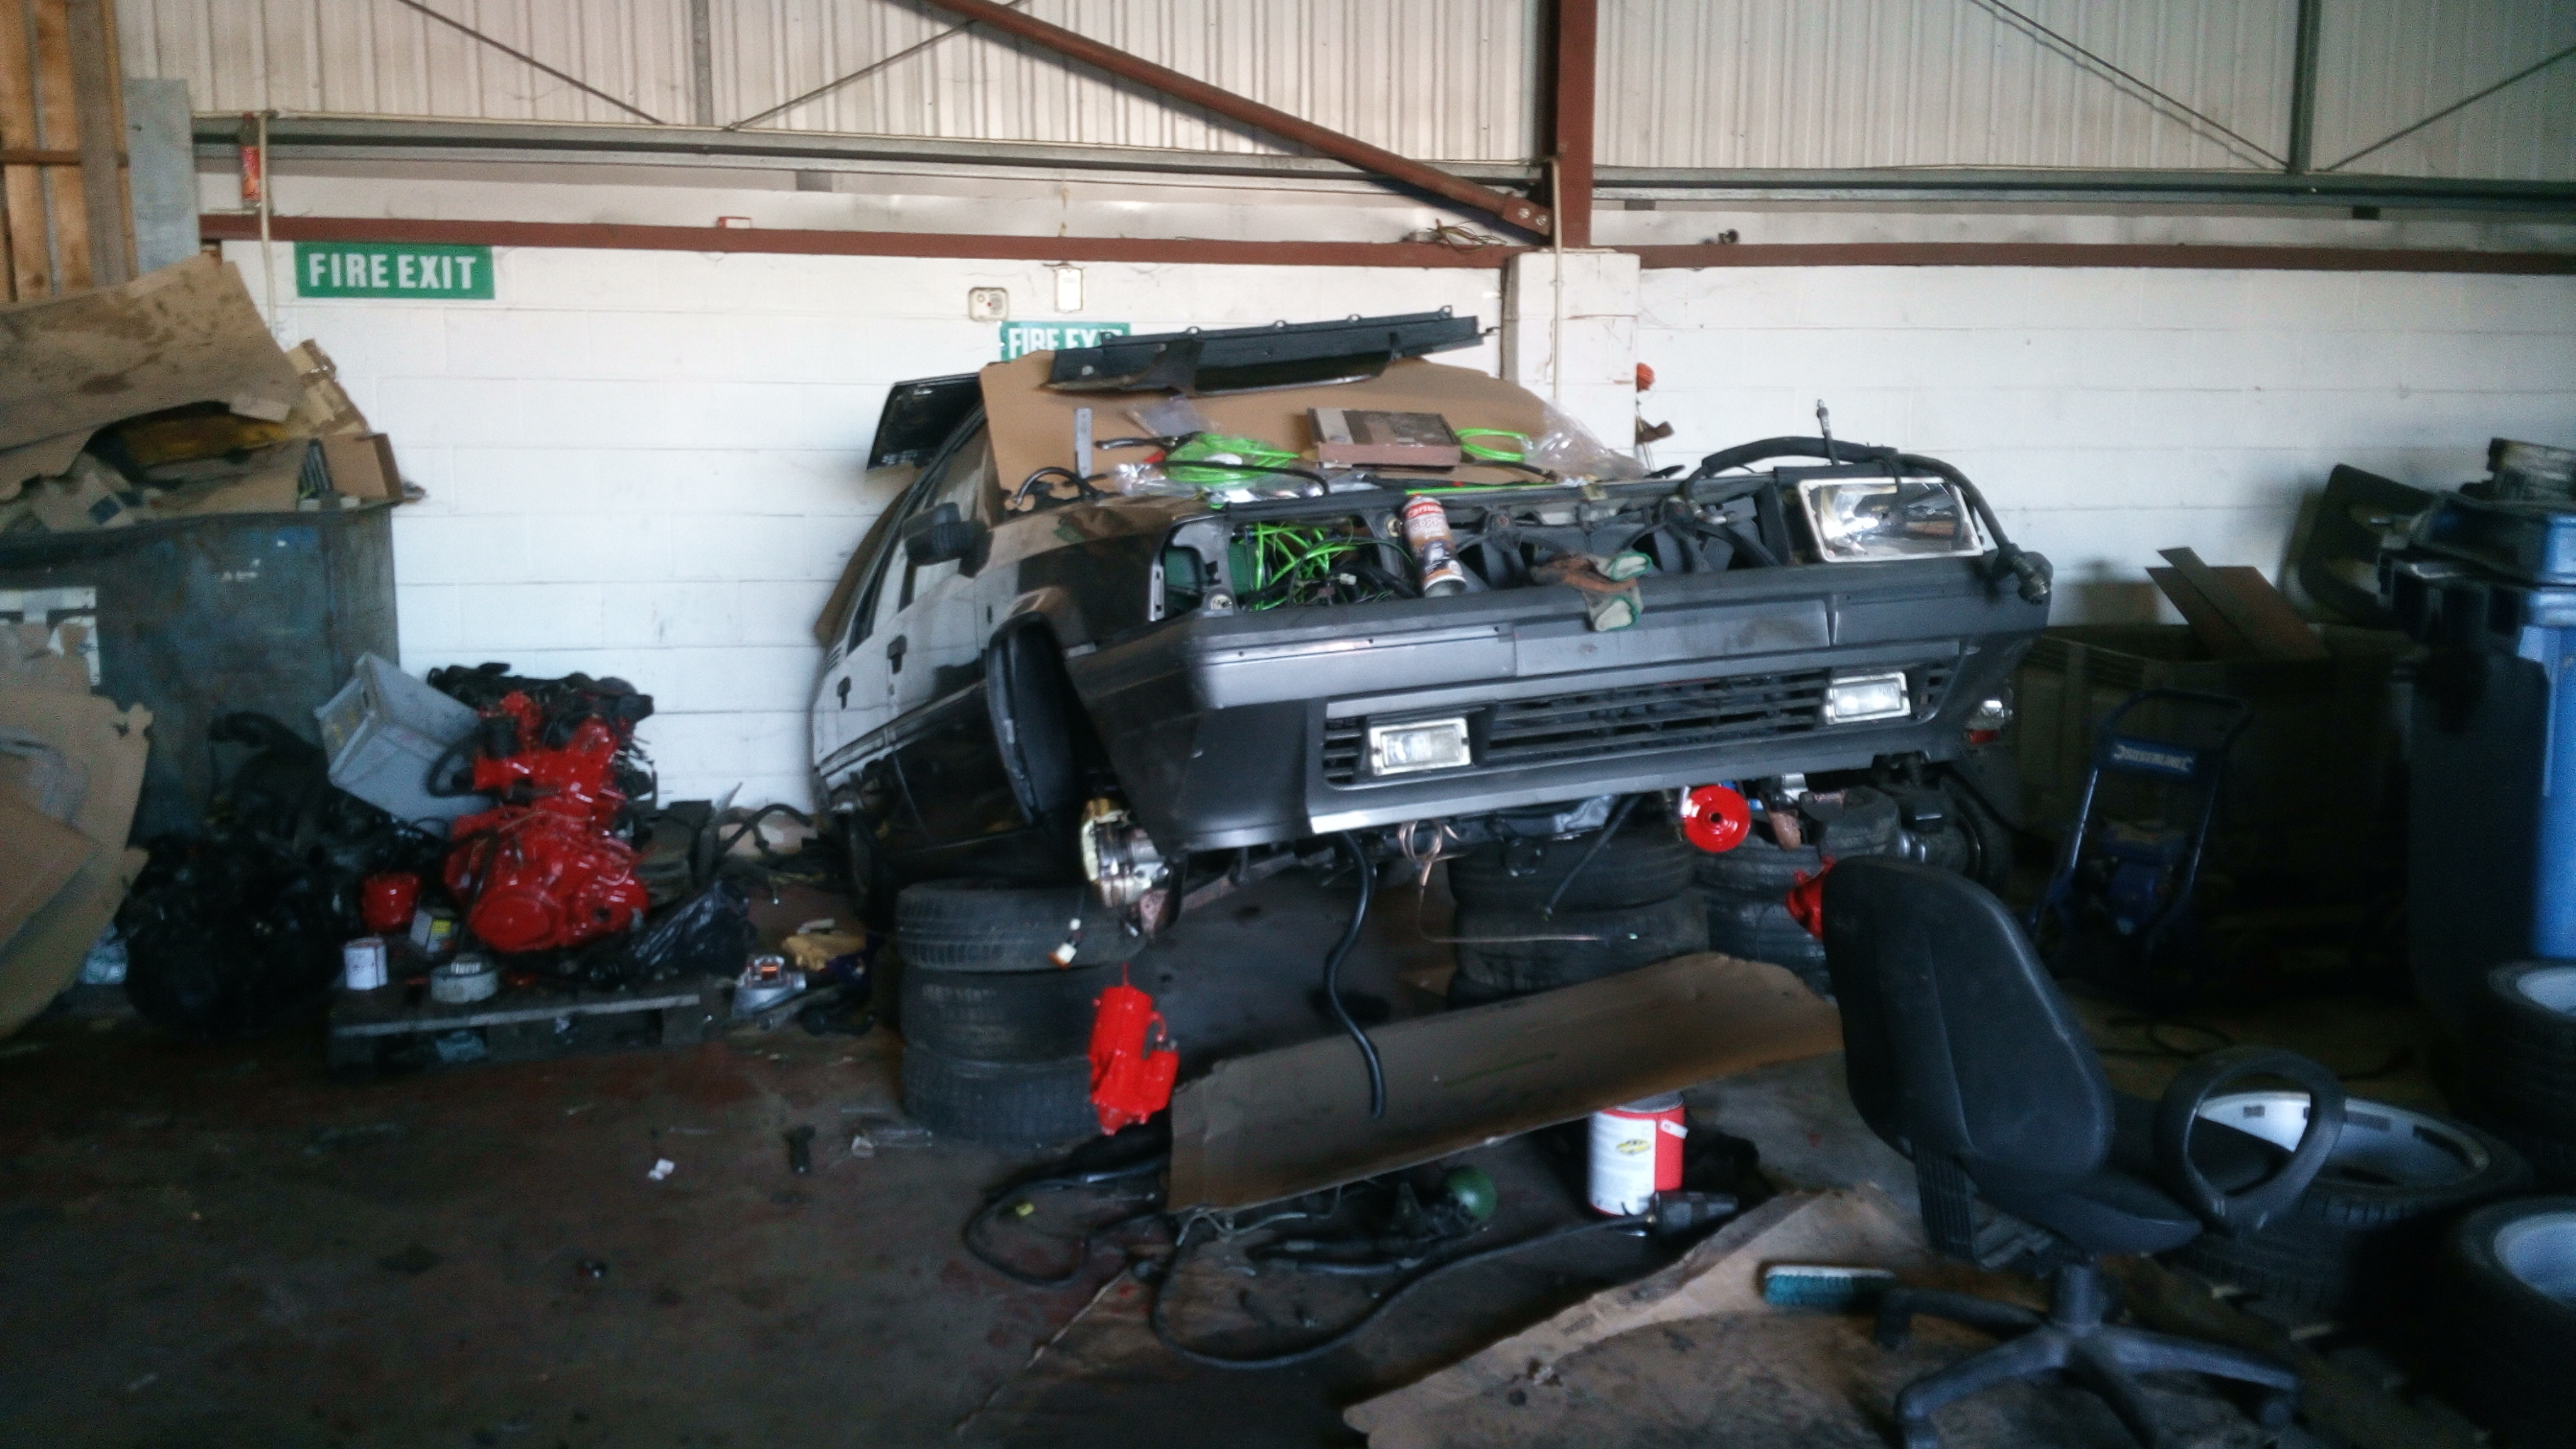
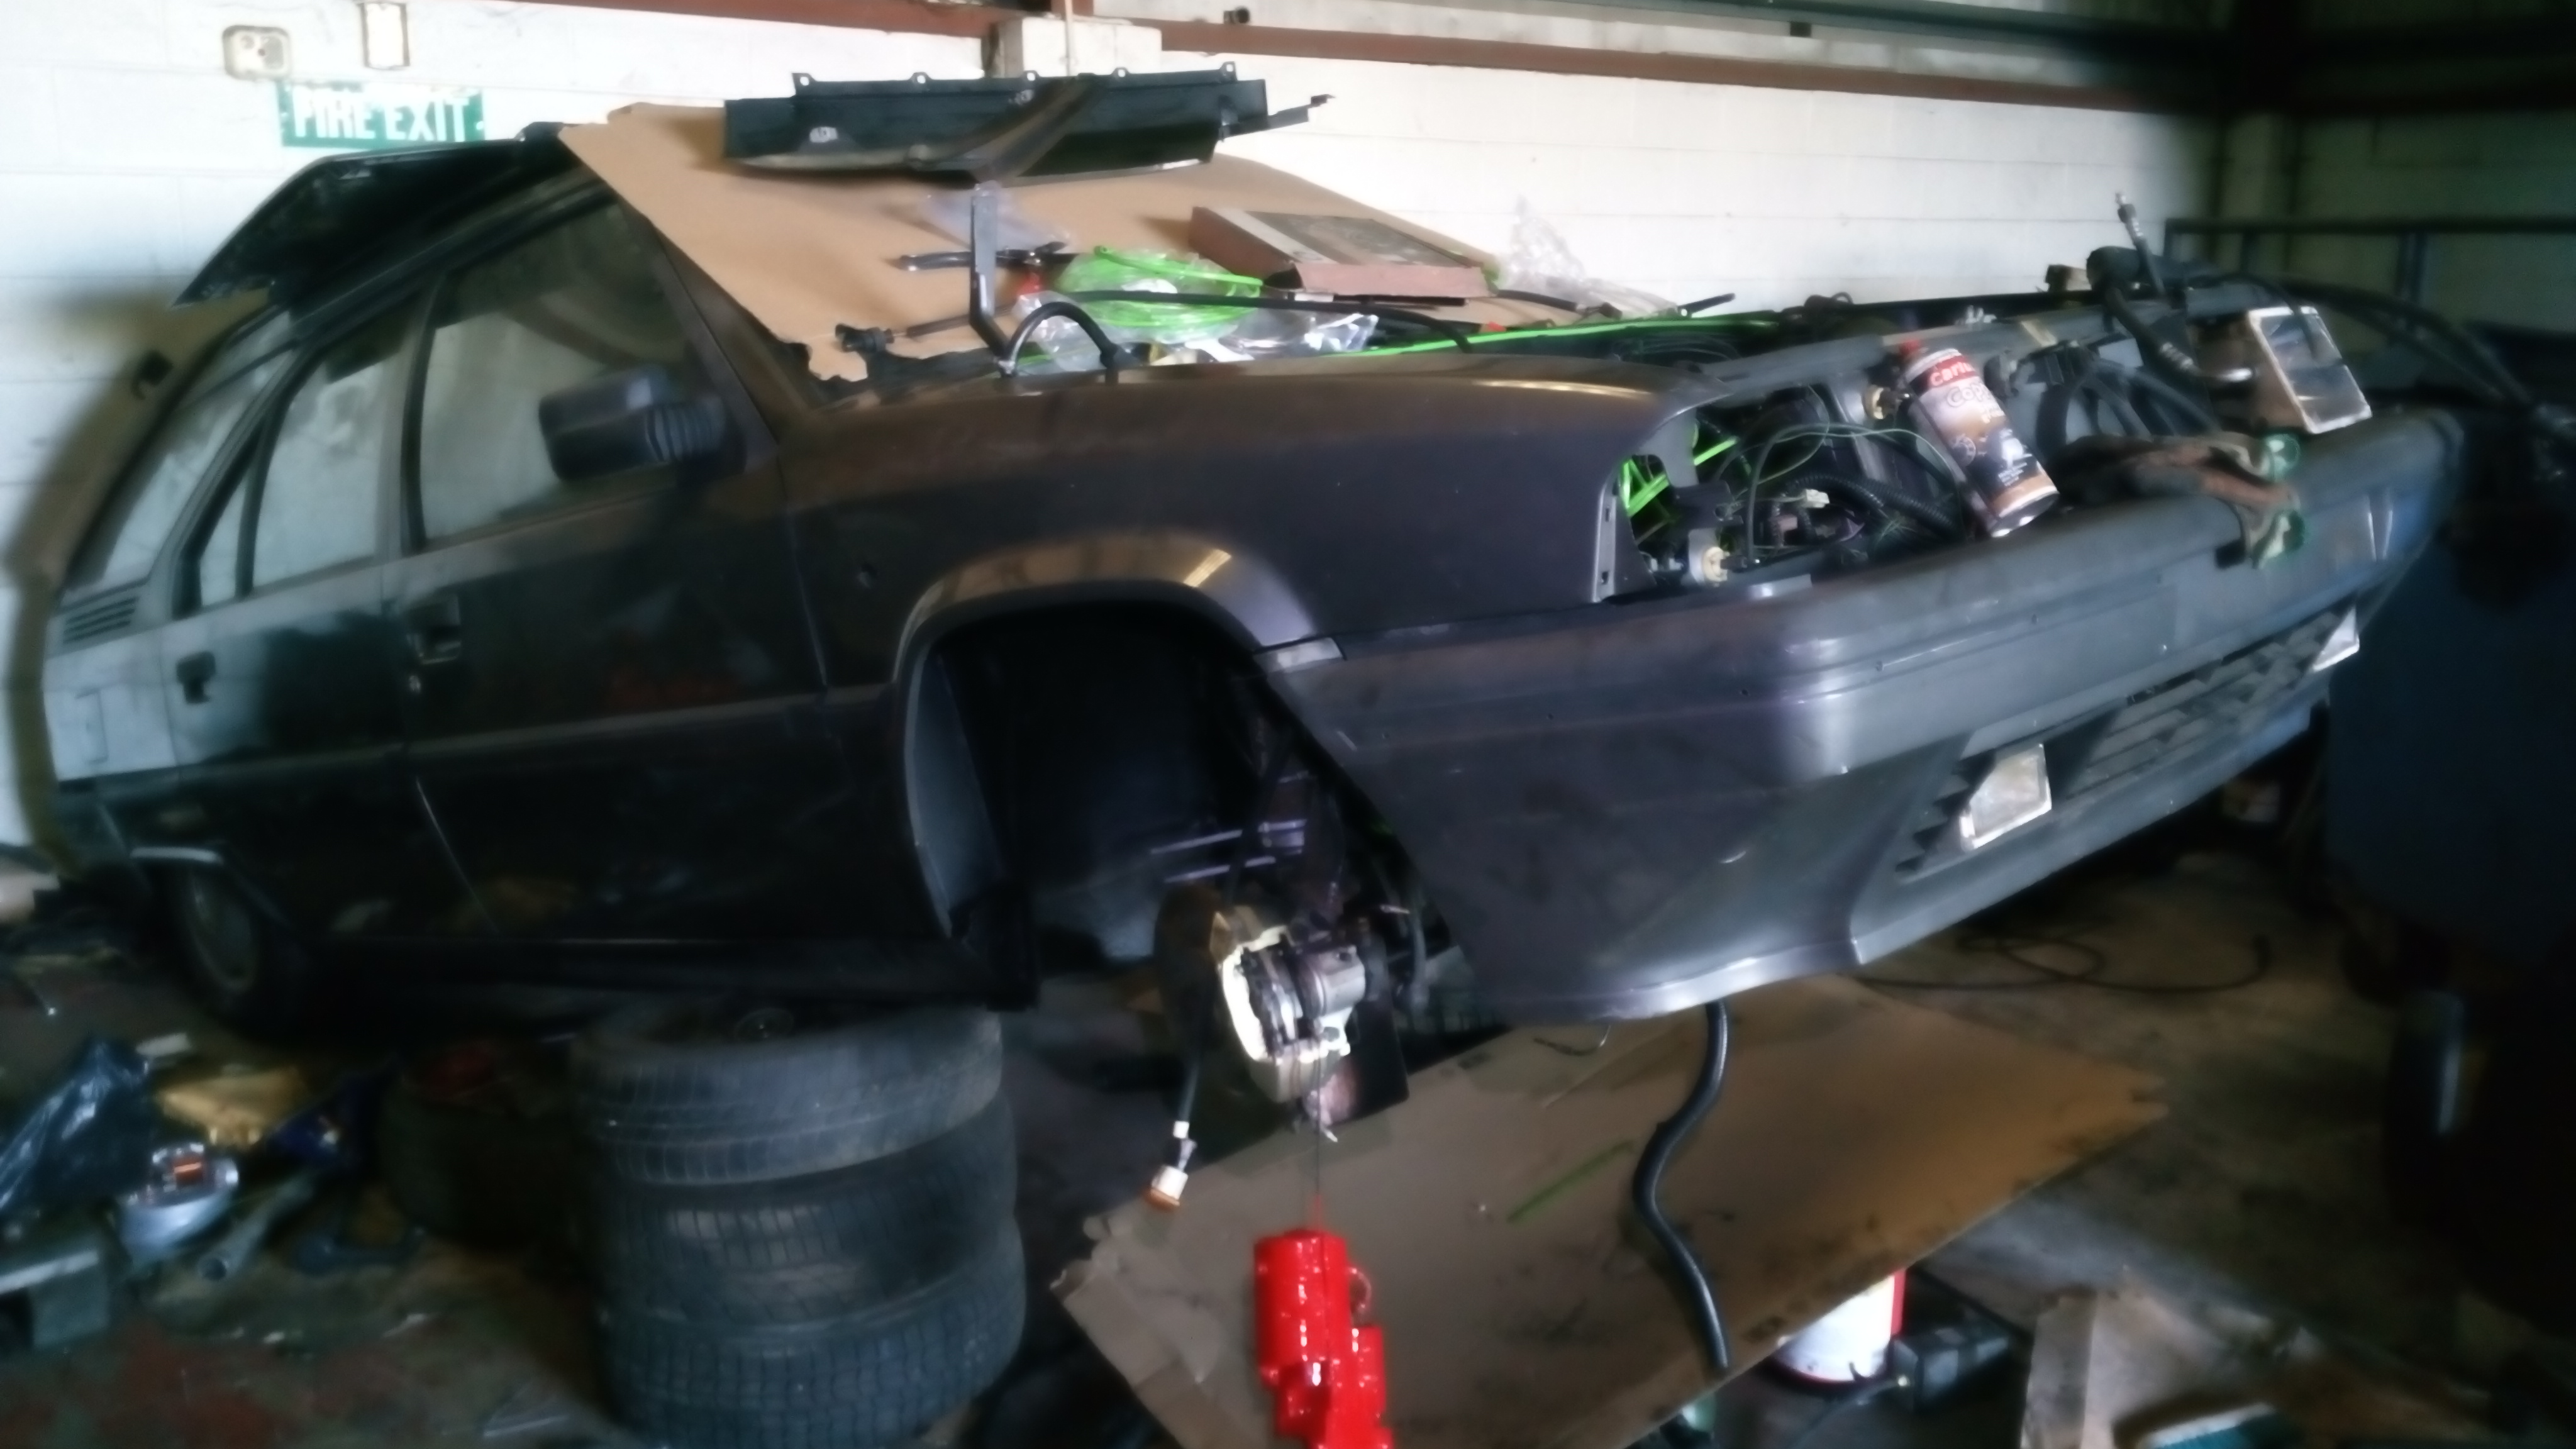
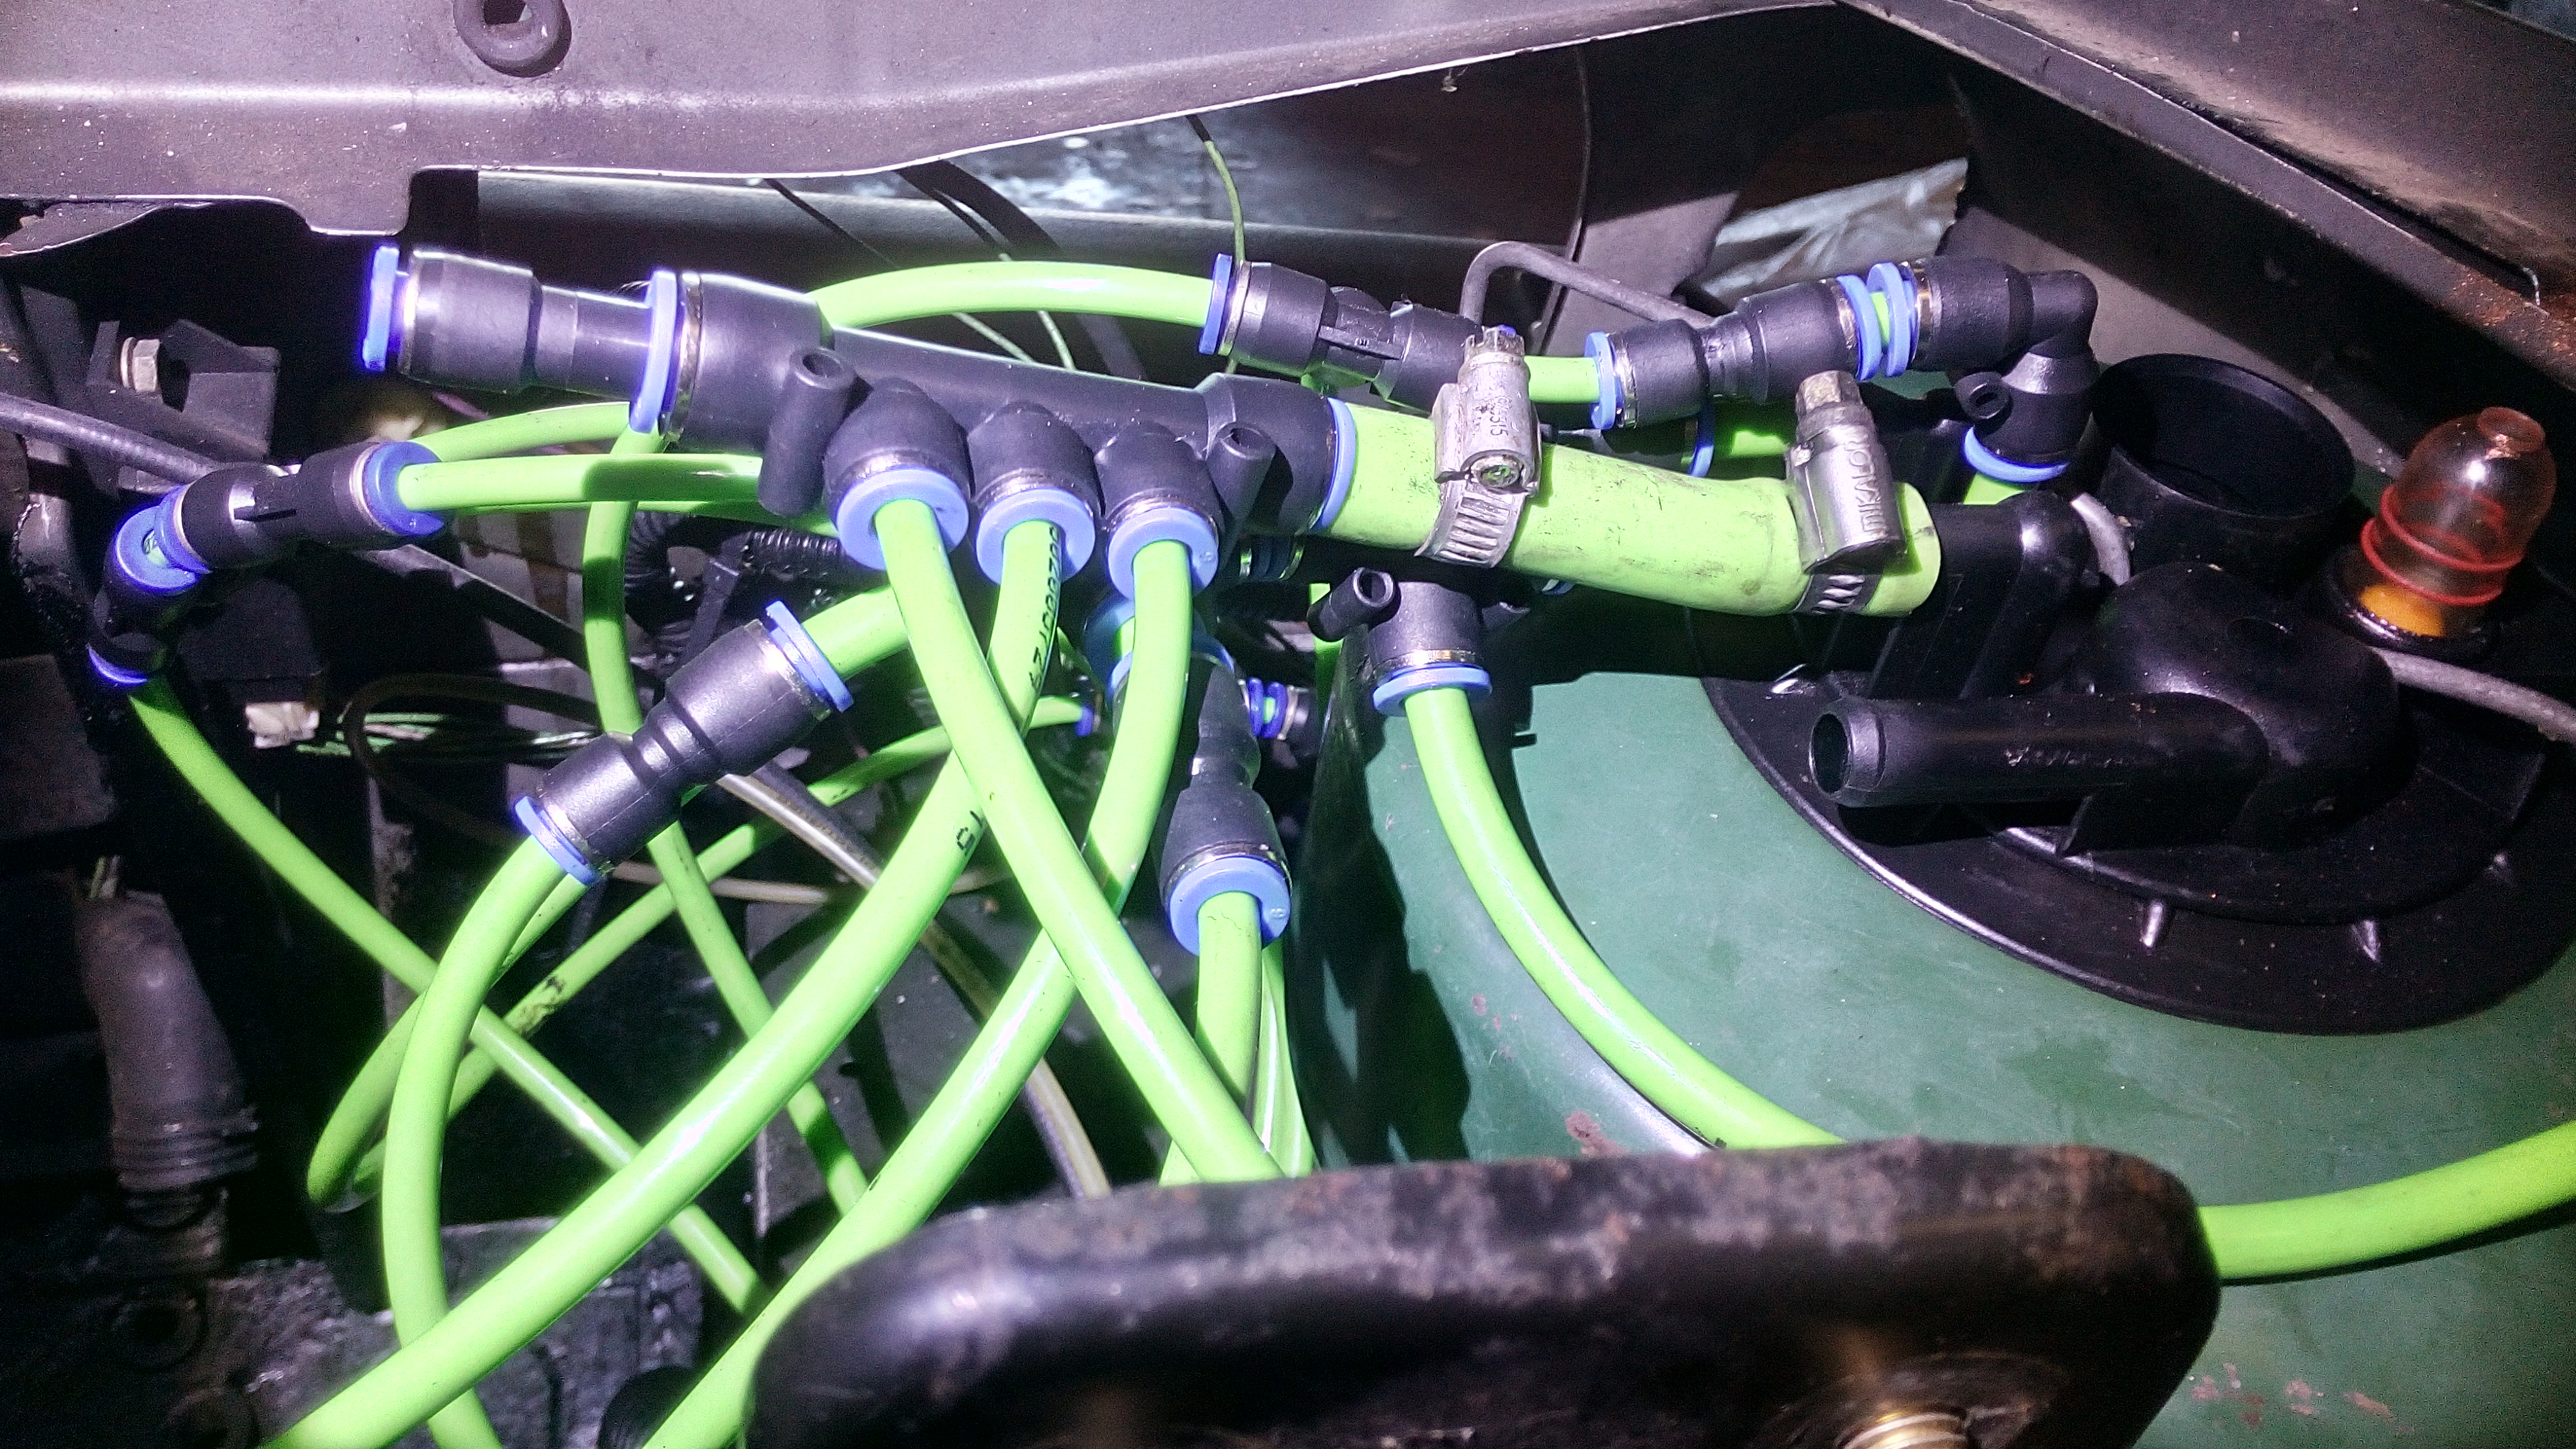
the returns are getting there now, i have the LHM tank in situ with all but 2 of the returns plumbed in. it looks a mess at the moment but it is because i have not trimmed any of the pipes yet. i am not sure how much LHM the BX takes but i have bought quite a bit. i know the old LHM was heavily saturated with moisture. when i dug the hydraulic pump out to clean it up and paint it, it was sized up! it soon freed off with a few back and forth twists but its a bit worrying! it feels good now and does pump LHM fine if i feed some into it and pin it by hand.
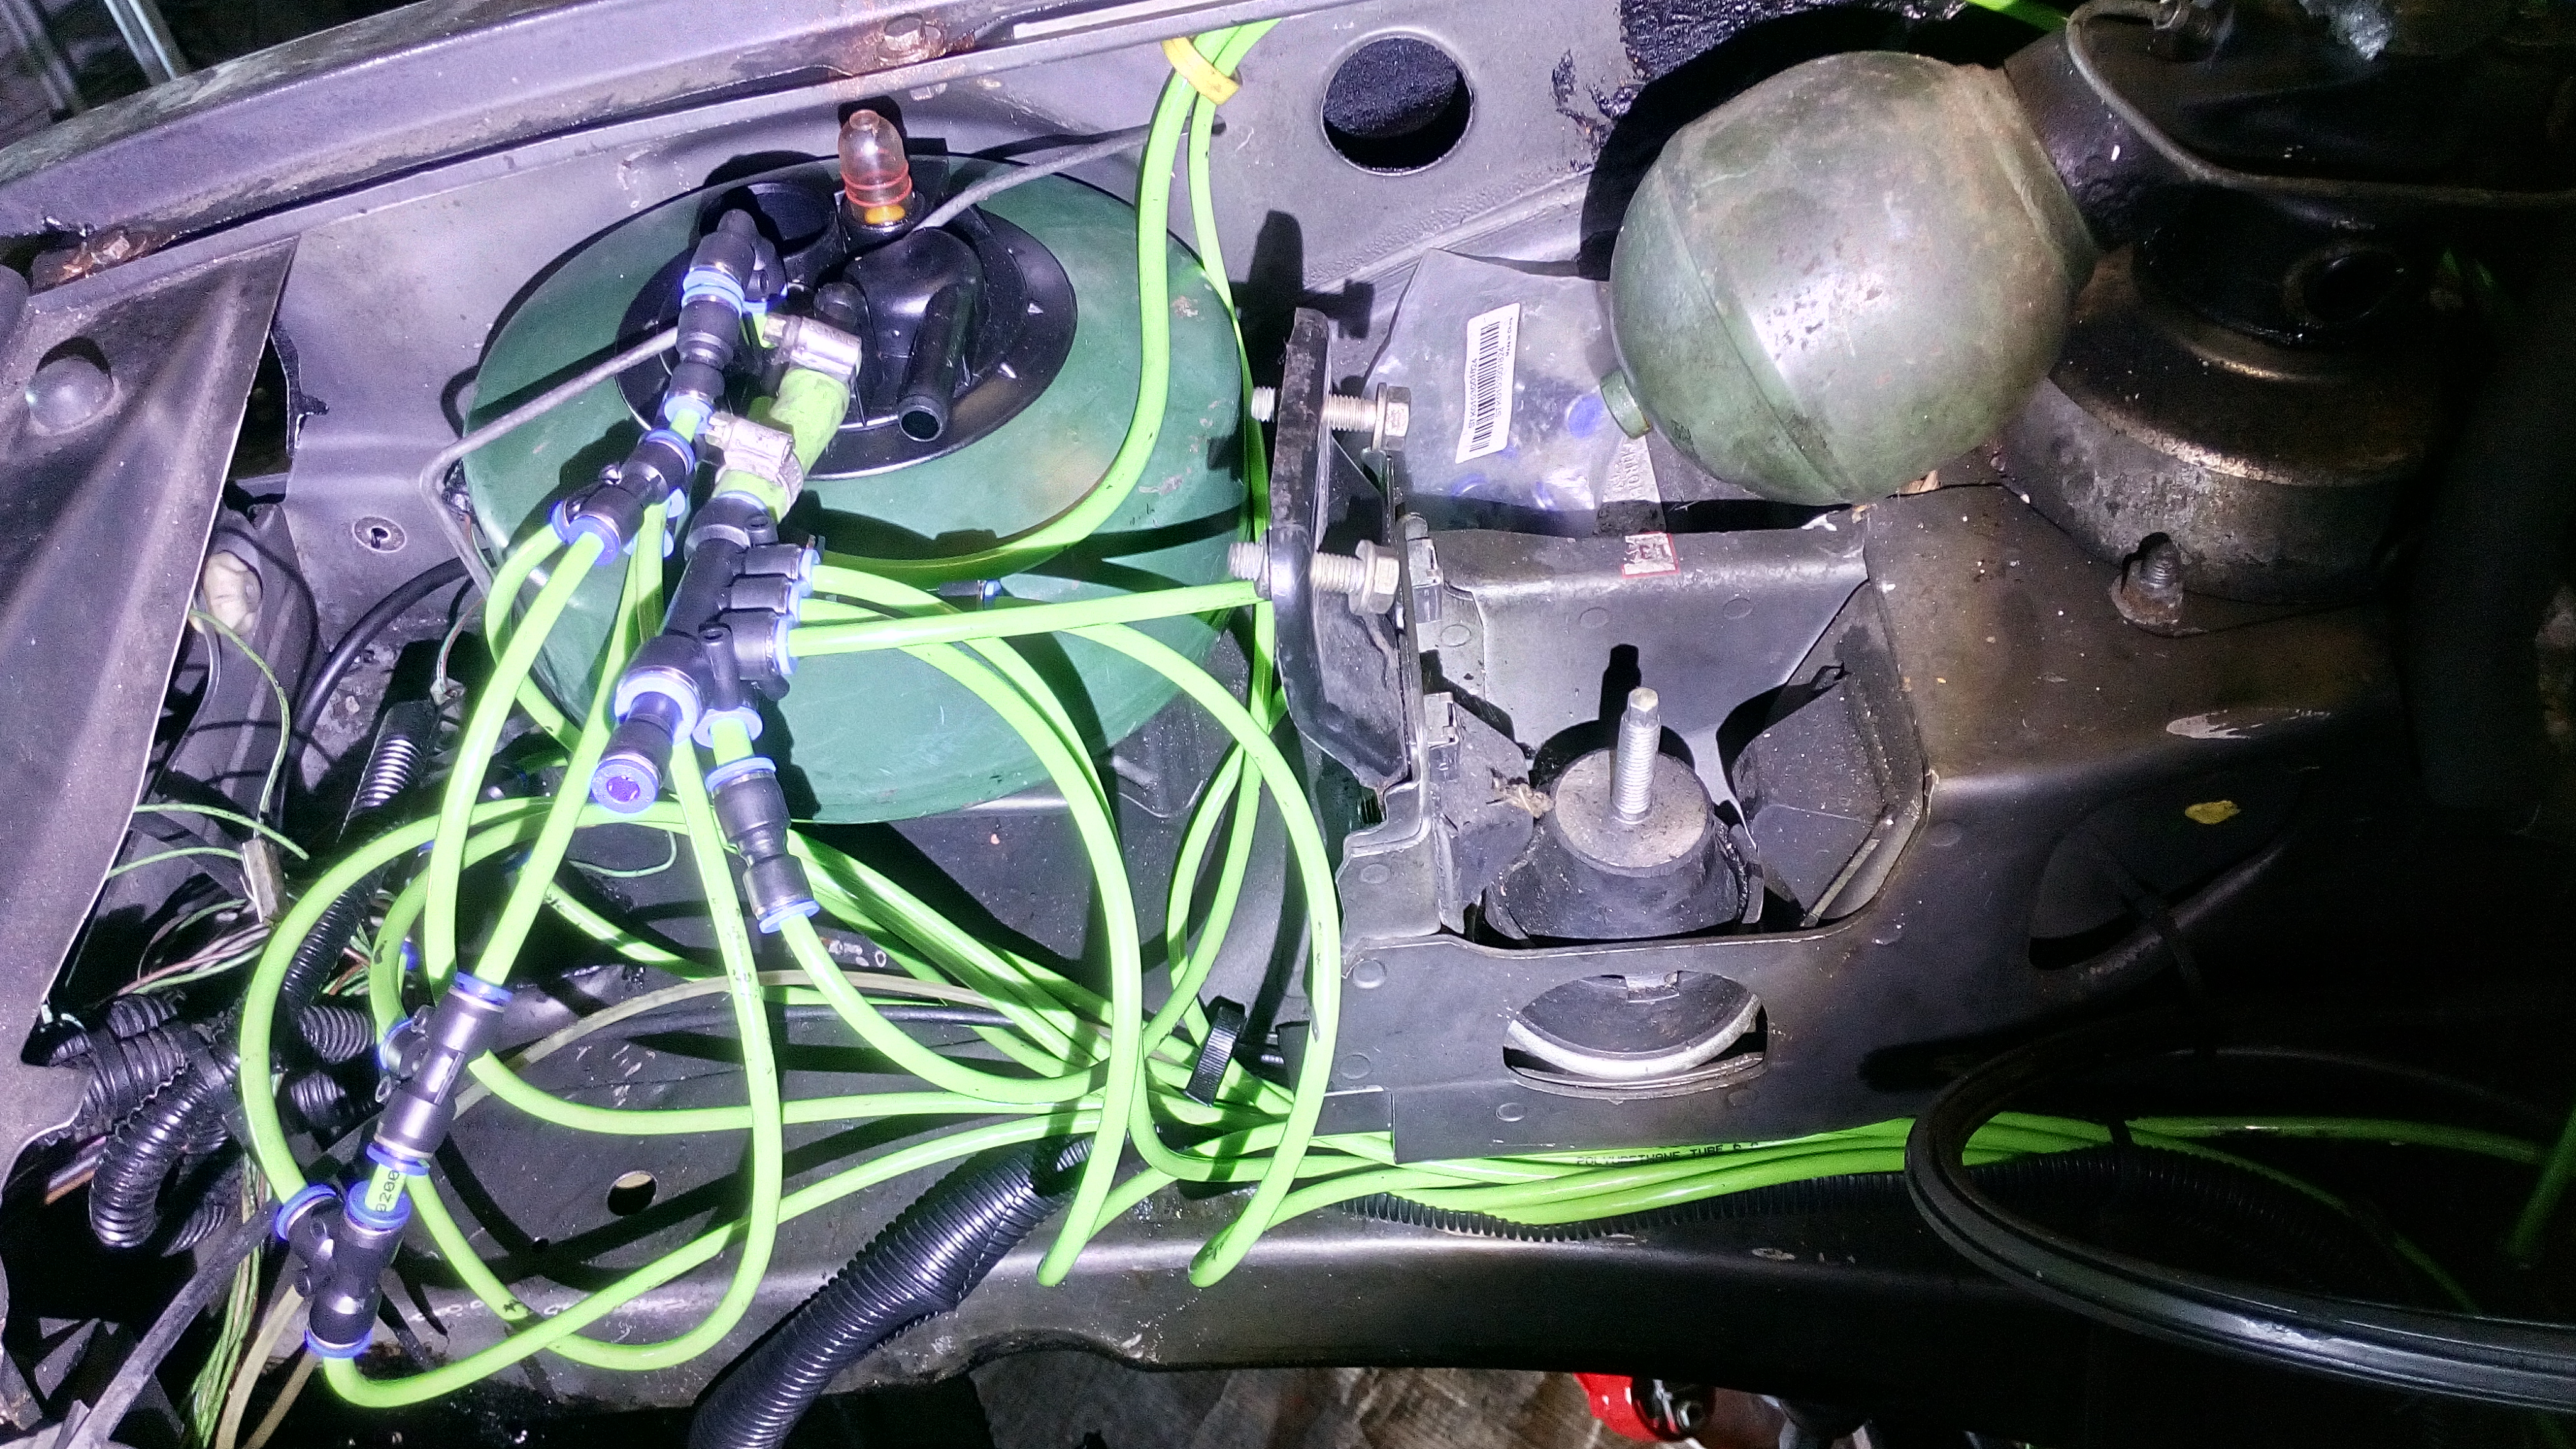
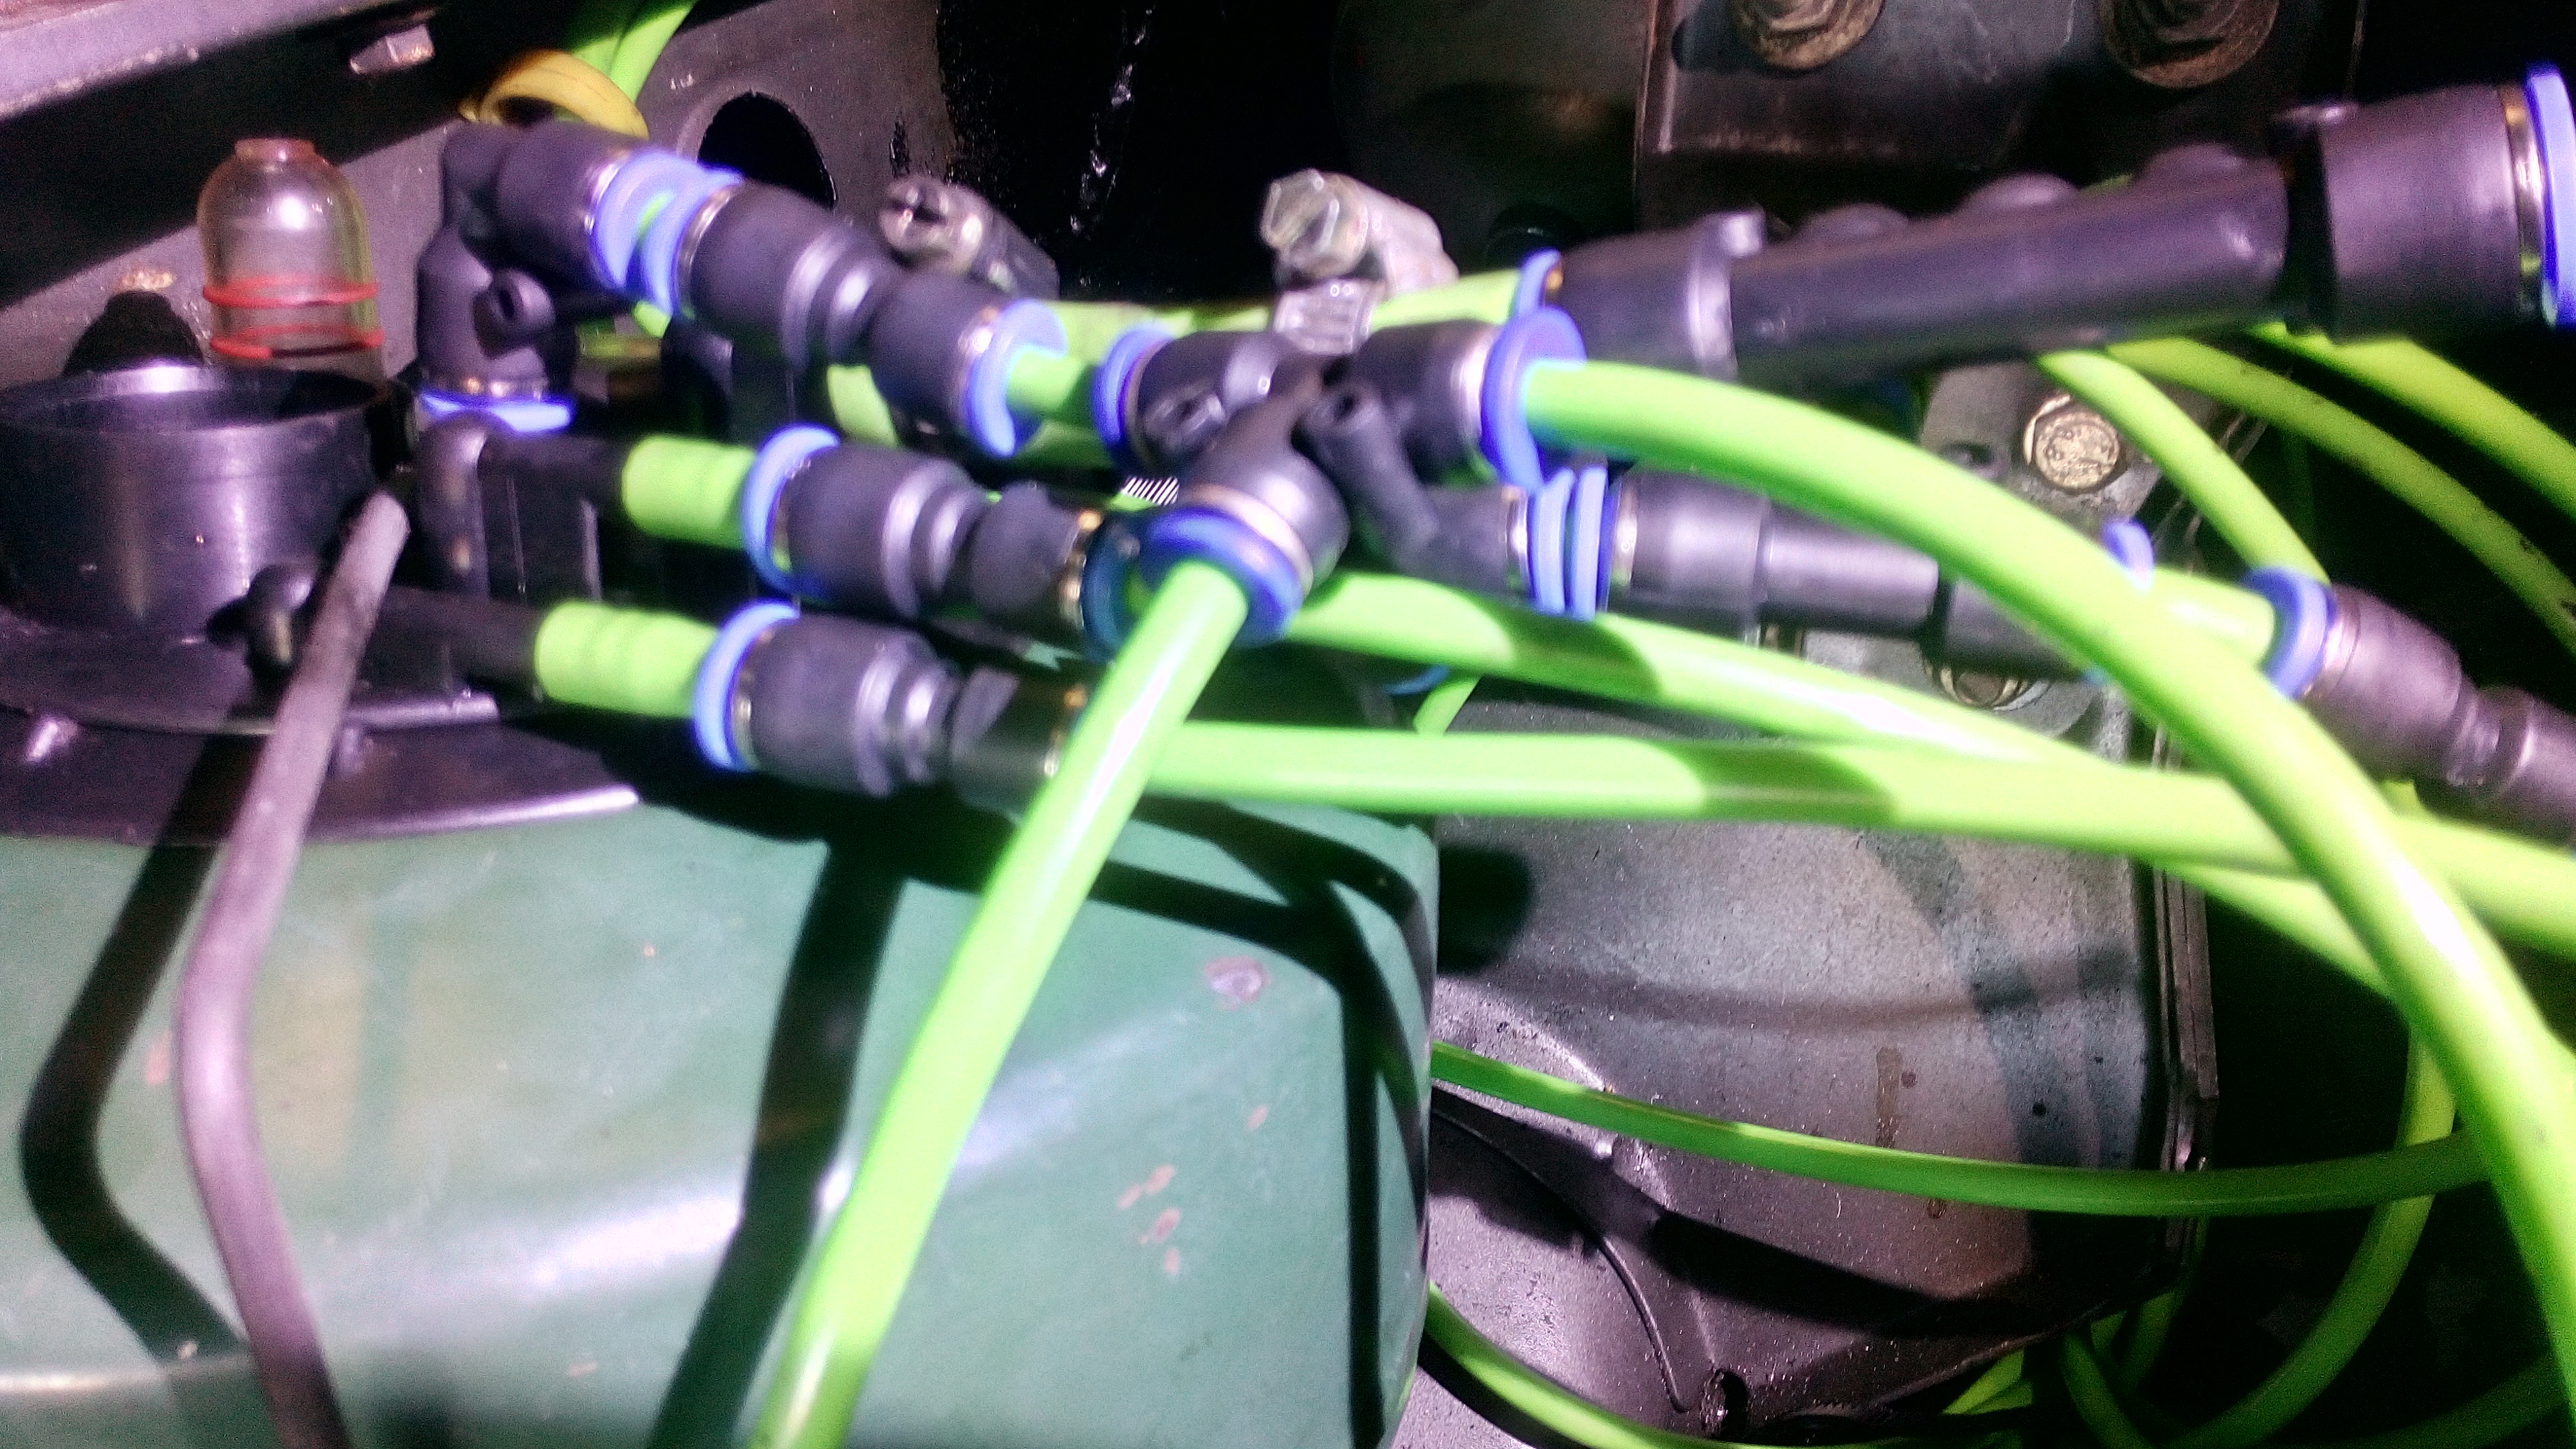
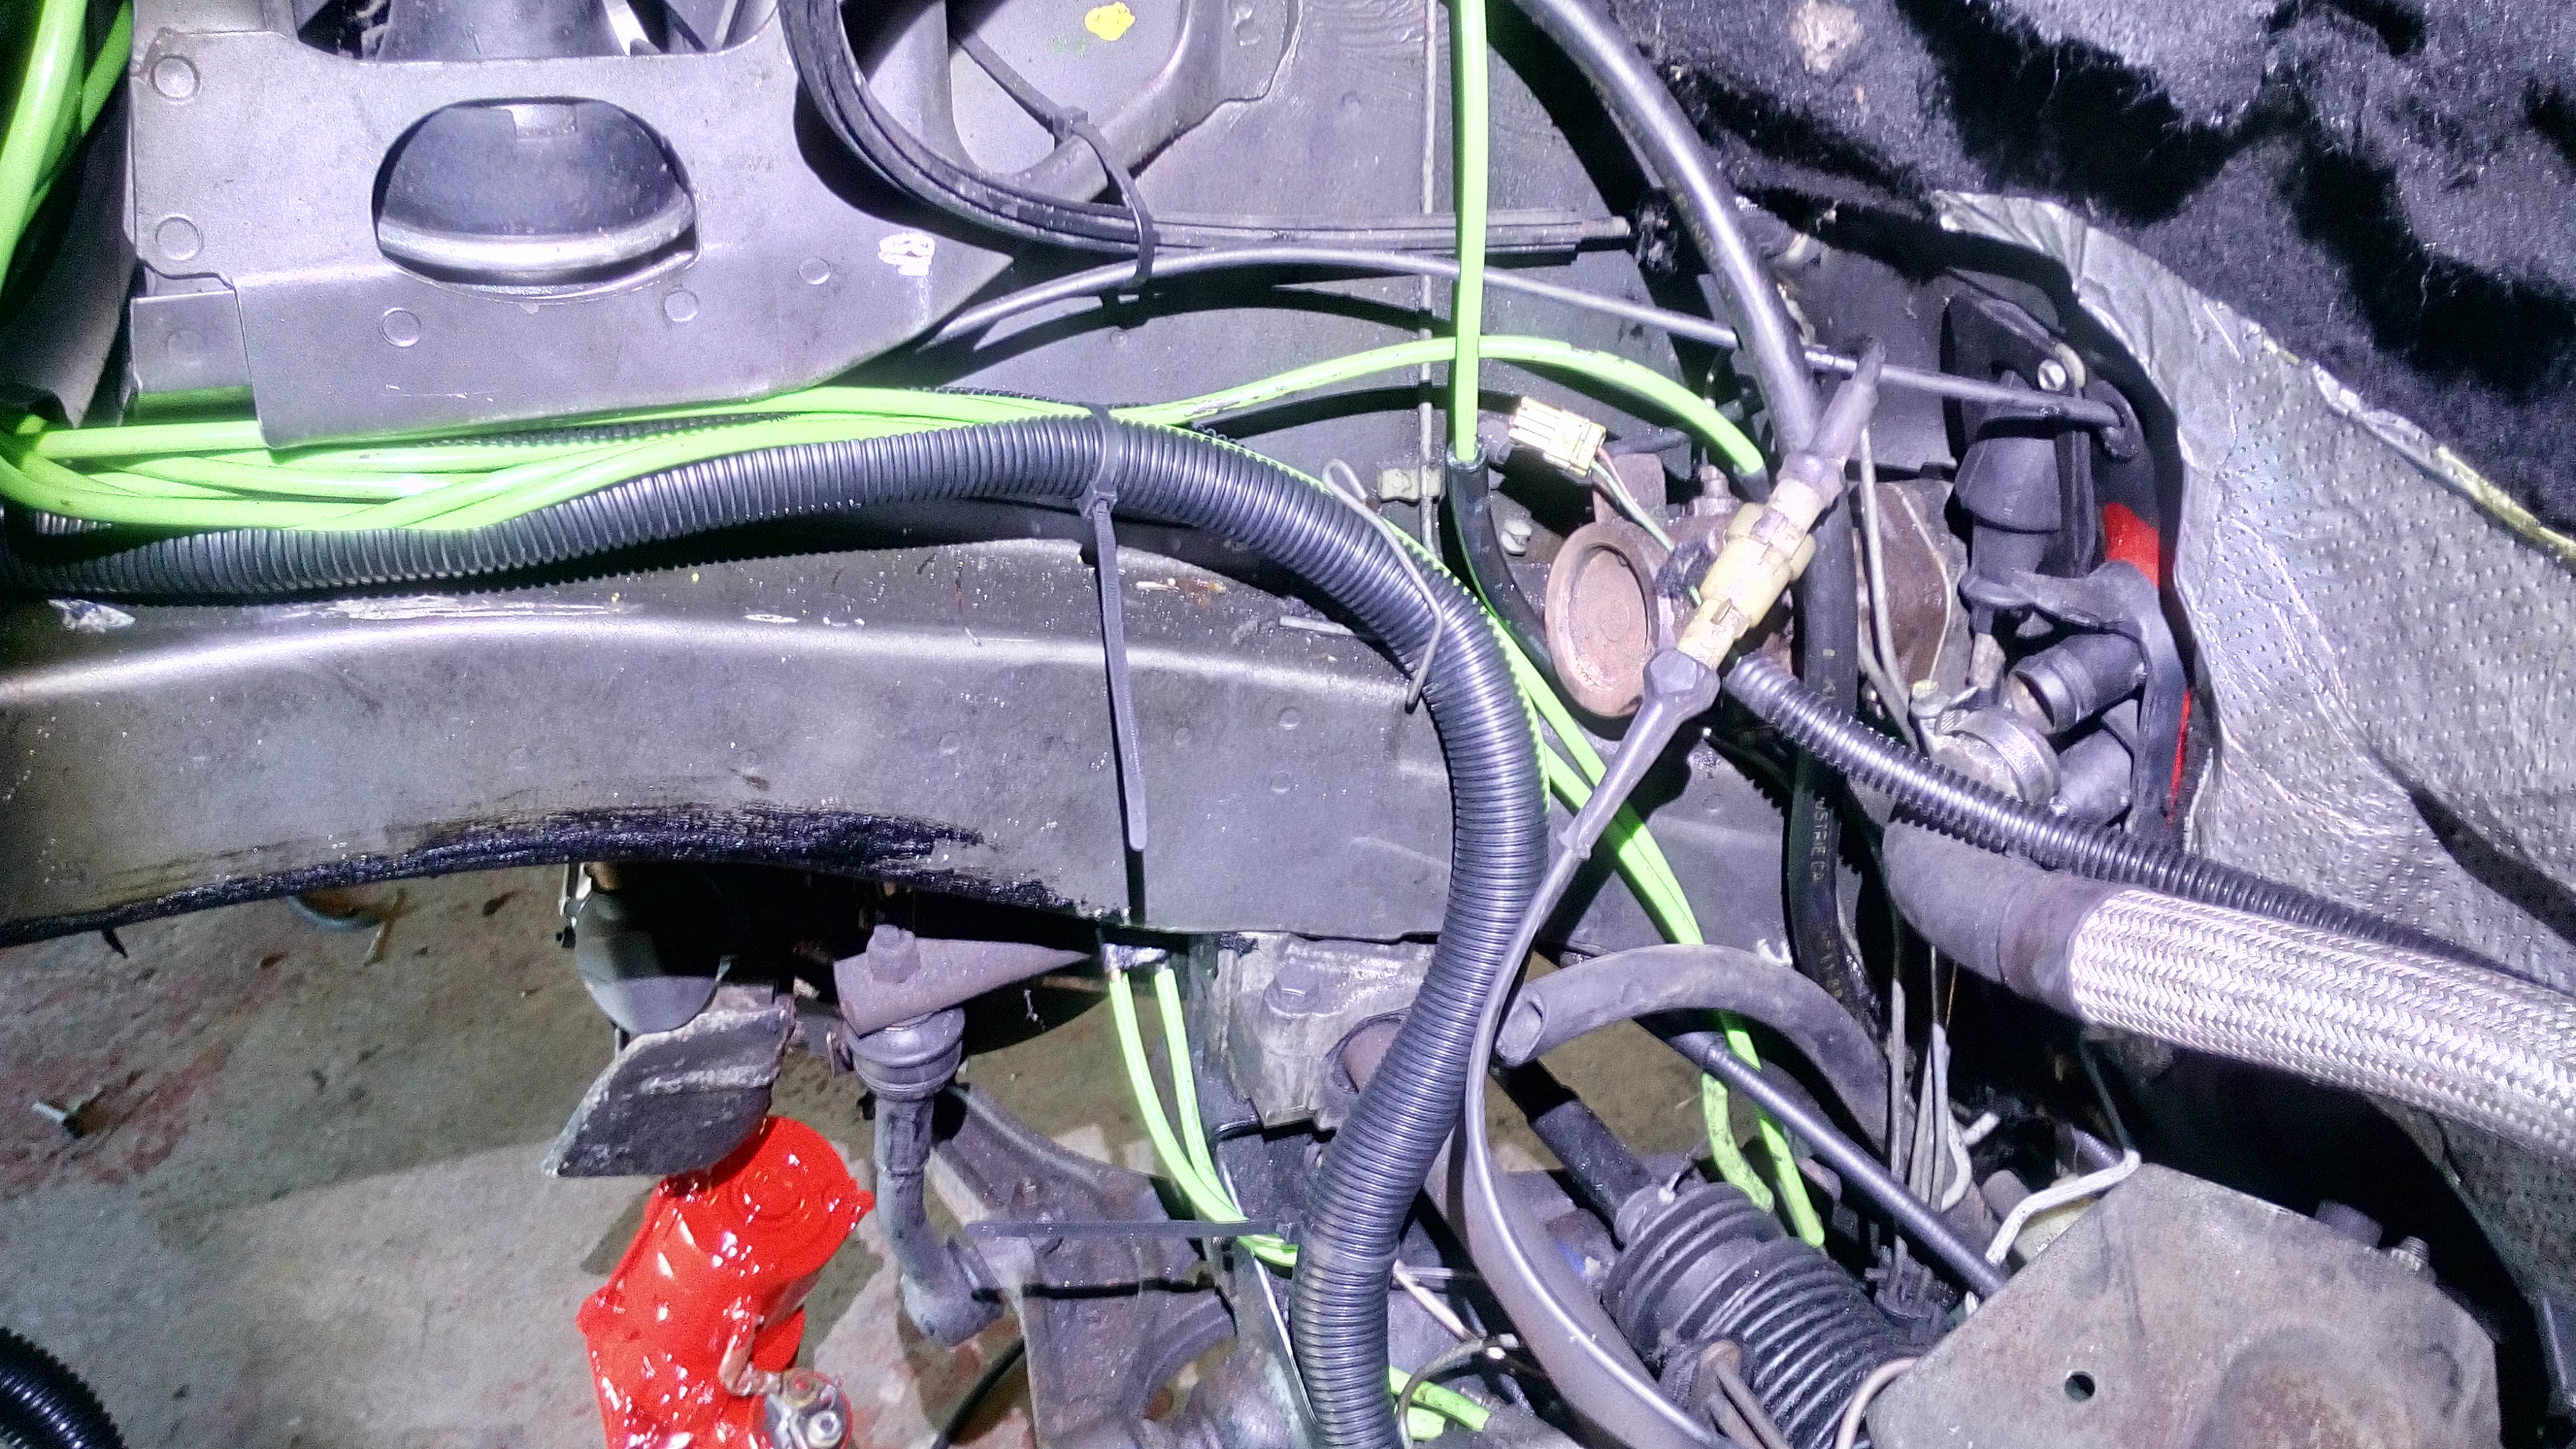
looks a lot more neat when you wrap it in this cable tidy pipe stuff...
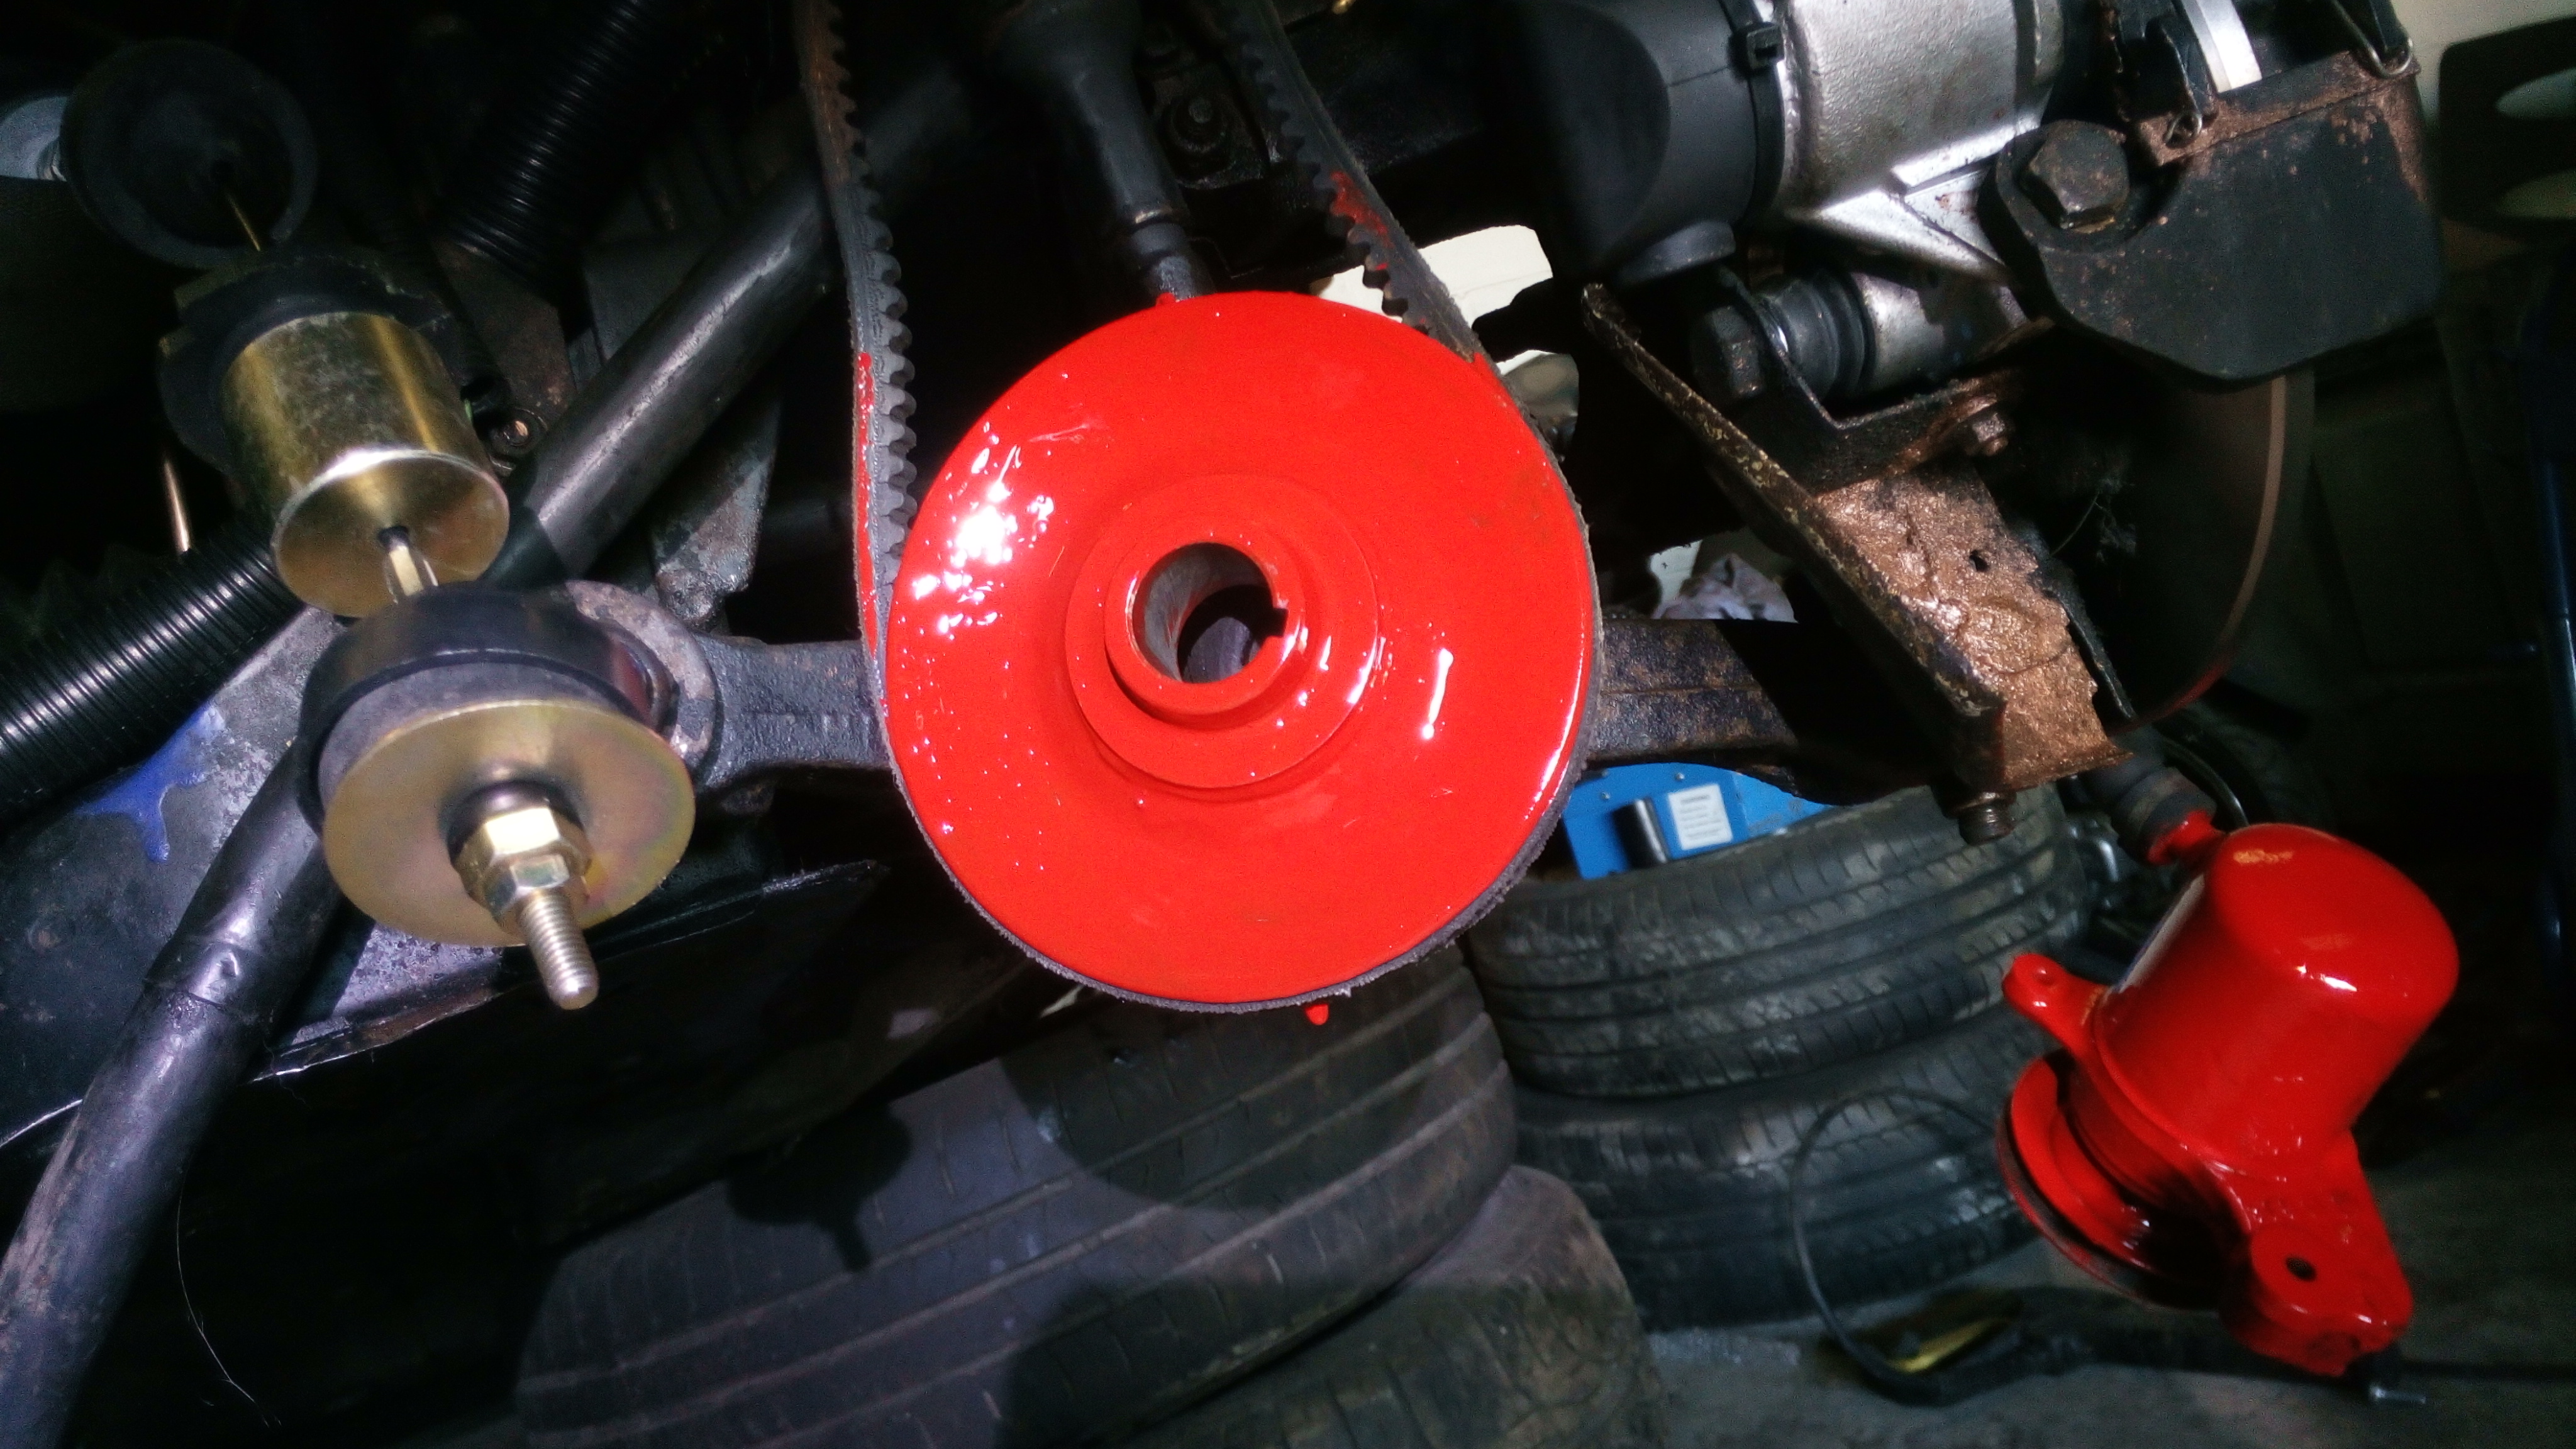
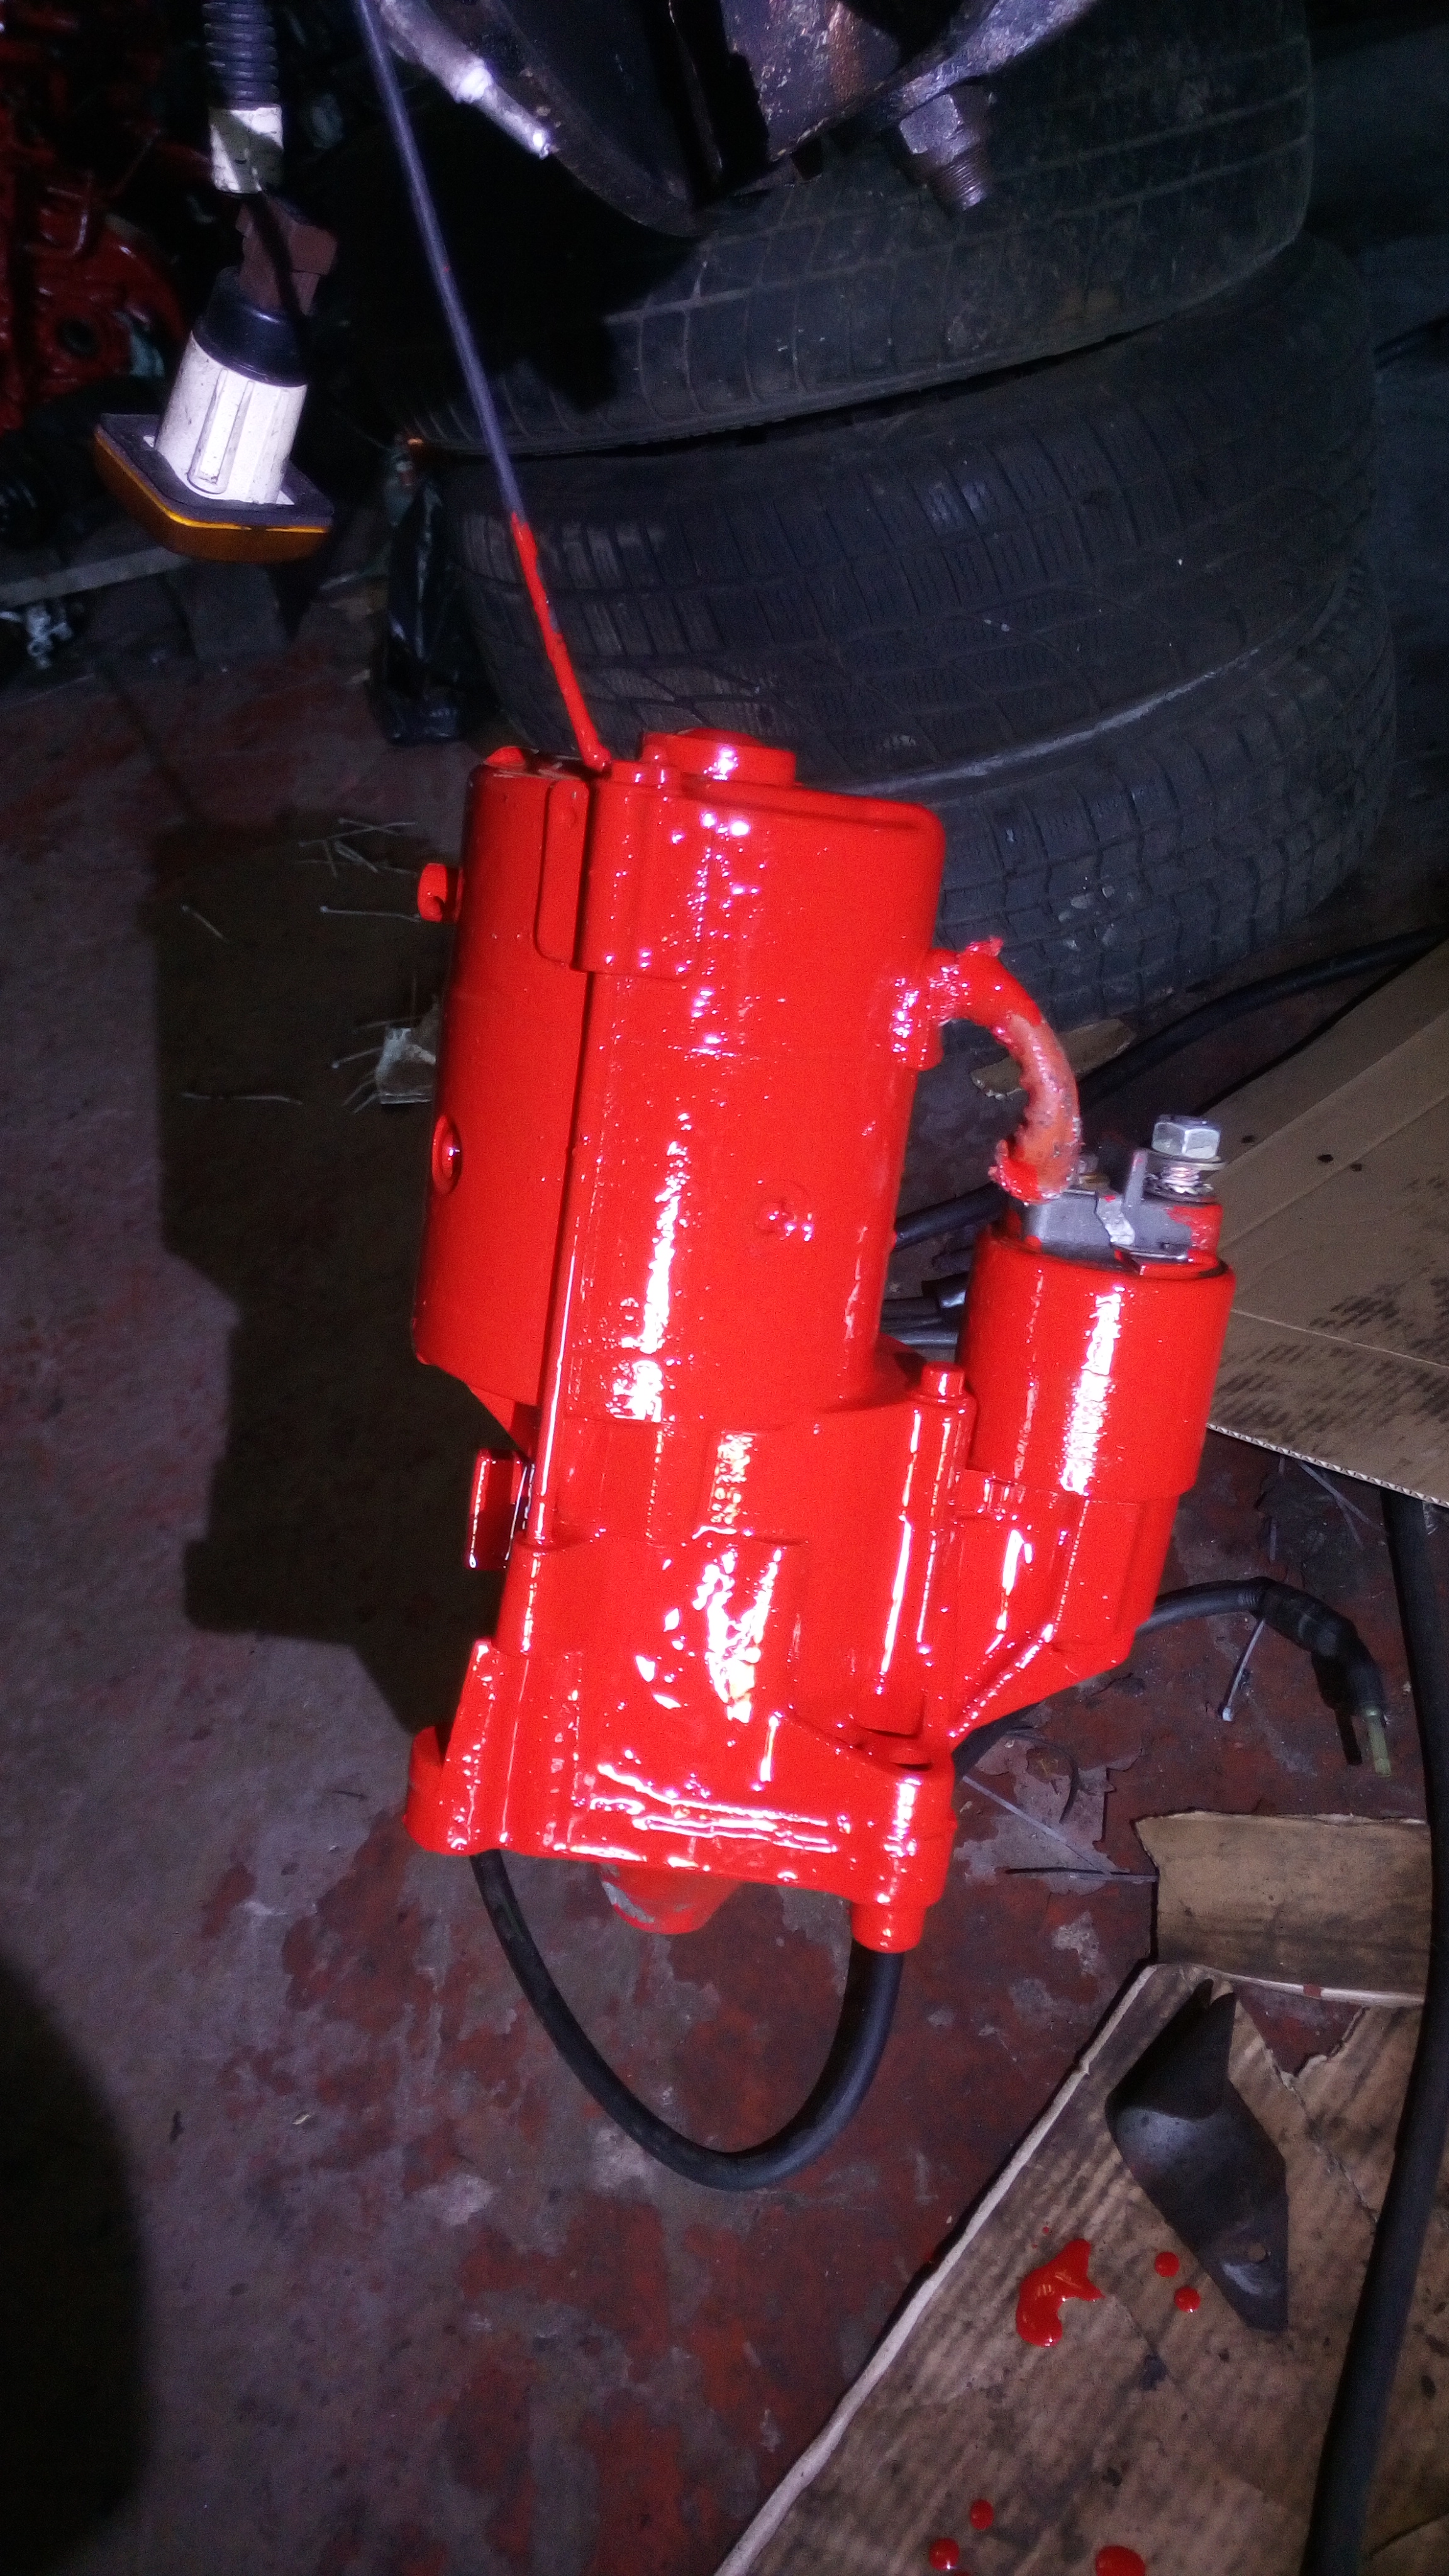
i did paint some stuff...
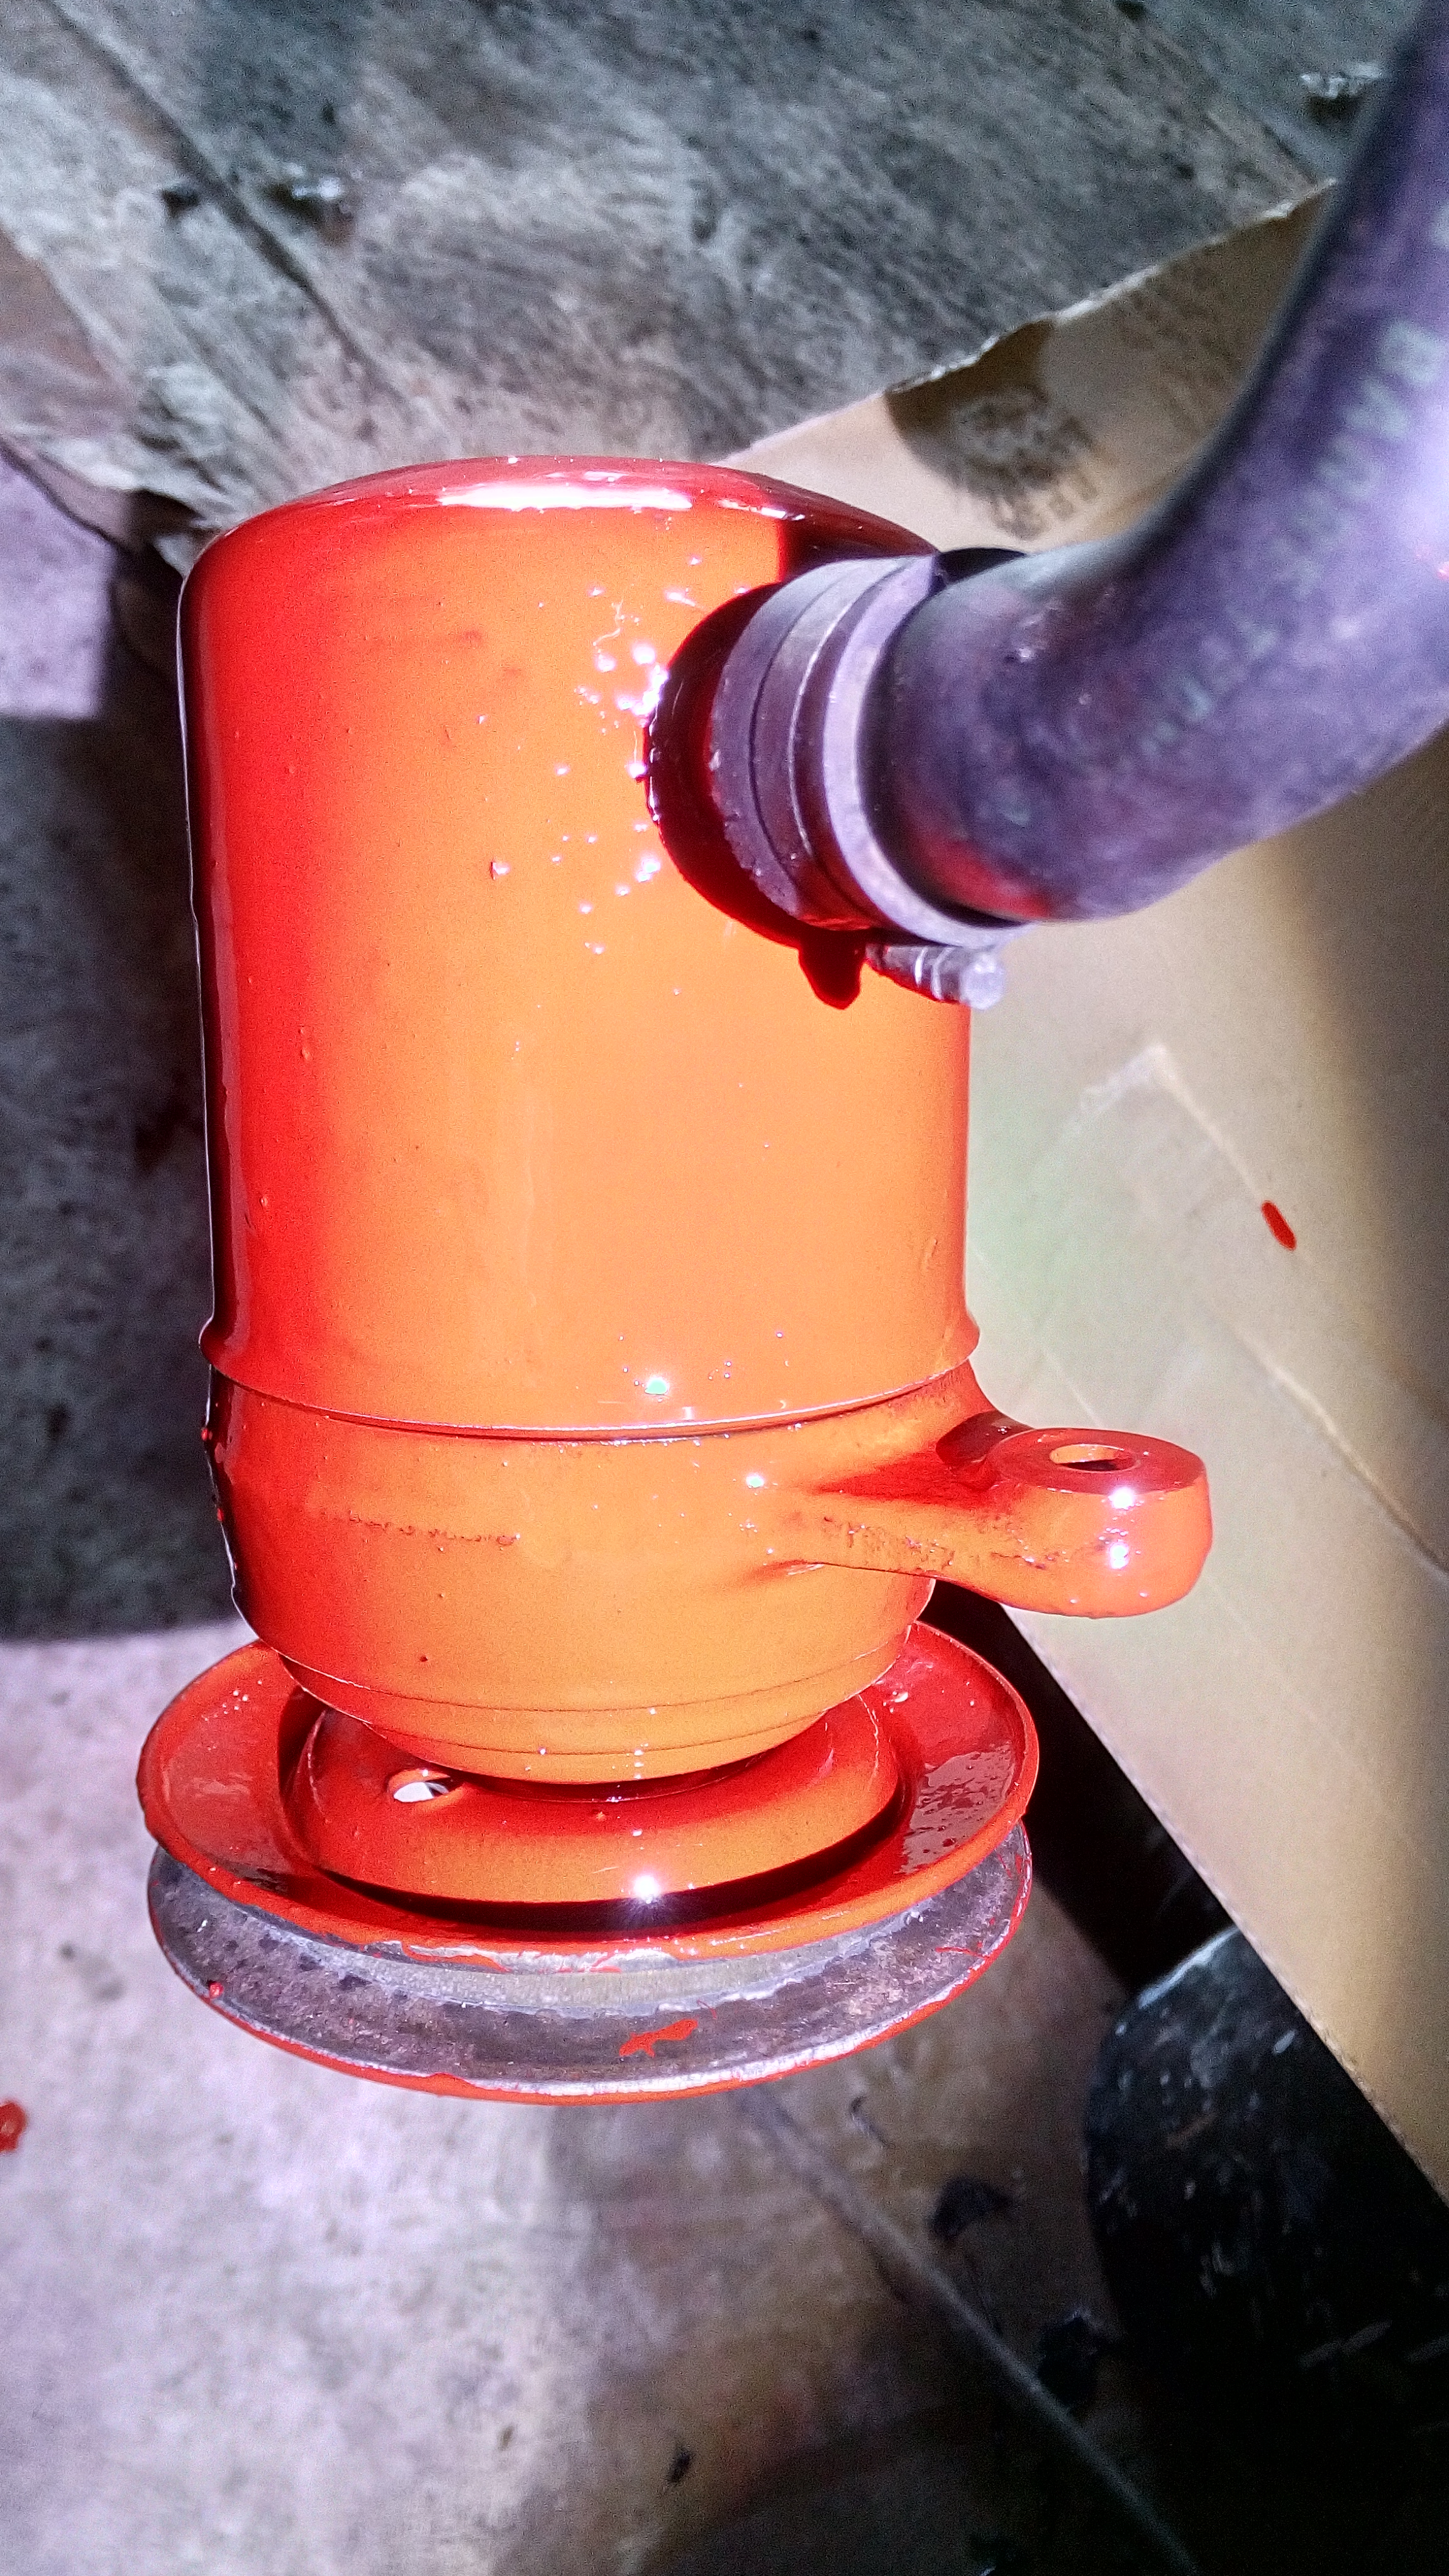
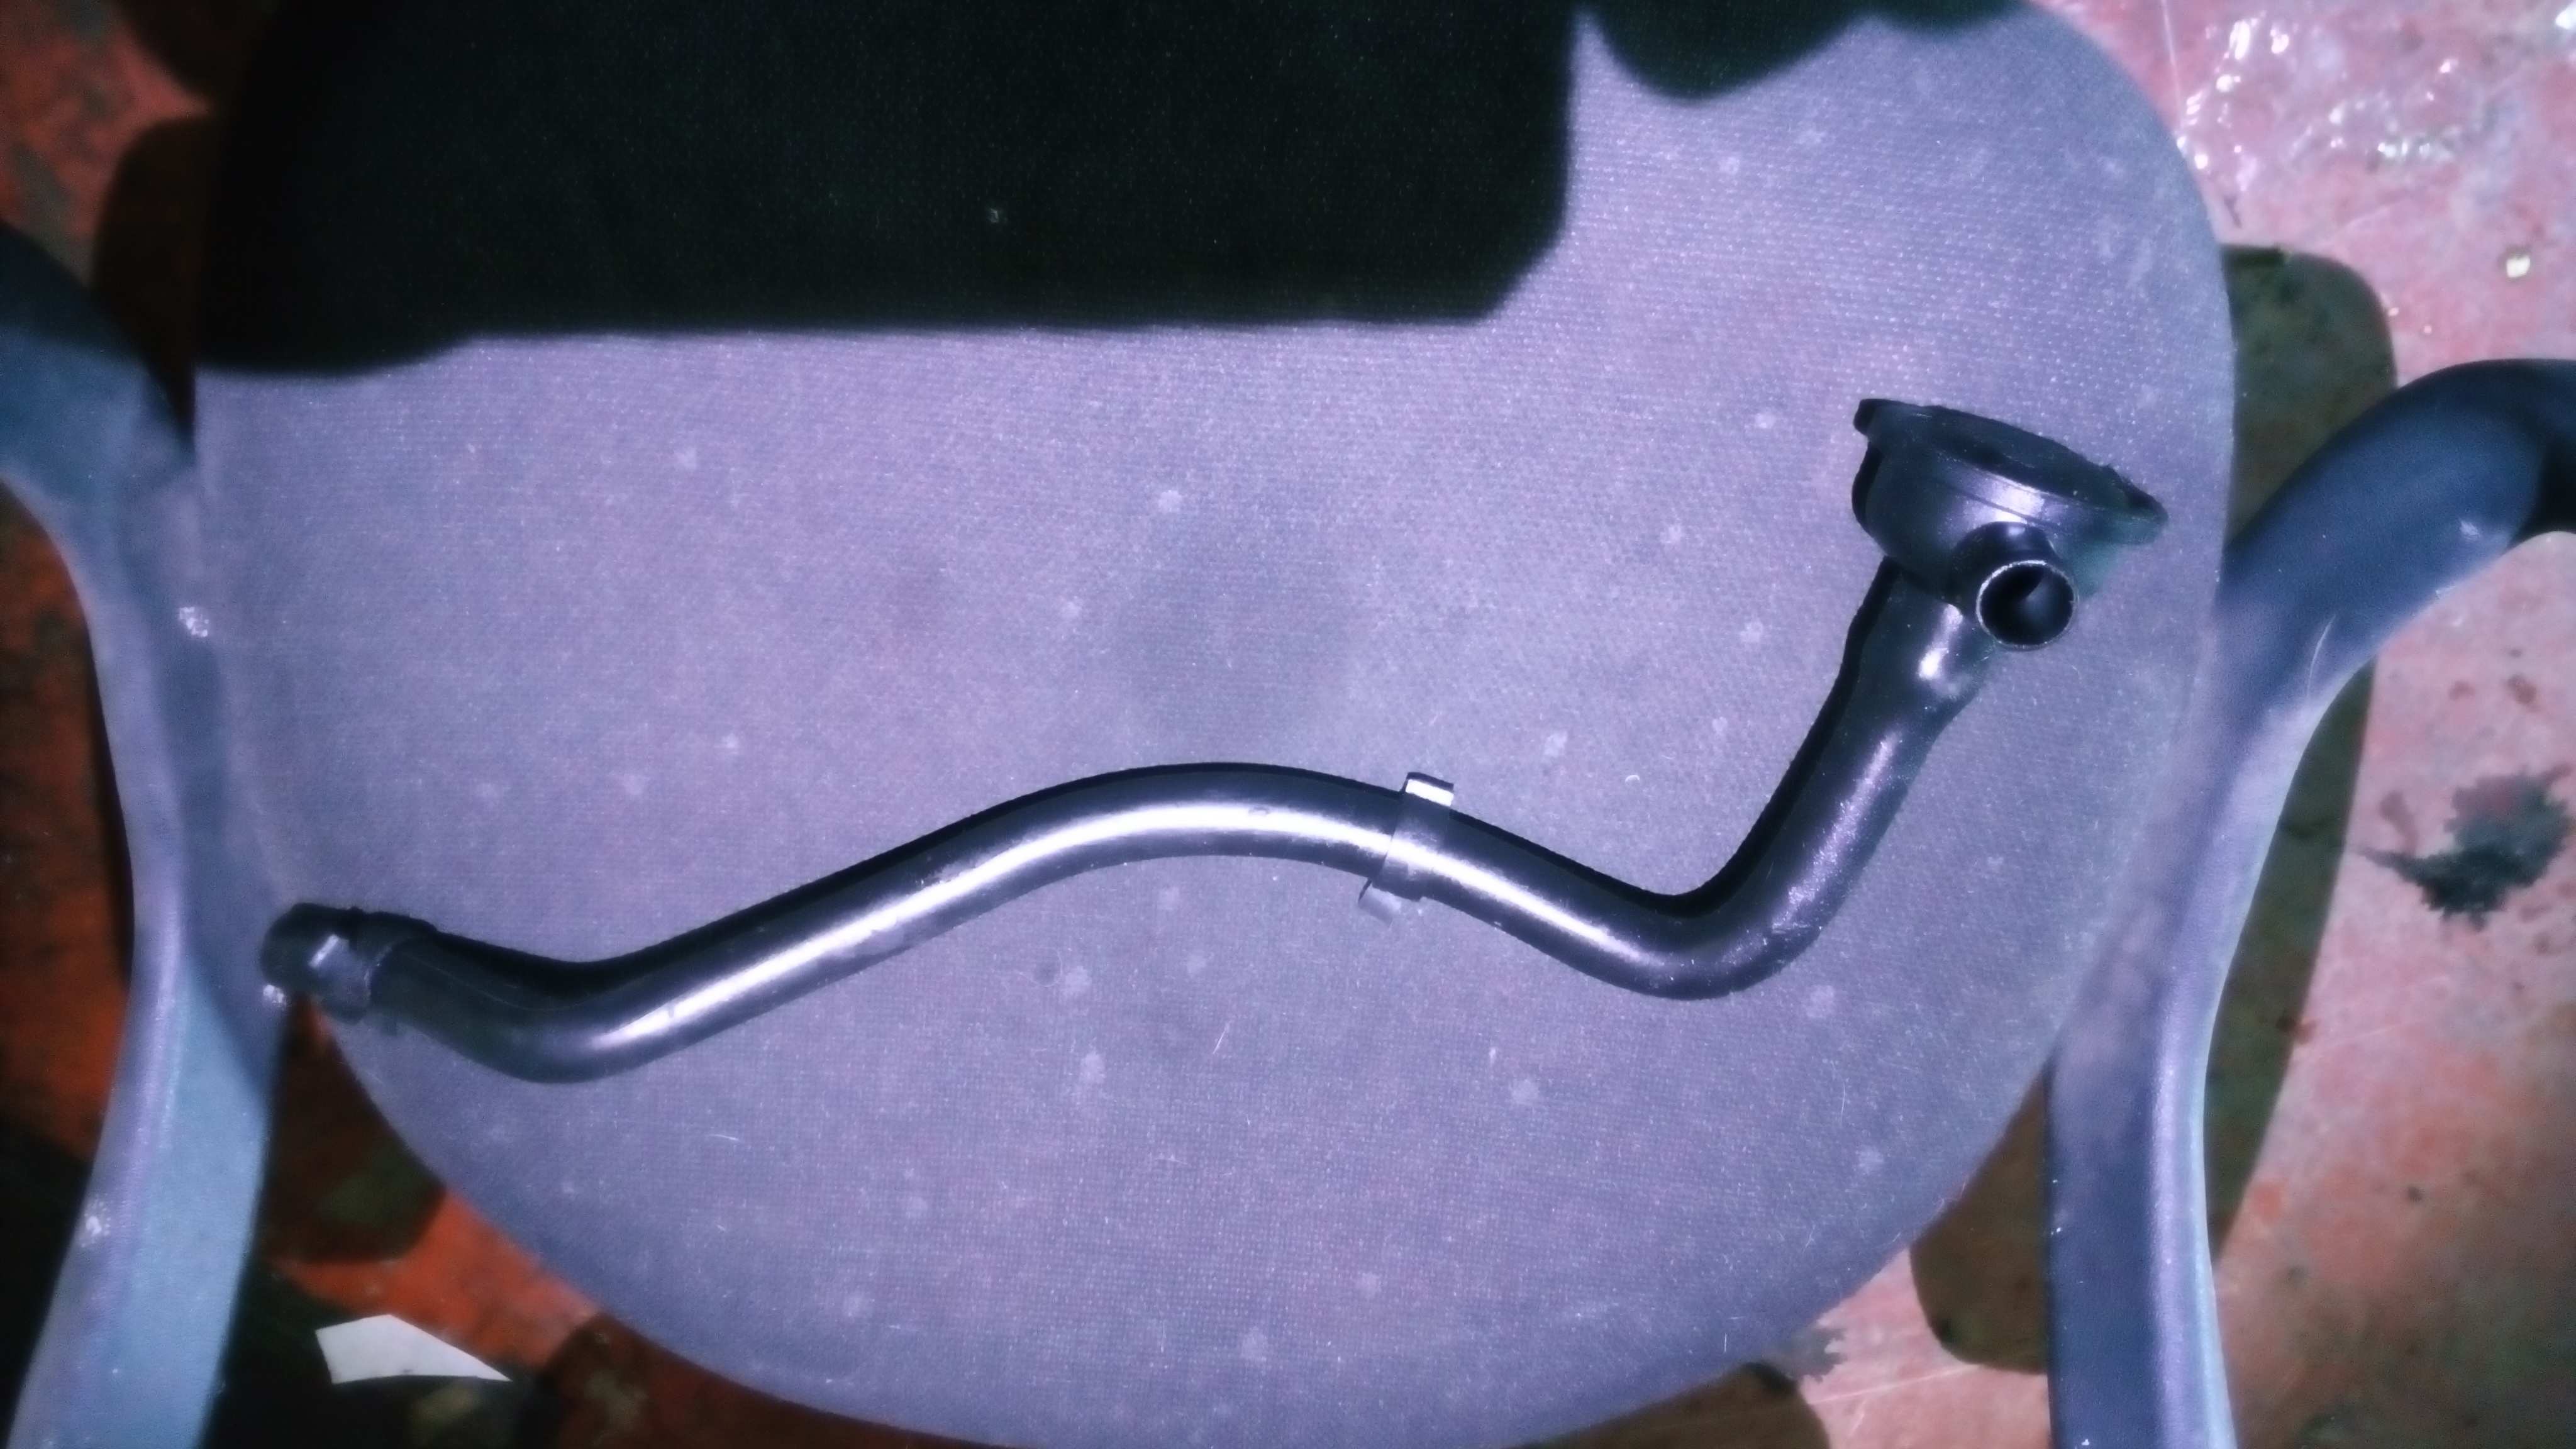
also, does anyone have a picture of where this pipe lives? i cant seem to find where it plumbs into? i know i have a spare pipe coming from the top of the oil fill/dipstick tube, but where it goes to i am unsure.. looks like a one way valve.. i guess its something to do with blow by?
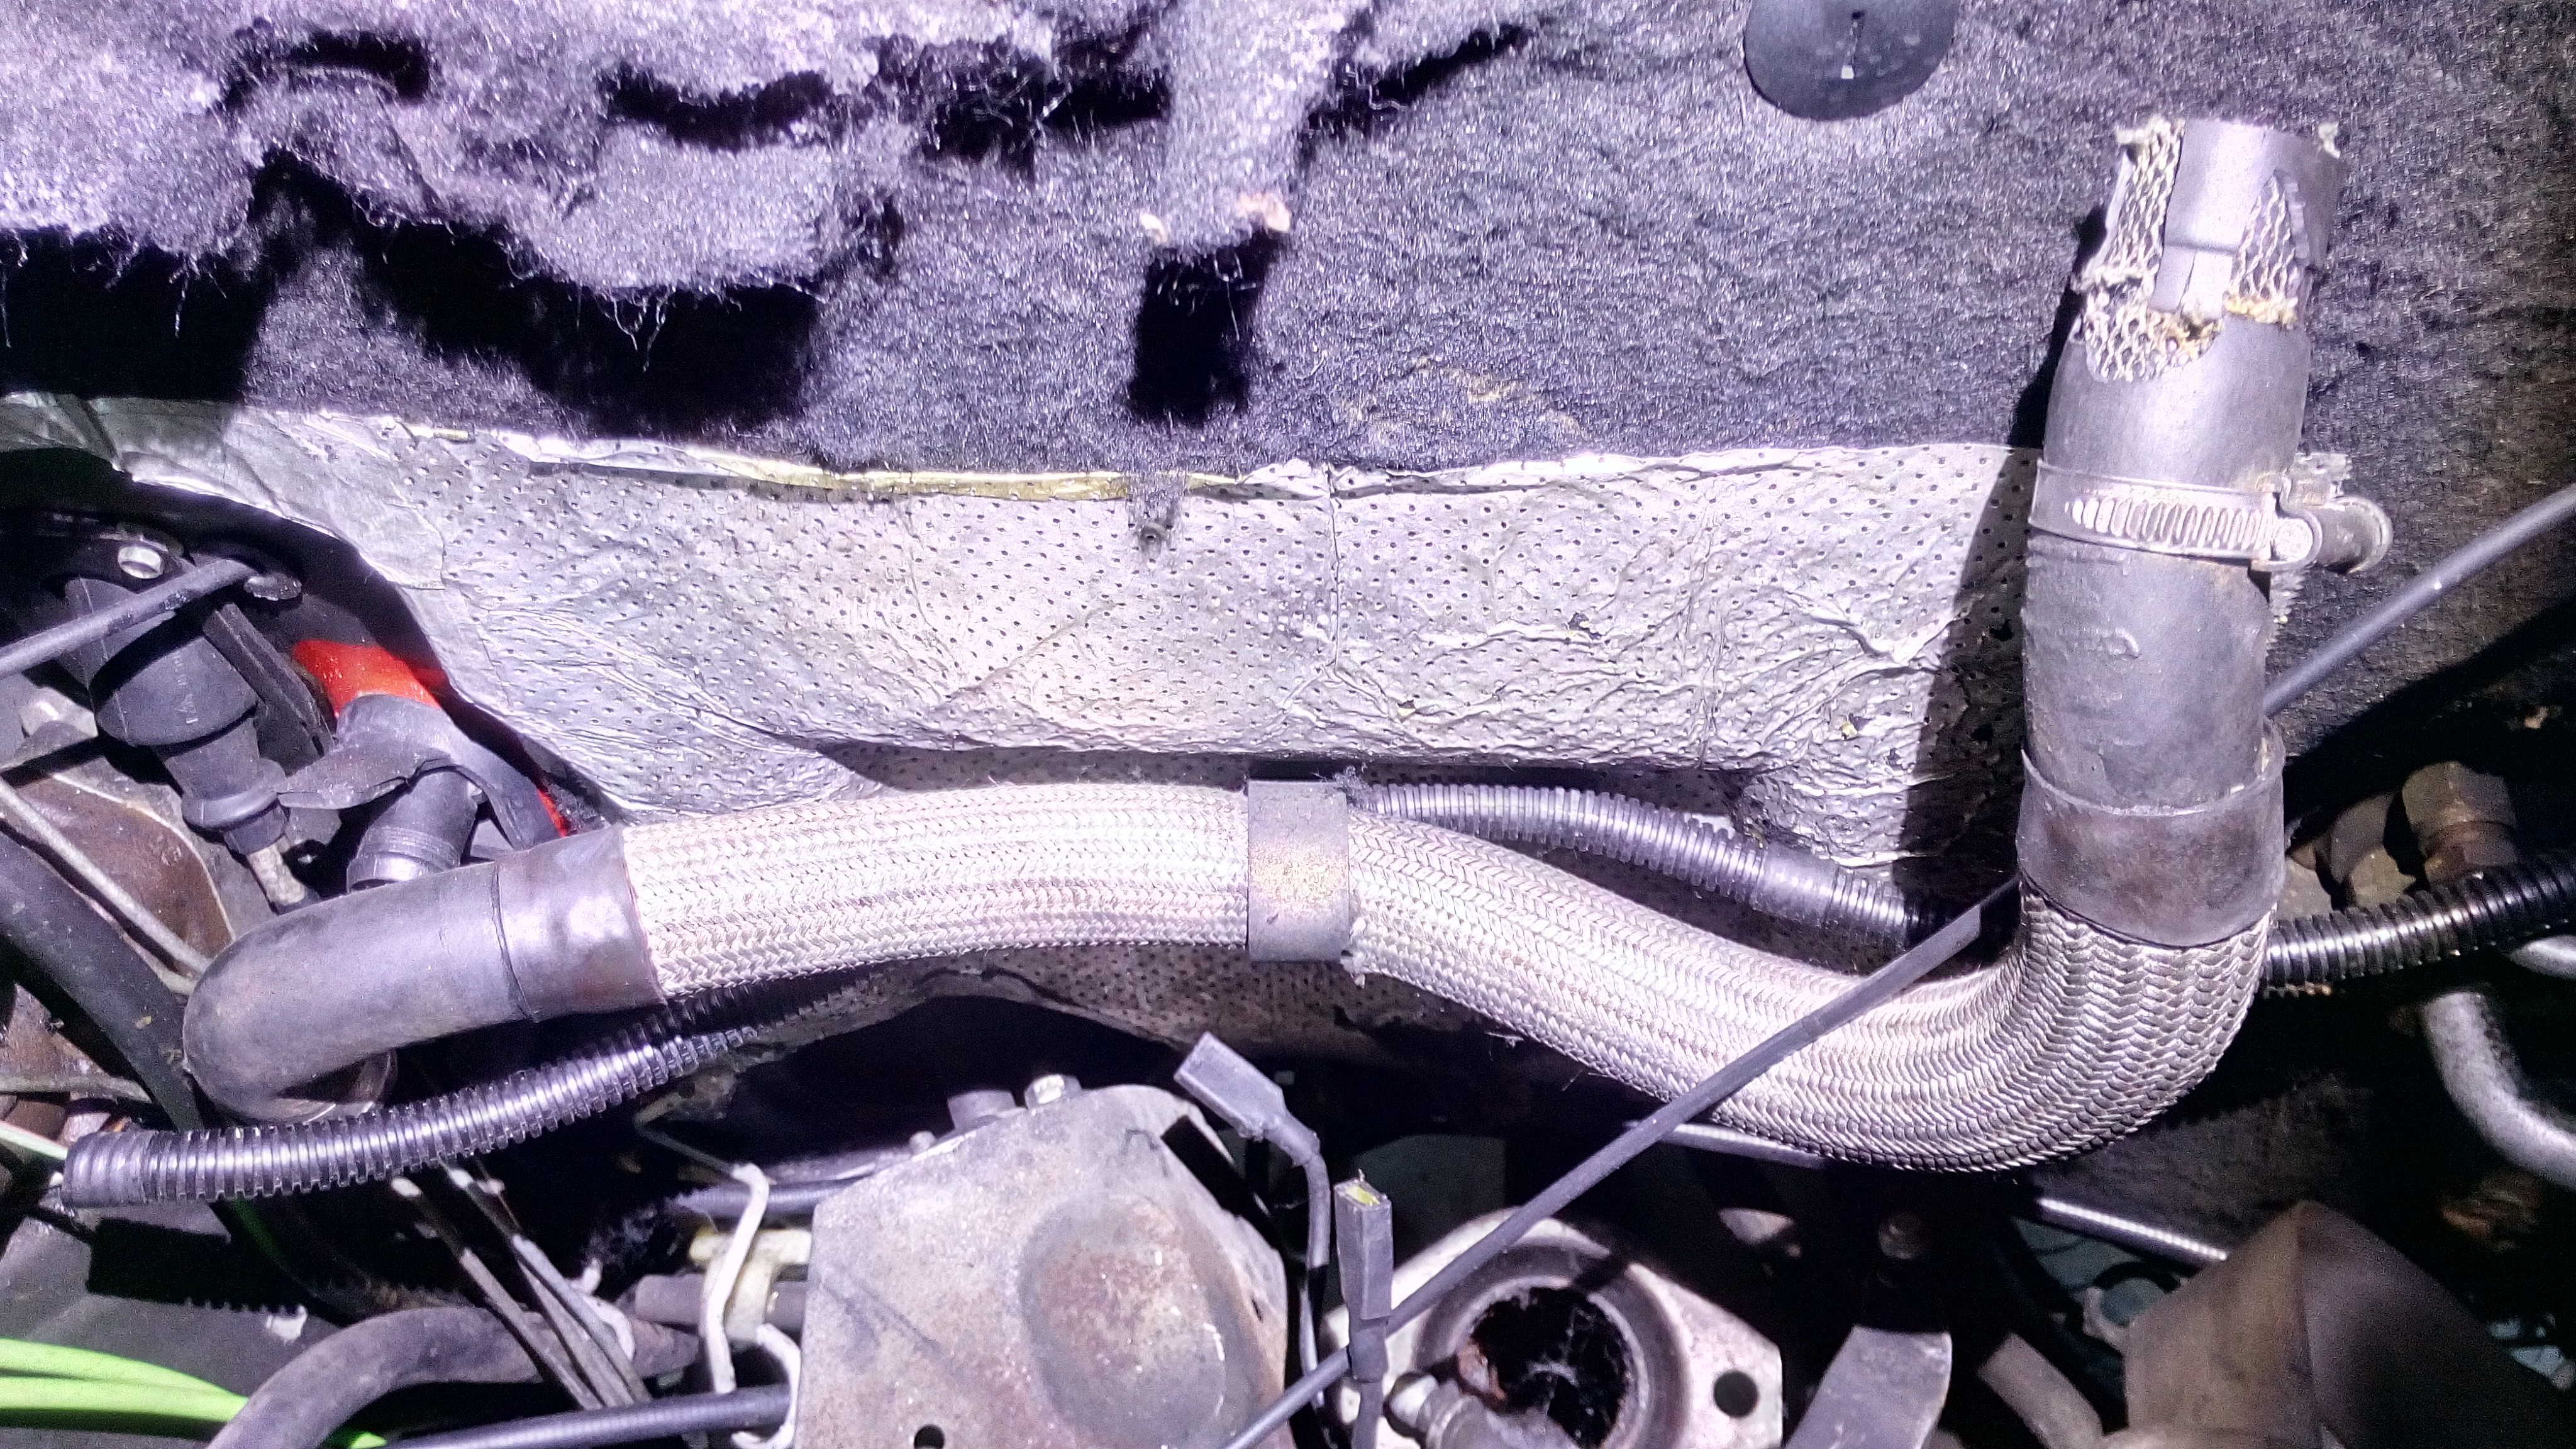
also, does anyone have a replacement one of these pipes? as you can see.. mine is pretty perished on the ends. if i could buy a new one i would... be nice to have a silicone one made up but at what insane cost???:
heres a few pictures as i know you like to see this crazy stuff
after undersealing where i can around the front and around the wings, i think its time to get the bumper and wings back on. i am not that fussed about getting the panel gaps perfect as i will be taking them all off again at some point to cavity wax everywhere i can get the waging pipe in!


the returns are getting there now, i have the LHM tank in situ with all but 2 of the returns plumbed in. it looks a mess at the moment but it is because i have not trimmed any of the pipes yet. i am not sure how much LHM the BX takes but i have bought quite a bit. i know the old LHM was heavily saturated with moisture. when i dug the hydraulic pump out to clean it up and paint it, it was sized up! it soon freed off with a few back and forth twists but its a bit worrying! it feels good now and does pump LHM fine if i feed some into it and pin it by hand.


looks a lot more neat when you wrap it in this cable tidy pipe stuff...

i did paint some stuff...


also, does anyone have a picture of where this pipe lives? i cant seem to find where it plumbs into? i know i have a spare pipe coming from the top of the oil fill/dipstick tube, but where it goes to i am unsure.. looks like a one way valve.. i guess its something to do with blow by?

also, does anyone have a replacement one of these pipes? as you can see.. mine is pretty perished on the ends. if i could buy a new one i would... be nice to have a silicone one made up but at what insane cost???:

- JohnDragonMan
Drives: Citroen Dispatch with retrofitted air conditioning
Classic Fiat Panda 4x4 Sisley named Talon (long term storage)
always buy base spec. that way you have the fun of putting all the cool bit on your vehicle
Drives: Citroen Dispatch with retrofitted air conditioning
Classic Fiat Panda 4x4 Sisley named Talon (long term storage)
always buy base spec. that way you have the fun of putting all the cool bit on your vehicle
-
rutter123
- Over 2k
- Posts: 2695
- Joined: Sun Sep 02, 2012 9:54 pm
- Location: South Lincs
- My Cars: 90 Bx Tzd turbo ven red 295k
74 D Super 5 black
05 Volvo V50 2.0d 180k
65 Peugeot Boxer work van 280k - x 137
Re: John Dragon Man's Citroen BX Diesel Estate
Hi JDM, that smaller pipe in the second photo from bottom is the breather pipe from the front of the intercooler which goes down onto the front of the block, and i have a braided water pipe here if you need one (unperished)
90 BX Tzd turbo 294k SORN undergoing major surgery
90 BX Tzd turbo estate 46k awaiting surgery
65 Peugeot Boxer Van the new workhorse
52 Toyota Rav4 180k Bulletproof Jap reliability
90 BX Tzd turbo estate 46k awaiting surgery
65 Peugeot Boxer Van the new workhorse
52 Toyota Rav4 180k Bulletproof Jap reliability
- Jaba
- 1K Away
- Posts: 1898
- Joined: Tue Jul 05, 2005 7:54 am
- Location: Usually in the garage
- My Cars: BX GTi, C3 Auto
- x 82
Re: John Dragon Man's Citroen BX Diesel Estate
The pipe pictured on the oil trap goes to the air filter. The oil trap fits on the front or LH side of the intercooler depending on the car's age.
The Joy of BX with just one Citroën BX to my name now. Will I sing Bye Bye to my GTI or will it be Till death us do part.
- Dragon Man
- BXpert
- Posts: 187
- Joined: Sat Aug 22, 2015 3:45 am
- Location: The East Midlands, Derby
- My Cars: Citroen Dispatch 2.0L HDi 2005
Fiat Panda 4x4 Sisley 1991 - x 6
- Contact:
Re: John Dragon Man's Citroen BX Diesel Estate
Hey guys,
today i fitted the wings on fully and really tidied up the LHM returns.
heres a few pictures:
it looks a little complex but in all of this, the Octopus now lives. from where the octopus should sit, all i did was extend all of the pipes up to the LHM tank and build everything there. in all fairness i think it does not look half bad. nice and accessible now and each part 100% user serviceable (just the way i like it.. if not i make it user serviceable hehe).
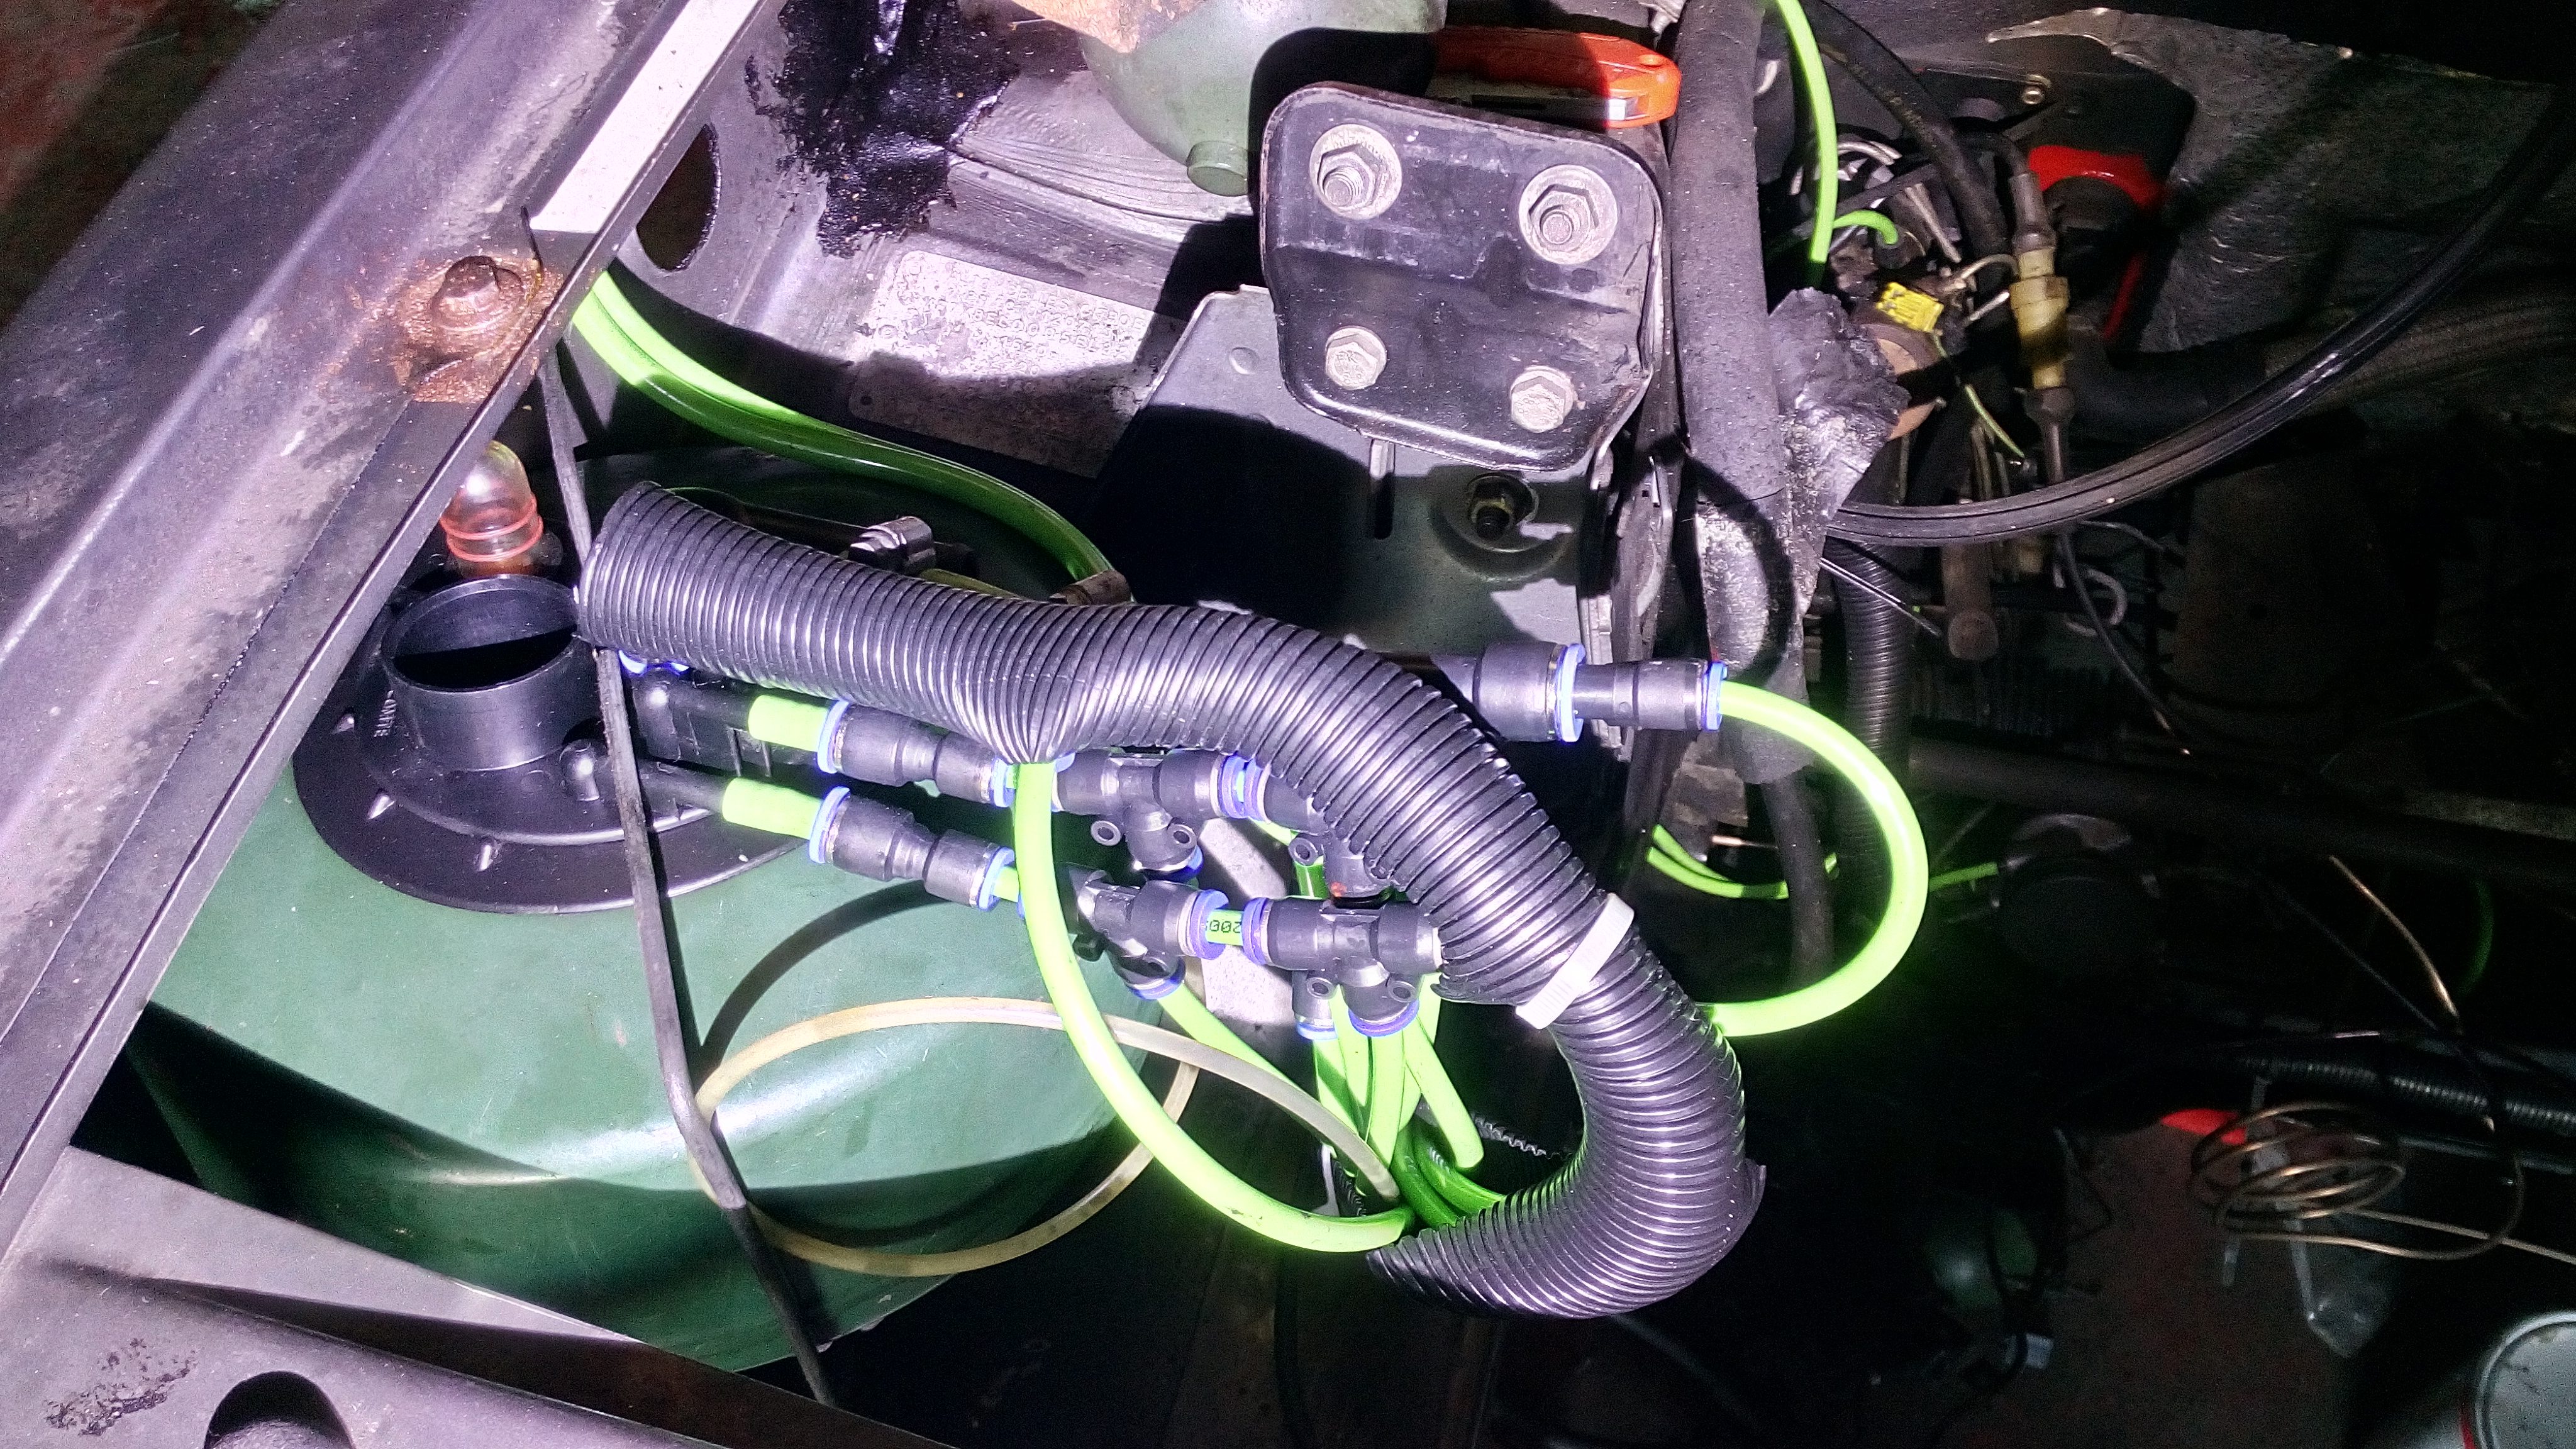
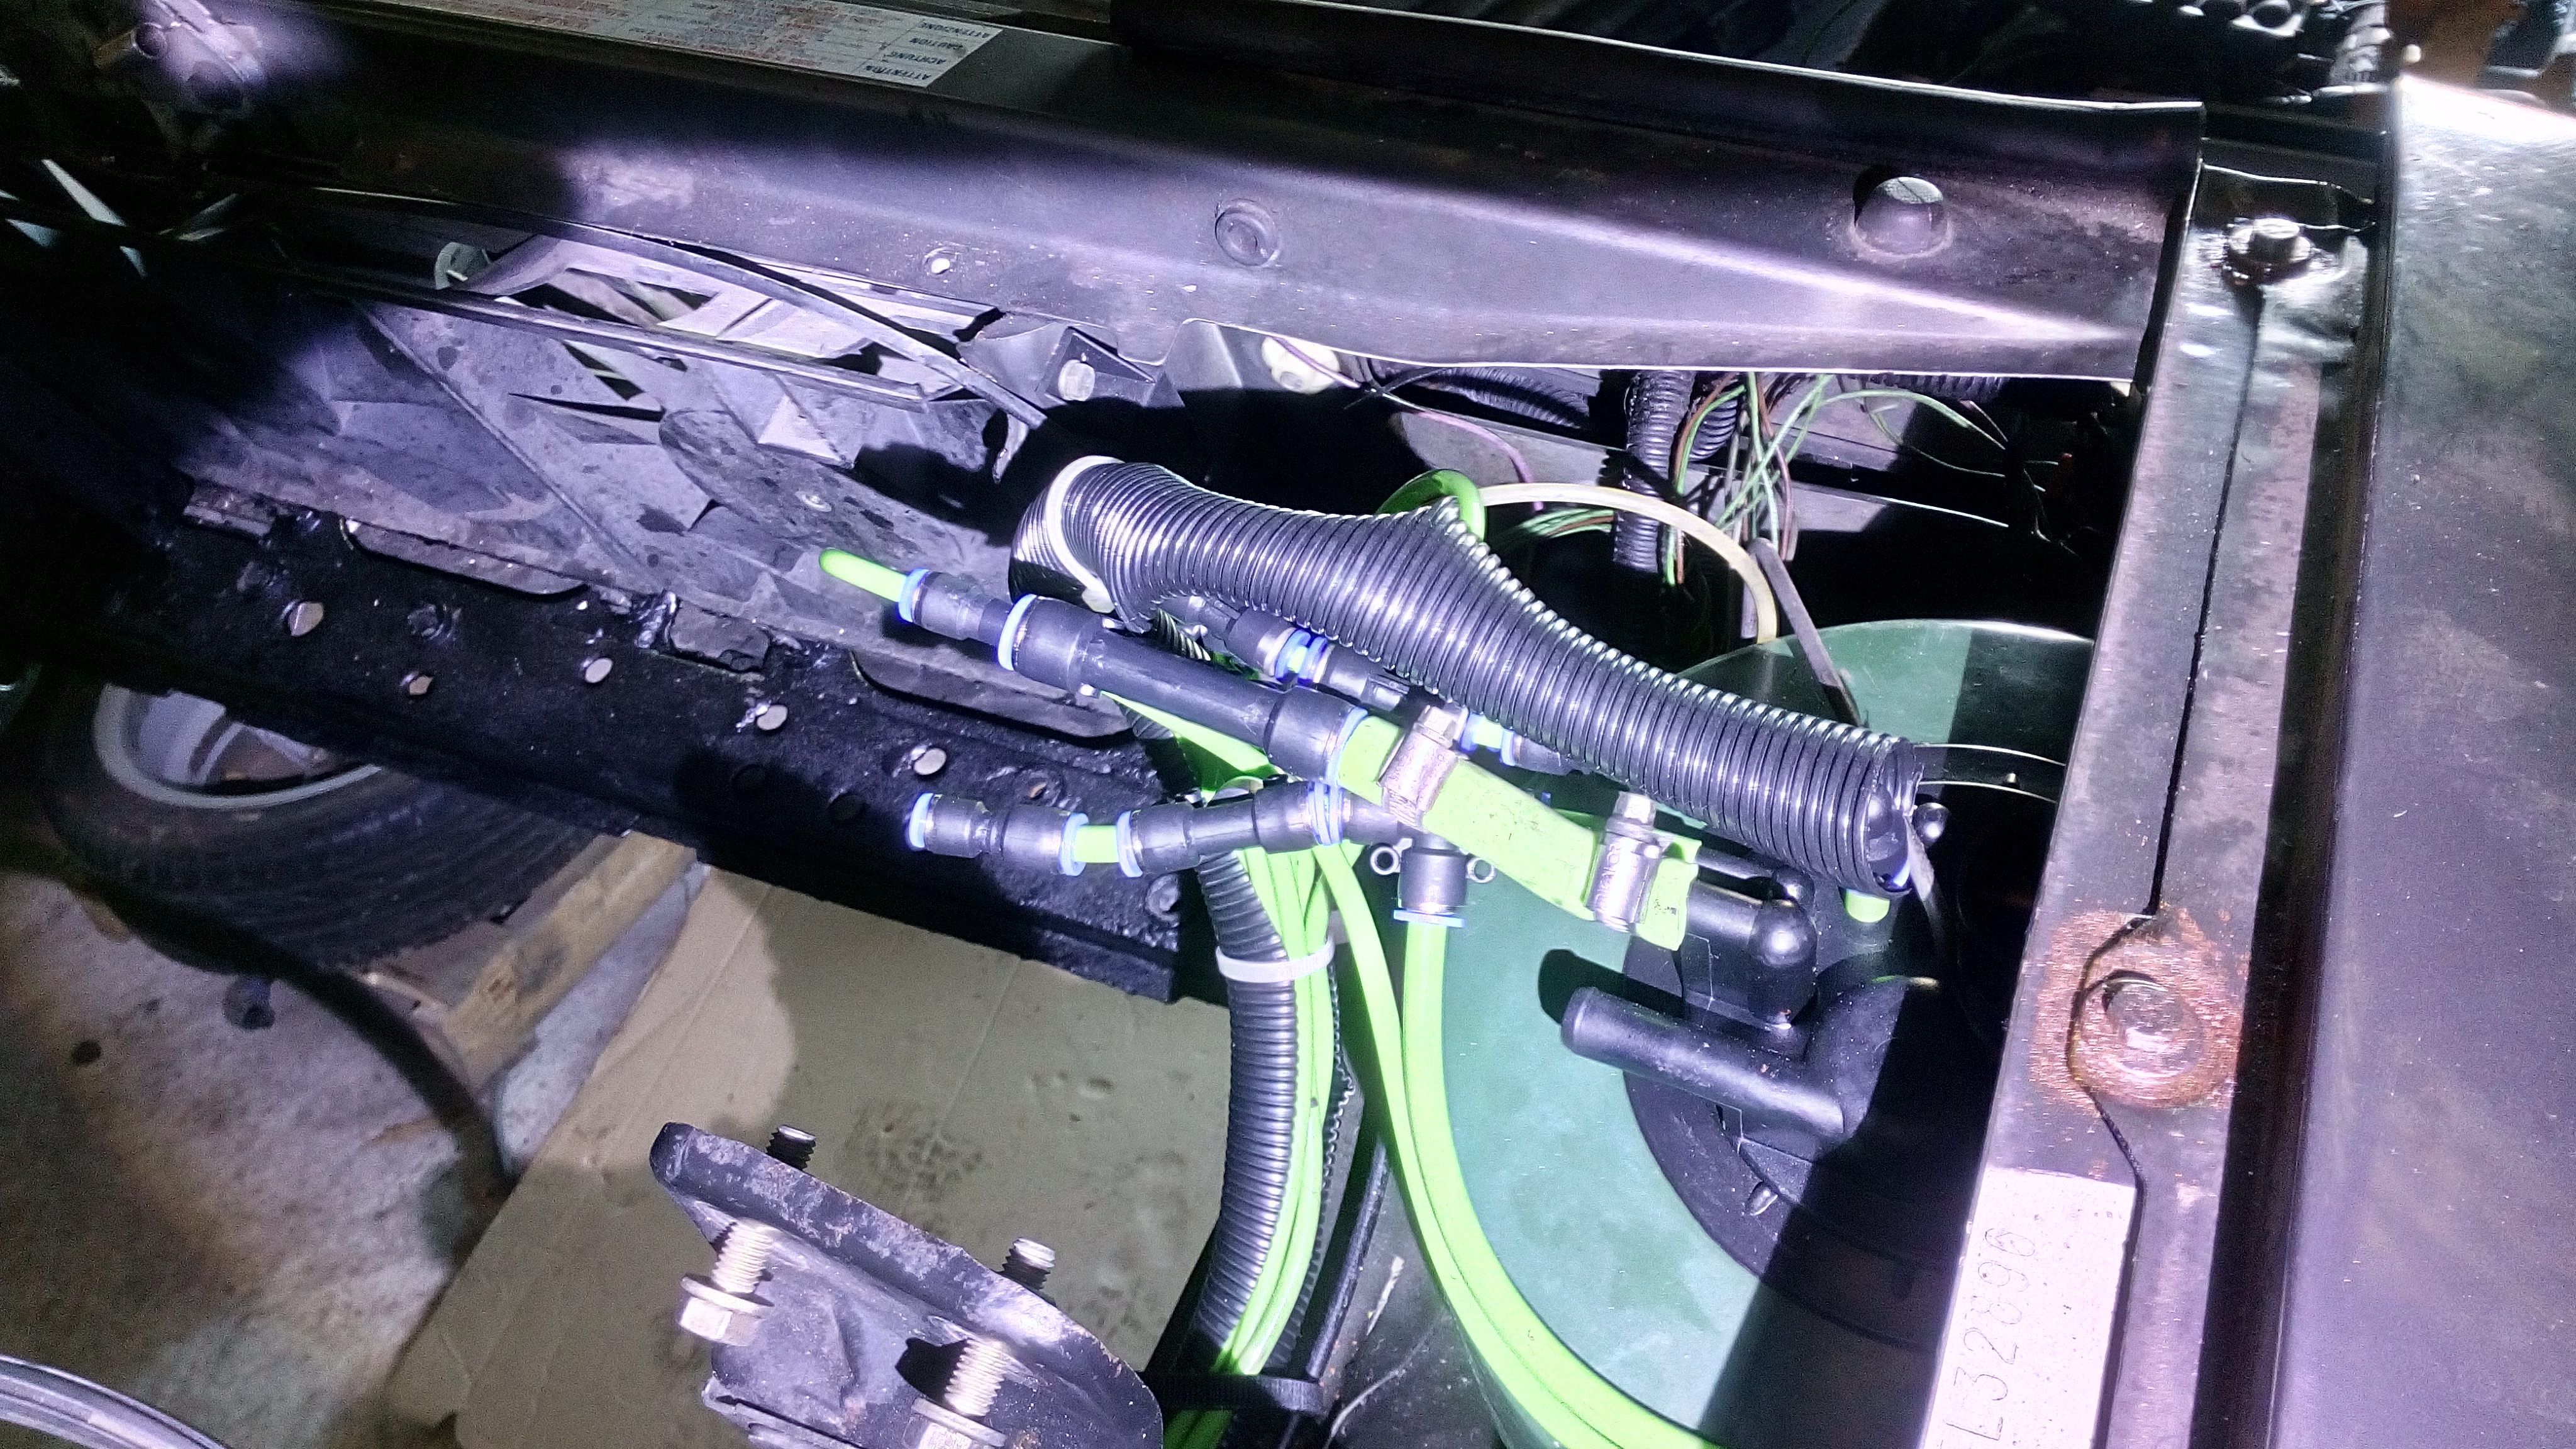
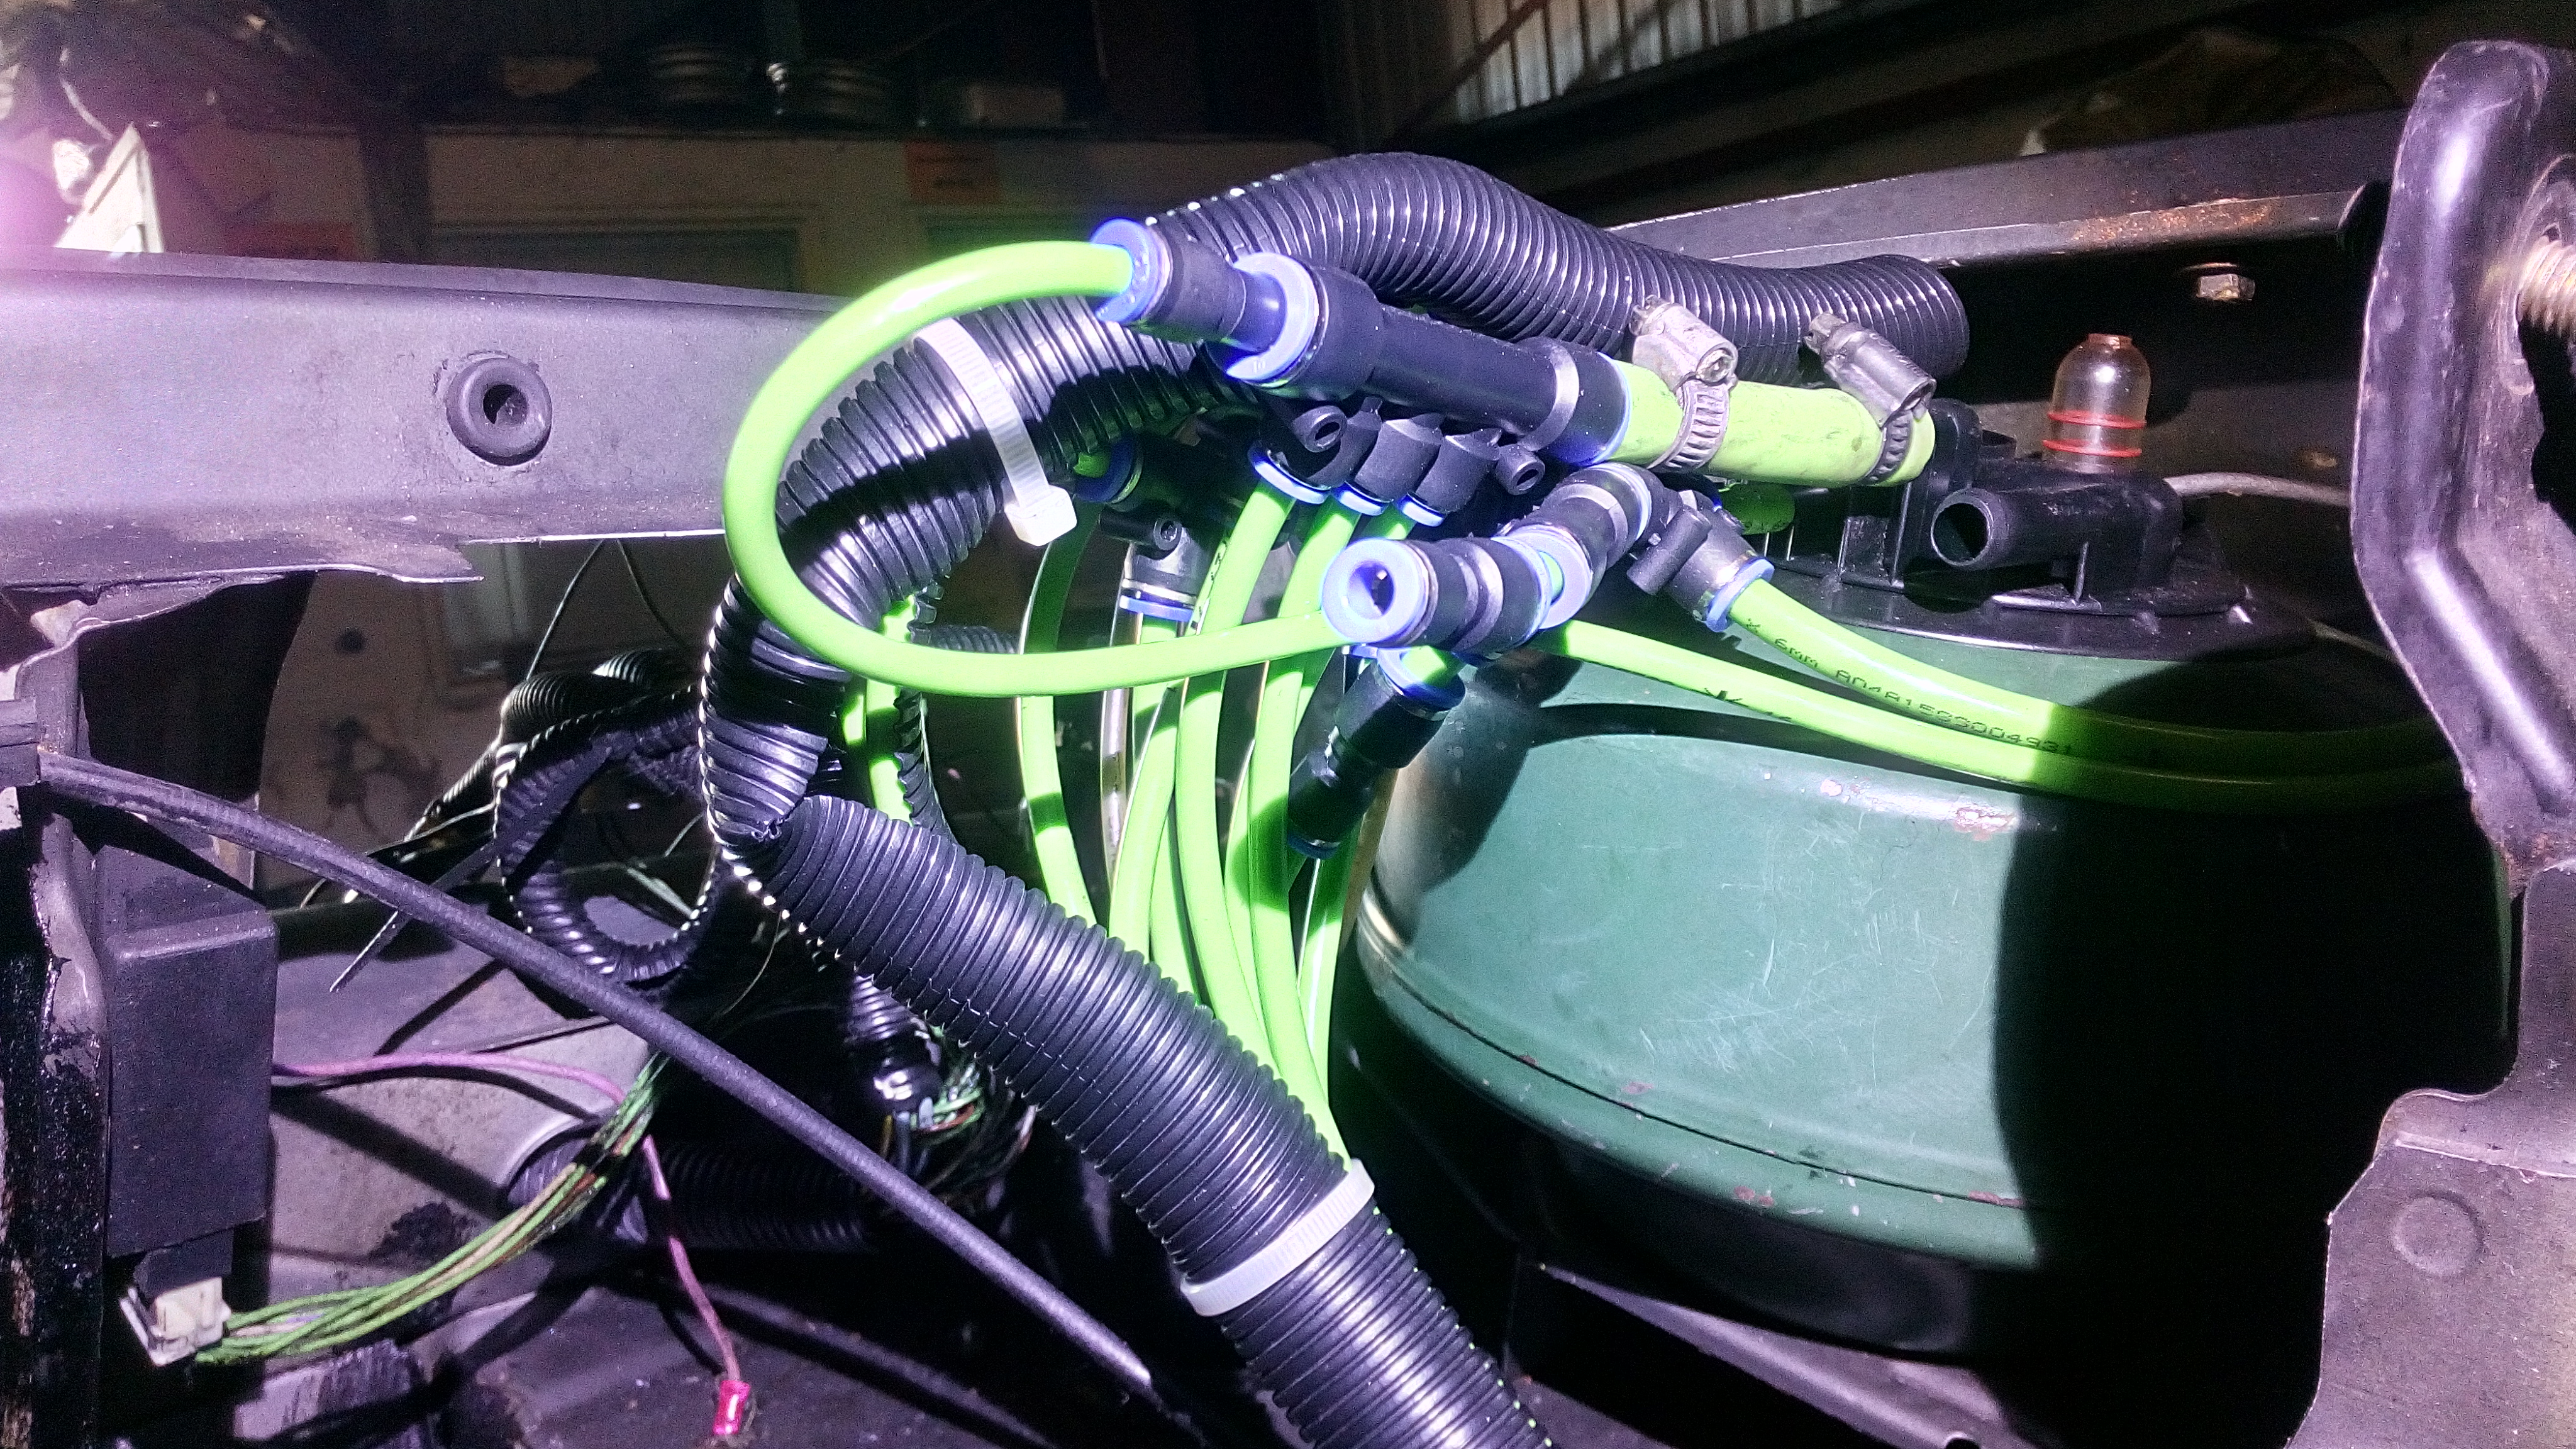
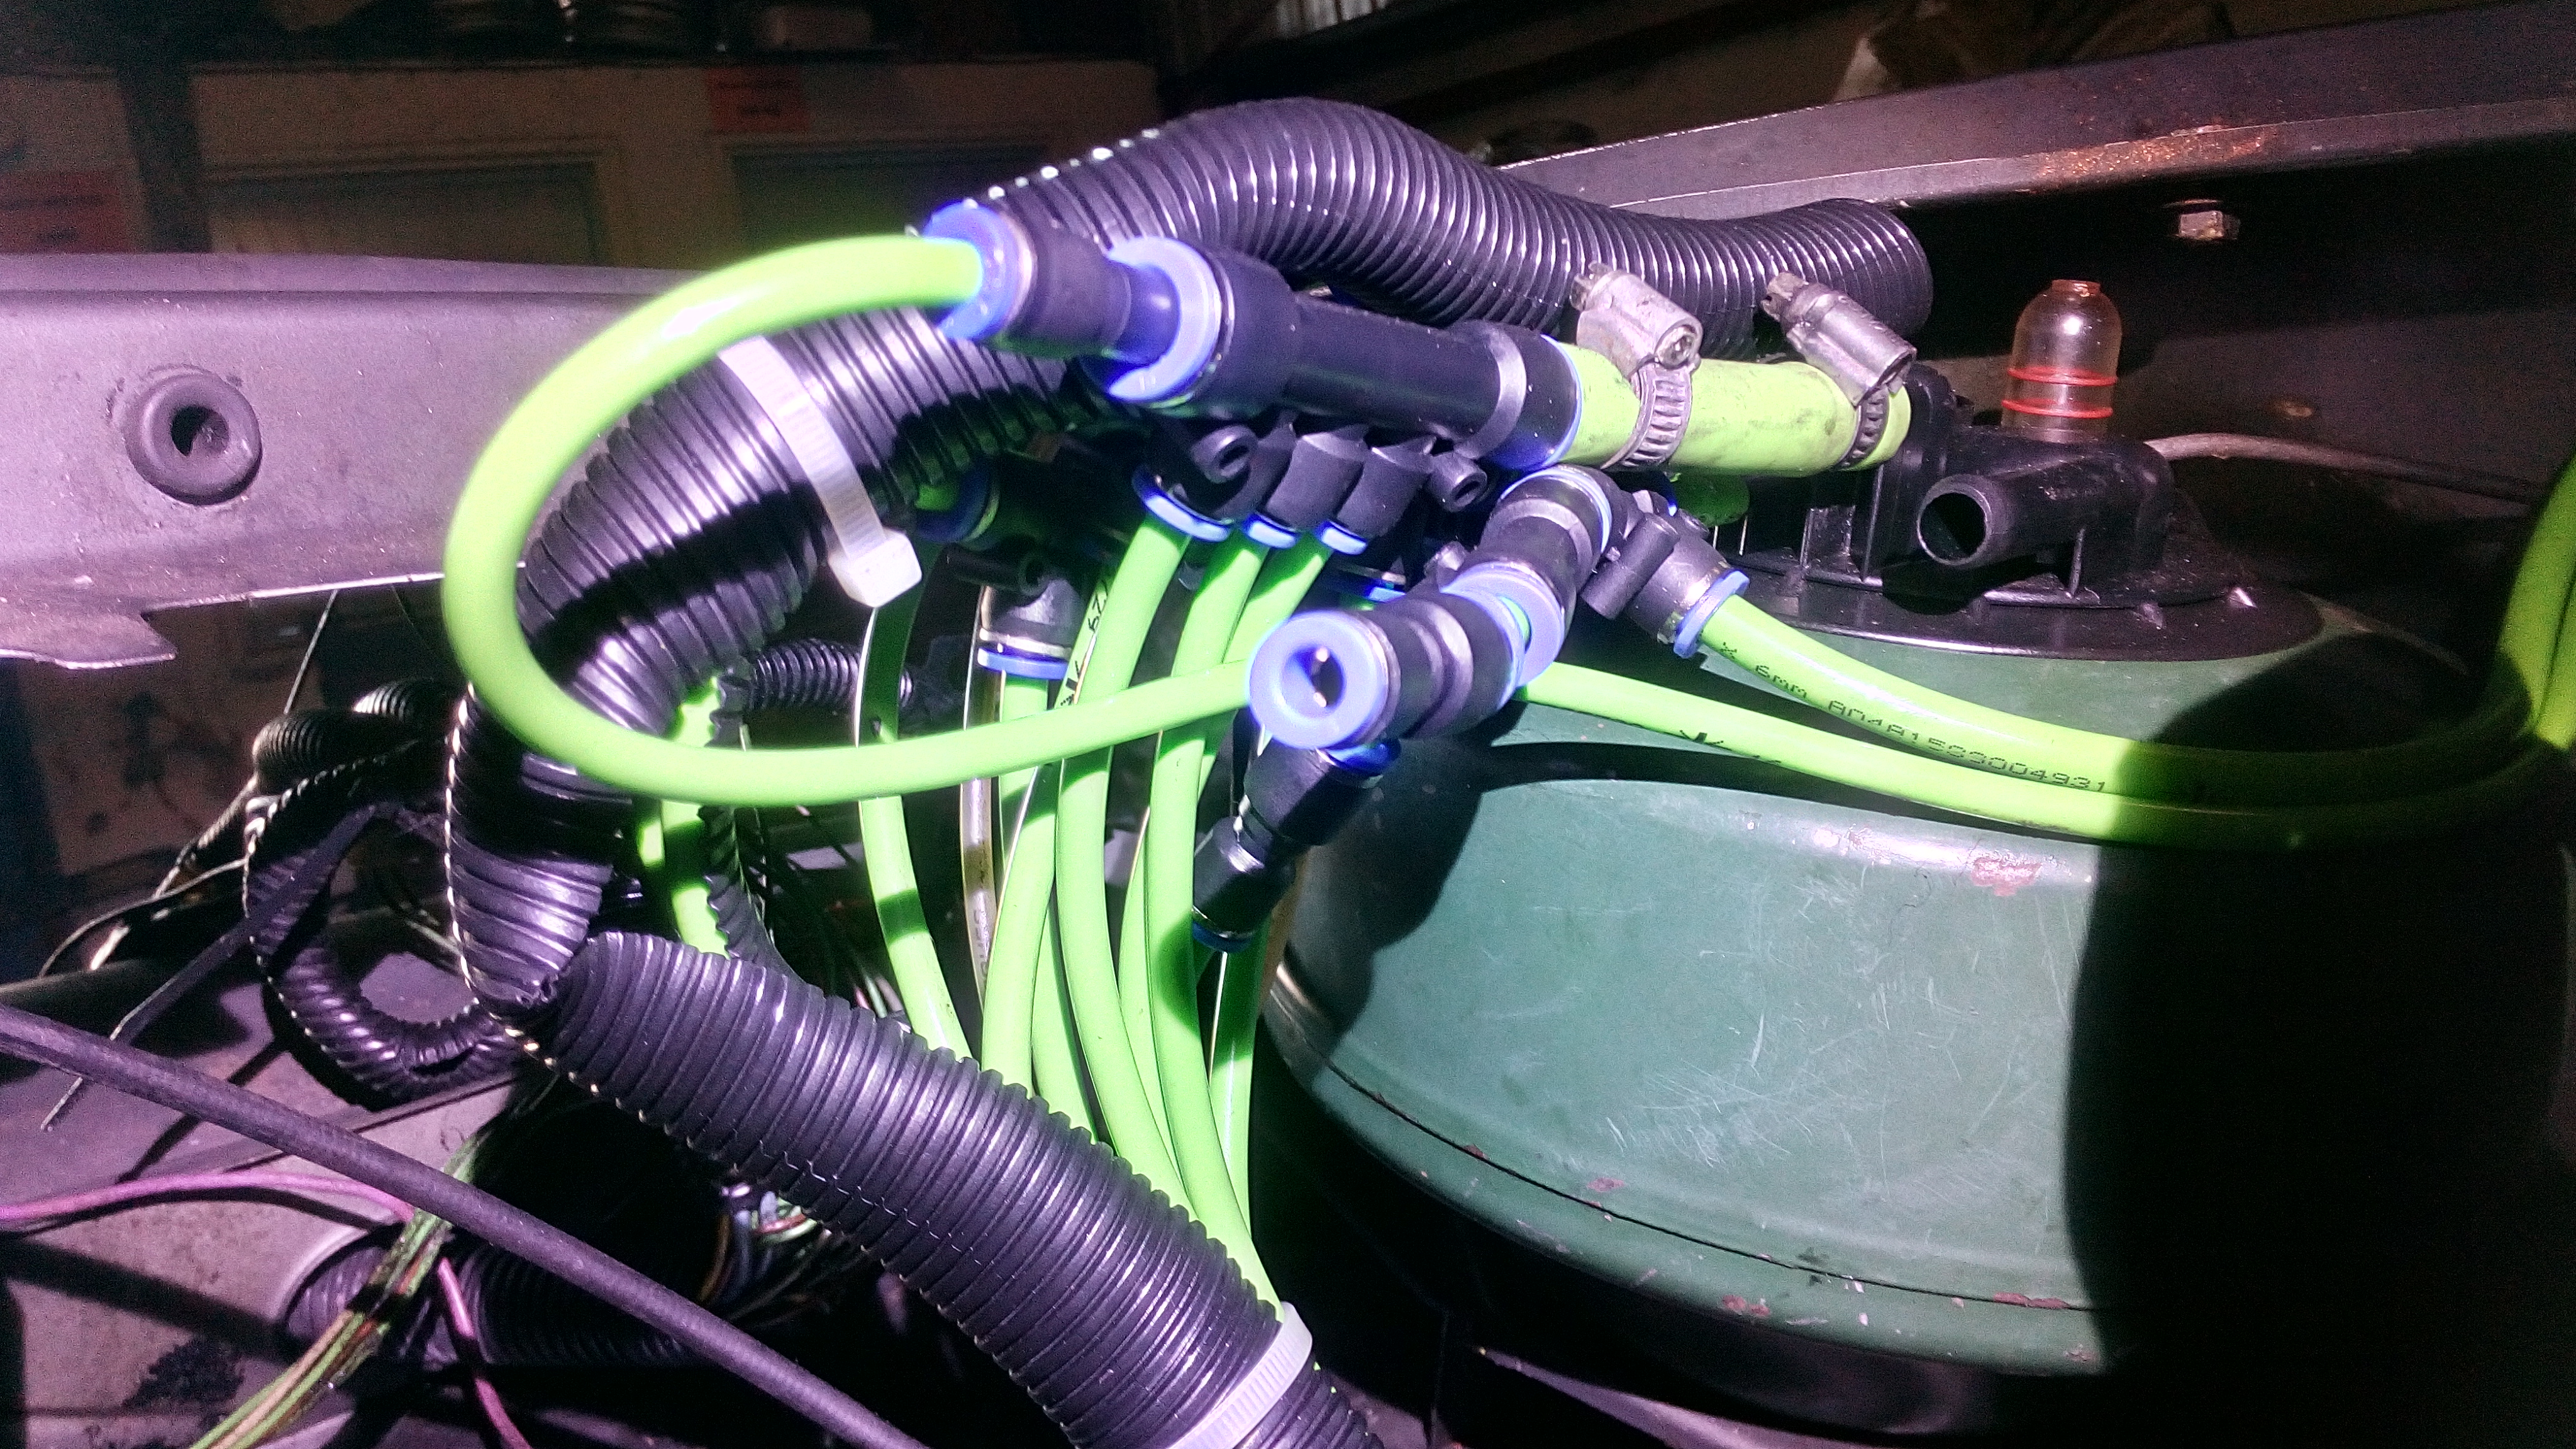
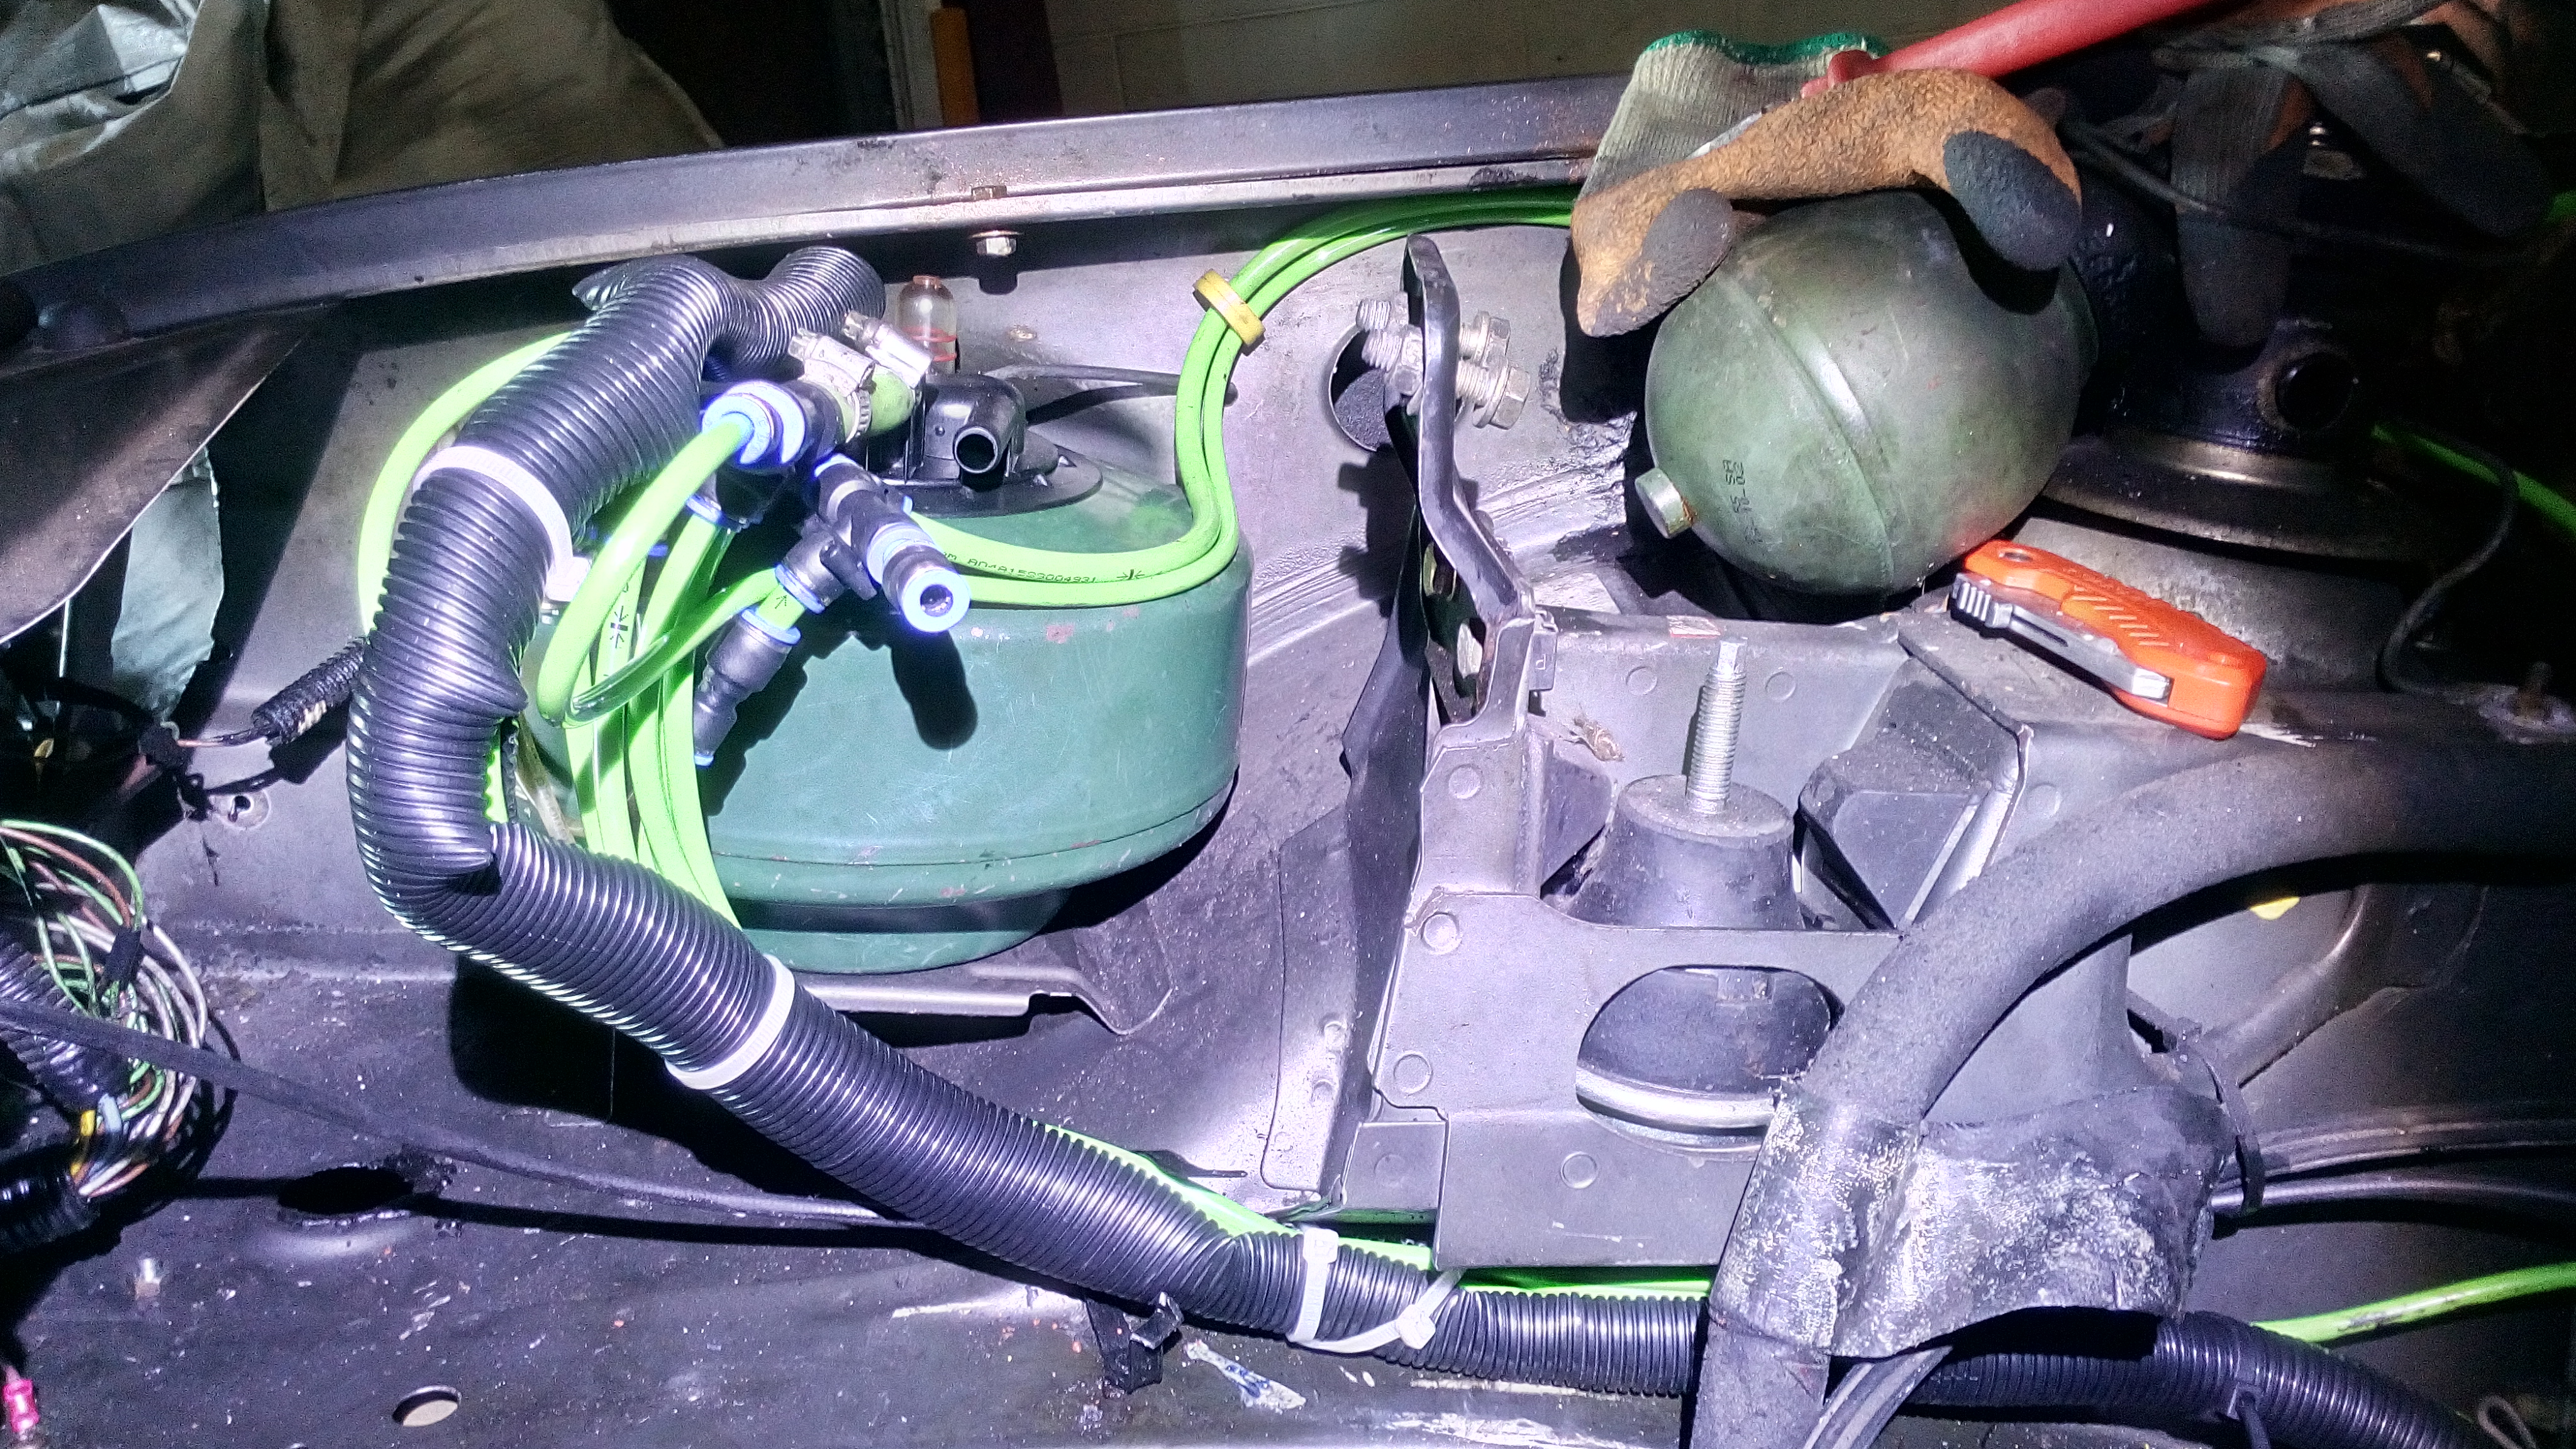
the one pipe left open is the return from the front accumulator sphere.. flow distribution valve? i will pipe that one up when the engine is in!
speaking of the engine, i have managed to find a local business to make me a nice solid turbo adaptor plate. i am really looking forward to the efficiency of a Variable geometry turbo, also the fact that is is almost up to a good pressure right down at idle is also nice!
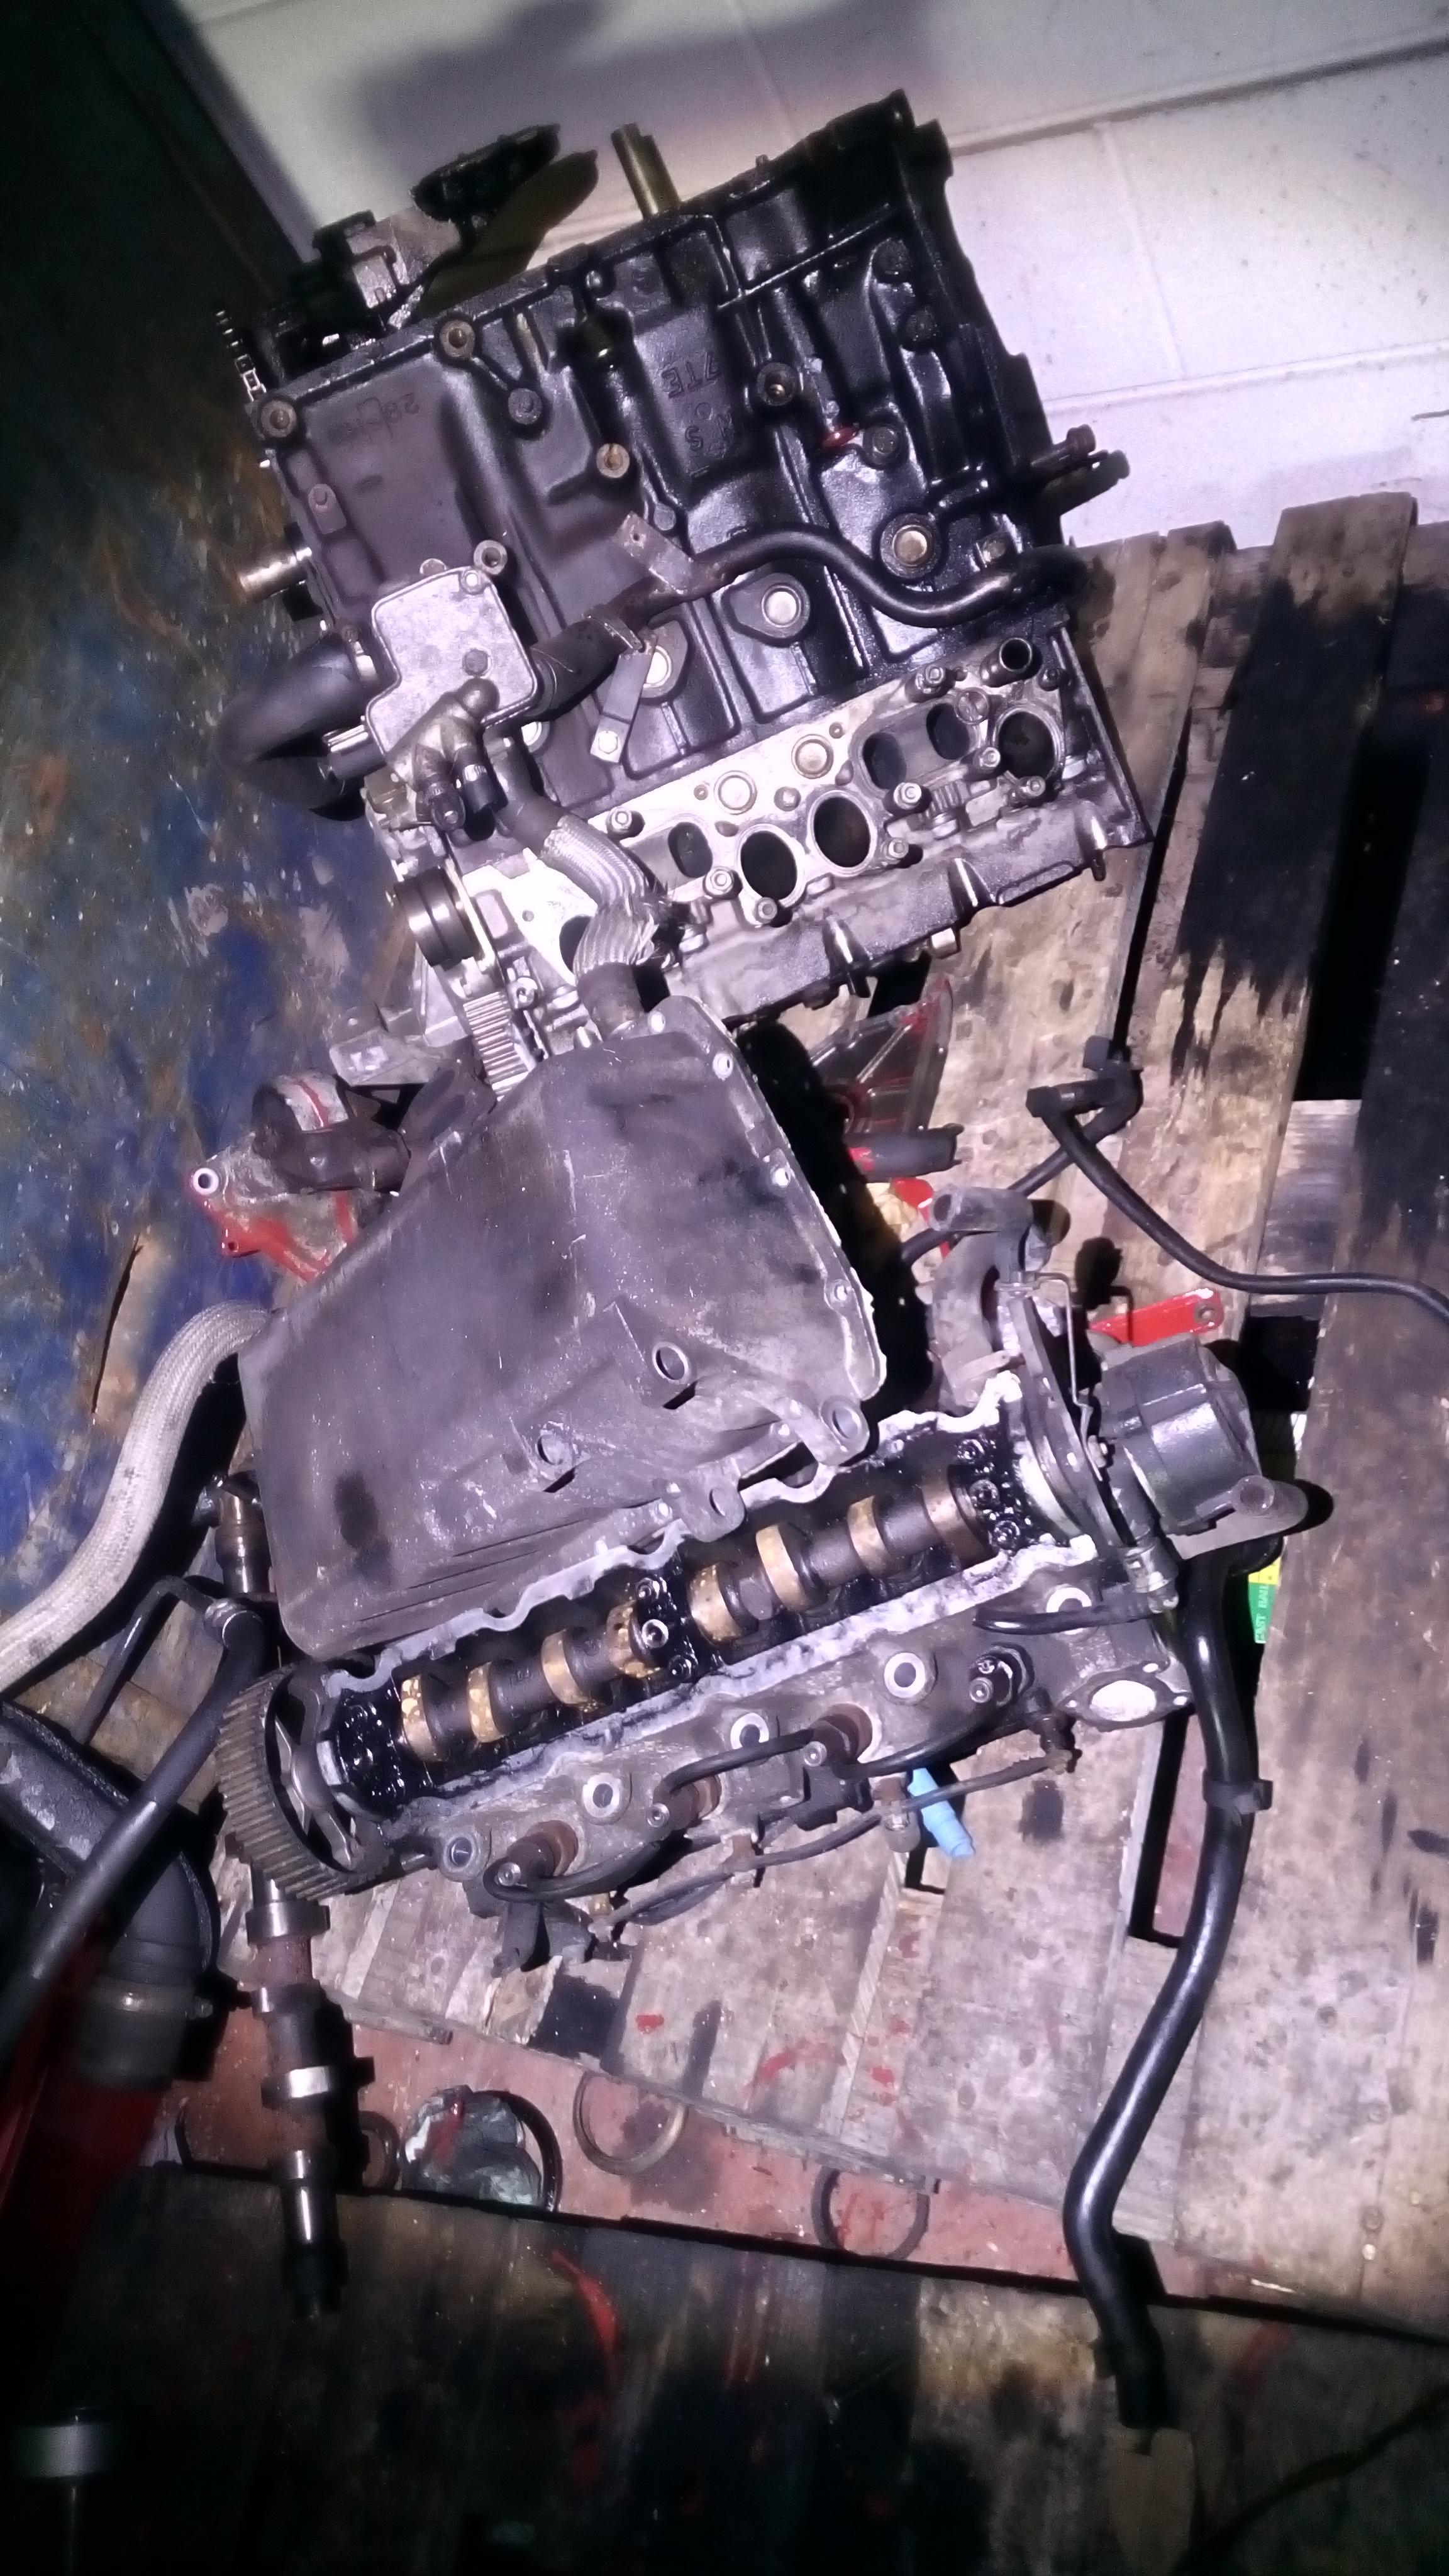
the old engine is kinda looking sorry for itself.. upside down :/
i have though managed to pull an XUD cylinder head out of the irony ally skip. no idea what XUD it was from but it has a complete camshaft, with all good camshaft bearing caps. if i could get hold of a BX camshaft, i could rebuild it when the car is finished so i can have a replacement engine, should i ever need it... which i really hope i dont.
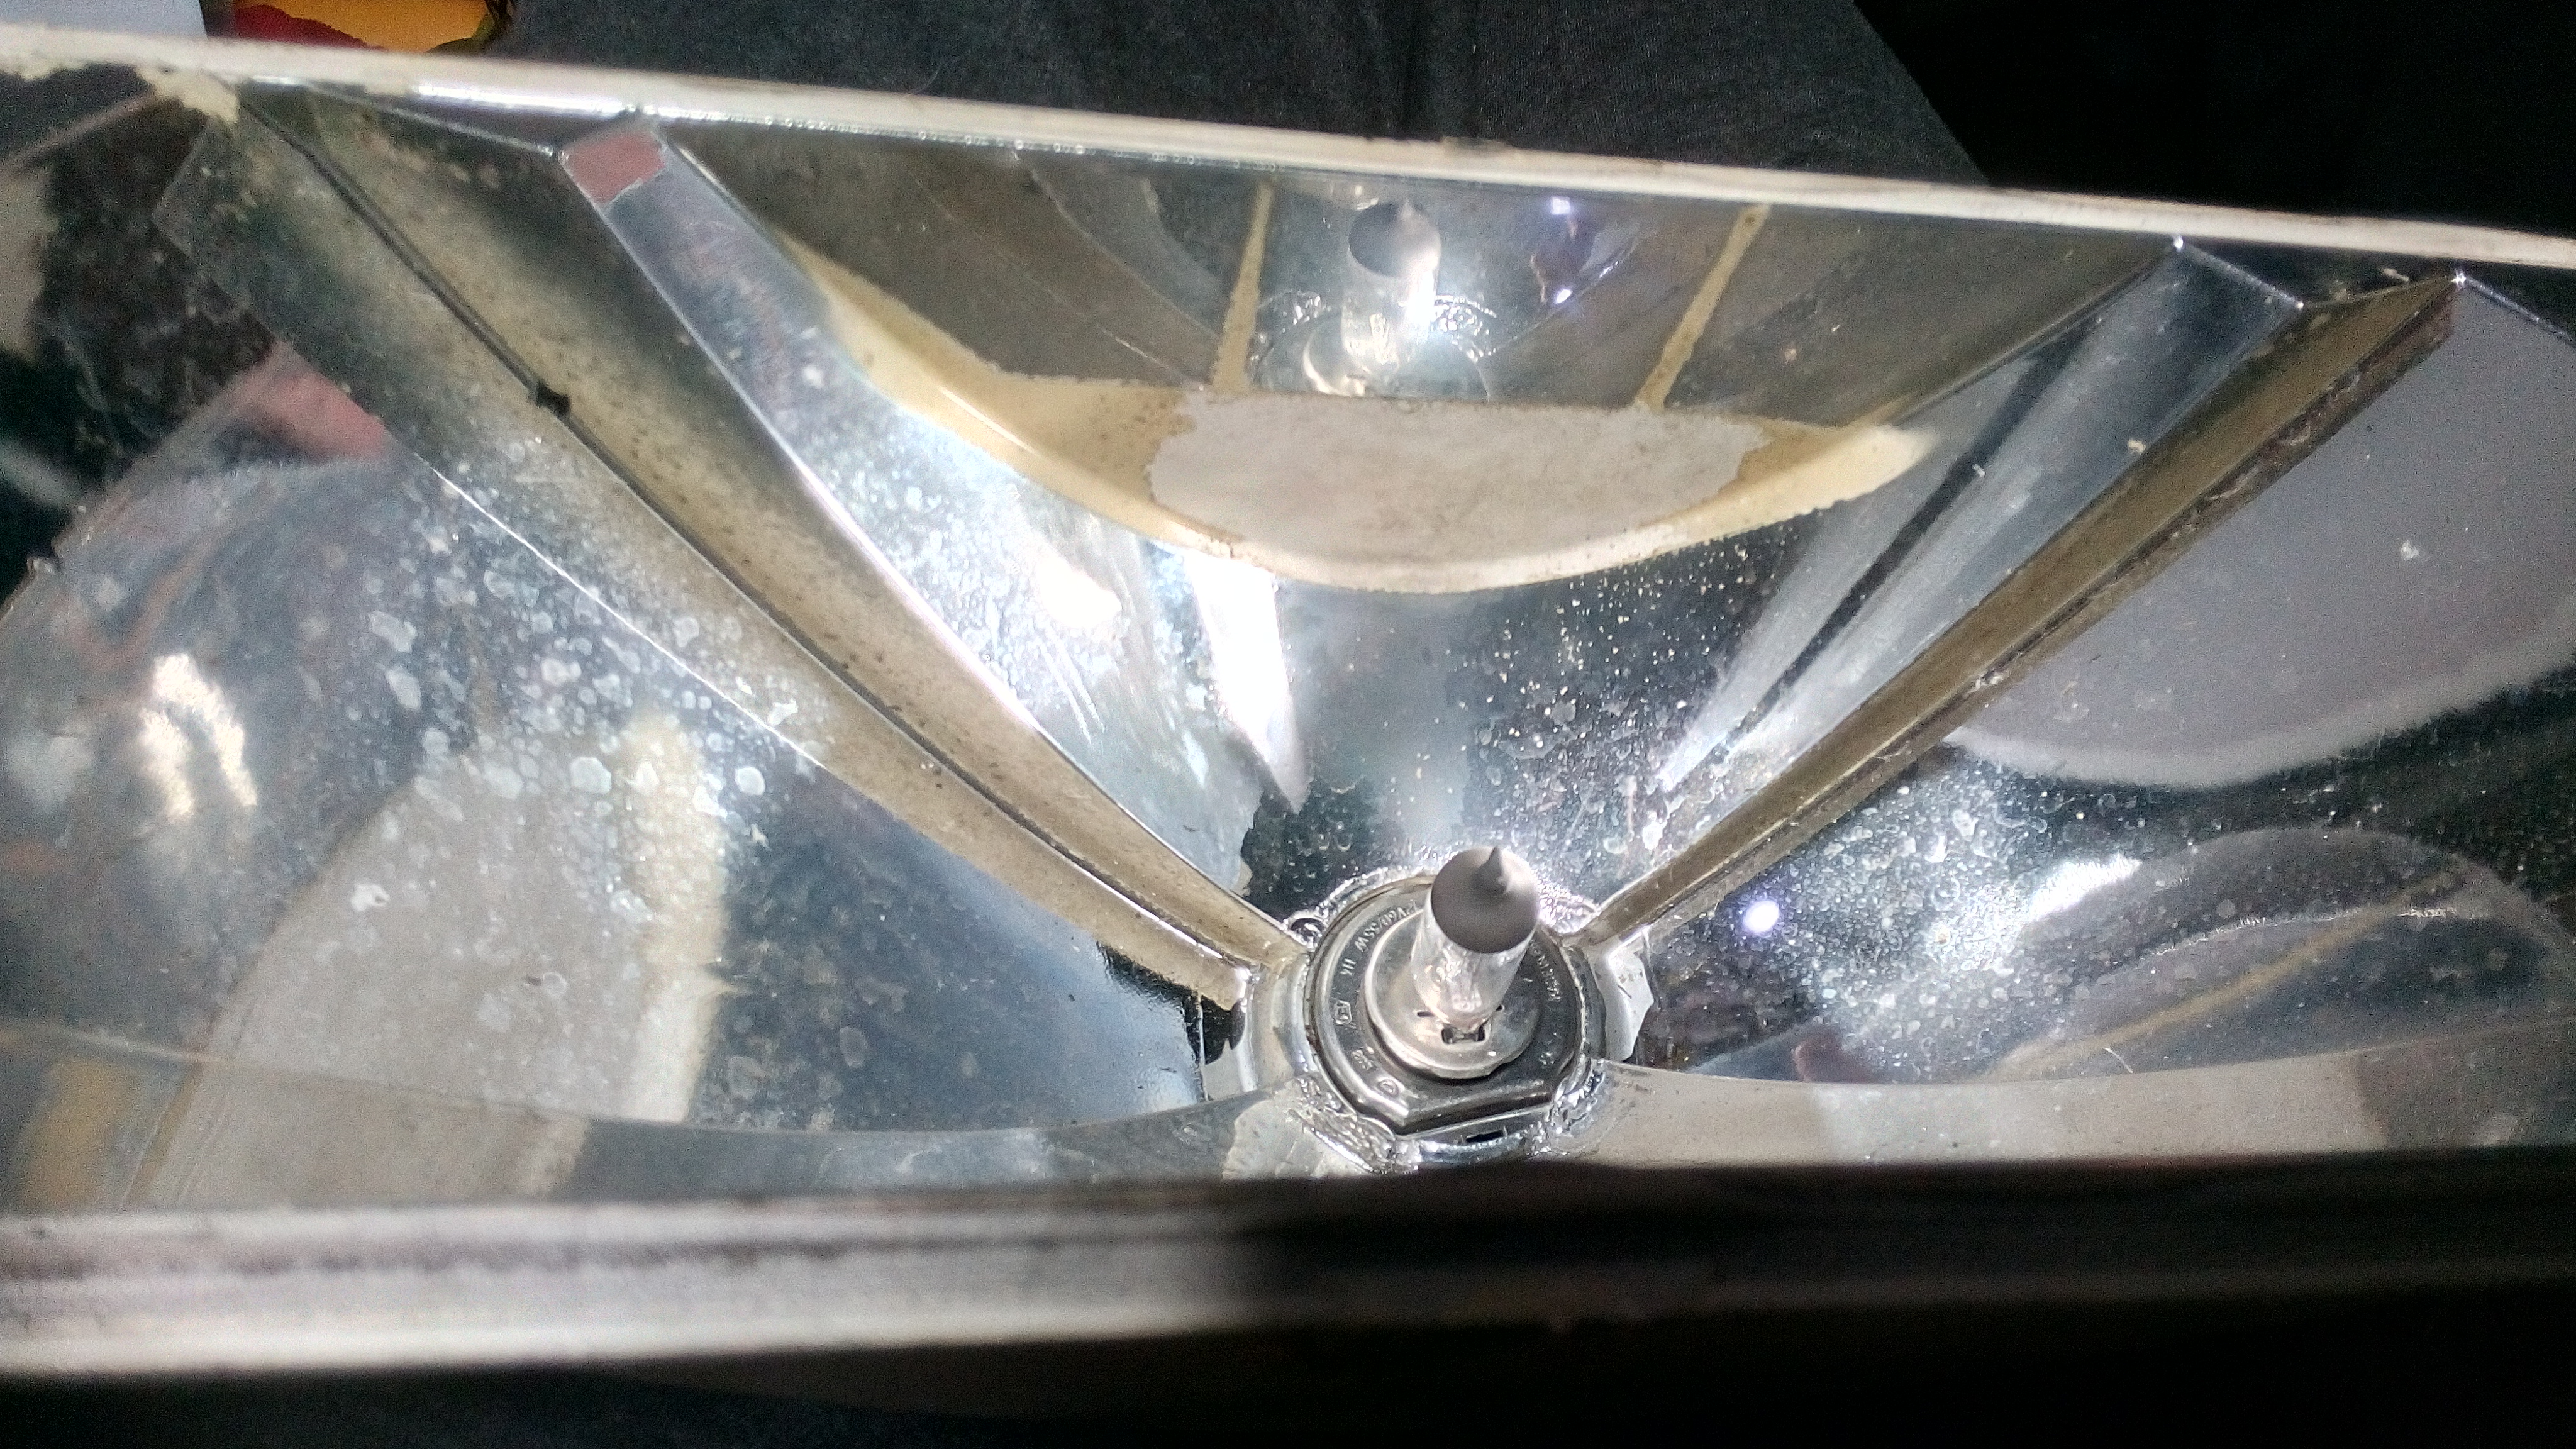
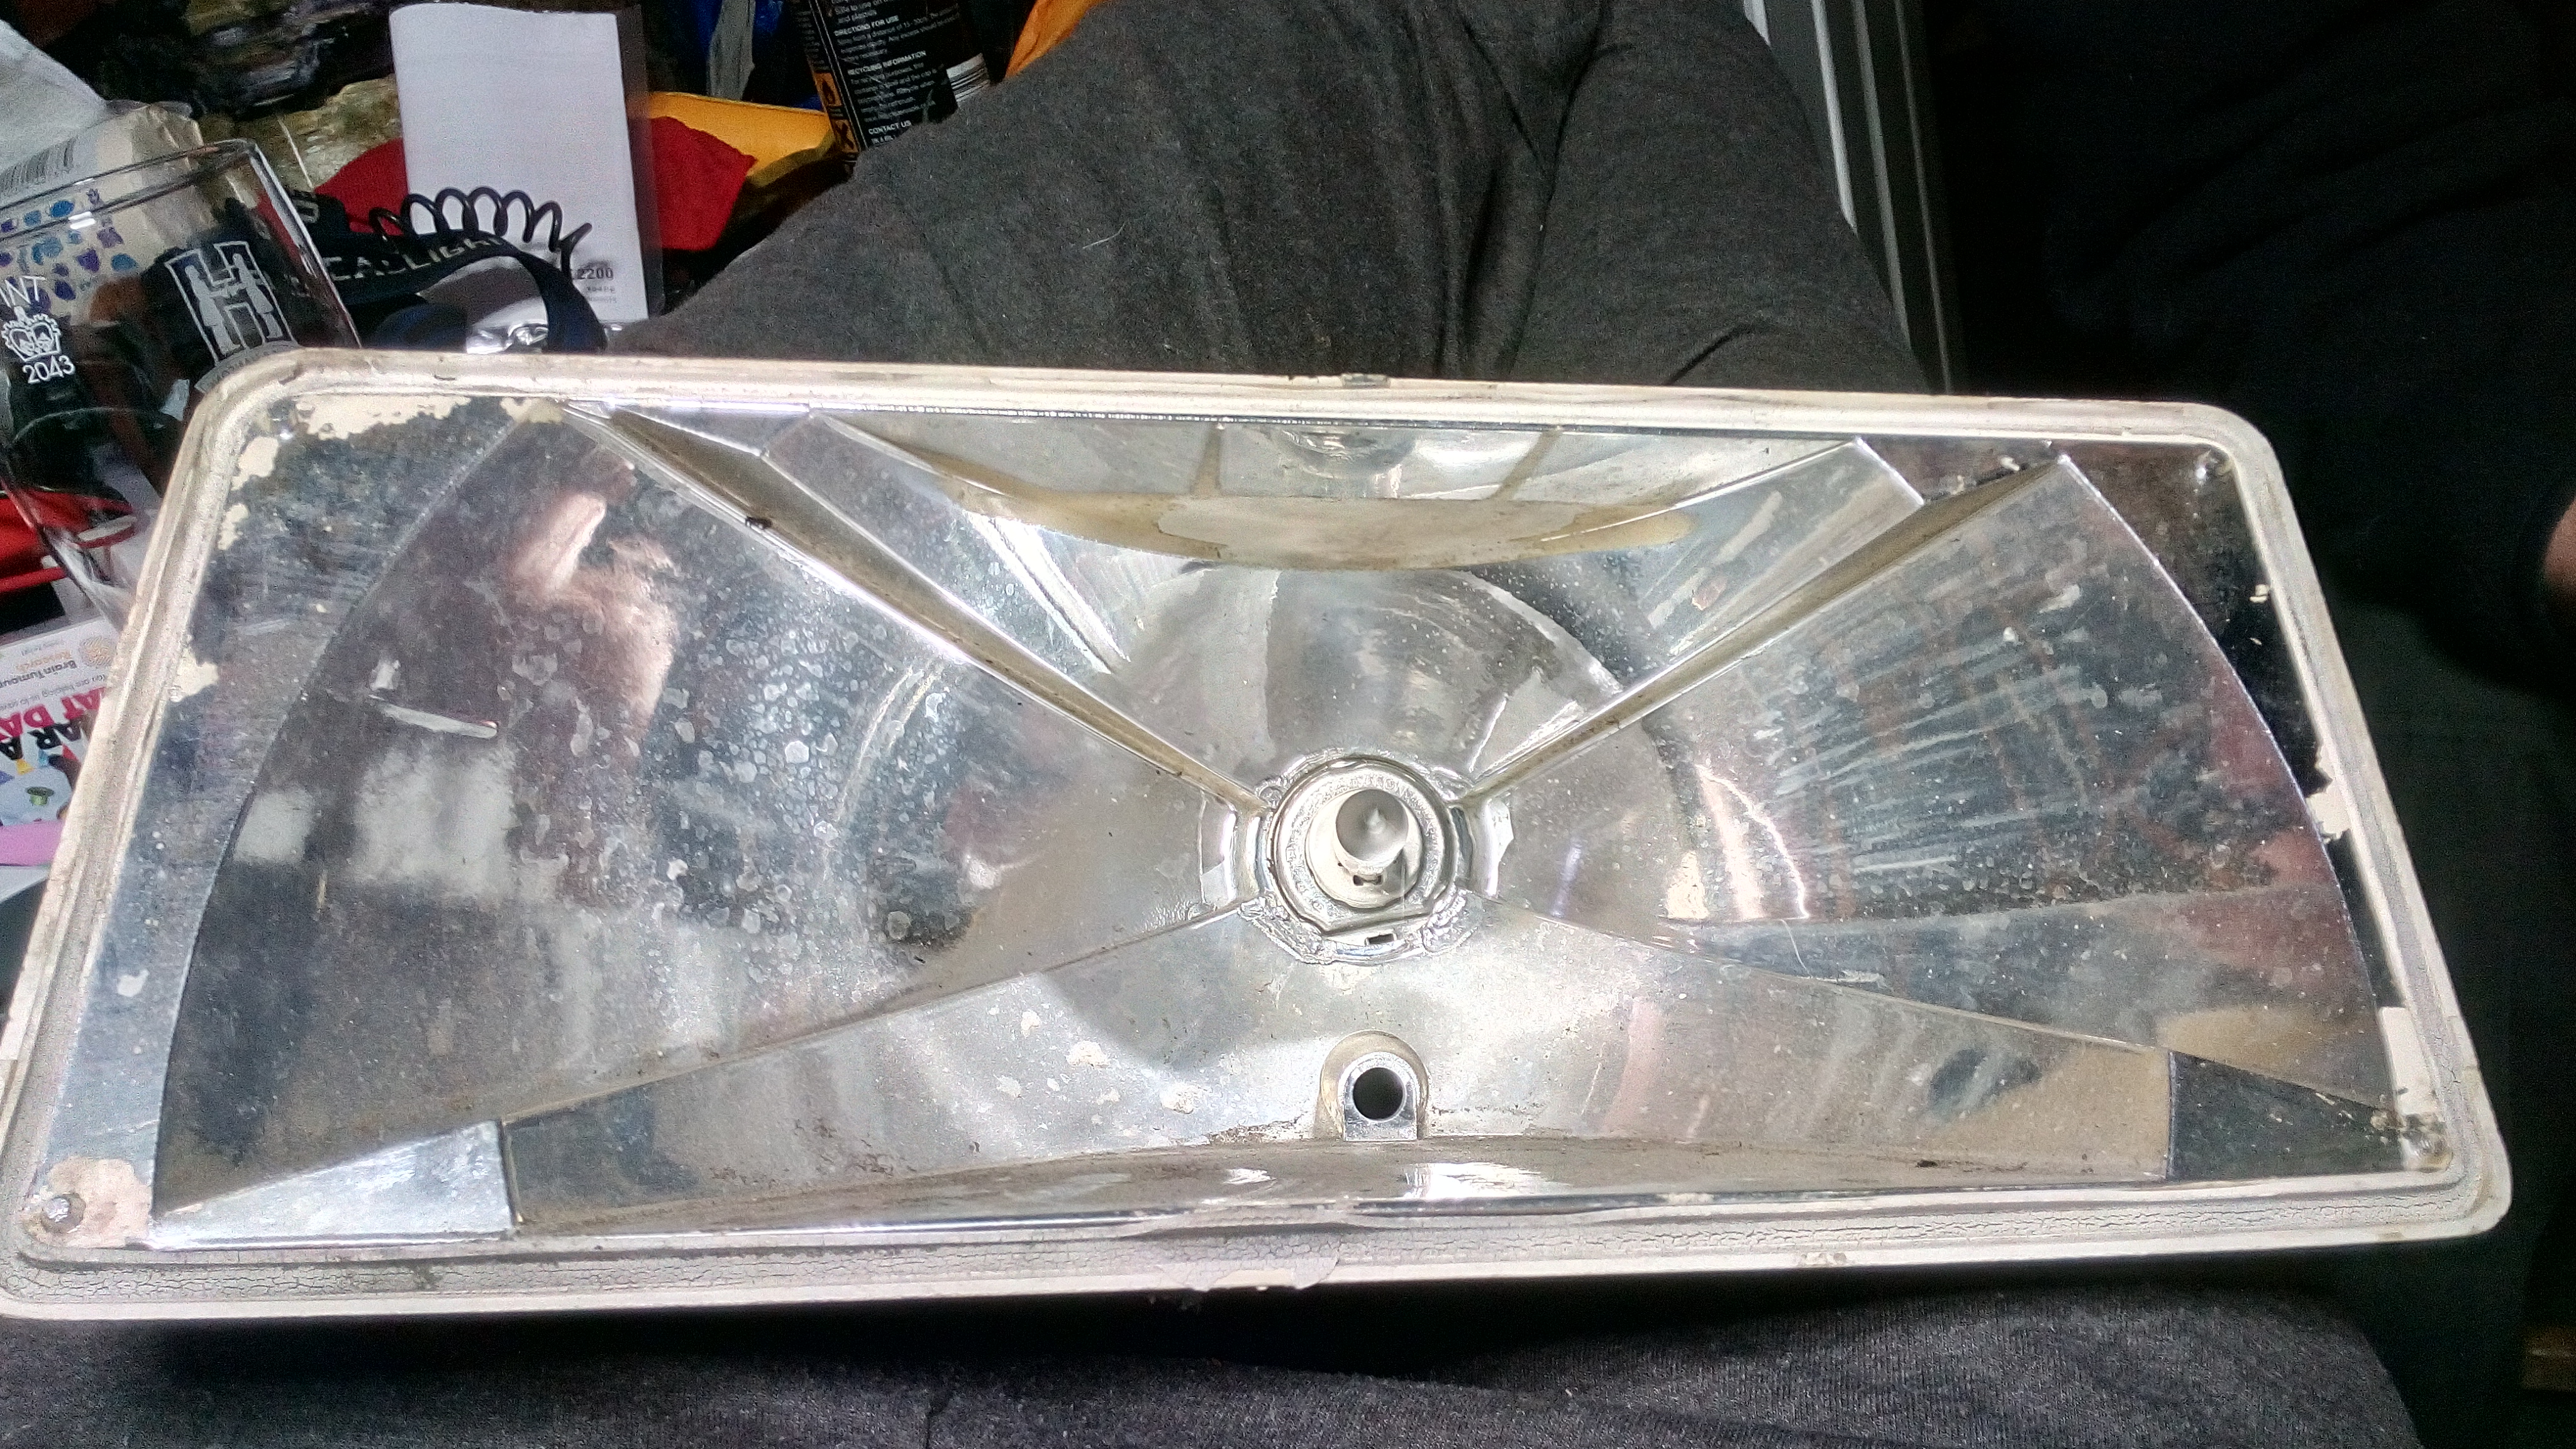
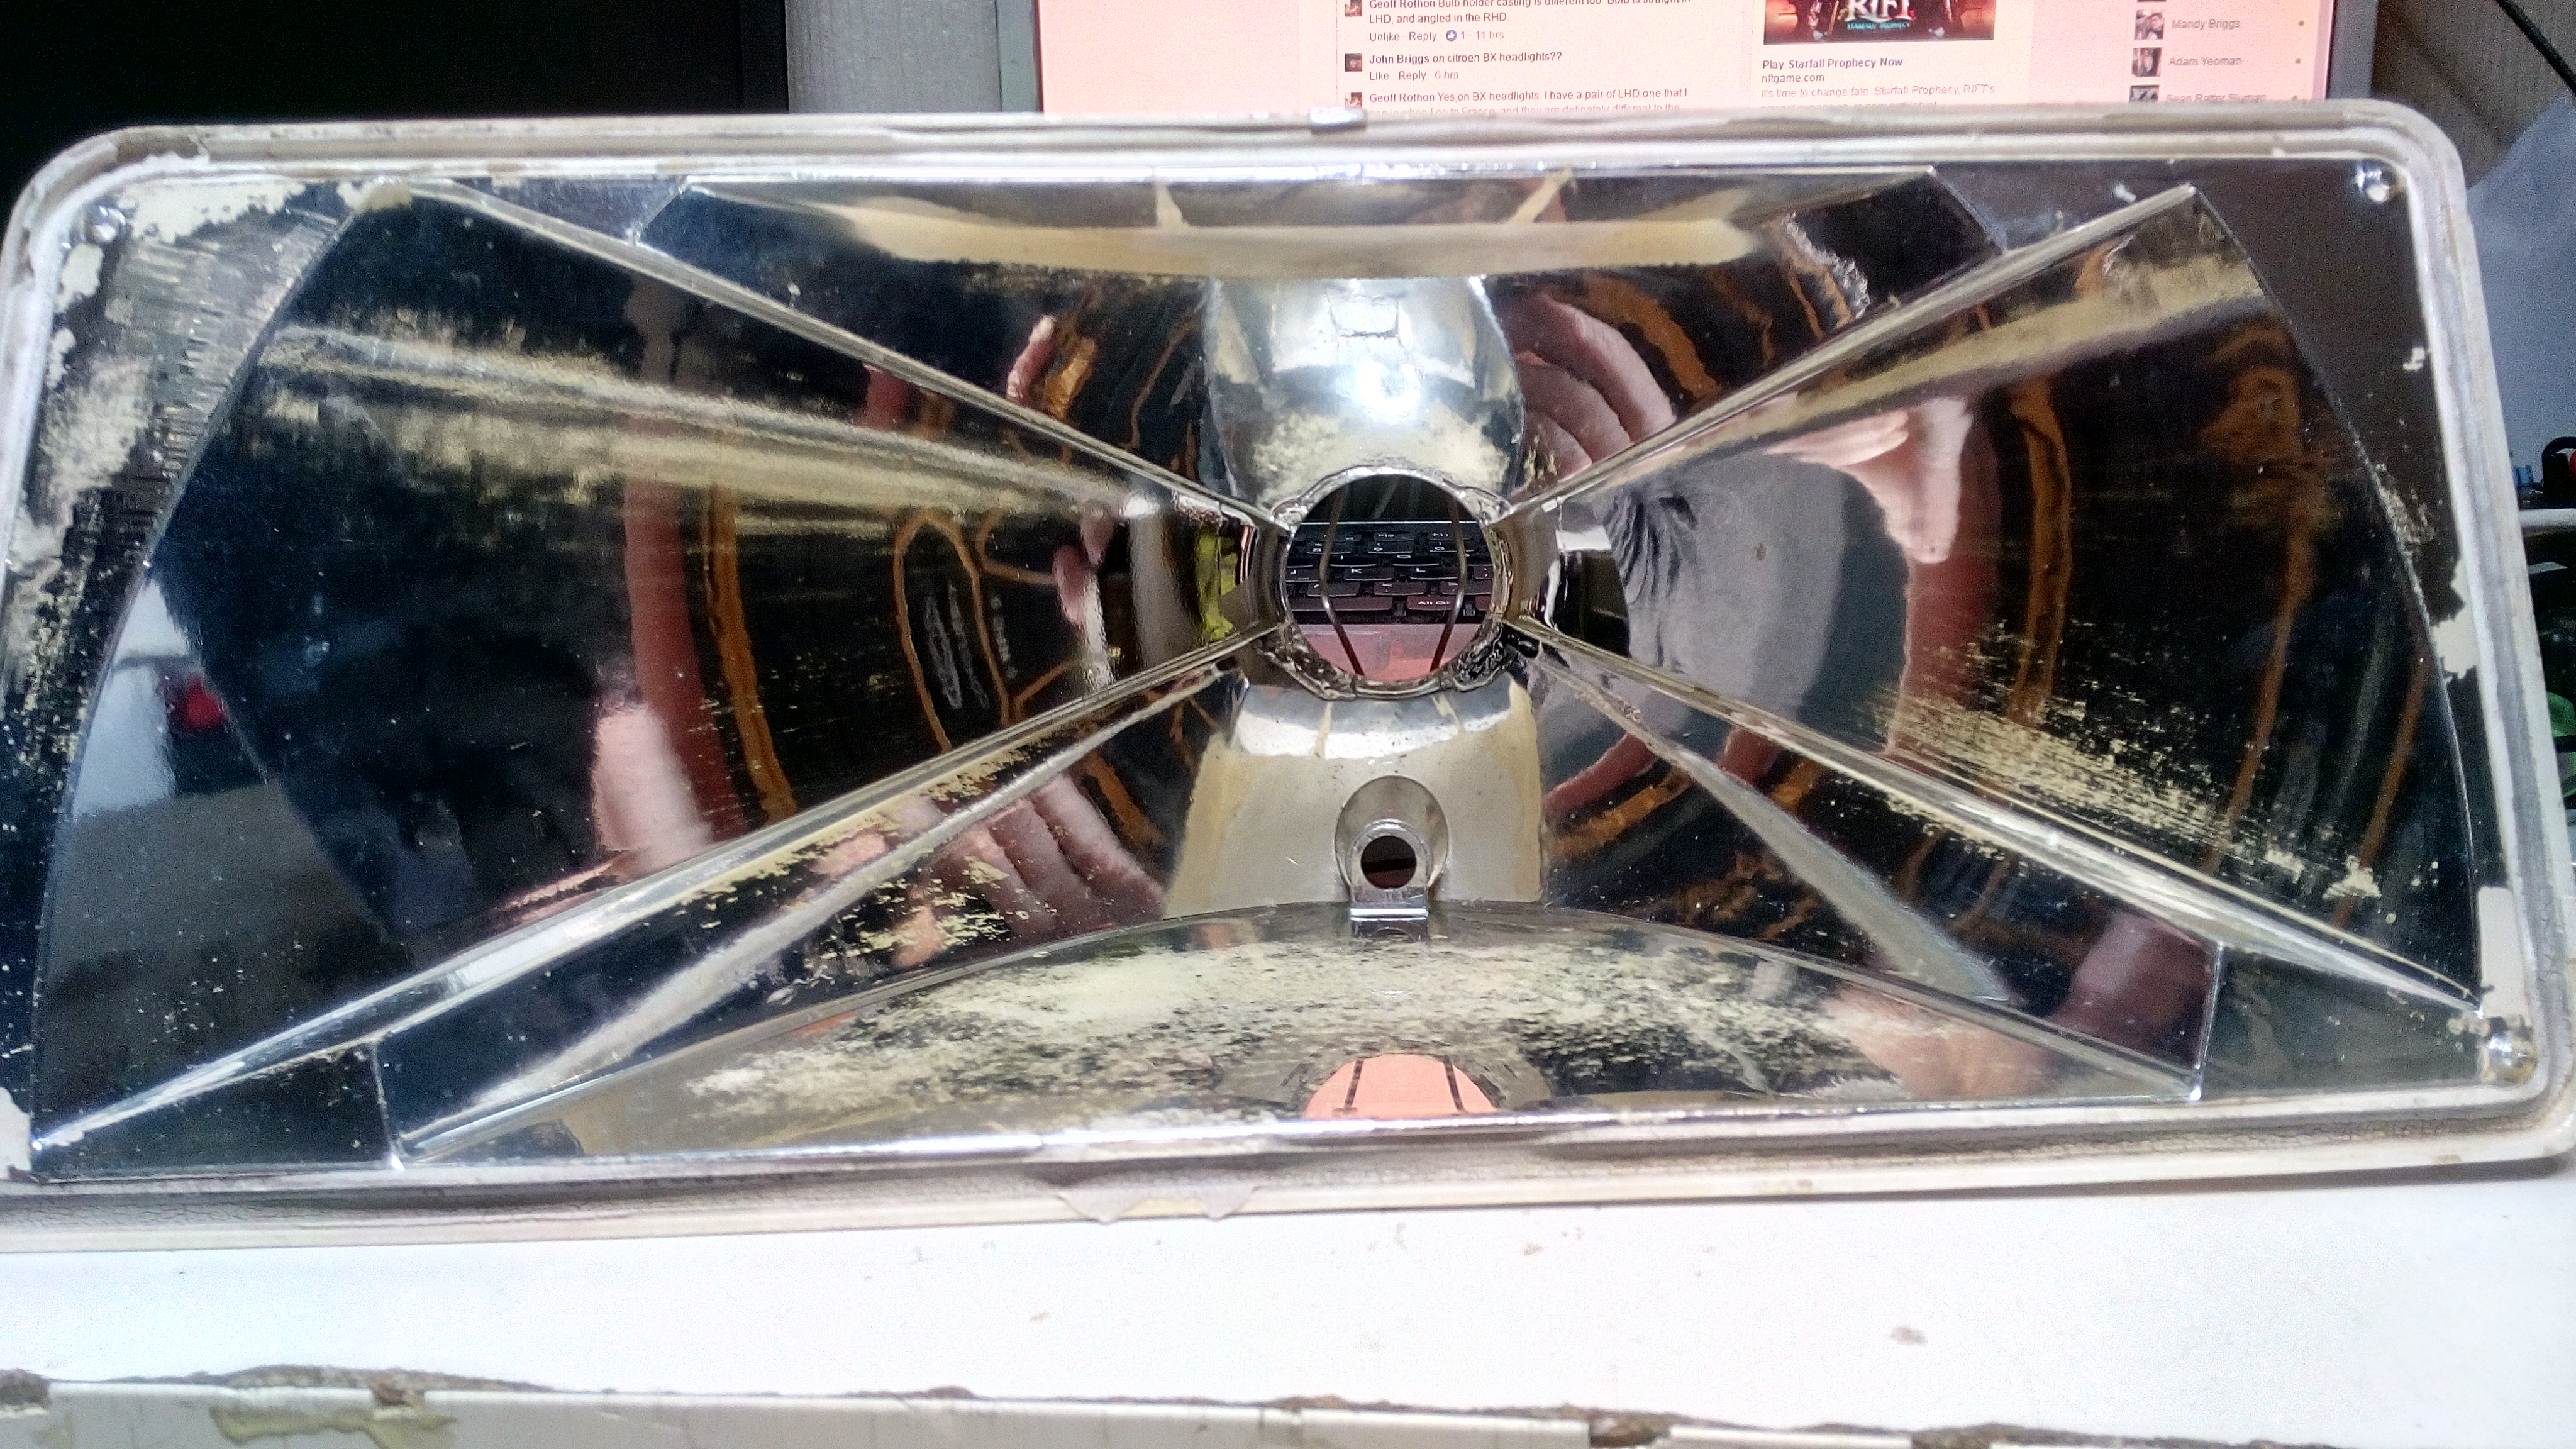
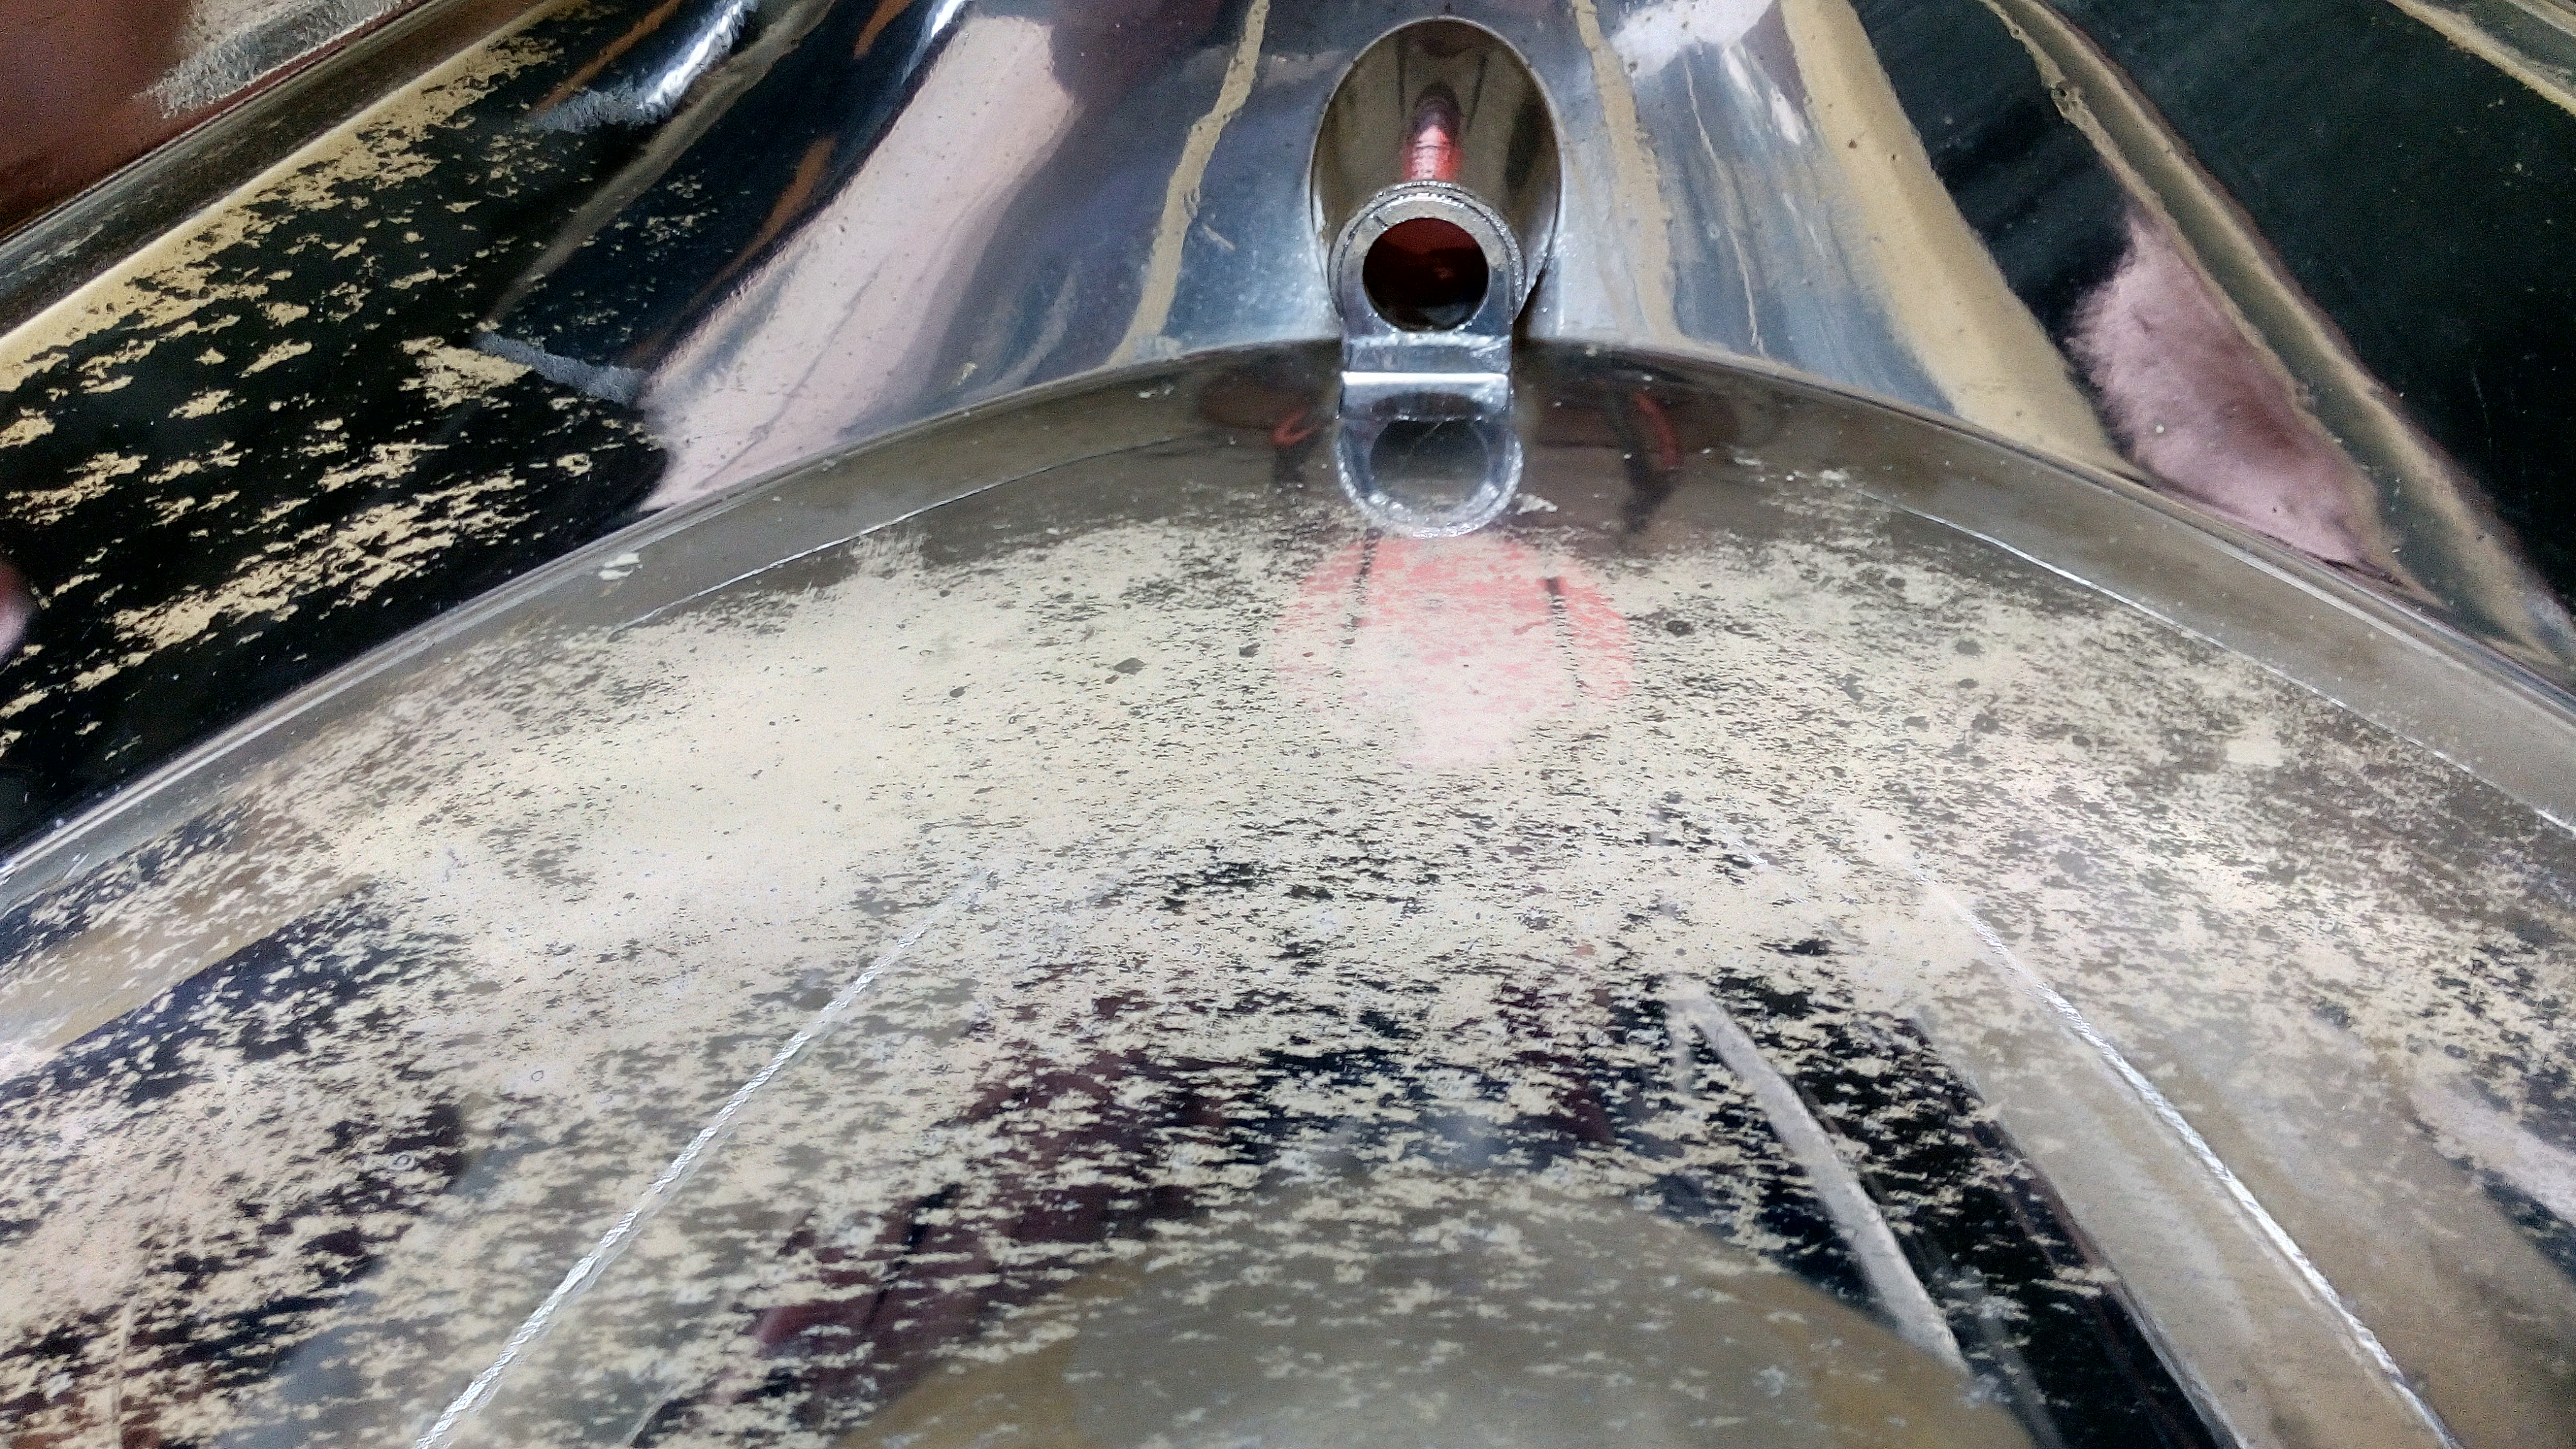
ive also bought the headlights home, i need to strip them down and get the reflectors re-silvered. all above where the bulb sits, the reflective paint has peeled off. i do love projector lenses but i just cant see any way of installing them without effecting the look of the car which is something i dont want to do as i think its a pretty nice looking car.
the drive axles have also been brought home too so i can rebuild them. all CV boots are split and open for gods knows how long or how many miles. one is bone dry of grease the other is full of grit. wont be hard to change though. i'm sure its got nothing on a fiat panda 4x4's prop shaft.
also found that i need another radiator hose as surprise surprise mine has perished :/
i'd do a video but i dont think its really worth it at the moment.
today i fitted the wings on fully and really tidied up the LHM returns.
heres a few pictures:
it looks a little complex but in all of this, the Octopus now lives. from where the octopus should sit, all i did was extend all of the pipes up to the LHM tank and build everything there. in all fairness i think it does not look half bad. nice and accessible now and each part 100% user serviceable (just the way i like it.. if not i make it user serviceable hehe).


the one pipe left open is the return from the front accumulator sphere.. flow distribution valve? i will pipe that one up when the engine is in!
speaking of the engine, i have managed to find a local business to make me a nice solid turbo adaptor plate. i am really looking forward to the efficiency of a Variable geometry turbo, also the fact that is is almost up to a good pressure right down at idle is also nice!
the old engine is kinda looking sorry for itself.. upside down :/
i have though managed to pull an XUD cylinder head out of the irony ally skip. no idea what XUD it was from but it has a complete camshaft, with all good camshaft bearing caps. if i could get hold of a BX camshaft, i could rebuild it when the car is finished so i can have a replacement engine, should i ever need it... which i really hope i dont.

ive also bought the headlights home, i need to strip them down and get the reflectors re-silvered. all above where the bulb sits, the reflective paint has peeled off. i do love projector lenses but i just cant see any way of installing them without effecting the look of the car which is something i dont want to do as i think its a pretty nice looking car.
the drive axles have also been brought home too so i can rebuild them. all CV boots are split and open for gods knows how long or how many miles. one is bone dry of grease the other is full of grit. wont be hard to change though. i'm sure its got nothing on a fiat panda 4x4's prop shaft.


also found that i need another radiator hose as surprise surprise mine has perished :/
i'd do a video but i dont think its really worth it at the moment.
- JohnDragonMan
Drives: Citroen Dispatch with retrofitted air conditioning
Classic Fiat Panda 4x4 Sisley named Talon (long term storage)
always buy base spec. that way you have the fun of putting all the cool bit on your vehicle
Drives: Citroen Dispatch with retrofitted air conditioning
Classic Fiat Panda 4x4 Sisley named Talon (long term storage)
always buy base spec. that way you have the fun of putting all the cool bit on your vehicle
- Dragon Man
- BXpert
- Posts: 187
- Joined: Sat Aug 22, 2015 3:45 am
- Location: The East Midlands, Derby
- My Cars: Citroen Dispatch 2.0L HDi 2005
Fiat Panda 4x4 Sisley 1991 - x 6
- Contact:
Re: John Dragon Man's Citroen BX Diesel Estate
did a little bit of work today
i had about 2 hours spare at the end of the day so i made for the garage, stocked the wood burner up and set about cleaning up the drive shafts.
i am happy to report that even with the state of the CV boots, the actual CV joints, ball bearings, cups and tripod joints (and cups) all had no ware on them! i guess it bust had been grit that had blown into the joint when the car was parked up.
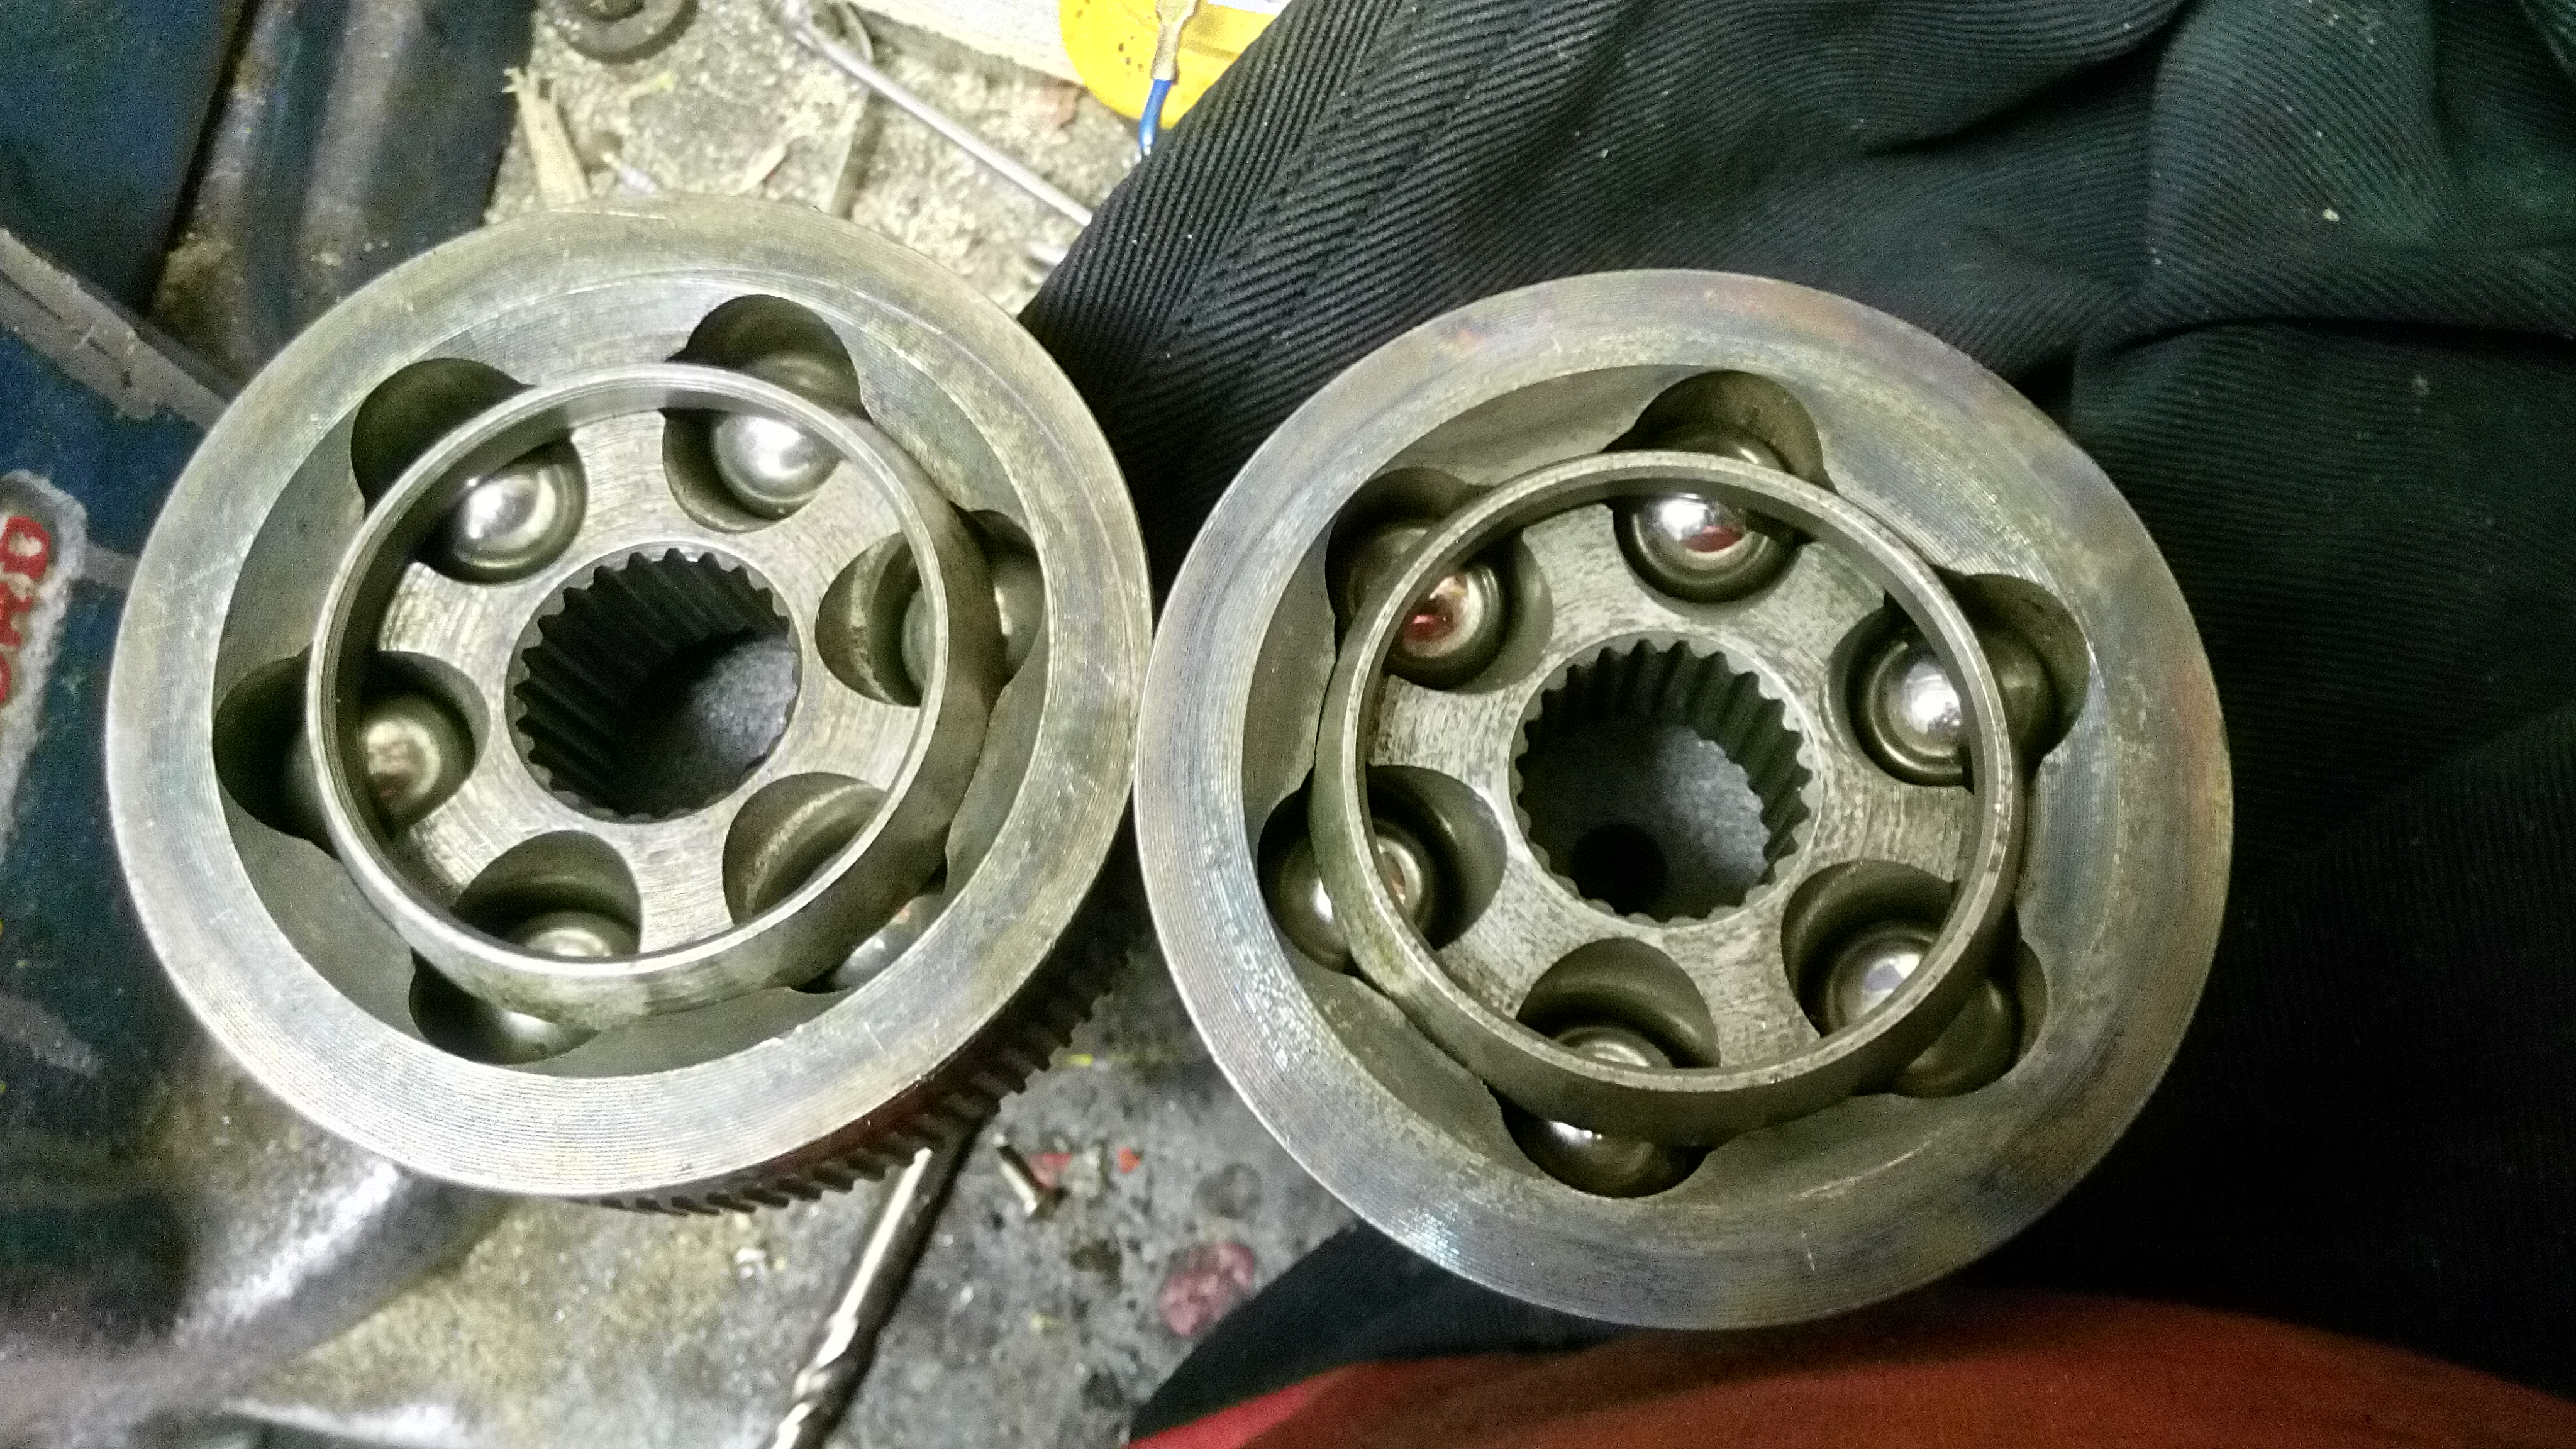
and after some de-rusting i managed to get them looking pretty good:
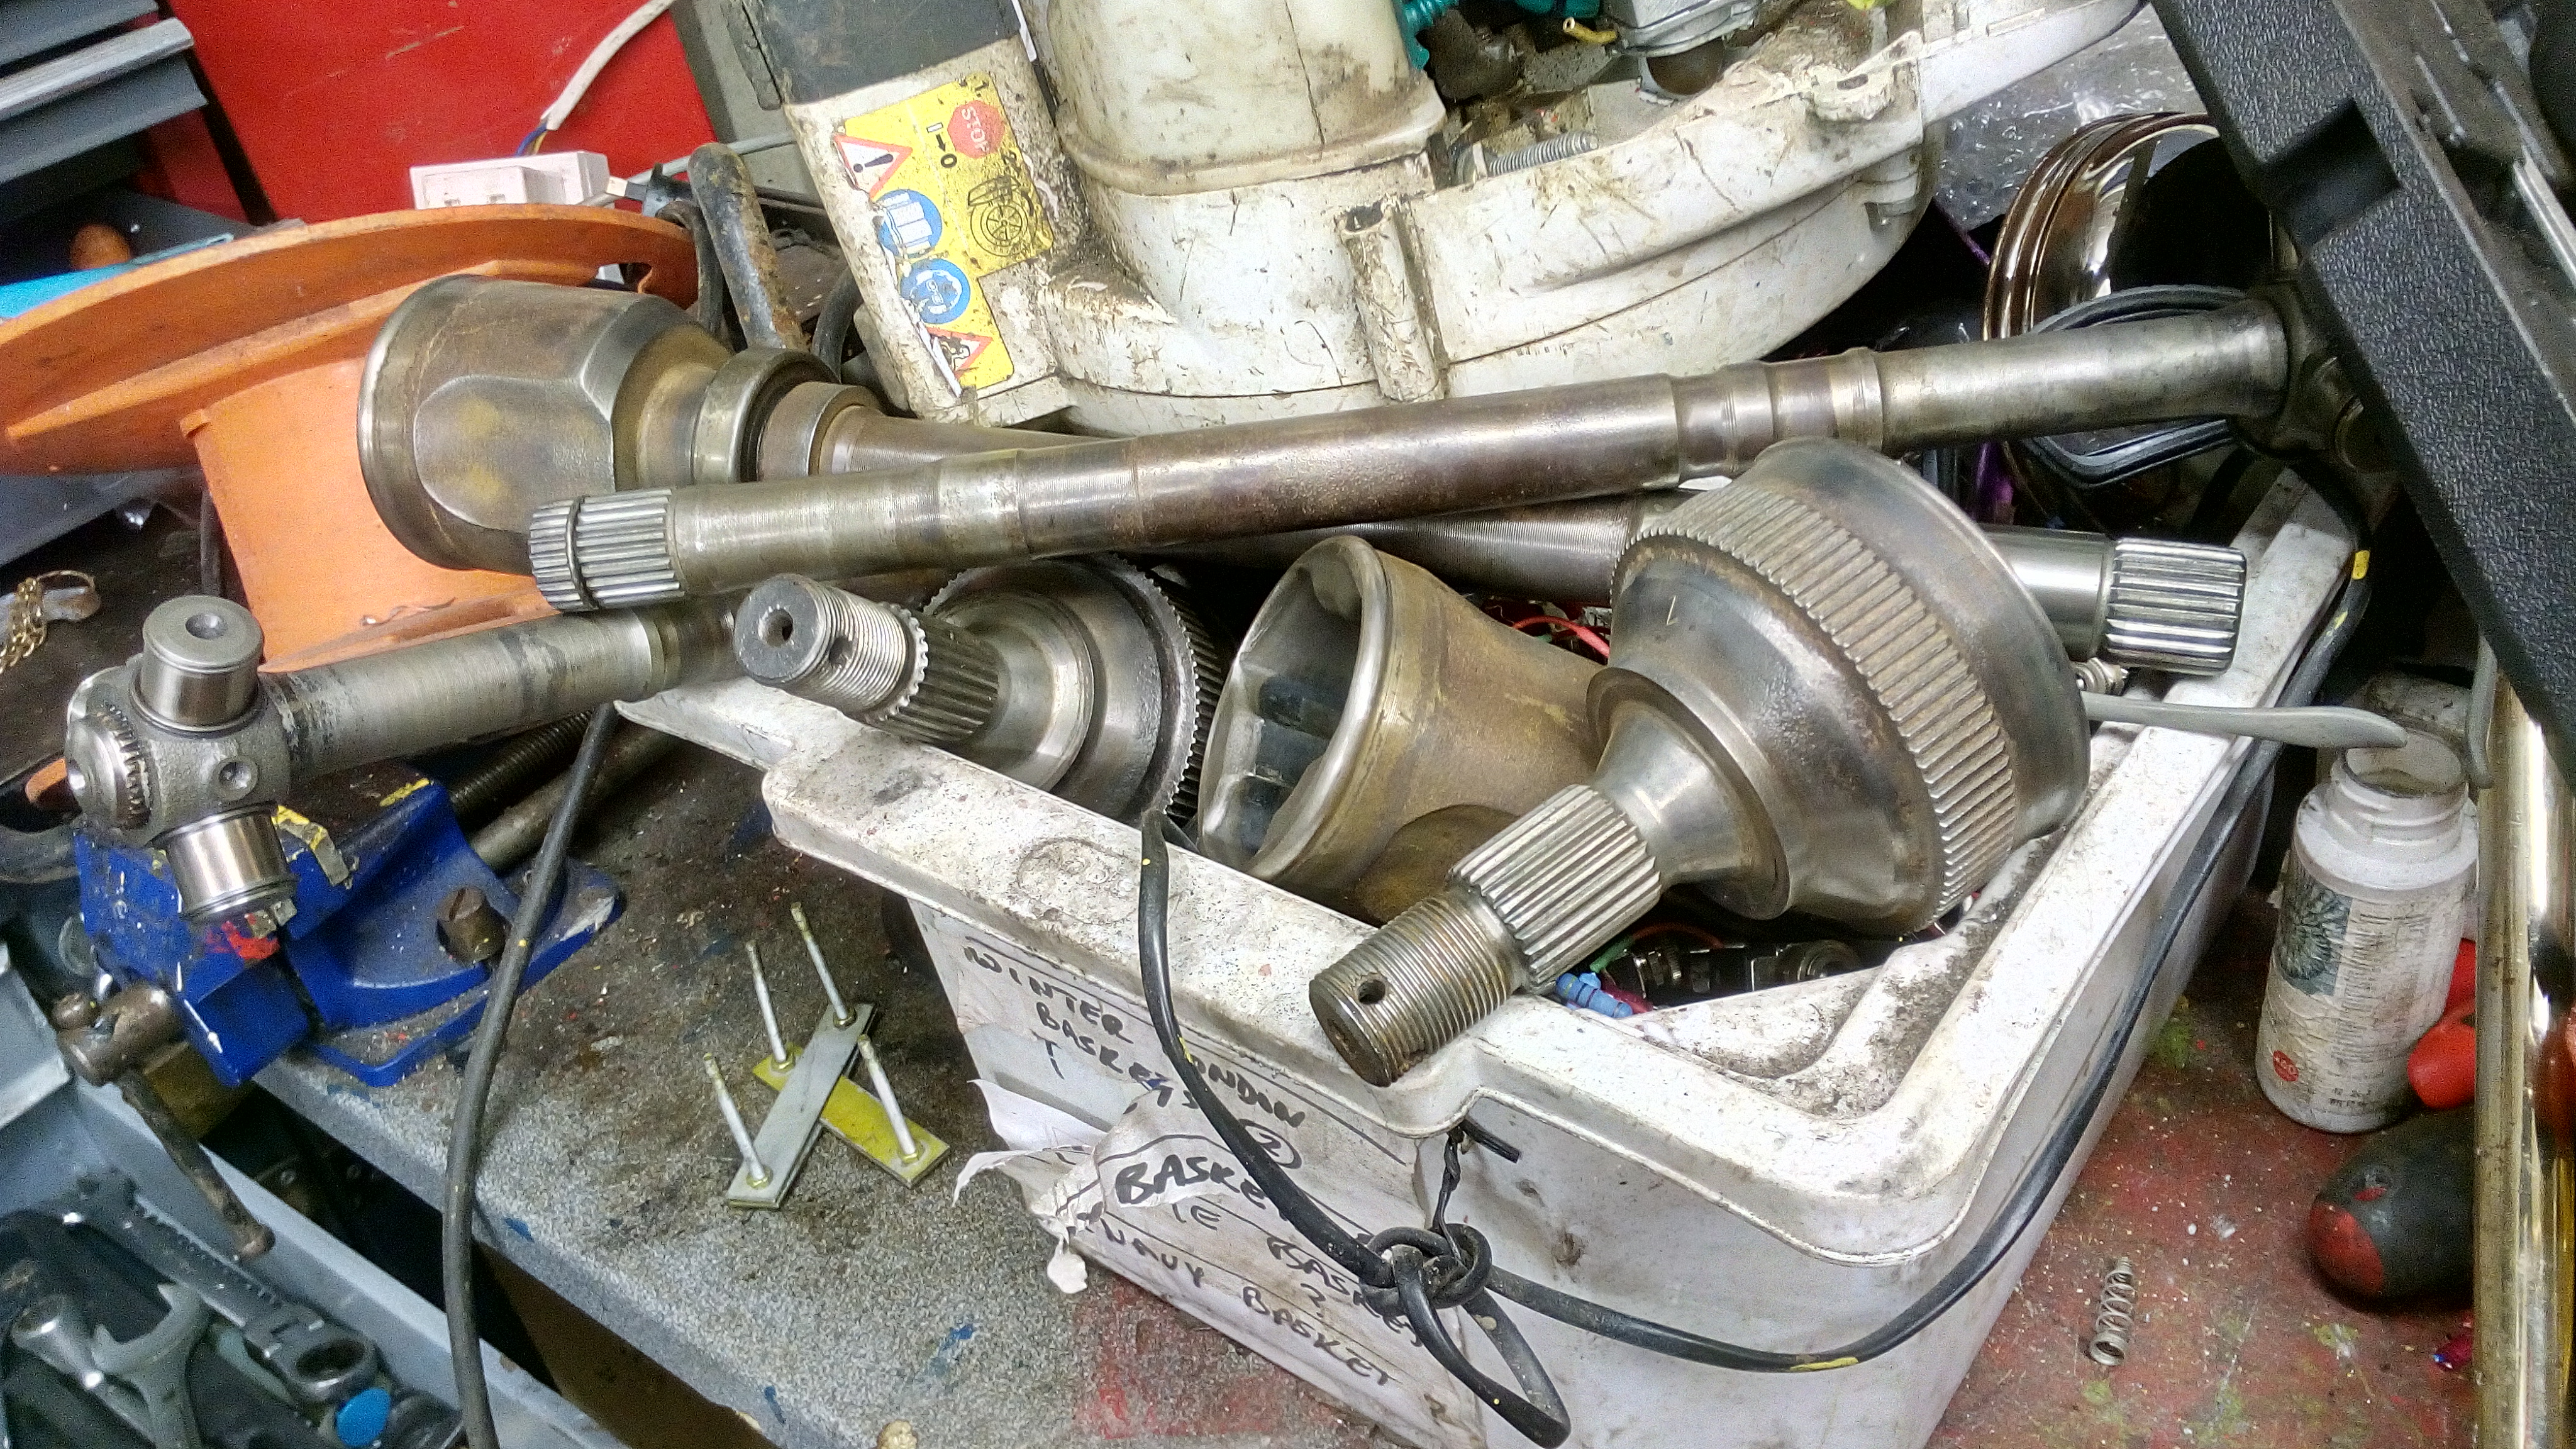
i did paint them too but i forgot to take a picture, the wood burner had burned out and the cold was setting in so i needed to get in the house.
i stick another coat on tomorrow. then it will be good to rebuild them back up with new boots and grease
one question though, in the tripod joint cup (inner joint) there was a spring forcing the joint outwards, should there be one on the other side too? (both tripod joints have the spring pressing the axle out) as only the short axle had the spring in it. it was also not in the correct sitting too. just wondered..
i had about 2 hours spare at the end of the day so i made for the garage, stocked the wood burner up and set about cleaning up the drive shafts.
i am happy to report that even with the state of the CV boots, the actual CV joints, ball bearings, cups and tripod joints (and cups) all had no ware on them! i guess it bust had been grit that had blown into the joint when the car was parked up.

and after some de-rusting i managed to get them looking pretty good:

i did paint them too but i forgot to take a picture, the wood burner had burned out and the cold was setting in so i needed to get in the house.
i stick another coat on tomorrow. then it will be good to rebuild them back up with new boots and grease
one question though, in the tripod joint cup (inner joint) there was a spring forcing the joint outwards, should there be one on the other side too? (both tripod joints have the spring pressing the axle out) as only the short axle had the spring in it. it was also not in the correct sitting too. just wondered..
- JohnDragonMan
Drives: Citroen Dispatch with retrofitted air conditioning
Classic Fiat Panda 4x4 Sisley named Talon (long term storage)
always buy base spec. that way you have the fun of putting all the cool bit on your vehicle
Drives: Citroen Dispatch with retrofitted air conditioning
Classic Fiat Panda 4x4 Sisley named Talon (long term storage)
always buy base spec. that way you have the fun of putting all the cool bit on your vehicle
- Philip Chidlow
- Over 2k
- Posts: 11594
- Joined: Fri Oct 07, 2005 1:08 pm
- Location: Chelmsford, Essex
- x 25
Re: John Dragon Man's Citroen BX Diesel Estate
Utterly impressive pipework there!
• 1992 Citroen BX TZD Turbo Hurricane
• 2006 Xsara Picasso 1.6 16v
• 2006 Xsara Picasso 1.6 16v
-
chris_90
- New Member
- Posts: 4
- Joined: Fri Sep 02, 2016 10:04 pm
- Location: Chesterfield
- My Cars: Bx TGD
Re: John Dragon Man's Citroen BX Diesel Estate
Any more progress on making that turbo fit? I'd definitely try and keep a spare engine when trying bigger turbos on the xud especially vnt, I'm speaking from experience dropped a rod 2 hours after tweek on the fuel pump but was probably Alot bigger turbo than the one you have.
- Dragon Man
- BXpert
- Posts: 187
- Joined: Sat Aug 22, 2015 3:45 am
- Location: The East Midlands, Derby
- My Cars: Citroen Dispatch 2.0L HDi 2005
Fiat Panda 4x4 Sisley 1991 - x 6
- Contact:
Re: John Dragon Man's Citroen BX Diesel Estate
hmm not much to report really.. the turbo adaptor plate looks like this now:
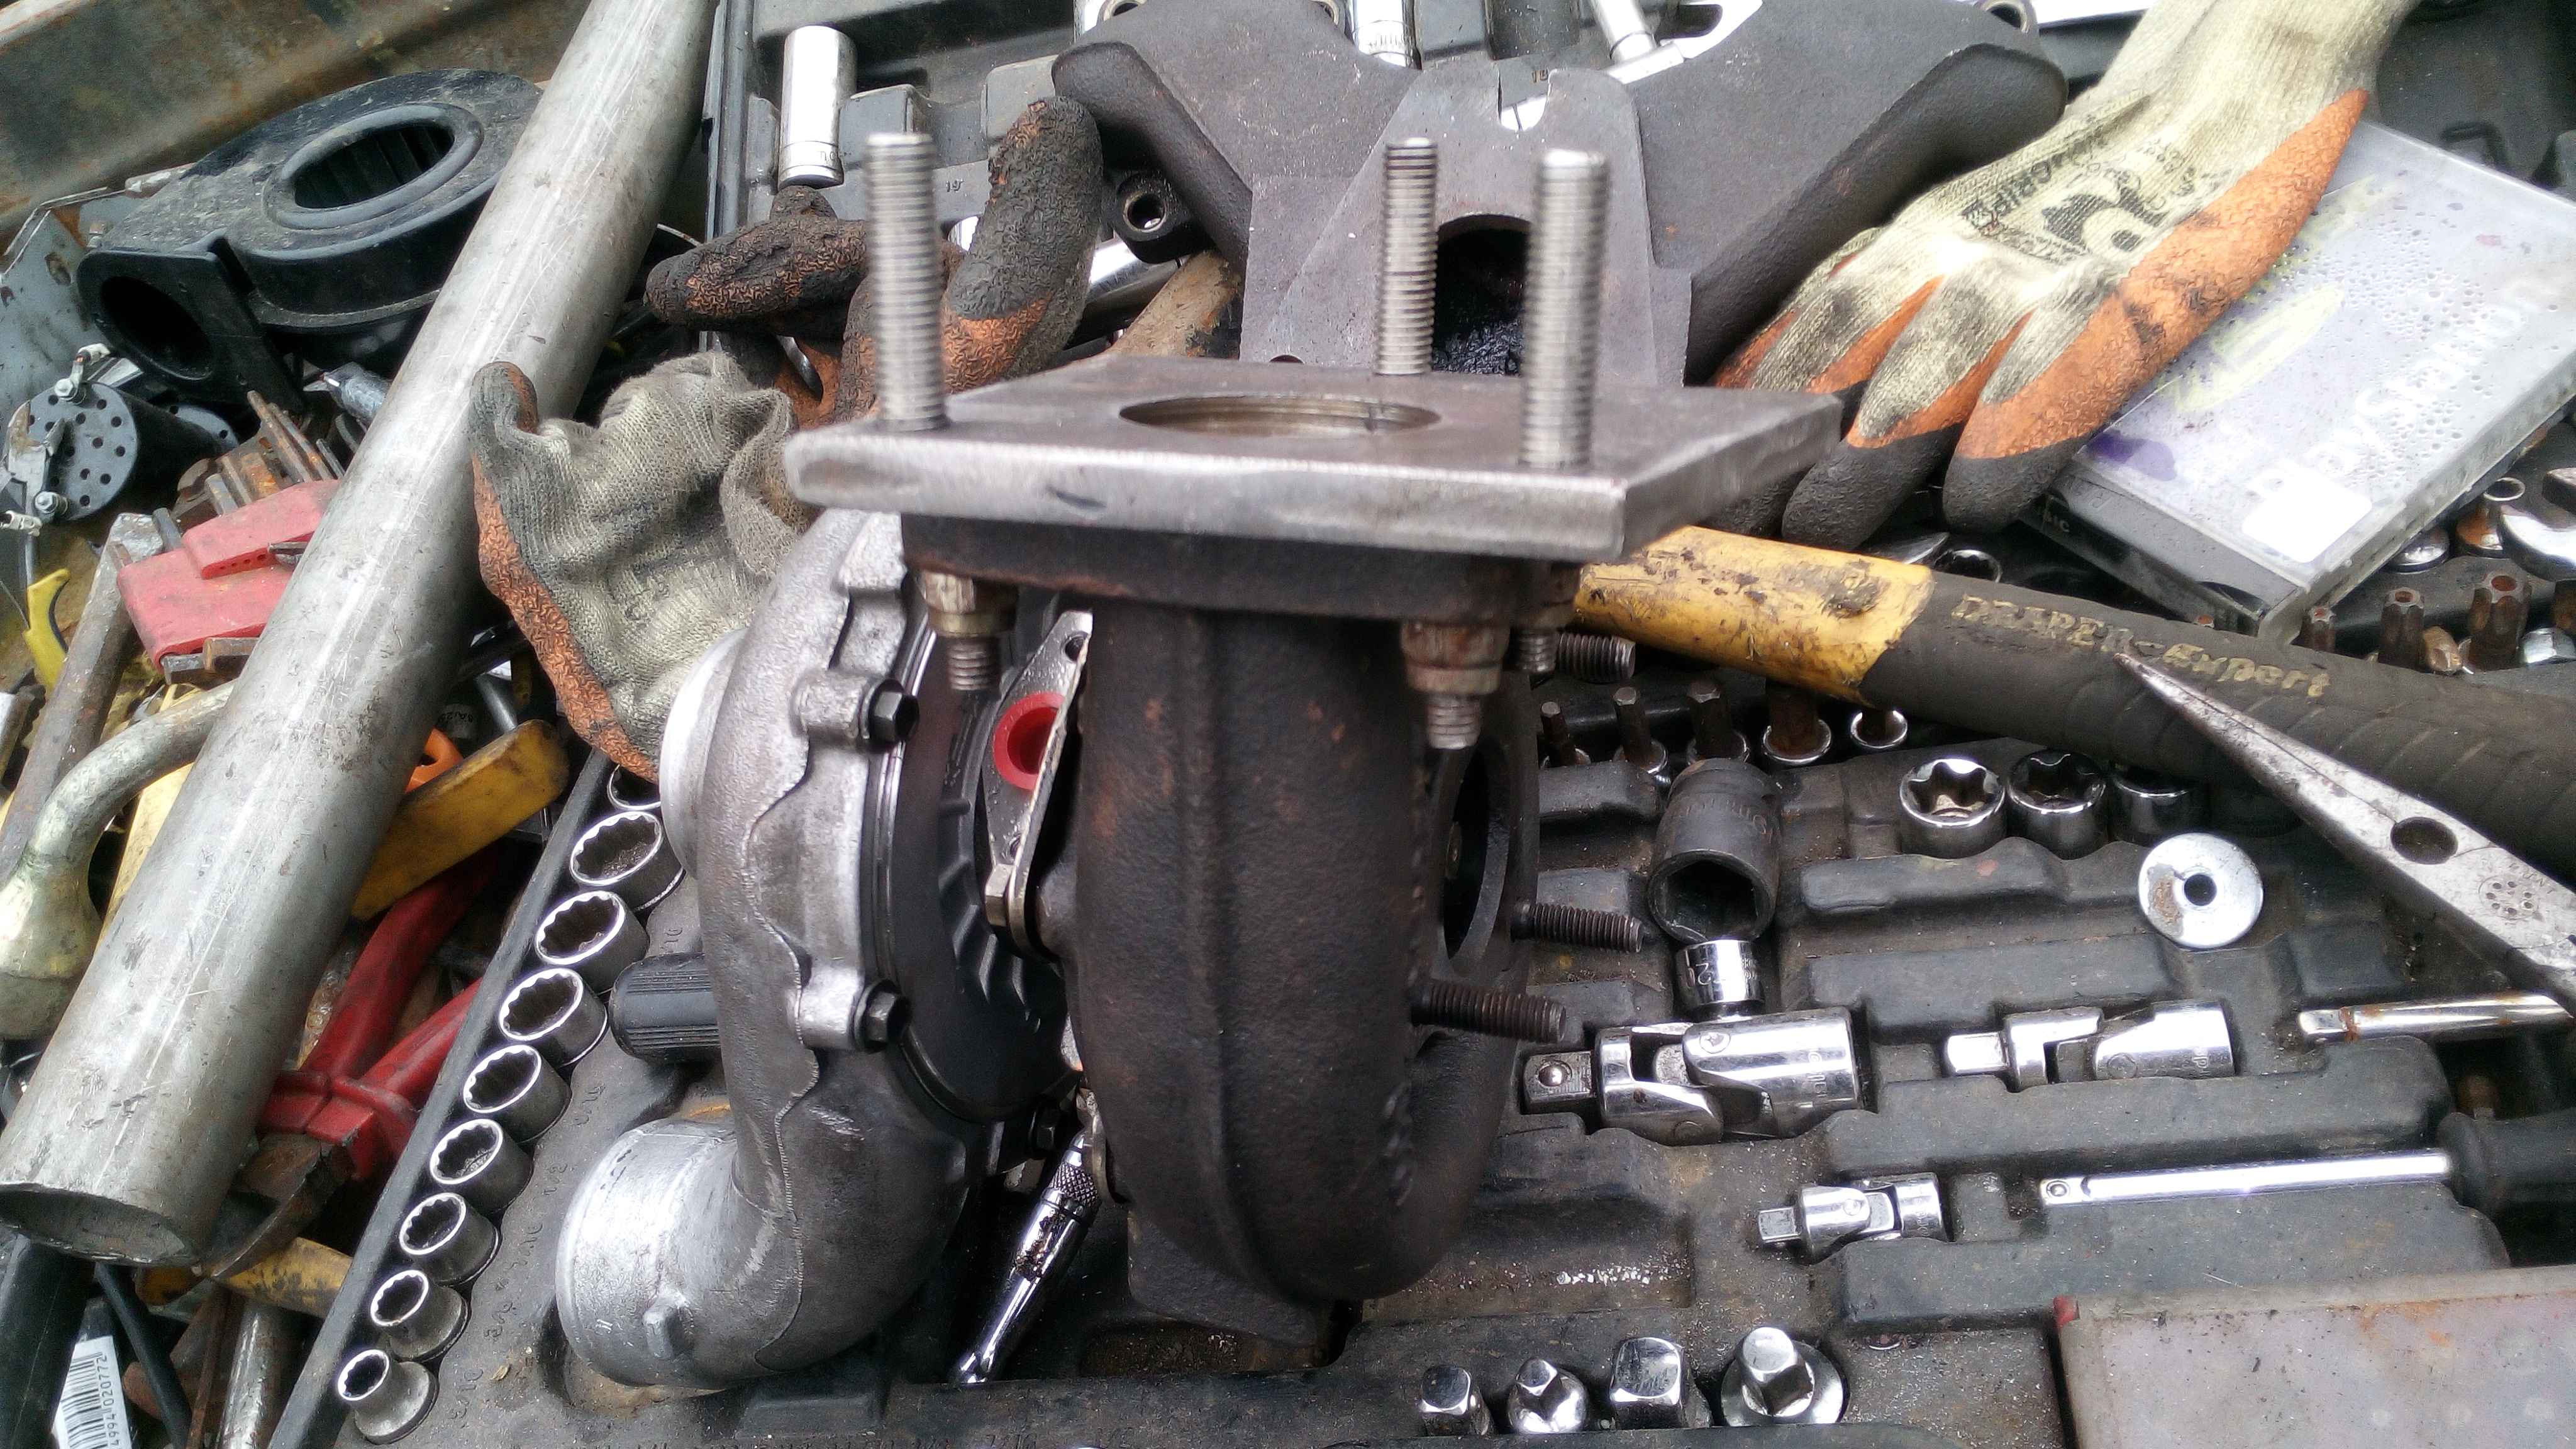
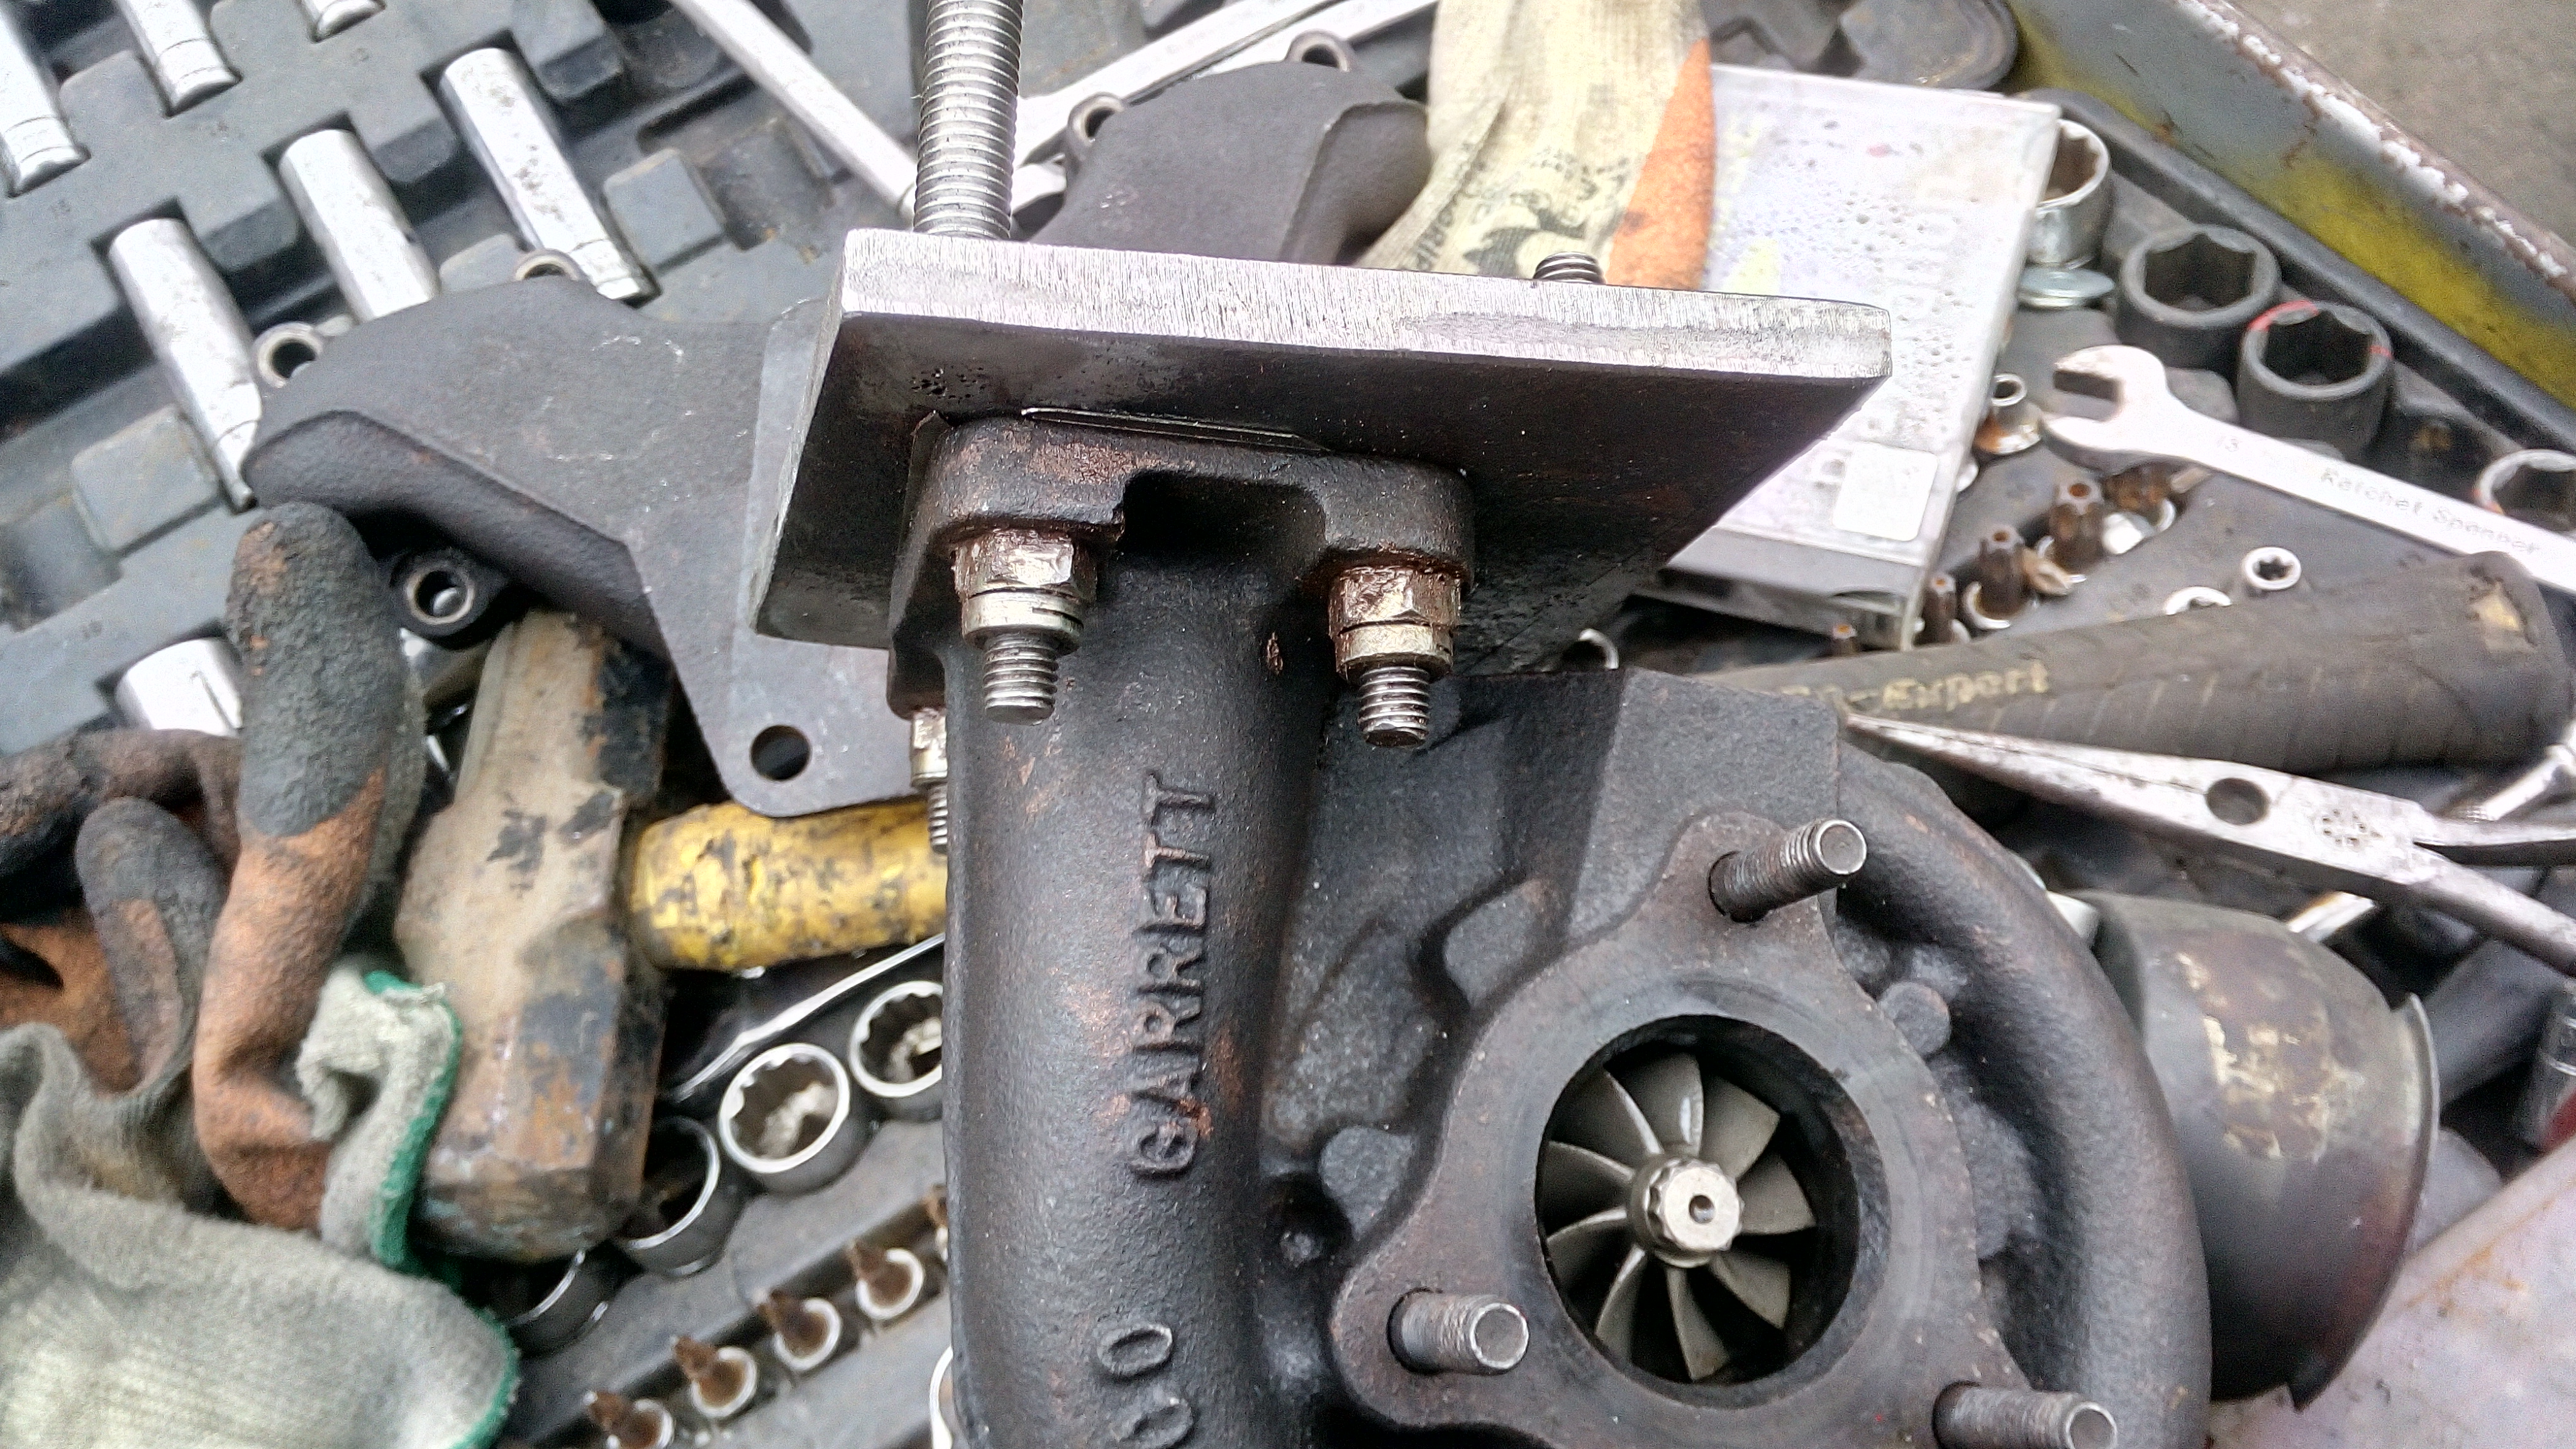
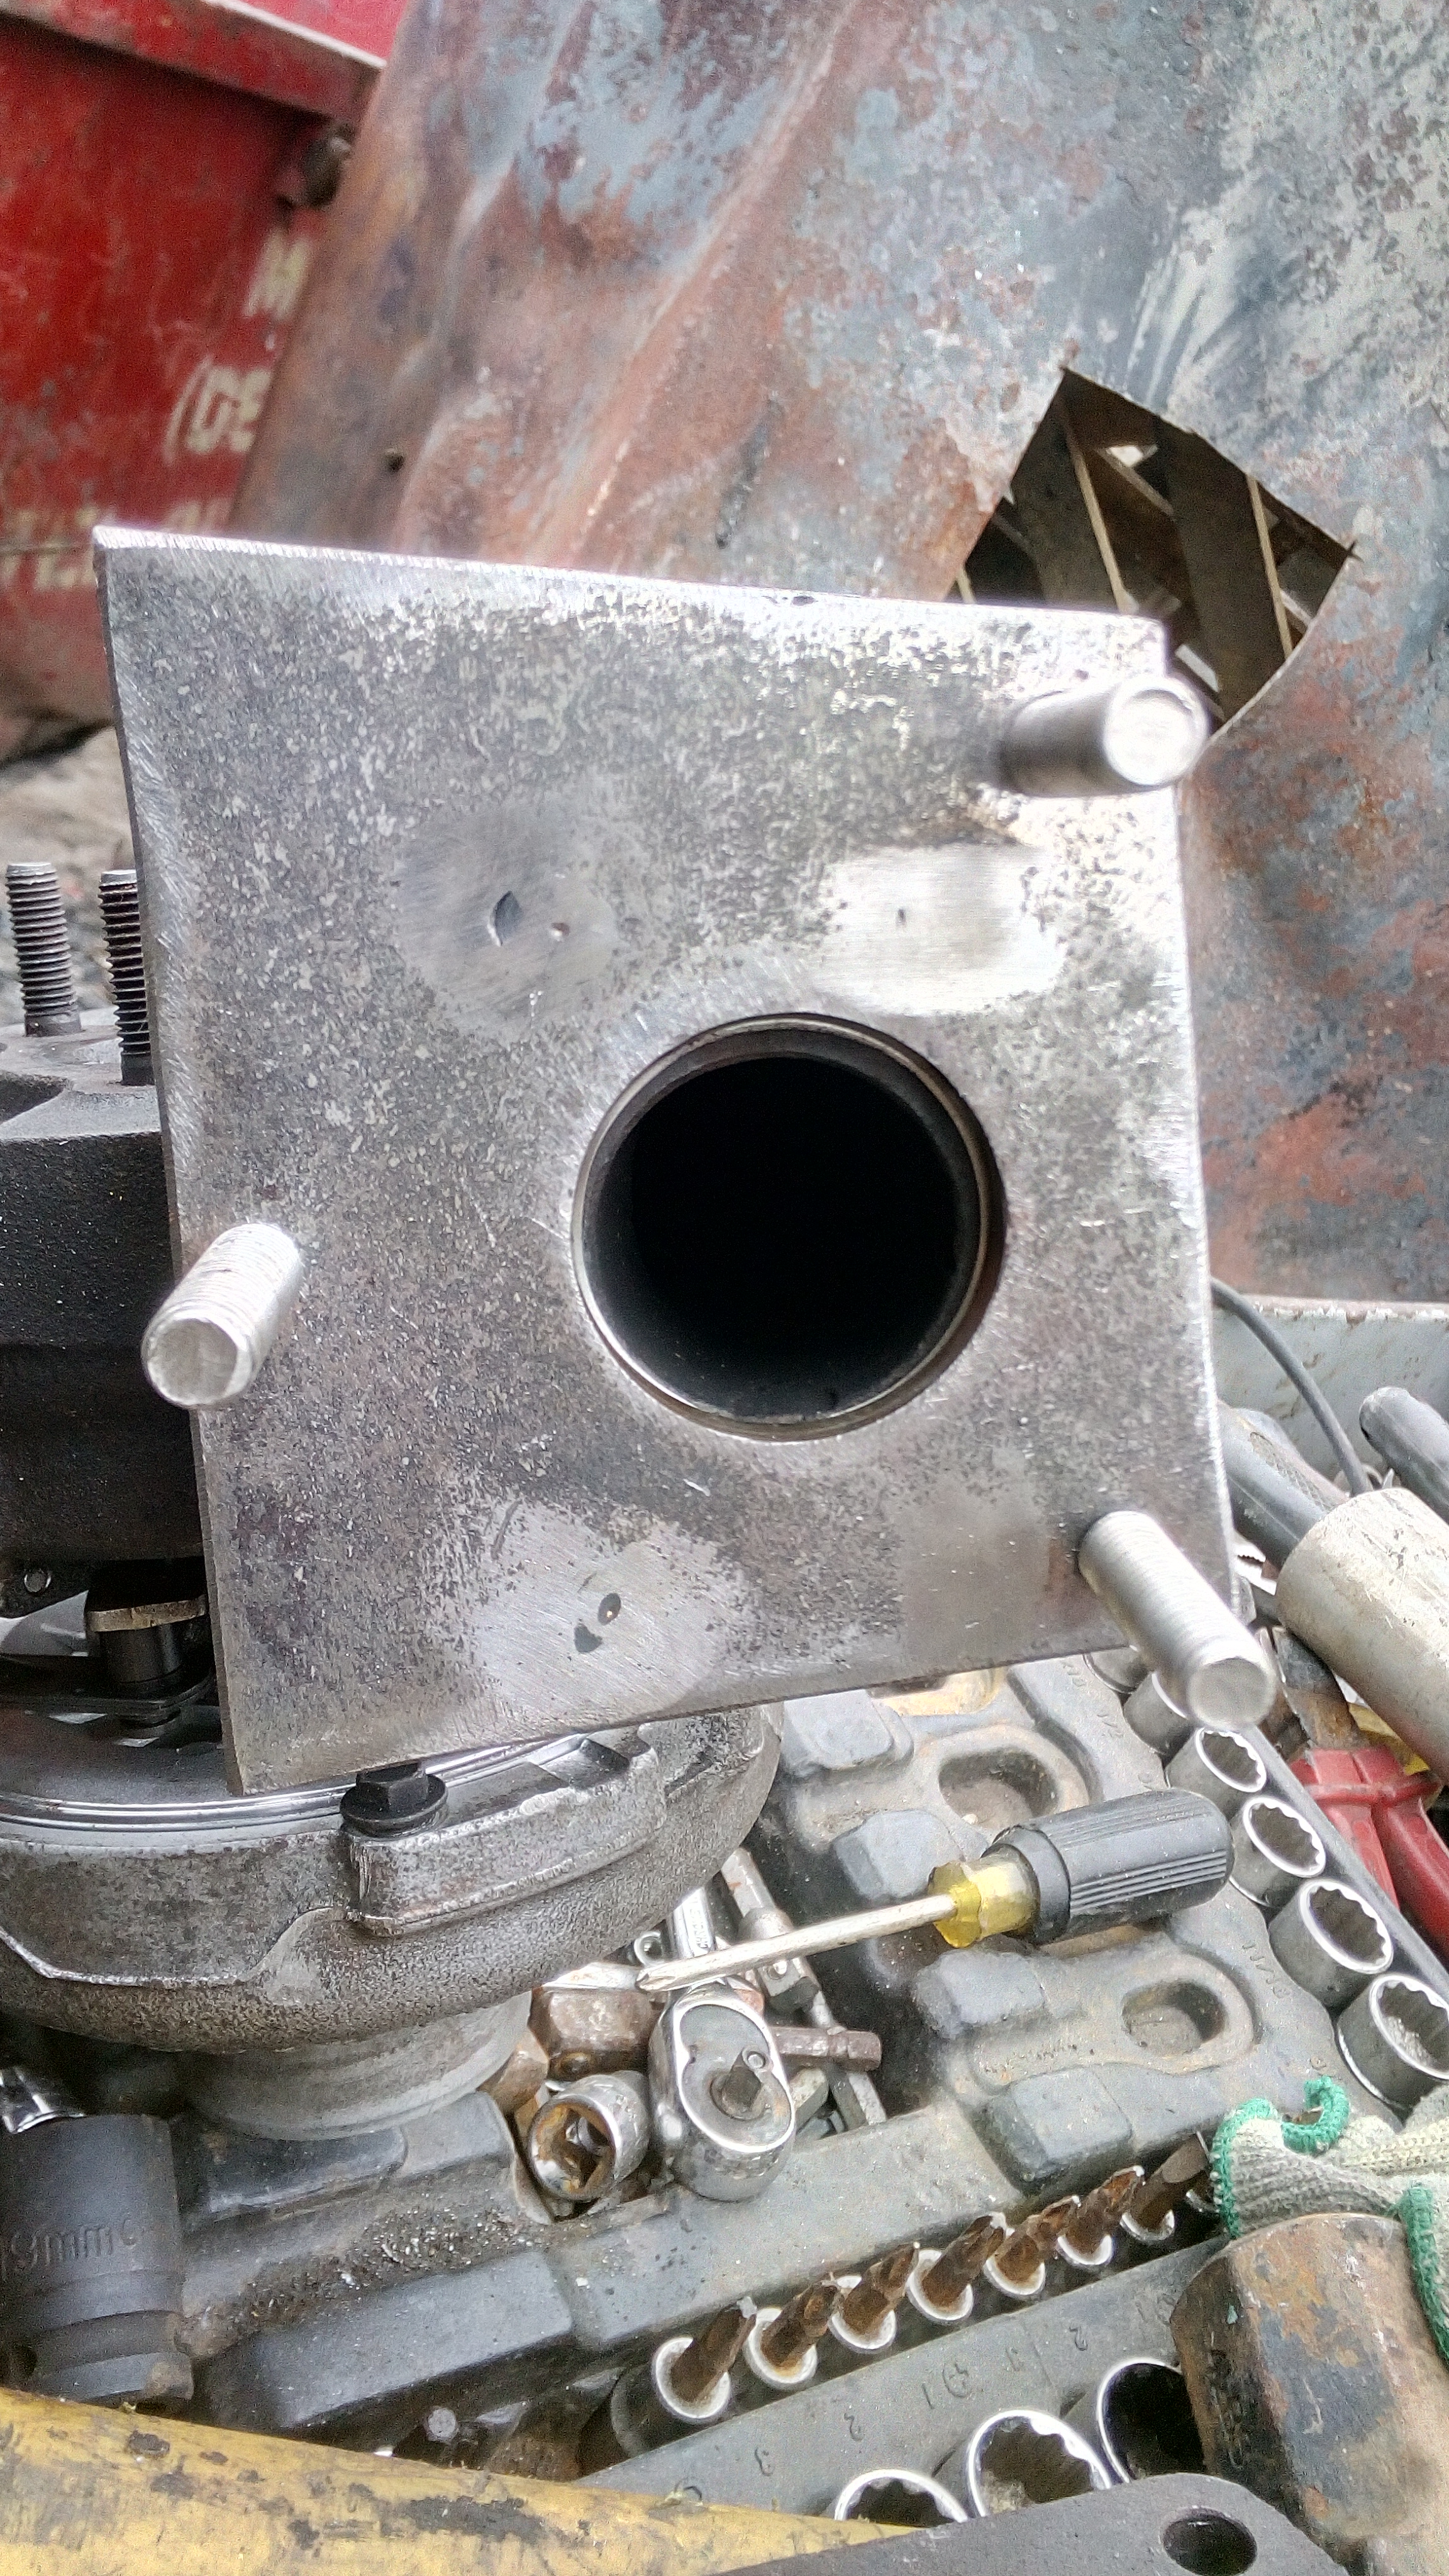
just waiting on a gasket coming from France, then it can be bolted to the engine.
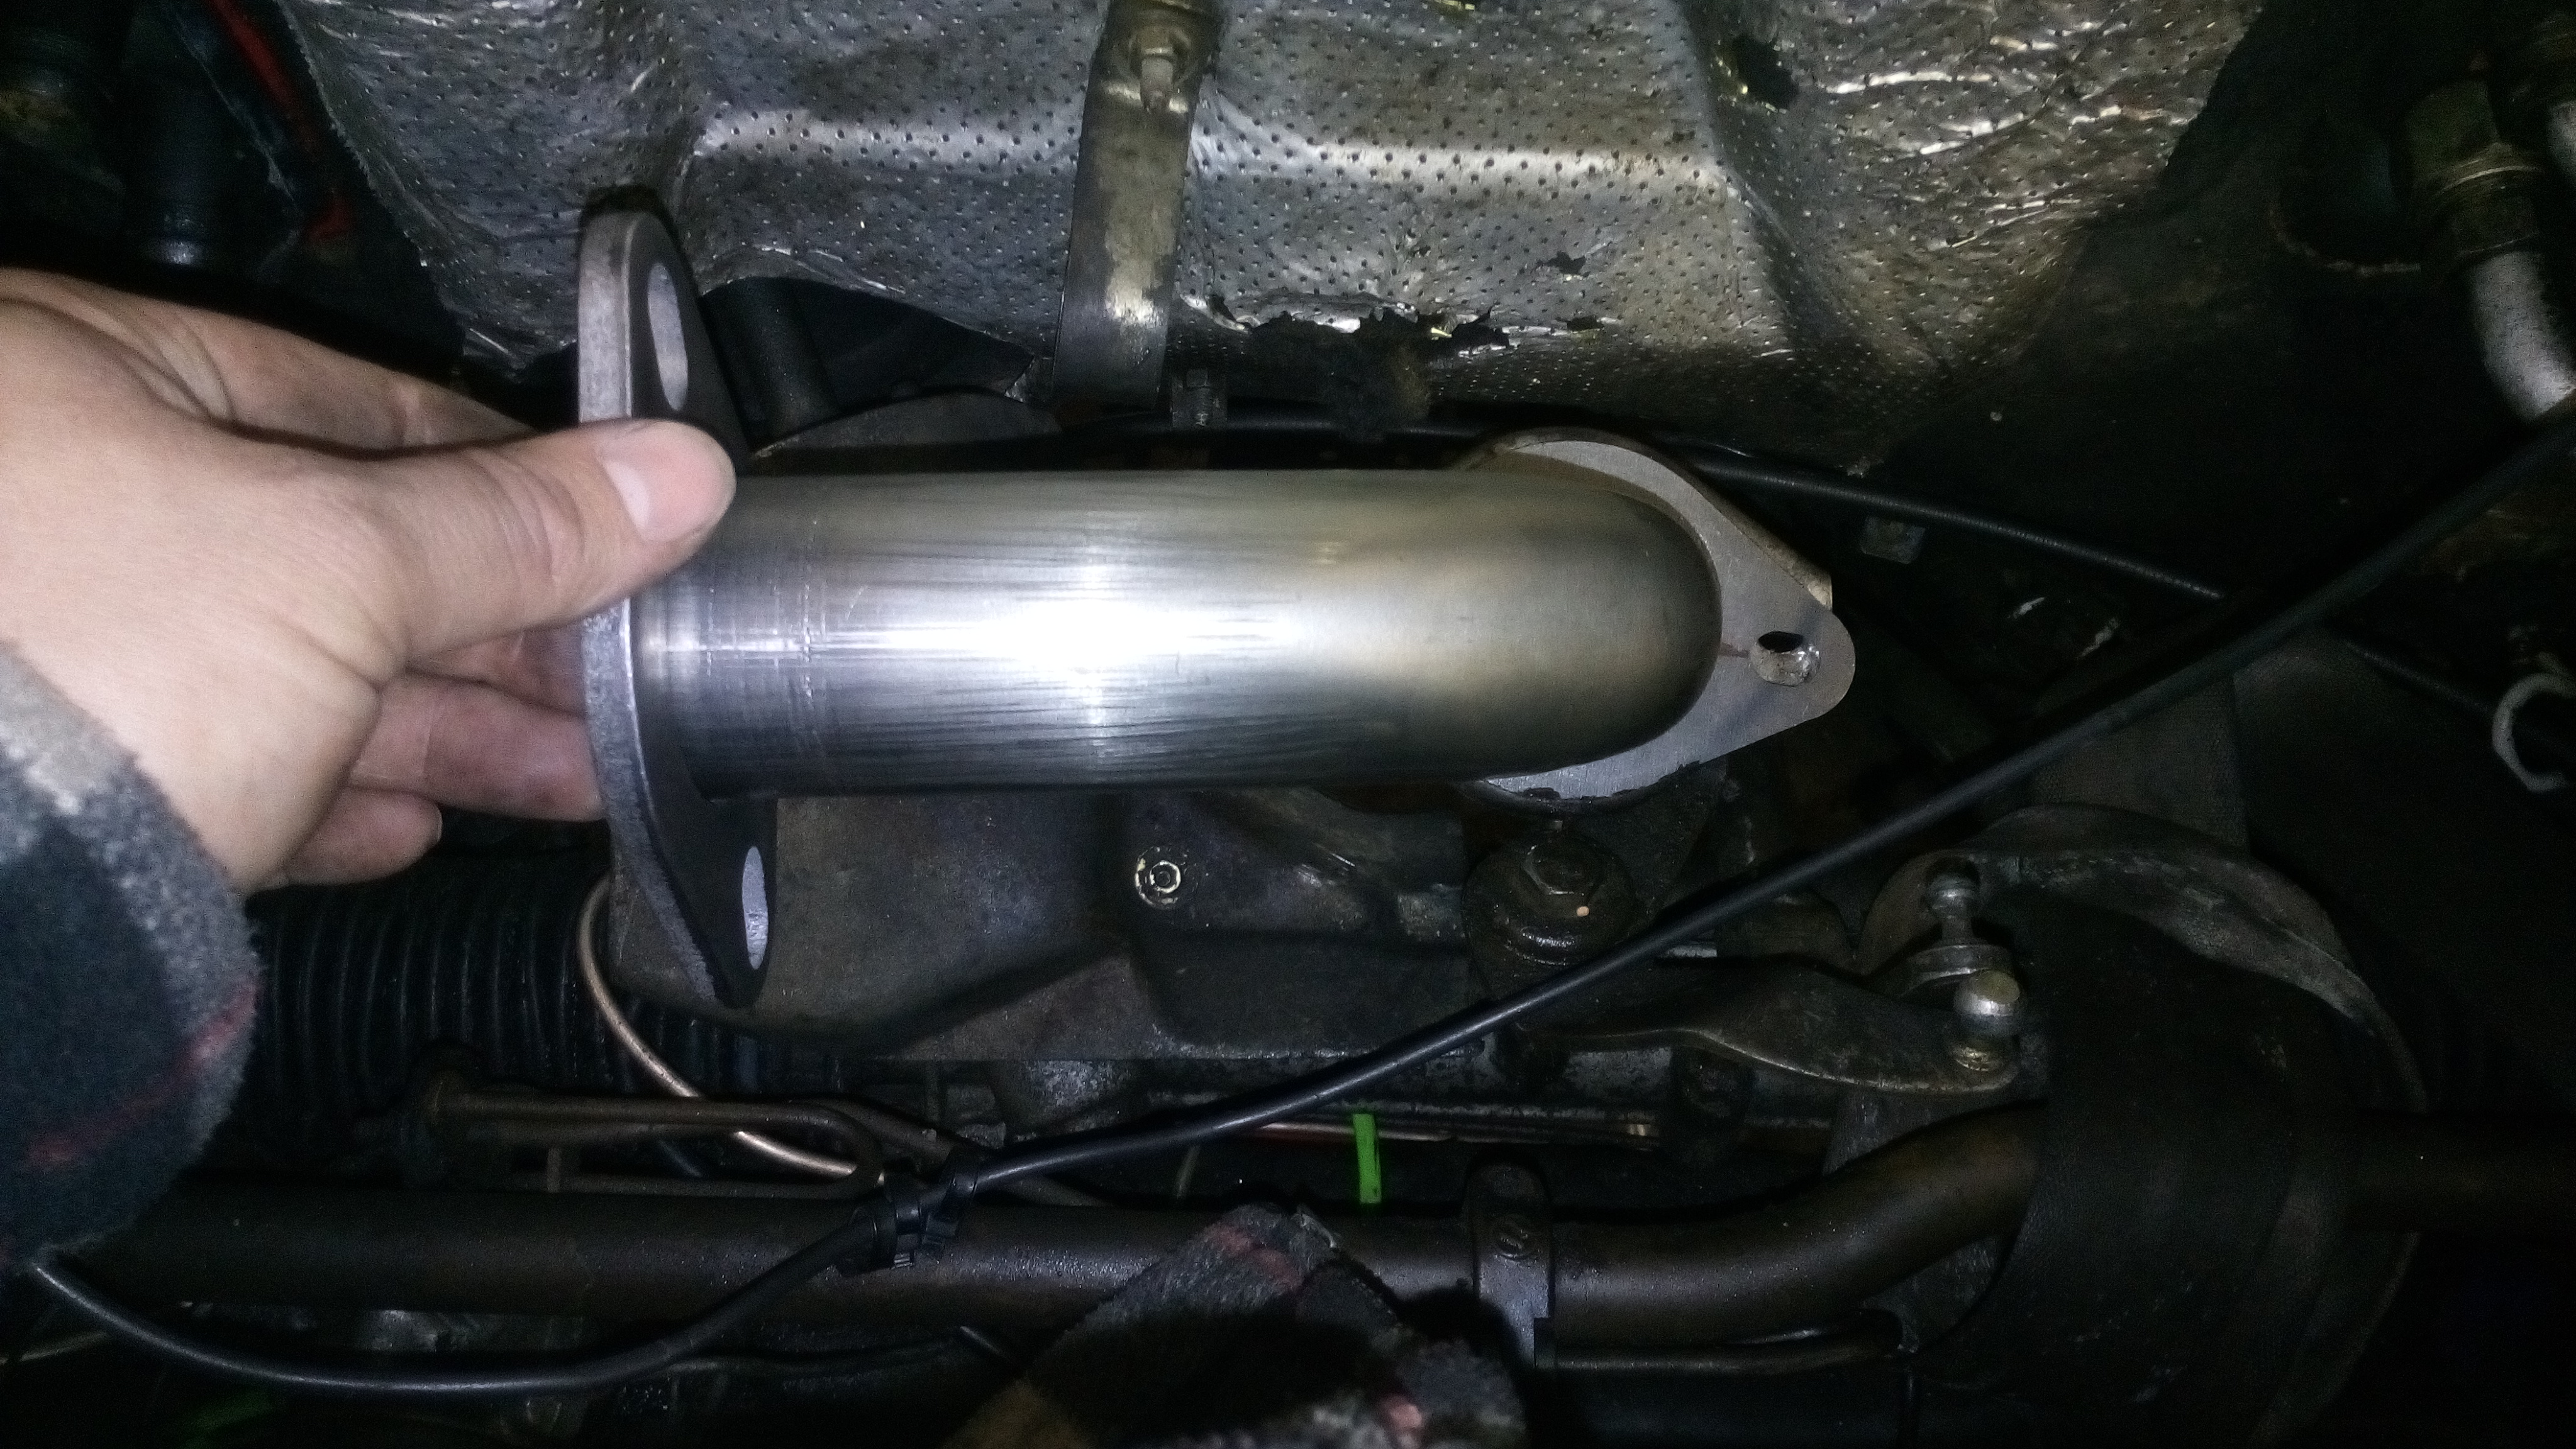
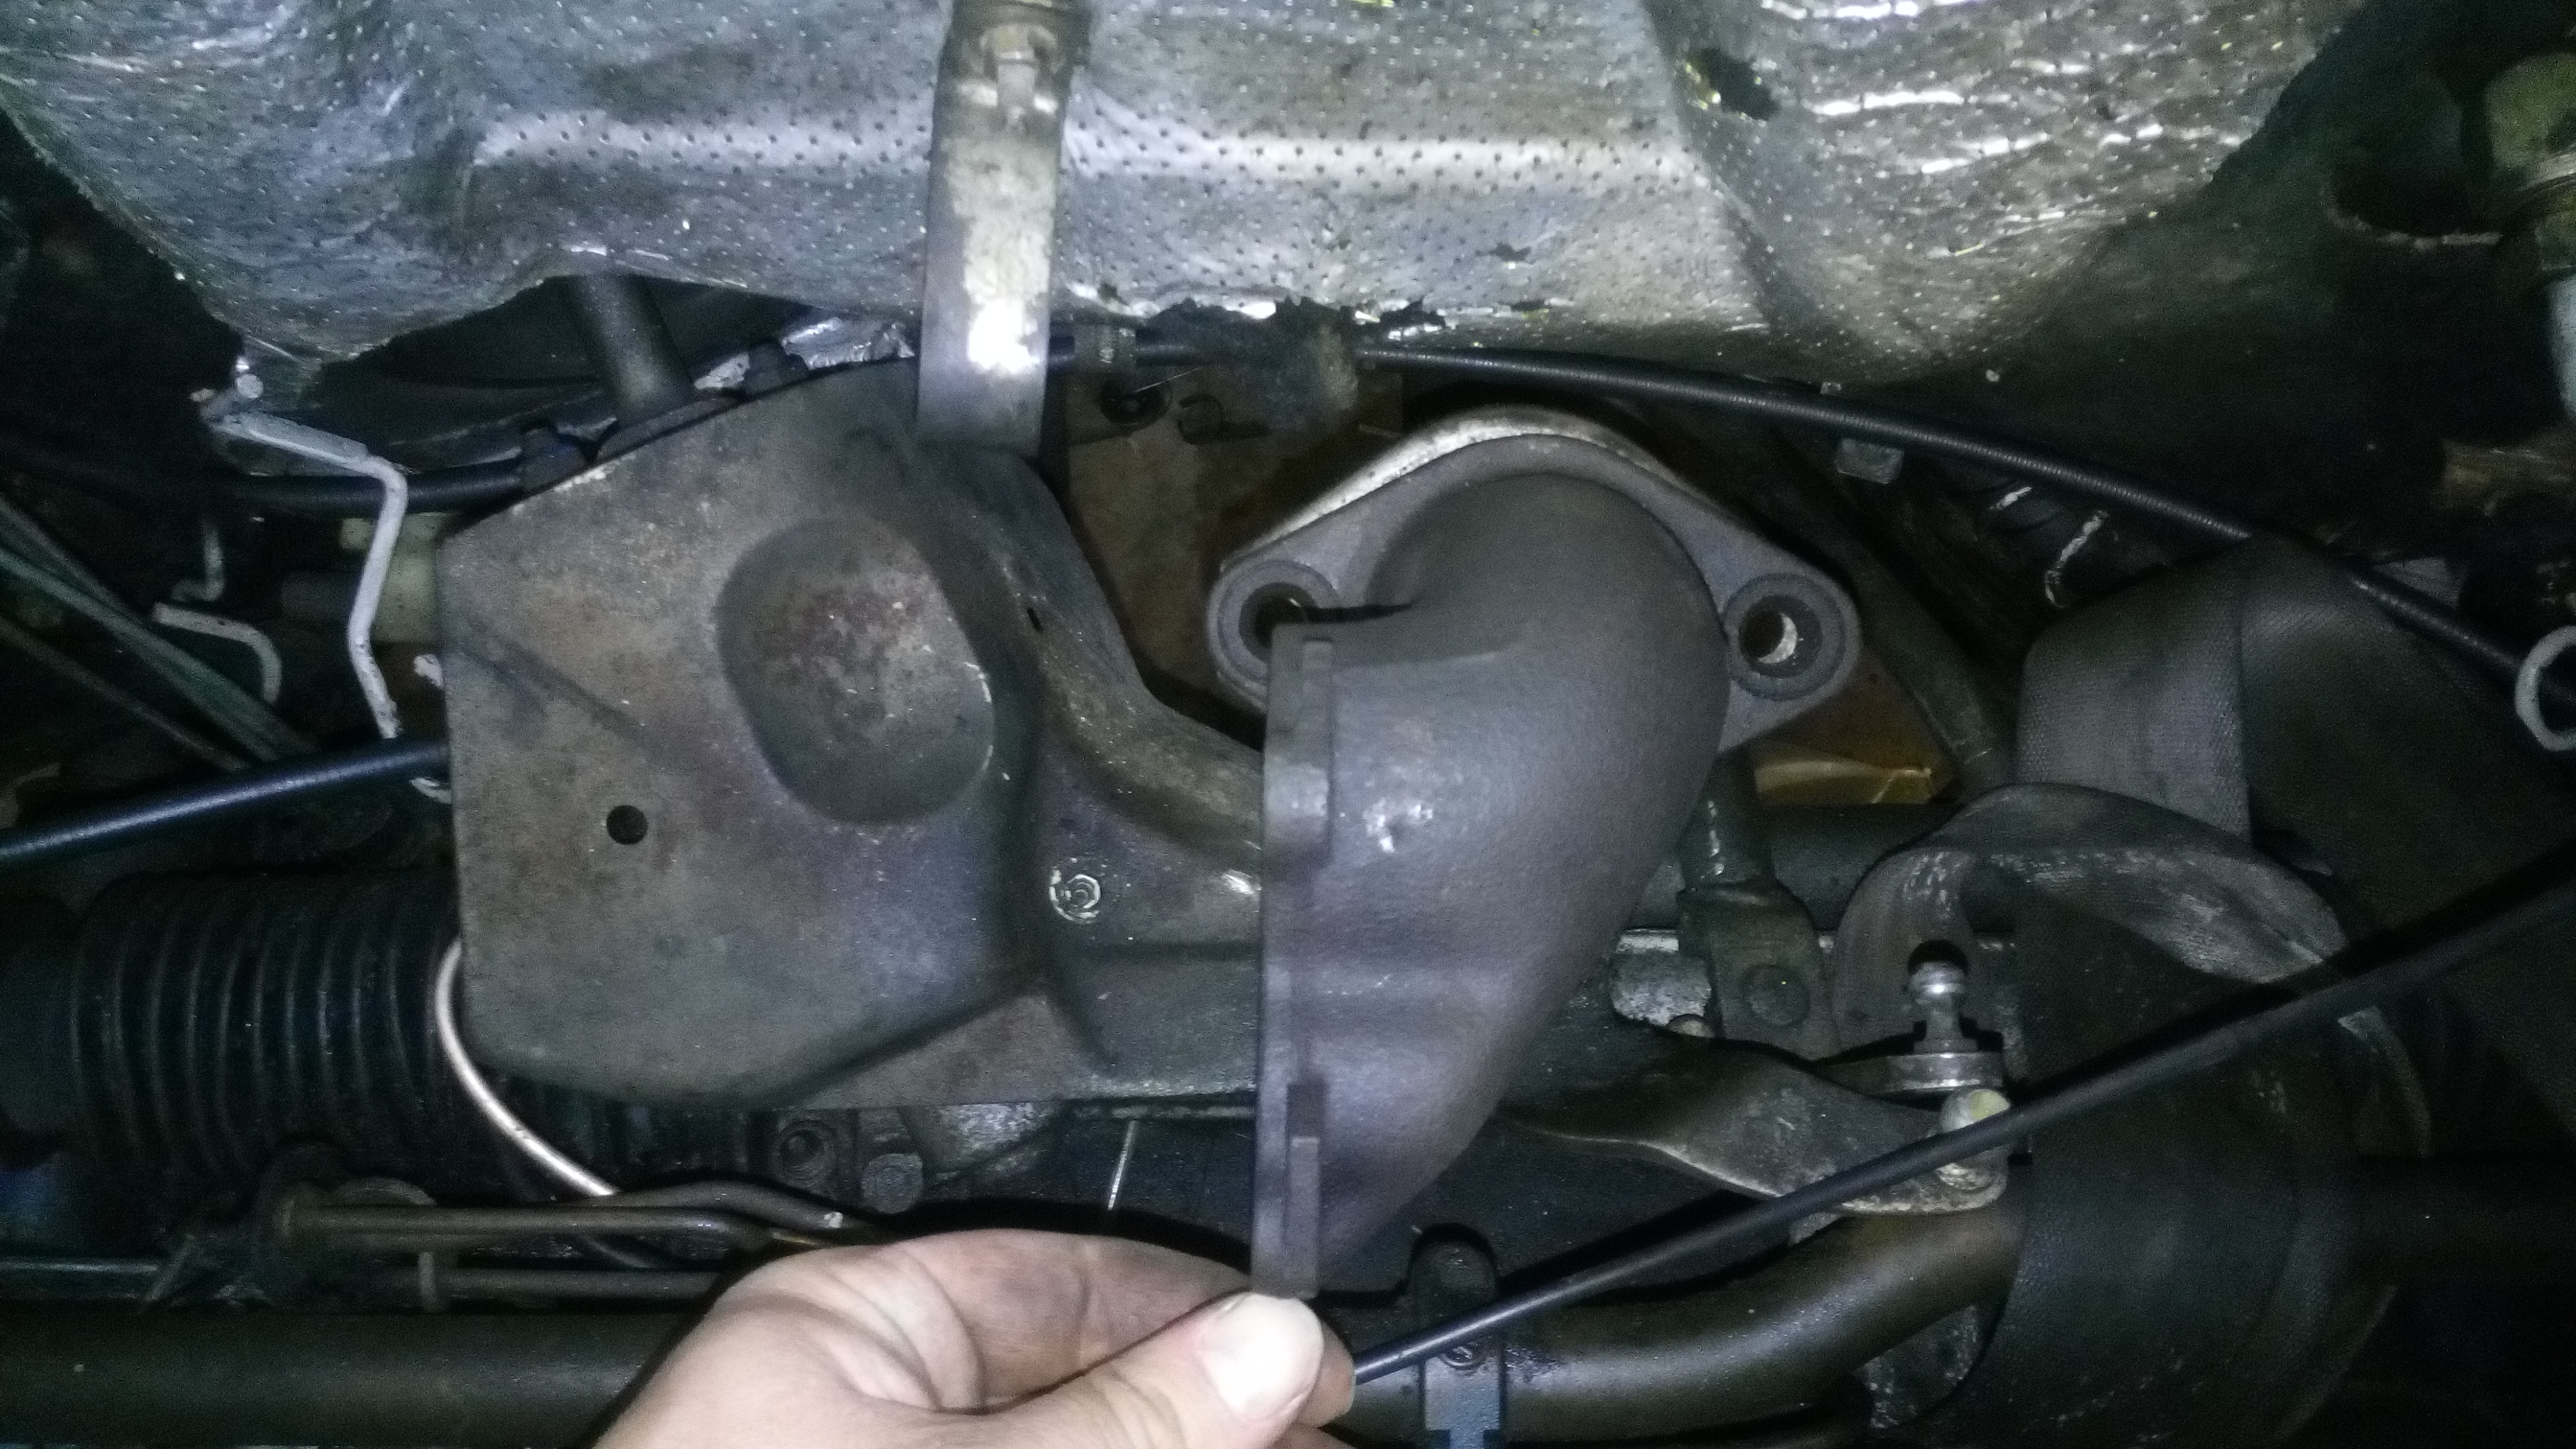
this is the next task at hand.. this is the 90 degree "elbow" i had made.. which is way too big, even though i gave the dimensions i needed. so i am having this adapted at yet more cost to get it to fit right.
heres a few close ups of the head lamp reflectors:
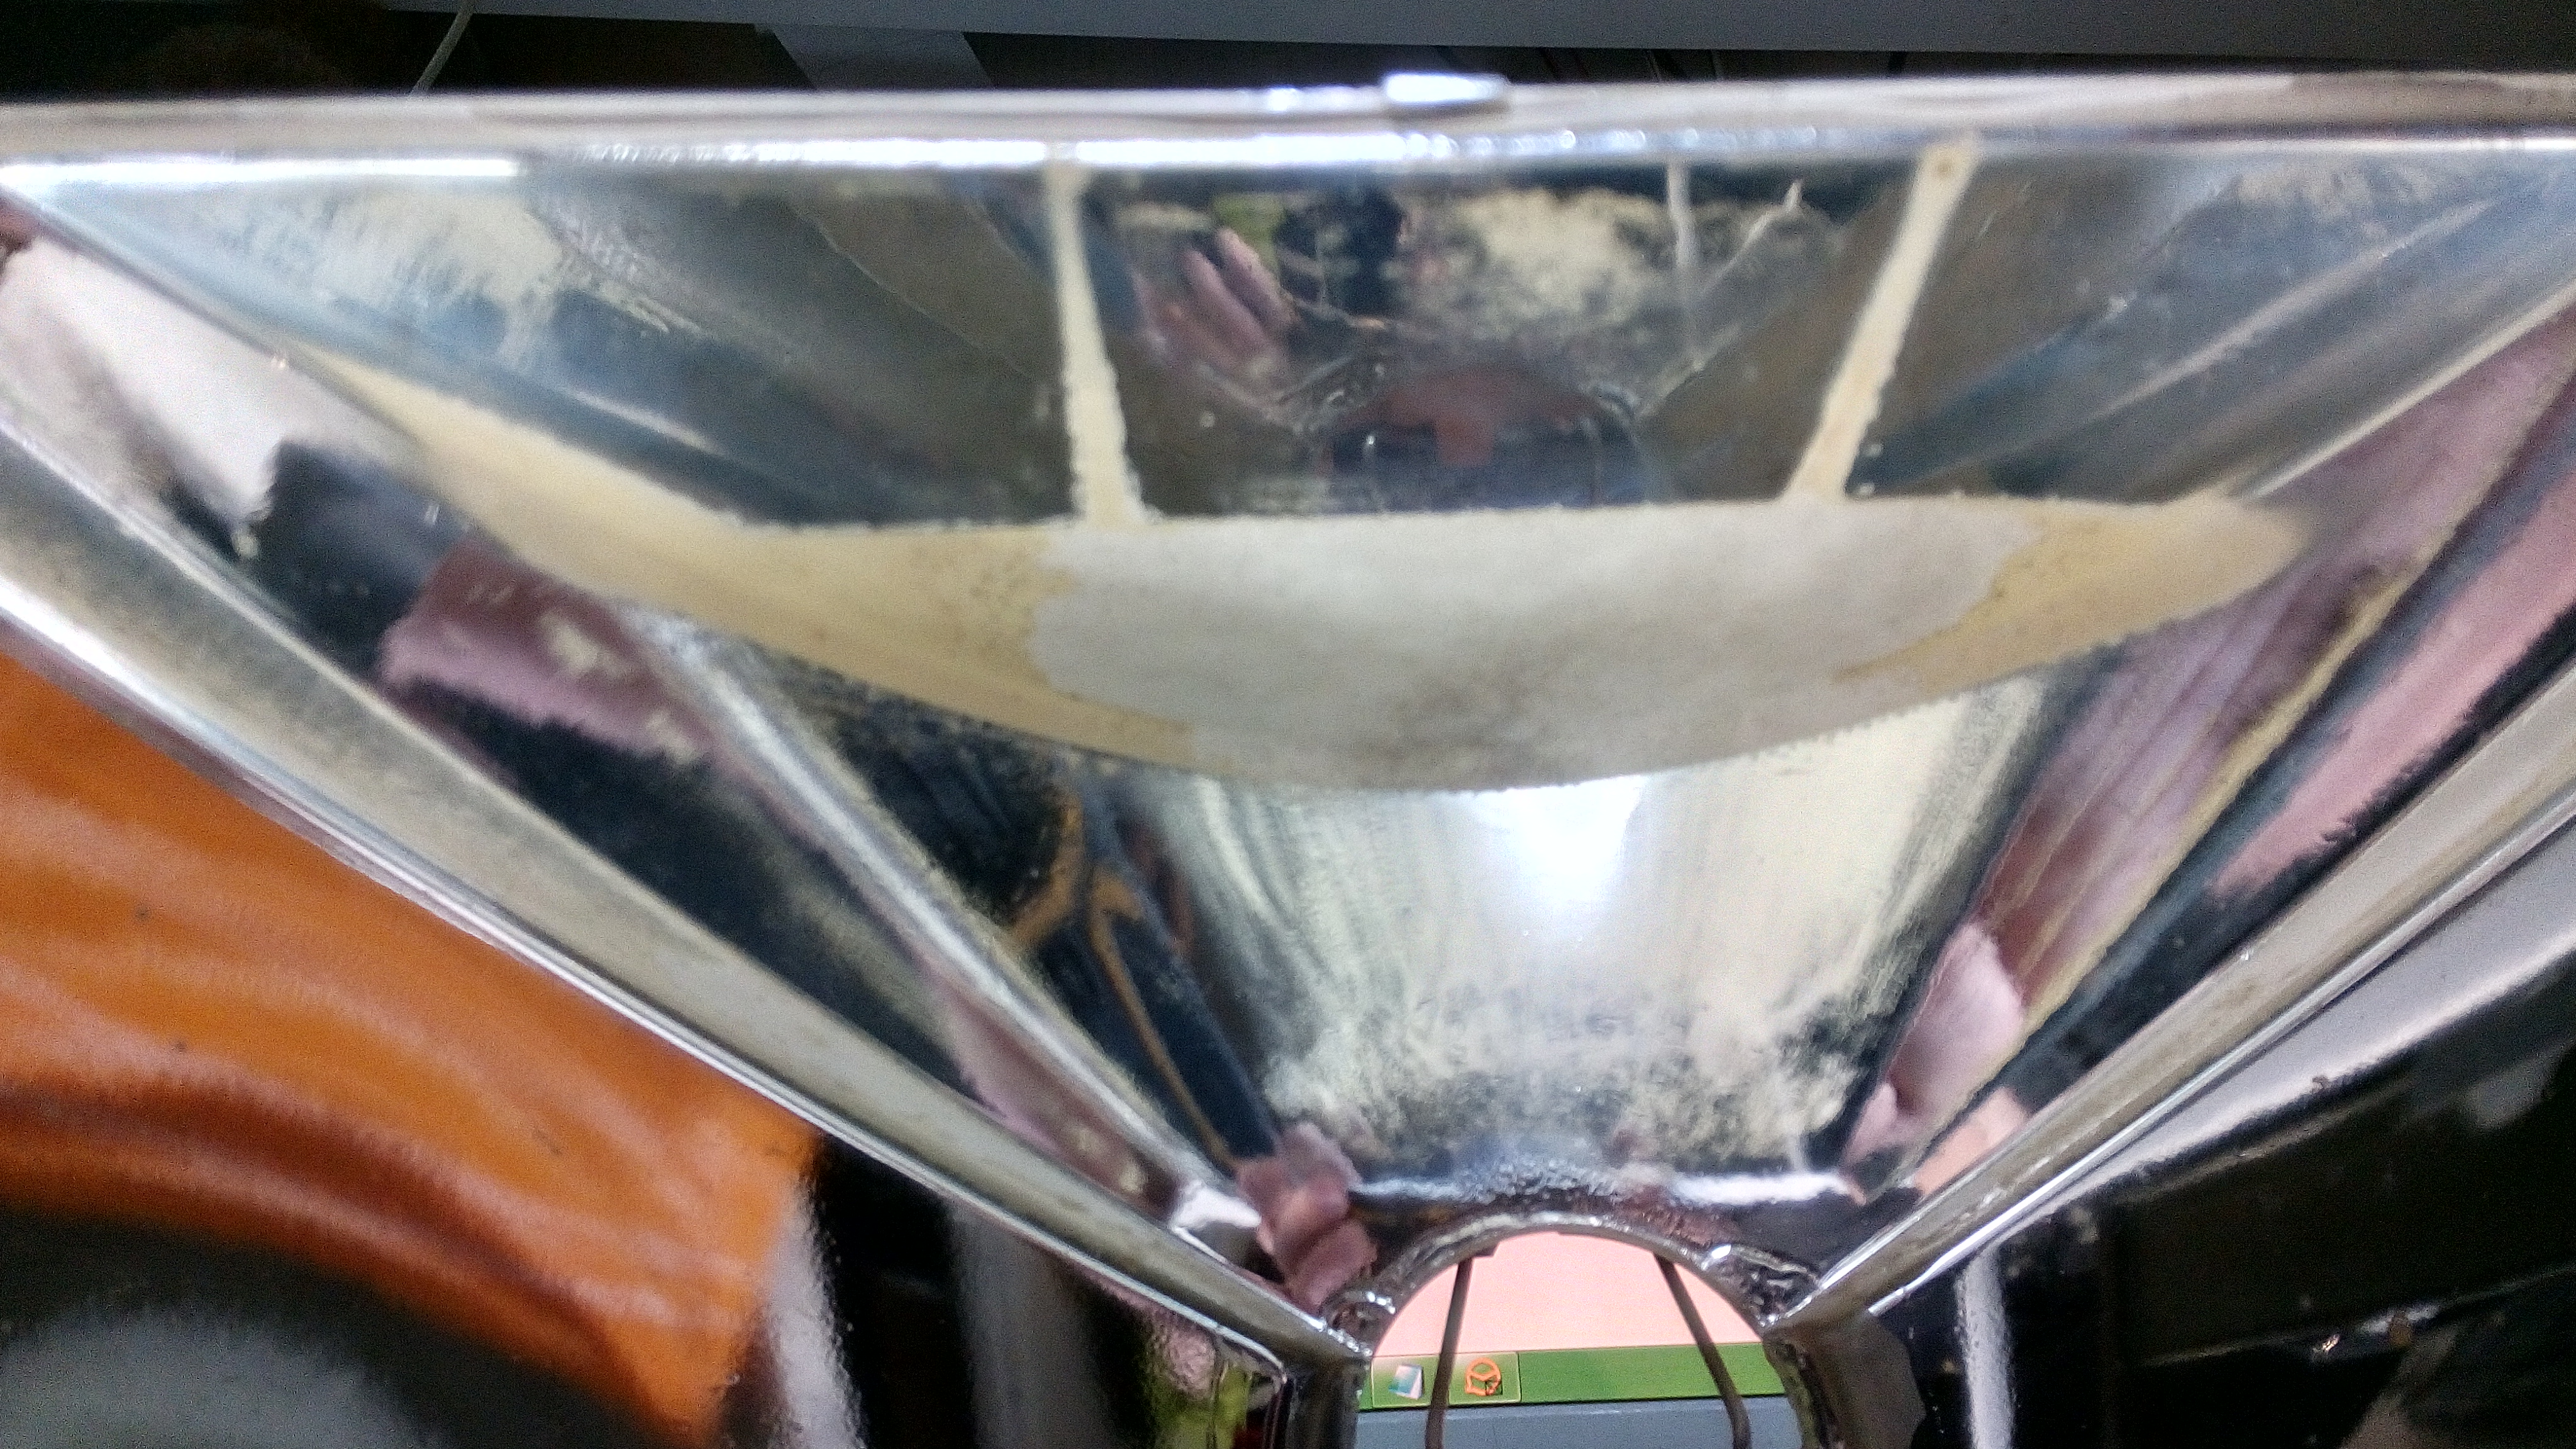
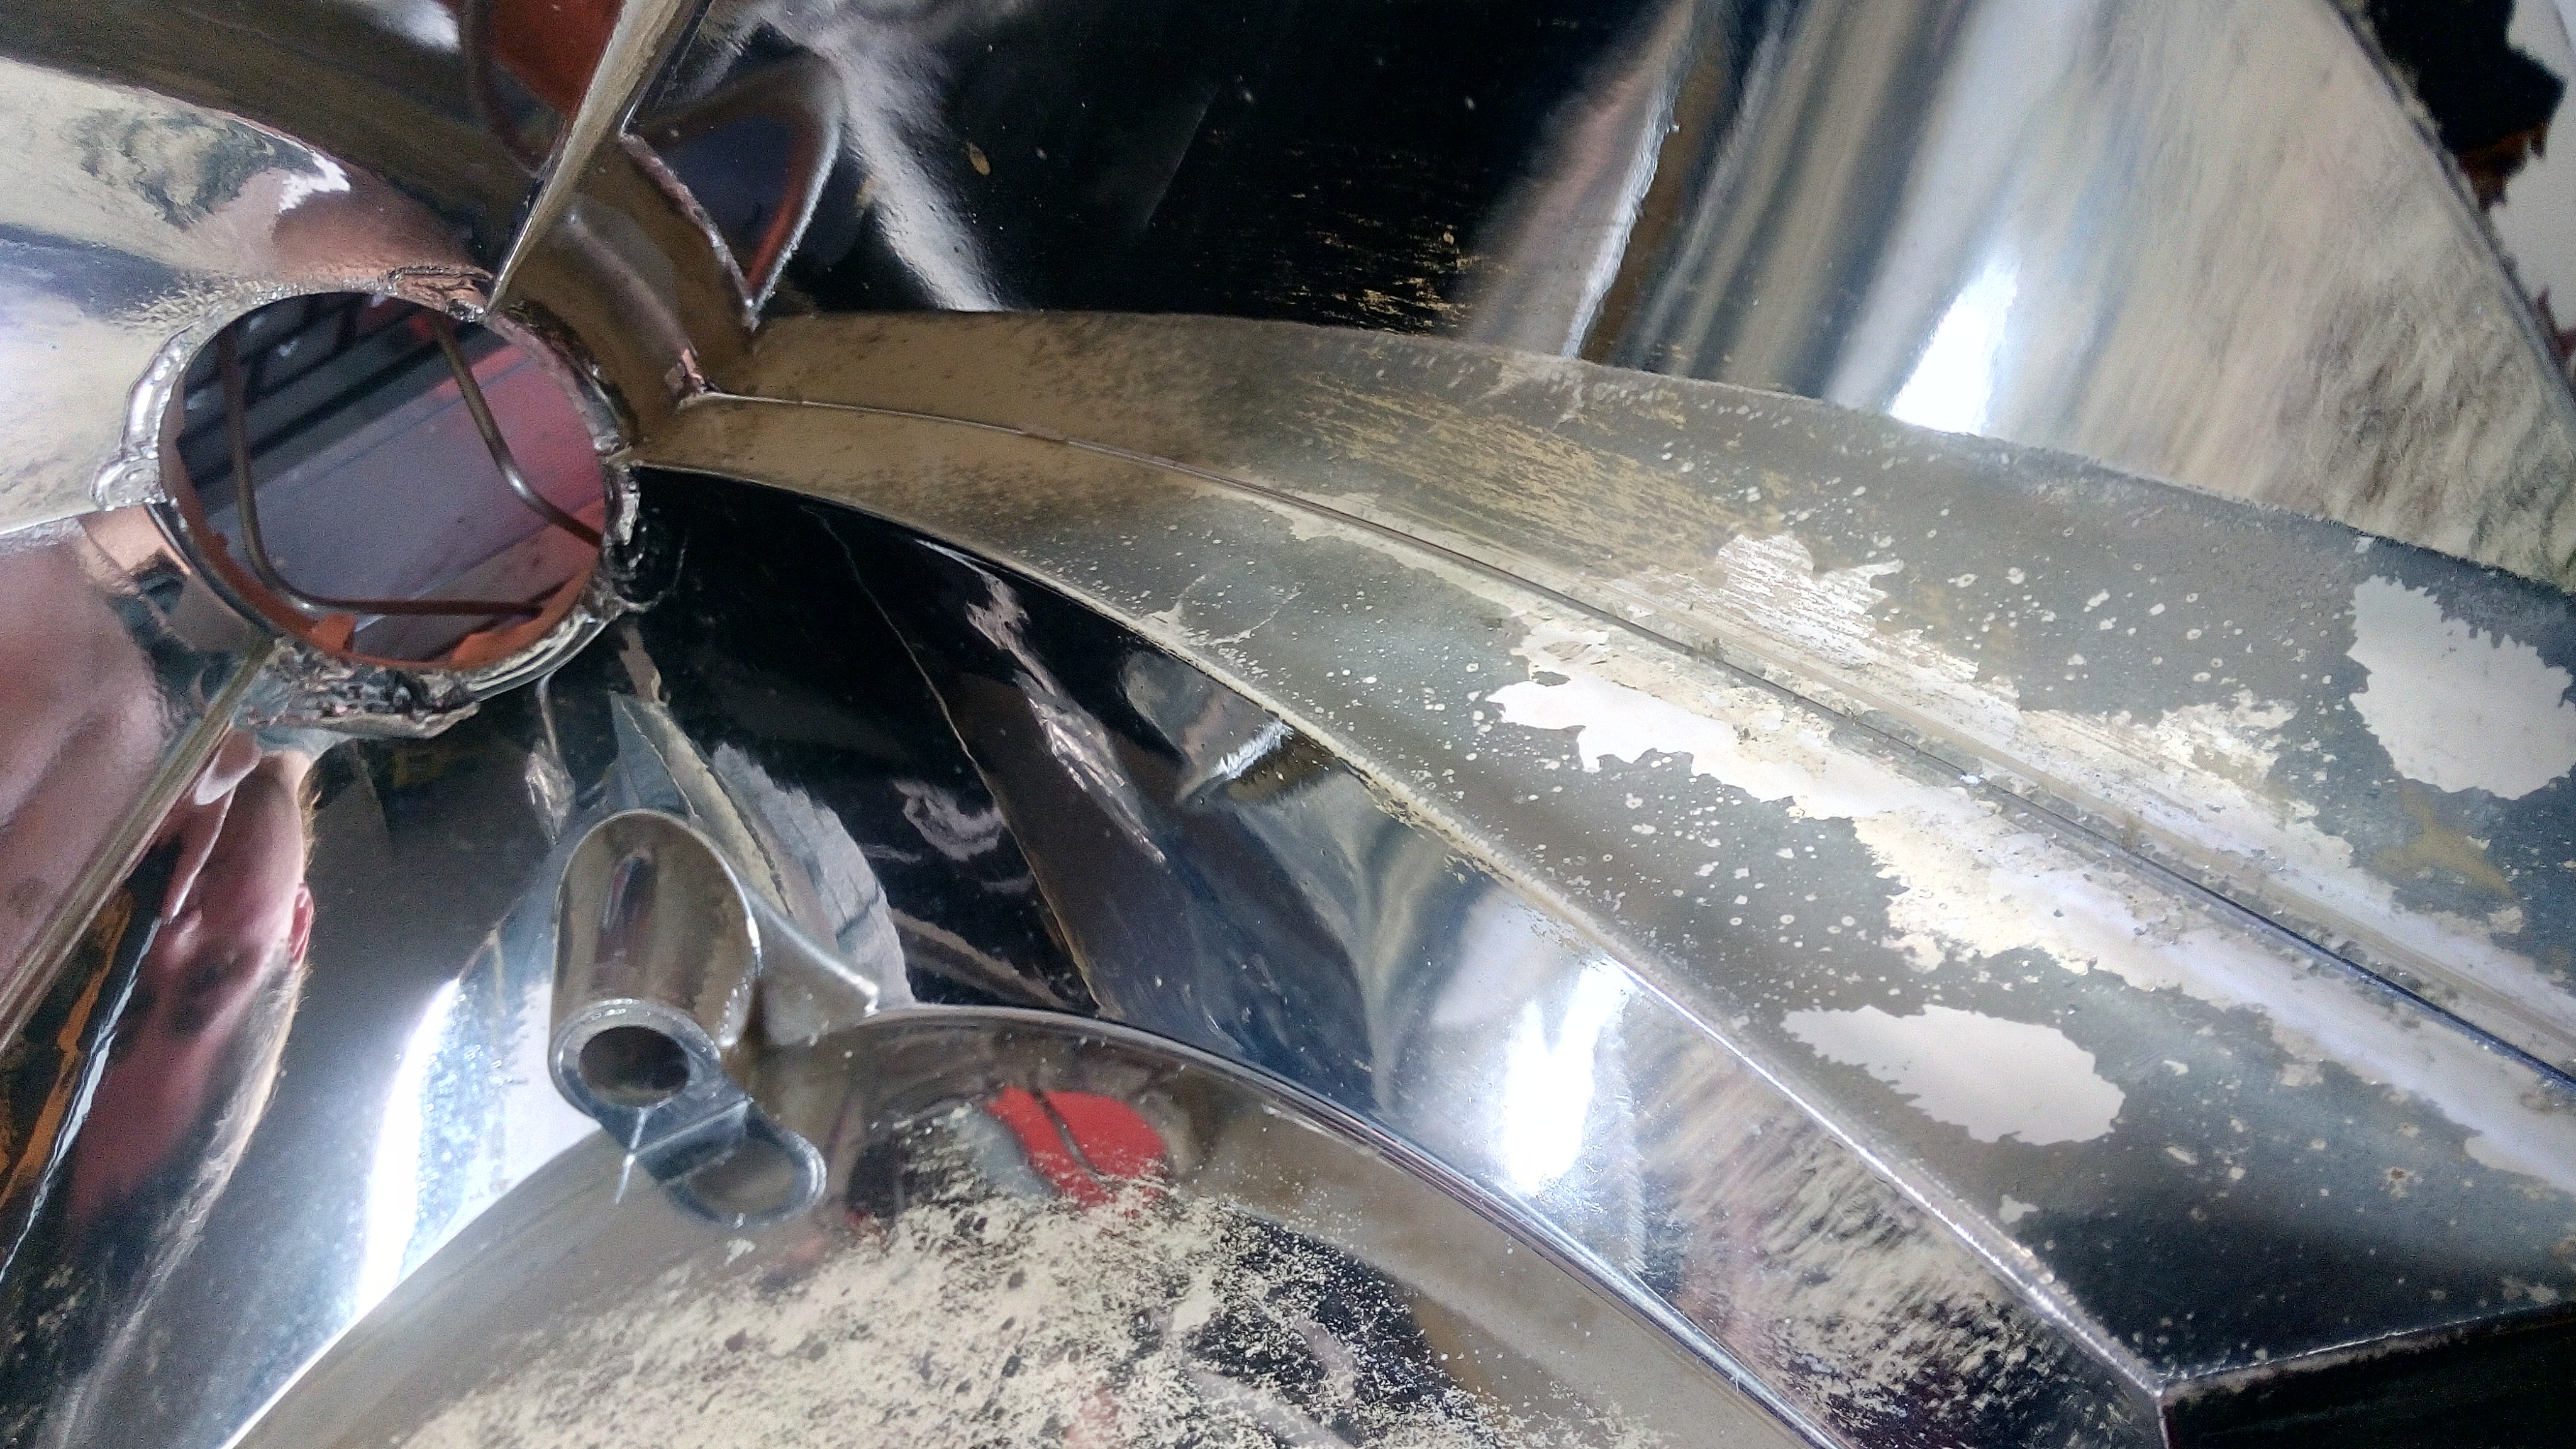
So what i am going to be doing is fitting some bi-xenon projector lenses. bi-xenon meaning they do both high and low beam.
the hard part will be getting a small "window" ground into the original headlamp's glass so the original markings on the head lamp wont affect the cut offs of the projector lens.
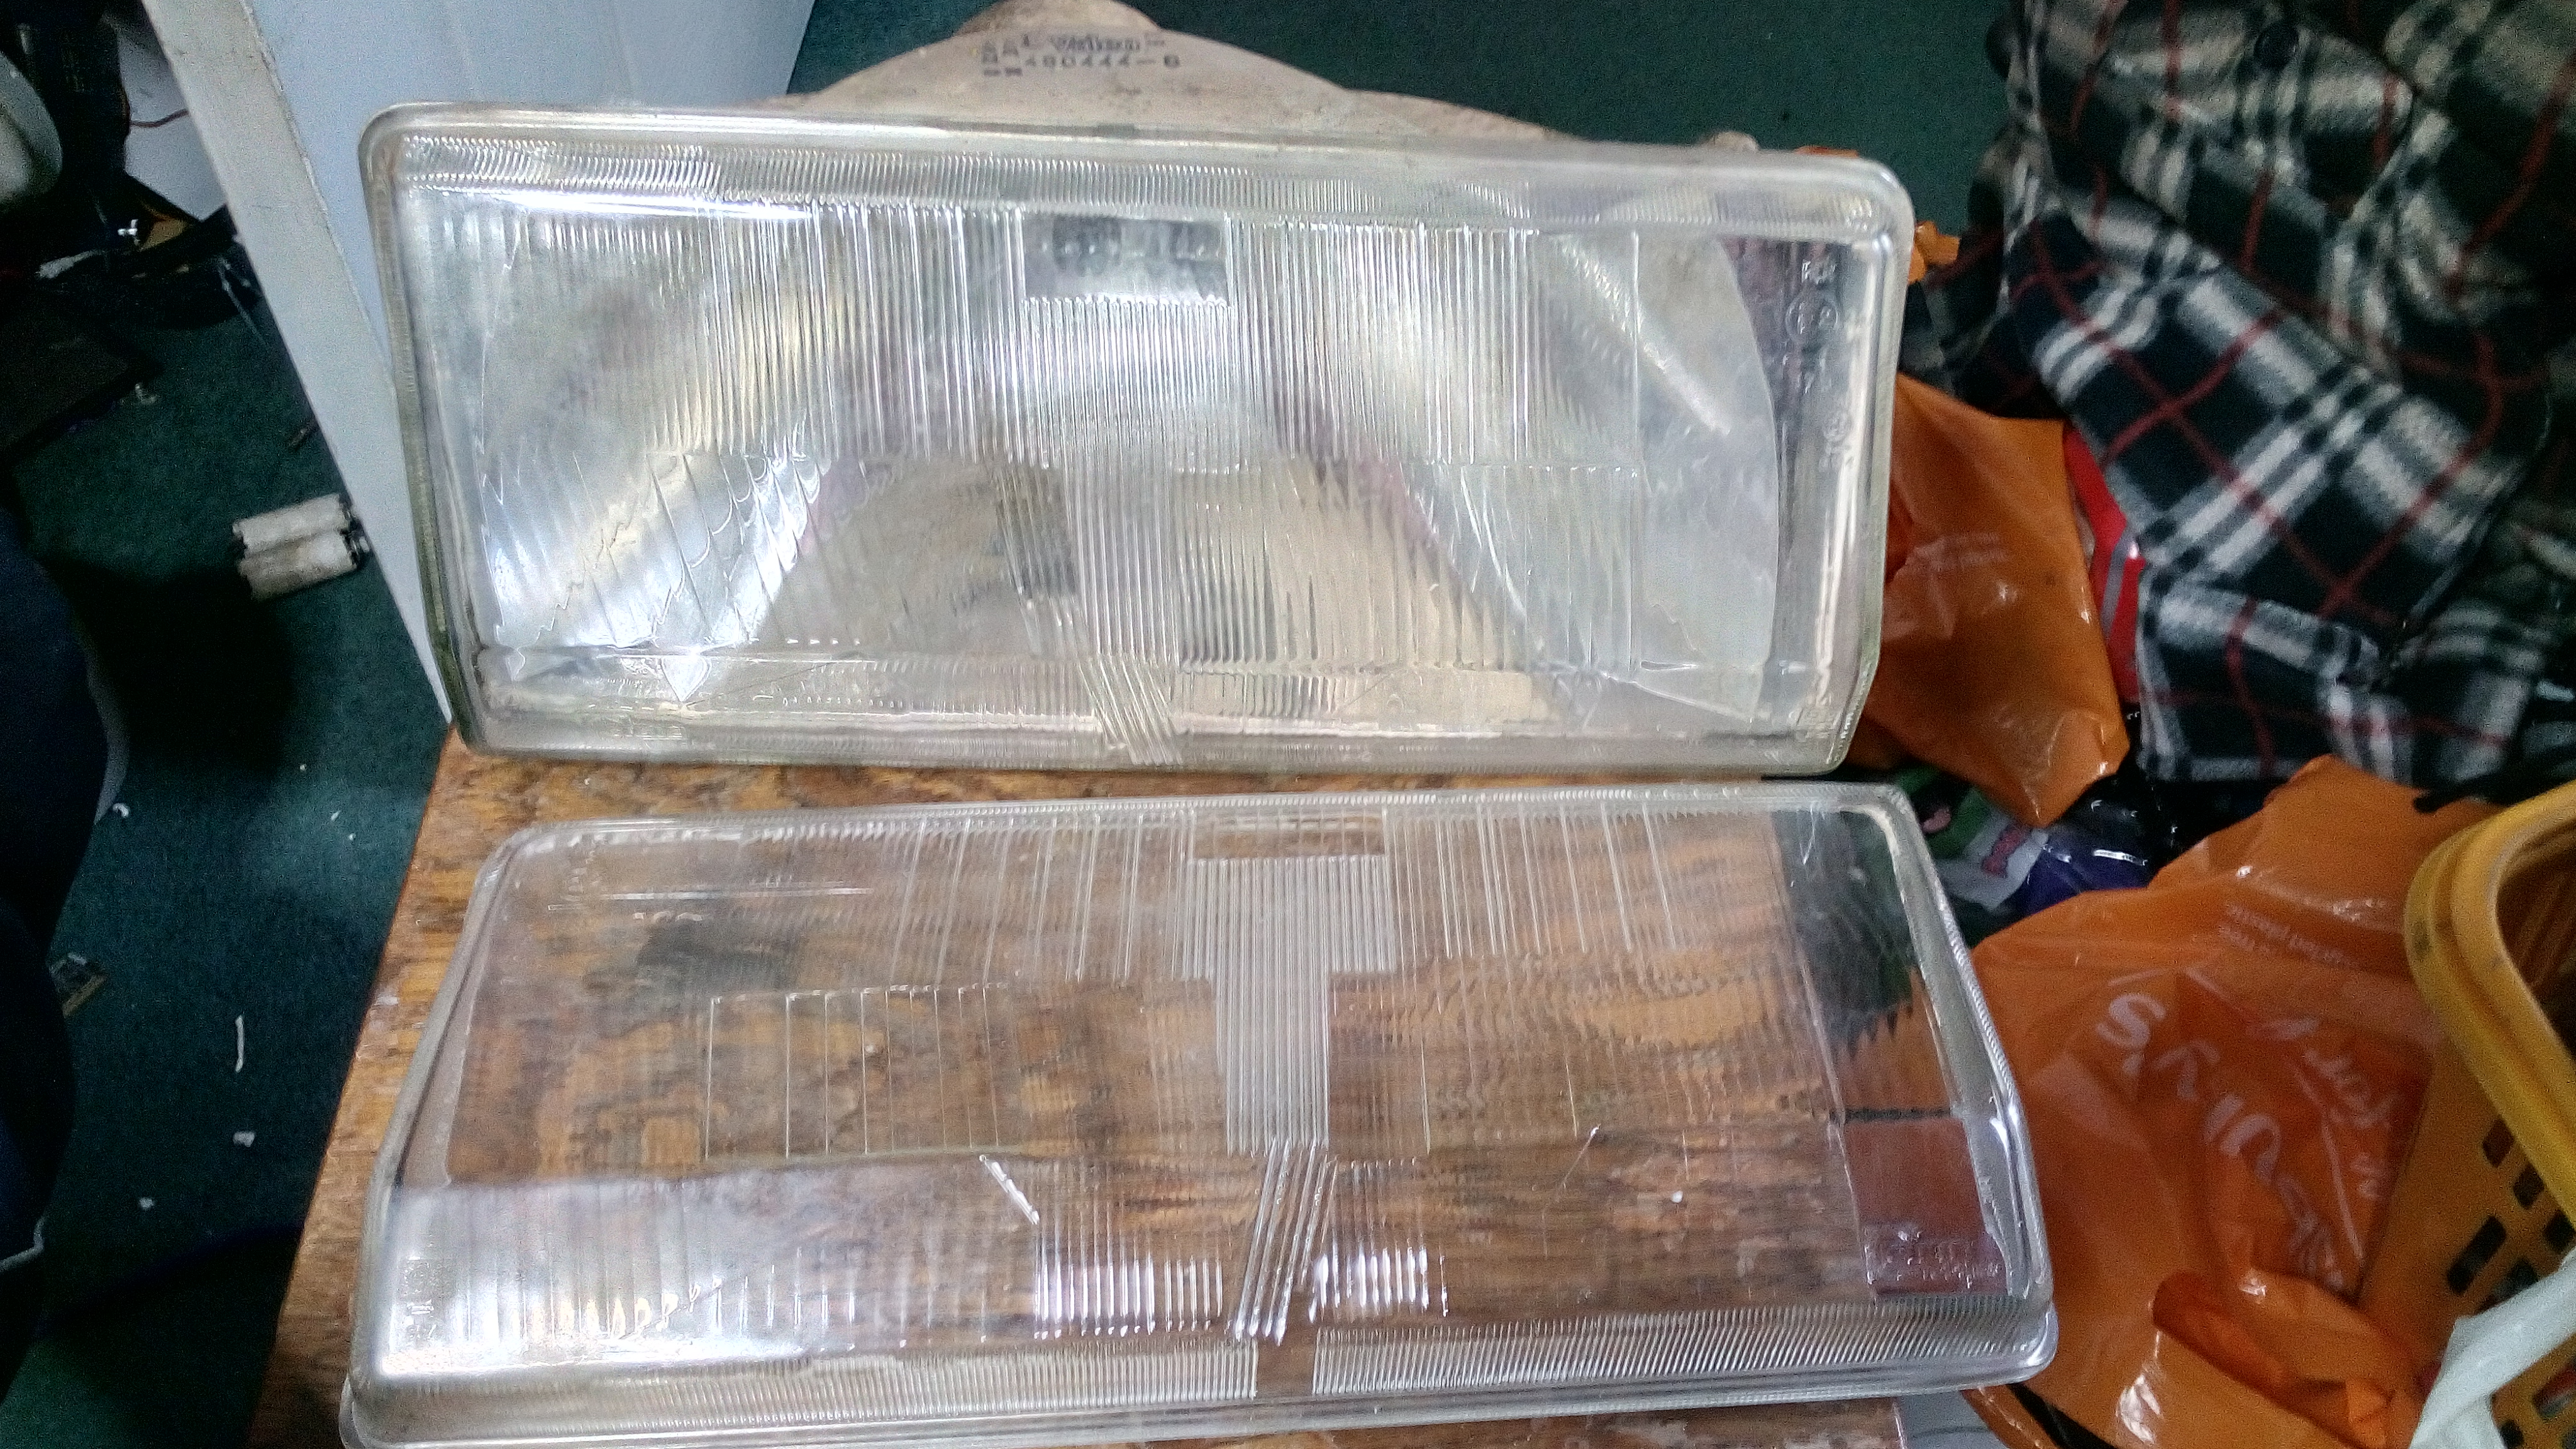
the aim is to make the headlamps look as if the car does not have them. besides the small circular shaped window in the centre of the head lamps, they should be unnoticeable. as far as legalities go, it does not matter what kind of headlamp produces the output light so long as it is in the correct beam pattern and level with good cut offs.
actually, does anyone have any left hand drive headlamps? or just the glass from out of them? i'd rather damage some left hand drive lamps than the more rare right hand drive lamps.
its a tough thing, once you go projector lense you never really want to go back. i only use 55w halogen H1 bulbs in project fallout but the beam and cut off compared to the original lamps are worlds apart.
Project Fallout:

(yes this is the car i drive at the moment, never had any issues with the police or MOTs. thats me the guy in black.)
when my brother swapped his halogen bulbs out for LED, the result was galaxies apart with a much tighter beam cut off. that was on a modern car with factory fit projector lenses. i dont think it is something i would do however... though it would be nice if i could get some low colour temperature LED's.. say 3500 - 4000k..
i also bit the bullet and bought some steering boot gators from citroen. anyway 5 more gators later..
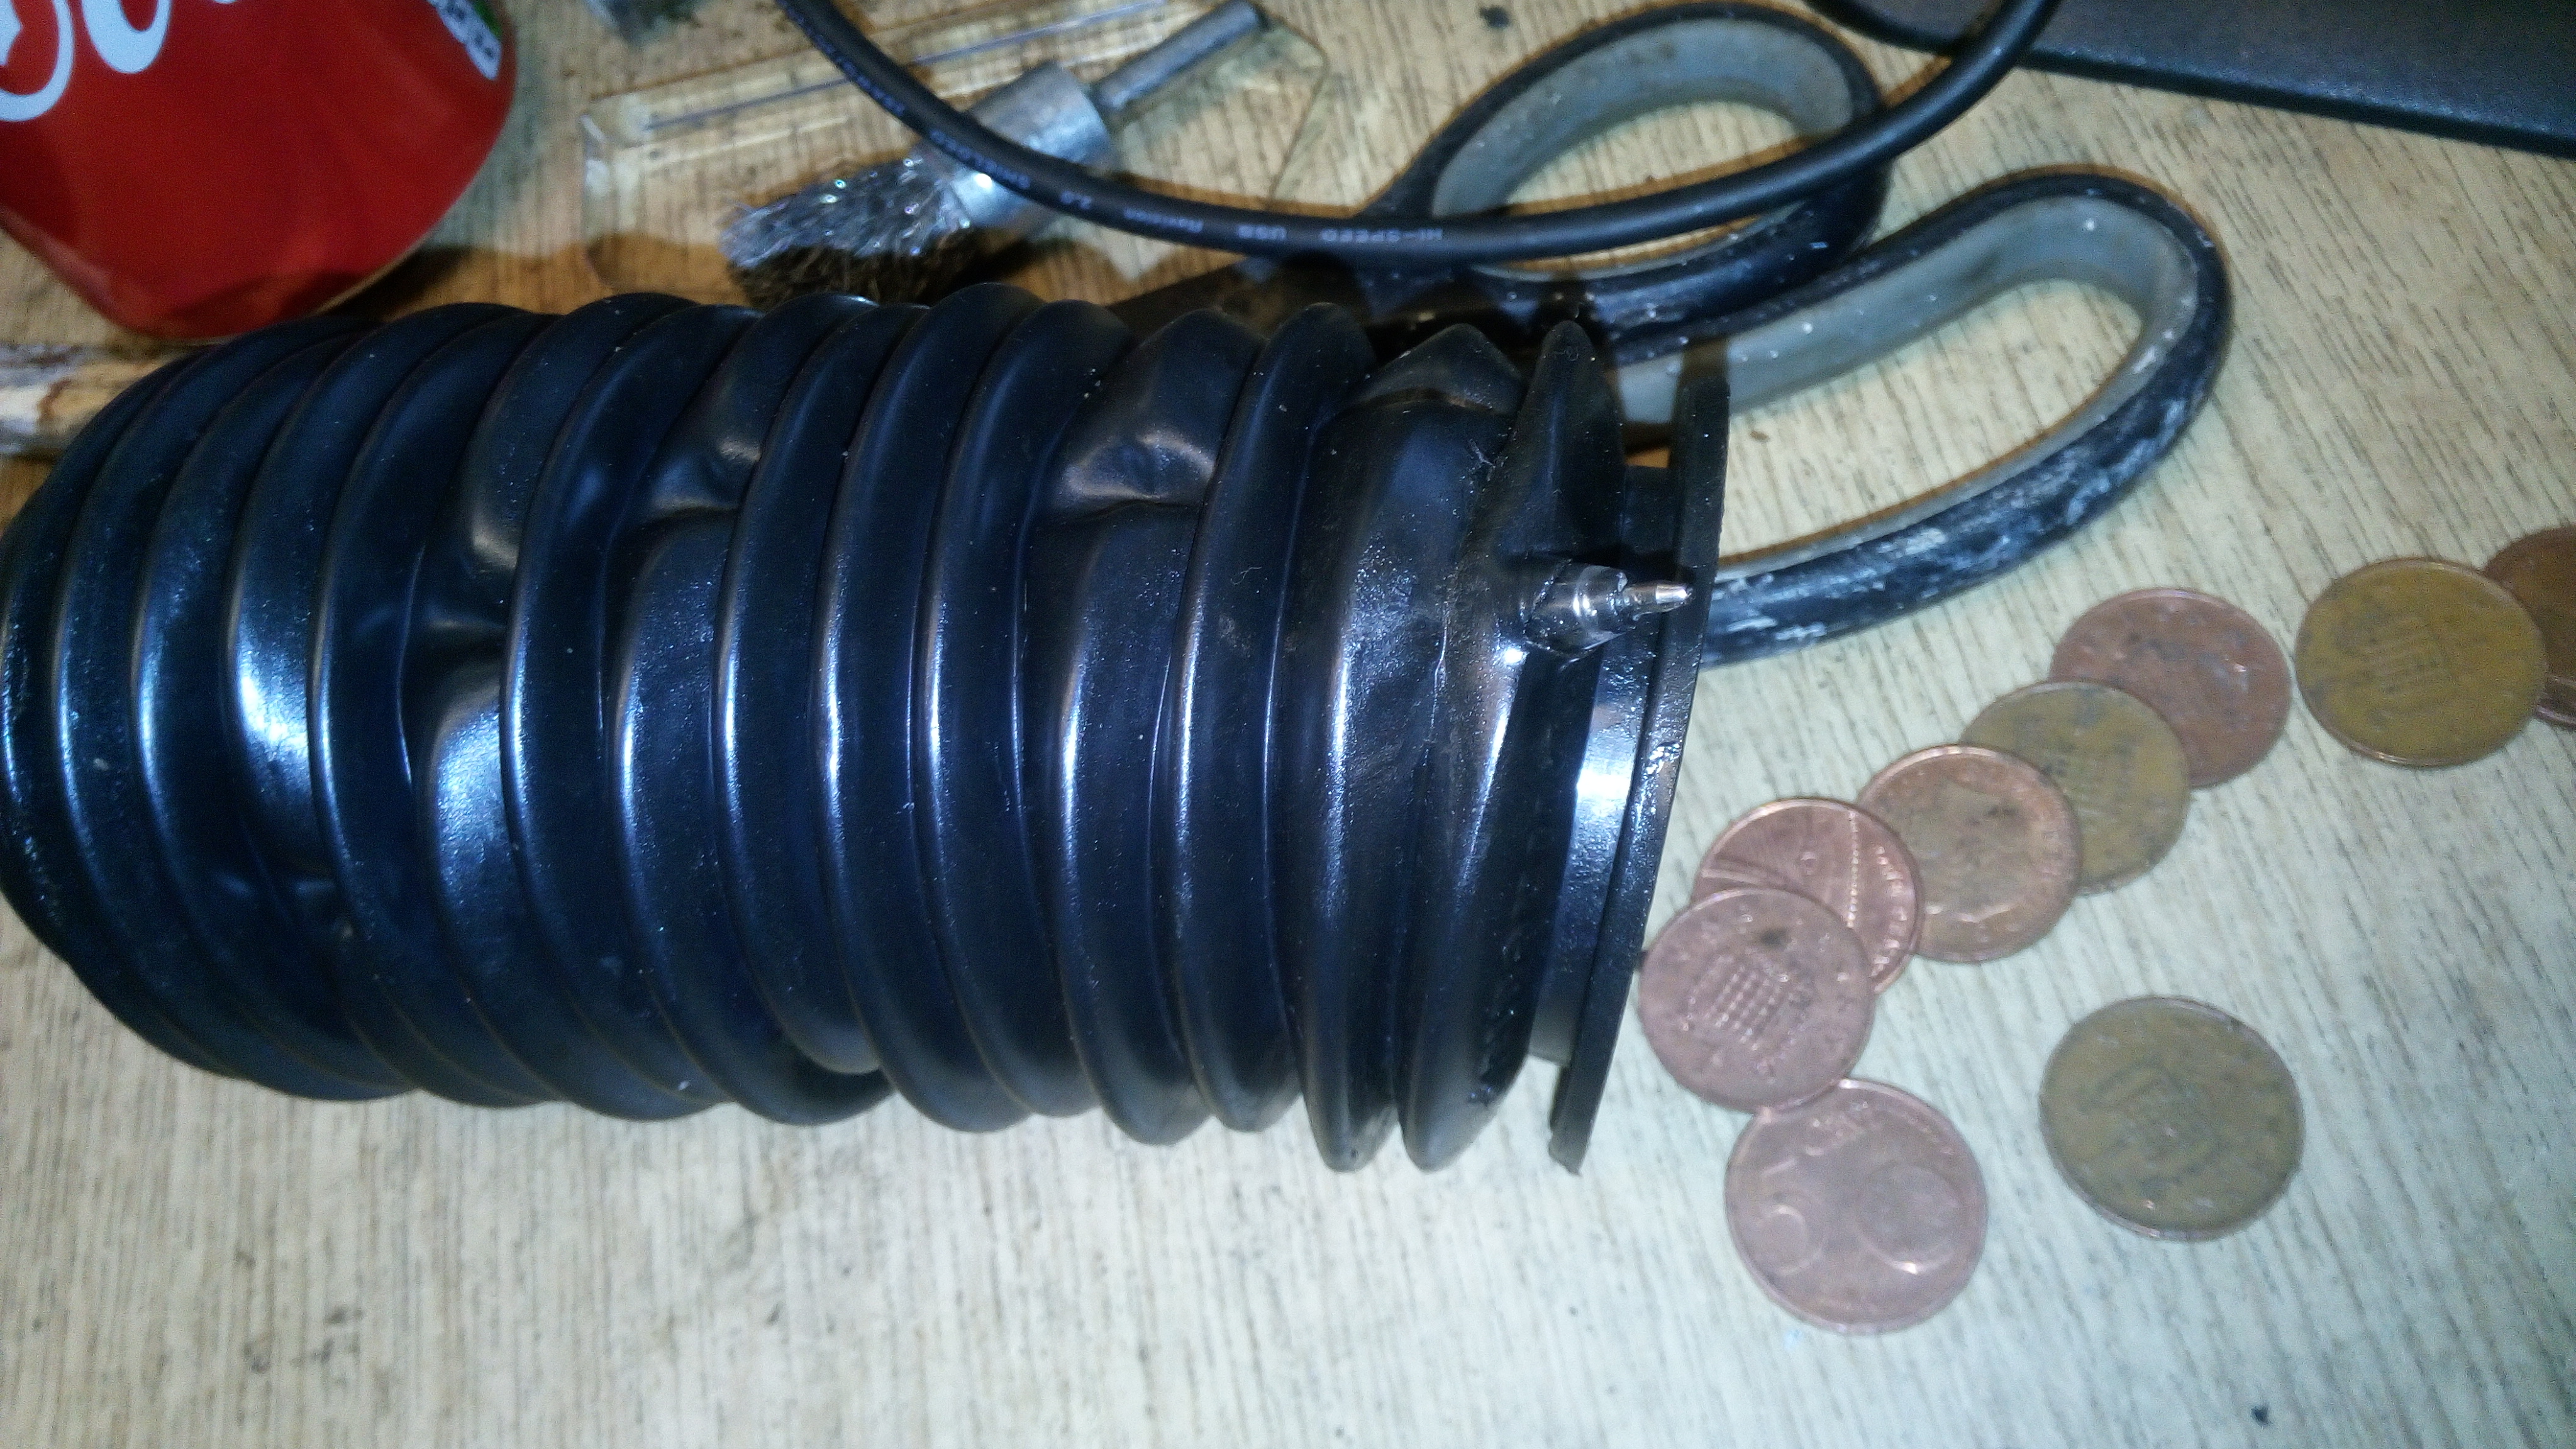
im going to on the look out for a xantia one as i have been told they will stretch over the stupid design.. i mean the steering ram connector.
i'll try and do a video at some point.. it has been a month or so since i have.


just waiting on a gasket coming from France, then it can be bolted to the engine.
this is the next task at hand.. this is the 90 degree "elbow" i had made.. which is way too big, even though i gave the dimensions i needed. so i am having this adapted at yet more cost to get it to fit right.


heres a few close ups of the head lamp reflectors:


So what i am going to be doing is fitting some bi-xenon projector lenses. bi-xenon meaning they do both high and low beam.
the hard part will be getting a small "window" ground into the original headlamp's glass so the original markings on the head lamp wont affect the cut offs of the projector lens.

the aim is to make the headlamps look as if the car does not have them. besides the small circular shaped window in the centre of the head lamps, they should be unnoticeable. as far as legalities go, it does not matter what kind of headlamp produces the output light so long as it is in the correct beam pattern and level with good cut offs.
actually, does anyone have any left hand drive headlamps? or just the glass from out of them? i'd rather damage some left hand drive lamps than the more rare right hand drive lamps.
its a tough thing, once you go projector lense you never really want to go back. i only use 55w halogen H1 bulbs in project fallout but the beam and cut off compared to the original lamps are worlds apart.
Project Fallout:

(yes this is the car i drive at the moment, never had any issues with the police or MOTs. thats me the guy in black.)
when my brother swapped his halogen bulbs out for LED, the result was galaxies apart with a much tighter beam cut off. that was on a modern car with factory fit projector lenses. i dont think it is something i would do however... though it would be nice if i could get some low colour temperature LED's.. say 3500 - 4000k..
i also bit the bullet and bought some steering boot gators from citroen. anyway 5 more gators later..

im going to on the look out for a xantia one as i have been told they will stretch over the stupid design.. i mean the steering ram connector.
i'll try and do a video at some point.. it has been a month or so since i have.
- JohnDragonMan
Drives: Citroen Dispatch with retrofitted air conditioning
Classic Fiat Panda 4x4 Sisley named Talon (long term storage)
always buy base spec. that way you have the fun of putting all the cool bit on your vehicle
Drives: Citroen Dispatch with retrofitted air conditioning
Classic Fiat Panda 4x4 Sisley named Talon (long term storage)
always buy base spec. that way you have the fun of putting all the cool bit on your vehicle
- Dragon Man
- BXpert
- Posts: 187
- Joined: Sat Aug 22, 2015 3:45 am
- Location: The East Midlands, Derby
- My Cars: Citroen Dispatch 2.0L HDi 2005
Fiat Panda 4x4 Sisley 1991 - x 6
- Contact:
Re: John Dragon Man's Citroen BX Diesel Estate
sadly no video yet but i have built the engine up enough to actually beed diesel right the way through to the injectors and into the cylinders.
engine is filled with oil, turbo is bolted to the back as are its oil feed and return (but not hooked up to the intake manifold yet).
i sadly ran out of time (and batteries) to get it fully running. i managed to get white smoke from the exhaust so glow plugs and a good battery should get the thing running.
now i have no coolant as the engine is still out of the car so it would only be a test fire.
i am not convinced that the injection pump is timed in right, on the belt it is timed up right, but i think the rotation is not good.
i have some new belts on order. i had to have the multi V belt that works the alternator and AC compressor made sadly. somehow the original belt is 10mm too long! how that happened i do not know. the original belt size is 1220mm inside measurement. strange...
one original but loose belt, note the alternator all the way out:
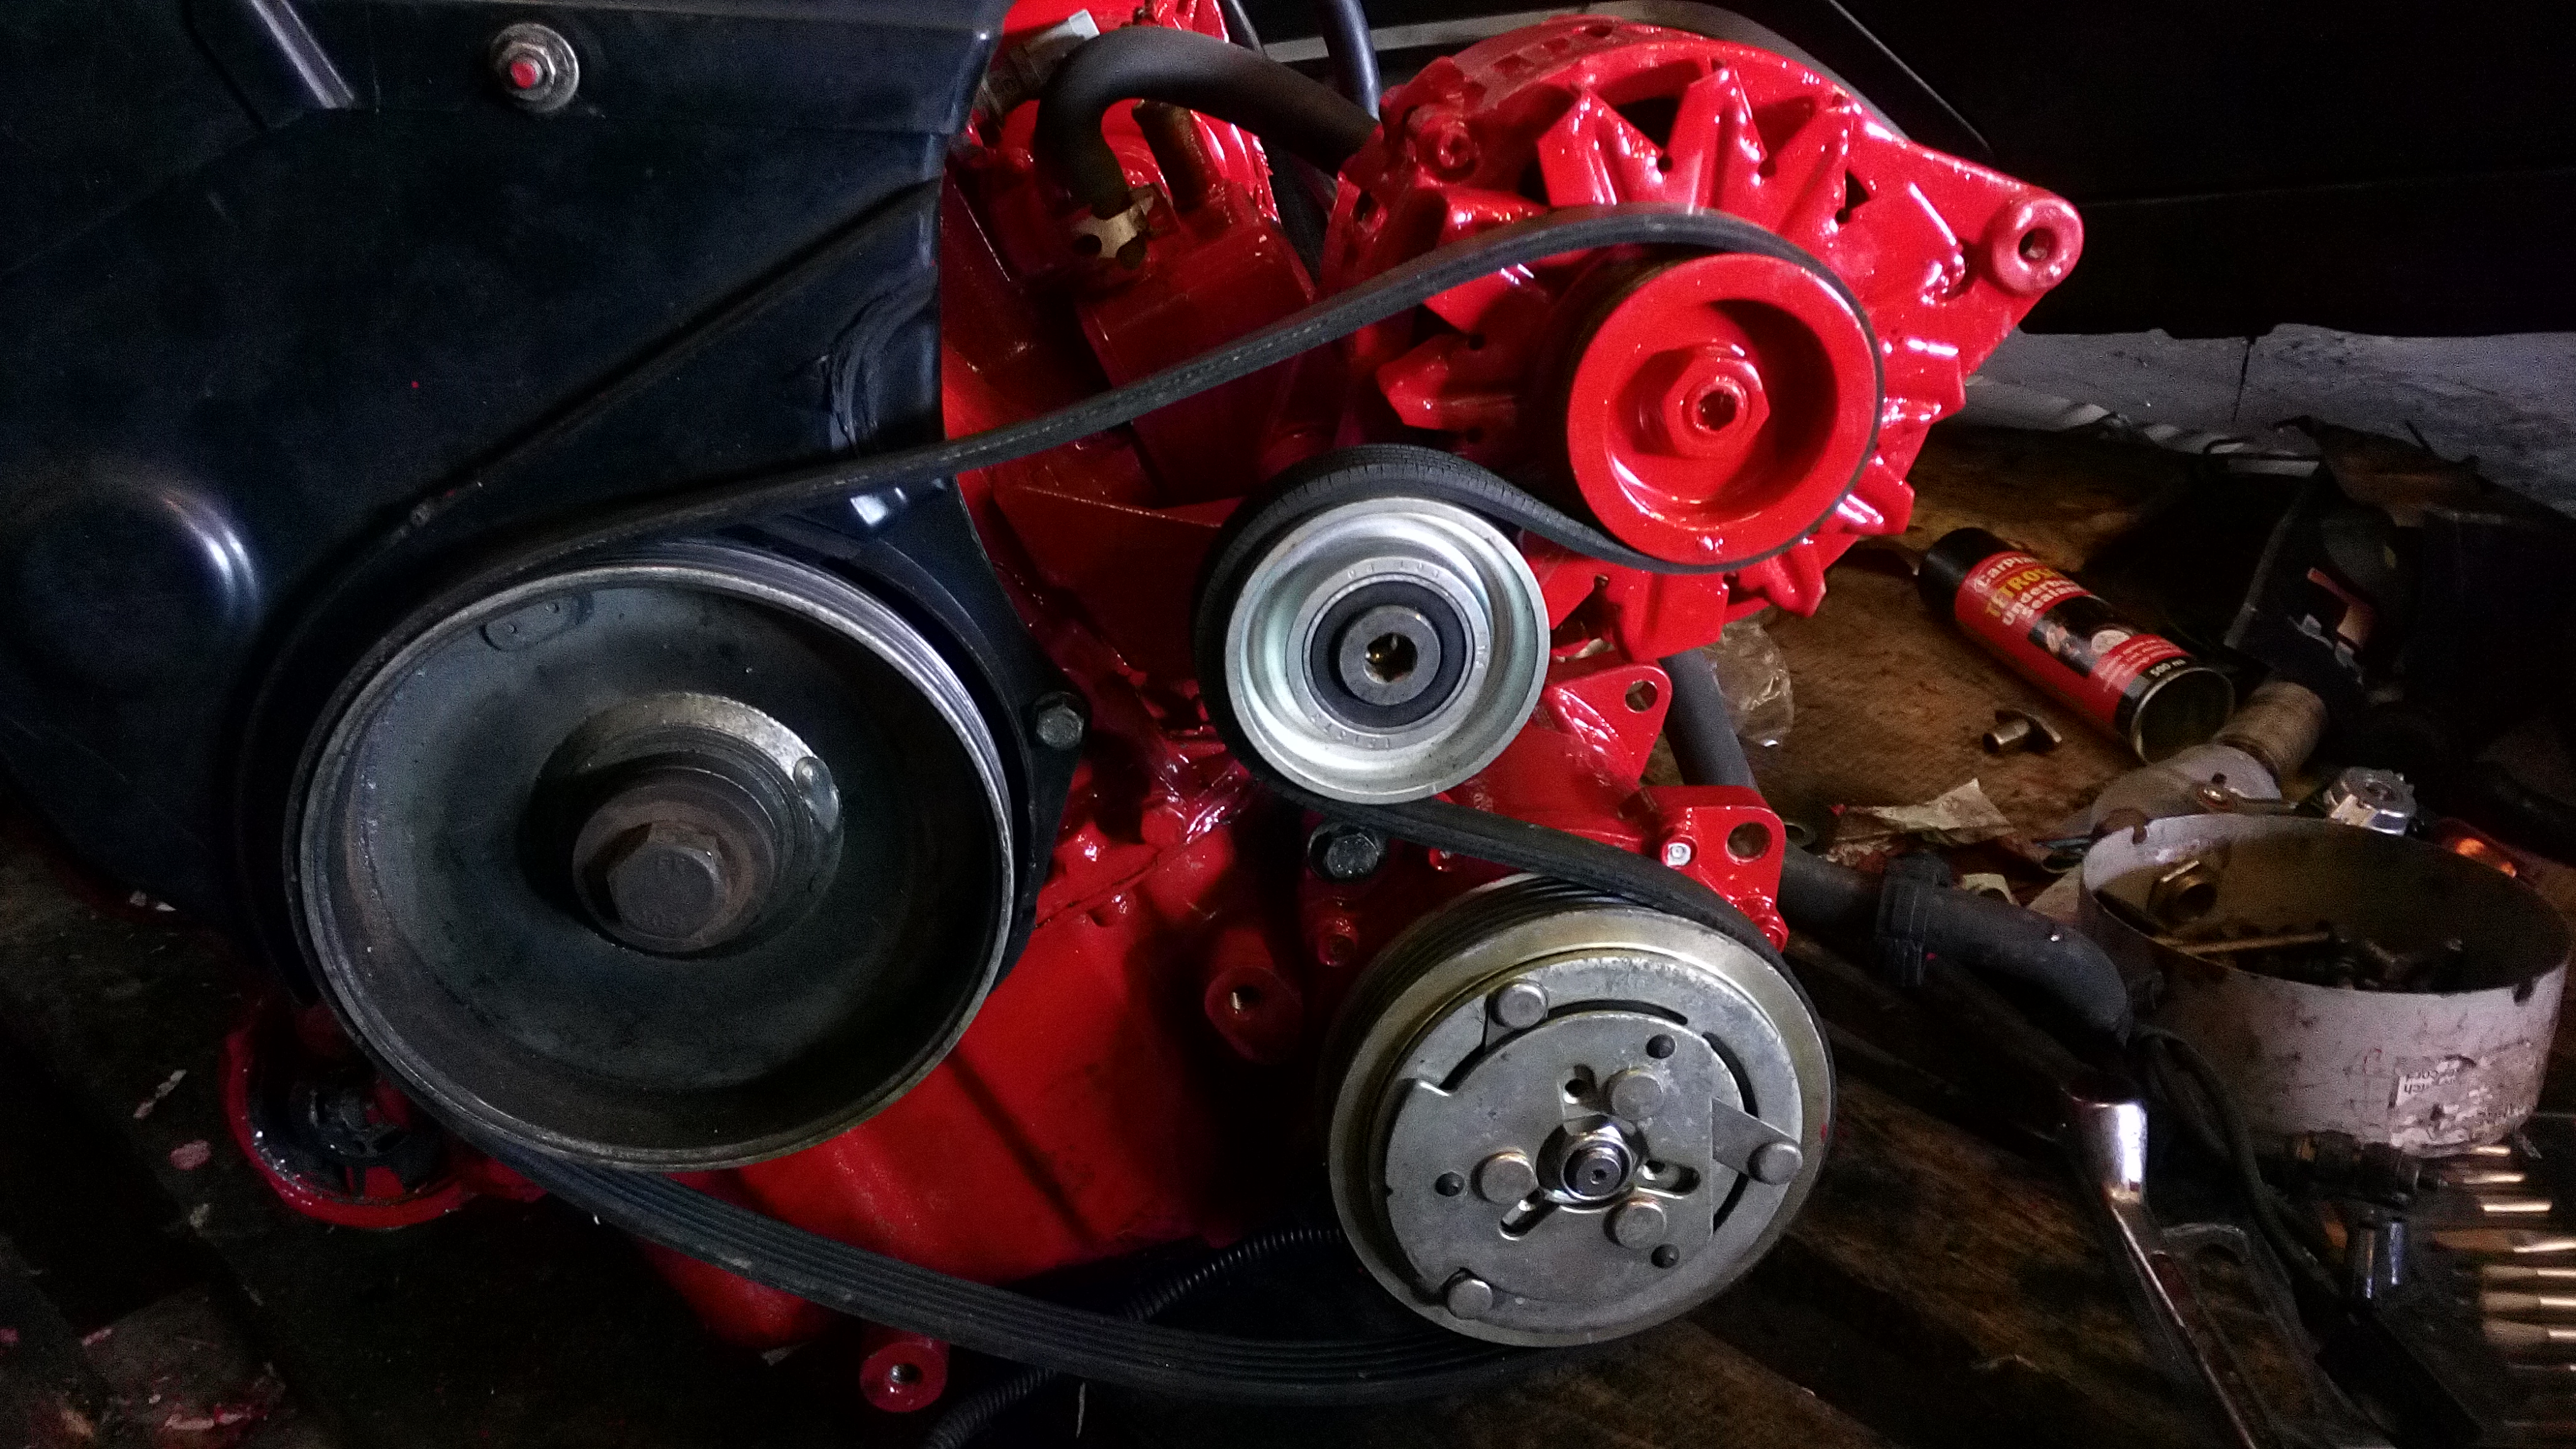
i have also replaced the pesky steering boot. it seems to work ok. xantia ones do stretch which is much better.
oh and the original 70k starter was sized solid.. so the one that was on the replacement engine has temporarily gone on while i strip it down and grease it all up.
i need to find a electric vacuum pump to work the turbos actuator. some diesel VW/Audi/Volvos have them just got to wait for a car to come in as scrap that has one on.. lately we have been getting loads of jags in!. i have a nice electronic turbo pressure controller that i will use. now given the engine is a bit old i am not going to go over the top running pressure. i think the engine only runs 6PSI standard.. so i'll up it to about 12 psi. im not after huge gains, just enough to to keep up with modern traffic.
i also got my projector lenses through the post. look at that beam cut off..
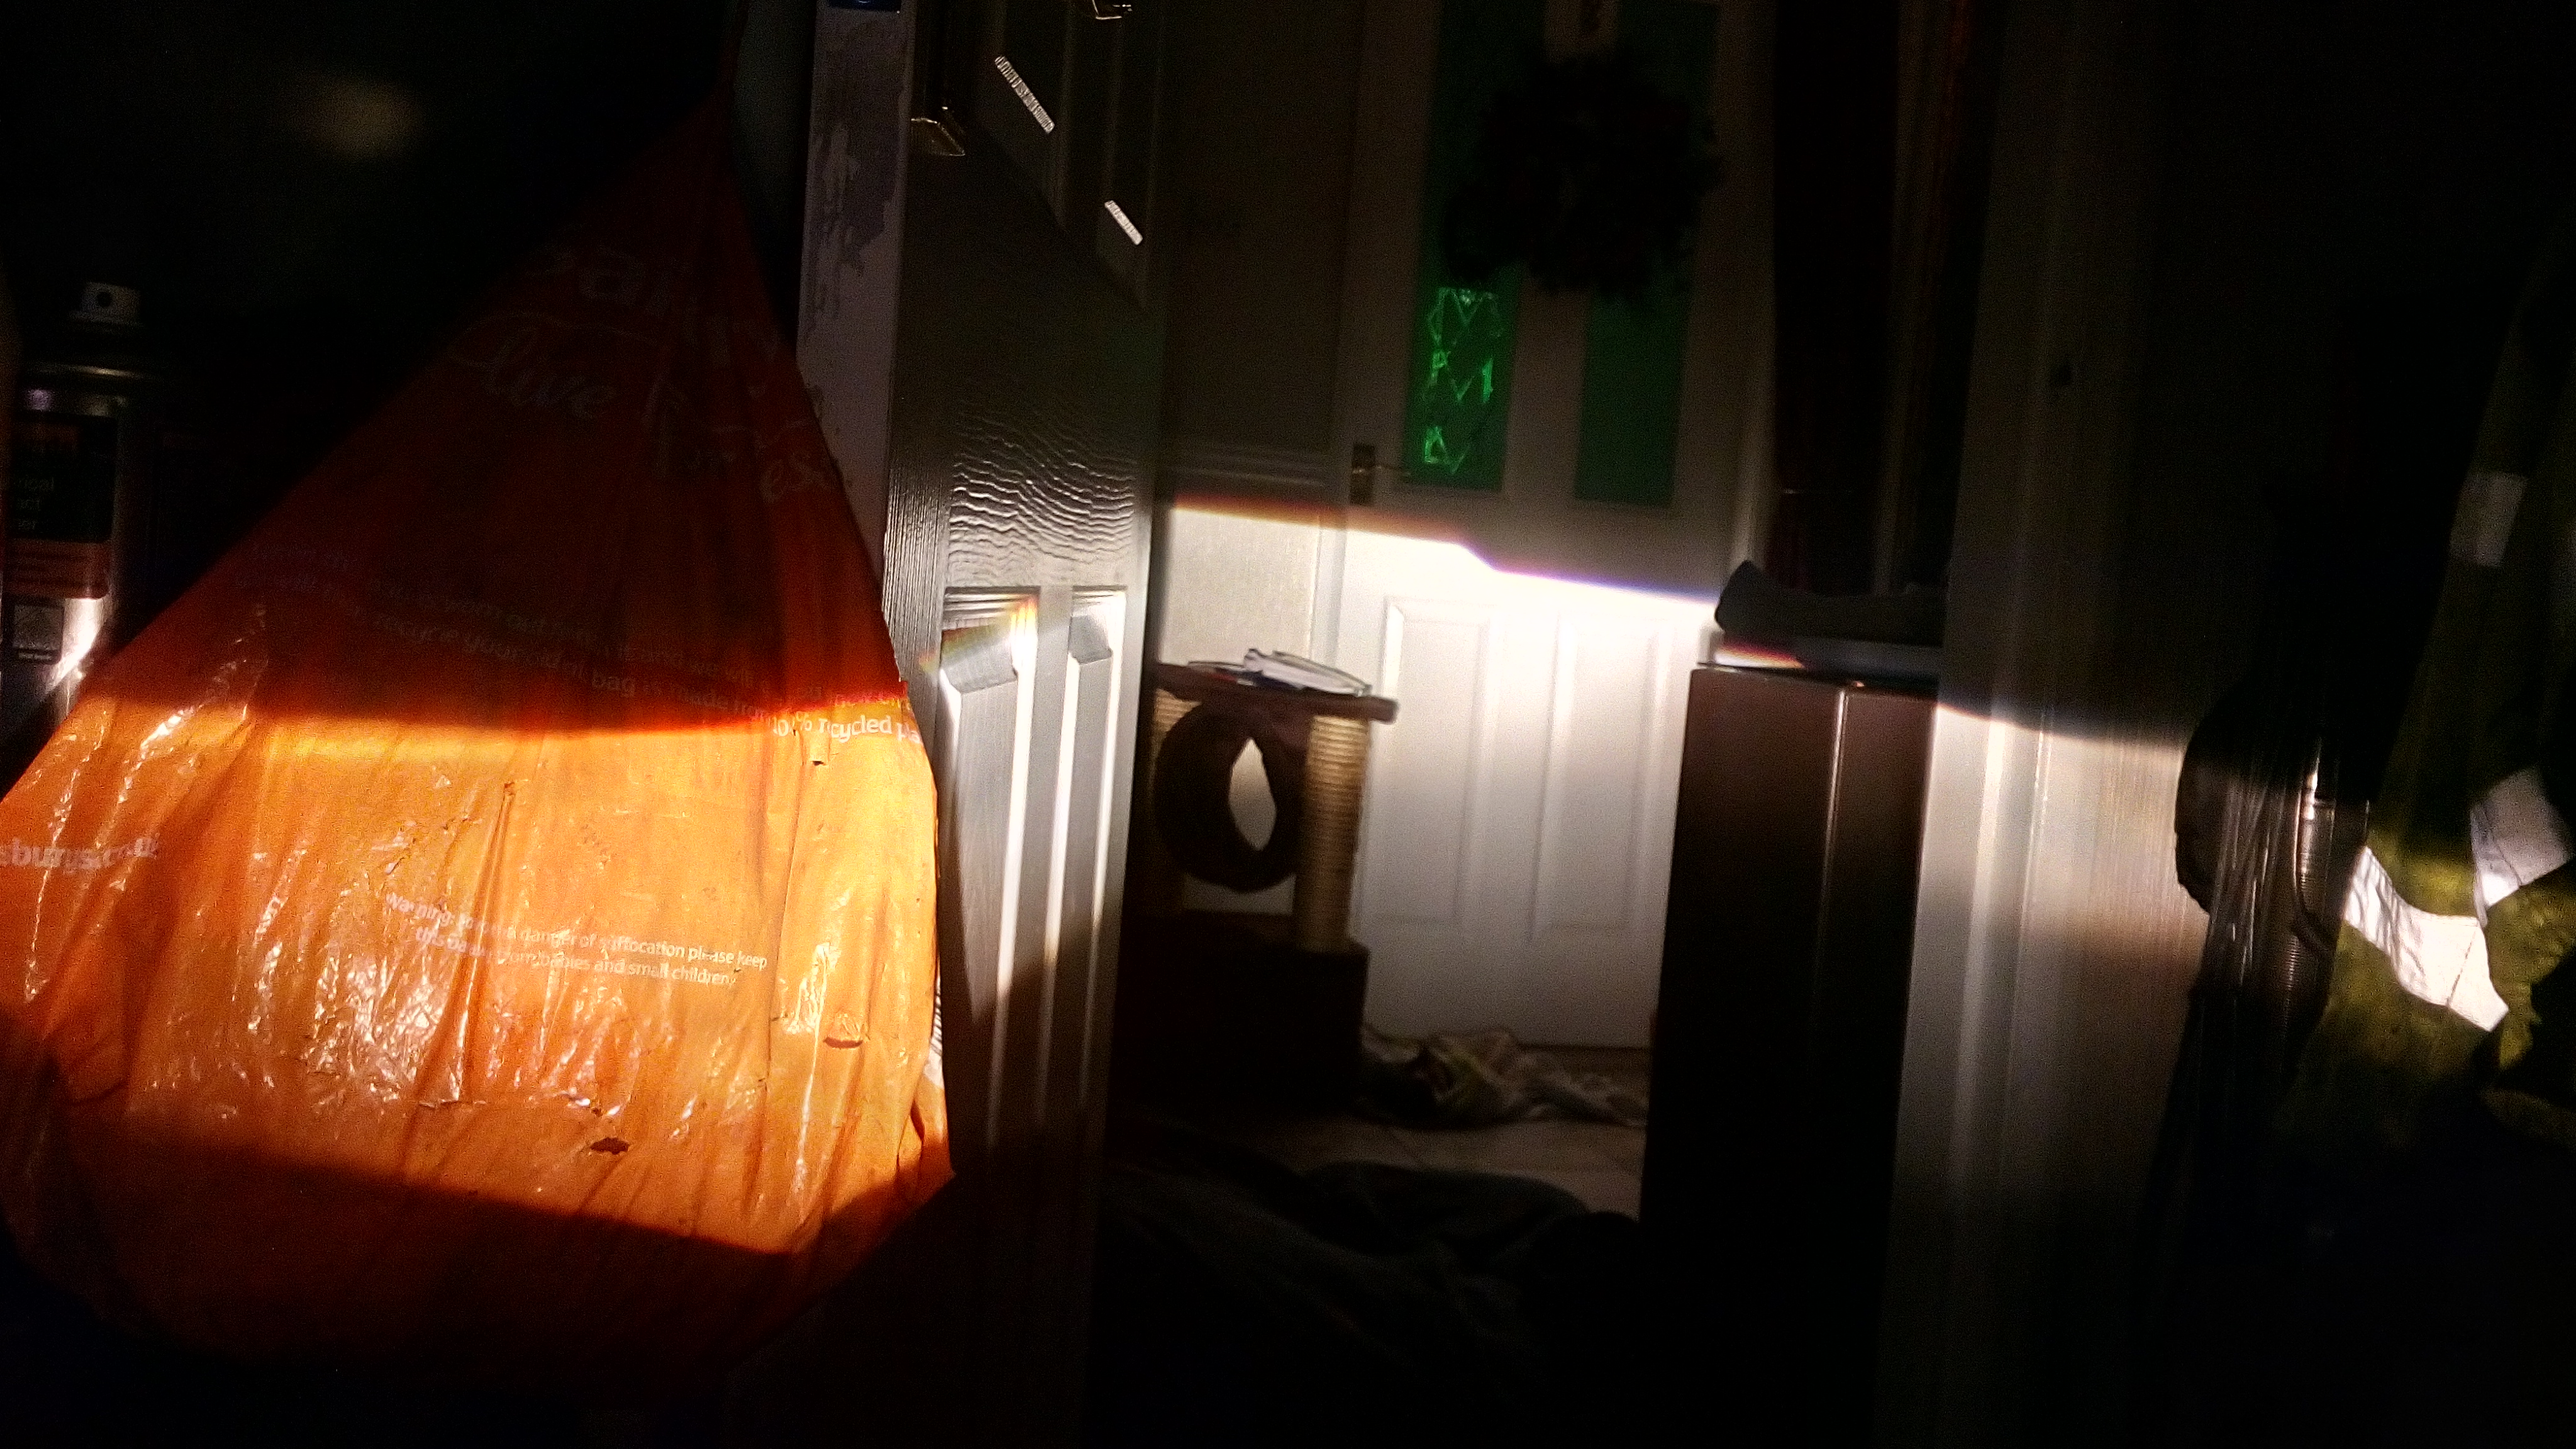
ok.. how about the high beam...
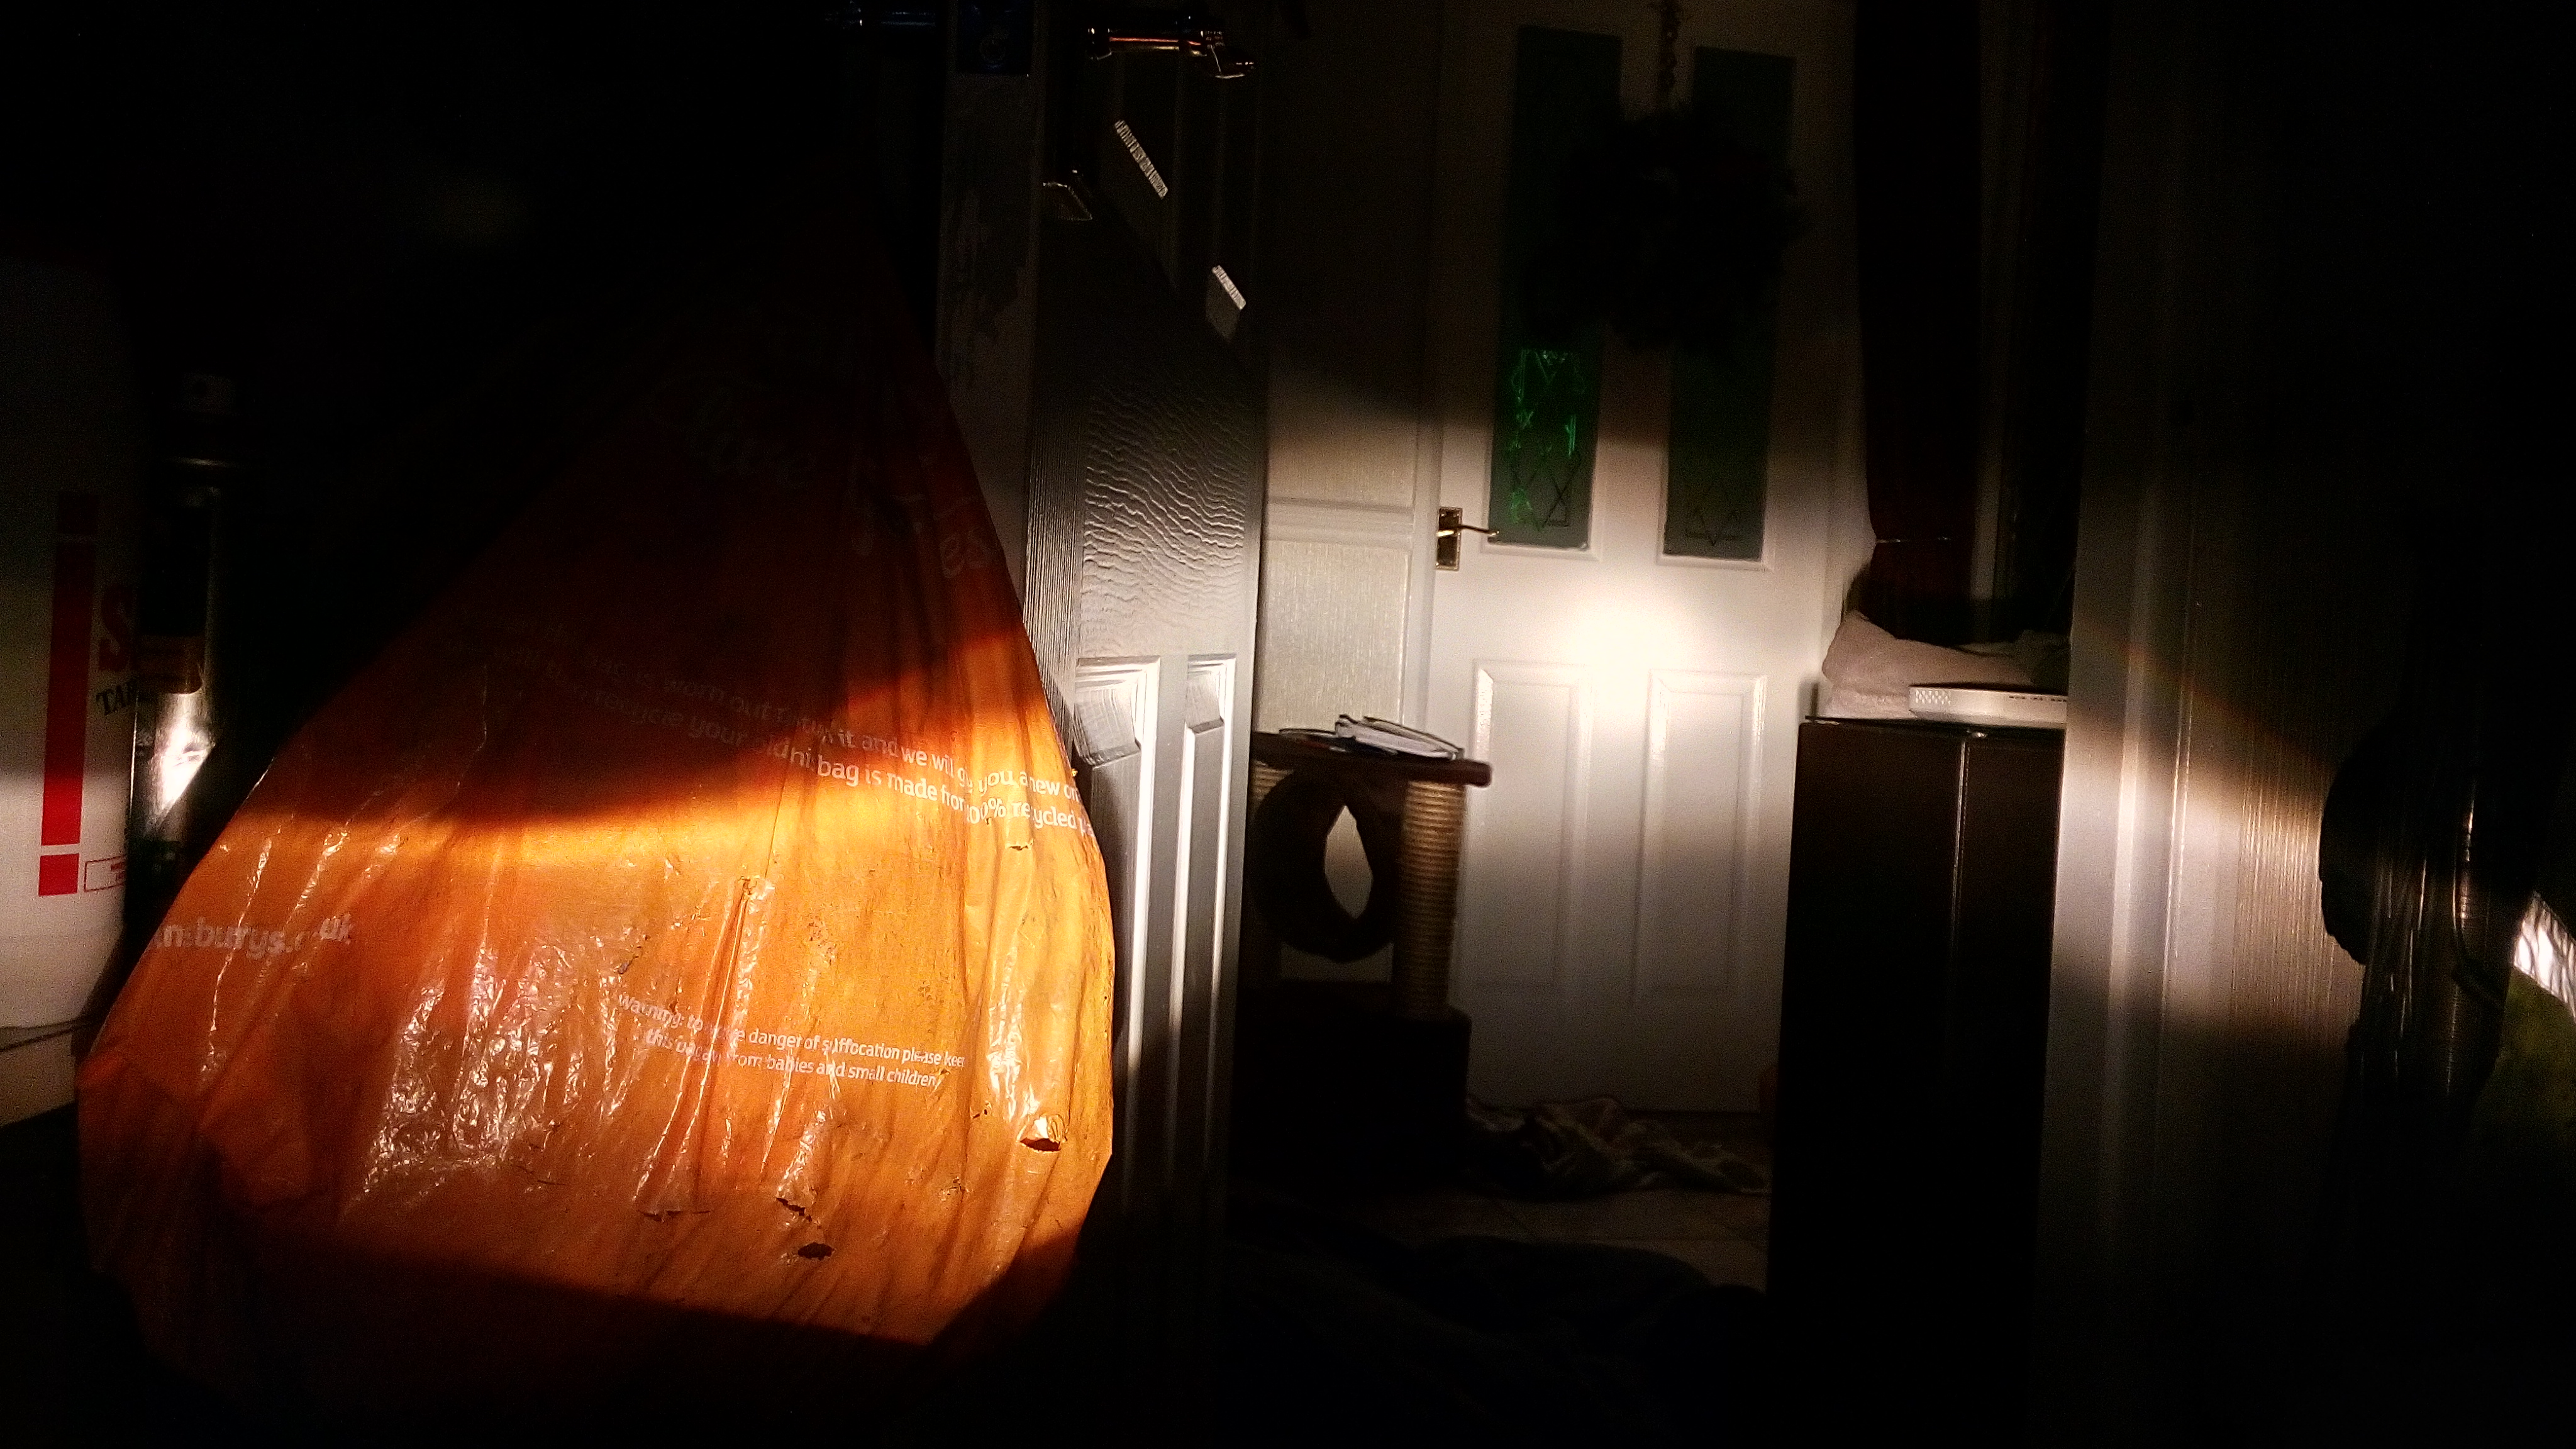
pretty good...
now lets put the glass over the headlamp and switch it back to low beam...
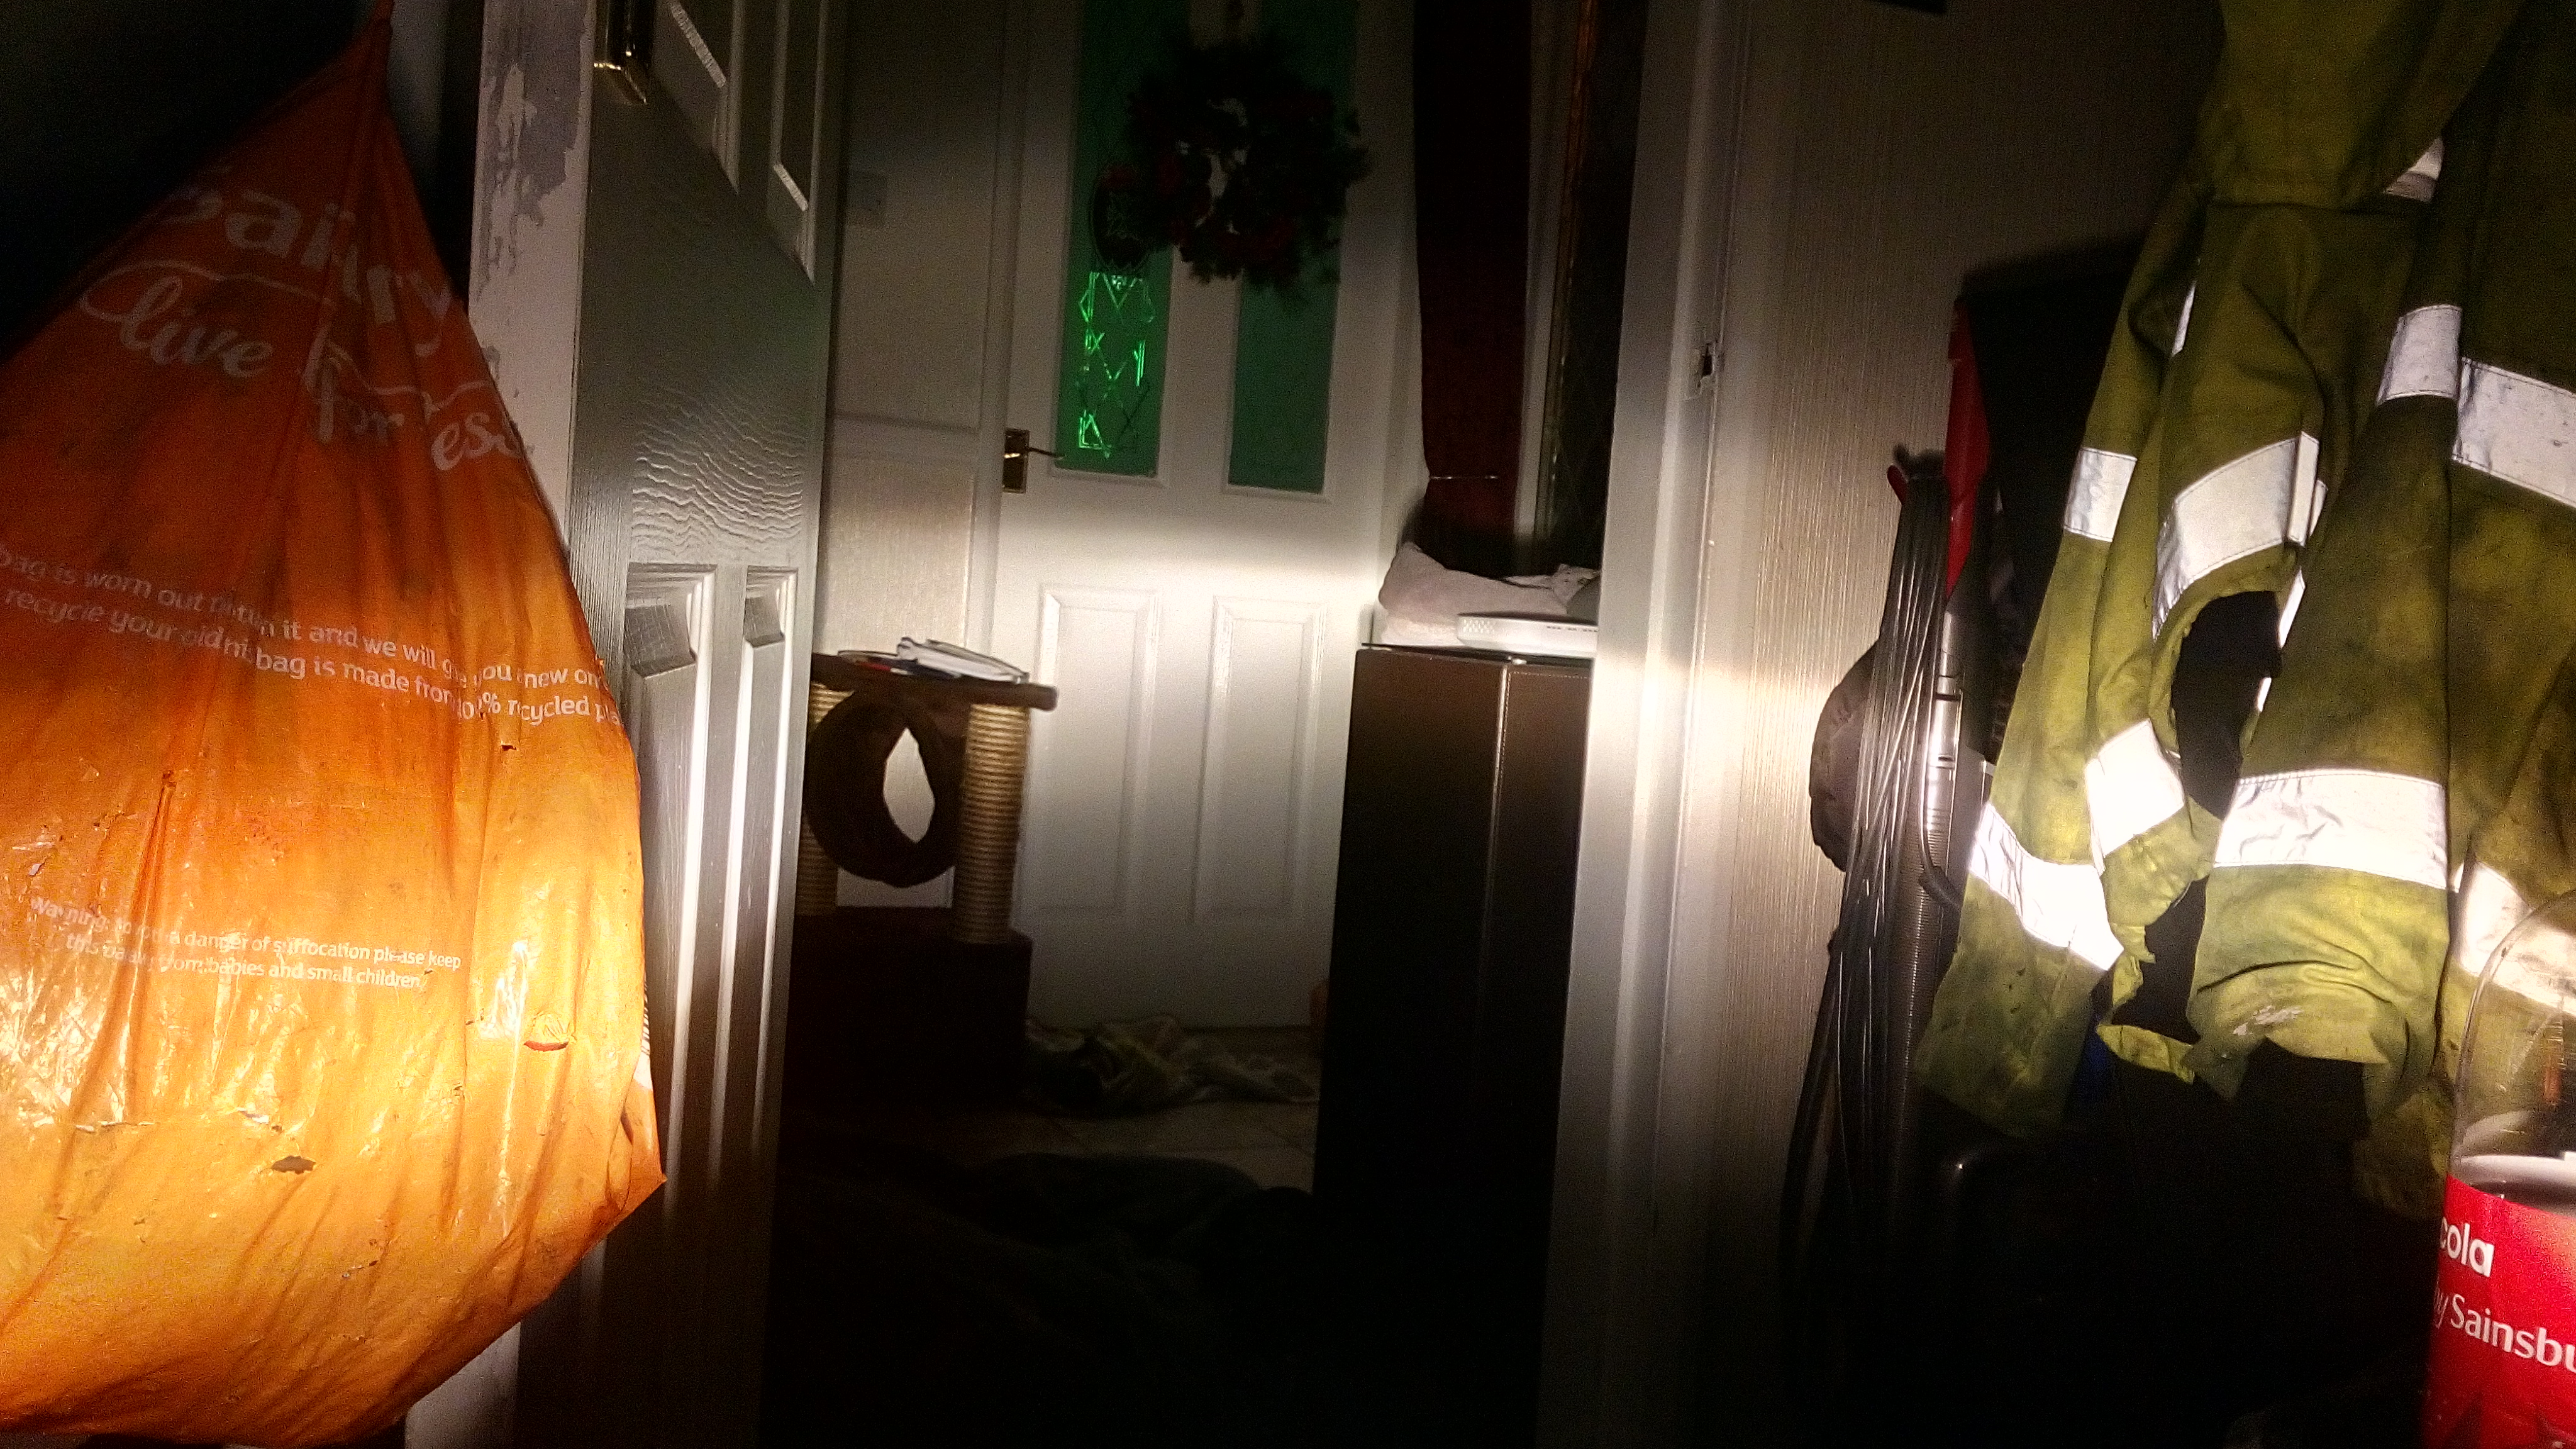
oh dear.. the cut off is now just a blur and the ridge has just gone! plus look at all the glare it gives now! only one way to fix that..
next job is to grind smooth a small circular "window" in the middle of the BX's head lamp glass. i need to remove all of the ridges/fluting where the light from the projector lense sits. this may be a challenge..
nothing more to report.
engine is filled with oil, turbo is bolted to the back as are its oil feed and return (but not hooked up to the intake manifold yet).
i sadly ran out of time (and batteries) to get it fully running. i managed to get white smoke from the exhaust so glow plugs and a good battery should get the thing running.
now i have no coolant as the engine is still out of the car so it would only be a test fire.
i am not convinced that the injection pump is timed in right, on the belt it is timed up right, but i think the rotation is not good.
i have some new belts on order. i had to have the multi V belt that works the alternator and AC compressor made sadly. somehow the original belt is 10mm too long! how that happened i do not know. the original belt size is 1220mm inside measurement. strange...
one original but loose belt, note the alternator all the way out:

i have also replaced the pesky steering boot. it seems to work ok. xantia ones do stretch which is much better.
oh and the original 70k starter was sized solid.. so the one that was on the replacement engine has temporarily gone on while i strip it down and grease it all up.
i need to find a electric vacuum pump to work the turbos actuator. some diesel VW/Audi/Volvos have them just got to wait for a car to come in as scrap that has one on.. lately we have been getting loads of jags in!. i have a nice electronic turbo pressure controller that i will use. now given the engine is a bit old i am not going to go over the top running pressure. i think the engine only runs 6PSI standard.. so i'll up it to about 12 psi. im not after huge gains, just enough to to keep up with modern traffic.
i also got my projector lenses through the post. look at that beam cut off..

ok.. how about the high beam...

pretty good...
now lets put the glass over the headlamp and switch it back to low beam...

oh dear.. the cut off is now just a blur and the ridge has just gone! plus look at all the glare it gives now! only one way to fix that..
next job is to grind smooth a small circular "window" in the middle of the BX's head lamp glass. i need to remove all of the ridges/fluting where the light from the projector lense sits. this may be a challenge..
nothing more to report.
- JohnDragonMan
Drives: Citroen Dispatch with retrofitted air conditioning
Classic Fiat Panda 4x4 Sisley named Talon (long term storage)
always buy base spec. that way you have the fun of putting all the cool bit on your vehicle
Drives: Citroen Dispatch with retrofitted air conditioning
Classic Fiat Panda 4x4 Sisley named Talon (long term storage)
always buy base spec. that way you have the fun of putting all the cool bit on your vehicle
- Dragon Man
- BXpert
- Posts: 187
- Joined: Sat Aug 22, 2015 3:45 am
- Location: The East Midlands, Derby
- My Cars: Citroen Dispatch 2.0L HDi 2005
Fiat Panda 4x4 Sisley 1991 - x 6
- Contact:
Re: John Dragon Man's Citroen BX Diesel Estate
Gahh I've been trolled.
because i was cranking the engine over and messing with the injection pump i did not notice this.
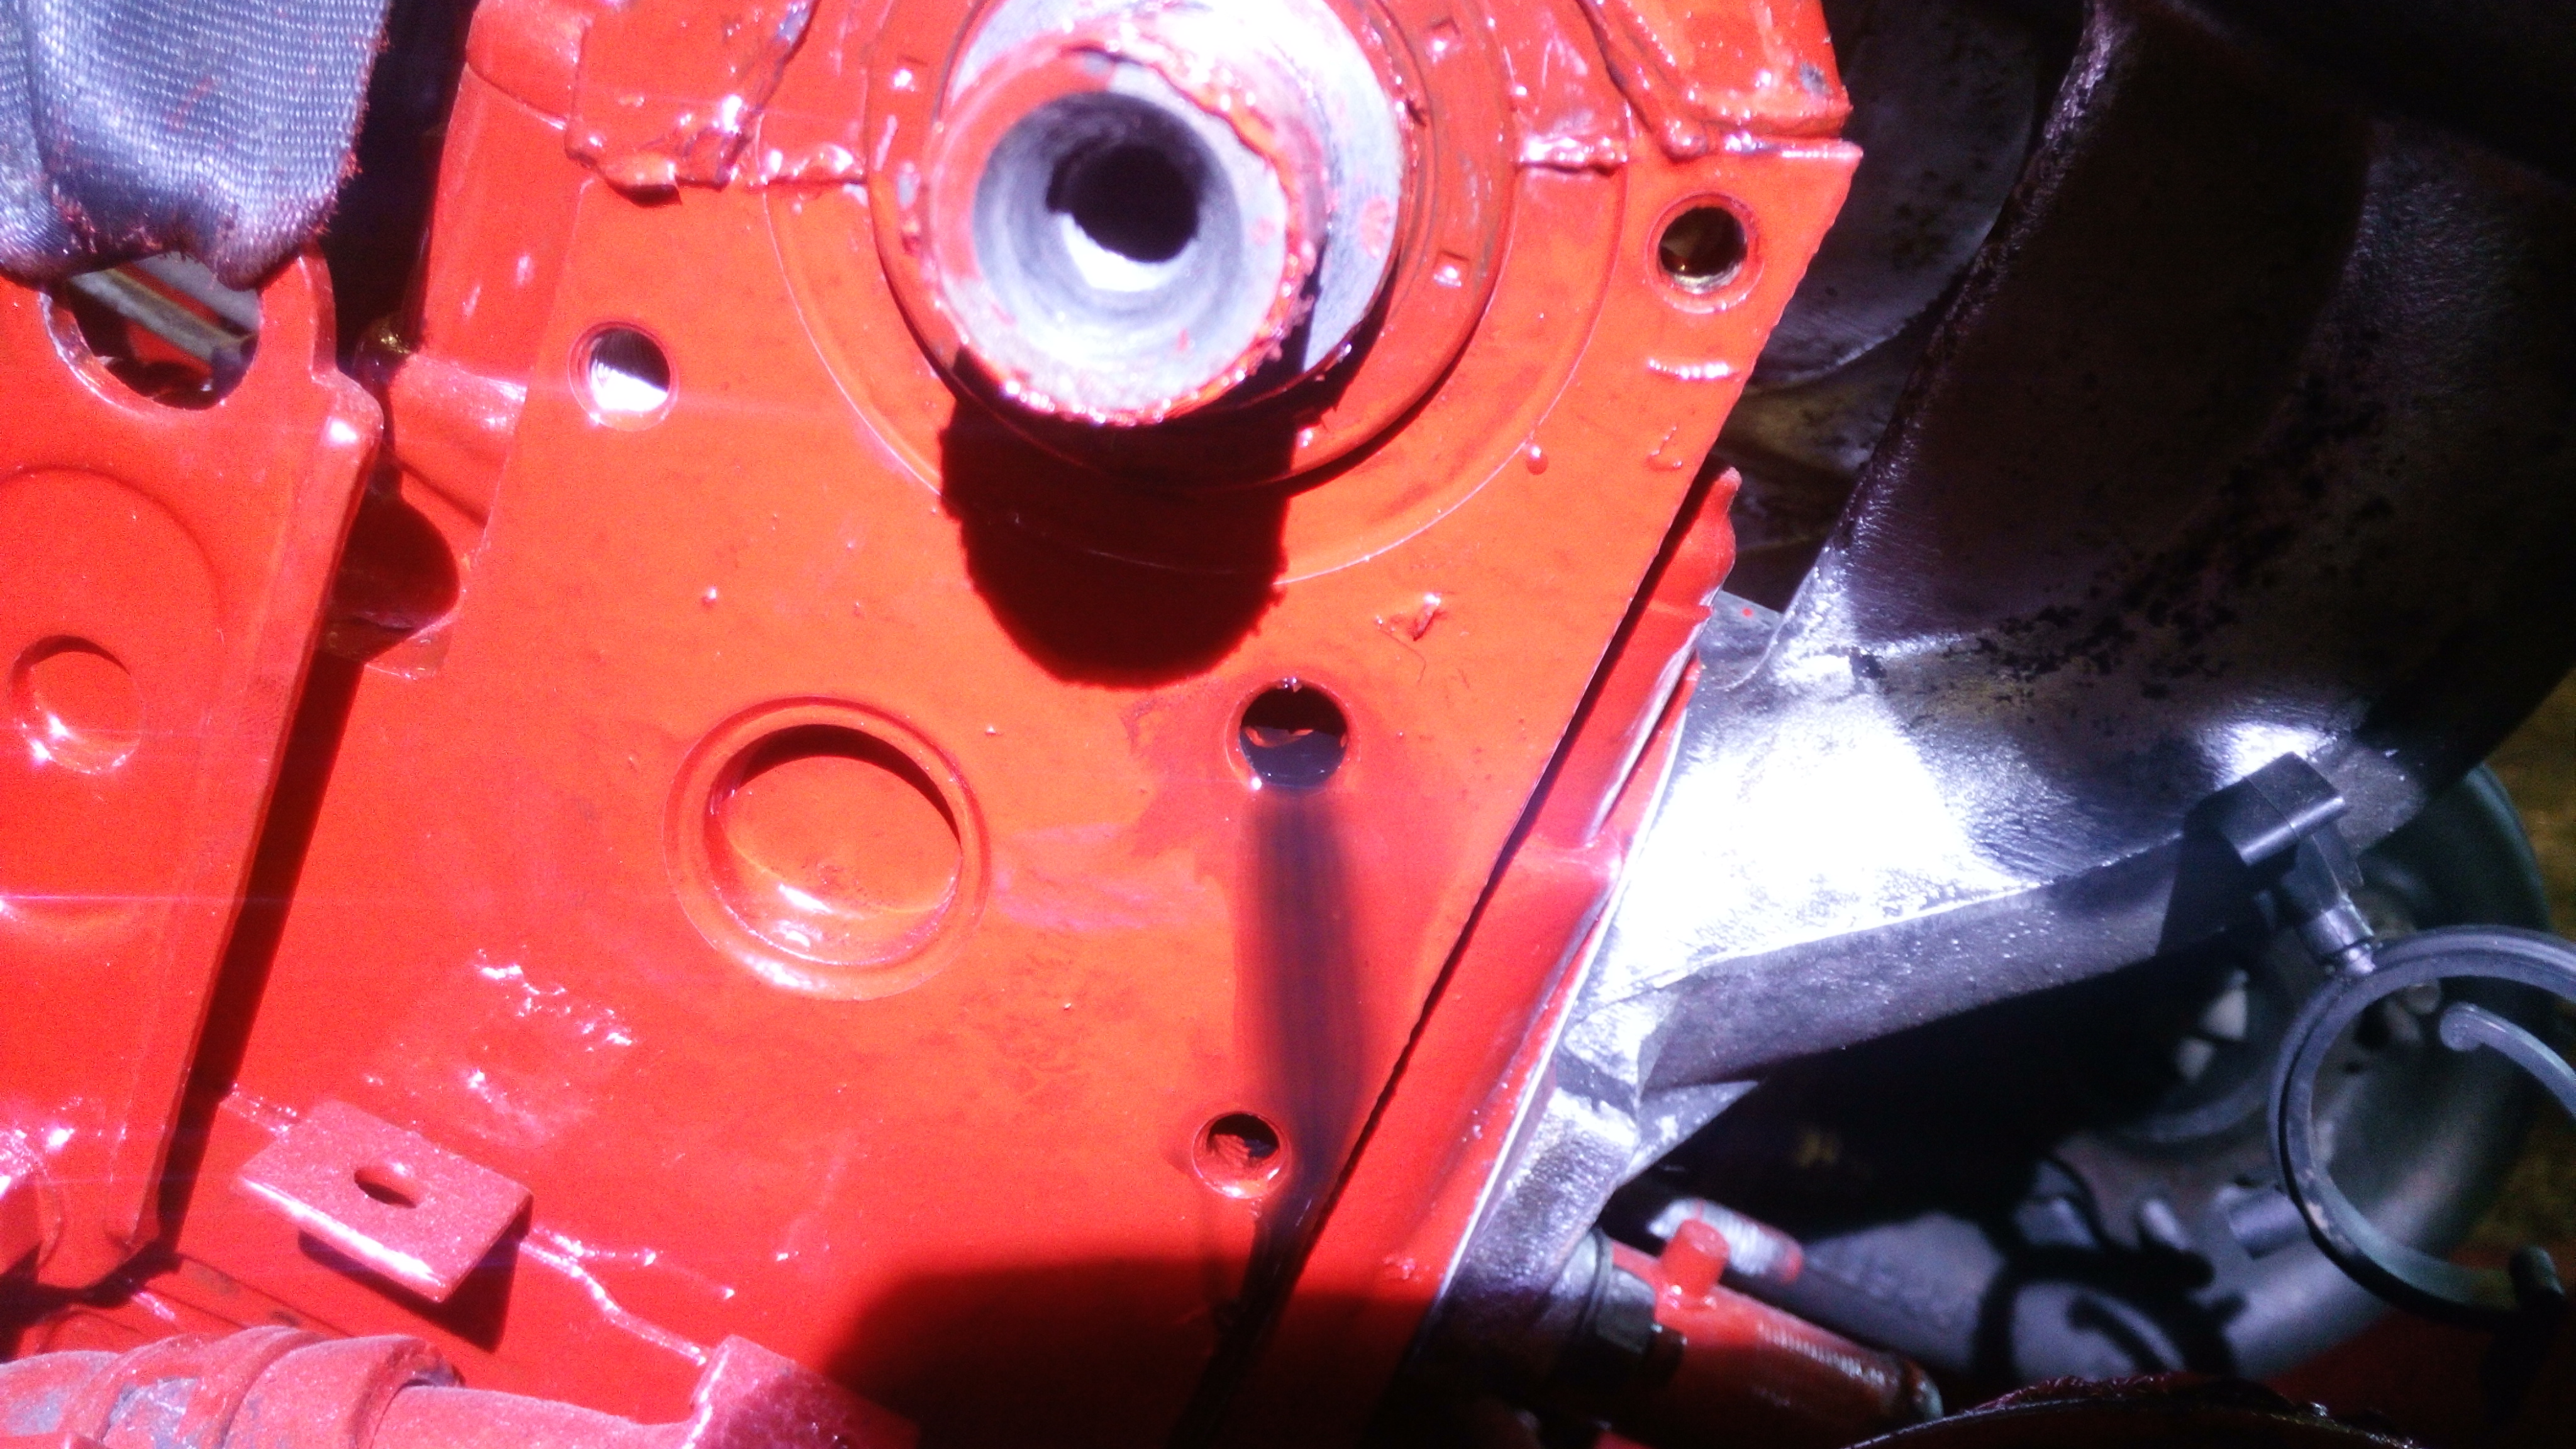
its the oil feed for the vacuum pump. so yep you guessed it.. i have lost all of my oil. i didnt notice it while i was priming the injectors. damn thats £30 gone just like that.
its also a pain that its not a threaded hole. i tried sticking the original engines plug in it, but the thread is way too big. i'd have to drill the hole out bigger. the thread on the plug seems like its an M10, but it has the diameter of an M12. so all i am going to do is put an M10 bolt in the hole with a copper washer. the plug can go back in the original engine. ill start building that back up when the car is done.
ahh every job i do is one job less.. its what i keep telling myself.
because i was cranking the engine over and messing with the injection pump i did not notice this.

its the oil feed for the vacuum pump. so yep you guessed it.. i have lost all of my oil. i didnt notice it while i was priming the injectors. damn thats £30 gone just like that.
its also a pain that its not a threaded hole. i tried sticking the original engines plug in it, but the thread is way too big. i'd have to drill the hole out bigger. the thread on the plug seems like its an M10, but it has the diameter of an M12. so all i am going to do is put an M10 bolt in the hole with a copper washer. the plug can go back in the original engine. ill start building that back up when the car is done.
ahh every job i do is one job less.. its what i keep telling myself.
- JohnDragonMan
Drives: Citroen Dispatch with retrofitted air conditioning
Classic Fiat Panda 4x4 Sisley named Talon (long term storage)
always buy base spec. that way you have the fun of putting all the cool bit on your vehicle
Drives: Citroen Dispatch with retrofitted air conditioning
Classic Fiat Panda 4x4 Sisley named Talon (long term storage)
always buy base spec. that way you have the fun of putting all the cool bit on your vehicle
- Dragon Man
- BXpert
- Posts: 187
- Joined: Sat Aug 22, 2015 3:45 am
- Location: The East Midlands, Derby
- My Cars: Citroen Dispatch 2.0L HDi 2005
Fiat Panda 4x4 Sisley 1991 - x 6
- Contact:
Re: John Dragon Man's Citroen BX Diesel Estate
long time no post guys,
well looking back at what i last posted i can say now that the oil feed for the vacuum pump has been tapped and bolted using a copper washer as the seal.
the turbo is now fully bolted to the engine along with the intake manifold.
oh and a small side note.. nothing really of importance.. not really worth mentioning really..
but...
it runs..
yeah the engine actually started and ran for a short time. till the wires on the battery wiggled off. i was pretty impressed to say the least!
i have here a bad quality video from my chinese phone capturing the moment.. dont worry it is diesel in the barrel!
also, does anyone know where i can get these little headlamp clips from?? many were snapped off mine when i got the car but more nowso are :/
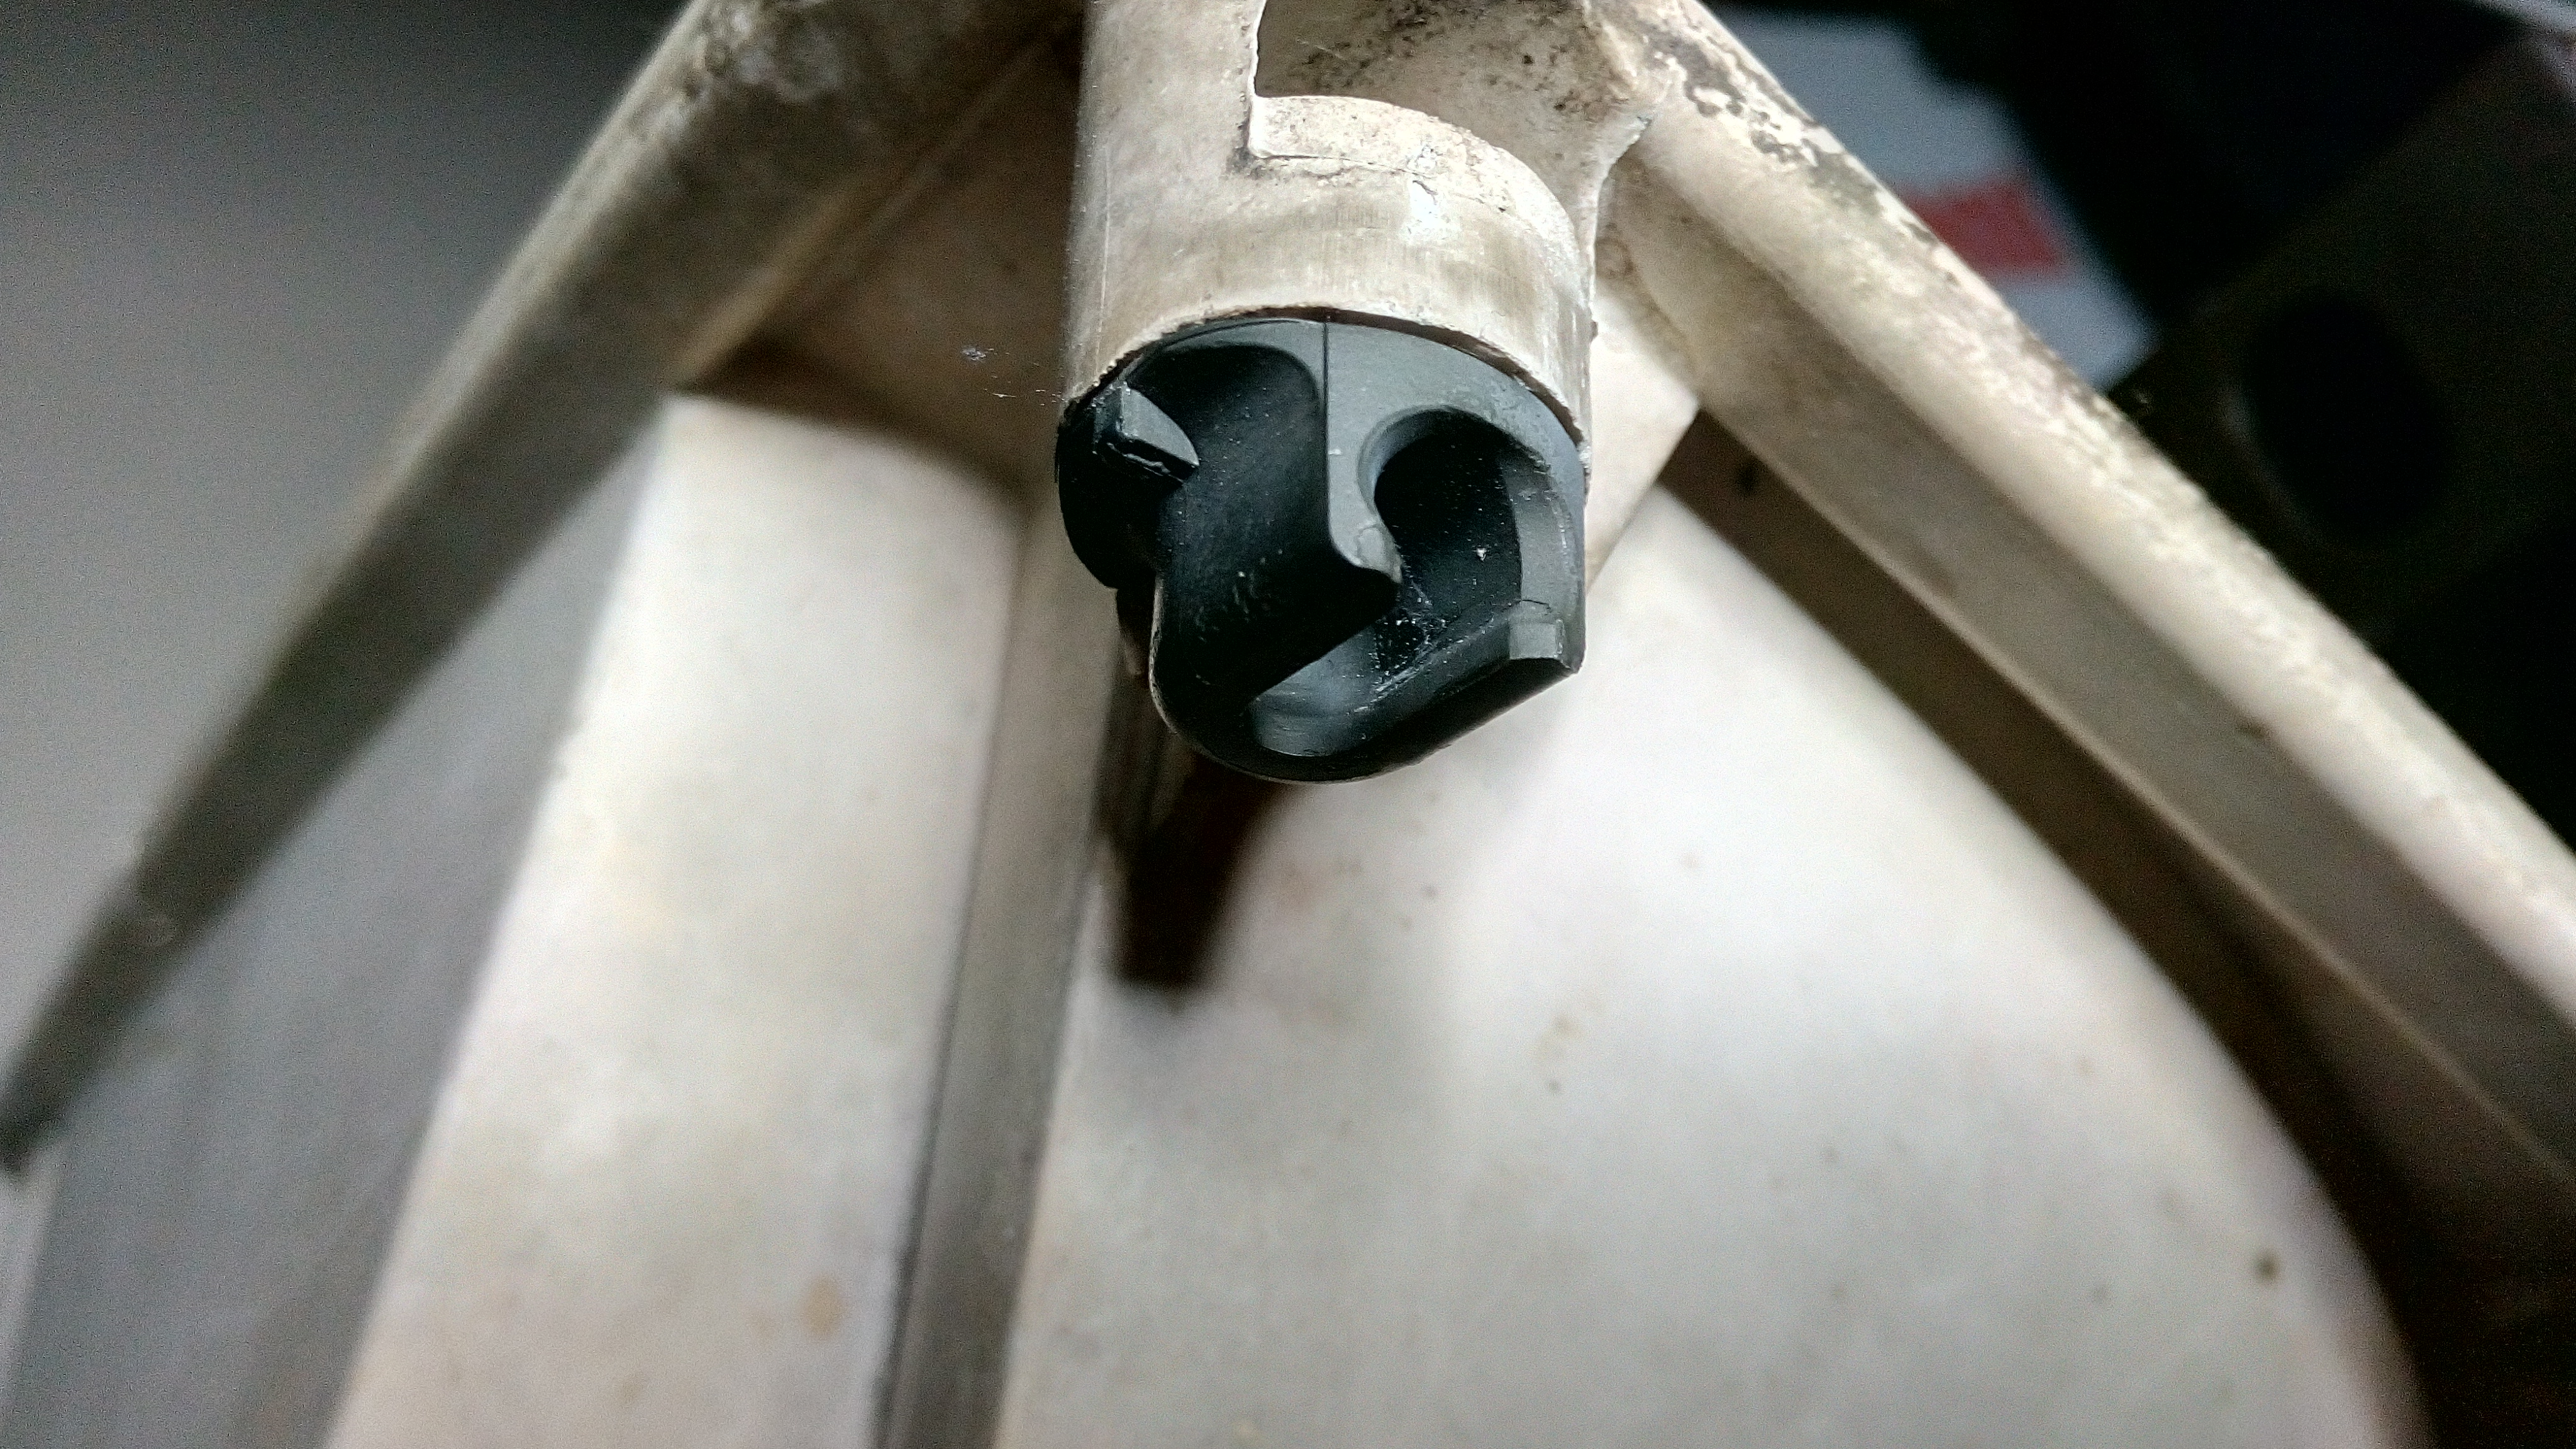
thanks!
well looking back at what i last posted i can say now that the oil feed for the vacuum pump has been tapped and bolted using a copper washer as the seal.
the turbo is now fully bolted to the engine along with the intake manifold.
oh and a small side note.. nothing really of importance.. not really worth mentioning really..
but...
it runs..
yeah the engine actually started and ran for a short time. till the wires on the battery wiggled off. i was pretty impressed to say the least!
i have here a bad quality video from my chinese phone capturing the moment.. dont worry it is diesel in the barrel!
also, does anyone know where i can get these little headlamp clips from?? many were snapped off mine when i got the car but more nowso are :/

thanks!
- JohnDragonMan
Drives: Citroen Dispatch with retrofitted air conditioning
Classic Fiat Panda 4x4 Sisley named Talon (long term storage)
always buy base spec. that way you have the fun of putting all the cool bit on your vehicle
Drives: Citroen Dispatch with retrofitted air conditioning
Classic Fiat Panda 4x4 Sisley named Talon (long term storage)
always buy base spec. that way you have the fun of putting all the cool bit on your vehicle
- Dragon Man
- BXpert
- Posts: 187
- Joined: Sat Aug 22, 2015 3:45 am
- Location: The East Midlands, Derby
- My Cars: Citroen Dispatch 2.0L HDi 2005
Fiat Panda 4x4 Sisley 1991 - x 6
- Contact:
Re: John Dragon Man's Citroen BX Diesel Estate
So in the past 2 days i have actually fitted the engine to the car. yes its in, kinda.
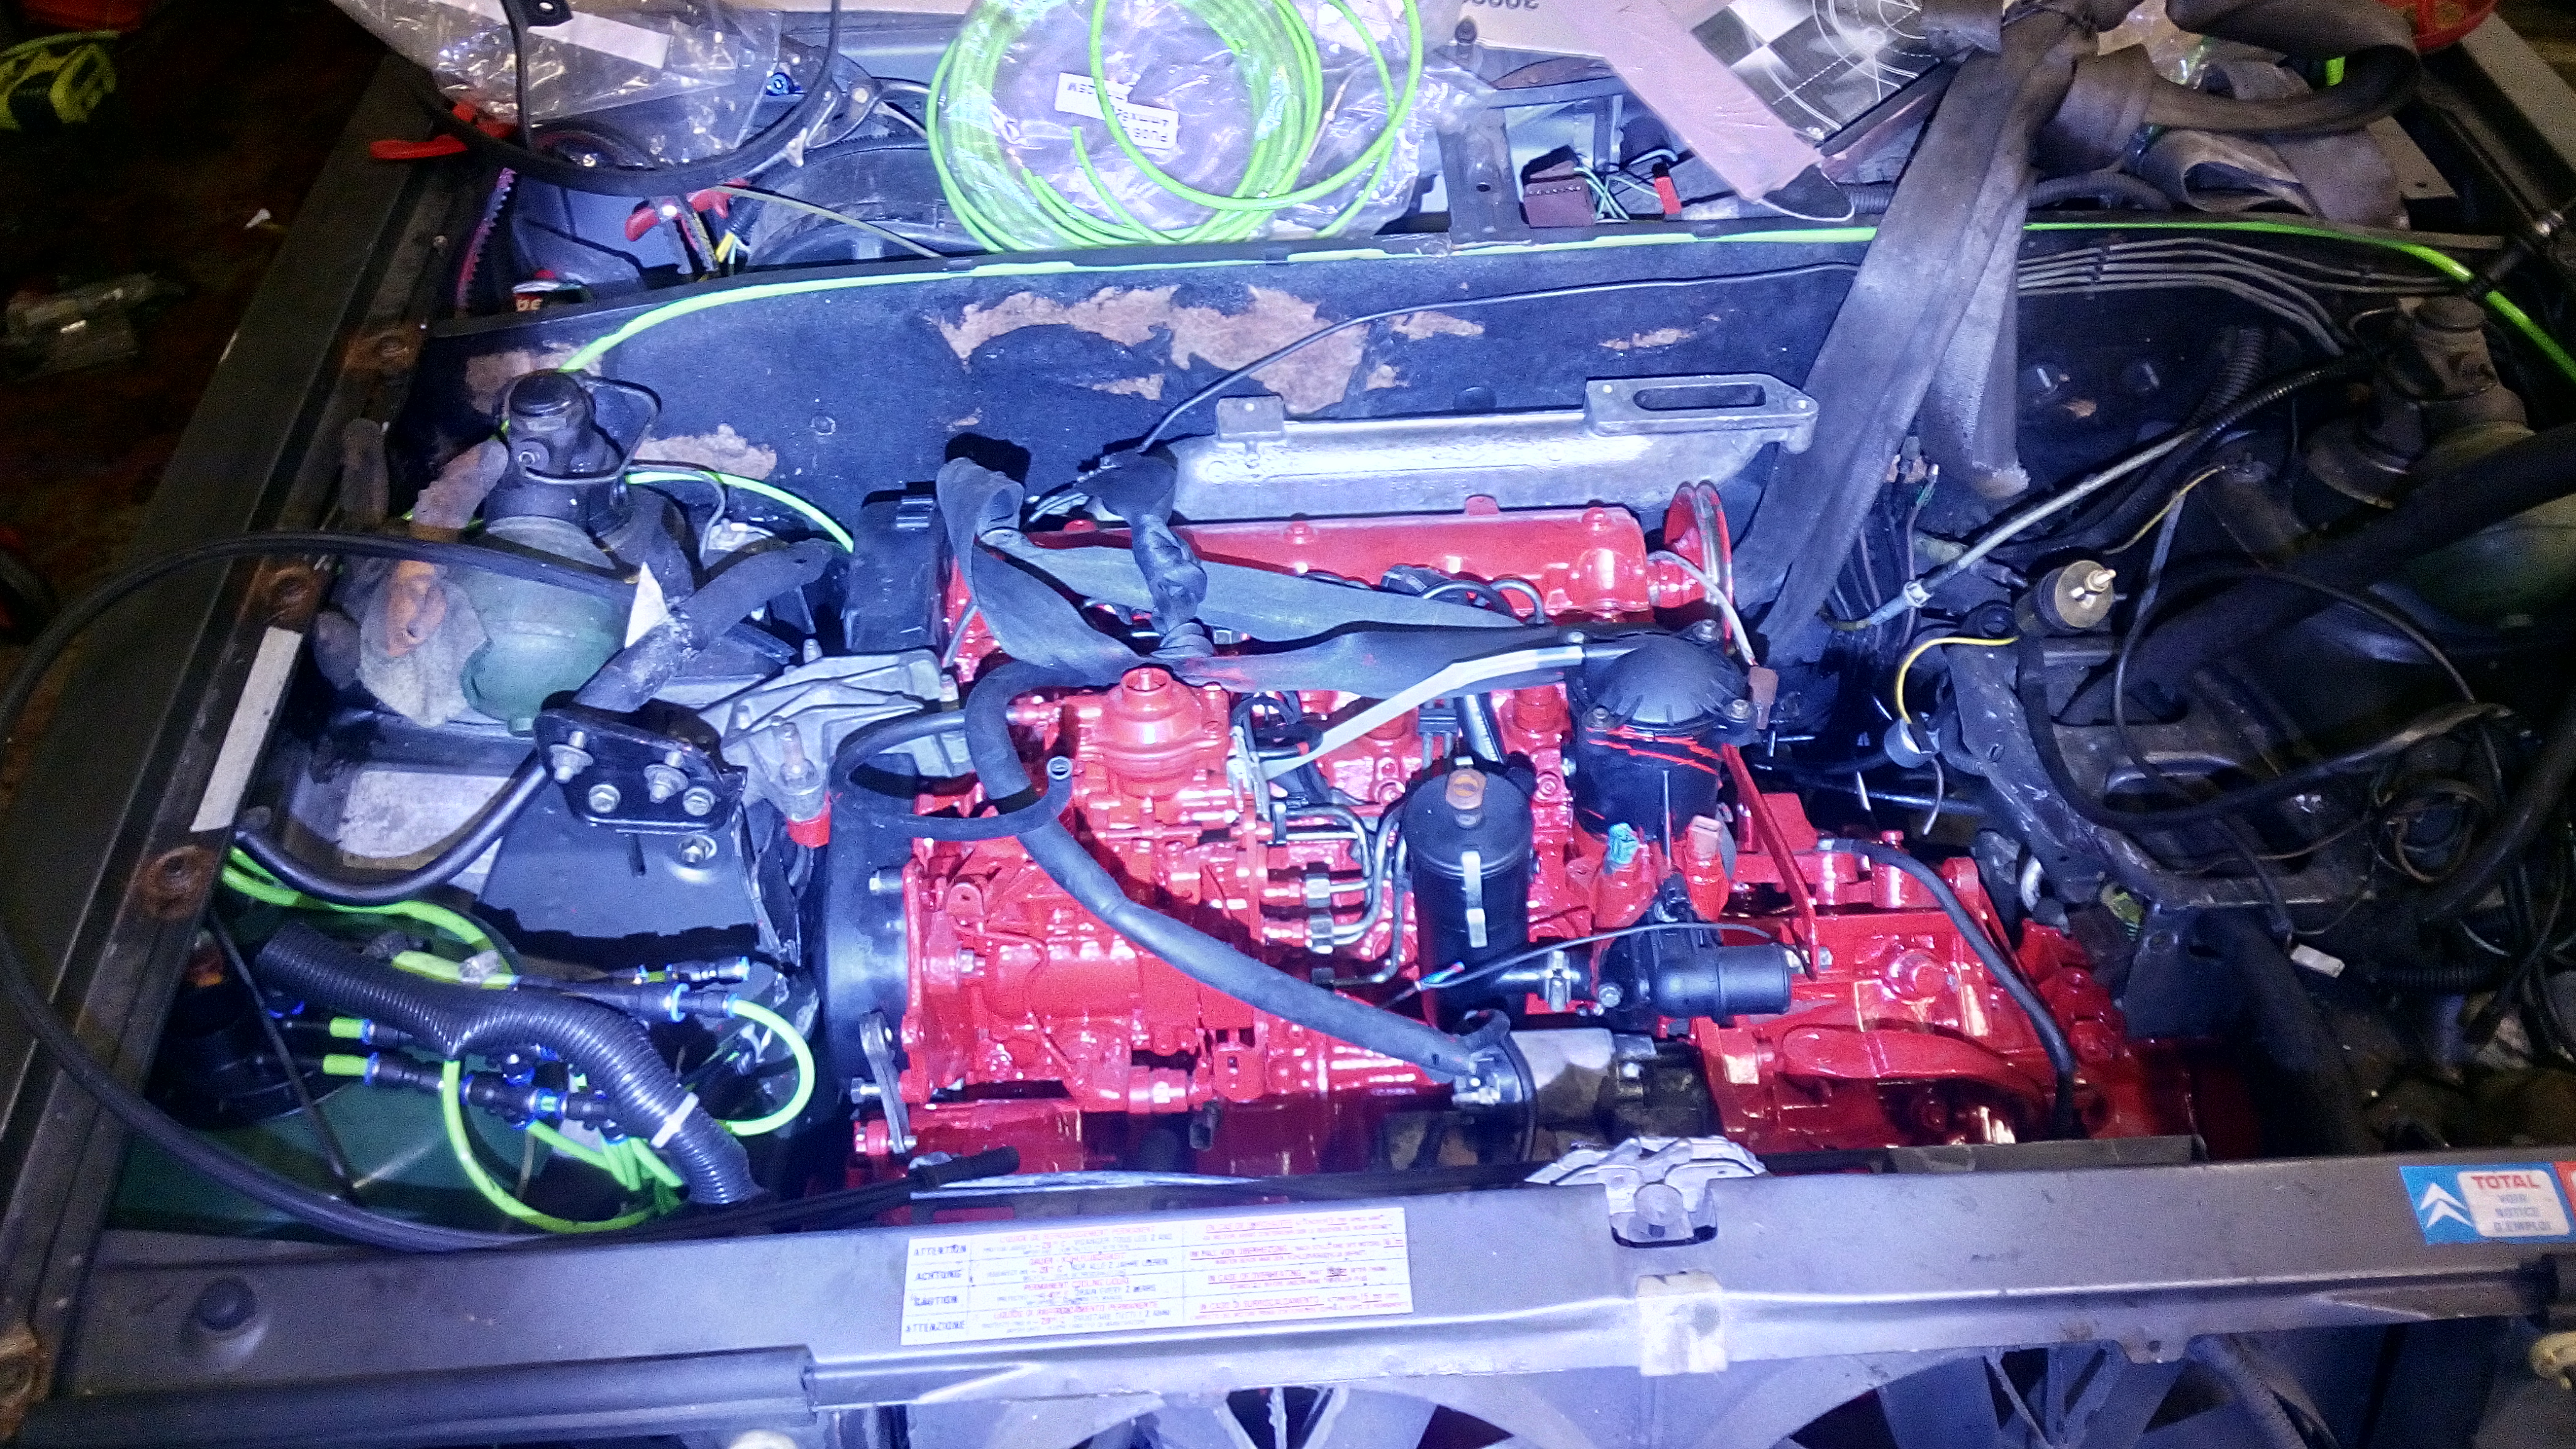
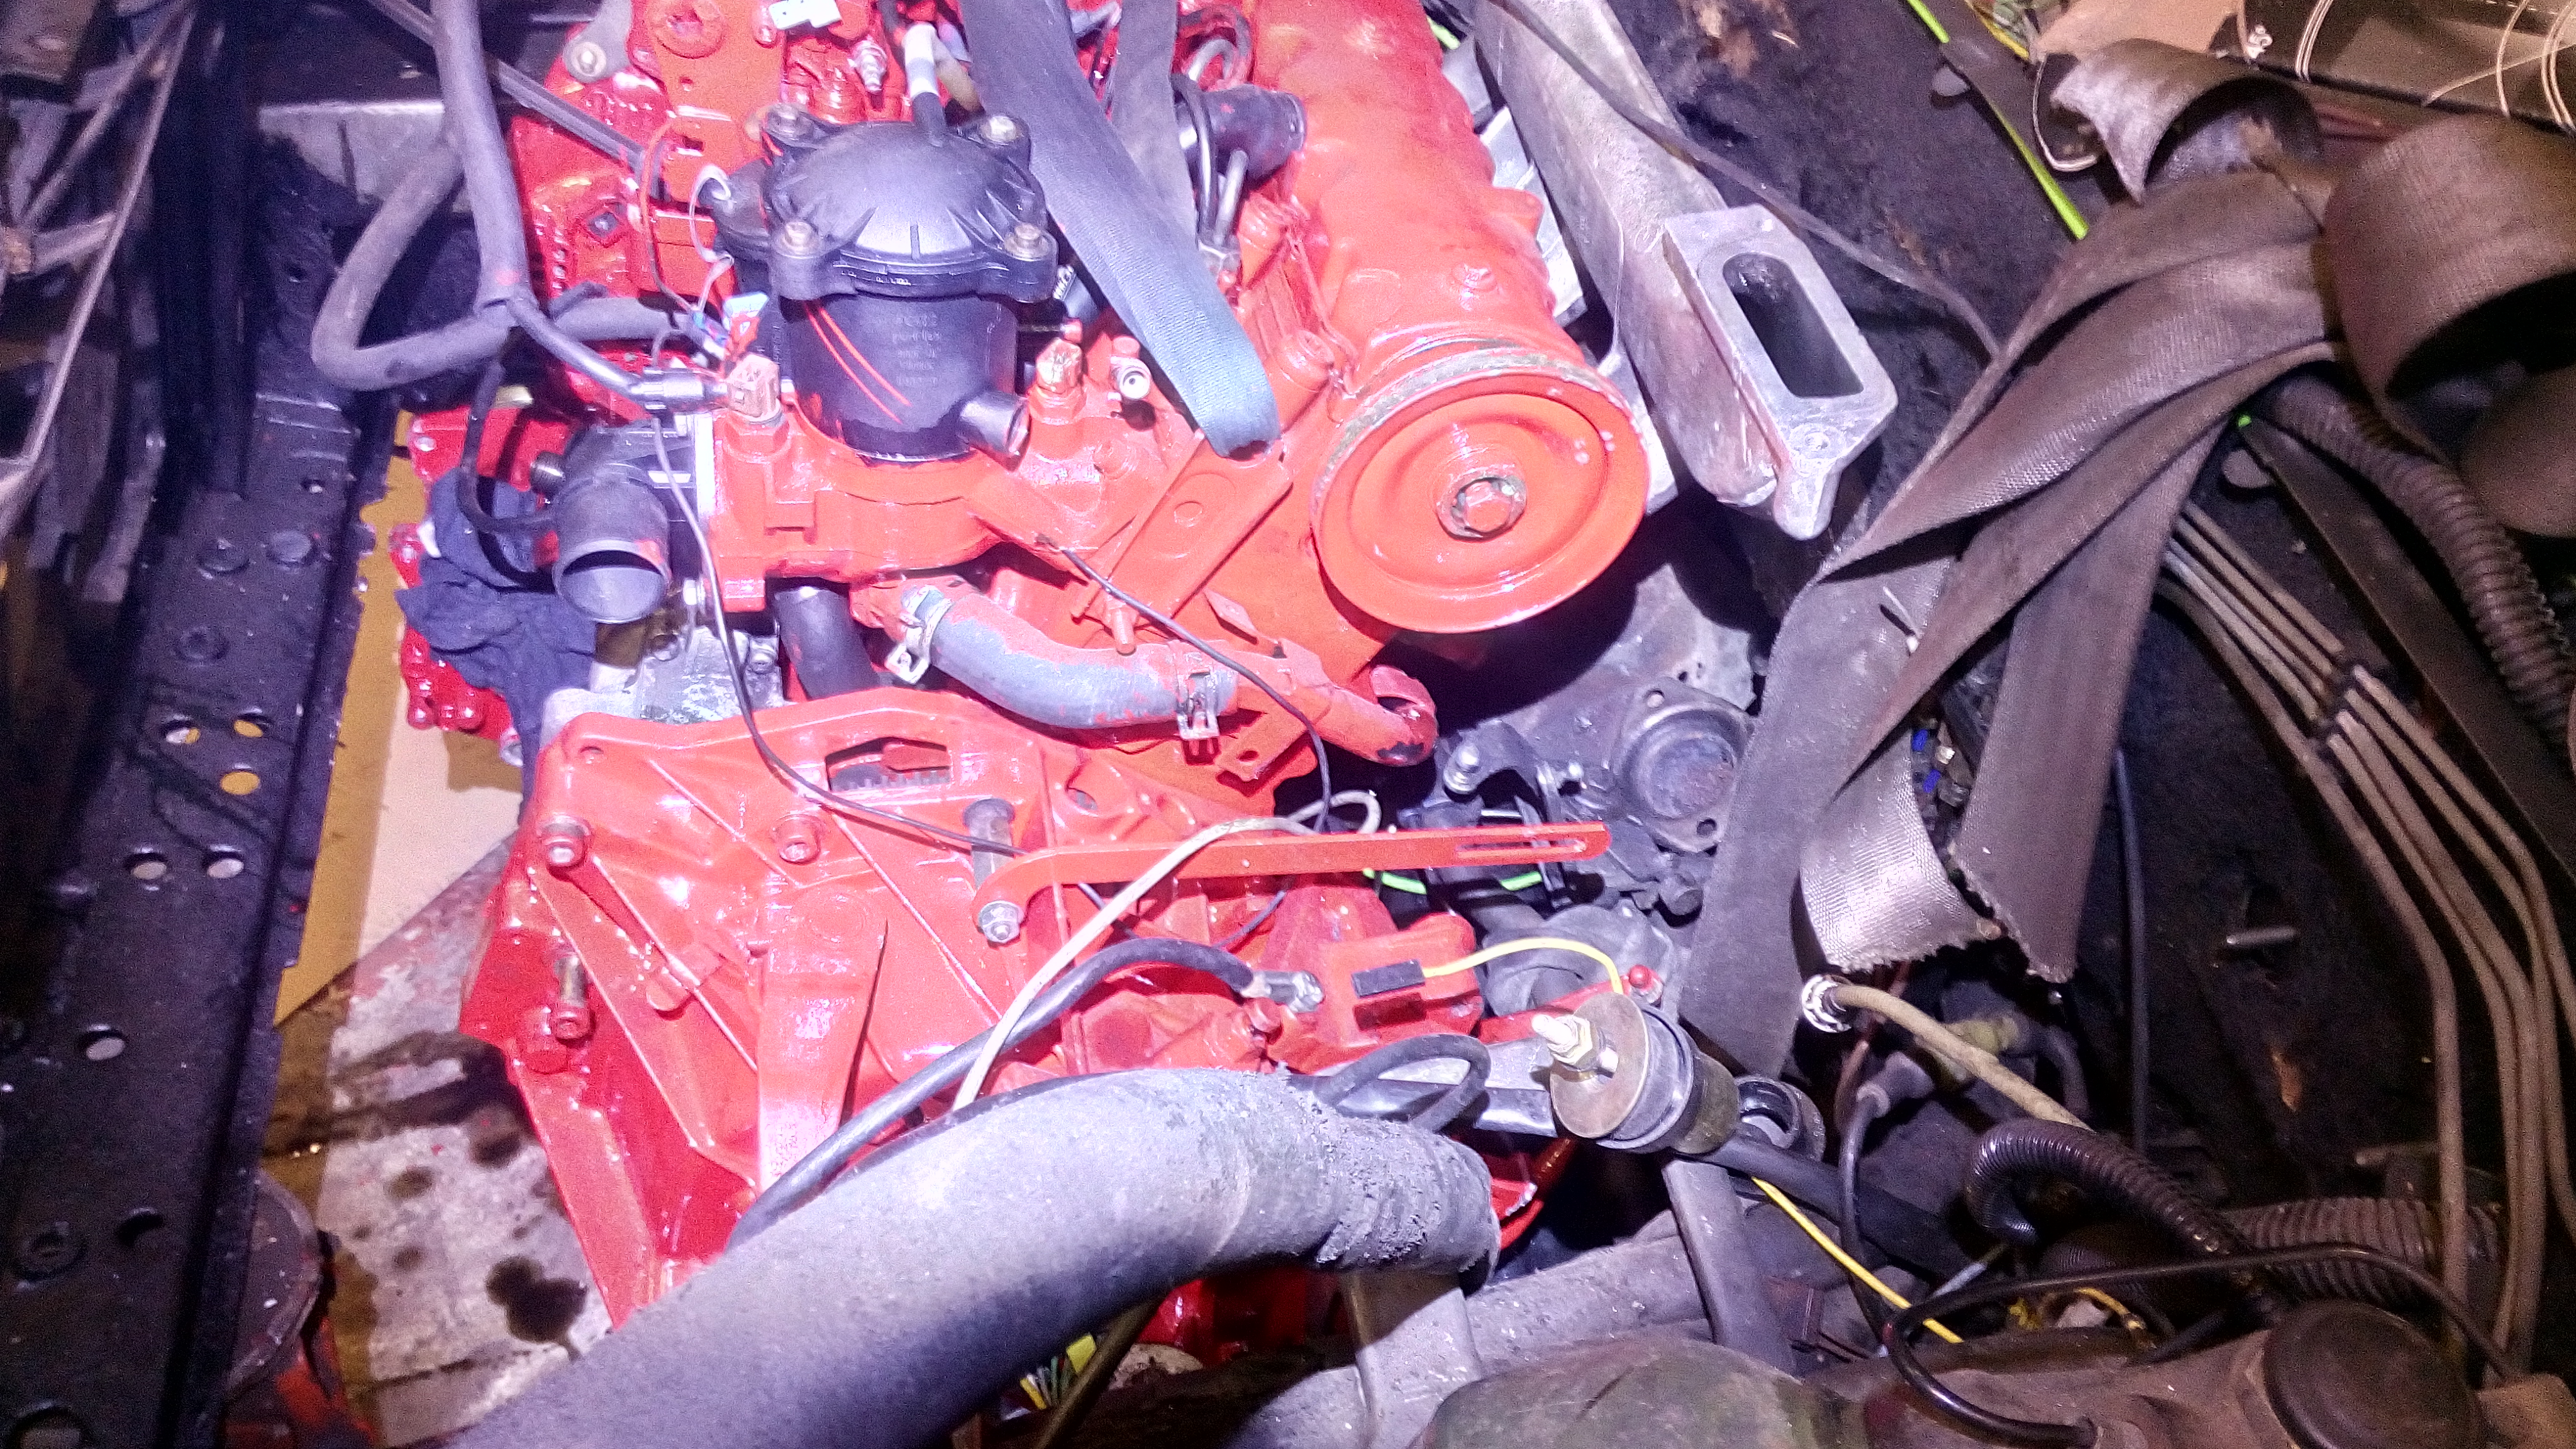
this camera makes it look bad, but the colour of it actually looks pretty good in the bay.
this is pretty tight down here for all the pipes..
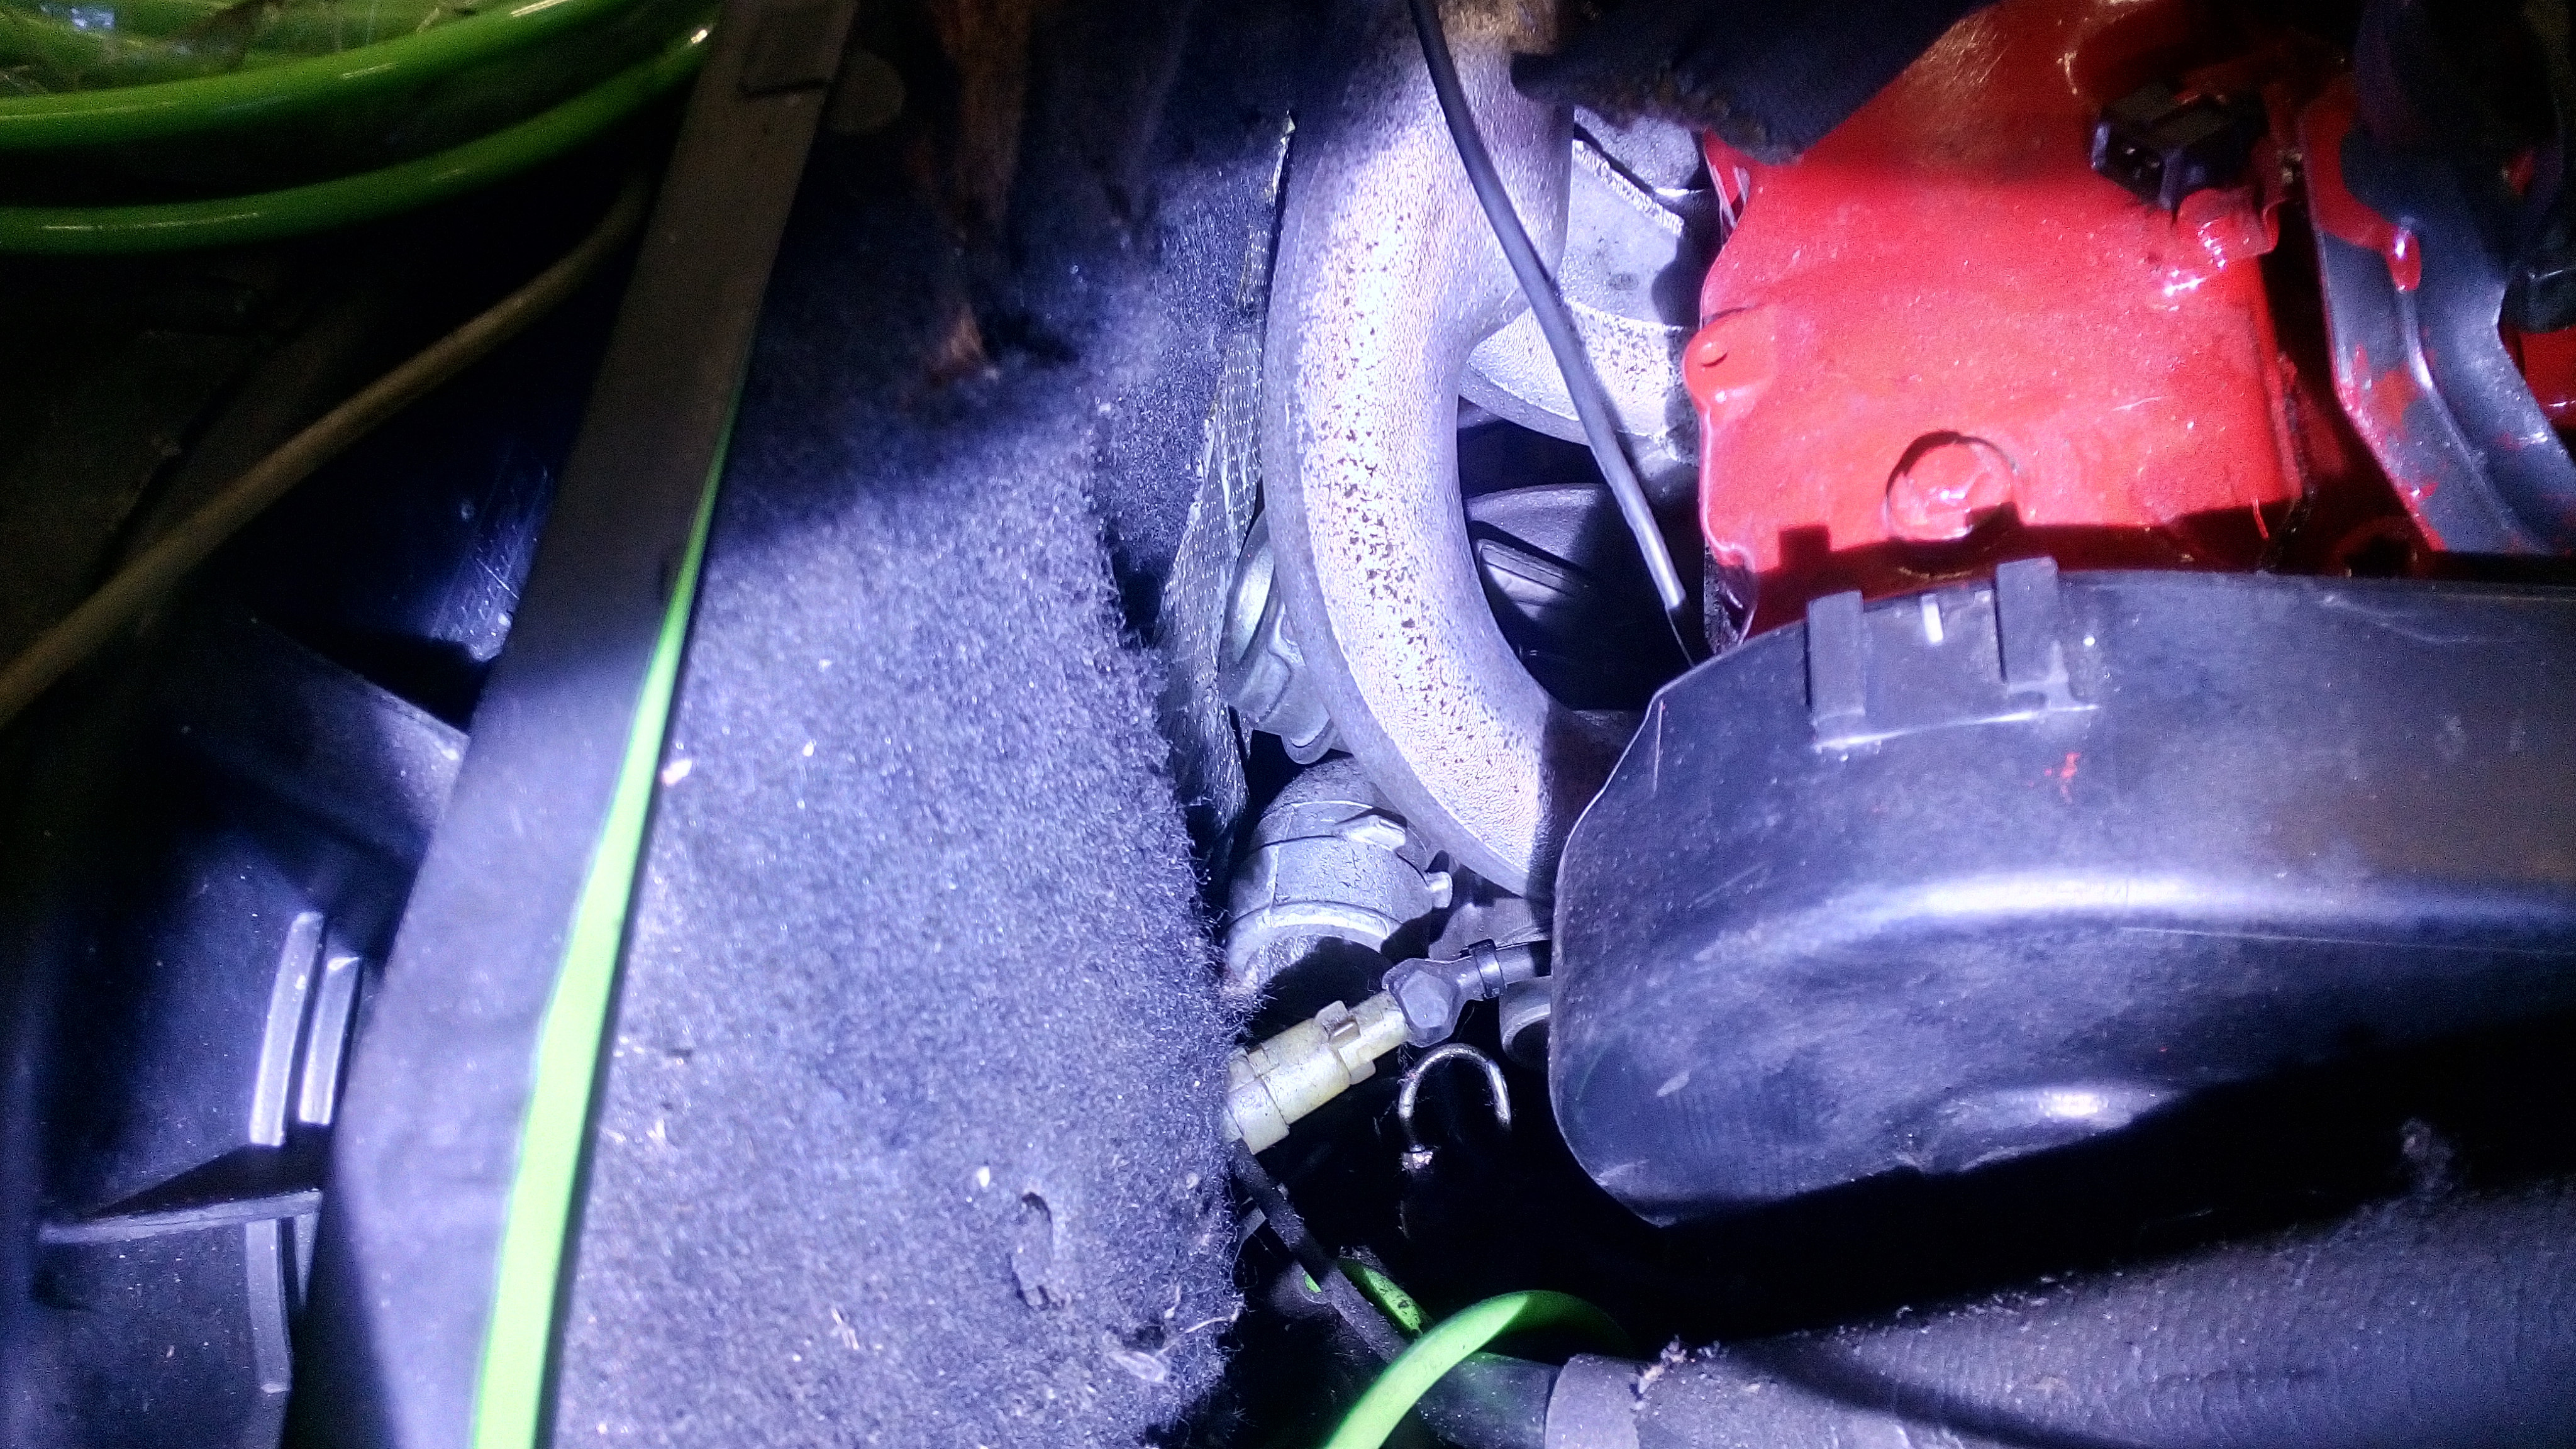
hang on.. lets have a closer look at that..
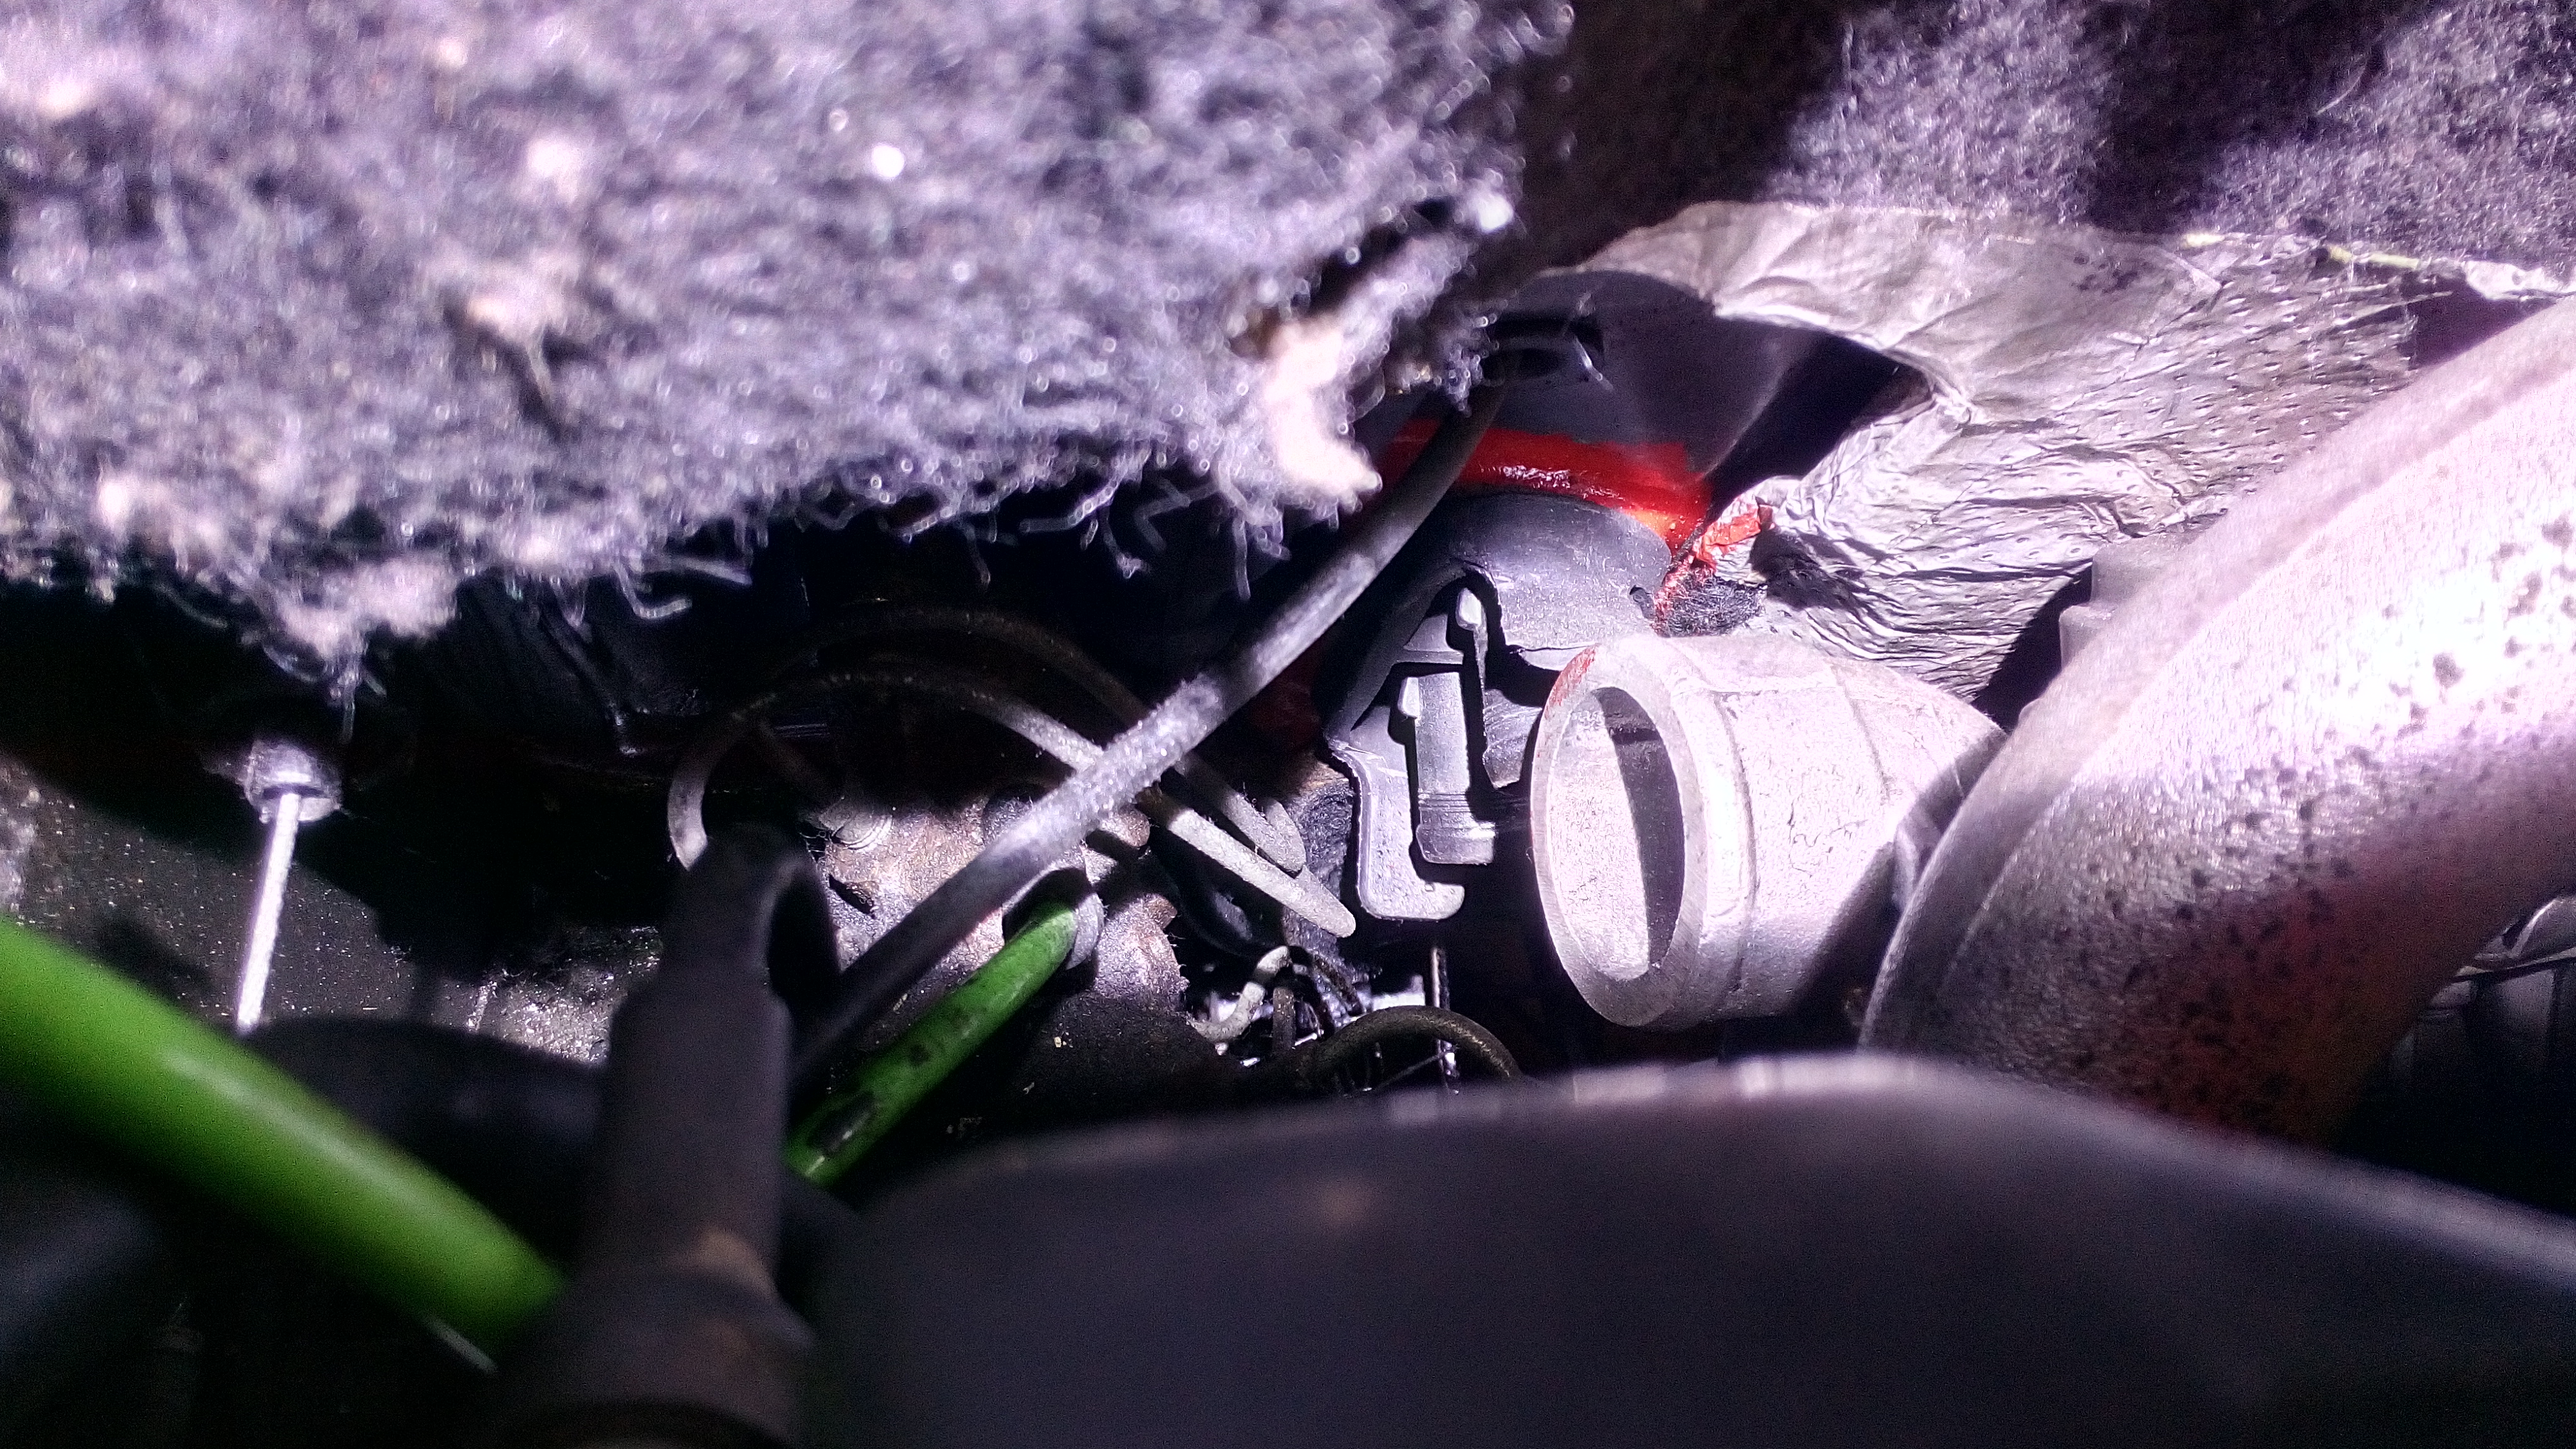
hmm that turbo outlet is way too close to that heater matrix pipe connection.. if i spin it around it should be good..
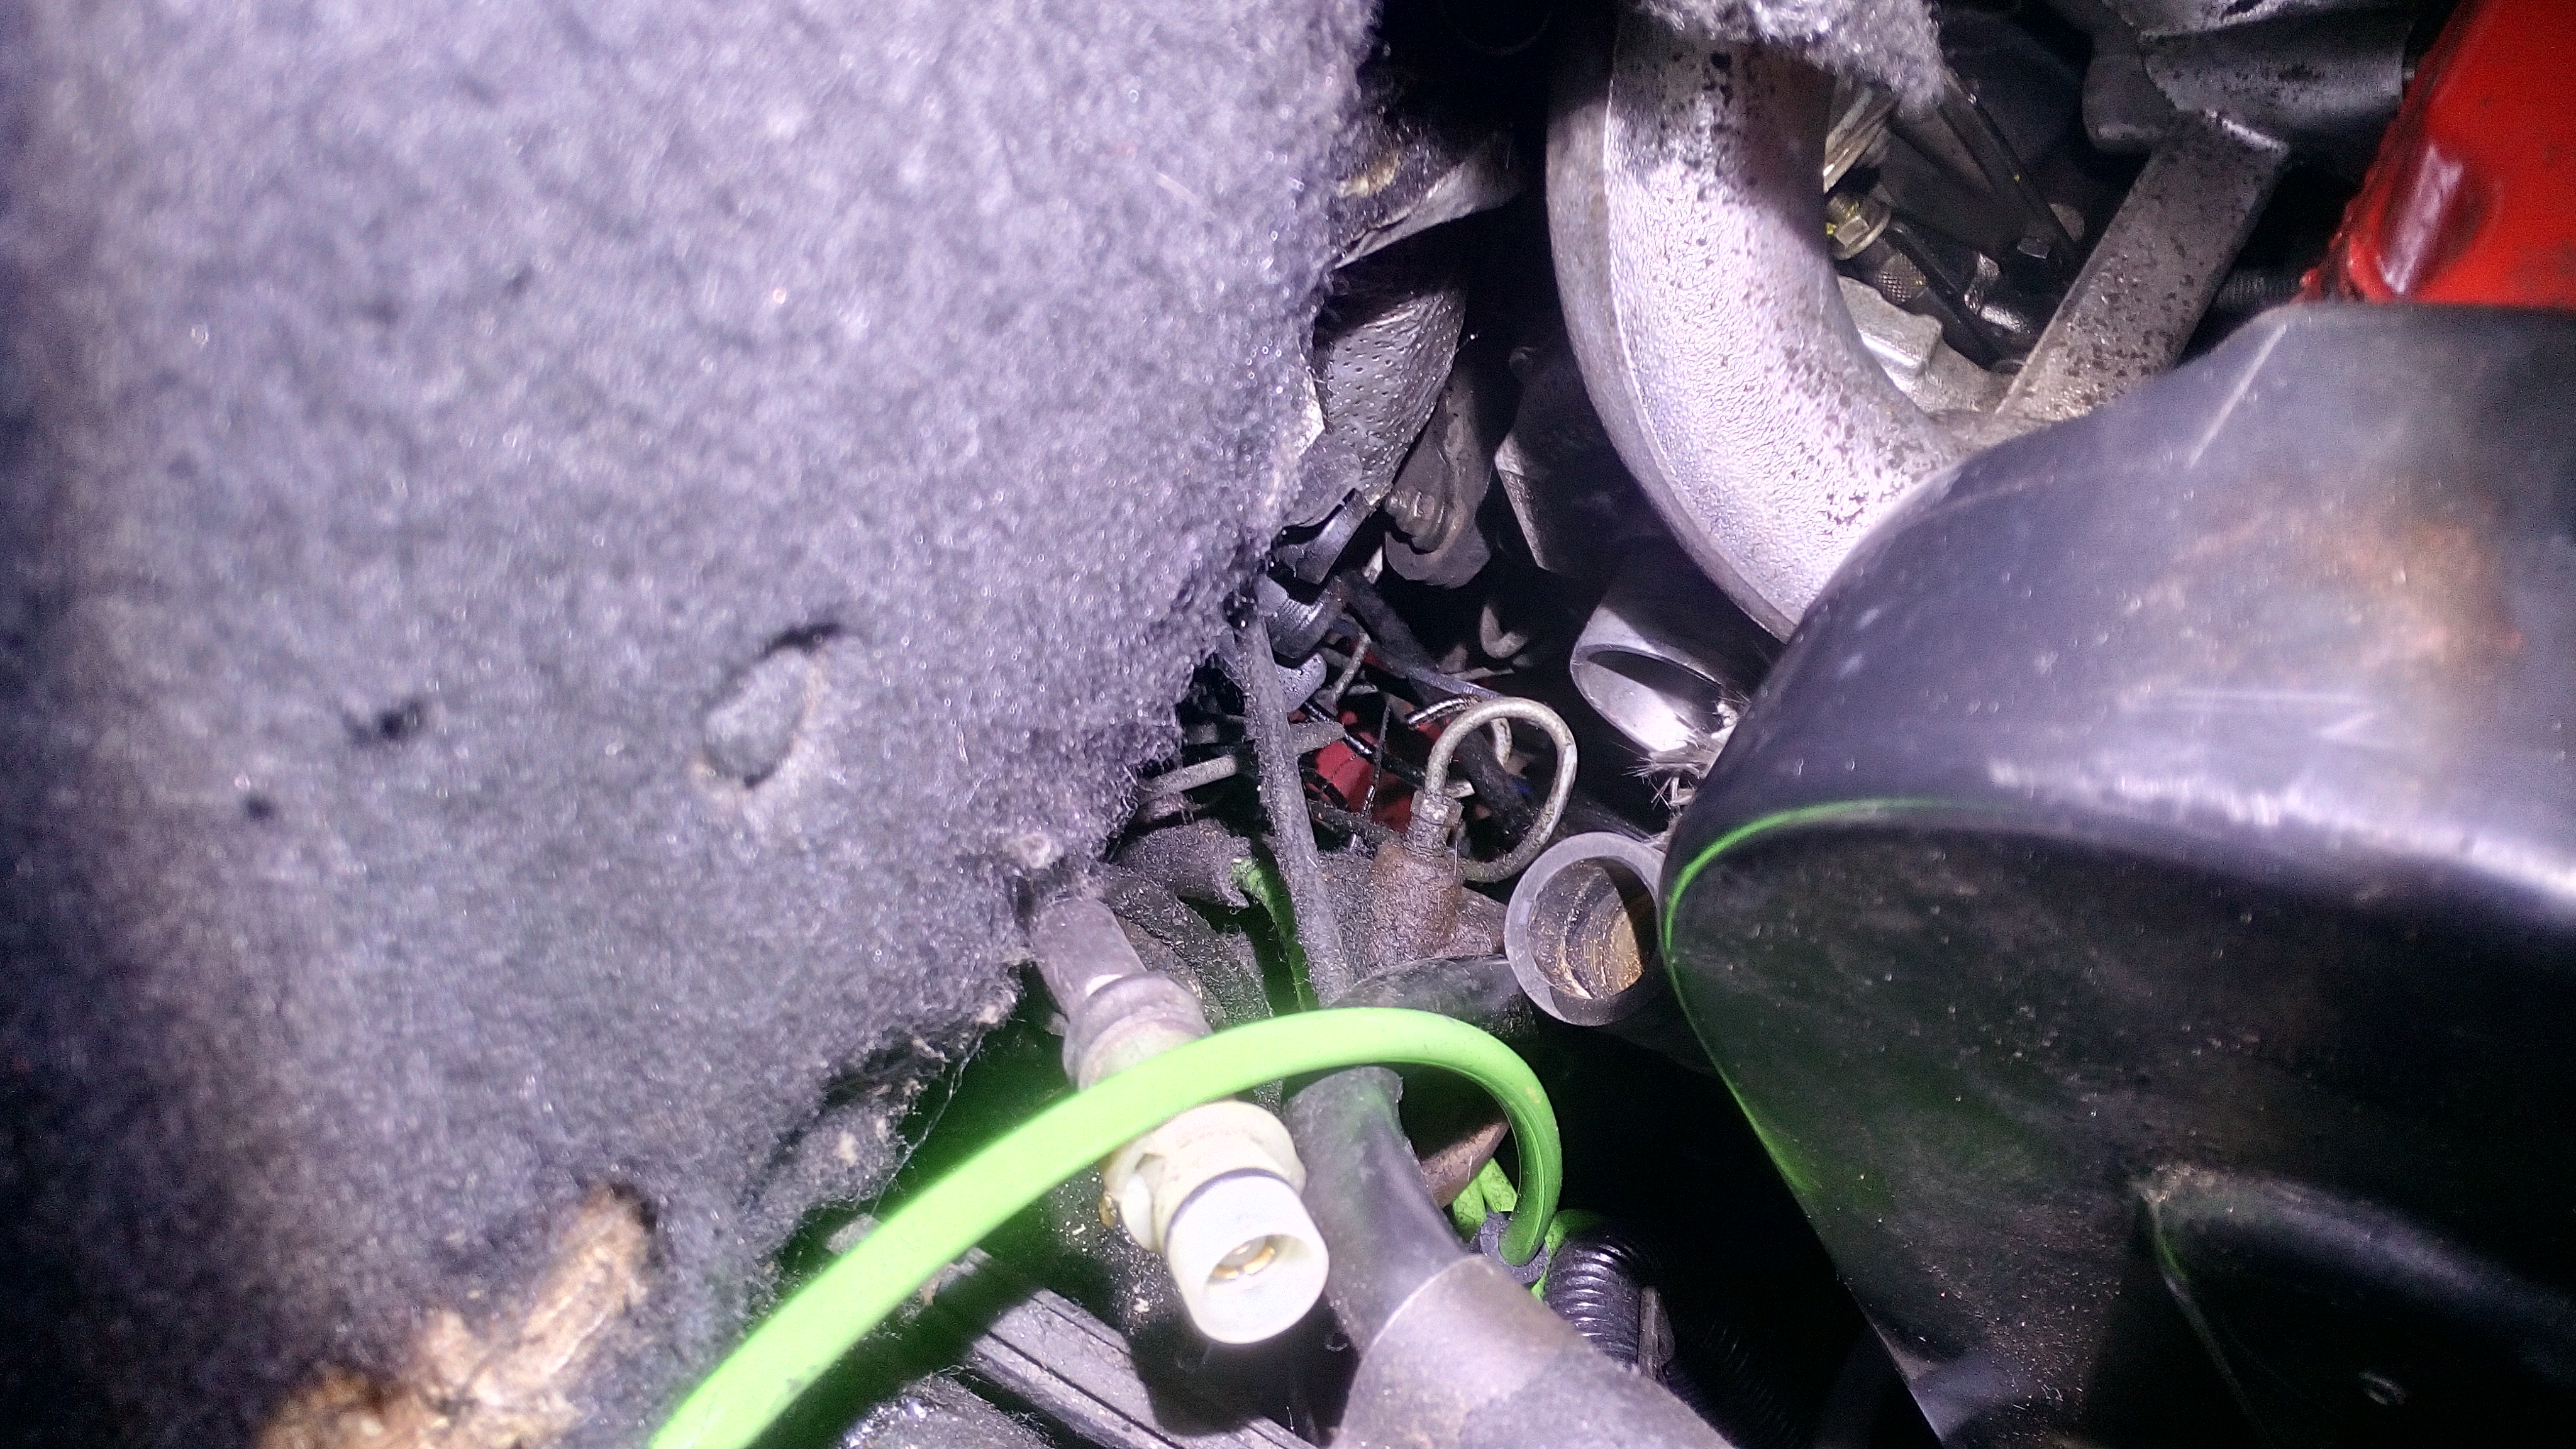
much better, now the turbo outlet is lower down.. ill just have to make a longer pipe to compensate that, should be ok.
i have got 3 coolant pipes to try and re-route, the one from the back of the block to the heater matrix, and the one from the heater matrix to the cylinder head.
the turbo vane actuator is a bit close to the bulk head but i think i can make it so it wont hit it by spacing the rubber bump stop on the engine mount out. i have not got the bottom engine mount tightened up yet, but that does hold the engine pretty steady its a good job i changed them all really as it holds the engine pretty firm in place.
ill have to work on maybe a heat shield, i may get away with just cutting out a square in the sound proofing then maybe pop riveting with a few washers (to make an air gap behind it) a thin sheet of aluminium plate where the turbo is.. we will see, it may be OK with just the sound proofing cut away., there's nothing really stopping me from adding it to the inside of the car.
for the engine i have decided to go with 0w/40 fully synthetic oil designed or turbo diesel vehicles without DPF's or Cat converters. of all modern oils it had the highest ZDDP content which is the main anti ware element of an engine oil (its something that is reduced a lot in modern oils as it poisons the cat converter and DPF). the fact it stays "runny" at cold temperatures means that it will help cold starting and means that the oil will get to where it needs to be a lot faster. i know these XUD engines like to leak oil (and thats running mineral oil!) me using fully synth oil maybe a bad idea in terms of leaking as with fully synth having a smaller molecular structure it will find those gaps in seals and leak by.. but with me changing the seals, i hope that wont be the case! time will tell. nothing like self applying rust proofing anyway.
i still have not done any work on the head lamp glasses.. i have all the bits now to do it but yeah.. i really dont want to break the glass. slow and steady wins the race with it i guess.
drive shafts can go in soon then gearbox oil.. i actually need to get a drive shaft for the passenger side.. i could rebuild my old one but meh i have the cash to get a new one..
also tempted to buy all replacement spheres too... hmmm question is, do you go for standard or comfort.. can i have your thoughts on this please? my guess is one is more soft and one is more sporty?
anyway thats all for this week!


this camera makes it look bad, but the colour of it actually looks pretty good in the bay.
this is pretty tight down here for all the pipes..

hang on.. lets have a closer look at that..

hmm that turbo outlet is way too close to that heater matrix pipe connection.. if i spin it around it should be good..

much better, now the turbo outlet is lower down.. ill just have to make a longer pipe to compensate that, should be ok.
i have got 3 coolant pipes to try and re-route, the one from the back of the block to the heater matrix, and the one from the heater matrix to the cylinder head.
the turbo vane actuator is a bit close to the bulk head but i think i can make it so it wont hit it by spacing the rubber bump stop on the engine mount out. i have not got the bottom engine mount tightened up yet, but that does hold the engine pretty steady its a good job i changed them all really as it holds the engine pretty firm in place.
ill have to work on maybe a heat shield, i may get away with just cutting out a square in the sound proofing then maybe pop riveting with a few washers (to make an air gap behind it) a thin sheet of aluminium plate where the turbo is.. we will see, it may be OK with just the sound proofing cut away., there's nothing really stopping me from adding it to the inside of the car.
for the engine i have decided to go with 0w/40 fully synthetic oil designed or turbo diesel vehicles without DPF's or Cat converters. of all modern oils it had the highest ZDDP content which is the main anti ware element of an engine oil (its something that is reduced a lot in modern oils as it poisons the cat converter and DPF). the fact it stays "runny" at cold temperatures means that it will help cold starting and means that the oil will get to where it needs to be a lot faster. i know these XUD engines like to leak oil (and thats running mineral oil!) me using fully synth oil maybe a bad idea in terms of leaking as with fully synth having a smaller molecular structure it will find those gaps in seals and leak by.. but with me changing the seals, i hope that wont be the case! time will tell. nothing like self applying rust proofing anyway.
i still have not done any work on the head lamp glasses.. i have all the bits now to do it but yeah.. i really dont want to break the glass. slow and steady wins the race with it i guess.
drive shafts can go in soon then gearbox oil.. i actually need to get a drive shaft for the passenger side.. i could rebuild my old one but meh i have the cash to get a new one..
also tempted to buy all replacement spheres too... hmmm question is, do you go for standard or comfort.. can i have your thoughts on this please? my guess is one is more soft and one is more sporty?
anyway thats all for this week!
- JohnDragonMan
Drives: Citroen Dispatch with retrofitted air conditioning
Classic Fiat Panda 4x4 Sisley named Talon (long term storage)
always buy base spec. that way you have the fun of putting all the cool bit on your vehicle
Drives: Citroen Dispatch with retrofitted air conditioning
Classic Fiat Panda 4x4 Sisley named Talon (long term storage)
always buy base spec. that way you have the fun of putting all the cool bit on your vehicle
- Dragon Man
- BXpert
- Posts: 187
- Joined: Sat Aug 22, 2015 3:45 am
- Location: The East Midlands, Derby
- My Cars: Citroen Dispatch 2.0L HDi 2005
Fiat Panda 4x4 Sisley 1991 - x 6
- Contact:
Re: John Dragon Man's Citroen BX Diesel Estate
hey guys!
well i have done a little more work today.
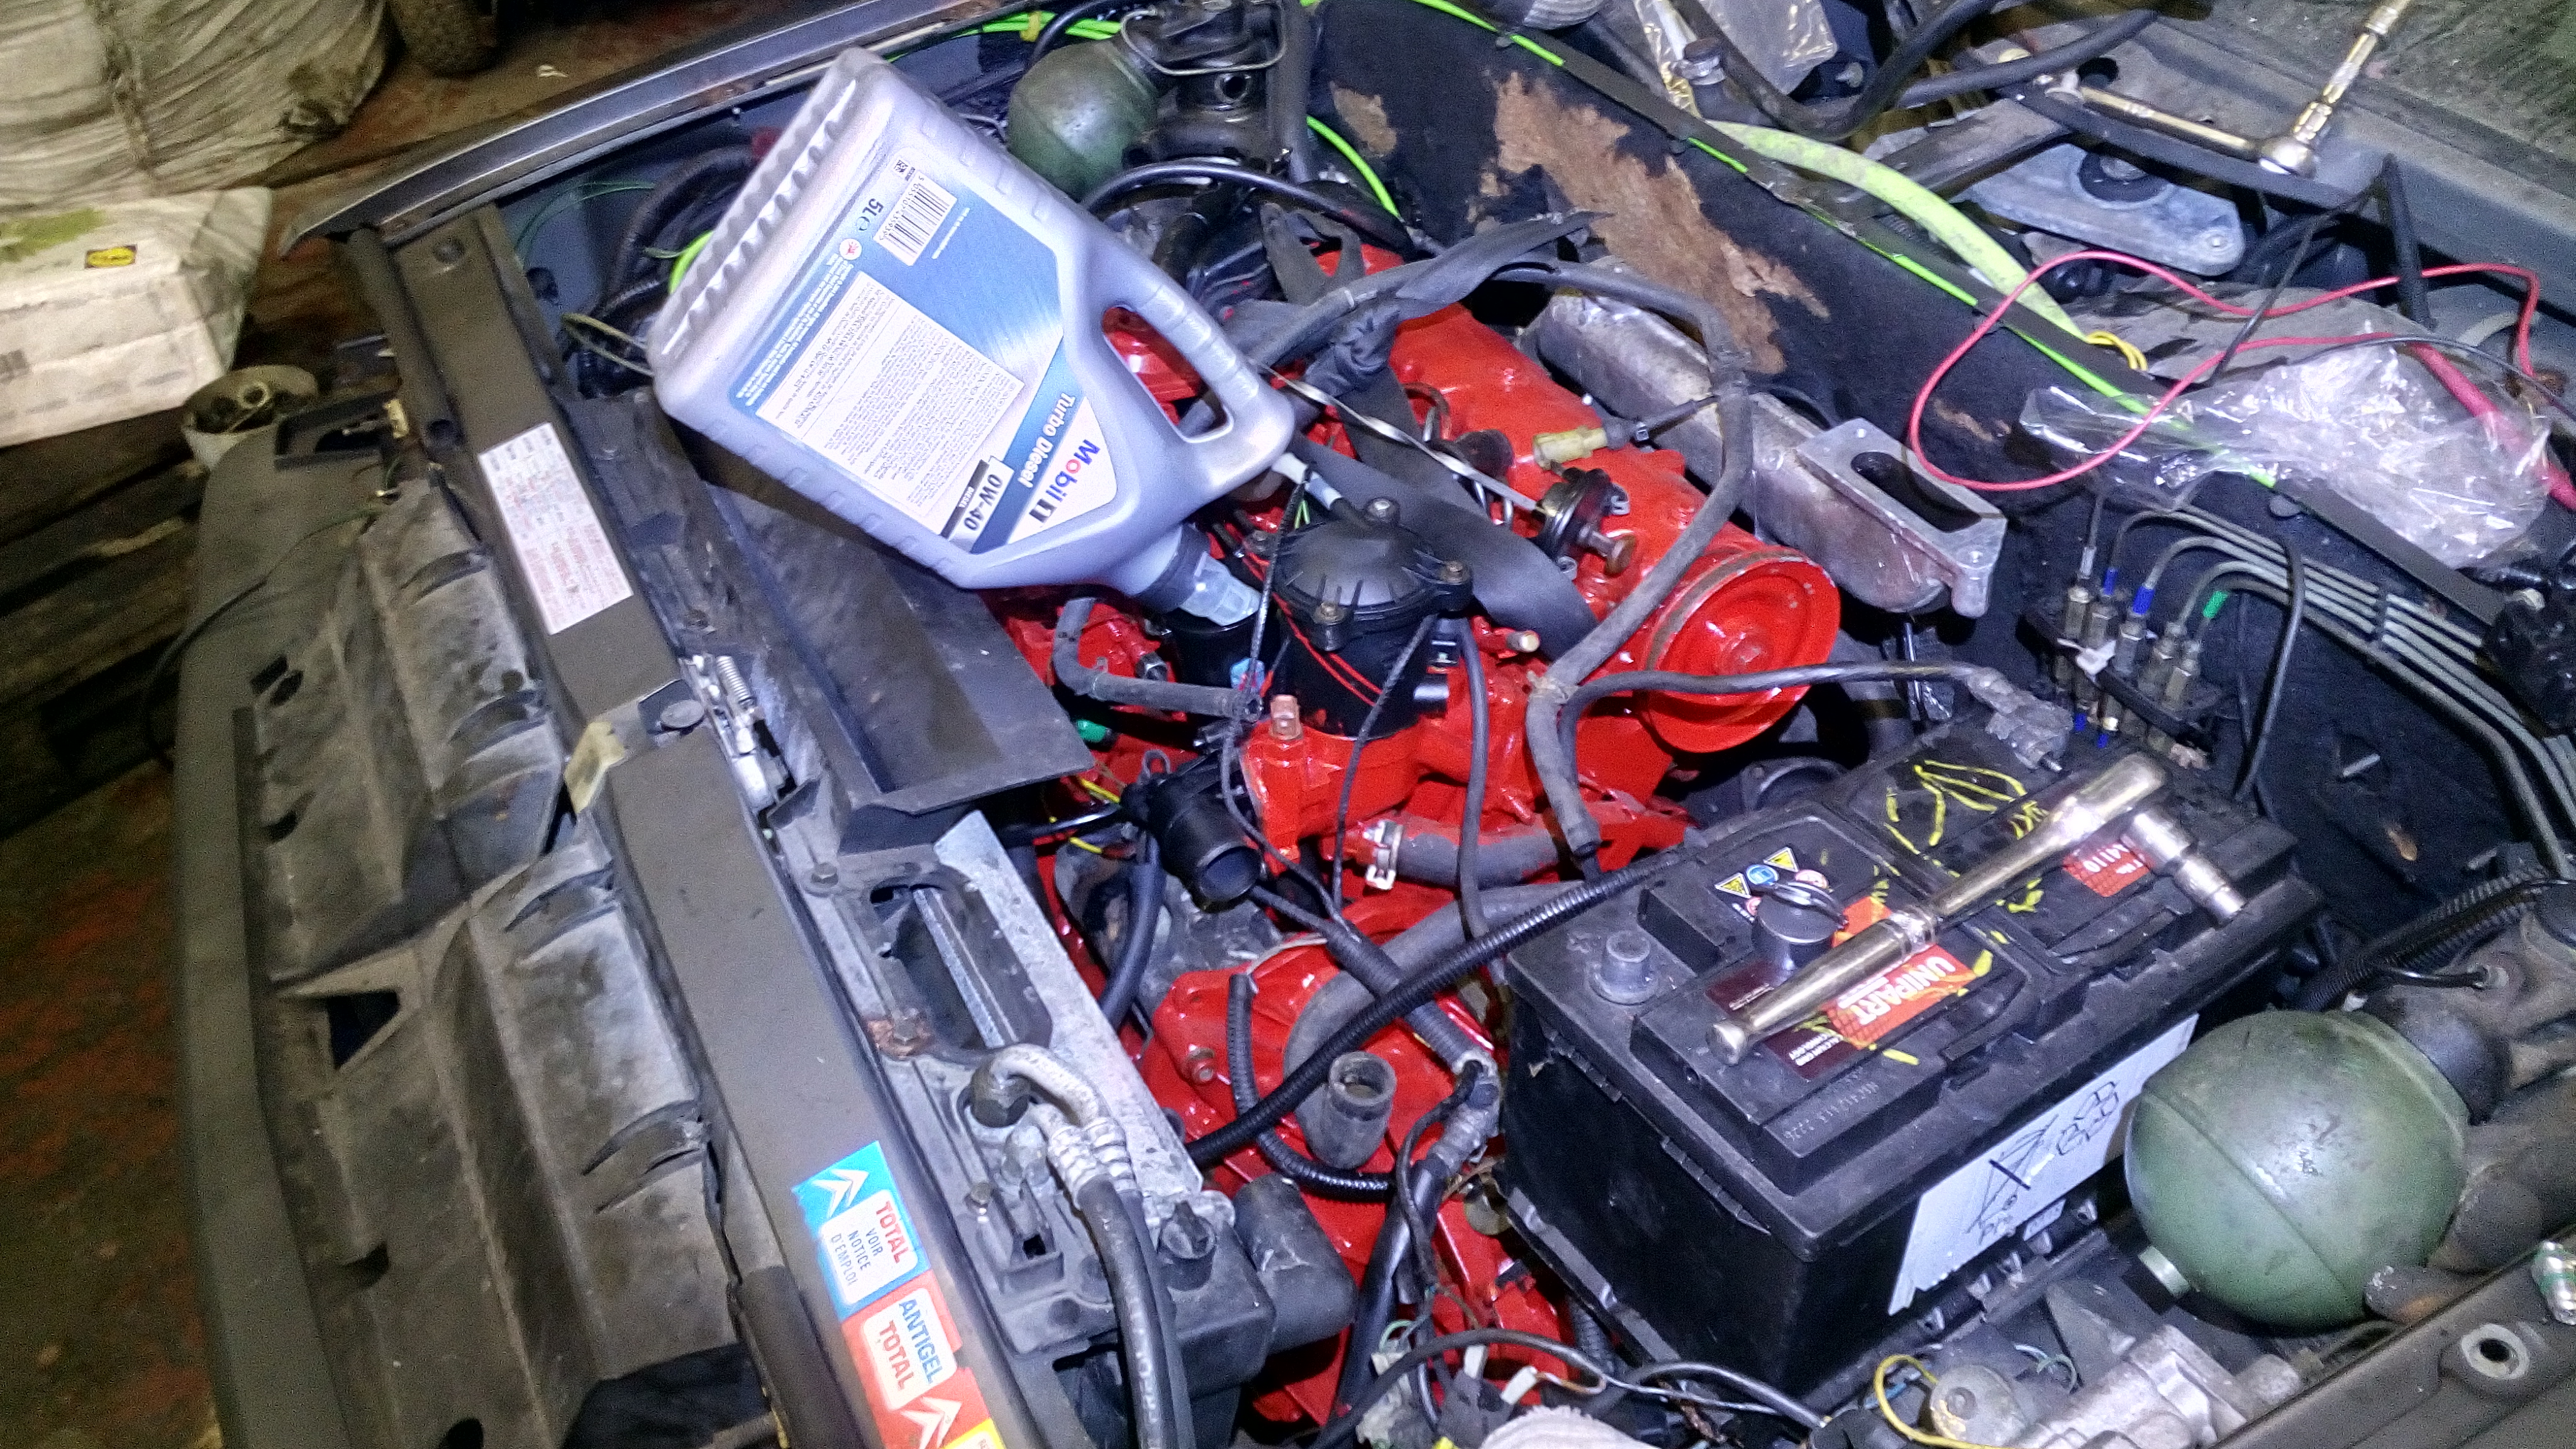
i have flushed the engine with diesel a few times. only cranking on the starter just to wash out any old stuff. i did this till the diesel was almost clear. then i put the new oil in with a MANN W712/8 oil filter.
heres a few pictures:
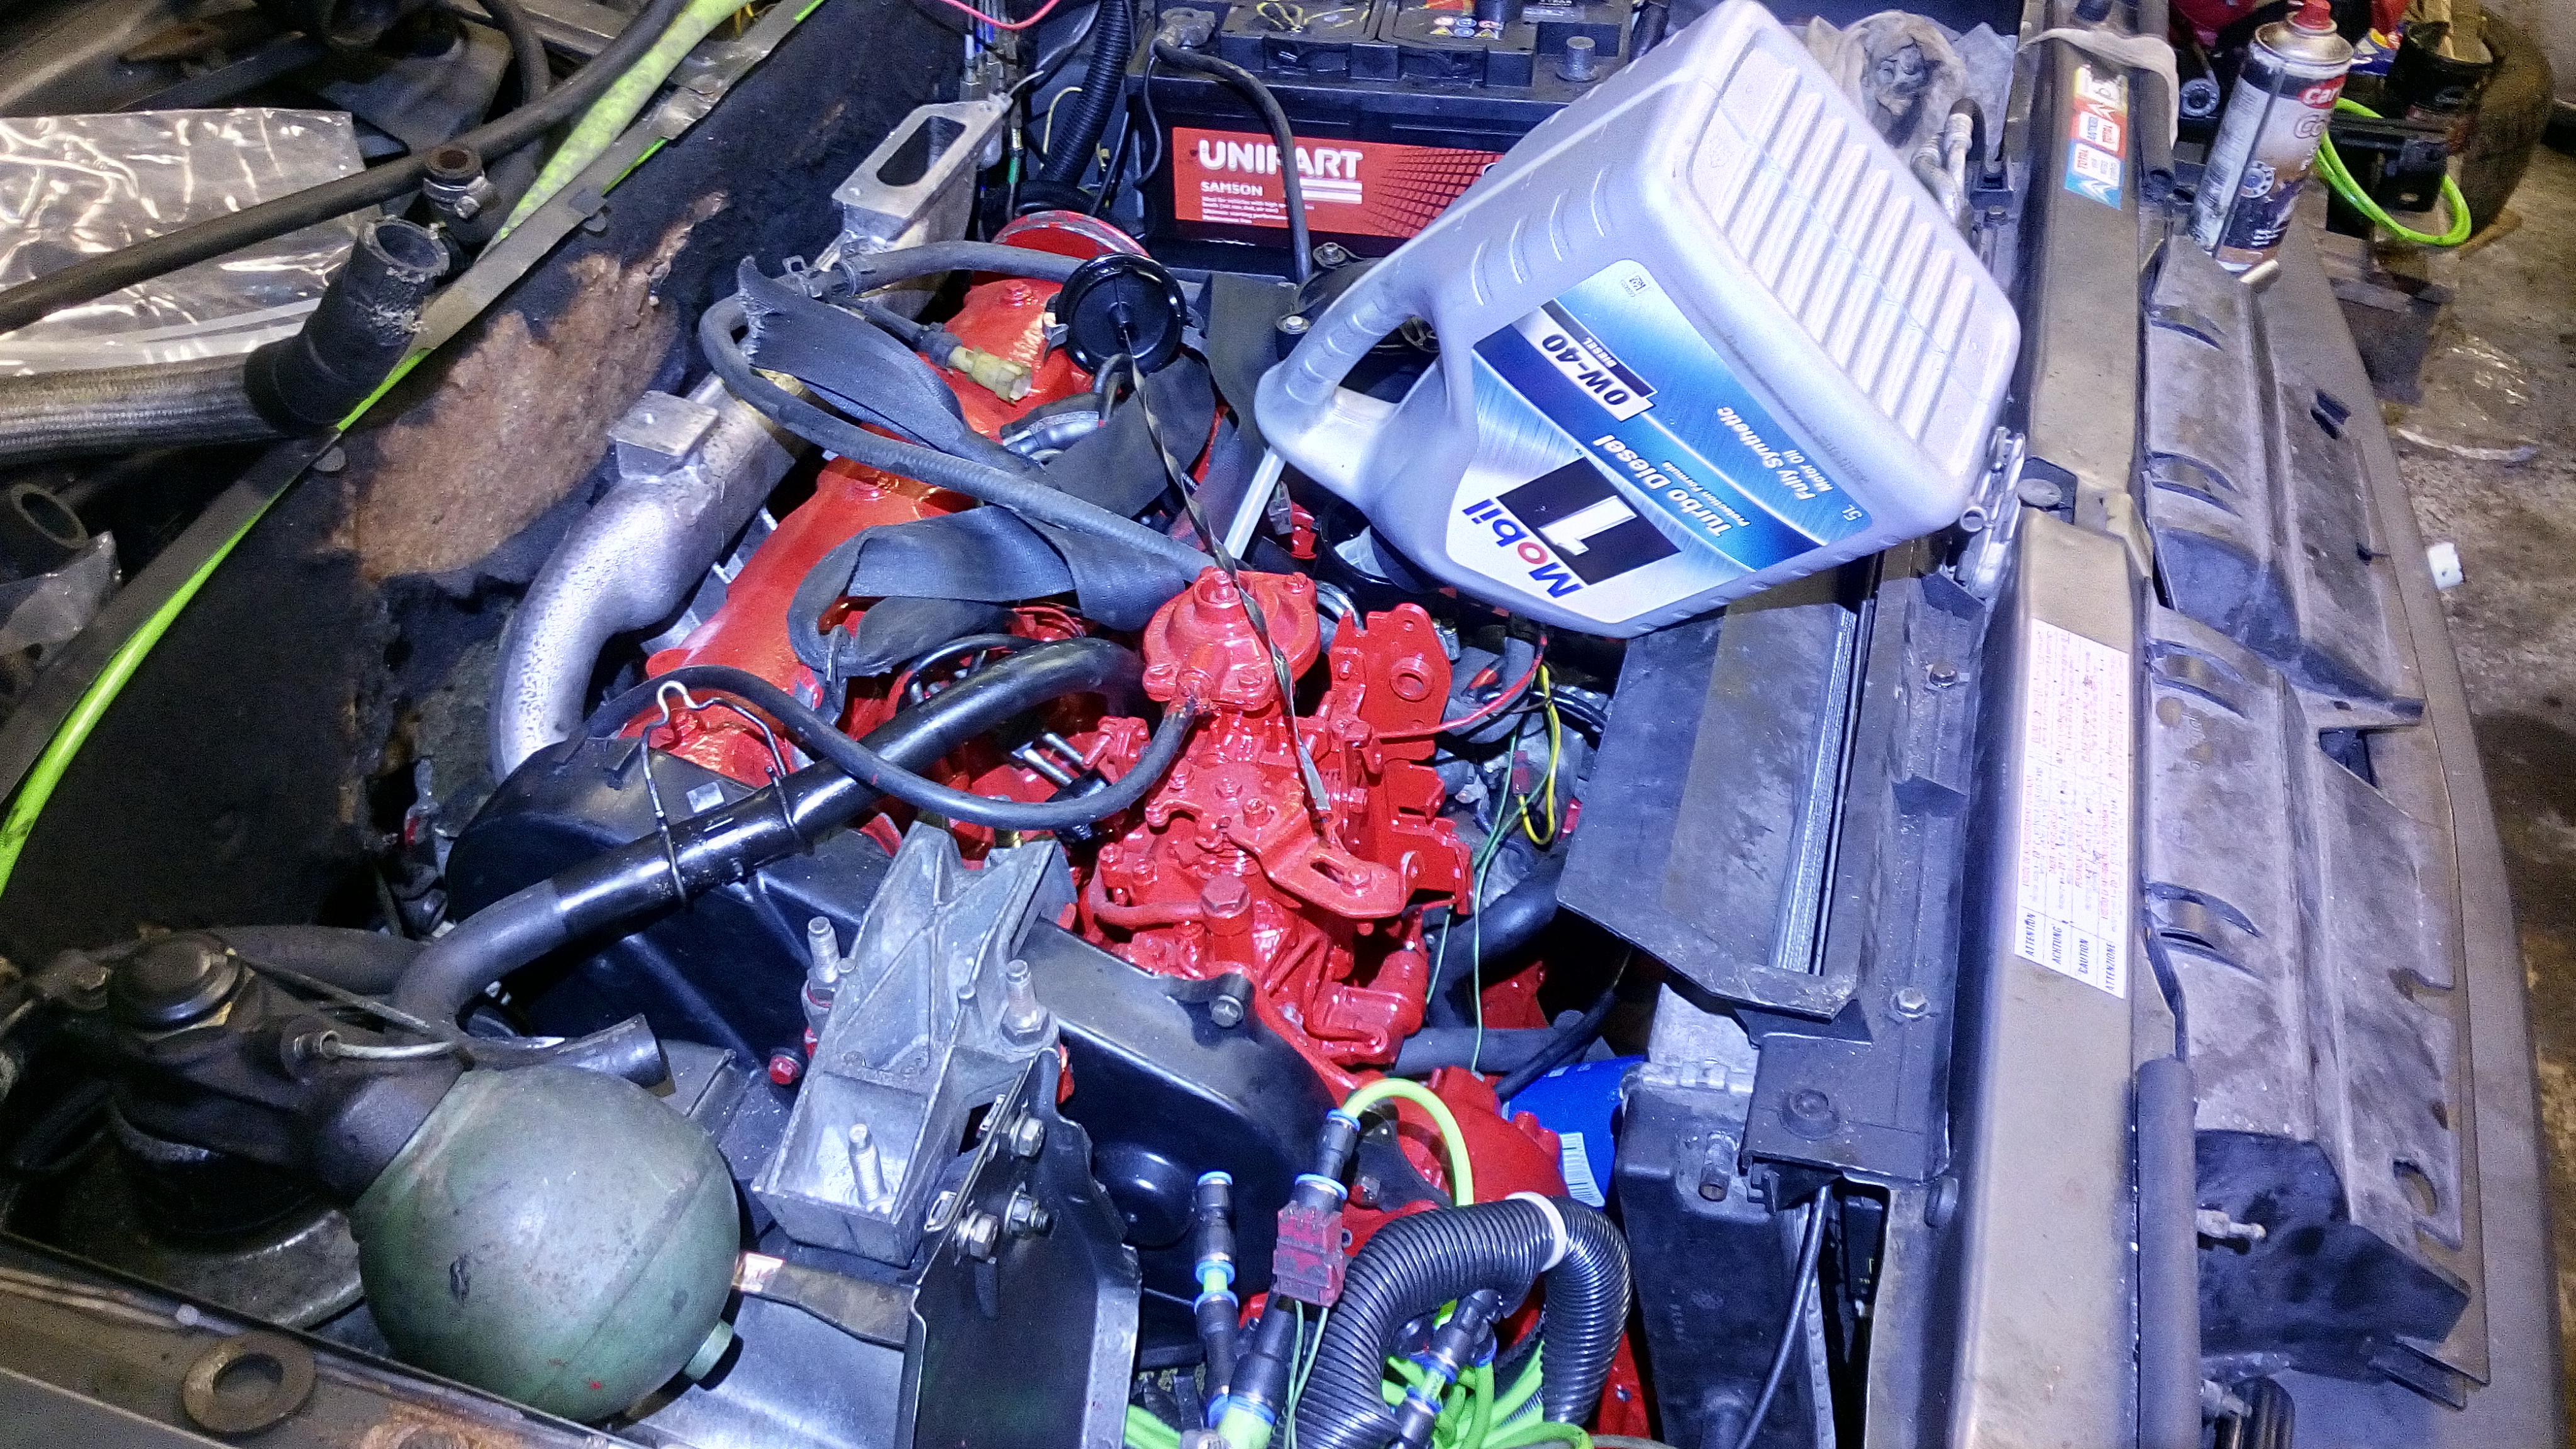
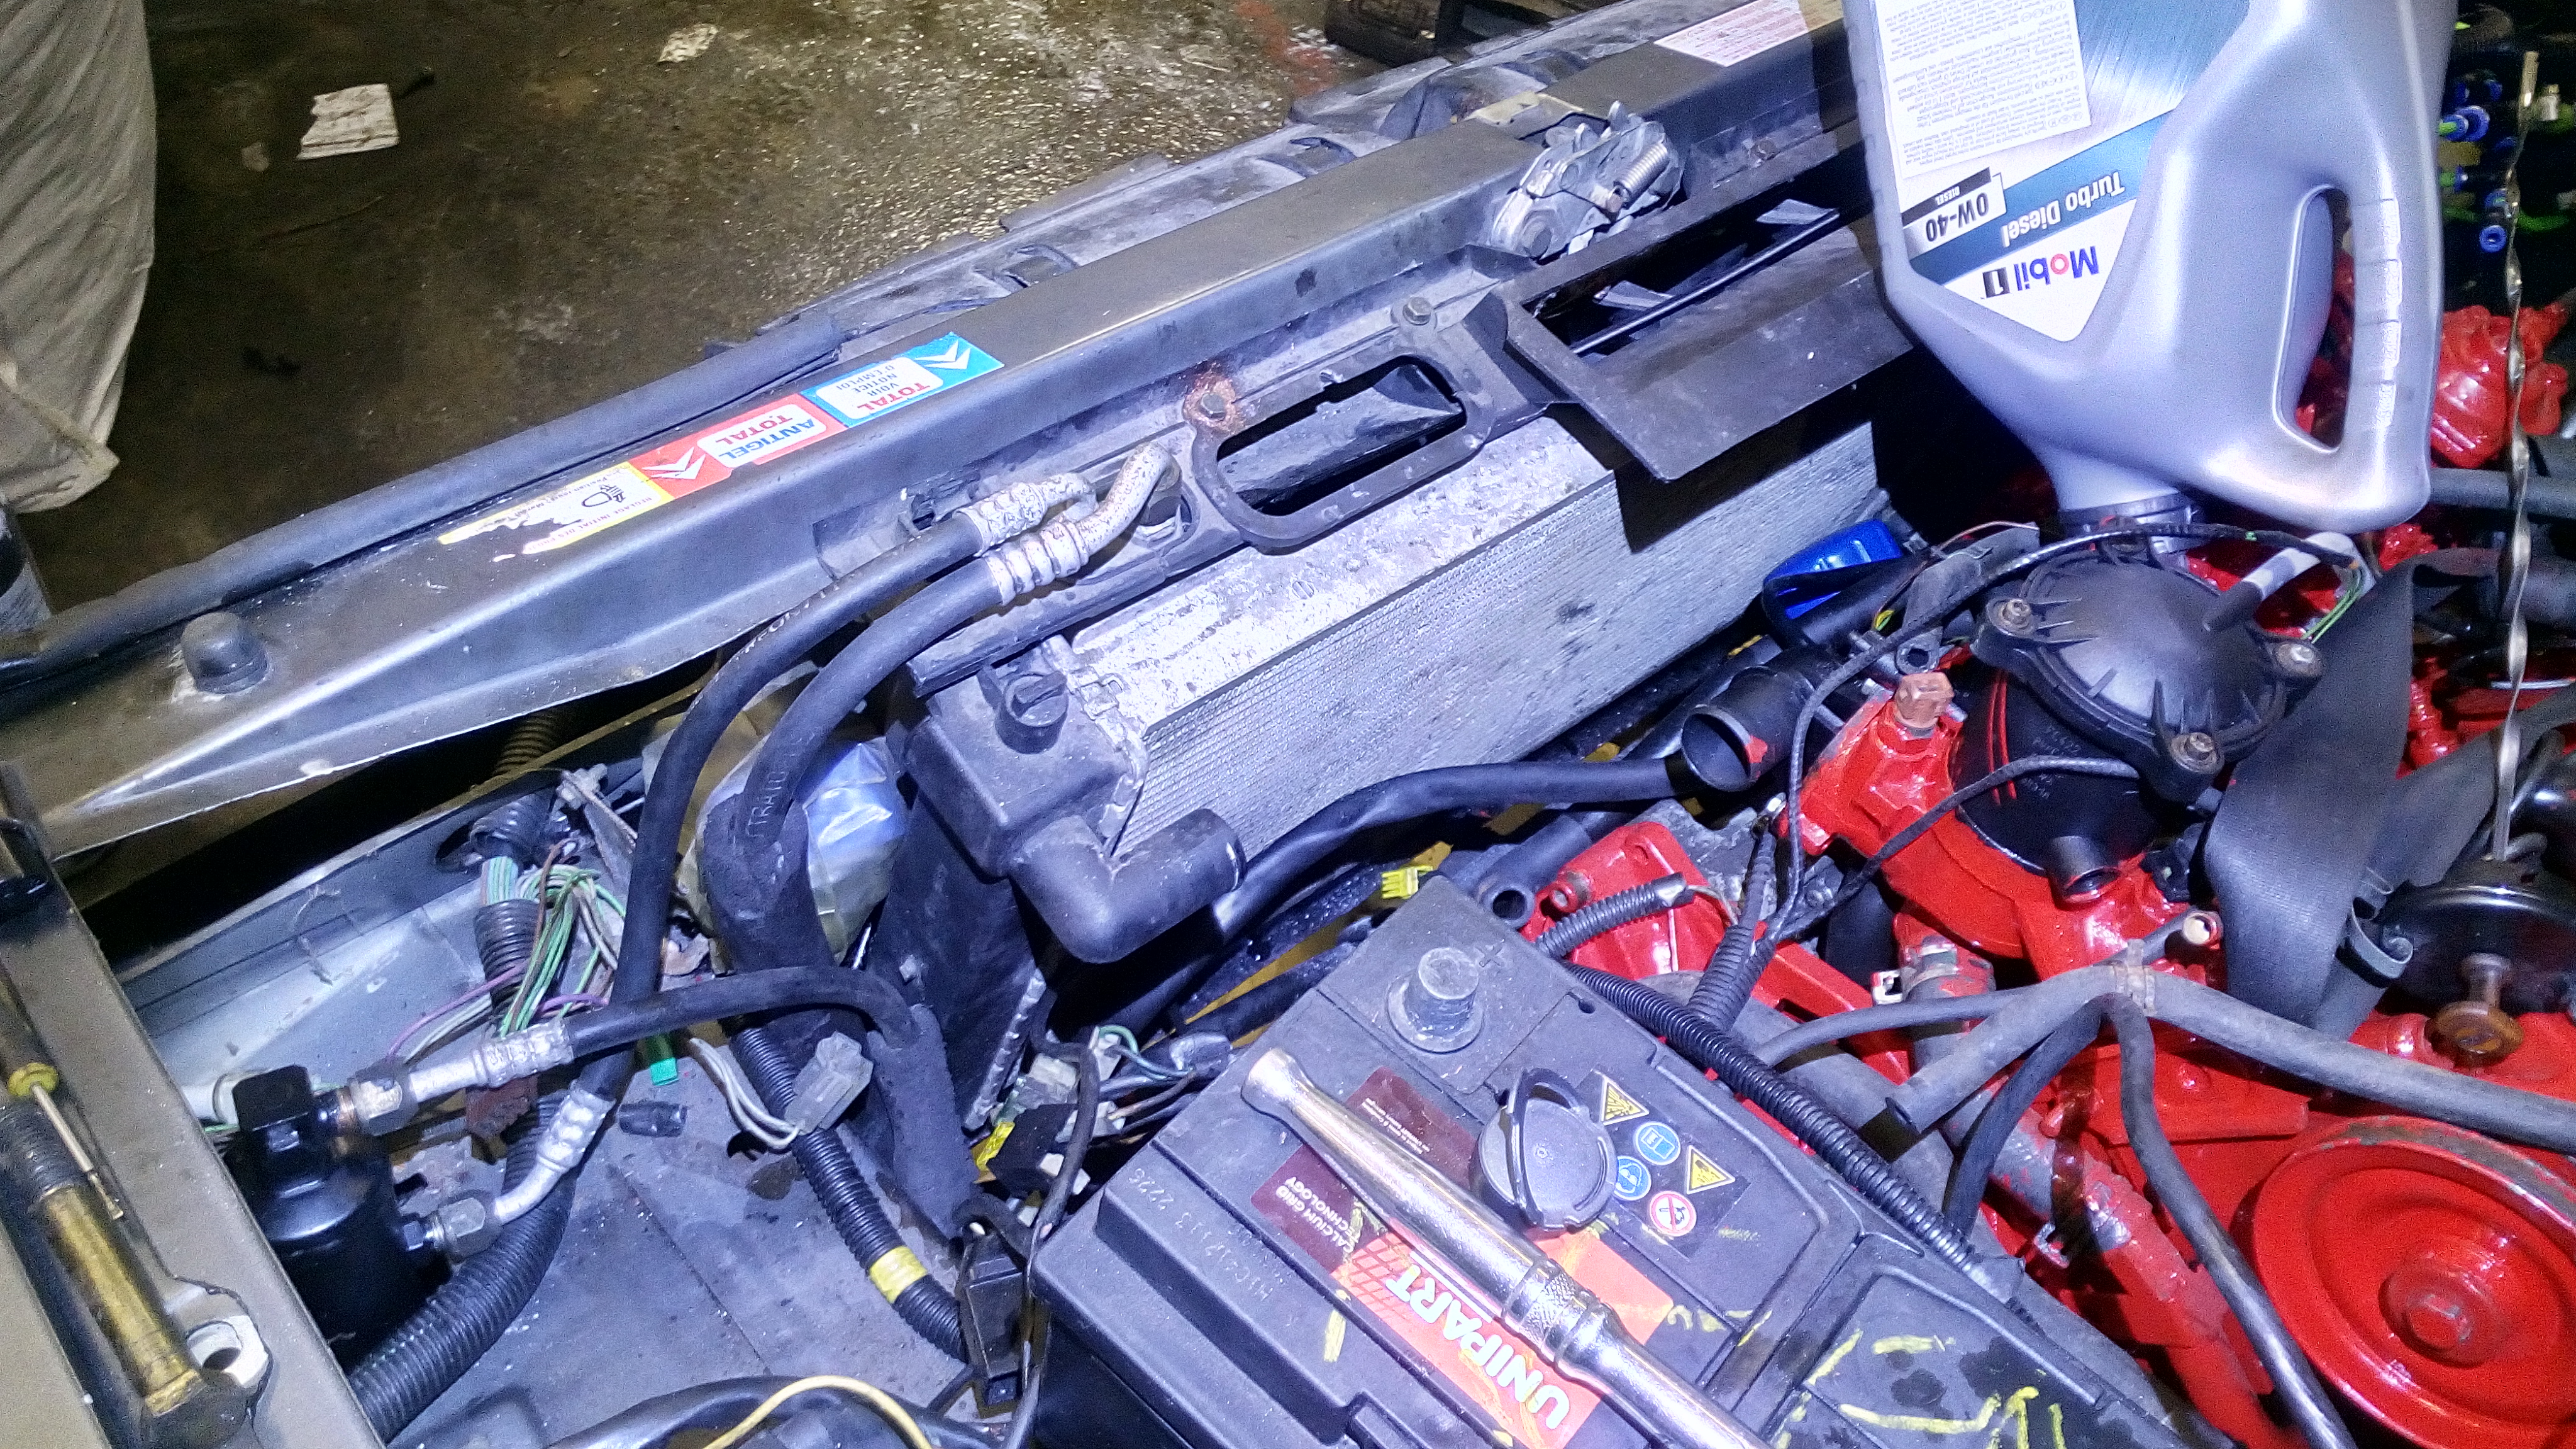
i have also replaced all of the external air conditioning piping seals too.. i think i just have to do a few under the dash. i have also filled the compressor with 135ml of PAO oil too. i am holding the system in a vacuum for now till i can get someone "trained" to fill the system for me.
as you can see, the radiators are in now:
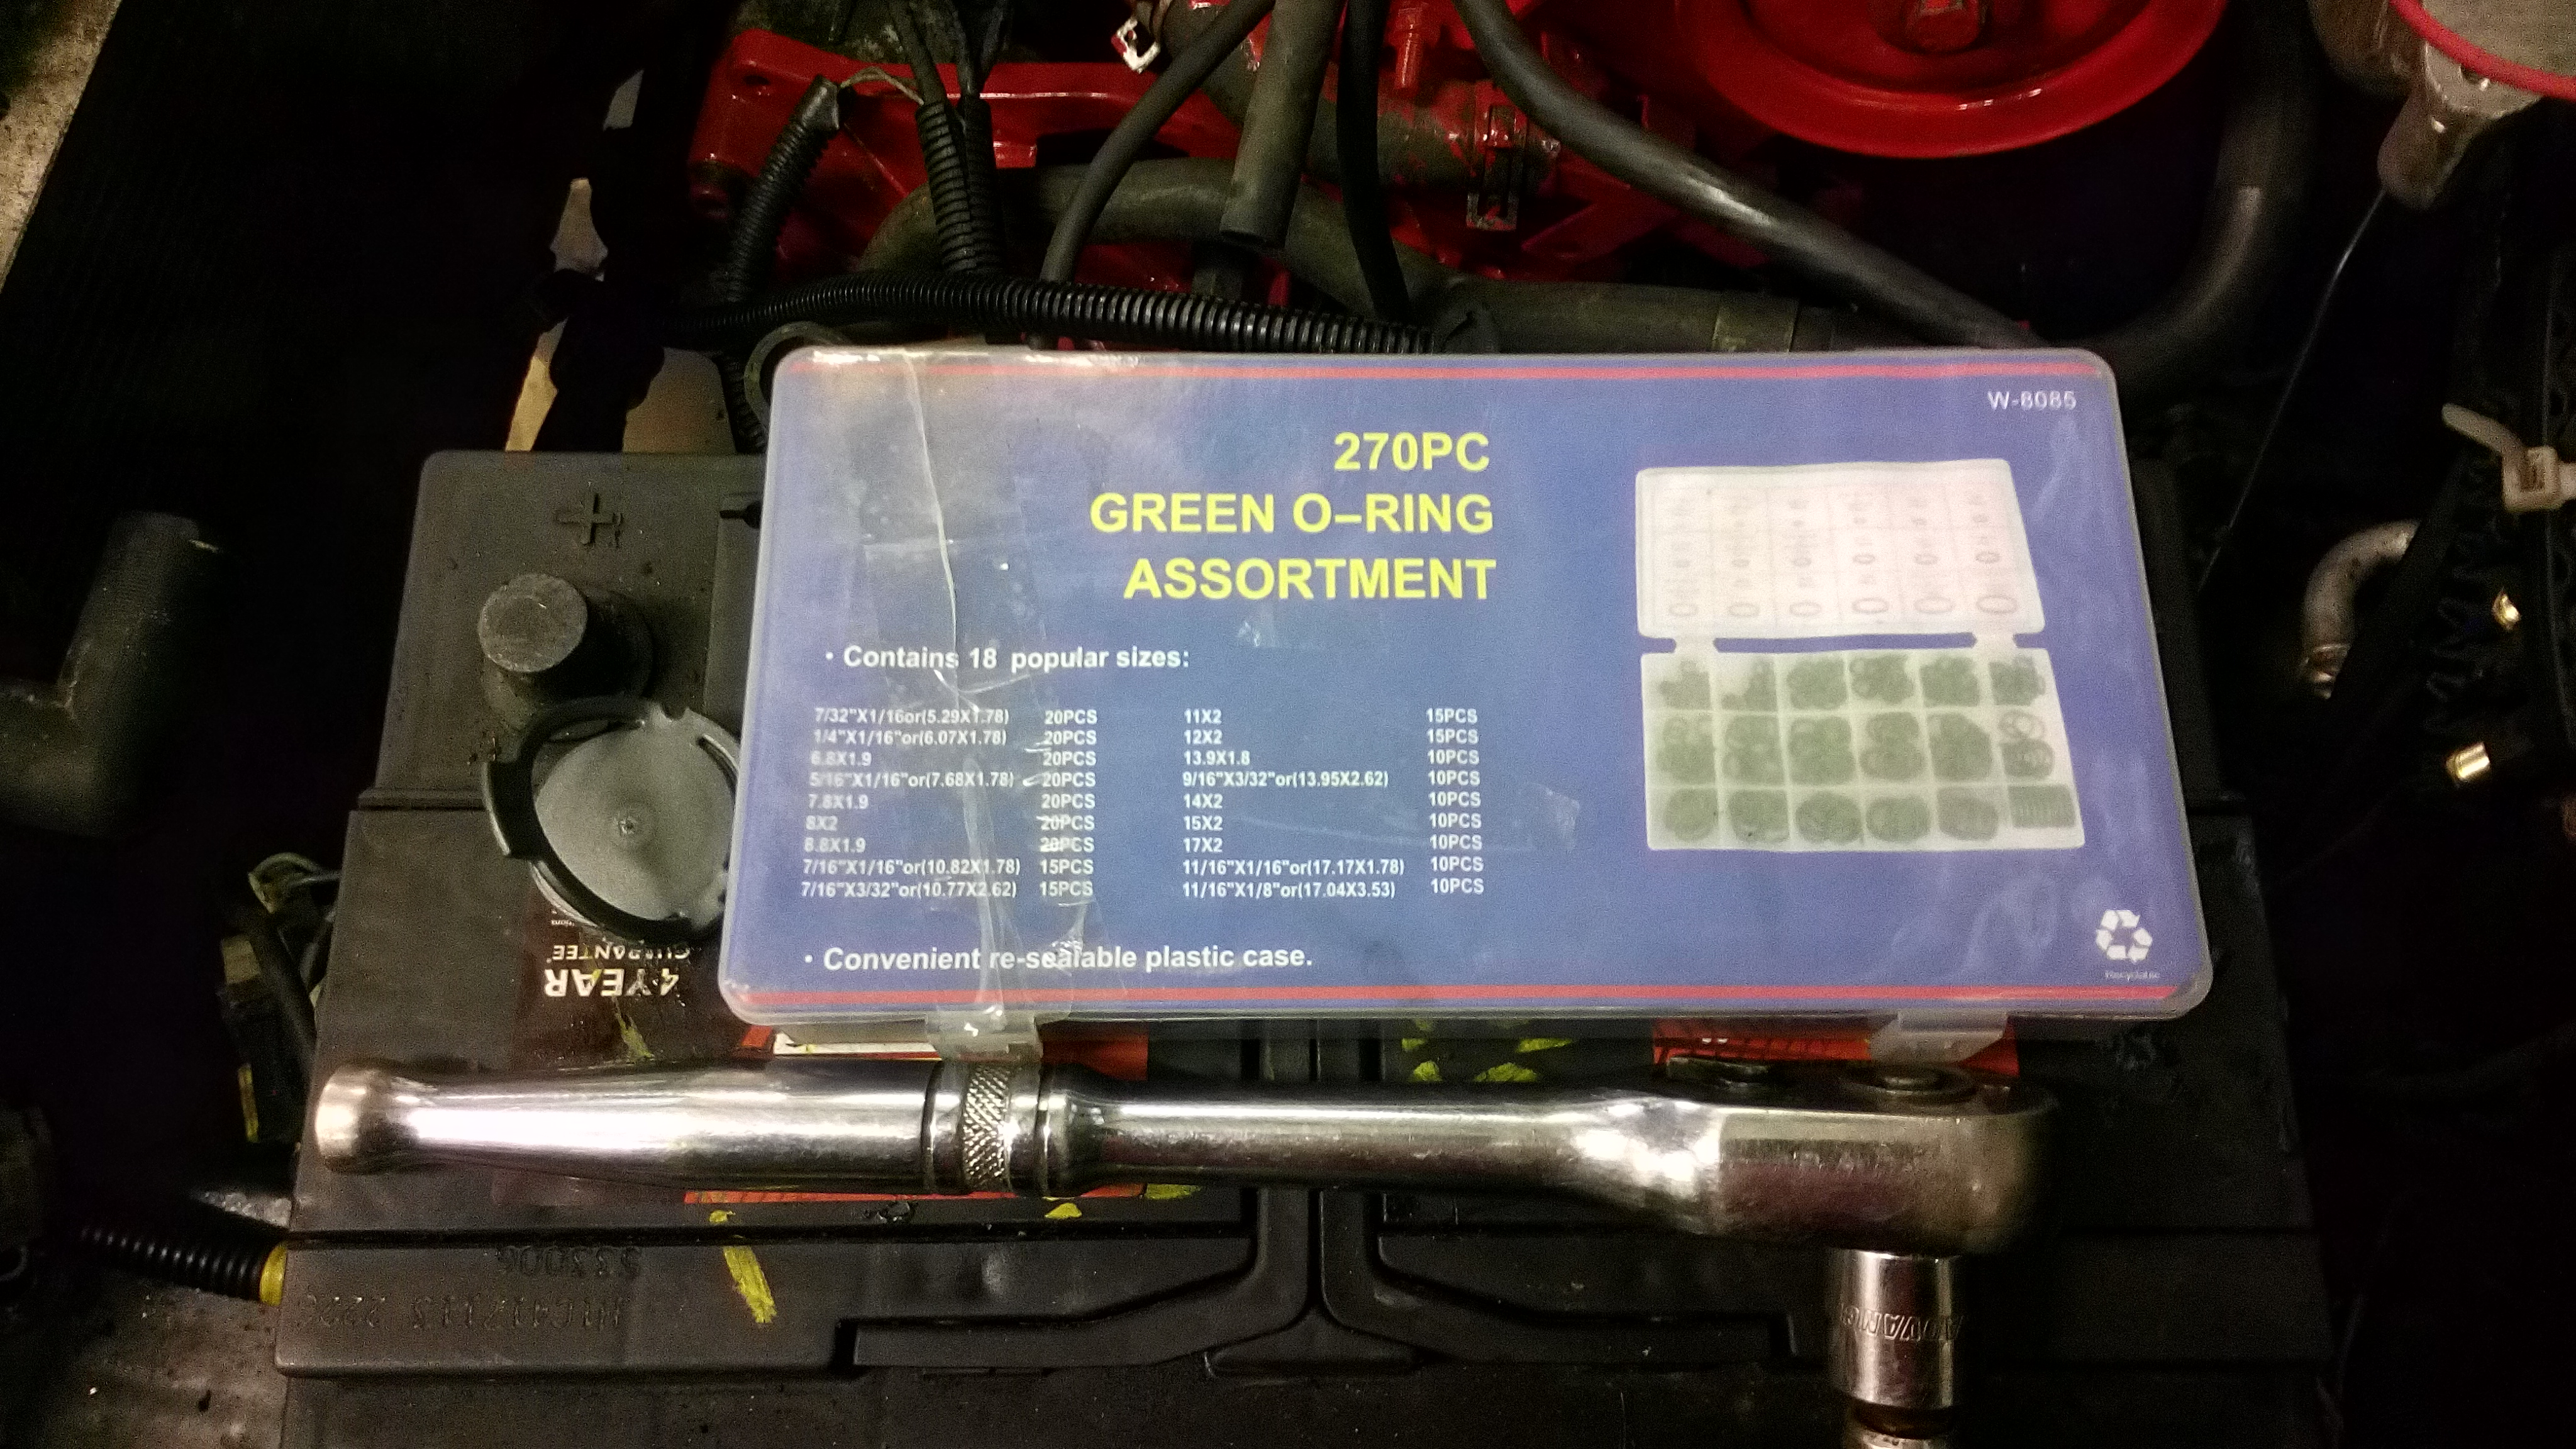
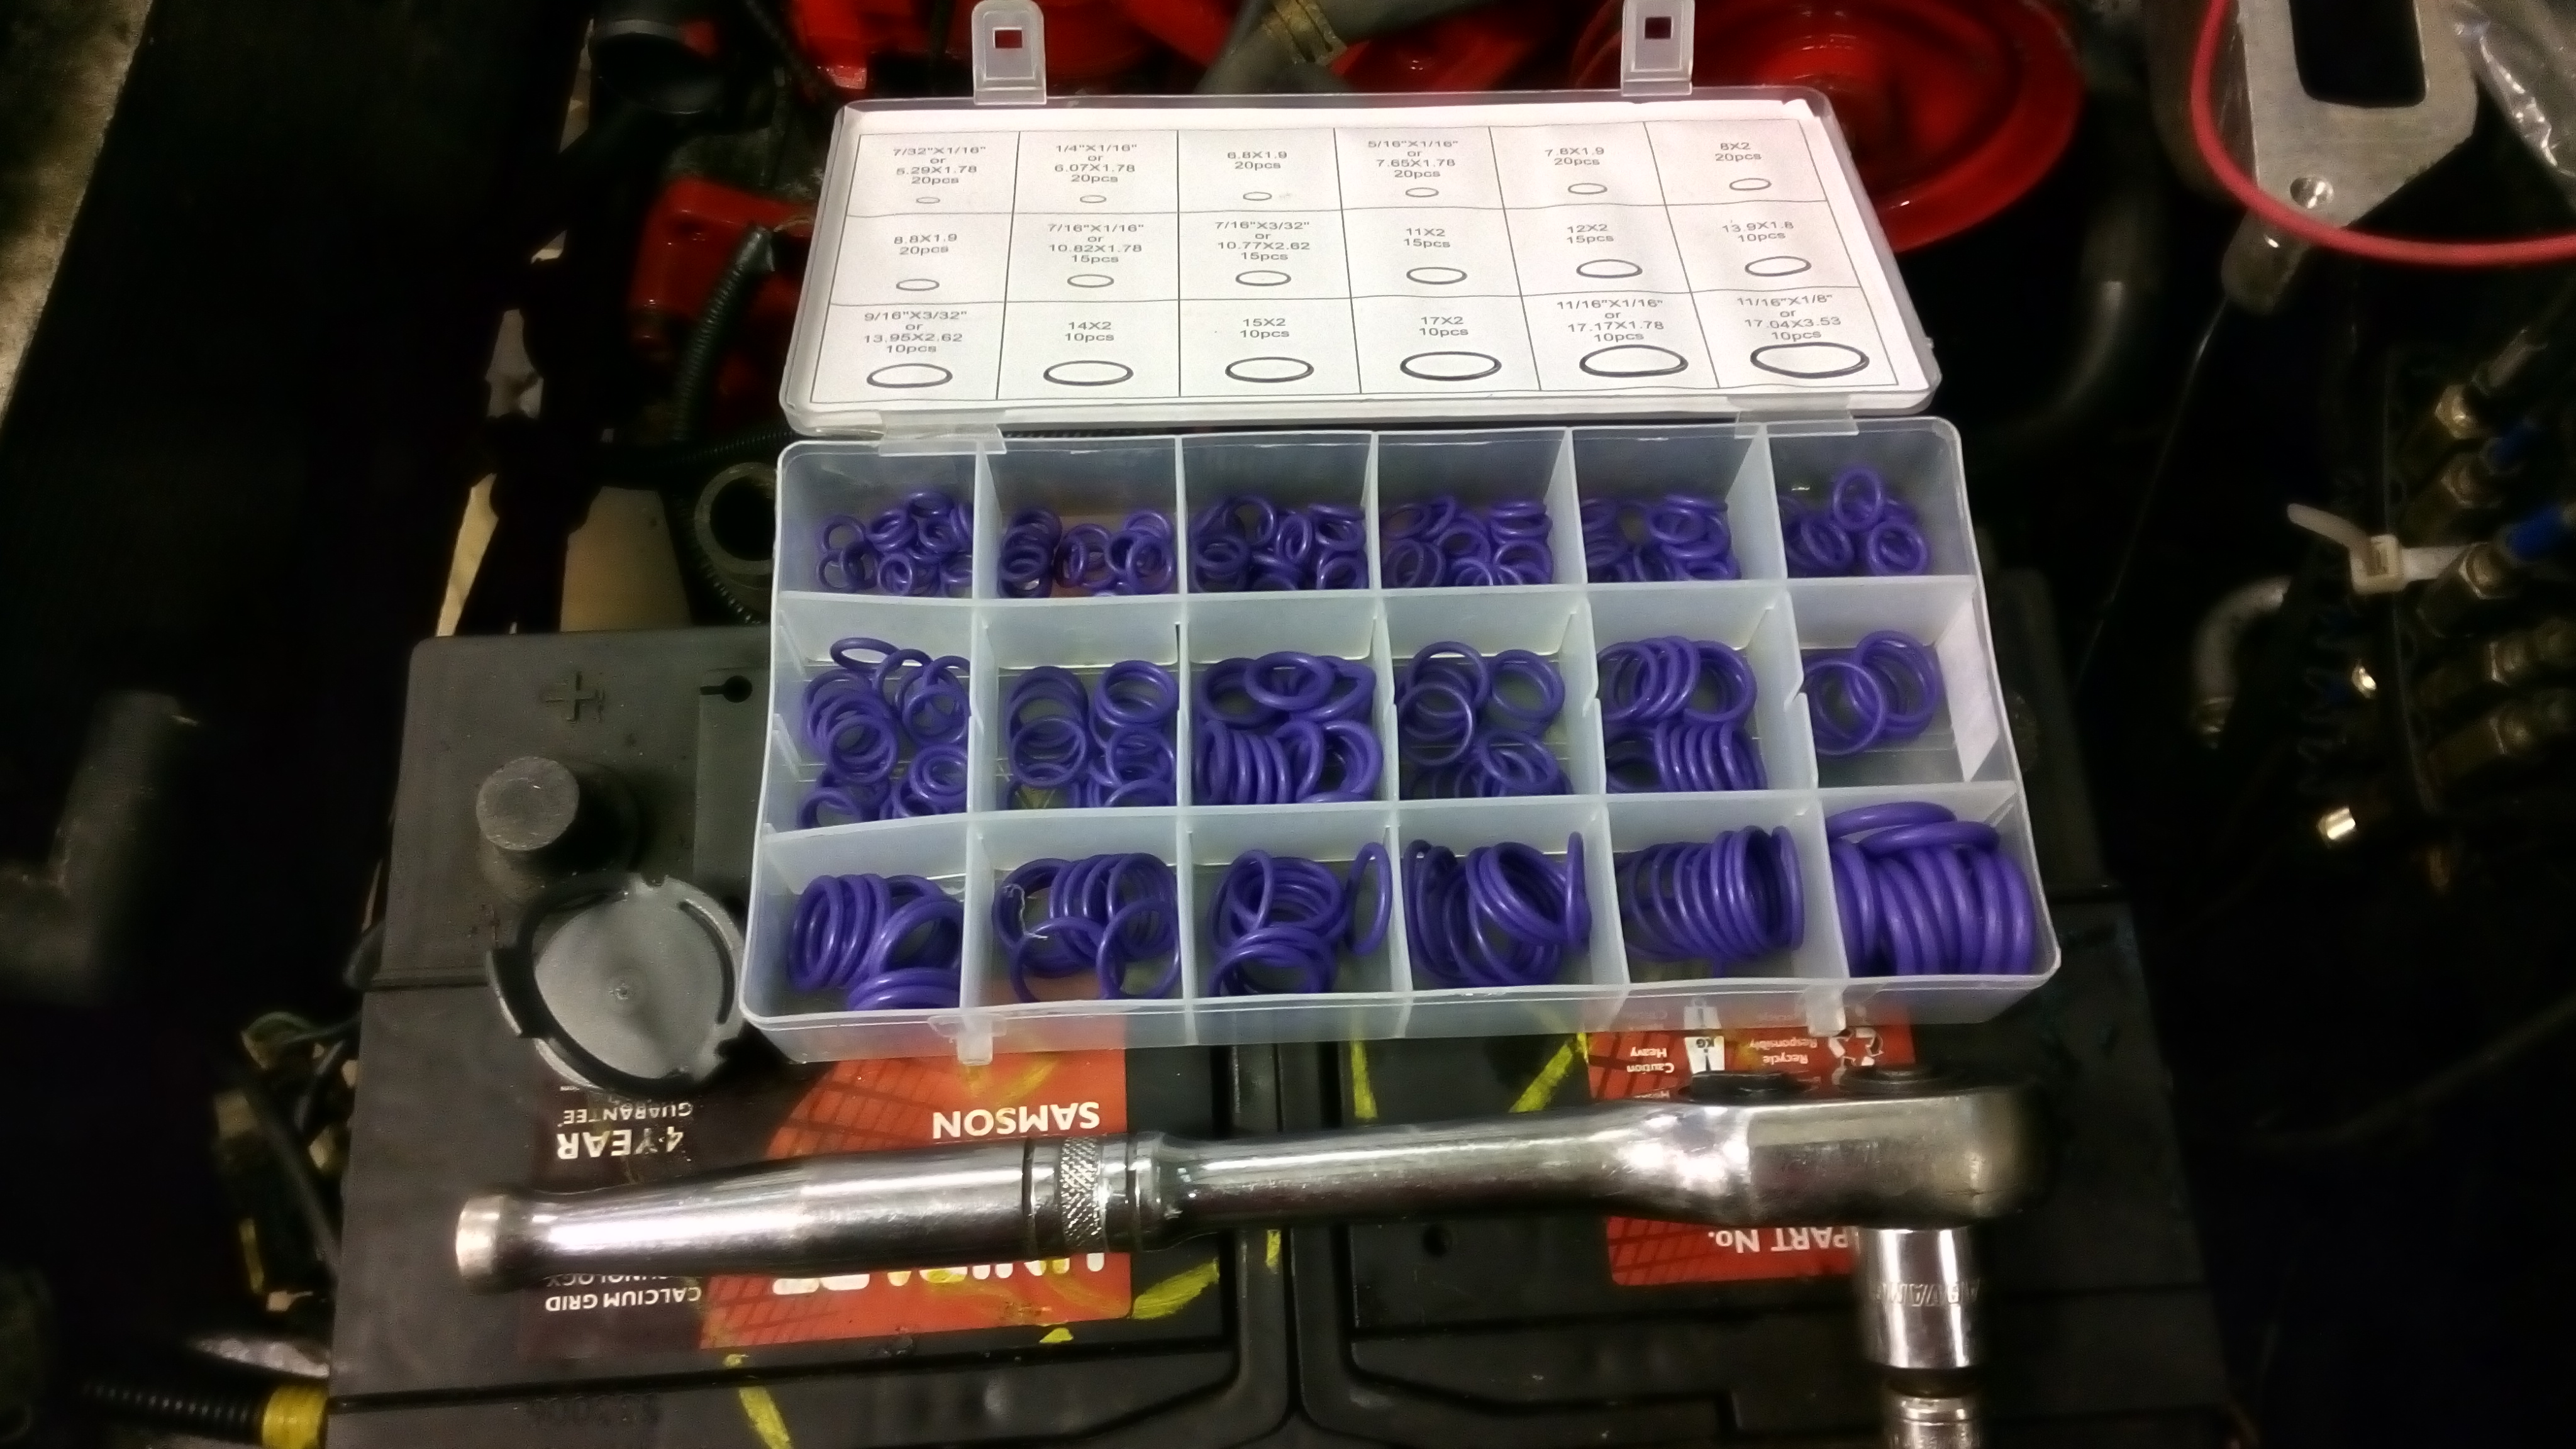
nice "Green" seals..
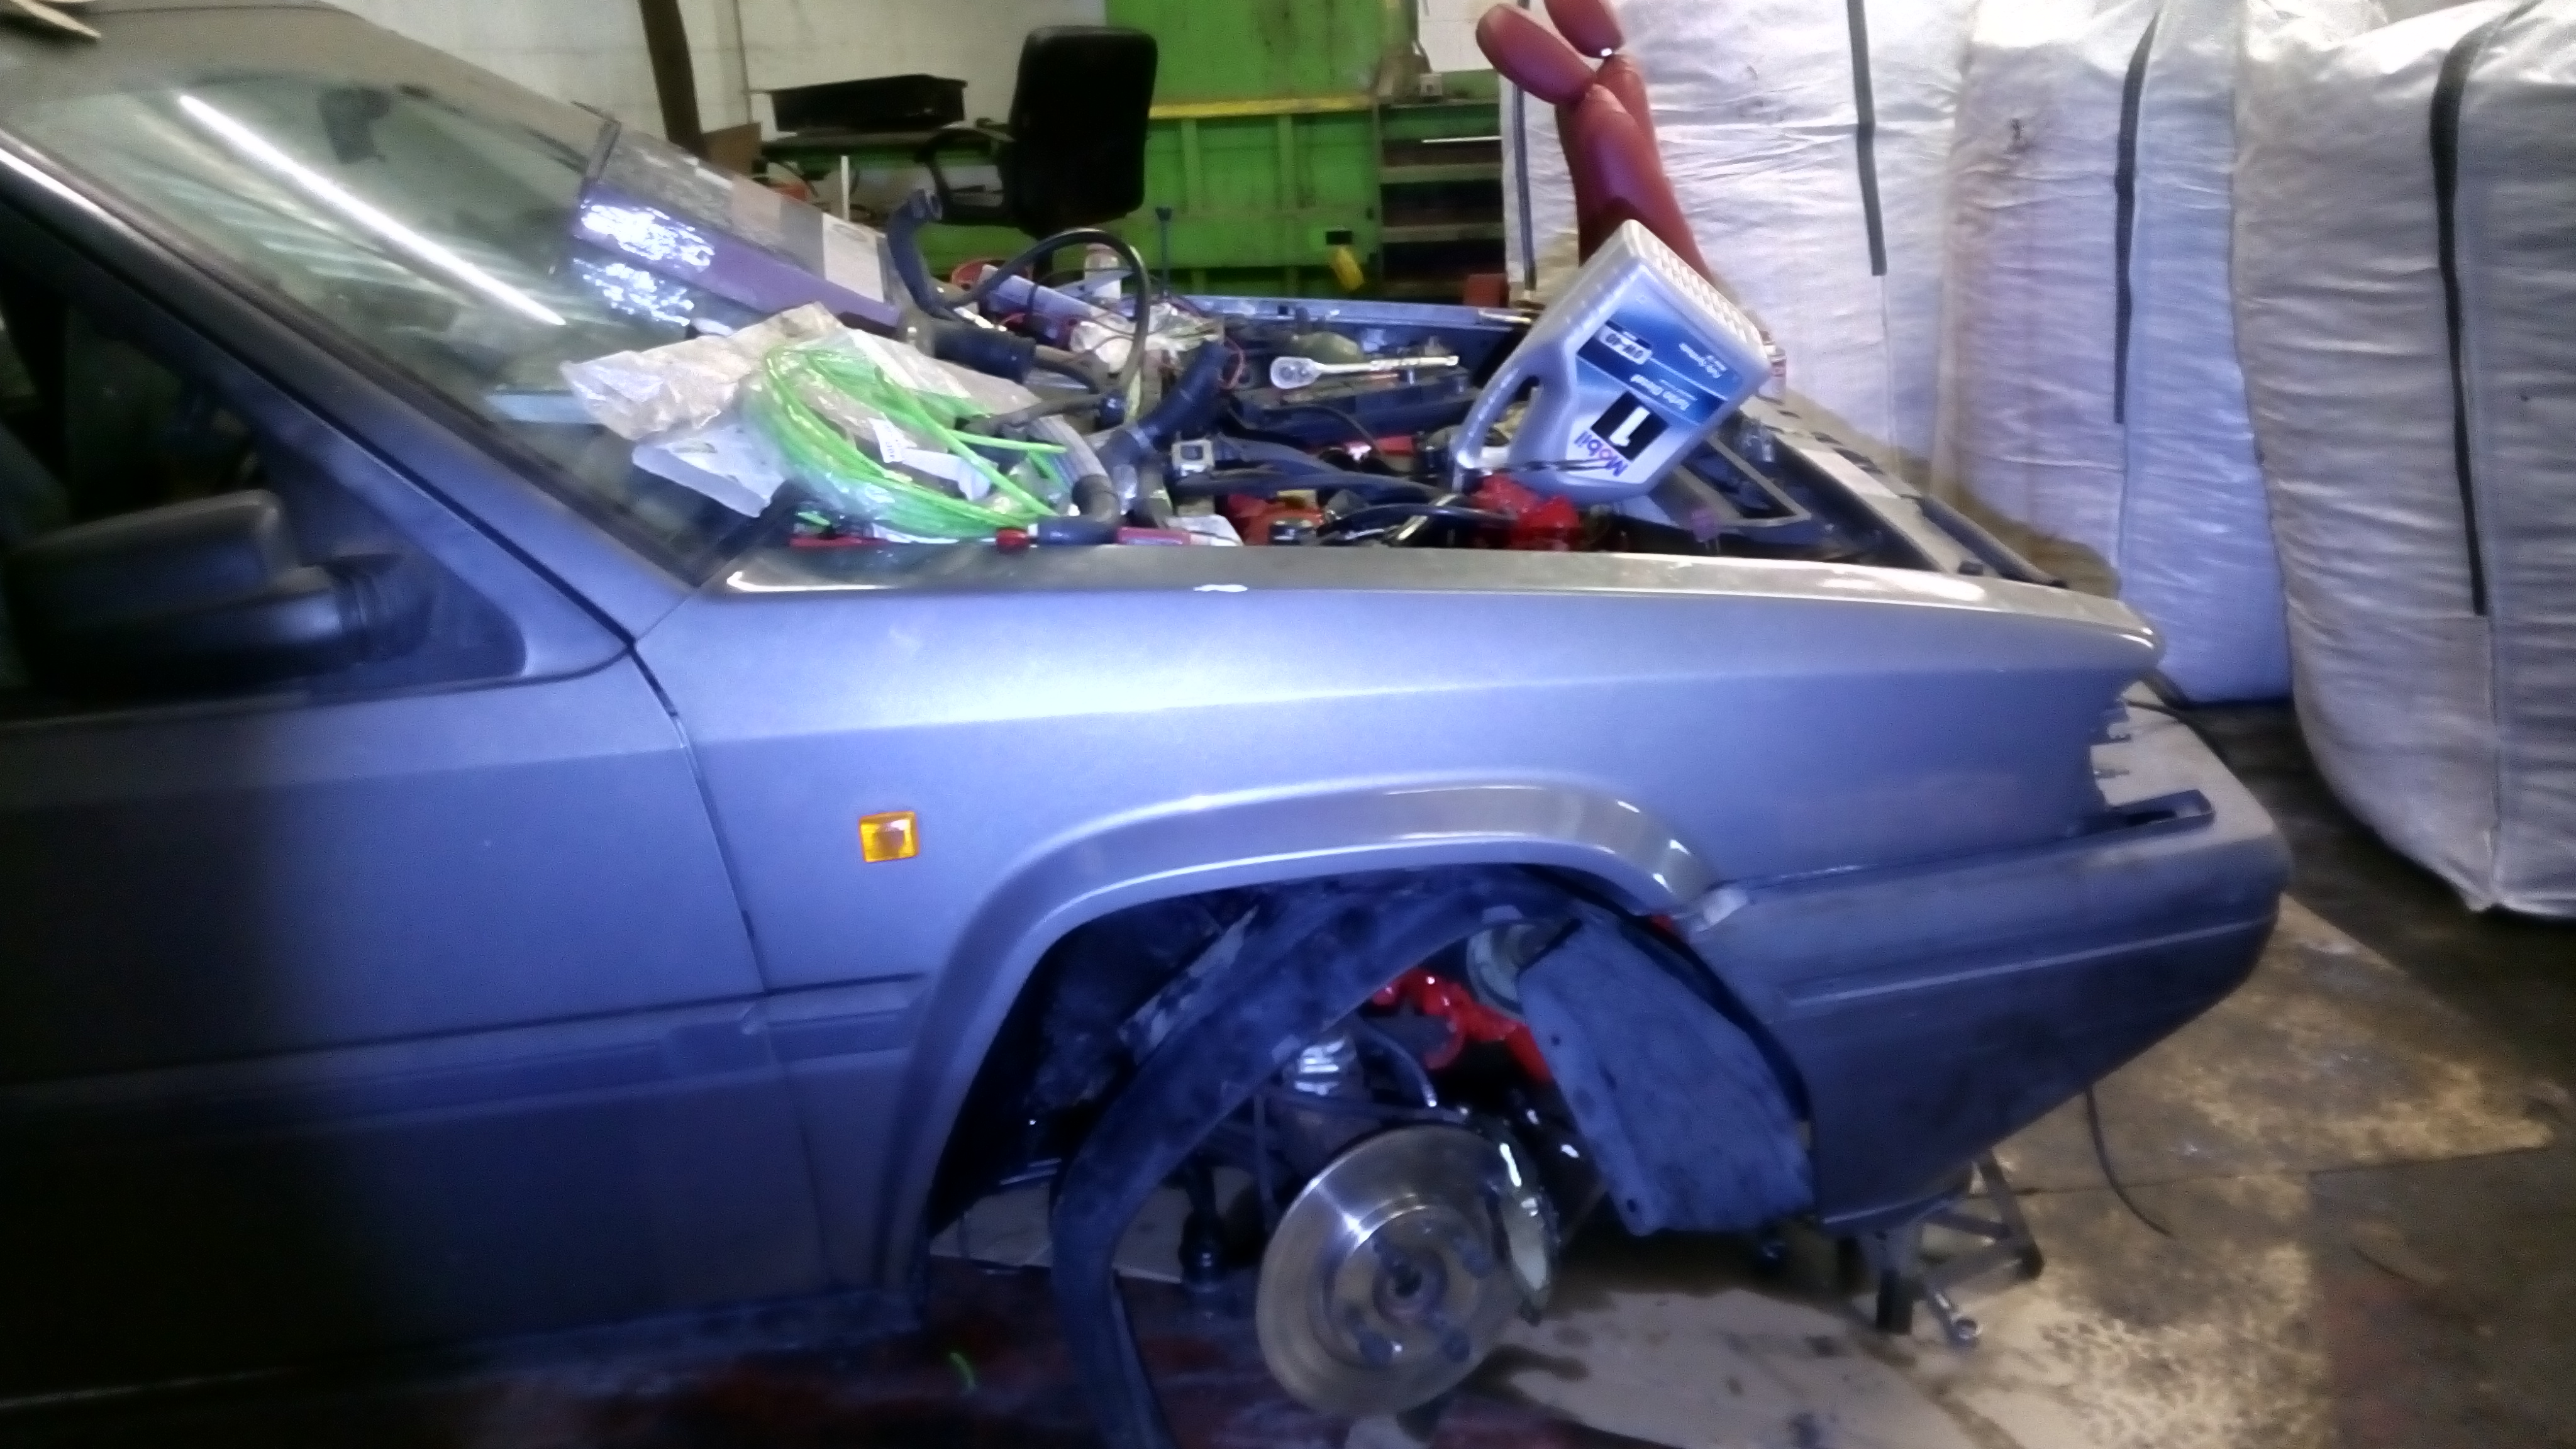
drivers side inner wheel arch liner fitted
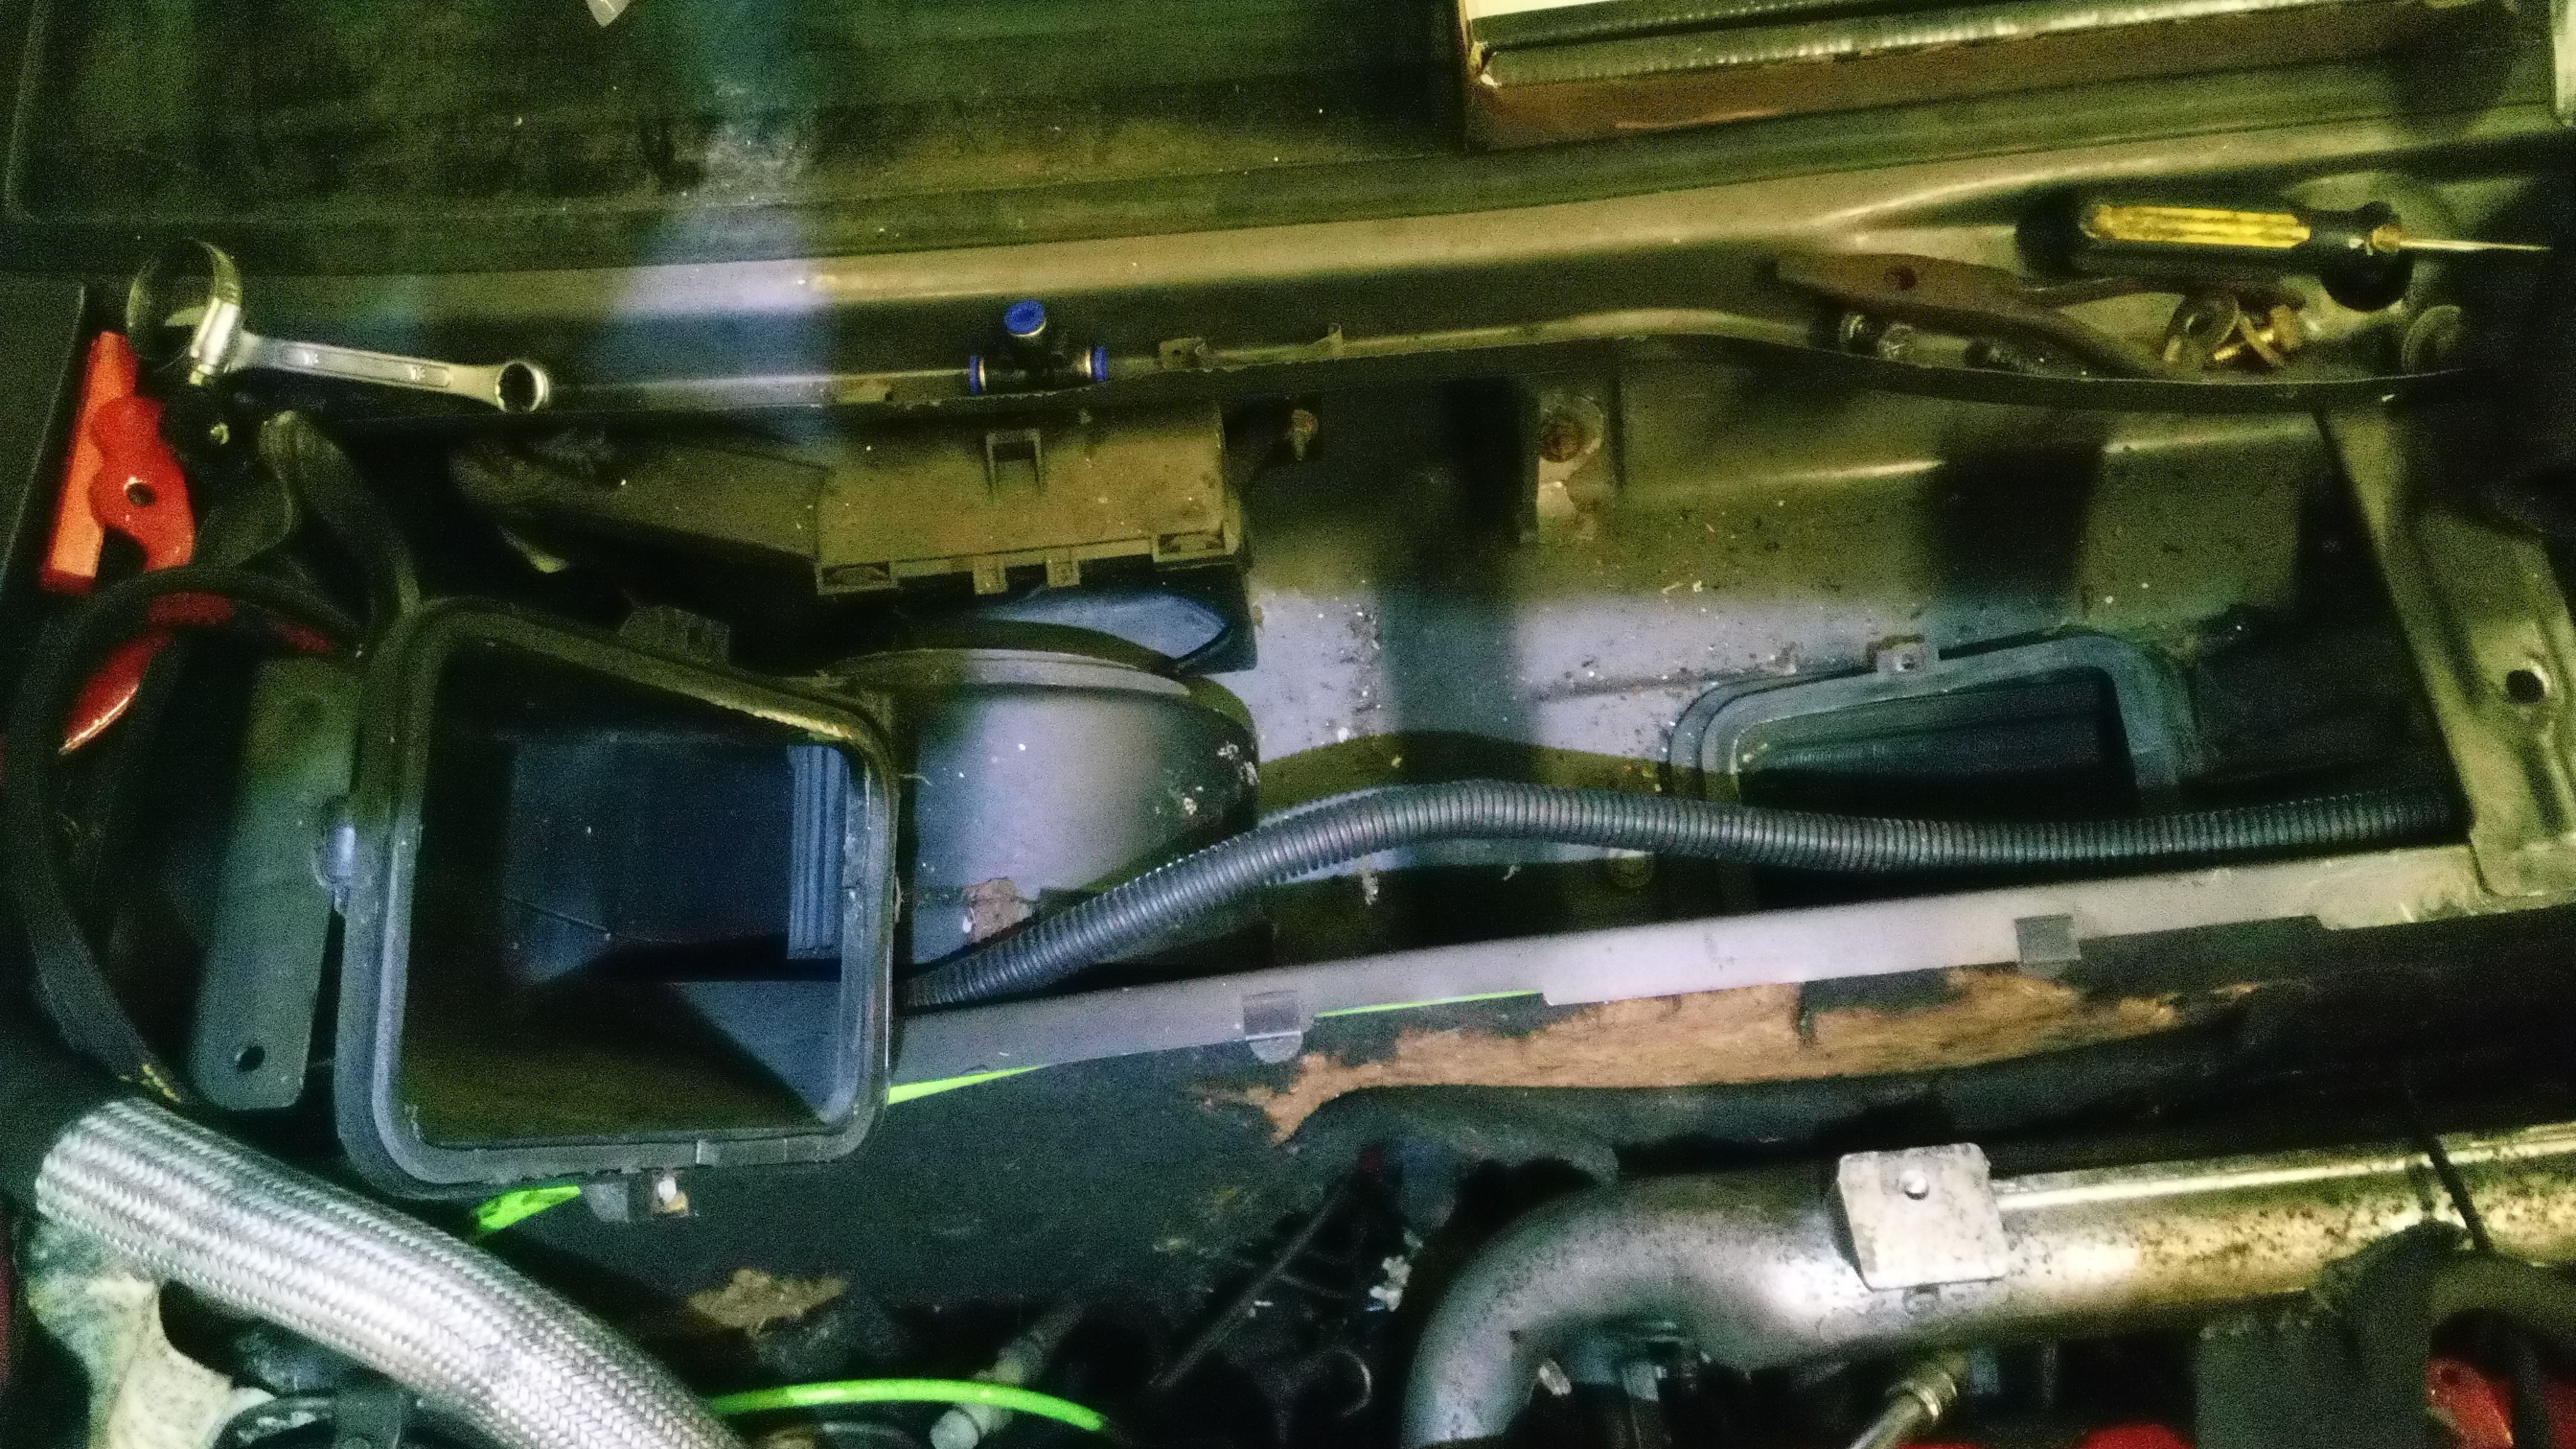
i also had to take out one of the blower motors (the BX with a/c has 2) so i could remove the wiper motor and free it up. my plan with that is to take the spline shaft apart and grease it well.
i am kinda glad i did take that blower off now... well just think, this car has 70k miles on it.. thats 70k miles with no kind of cabin air filter... lets have a look inside at the AC evaporator..
just as i suspected..
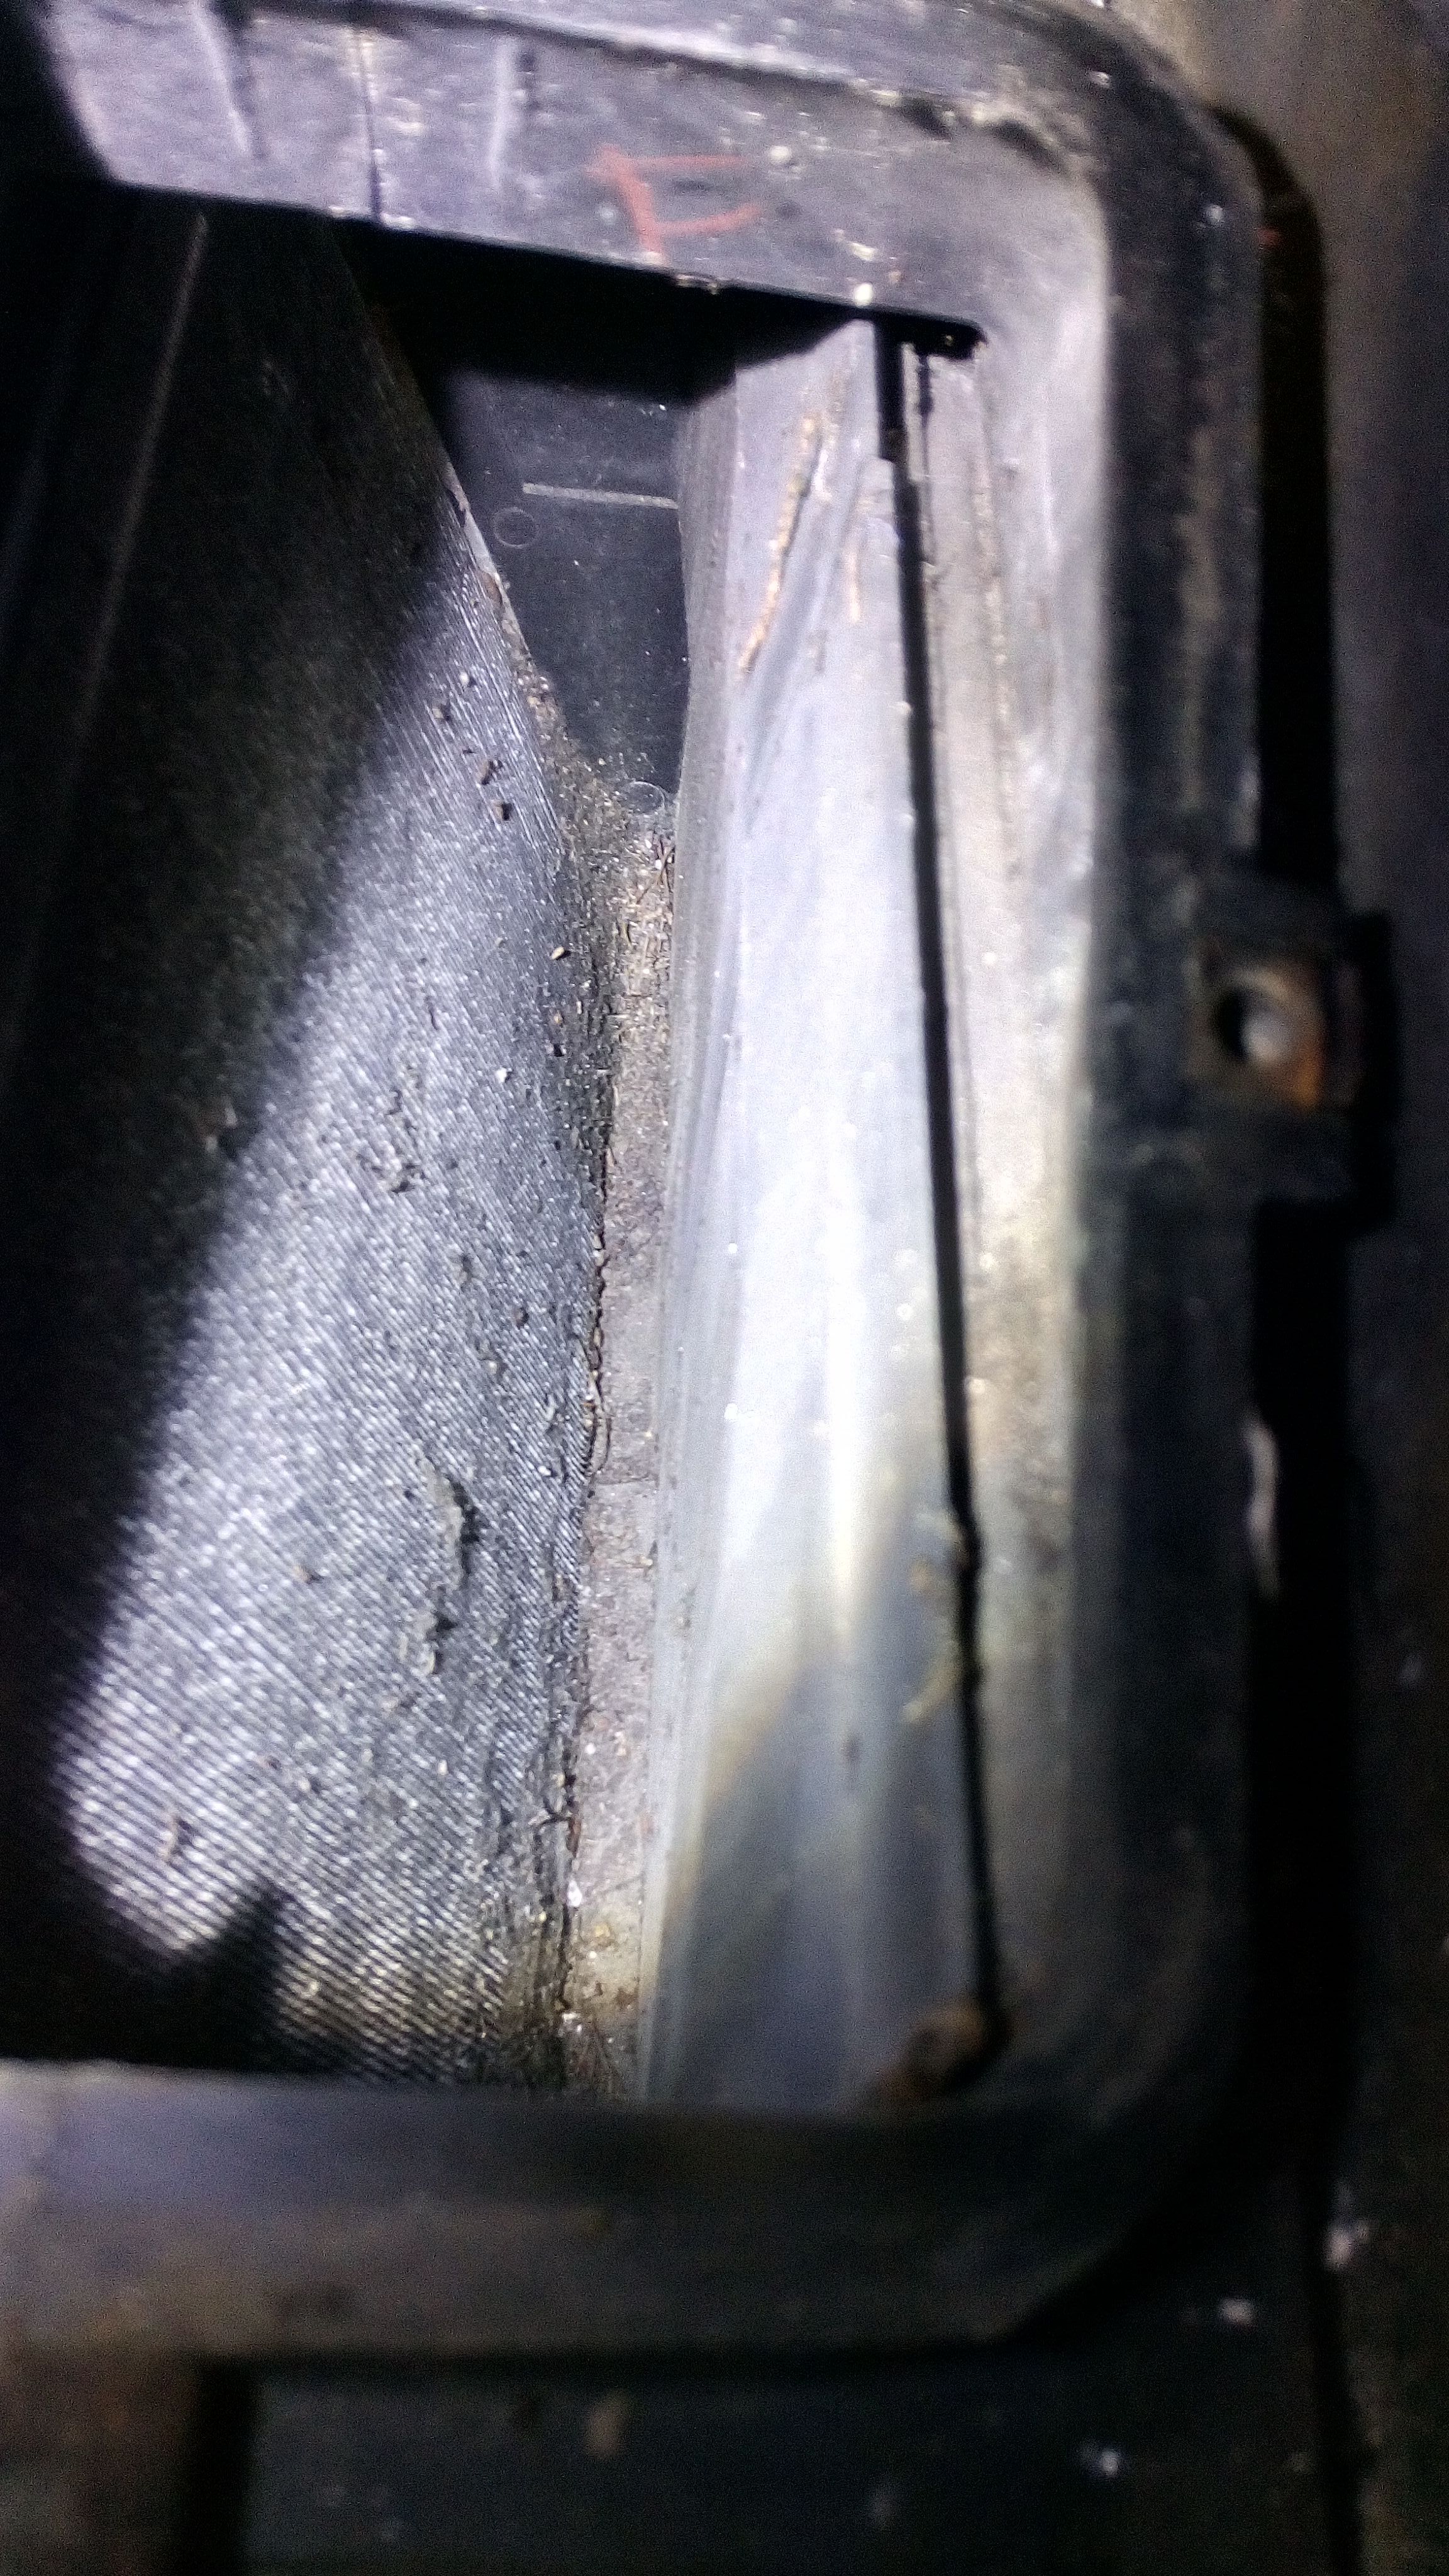
filthy. just think how nice this smells when its working. i really need to find some way if fitting a filter to this. even if its something like a filter sock with some wire mesh in it jammed into the blower fan pipes.. anything to stop this.
its going to be a pain to clean out.. wonder how hard it is to take the evaporator out..
a few pictures of the blower fan:
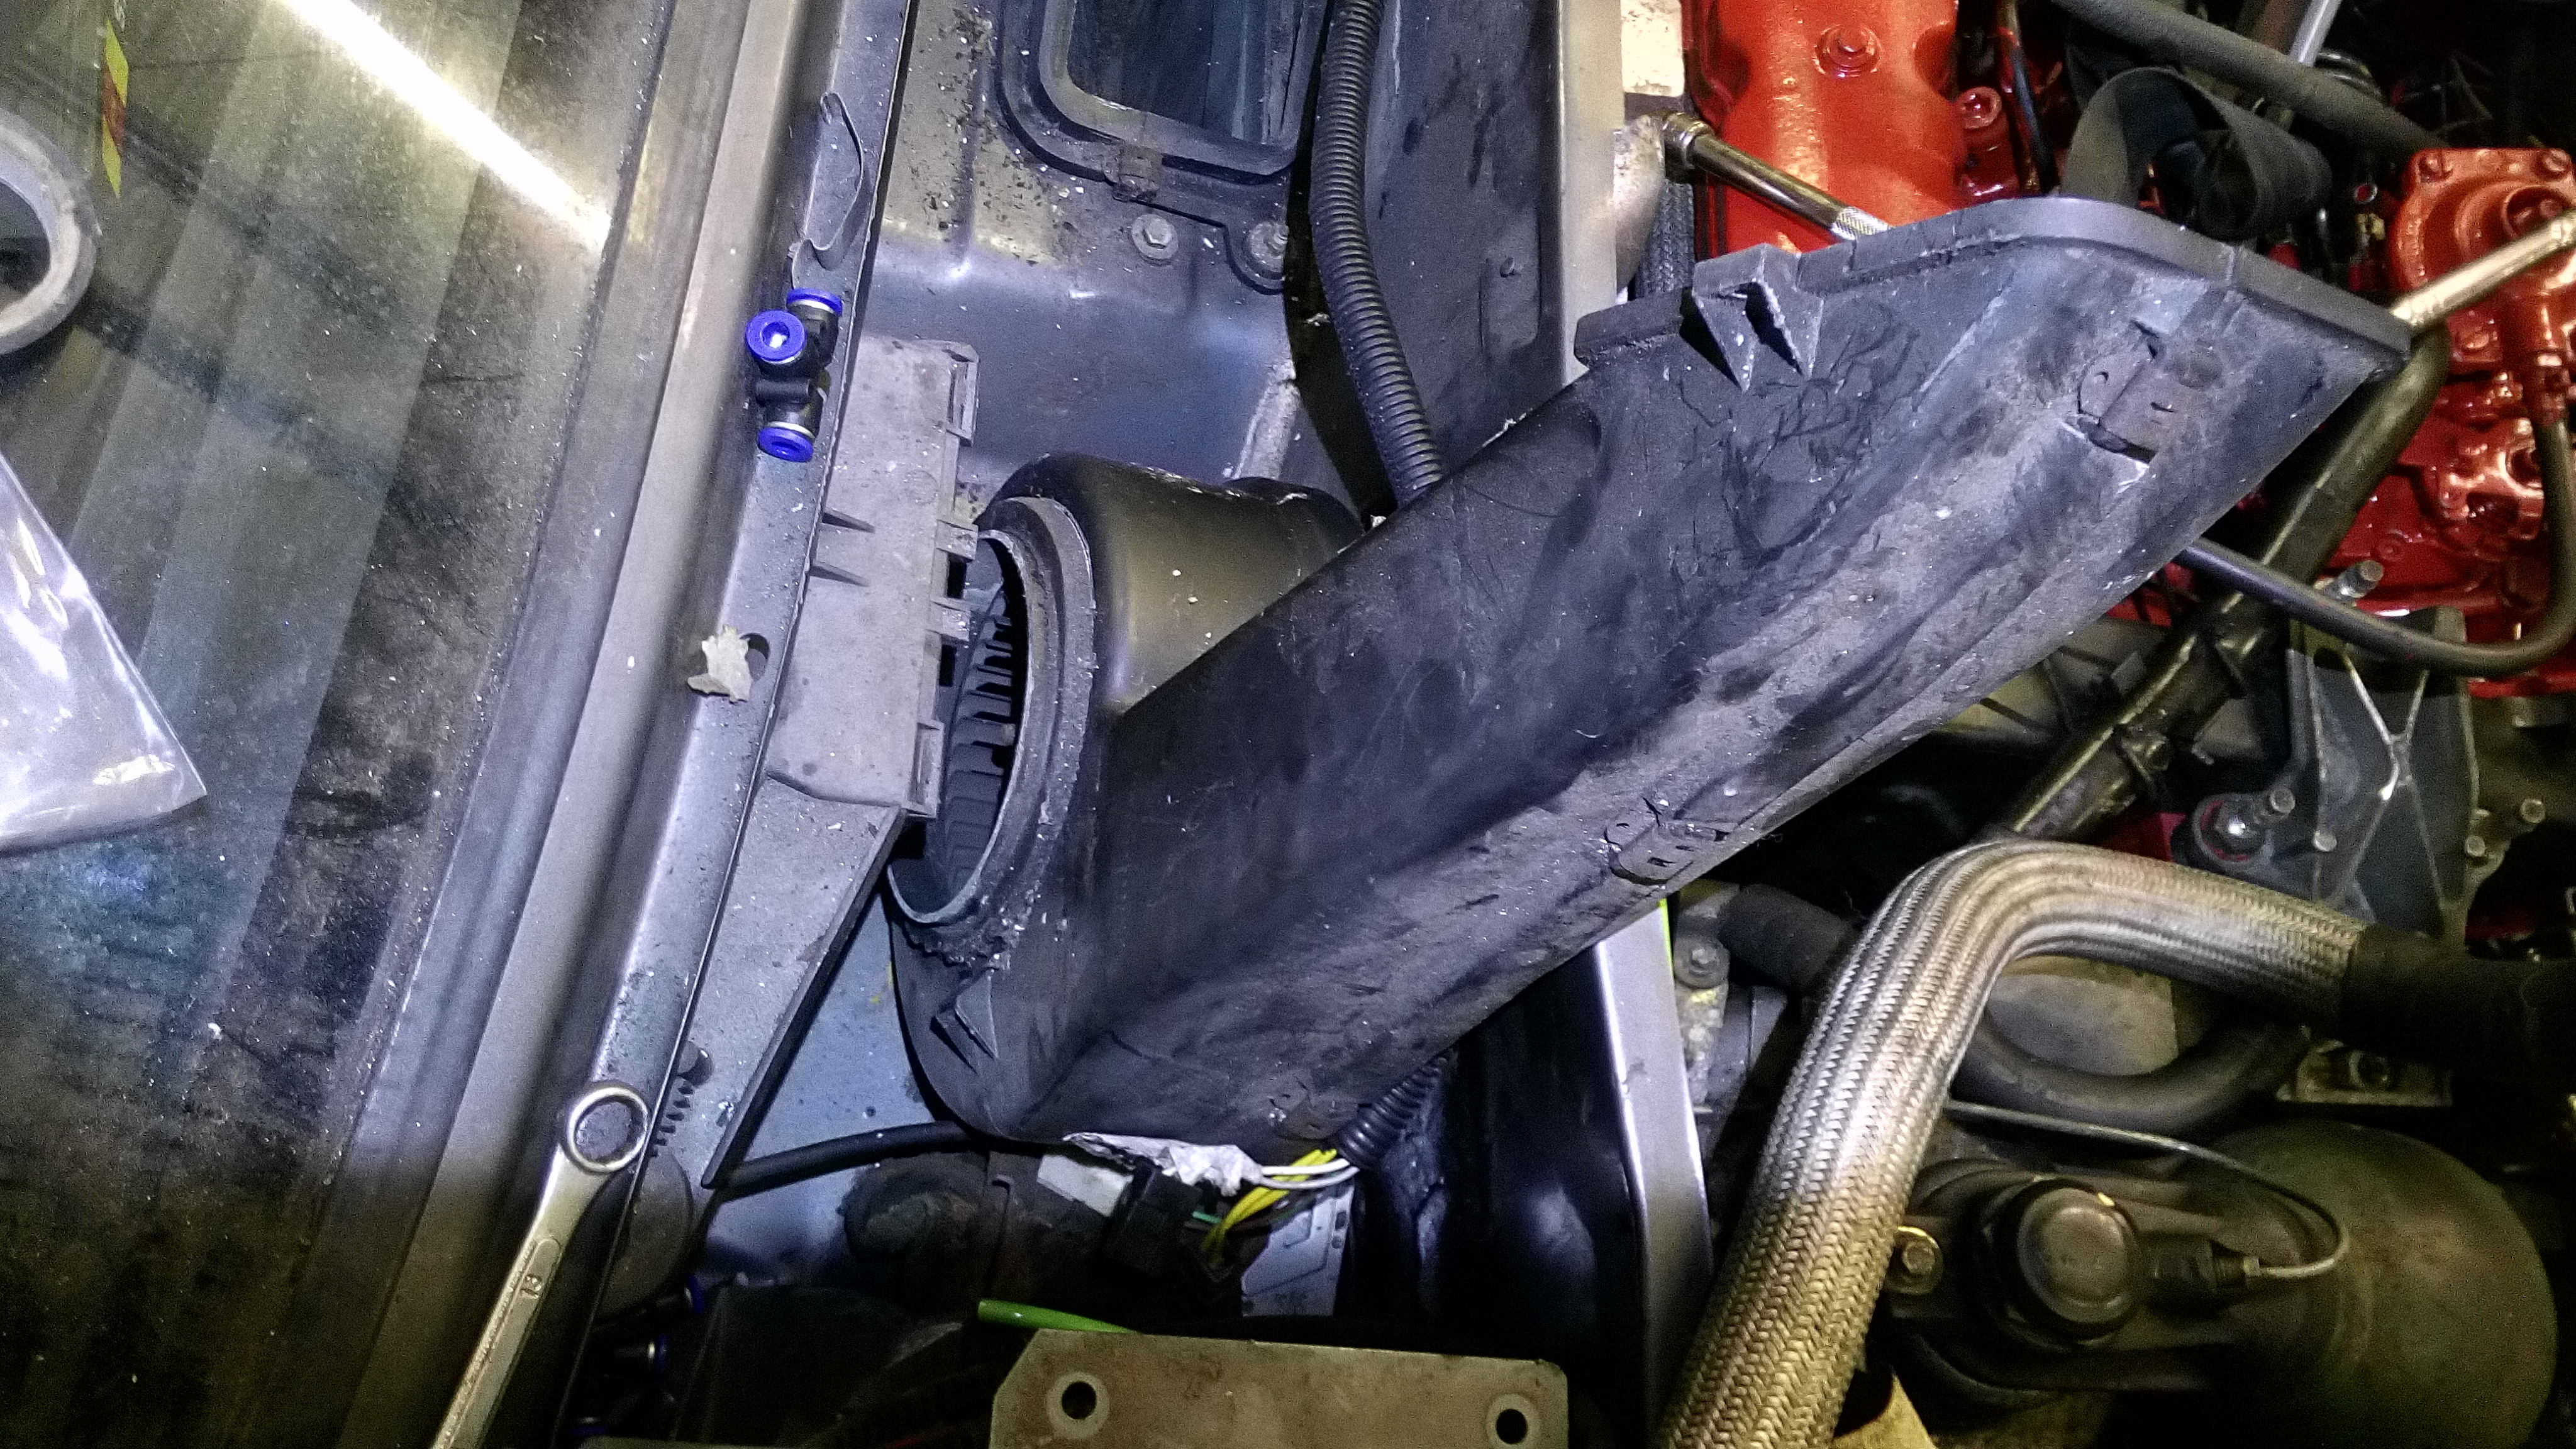
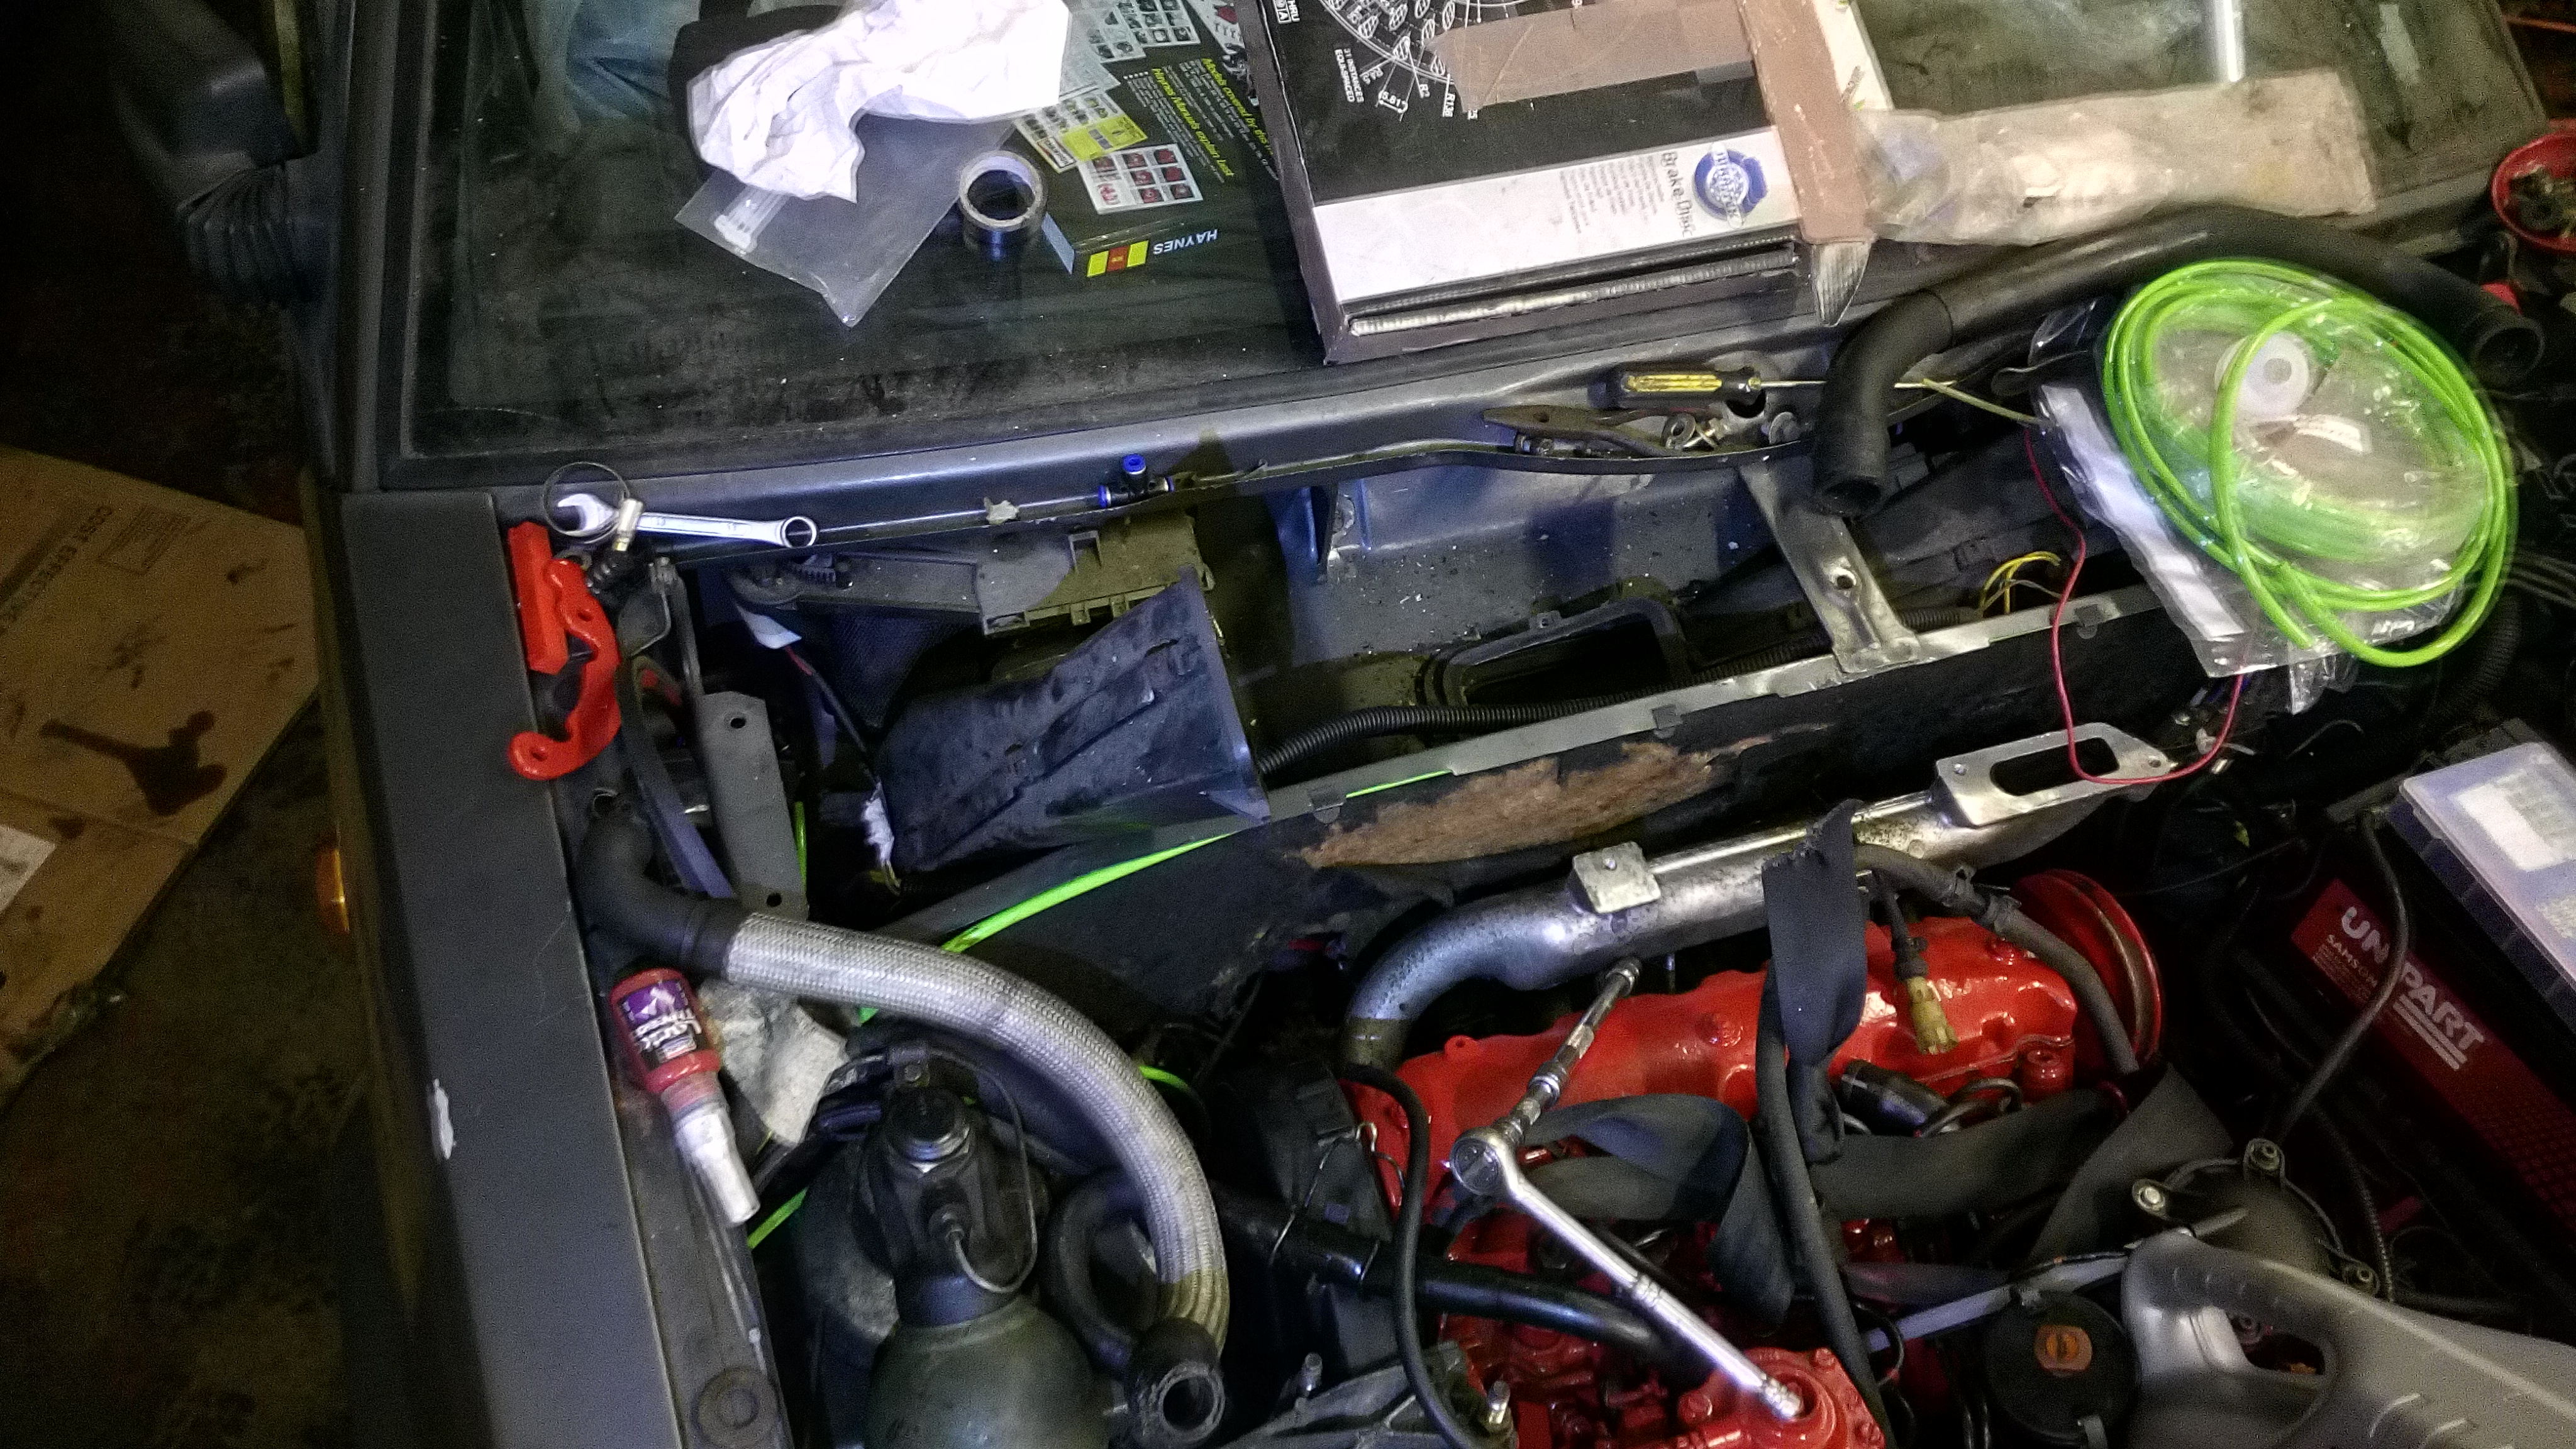
happy to report that the wiper motor has freed up. i am still going to take the spline apart and grease it though.
i think thats about it so far.. need to make a boost pipe as the one i have wont be long enough or have the right bends in it.. then i need to make an up and over turbo input pipe..
i ordered a bottom radiator hose for a peugeot 405 but sadly it still has not got here. i dont know if the guys shipped it out as i never got the confirmation email telling me it has.. i sent them a message yesterday but so far i have had no reply :/ it can go both ways i guess.
anyway, till next time!
well i have done a little more work today.
i have flushed the engine with diesel a few times. only cranking on the starter just to wash out any old stuff. i did this till the diesel was almost clear. then i put the new oil in with a MANN W712/8 oil filter.
heres a few pictures:

i have also replaced all of the external air conditioning piping seals too.. i think i just have to do a few under the dash. i have also filled the compressor with 135ml of PAO oil too. i am holding the system in a vacuum for now till i can get someone "trained" to fill the system for me.

as you can see, the radiators are in now:


nice "Green" seals..
drivers side inner wheel arch liner fitted

i also had to take out one of the blower motors (the BX with a/c has 2) so i could remove the wiper motor and free it up. my plan with that is to take the spline shaft apart and grease it well.

i am kinda glad i did take that blower off now... well just think, this car has 70k miles on it.. thats 70k miles with no kind of cabin air filter... lets have a look inside at the AC evaporator..
just as i suspected..

filthy. just think how nice this smells when its working. i really need to find some way if fitting a filter to this. even if its something like a filter sock with some wire mesh in it jammed into the blower fan pipes.. anything to stop this.
its going to be a pain to clean out.. wonder how hard it is to take the evaporator out..
a few pictures of the blower fan:


happy to report that the wiper motor has freed up. i am still going to take the spline apart and grease it though.
i think thats about it so far.. need to make a boost pipe as the one i have wont be long enough or have the right bends in it.. then i need to make an up and over turbo input pipe..
i ordered a bottom radiator hose for a peugeot 405 but sadly it still has not got here. i dont know if the guys shipped it out as i never got the confirmation email telling me it has.. i sent them a message yesterday but so far i have had no reply :/ it can go both ways i guess.
anyway, till next time!
- JohnDragonMan
Drives: Citroen Dispatch with retrofitted air conditioning
Classic Fiat Panda 4x4 Sisley named Talon (long term storage)
always buy base spec. that way you have the fun of putting all the cool bit on your vehicle
Drives: Citroen Dispatch with retrofitted air conditioning
Classic Fiat Panda 4x4 Sisley named Talon (long term storage)
always buy base spec. that way you have the fun of putting all the cool bit on your vehicle
- Tim Leech
- Over 2k
- Posts: 15578
- Joined: Tue Apr 15, 2008 11:12 am
- Location: Derbyshire
- My Cars: Various
- x 148
Re: John Dragon Man's Citroen BX Diesel Estate
Keep it up mate, great work
Lots of Motors, mostly semi broken....