C'est Bleriot - 1987 17RD Hatchback
-
- BXpert
- Posts: 553
- Joined: Mon Feb 04, 2013 11:30 am
- Location: Kent
- My Cars: 1980 Austin Princess 1.7 HL
1987 Citroen BX 17RD - x 105
Re: C'est Bleriot - 1987 17RD Hatchback
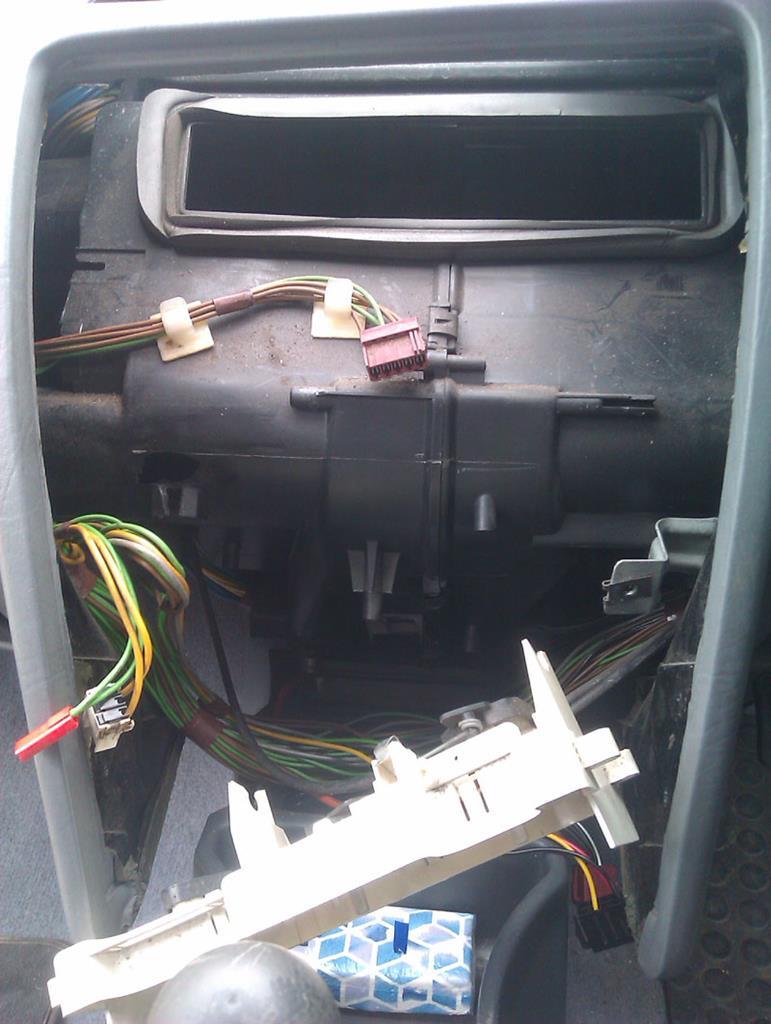
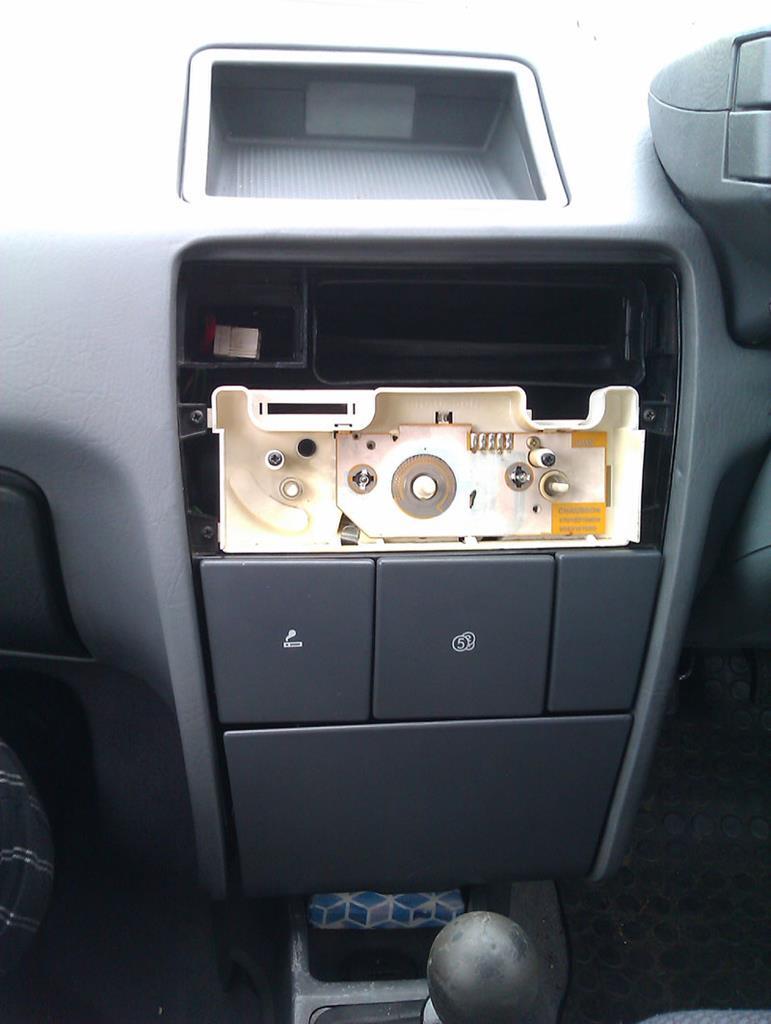
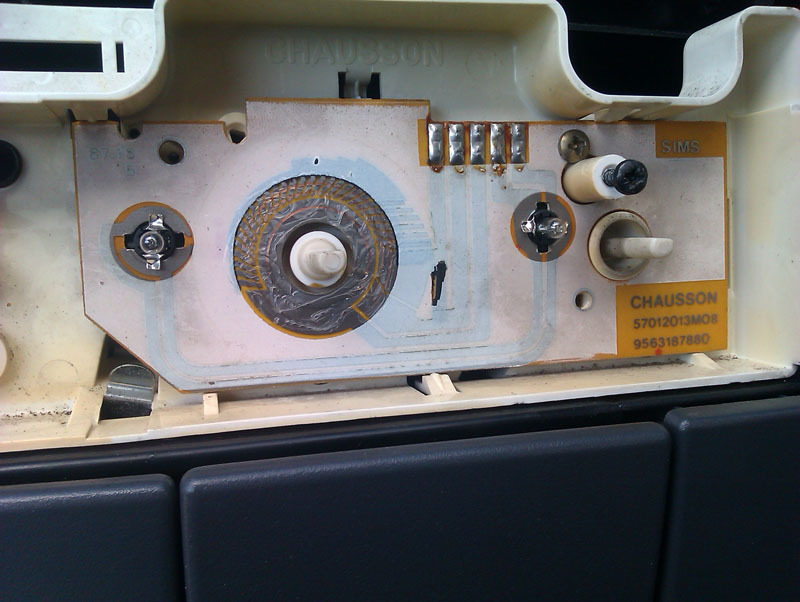
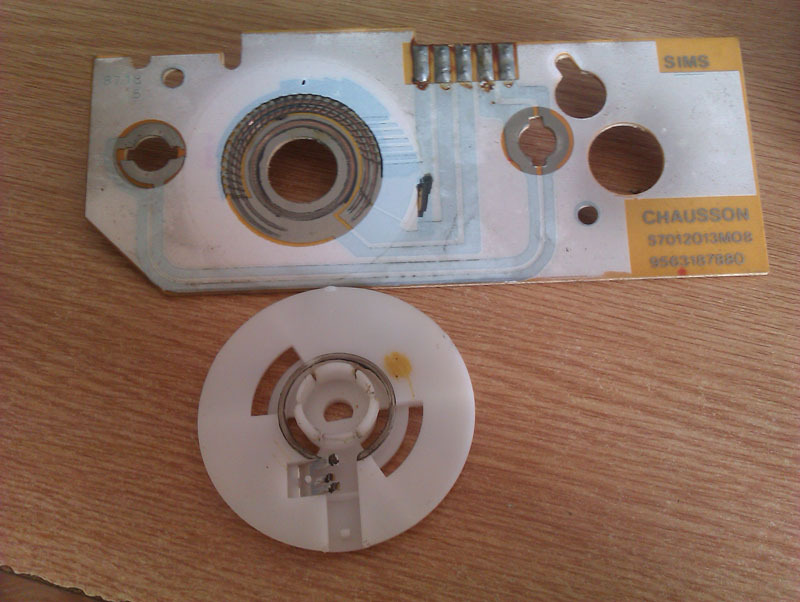
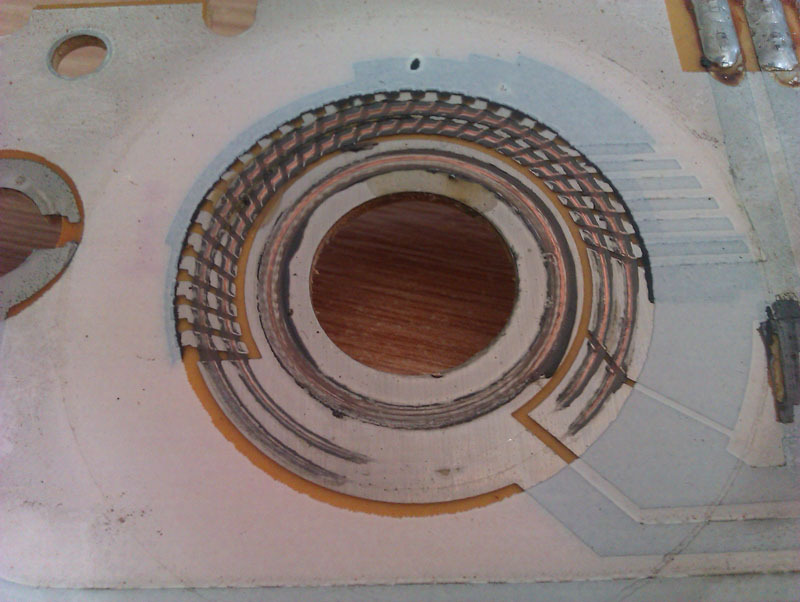
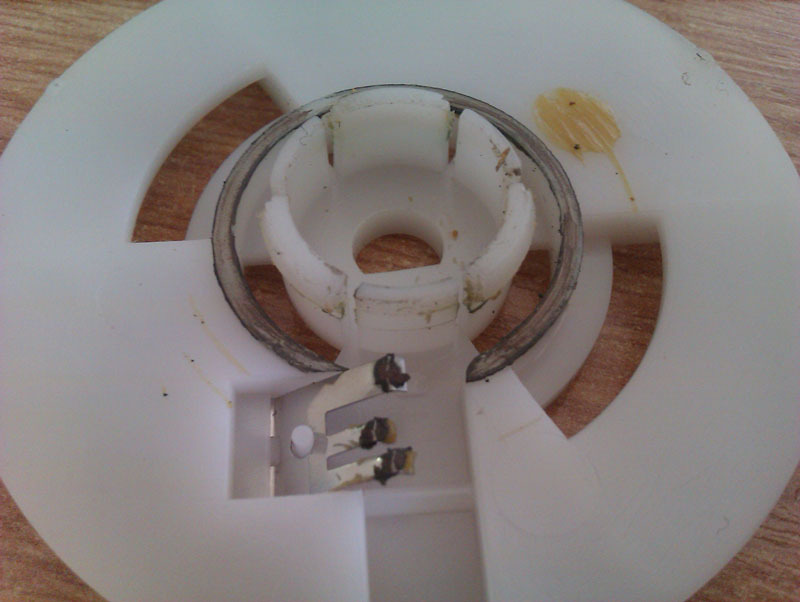
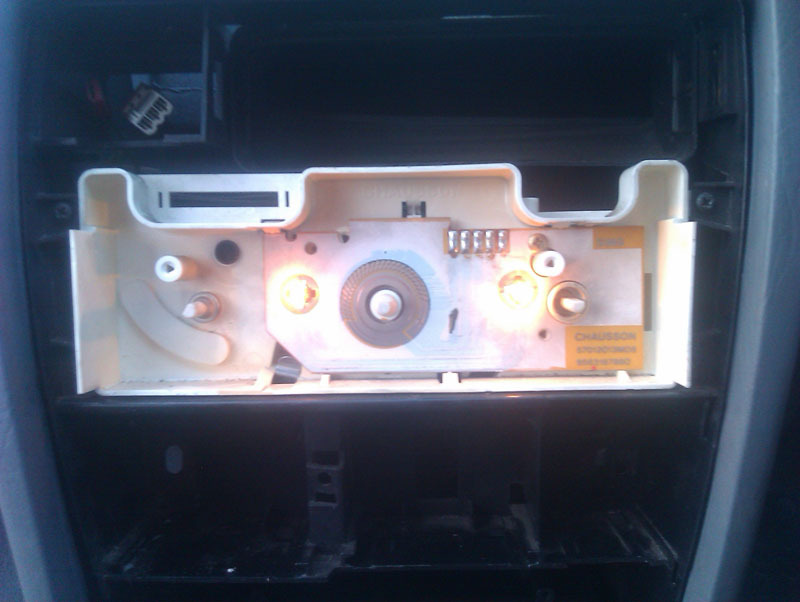
Today, decided to tackle the blower fan control on the BX. It's a bit of a palaver getting the centre console dismantled, quite a few screws and whatnot. Eventually, I got to the little circuit board I needed to access to see if it was the suspected dirty contact tracks that might be causing the issue and do you know what, it could just be.
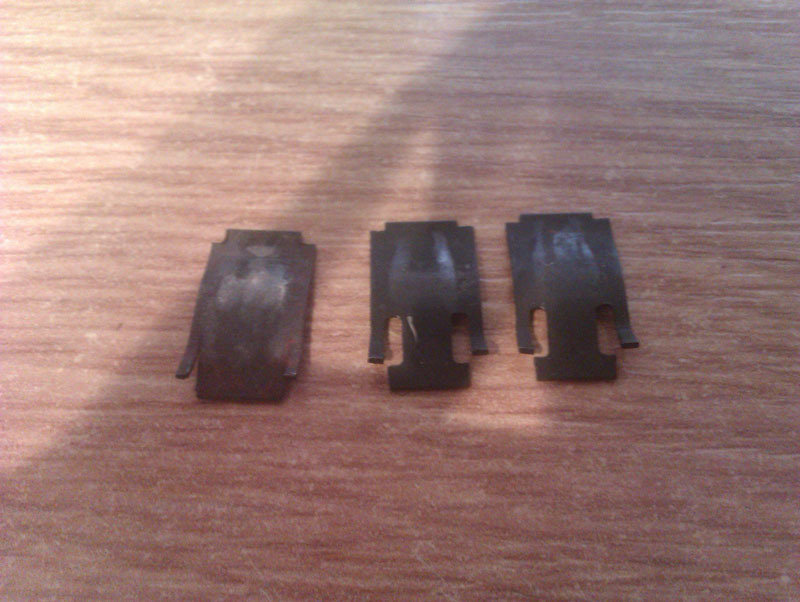
As a little bonus, I found three loose dial spring clips in the centre console so that saves me trying to source replacements for when I put the dials back on, I'm missing one, except now of course I have two surplus.
After cleaning up the contacts and the track I also replaced the two blown bulbs with new spares I had from doing the instrument cluster since I might as well while everything's apart. Tested the bulbs and they work just fine. The tracks I couldn't test because try as I might I could not find a single shop stocking suitable grease so I'm going to have to place an online order and wait for some to arrive. I can probably reassemble the control without grease but since there was some on there and it seems like normal practice for this sort of controller, I feel it's sensible to apply fresh before reassembly. Especially so given how annoying assembly and disassembly of this whole section is.
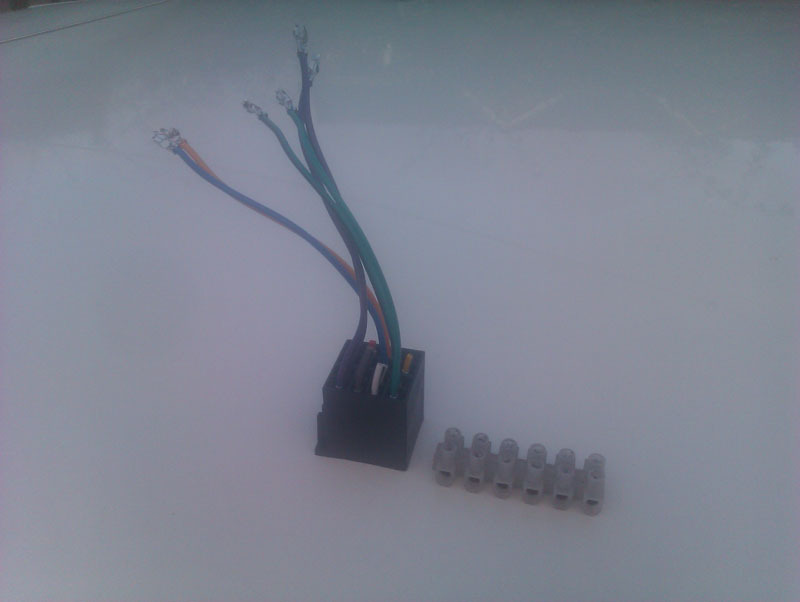
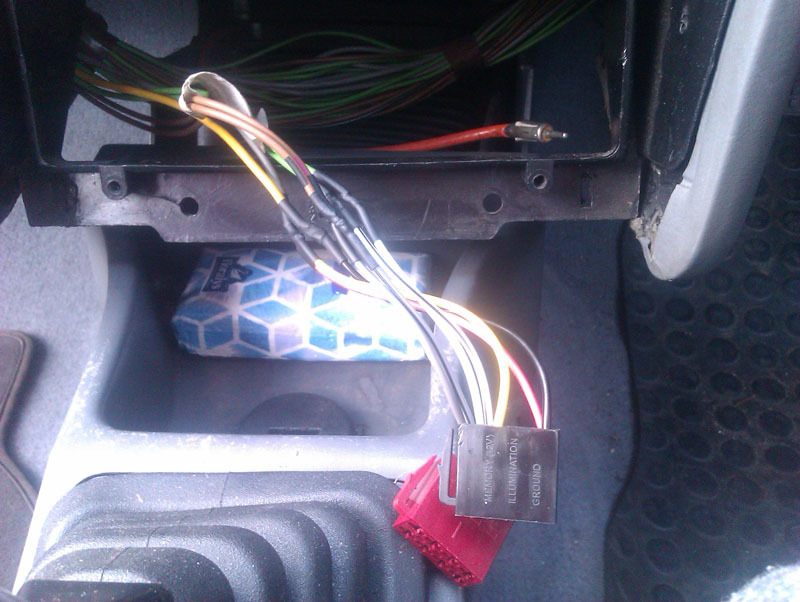
The other thing that was sorted was the radio wiring. There was nothing especially dangerous in there, just some extra bits that didn't need to be there. Mike kindly stripped out the extraneous plug and the choc-block connector in favour of soldered and wrapped connections, it's a low stress area as far as movement is concerned so we shouldn't need to worry about cracked solder joints here and it just tidies things up.
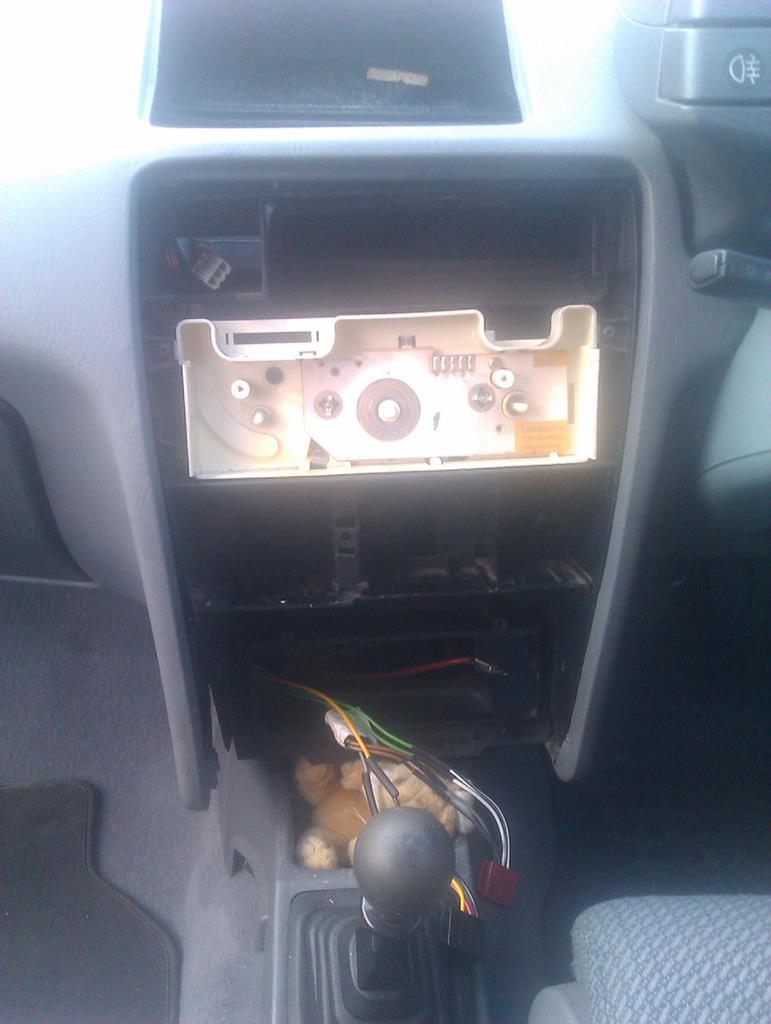
That's as far as we got. I'll clean up the various plastics since I can get in at all the awkward bits with it all apart, and then reassemble once the contact grease arrives.
As a little bonus, I found three loose dial spring clips in the centre console so that saves me trying to source replacements for when I put the dials back on, I'm missing one, except now of course I have two surplus.
After cleaning up the contacts and the track I also replaced the two blown bulbs with new spares I had from doing the instrument cluster since I might as well while everything's apart. Tested the bulbs and they work just fine. The tracks I couldn't test because try as I might I could not find a single shop stocking suitable grease so I'm going to have to place an online order and wait for some to arrive. I can probably reassemble the control without grease but since there was some on there and it seems like normal practice for this sort of controller, I feel it's sensible to apply fresh before reassembly. Especially so given how annoying assembly and disassembly of this whole section is.
The other thing that was sorted was the radio wiring. There was nothing especially dangerous in there, just some extra bits that didn't need to be there. Mike kindly stripped out the extraneous plug and the choc-block connector in favour of soldered and wrapped connections, it's a low stress area as far as movement is concerned so we shouldn't need to worry about cracked solder joints here and it just tidies things up.
That's as far as we got. I'll clean up the various plastics since I can get in at all the awkward bits with it all apart, and then reassemble once the contact grease arrives.
-
- Confirmed BX'er
- Posts: 70
- Joined: Sun Jul 09, 2017 10:52 am
- Location: Between Derbyshire and Argyle and Bute
- My Cars: Citroen Acadiane
Citroen BX 16 TGS
The moderns.
Skoda Superb
Citroen C1
The Motor Bike,
250 MZ - x 12
Re: C'est Bleriot - 1987 17RD Hatchback
Had to do a similar job on mine. Blower was working but with no air coming out. The plonker who had installed the LEDs’, on 600mm of wire never bothered to reconnect the cable that opens the flaps. Replaced the lamps and had to do a bit of wiring as well due to a faulty ground. Didn’t bother with grease on mine.
-
- BXpert
- Posts: 553
- Joined: Mon Feb 04, 2013 11:30 am
- Location: Kent
- My Cars: 1980 Austin Princess 1.7 HL
1987 Citroen BX 17RD - x 105
Re: C'est Bleriot - 1987 17RD Hatchback
I could probably have got away with no using the grease, I just didn't fancy pulling all this out again if it turned out it did need grease. Thankfully, there's not been any bodgery hiding on this one, so it's all been much easier to sort than I'm used to.
---
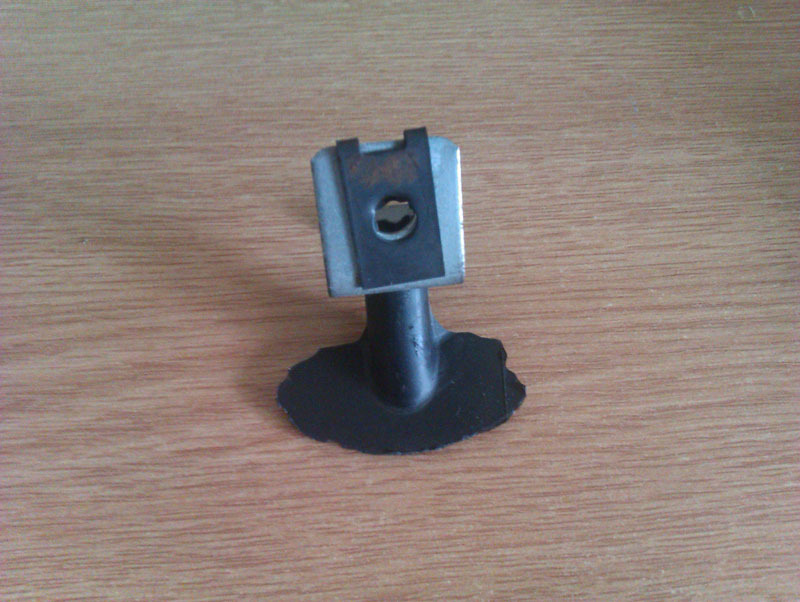
While we wait for the contact grease to arrive from Lithuania it's a good opportunity to get the broken console fixing peg reattached. First up was trying to find out where it went, which meant even more dashboard dismantling.
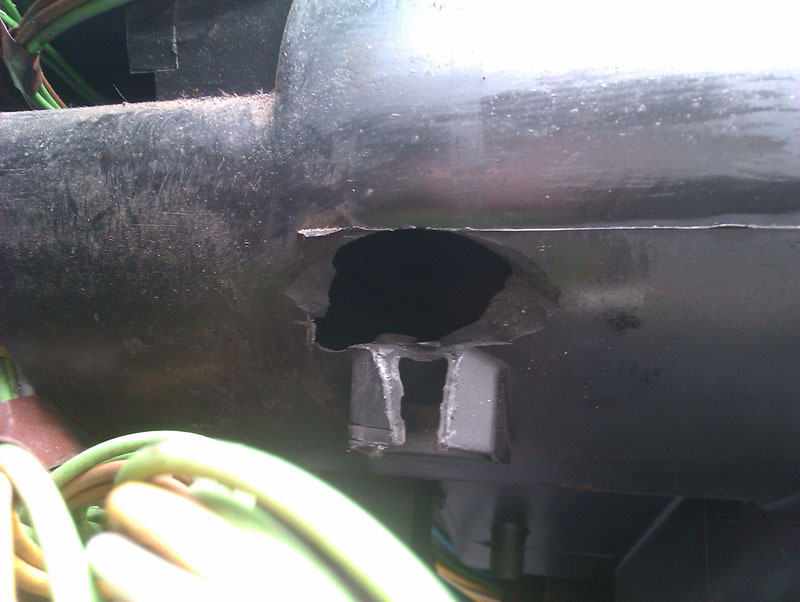
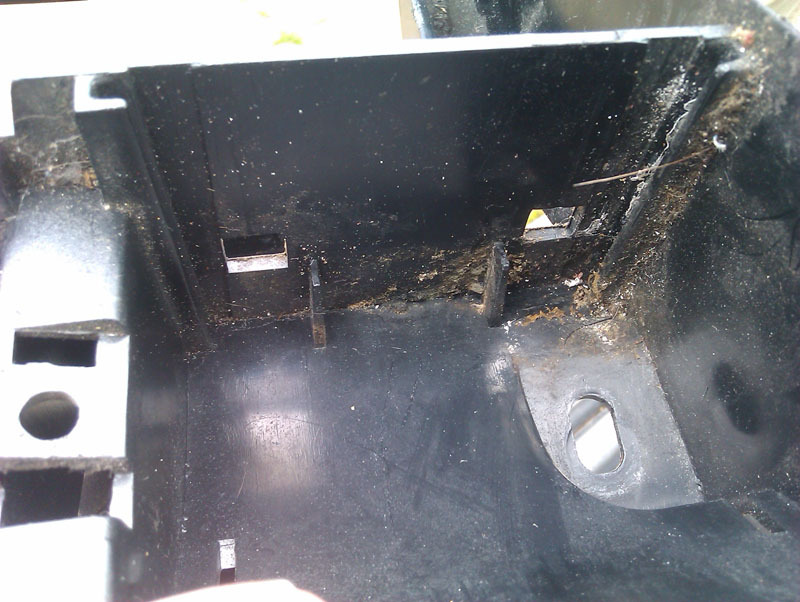
To the right, in the middle of the hole you can see a metal bracket. There should be another to the left side of the hole, where the thicker part of the wiring loom is. I'm not exactly sure how someone has broken that bit in the past, it's not exactly easy to get to, nor is it really in the line of fire of anything. Fortunately, the break was fairly clean and I could get to everything without too much trouble.
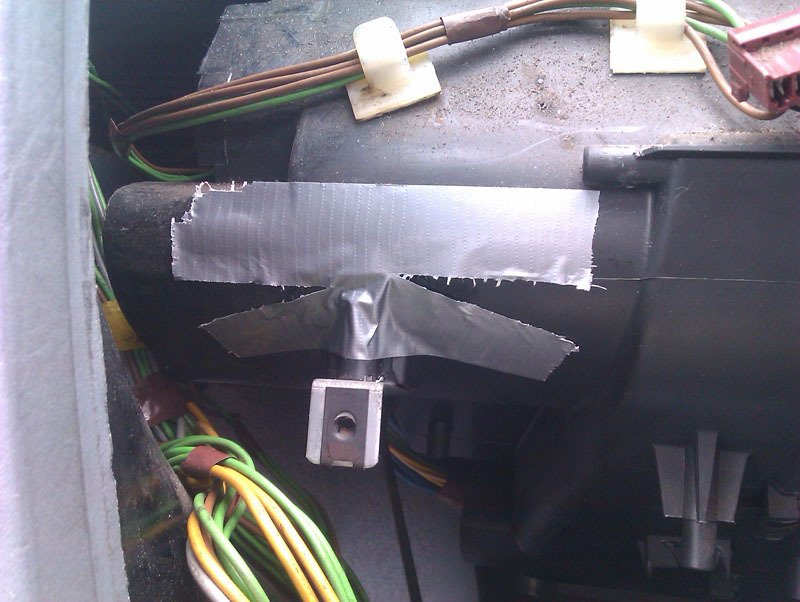
Plenty of surfaces to glue to which should make for a good strong repair. I'm using the same epoxy glue I used for the sunvisor clip since that did an excellent job and is probably higher stress than this area. A bit of duct tape was used just to keep the part in place while the glue dried because I didn't want to be sat holding it for half an hour and there's no way to get clamps or similar on there to keep it in place.
While that was drying I could clean up the black panel that all the various little bits and pieces slot into, like the ashtray, under which was the usual grime that's pretty much impossible to clean up with it attached to the car.
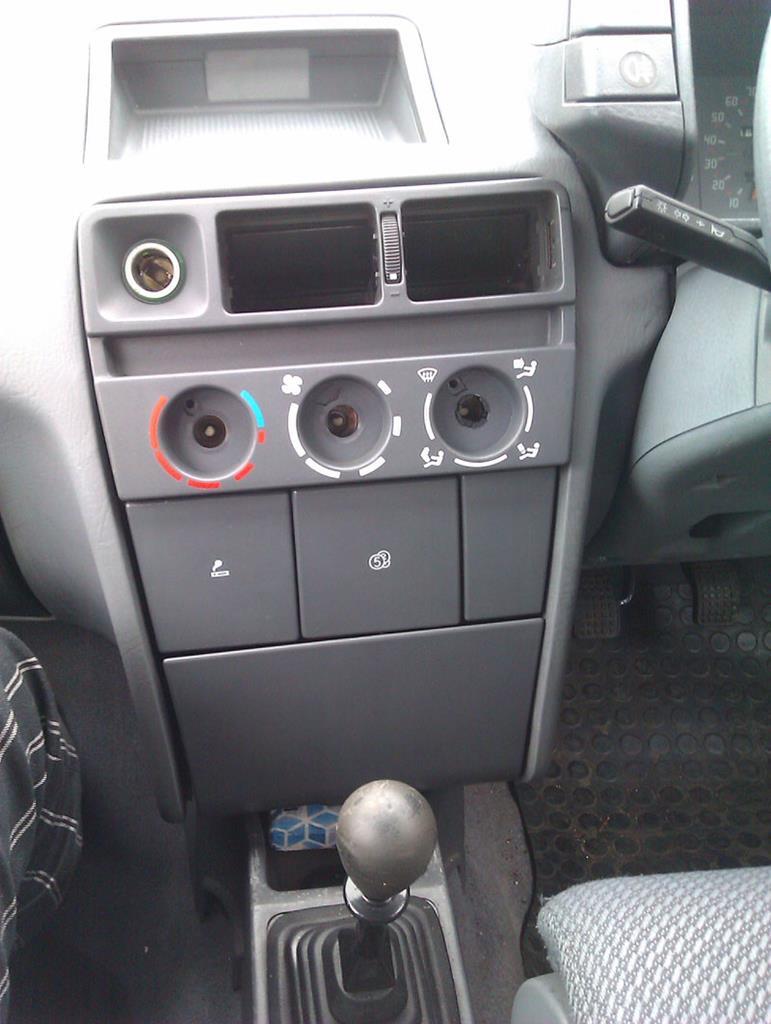
Lovely. With that cleaned out and all the various bits and pieces cleaned, I reassembled as much as I could. Someone has put two large self-tapping screws through the sides of the centre console, what I think of as the 'wings' of the dashboard panel. At first I thought this was to hold everything together because of that broken fixing peg, it turns out it's because the dashboard is warped slightly and that's the only way to get the wings to pull snug to the centre console nicely.
That's also why there's a bigger gap one side than the other. Ideally, I could do with a new dashboard shell, this will have to do for now. I plopped the top trim panel in place but didn't screw it down yet as I can't rebuild the heater controls until the grease arrives and, since this top section is quite awkward to remove, it makes sense to not actually fit it just yet. After fixing that peg, there's a lot less movement in this console now, unsurprisingly, which makes it feel just a little bit better built than it did before. It was also nice to get a couple of decades of grime out of all the inaccessible bits, like the blower fan ducting, and just make the whole thing look a feel that little bit nicer in a way regular cleaning doesn't allow.
-
- BXpert
- Posts: 553
- Joined: Mon Feb 04, 2013 11:30 am
- Location: Kent
- My Cars: 1980 Austin Princess 1.7 HL
1987 Citroen BX 17RD - x 105
Re: C'est Bleriot - 1987 17RD Hatchback
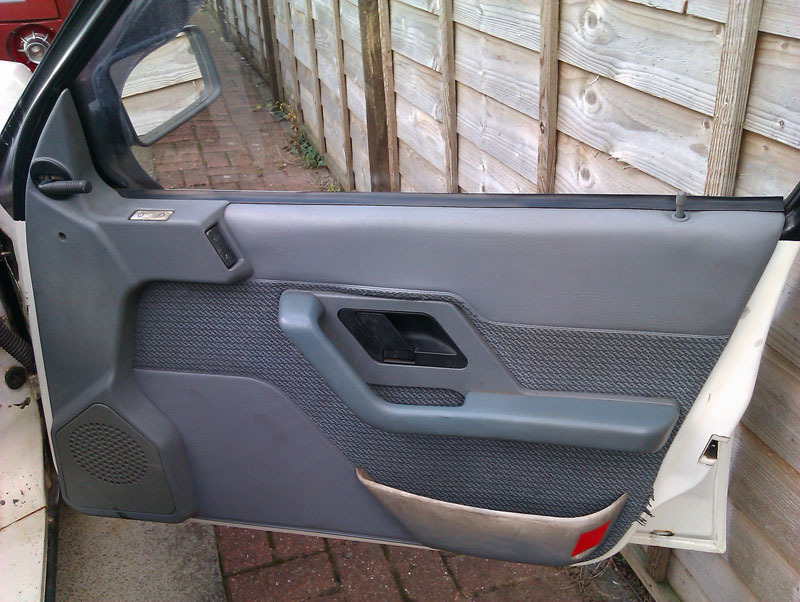
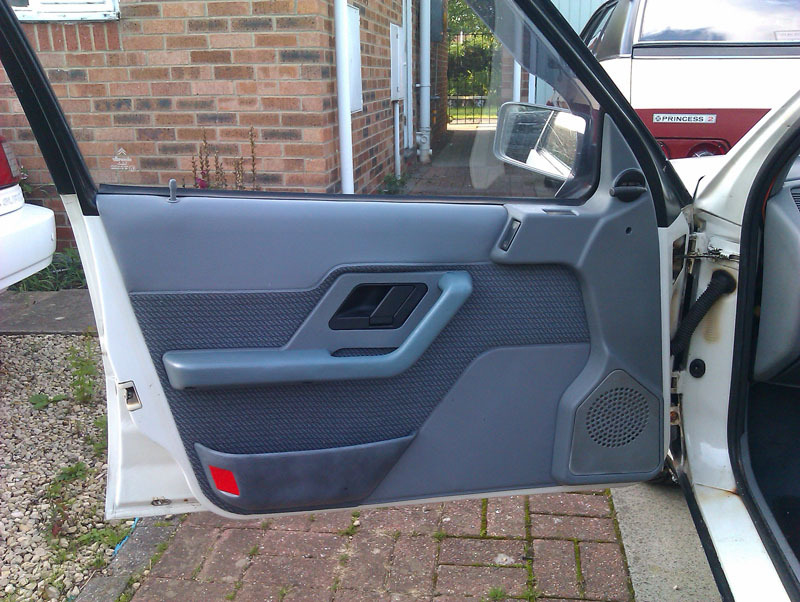
Today I had a bit of free time so tackled the sun faded door bin on the passenger side of the BX. I had lots of different greys available, and bought more greys, and annoyingly not a one was a good match for the plastic. I ended up making multiple light passes with the two greys I'd got that were either side of the shade I was after for an approximation of the original colour and topped it off with some satin varnish to dull the gloss down suitably. Here's the driver's side for a before shot.
Passenger side after that was done, as well as having all of the door card and trim cleaned up. I used various paints, including a plastic primer, a couple of Rustoleum enamels, and Humbrol satin varnish to finish. It was an easier and cheaper way of doing it than getting some vinyl dye made up and will tide me over until I find good quality original replacements.
With that in mind, if anyone has good quality early facelift interior trim, please do let me know. There's a few pieces I'd like to renew on this car and I'm finding all the spares available out there are for later facelift or higher spec cars so they don't match this one.
-
- Over 2k
- Posts: 15615
- Joined: Tue Apr 15, 2008 11:12 am
- Location: Derbyshire
- My Cars: Various
- x 159
Re: C'est Bleriot - 1987 17RD Hatchback
Early Mk2 were a lighter grey than those post 1989.
Lots of Motors, mostly semi broken....
-
- BXpert
- Posts: 553
- Joined: Mon Feb 04, 2013 11:30 am
- Location: Kent
- My Cars: 1980 Austin Princess 1.7 HL
1987 Citroen BX 17RD - x 105
Re: C'est Bleriot - 1987 17RD Hatchback
That's confusing. Both my '91 estate and the spares car that I got the passenger seat base from were a much paler grey than this one, in the same fabric pattern. Did the later cars get darker vinyl and brighter cloth?
-
- Over 2k
- Posts: 15615
- Joined: Tue Apr 15, 2008 11:12 am
- Location: Derbyshire
- My Cars: Various
- x 159
Re: C'est Bleriot - 1987 17RD Hatchback
Yes they did, its just the dash/ door trims and vinyl that is lighter shade
Lots of Motors, mostly semi broken....
-
- BXpert
- Posts: 553
- Joined: Mon Feb 04, 2013 11:30 am
- Location: Kent
- My Cars: 1980 Austin Princess 1.7 HL
1987 Citroen BX 17RD - x 105
Re: C'est Bleriot - 1987 17RD Hatchback
Well, now I know, and knowing is half the battle ~GI JOE~
---
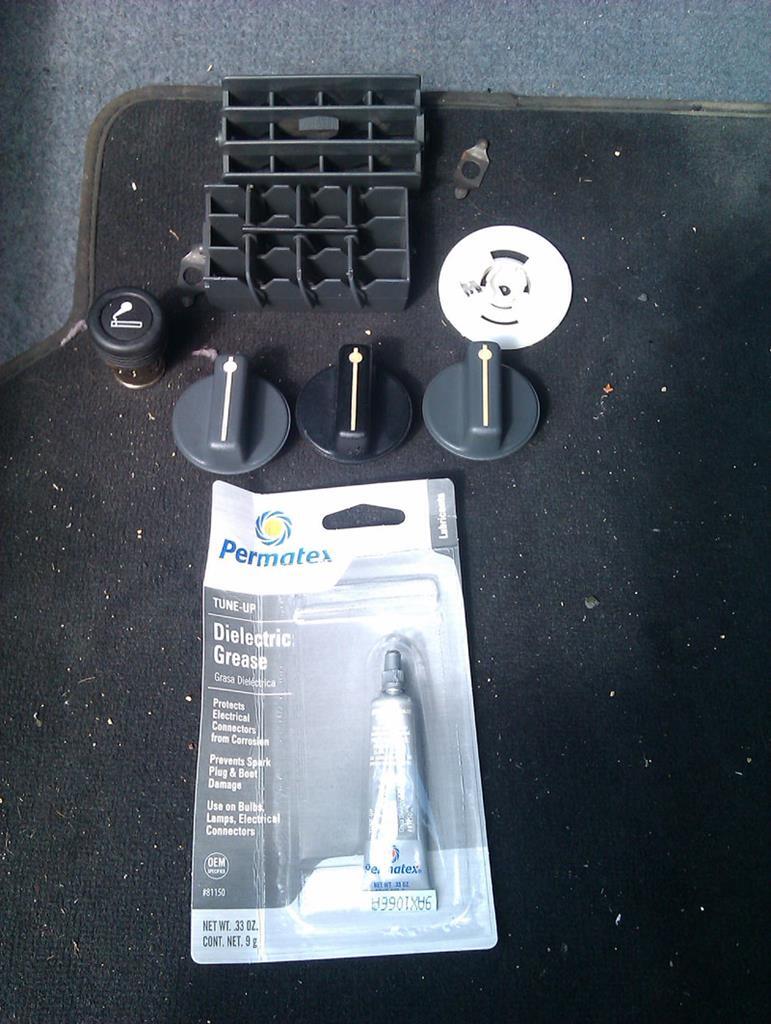
The dielectric grease finally arrived so I could get the centre console back together. It's not strictly necessary, it would likely function fine without it, I just thought it sensible to reinstate since there was grease there when I took it apart. Got all my pieces laid out ready to go together.
You only really need a thin smear over the contact surfaces, the tangs on the dial will scrape away the grease where contact is required and the grease will keep moisture out of the rest of the track, preventing corrosion. Or at least that's my understanding of how it works and why it's used. The photograph makes it look like I used half the tube of grease. This bit of the job was quite easy. So far, so good.
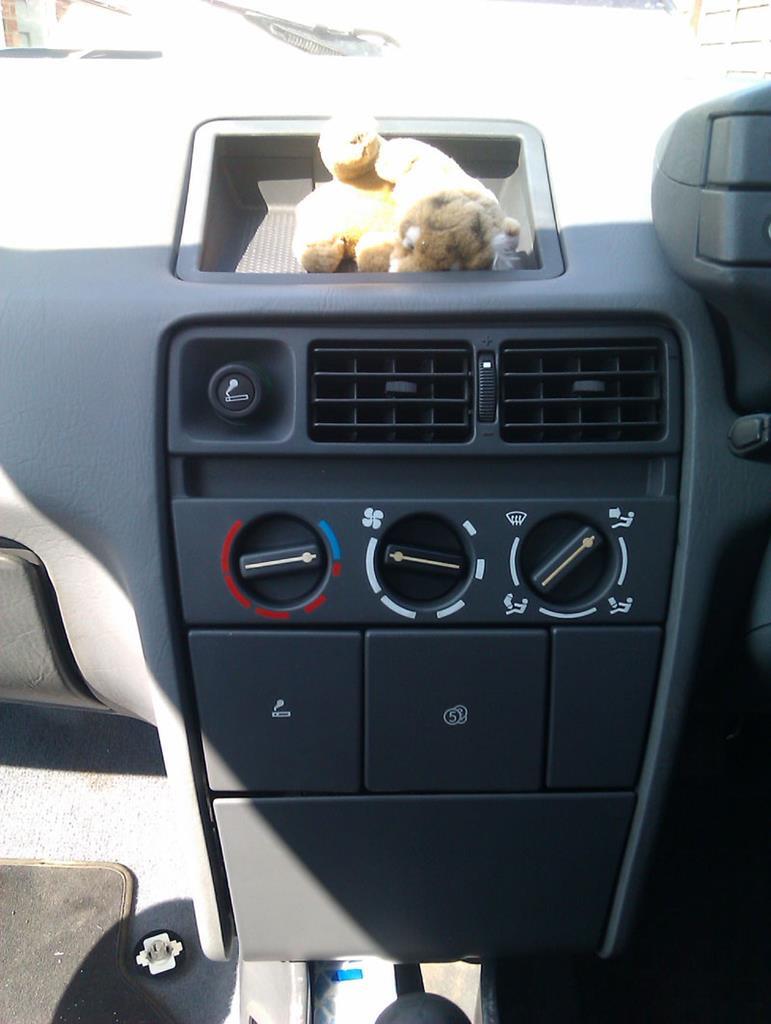
With that greased up, you push the white plastic dial on to complete the slider mechanism. Except I couldn't quite get it to seat because the board flexes a little and was preventing the locking tangs from seating so I had to unplug and unscrew the board to get the switch to seat properly, then reassemble. Then I did a dry fit with the dials and found that they didn't all line up correctly so where the dial was pointing was not necessarily the function selected. Either I dislodged the plastic cogs on the back of the control panel during all the faffing about, or someone before me had. It's a fairly easy task to lever out the black plastic half of the mech for each dial and rotate until it's in the correct orientation, and then put it all back together. That done, it was simply a case of pulling the cigarette lighter wiring out of the void it was trying to escape into before fighting that back into its proper place, screwing down all the various bits and pieces and giving it a test run. I'm pleased to report the intermittent nature of the fan speed dial is now eliminated and it works properly. Then, I could reassemble everything properly, accidentally install one of the fresh air vents back to front and have to wrestle that back out, glue the spring clips for the fresh air vents onto the vents because they were determined to not stay in place otherwise, et voila! Dashboard back together again.
With the spring plate things for the fresh air vents glued onto them, the air vents no longer try and sag down as you're driving along, so that was an unexpected bonus. The full speed on the blower fan reliably selects now too. The only issue I really have is that the strength of the blower fan is really quite rubbish. I don't remember it being much better in the old estate I had either. The blower fan works, on all speeds, and the air does just about get to your face, but it's not very strong, it's more of a wafter fan than a blower fan. It's a job off the very short list at any rate. Also of note is the rear boots that had been leaking LHM no longer are. I haven't had the time to get into boot replacement so I've still got the new parts waiting to go on when I do, for now it doesn't seem to be a problem. There's an occasional creak on the front suspension on the first lift after a day or two of being sat idle, this creak goes away within a mile of driving and doesn't come back until the car has been idle for a while, and since it's not dropping any LHM that I can see and there's plenty in the system, I'm just putting this down as a BX quirk since nothing seems amiss otherwise.
It's been pretty uneventful otherwise. None of the minor bits and bobs I was aware of when I got the car have got any worse and it just chugs along quite happily without complaint. It could be very easy to be very complacent about maintenance on a car like this.
-
- BXpert
- Posts: 459
- Joined: Mon Jan 22, 2018 4:44 pm
- Location: Widnes
- My Cars: 1985 BX 19 GT (DKK), 1971 Morris Minor Traveller, 1971 Commer Auto-Sleeper, 1969 Commer Jennings Roadranger.
'88 BX GTi (a long time ago) - x 112
-
- Over 2k
- Posts: 15615
- Joined: Tue Apr 15, 2008 11:12 am
- Location: Derbyshire
- My Cars: Various
- x 159
Re: C'est Bleriot - 1987 17RD Hatchback
Maybe the blower itself is a little tired, not a difficult job to remove, just take out the wiper arm, and vent panel and it unbolts
I have a spare
I have a spare
Lots of Motors, mostly semi broken....
-
- BXpert
- Posts: 553
- Joined: Mon Feb 04, 2013 11:30 am
- Location: Kent
- My Cars: 1980 Austin Princess 1.7 HL
1987 Citroen BX 17RD - x 105
Re: C'est Bleriot - 1987 17RD Hatchback
I shall give that a go when I next have a chance. It was suggested that it could be a stuck heater flap restricting flow but since I can select all functions and air does come out all the relevant places, that seems less likely than a tired motor. At least it sounds nice an easy to get to the motor and I'll be able to repaint the wiper arm while I'm at it.
-
- BXpert
- Posts: 553
- Joined: Mon Feb 04, 2013 11:30 am
- Location: Kent
- My Cars: 1980 Austin Princess 1.7 HL
1987 Citroen BX 17RD - x 105
Re: C'est Bleriot - 1987 17RD Hatchback
Had a free five minutes to have another look, managed to unbolt the heater box and move it just enough to get access to the flap without removing the wiper arm or scuttle panel. The flap is very floppy, no resistance at all, so it seems likely it's not connected after all. I set the flap to the open position, bolted the heater box back down, and the blower output was much improved, steadily weakening as the flap returned to the off position on its own thanks to things like physics and gravity. Problem found, at least, I'll try and fettle it when I've a little more time.
-
- BXpert
- Posts: 459
- Joined: Mon Jan 22, 2018 4:44 pm
- Location: Widnes
- My Cars: 1985 BX 19 GT (DKK), 1971 Morris Minor Traveller, 1971 Commer Auto-Sleeper, 1969 Commer Jennings Roadranger.
'88 BX GTi (a long time ago) - x 112
-
- BXpert
- Posts: 553
- Joined: Mon Feb 04, 2013 11:30 am
- Location: Kent
- My Cars: 1980 Austin Princess 1.7 HL
1987 Citroen BX 17RD - x 105
Re: C'est Bleriot - 1987 17RD Hatchback
Nobody really wants a loose flap, it's true.
-
- 1K Away
- Posts: 1926
- Joined: Tue Jul 05, 2005 7:54 am
- Location: Usually in the garage
- My Cars: BX GTi, C3 Auto
- x 86
Re: C'est Bleriot - 1987 17RD Hatchback
Best thing to do with that flap is to remove it if it is not connected to anything. Otherwise it will always move of its own accord to where you don't want it. I am not certain that it is fitted to all BXs anyway.
The Joy of BX with just one Citroën BX to my name now. Will I sing Bye Bye to my GTI or will it be Till death us do part.