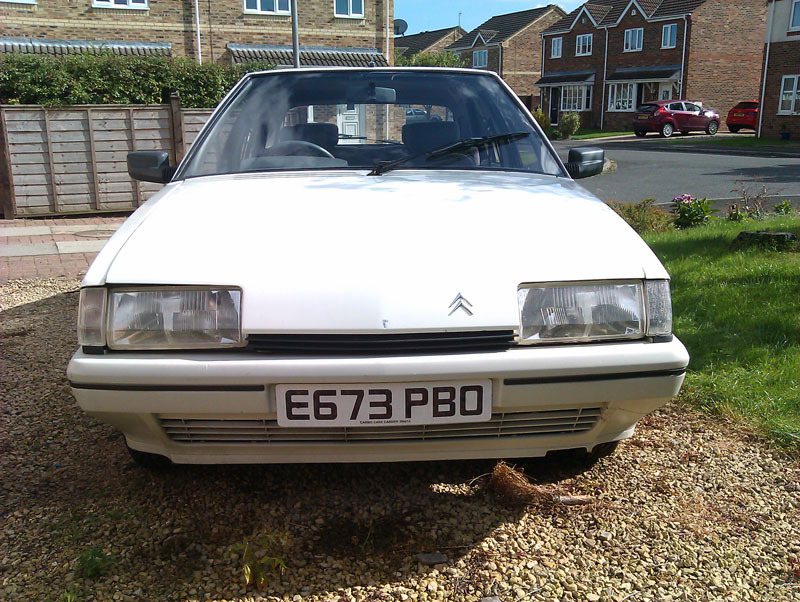
C'est Bleriot - 1987 17RD Hatchback
-
- BXpert
- Posts: 553
- Joined: Mon Feb 04, 2013 11:30 am
- Location: Kent
- My Cars: 1980 Austin Princess 1.7 HL
1987 Citroen BX 17RD - x 105
Re: C'est Bleriot - 1987 17RD Hatchback
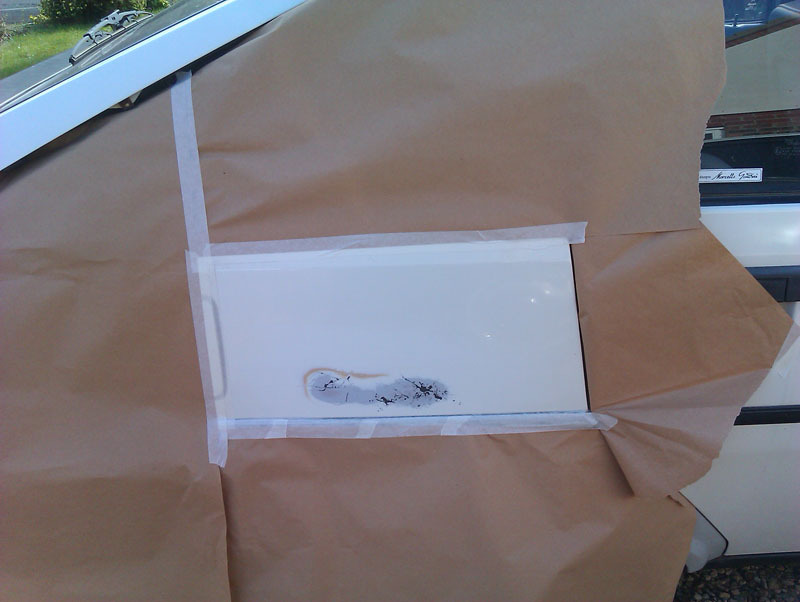
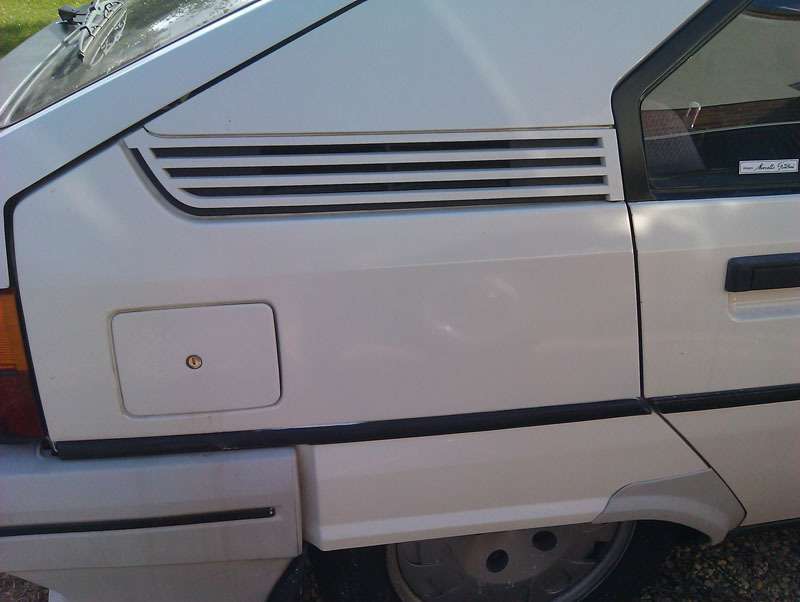
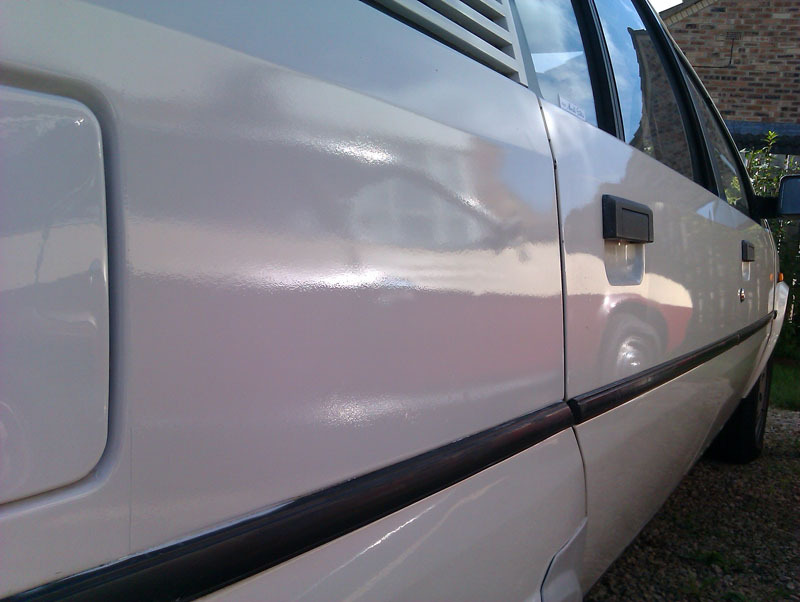
Another small cosmetic update, this time eliminating some rust spiders. First up was to sand back the problem area to see what I was dealing with, I was surprised to find a lack of holes and the rust was easily removed, the surface given some rust treatment, and we were ready for paint fairly quickly on this one.
I masked off on the lines of the car that would make a hard edge least visible, except the trailing edge which in hindsight I should have left open all the way back to the rear light. Never mind, this can be sorted later. With some primer, top coat, and lacquer the rust spiders were gone. It's not a bad finish for an outdoor rattle can job and in a few days when it's hardened a bit I'll be able to give it a polish to improve things further. I've a bit of hard line to deal with near the filler flap, and a bit of overspray to remove from the rubber trim strip where the tape failed, other than that I'm pretty happy with the end result and the defects can be dealt with when I polish, I'm not stressing about it.
-
- BXpert
- Posts: 537
- Joined: Fri Jun 01, 2012 10:36 pm
- Location: Bedfordshire
- x 10
Re: C'est Bleriot - 1987 17RD Hatchback
You're doing a cracking job with this car!
I need to do my window surrounds sometime, but I too have painted the wiper arm in satin black as the end where the blade attaches had started to rust and the rest had started to bleach from the sun, I also had the front bumper inserts out, stripped all the plastic coating off them which had curled up or simply fallen off over time, knocked out the dents in the corners and a gave them a few coats of satin black and it really does help to smarten up the front end.
-
- BXpert
- Posts: 553
- Joined: Mon Feb 04, 2013 11:30 am
- Location: Kent
- My Cars: 1980 Austin Princess 1.7 HL
1987 Citroen BX 17RD - x 105
Re: C'est Bleriot - 1987 17RD Hatchback
Can you remove the front bumper strip without taking the bumper off? I need to do exactly what you did on mine, there's a particularly bad dent on one corner that needs knocking out.
There's not much of anything to do on this besides the cosmetic really. The LHM leak from the rear boots has stopped of its own accord (I'll still be fitting the new boots eventually), and the only other leak of note is the sump plug which I suspect just needs a new copper washer which I'll sort when I do the oil change that I should have done already.
-
- BXpert
- Posts: 537
- Joined: Fri Jun 01, 2012 10:36 pm
- Location: Bedfordshire
- x 10
Re: C'est Bleriot - 1987 17RD Hatchback
Yeah the inserts are only held in with 4-6 white tabs (can't remember how many) that run around in a channel on the rear face of the insert. Just start from one end and gently pop them out one at a time. The rear inserts are the same but one insert feeds into the other so there is an overlap in the middle of the rear bumper. No need to take the whole bumper off.
-
- BXpert
- Posts: 553
- Joined: Mon Feb 04, 2013 11:30 am
- Location: Kent
- My Cars: 1980 Austin Princess 1.7 HL
1987 Citroen BX 17RD - x 105
Re: C'est Bleriot - 1987 17RD Hatchback
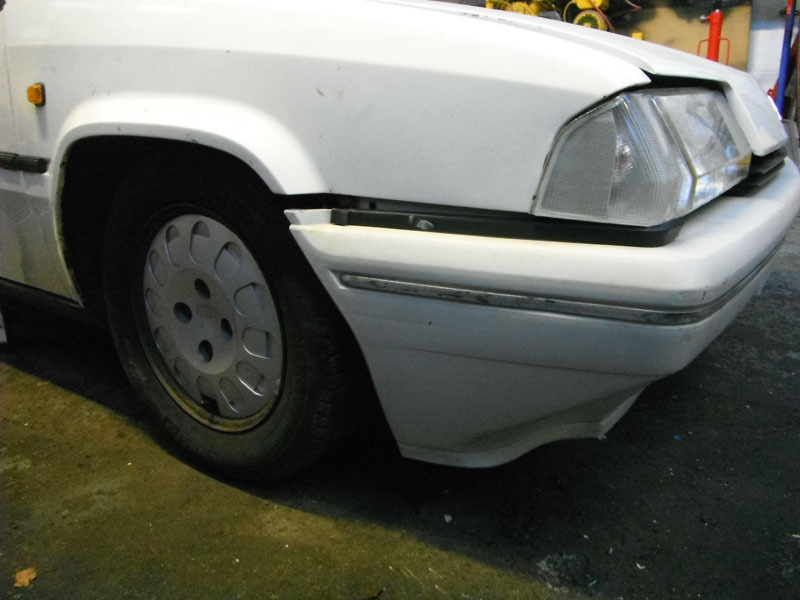
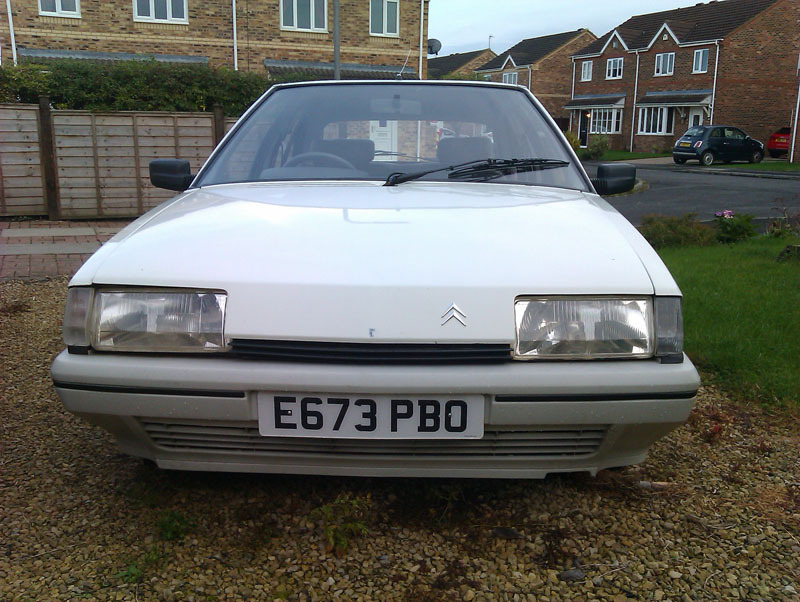
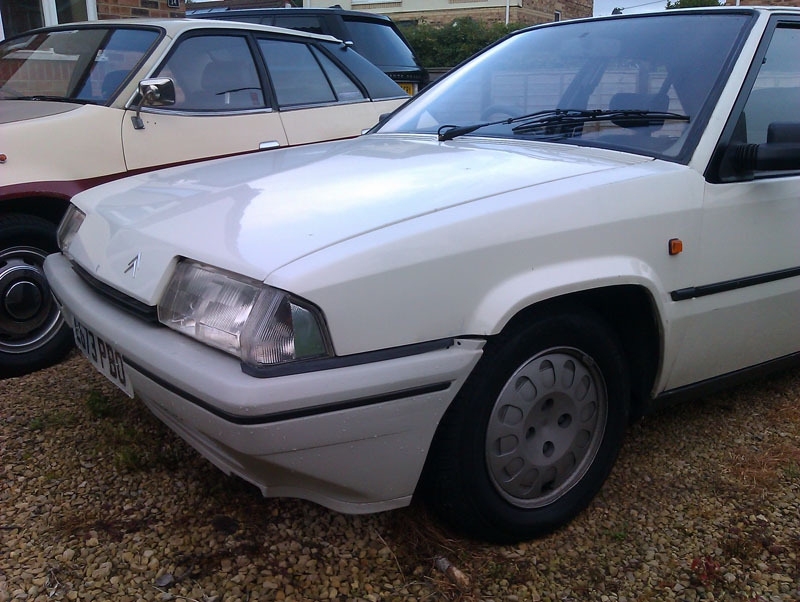
Here's an easy one; front bumper trim inserts. Mine was missing almost all the original coating and was dented on the corners, both sides.
It was the one bit of black trim on the car that looked bad and I'd put off doing it for no particular reason. Thankfully, a tip off from TizzyD demonstrated that it was a simple matter to remove the trims by putting a screwdriver behind the insert and gently popping it free of the bumper. All 6 clips both sides came out no bother and I soon had both trims cleaned and stripped of the last shreds of factory coating. Normally I'd use generic satin black paint for this but since that wasn't at home, I used the black stonechip I had instead which turned out to generate a moderately close finish to the original and has the benefit of being well suited to a high impact part like this. All 12 clips cleaned up well and none had any damage. Here's one side after painting.
The easiest way I found to reinstall the trim was to click the clips into the trim, three on each half, and then slide the clips along the trim until they line up with the bumper holes. Then gently push the clips in at one end and pop them all home and the trim will pull snug to the bumper. I also spent a bit of time straightening the dents and bends in the aluminium trims before painting so they sit a little nicer now. Here's one trim fitted, you can see the holes in the bumper on the other side which is where the plastic clips click in.
It's another of those small jobs that adds up with all the other small jobs to make a general improvement to the look of the car. Here it is with both fitted. It has unfortunately highlighted that I need the little trims that go on the end of the bumper where it flares out to meet the wheel arch, a part that tends to be a bit on the pricey side when you do find it. As a stop-gap, I could just paint that part of the bumper, I'd just rather do it right with the proper trim and a bit of adhesive to stop it escaping.
I don't know if the stonechip will fade or not. If it does, I can very easily pop these trims off and reblack in something more suitable, so we'll wait and see.
-
- BXpert
- Posts: 553
- Joined: Mon Feb 04, 2013 11:30 am
- Location: Kent
- My Cars: 1980 Austin Princess 1.7 HL
1987 Citroen BX 17RD - x 105
Re: C'est Bleriot - 1987 17RD Hatchback
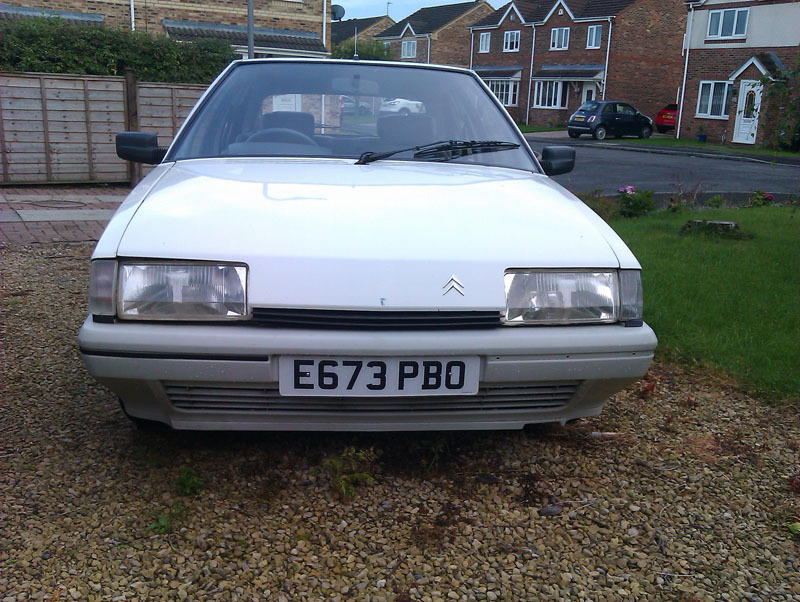
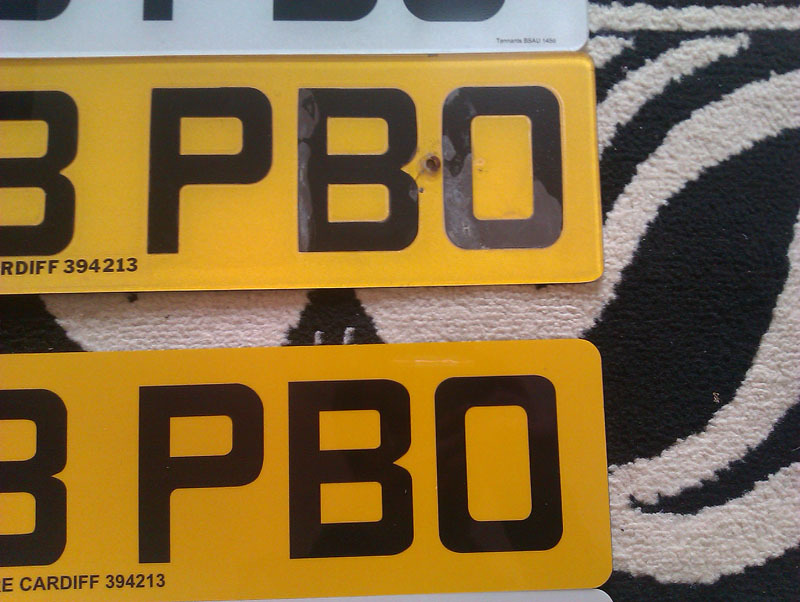
New numberplates arrived today. Entirely by chance, I found that A1 Showplates are still a thing (I'd not been able to find them when actually looking recently) and they have an exact Serck font available. Thanks to https://www.flickr.com/groups/serck/ for the link on their page and plenty of lovely Serck-y goodness. The original plate had started delaminating which not only looked scruffy, but might have caused problems at future MoTs, so it's best to sort this now. The only thing that had stopped me doing the plates sooner is that I couldn't find a supplier until very recently. Here you can see the differences, and similarities, between the two plates. If I'm being super picky, I did select the wrong font for the dealership details but we're not going for concours here so it doesn't actually matter, what matters is they look the part and are a very good replica of the original plate, which was the goal.
It just makes me happy to see the car on proper plates rather than mismatched ones. The fixing screws were moved to be through the letters, front and rear, so that black caps could be used for a smarter finish. It's the little things.
-
- Confirmed BX'er
- Posts: 49
- Joined: Thu Dec 20, 2018 2:17 pm
- Location: Tonbridge
- My Cars: Citroën C4 Grand Picasso
Previous cars
Peugeot 806 TD
Peugeot 309 TD
Ford Fiesta 1.1
Mazda 323 mk1
Nissan Micra mk1 - x 2
Re: C'est Bleriot - 1987 17RD Hatchback
As part of my old job at G.E Tunbridges, used to make number plates.
I enjoyed that.
I enjoyed that.
-
- BXpert
- Posts: 537
- Joined: Fri Jun 01, 2012 10:36 pm
- Location: Bedfordshire
- x 10
Re: C'est Bleriot - 1987 17RD Hatchback
The bumper inserts came up nicely! And those plates look like great, it's the little things that make a big difference sometime.
Keep up the great work!
-
- Over 2k
- Posts: 15618
- Joined: Tue Apr 15, 2008 11:12 am
- Location: Derbyshire
- My Cars: Various
- x 160
Re: C'est Bleriot - 1987 17RD Hatchback
Looking great! well done
Lots of Motors, mostly semi broken....
-
- BXpert
- Posts: 553
- Joined: Mon Feb 04, 2013 11:30 am
- Location: Kent
- My Cars: 1980 Austin Princess 1.7 HL
1987 Citroen BX 17RD - x 105
Re: C'est Bleriot - 1987 17RD Hatchback
Thank you
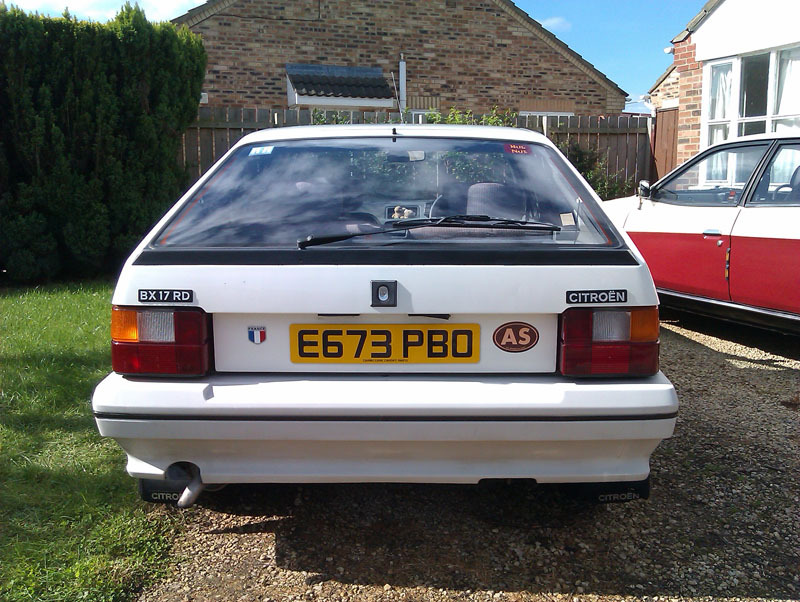
I'm having a quandary about that rear panel. I really like the car with it, general consensus amongst my peers is that it looks better, more finished, with it fitted. But... the tailgate isn't as nice to use with it fitted. The edges on the reflective panel aren't that pleasant to handle, and it's too easy to accidentally grab the holes for the number plate lights and risk breaking it. The tailgate also sounds nicer closing without the panel fitted than with and, if I'm going to refit it, I'm going to have to drill MORE holes in it because of the new number plates having holes in different places.
I don't hate the car without the panel, far from it, but I don't really want to refit it even after all the work to clean it up and repair it. I guess it'll just live in storage for a while and maybe I'll just get it out for shows or something.
-
- BXpert
- Posts: 480
- Joined: Mon Jan 22, 2018 4:44 pm
- Location: Widnes
- My Cars: 1985 BX 19 GT (DKK), 1971 Morris Minor Traveller, 1971 Commer Auto-Sleeper, 1969 Commer Jennings Roadranger.
'88 BX GTi (a long time ago) - x 116
-
- BXpert
- Posts: 553
- Joined: Mon Feb 04, 2013 11:30 am
- Location: Kent
- My Cars: 1980 Austin Princess 1.7 HL
1987 Citroen BX 17RD - x 105
Re: C'est Bleriot - 1987 17RD Hatchback
I know how that game goes! I once ended up owning 3 Princesses because of that game.
Today, the BX finally gave me some problems to sort out. Water is getting in seemingly through the passenger front door somewhere, not a lot, just a few spots, it showed up with the recent heavy rain. The other issue was Mike noticing I had a front sidelight out, turns out one of the connectors has fallen off the end of the wire to the sidelight socket.
It's otherwise just being a car. A very comfortable car.
-
- Over 2k
- Posts: 15618
- Joined: Tue Apr 15, 2008 11:12 am
- Location: Derbyshire
- My Cars: Various
- x 160
Re: C'est Bleriot - 1987 17RD Hatchback
Do what I do, have one with and one without!
Lots of Motors, mostly semi broken....
-
- BXpert
- Posts: 553
- Joined: Mon Feb 04, 2013 11:30 am
- Location: Kent
- My Cars: 1980 Austin Princess 1.7 HL
1987 Citroen BX 17RD - x 105
Re: C'est Bleriot - 1987 17RD Hatchback
I do quite like BX estates an... no. No. I must be strong!
--
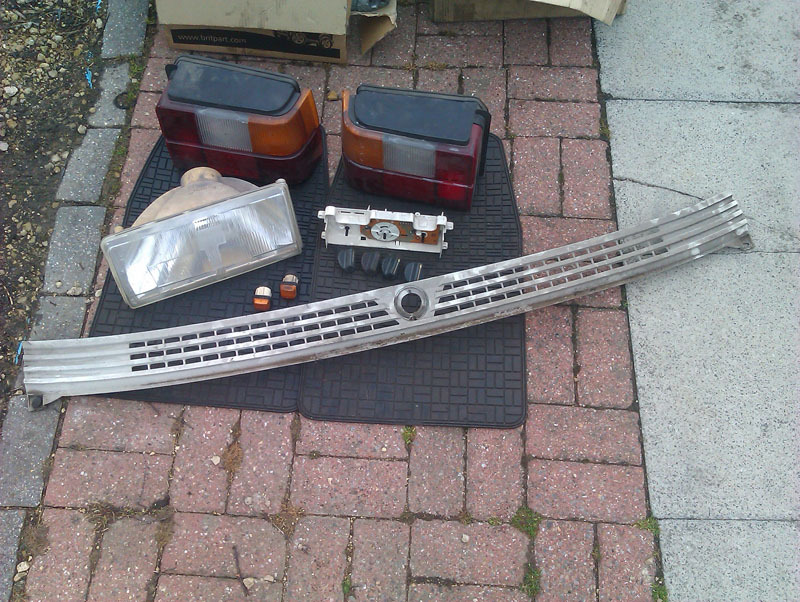
I didn't come away empty handed for my own car, of course. I splurged £80 and got myself this little selection. Unfortunately, all of the really nice interior bits and pieces he had were black, or higher trim, so I didn't have a great deal to choose from but I'm still happy with what I did haul away.
Pair of really nice rear lights (one of my originals has a little crack), a good headlight (nicer silvering than the ones on the car), a spare heater control panel, FOUR grey heater knobs, a pair of nice side repeaters, a really nice (if dirty) scuttle panel, and a pair of generic rubber mats that will look far better than what's currently in the car. This weekend this will be scrubbed a lot and installed where necessary to make those little improvements I'm so fond of doing on this car.
-
- BXpert
- Posts: 553
- Joined: Mon Feb 04, 2013 11:30 am
- Location: Kent
- My Cars: 1980 Austin Princess 1.7 HL
1987 Citroen BX 17RD - x 105
Re: C'est Bleriot - 1987 17RD Hatchback
Hope so! Friend and I think we have our schedules aligned, so we'll find out soon enough.
--
I've been cleaning the recently acquired parts and they've all come up quite well, though I was a little disappointed to find quite a few paint chips on the scuttle panel. Never mind, I have a spare now so I can paint one while it's off the car and make it nice and swap it with the less than perfect one on the car and nobody other than the fine folks reading all this will know I've done anything at all. It rained a lot again last night and, predictably, the passenger carpet was damp when pressed, so I determined to investigate and see if our theory of water ingress proved good. I undid the screws holding the sill trim on but didn't remove the trim because that meant removing the seat since it sort of hooks around the back and is held down by the seat rail, it seems. The carpet lifted out easily after that which makes drying out the car and cleaning/replacing the carpet hugely easy, good job Citroen! Under the carpet I found a soggy bit of history.
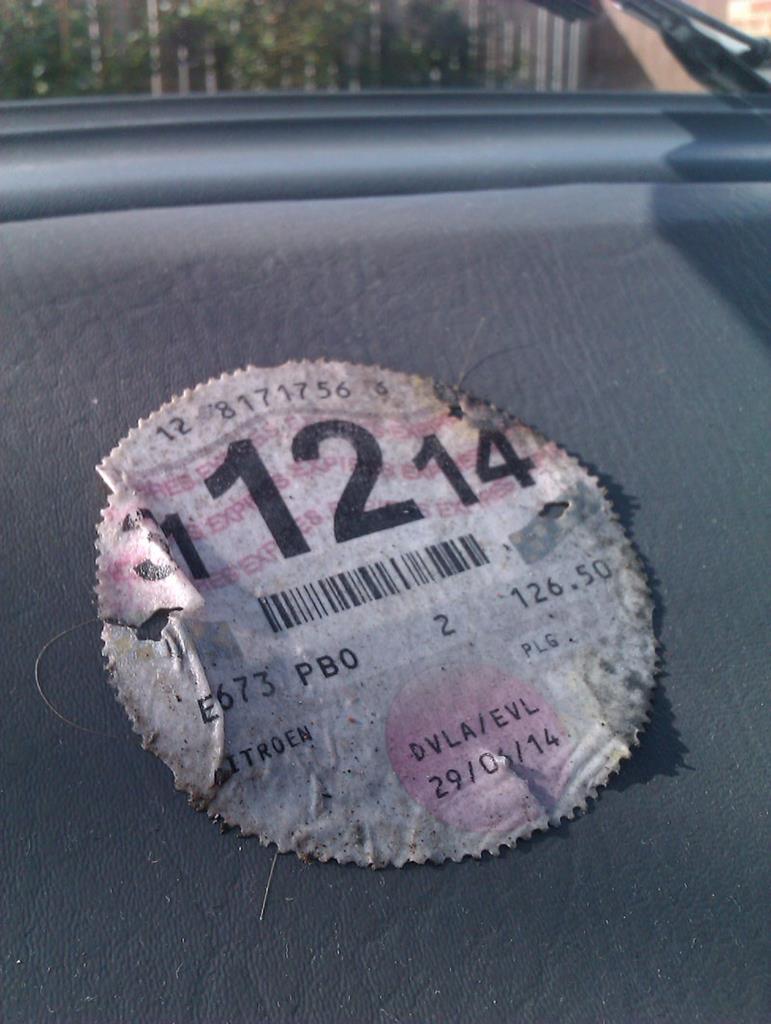
With the carpet out and the door seal lifted it was immediately obvious where the water was coming from, mostly because you could still see the path the water was taking.
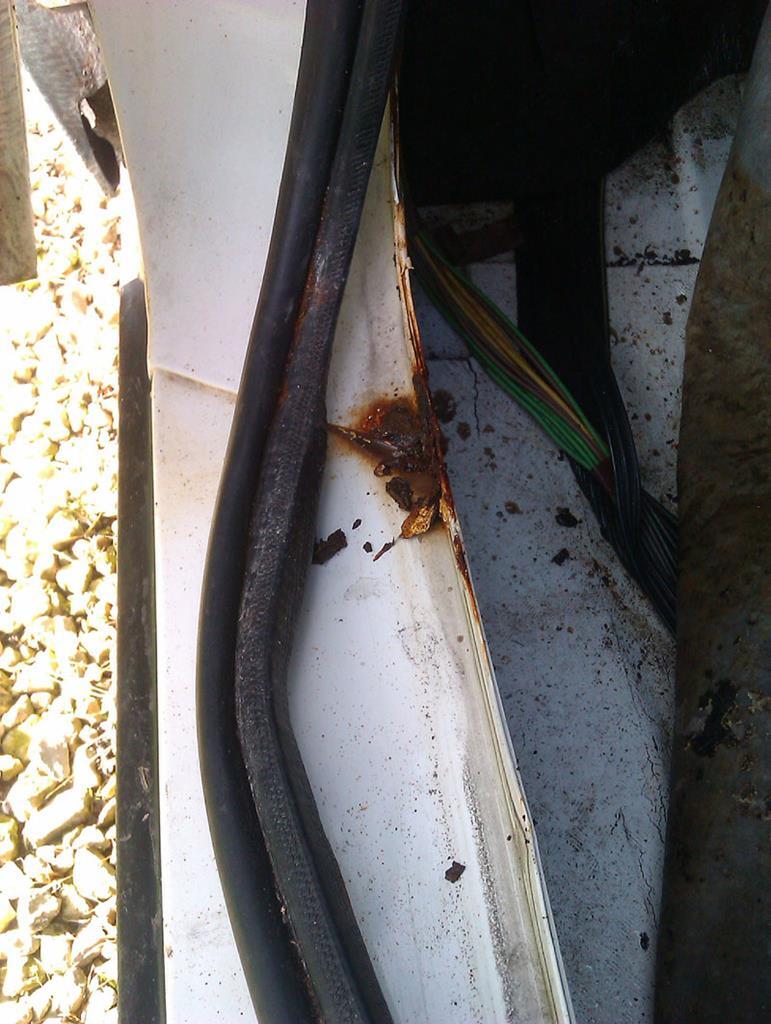
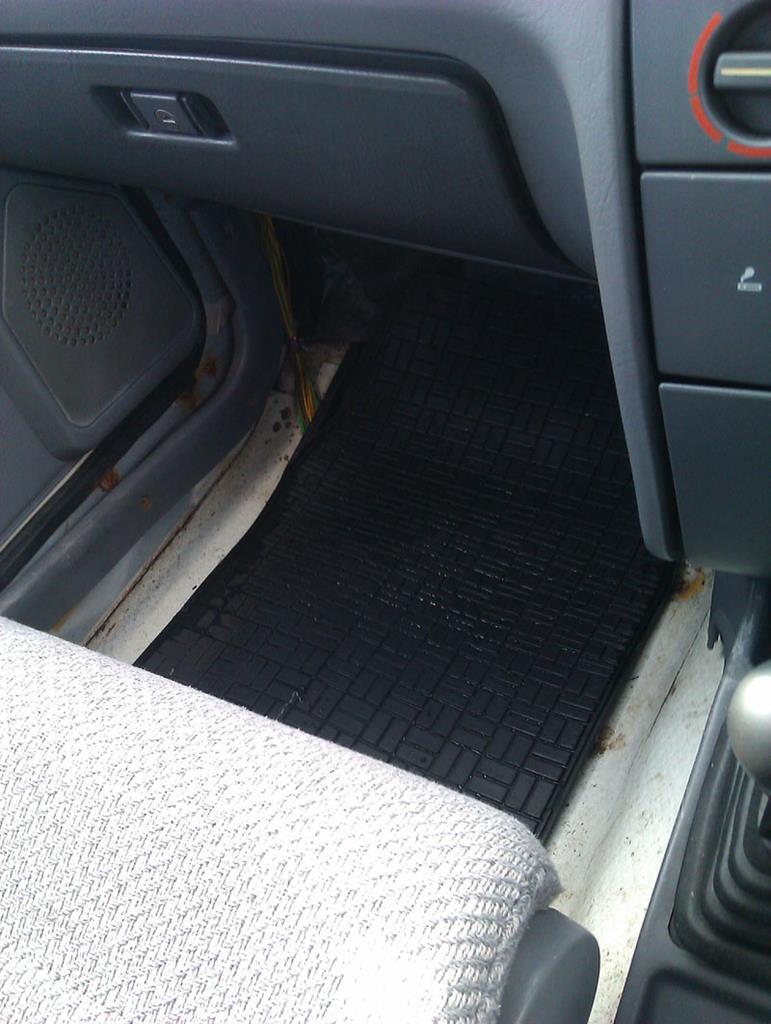
That looks far worse than it actually is most of it is just stains. A good go over with an abrasive tool will remove most of it and we might even get away with not having to weld this area. It looks like water has sat on the sill-to-a-pillar join and over time it's rusted unseen until it expanded the door seal out which, in turn, has allowed water into the car. There wasn't even enough water to make the carpet wet so I think this has been caught early enough to not be an issue and it gives me something fun to do this weekend. I left everything to dry out, which it did pretty quickly, and I've left the front carpet out until I've got this bit fixed to prevent any other issues. The rest of the floor looked in great shape. I then removed the mismatched front mats and disposed of those to replace them with the smart generic ones I picked up which fit the footwells much better. Proper Citroen ones would have been nice but I'll take these smart generic rubber ones since they don't look out of place.
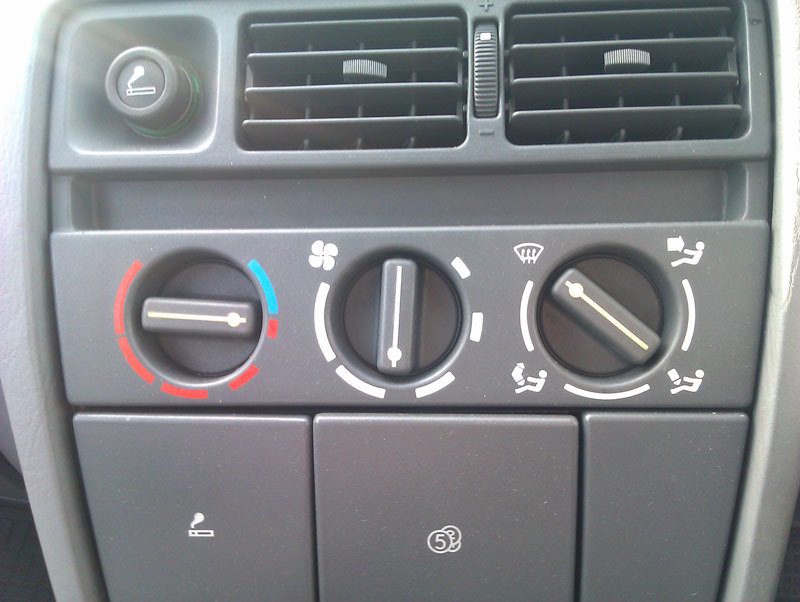
Finally, I replaced that one black dial that was really annoying me. After cleaning up the control dials I picked up recently I found them to be a perfect match so picked the best three from the six grey dials I have and I'm now much happier that everything matches. It quite literally is the little things that make all the difference.
--
I've been cleaning the recently acquired parts and they've all come up quite well, though I was a little disappointed to find quite a few paint chips on the scuttle panel. Never mind, I have a spare now so I can paint one while it's off the car and make it nice and swap it with the less than perfect one on the car and nobody other than the fine folks reading all this will know I've done anything at all. It rained a lot again last night and, predictably, the passenger carpet was damp when pressed, so I determined to investigate and see if our theory of water ingress proved good. I undid the screws holding the sill trim on but didn't remove the trim because that meant removing the seat since it sort of hooks around the back and is held down by the seat rail, it seems. The carpet lifted out easily after that which makes drying out the car and cleaning/replacing the carpet hugely easy, good job Citroen! Under the carpet I found a soggy bit of history.
With the carpet out and the door seal lifted it was immediately obvious where the water was coming from, mostly because you could still see the path the water was taking.
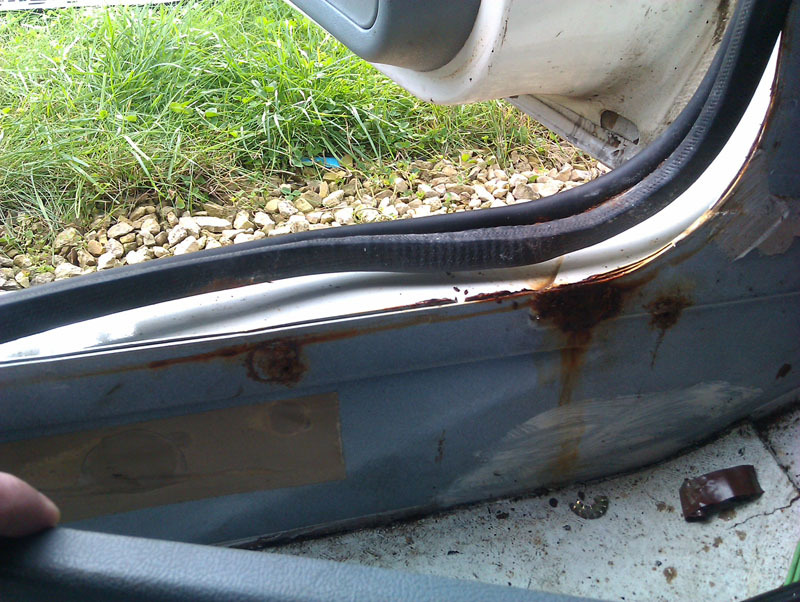
That looks far worse than it actually is most of it is just stains. A good go over with an abrasive tool will remove most of it and we might even get away with not having to weld this area. It looks like water has sat on the sill-to-a-pillar join and over time it's rusted unseen until it expanded the door seal out which, in turn, has allowed water into the car. There wasn't even enough water to make the carpet wet so I think this has been caught early enough to not be an issue and it gives me something fun to do this weekend. I left everything to dry out, which it did pretty quickly, and I've left the front carpet out until I've got this bit fixed to prevent any other issues. The rest of the floor looked in great shape. I then removed the mismatched front mats and disposed of those to replace them with the smart generic ones I picked up which fit the footwells much better. Proper Citroen ones would have been nice but I'll take these smart generic rubber ones since they don't look out of place.
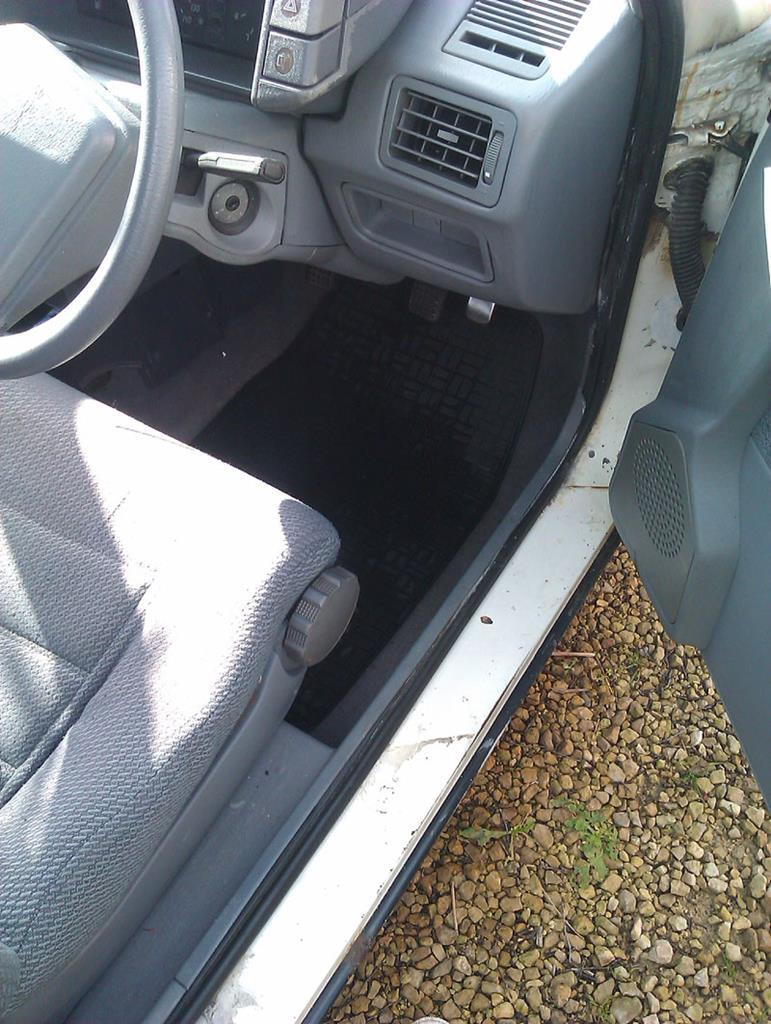
Finally, I replaced that one black dial that was really annoying me. After cleaning up the control dials I picked up recently I found them to be a perfect match so picked the best three from the six grey dials I have and I'm now much happier that everything matches. It quite literally is the little things that make all the difference.