Dragon Man wrote:
its going to be a pain to clean out.. wonder how hard it is to take the evaporator out..
Its not easy, this is a Citroen. To get the evaporator out you first have to extract the temperature sensor which is inserted into its gills from the inside of the car. I think the only way is to get to it with the heater matrix out or even the dash out which is perhaps too much work. Might be easier to just blow the muck out from the inside somehow or vacuum it off.
I guess all BXs with or without aircon have a lot of dust sitting in the heat exchanger or evaporator and look just like yours.
The two blower motor air intake grills are the place to put some filtration if this bothers you.
Last edited by Jaba on Sat Feb 04, 2017 11:46 pm, edited 1 time in total.
The Joy of BX with just one Citroën BX to my name now. Will I sing Bye Bye to my GTI or will it be Till death us do part.
does anyone have a picture or can link me to an ebay advert selling one of these xantia filters?
i dont mind where the filter is, nor do i think it really matters. begin a hay fever sufferer it would be really nice to get some pollen filtration in the car though. the idea of putting the filter in the blower outflow tube was that it would filter all the time. be it sucking air in from outside or recirculated.
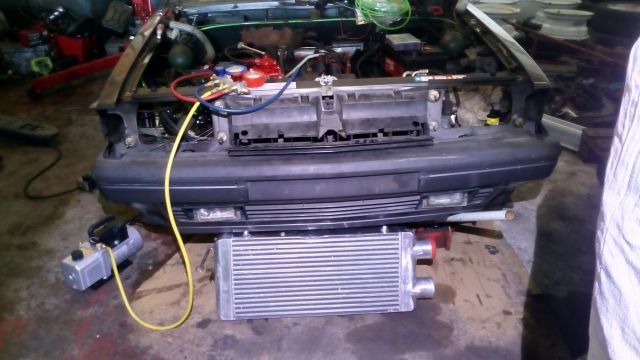
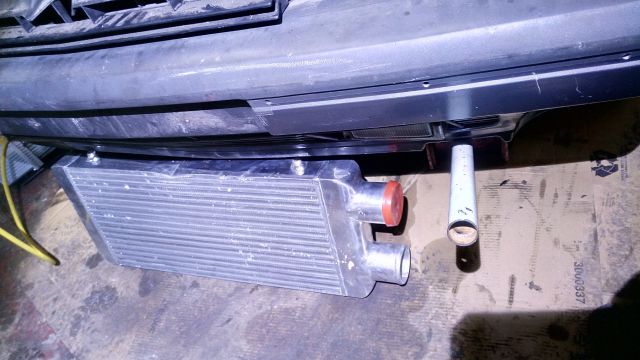
i did a little more work on the car today but before that ill show a "just for fun" picture of a intercooler i found in the scrap yard i work at. it still holds pressure too (i tested it to 50 PSI) and looks like it has never been used on a car. sadly though it was scrapped because of one dent in the top/bottom edge though it does not effect it in any way. i am not fitting this to the BX, this was just for fun while i was vacuuming out the AC system to see if it holds a vacuum.
oh and the AC seems to be holding a good vacuum.. this was 3 hours after i evacuated the system. im pretty happy with that.
anyway,
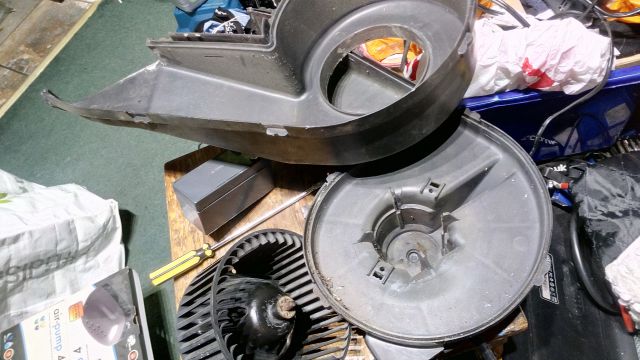
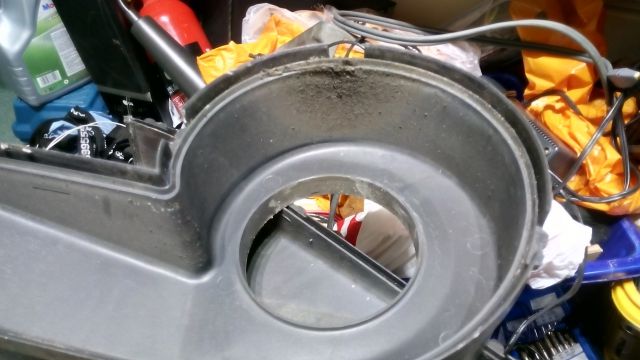
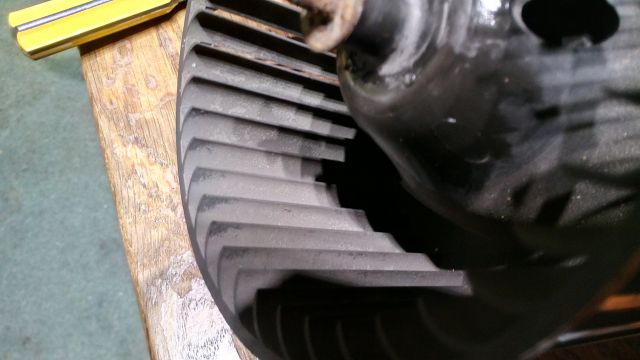
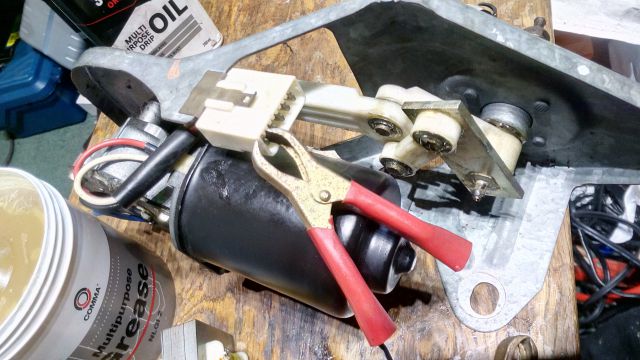
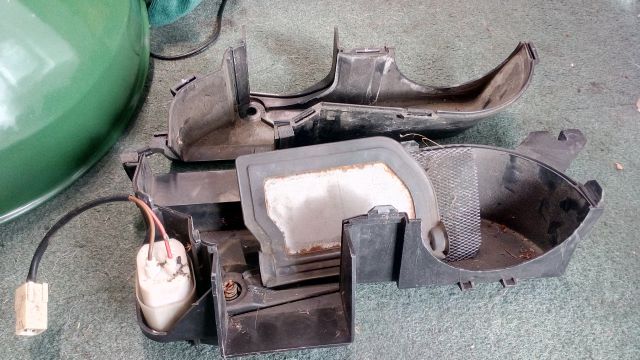
i decided to bring home the blower motor i had to remove so i could get the wiper motor out. my idea was to see how i could maybe adapt a filter sock to sit inside it and help with cleaning the air a bit before it hits the evaporator.... but me being me it turns into a full restoration of it, cleaning it, checking brush and commutator wear then oiling the bearings till it all spins free with least resistance... as you can see from the following pictures it was not very clean
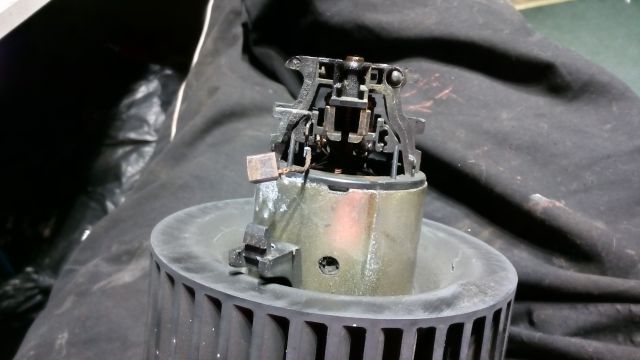
brushes are a little low but this thing is so easy to strip down i will run them till they fail.
here it is all cleaned up, back together and being tested
note the filter sock on the chair haha. well it was worth a try.
i am wondering if i could find a filter the right size, if i could jam it in the pipes maybe in a wire mesh cadge to hold it in position if i could get that to work. it would be at a kinda angle to get the maximum air flow through it sort of like this |\| it may work.. its just finding a filter that is long and thin.
anyway thats all for now! tune in next time for another episode of "Hit it till it works" the real art of persuasive maintenance brought to you by JohnDragonMan.
Thanks for posting about the blower motor DragonMan, I need to have a look at mine as it's quite noisy with the occasional squeal- must get that done before the challenge. It looks simple though, what kind of grease would you recommend?
"The real art of persuasive maintenance" Love that, made me chuckle!
I'm not a Saint, or a James, but a Tom Saint-James!
i used LM2 grease i just put a blob on and kinda pulled the shaft in and out while turning it. the fan end bearing is a little more hard to get to, what i did was stick a bit of grease in a syringe and heat it up so it was runny. then i injected it into where the bearing is and again moved the shaft in and out and rotated it till i felt it free up more.
the noise on yours could just be the brushes.. clean up the commutator with a bit of fine sand paper and wash off any dust with some WD-40. the brushes may be very short on yours, if you can measure the dimensions of them you can find replacements if however they are still long and good just take them out by removing the little cap on the end.. watch out as there is a spring behind it that will shoot out.. and just sand paper away the marks out of the curved end of the brush then replace it. i actually put a small film of grease around the brush just to help it move in the guide.
this fan of mine was super loud when i tested it in the car, made a ticking noise where one of the commutator pads had a bit of corrosion on it the brushes squealed, and the whole thing felt stiff.
i should have done a before and after video of it running showing how many amps it was drawing before and after cleaning. but it did drop quite a bit!
it makes me wonder if it is what causes the fan speed controller to fail with the more heavy load of a tight fan motor.
it went from something like drawing 18-19 amps to under 14 amps. pretty impressive result! the fact that road dust can get into it does not help though.
hope this helps you out! ahh yes, you have got to have a bit of a laugh. my desktop computer, often the graphics card does not sit right in the slot so when its powered down i just give it a few light kicks and it always fixes it. its a 10 year old machine but its still playing far cry 4! (which is a pretty needy game!)
Back again with another episode of "hit things till it works"
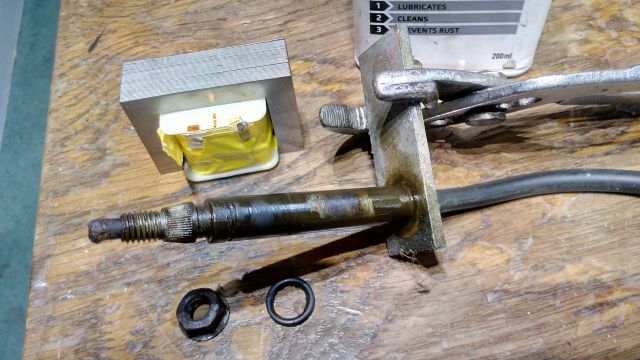
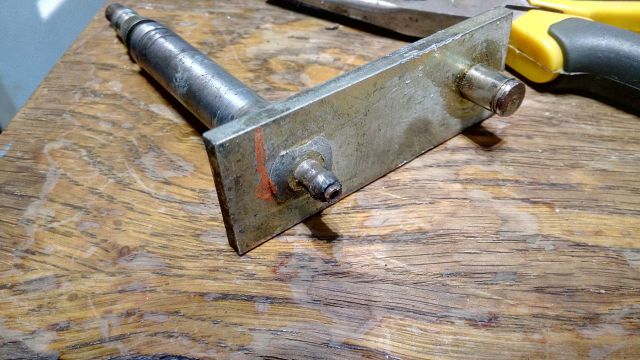
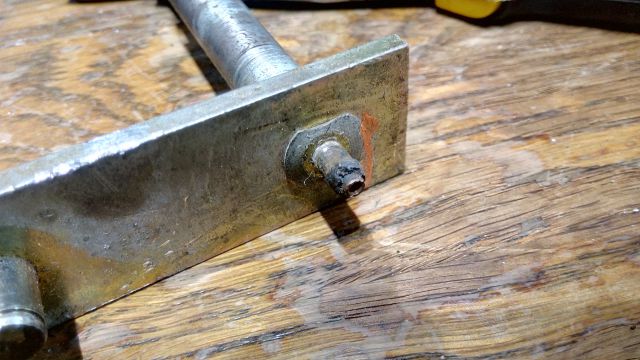
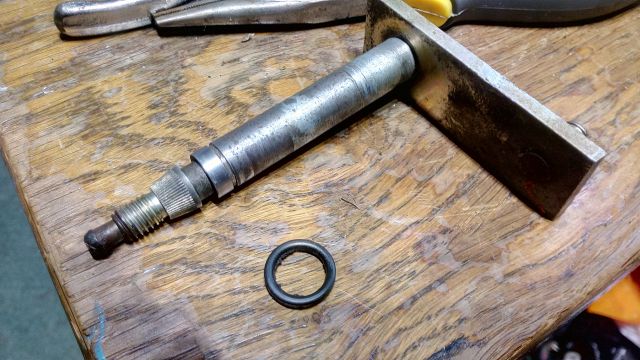
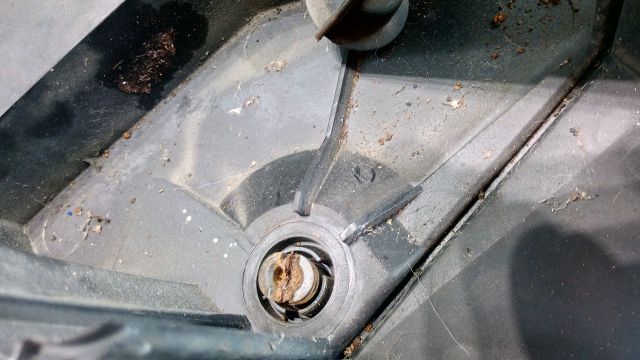
ahh so some of you have seen on the facebook group that i have took apart the wiper mechanism. it was locked up tight but some 3 in 1 oil and a bit of light tapping seemed to free it up, but i dont like the idea of leaving it "rusty" inside so i striped it down and gave it a good cleaning, re-grease and rebuild.
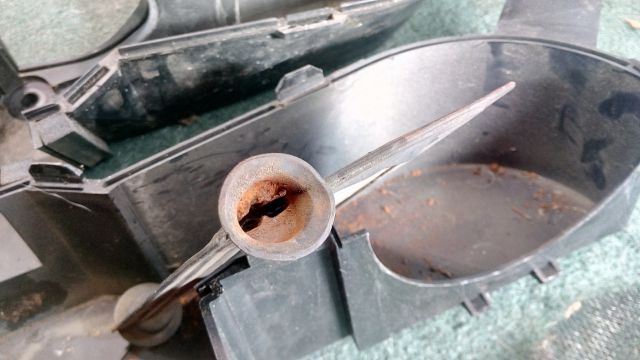
sadly the poor old washer fluid nipple is a bit corroded. nothing much i can do about that.. well i could snap it off level, drill it out tap a M6 thread and install a small M6 thread bleed nipple i guess.. if i was going to that trouble i would attempt to make a 316 stainless steel replacement shaft but i would need access to a lathe for that.
it all works great now so im happy with that.
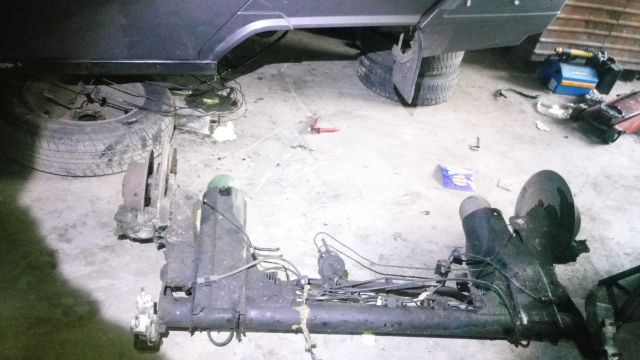
i also jacked the back end of the car up all the way so that the rear wheels were off the floor.. all i can say is thank the gods for the tow bar! there's not many jacking points on this car!
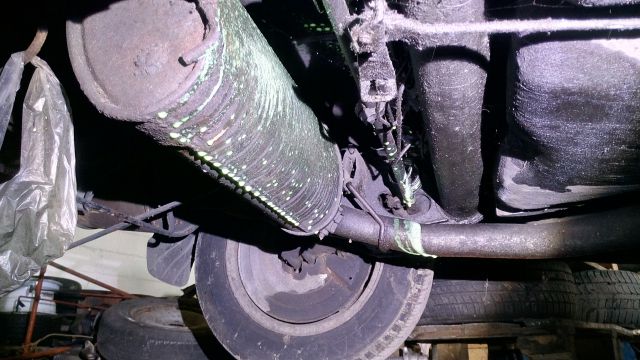
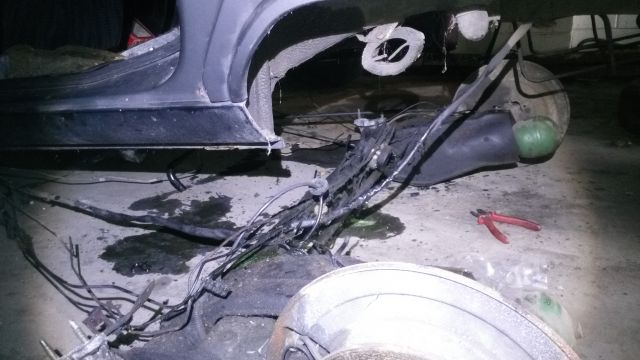
hmm as i was jacking something went pop and loads of LHM sprayed under the car... hmm interesting.. well i have not been under here yet so i have yet to inspect and replace all of the pipes which i am sure that is all it is. though i guess a sphere could have popped internally.. i am going to replace them all in time anyway.
loads of pipes were burst on this car.. when i was taking them off, i always blow the old LHM out of them out of fun i would block up one end and blow about 130psi of air through them to see if it had a leak.. one of them was like a damn garden hose pipe that some maniac attacked with a pin! the fuel lines also look in a very bad state.
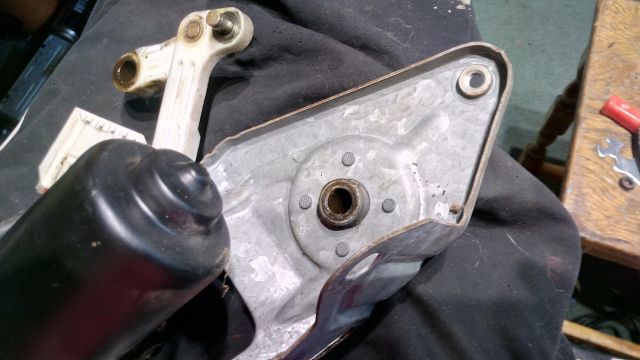
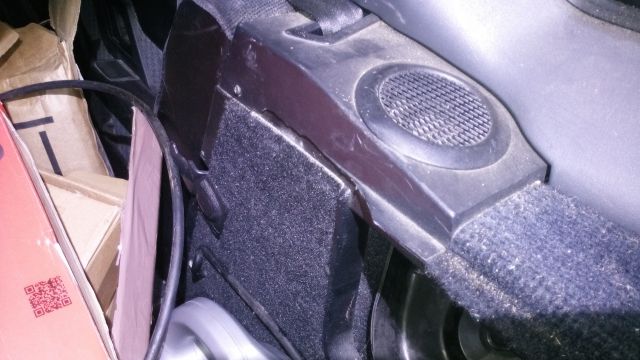
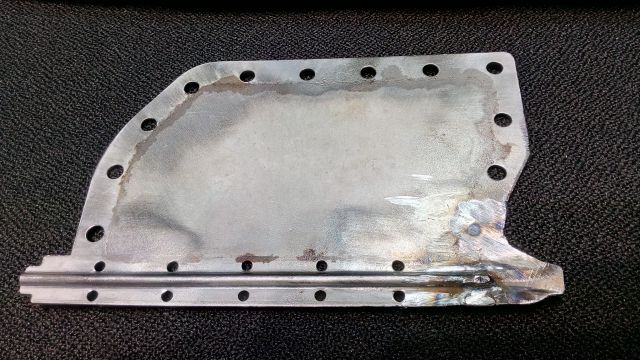
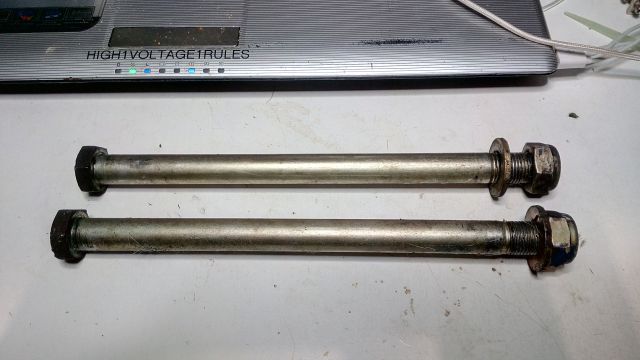
also this is the snapped bit in the car that i need to replace. i cant believe how flimsy it is! for saying its a huge parcel shelf they really built this a bit naff.
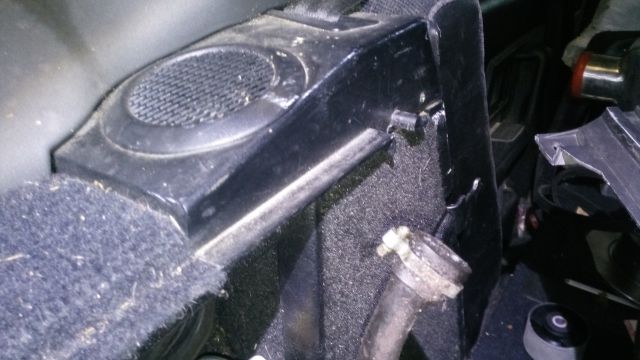
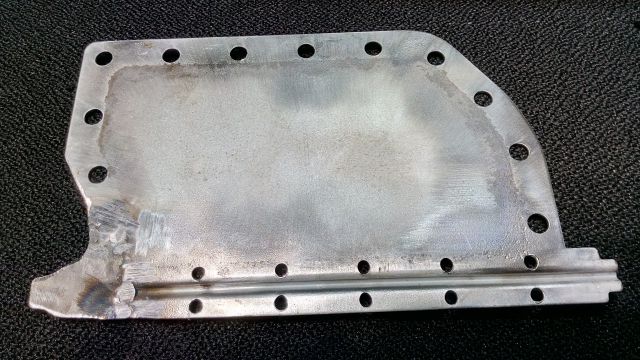
other side for comparison:
oh and both front wheel arch liners are back in, and the front accumulator sphere is bolted to the gearbox once again!
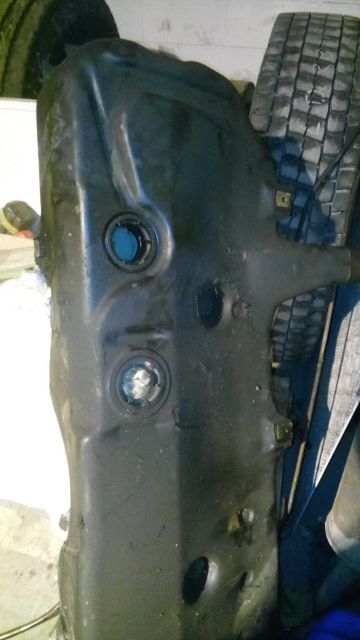
i managed to get the fuel tank off and found the leak. was actually more simple than i expected!
it turned out to be the fuel sender unit that somehow has cracked due to the car sitting on something pushing the bottom of the tank up.
i just need to find a replacement and i will be good to go with that.
i took off the original fuel lines as they were pretty bad, when i grabbed hold of one it just crumpled in my hand. i have some nice nylon pipe on its way to replace it with.
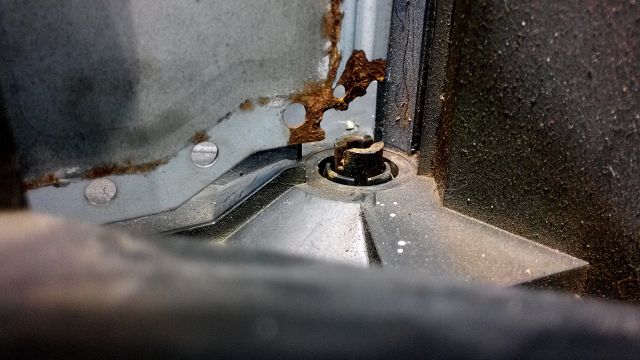
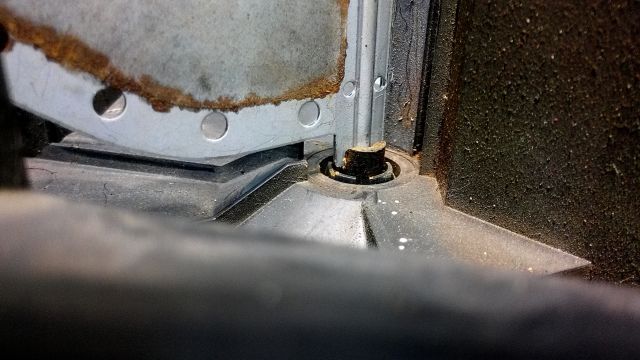
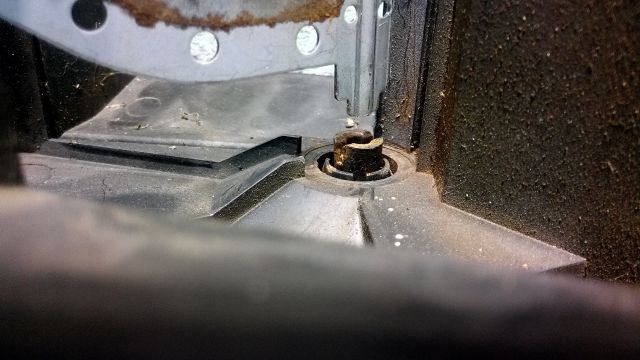
sadly theres some rust in where the front 2 bolts that hold in the rear subframe come through... not sure how i am going to fix that but i am pretty sure i am going to have to take off the outer sill. its a shame as the outer sill has no rust on it grrr.
i took the rear subframe off to check it over. seems all good but i am going to replace all the rubber bits (ordered 2 new boots from chevronics). it needs a clean. it turns out the leak on the back end was just the operations return (i think) from the height corrector... it went into a rubber pipe then went back into a metal one.
i also started work on the other blower motor, that is now cleaned up, greased/oiled and back with the car to be fit in.
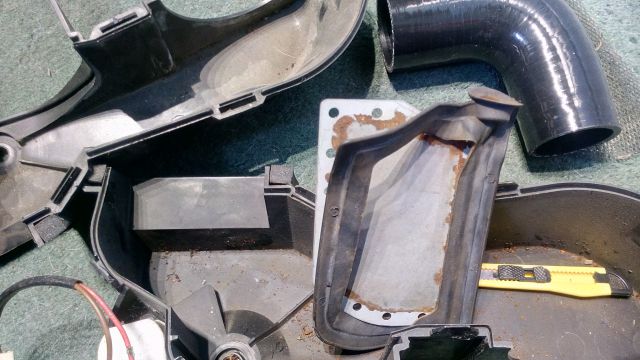
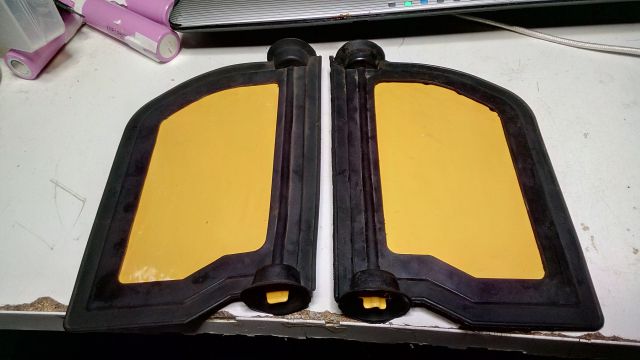
ive got to repair one of the air recirculation flaps... one of them has rotted out on one of the fixing points. sadly its the side that the motor uses to turn the flap.
this is how it should look...
this is how it does look...
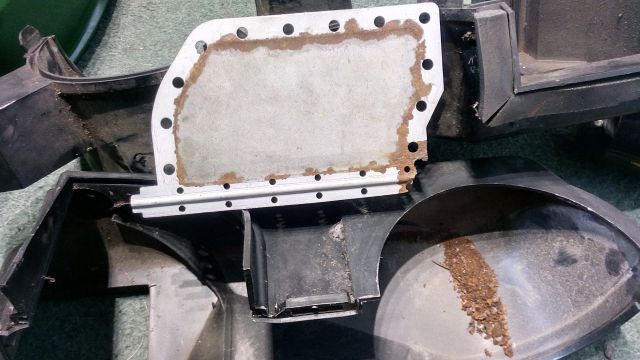
so cut the rubber seal off the metal flap.. i can glue it back on as i did not damage it
a broken metal flap missing one of its pivot points. with all that was left in the bit of plastic next to it.
can see why it never actually moved...
this is how it should be.. (just flipped over)
im going to do the old cut out and weld new method of repair. sure i could make a whole complete flap but meh.. its going to get painted anyway. so long as i keep it nice and flat on the edges it wont matter how it looks.
just so you guys know, i have made 2 new videos, check them out!
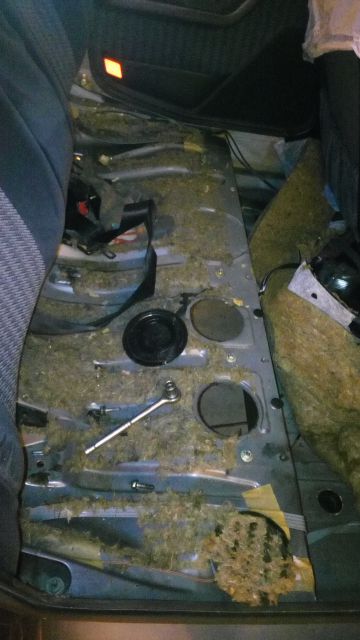
well today and yesterday i have cleaned and brushed out all of the mud and road grit from both rear wheel arches. i have removed the "range extender" fuel tank and cleaned that as it was very muddy. i am also considering making a nice new metal strap for it out of stainless steel we get loads come into the scrap yard where i have the bx.
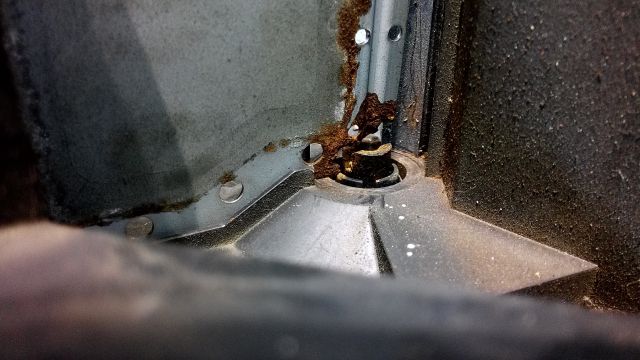
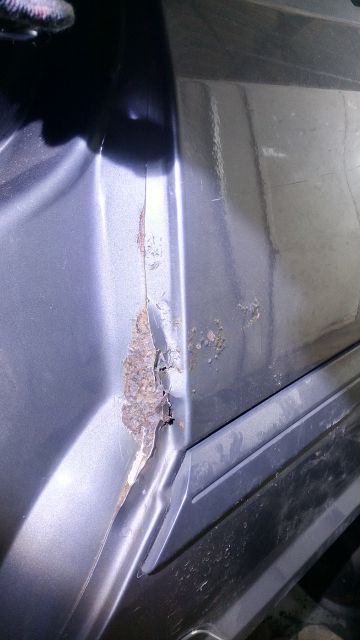
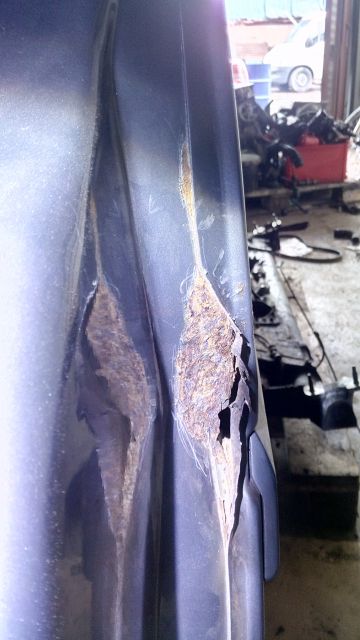
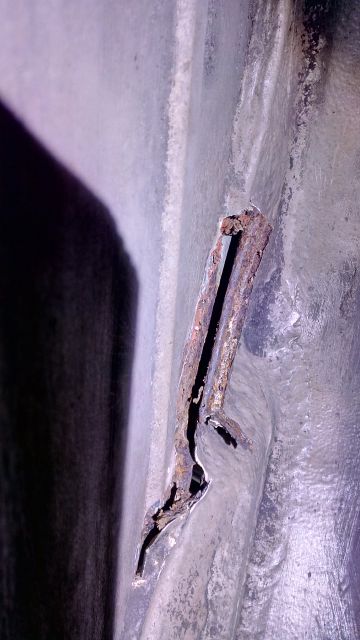
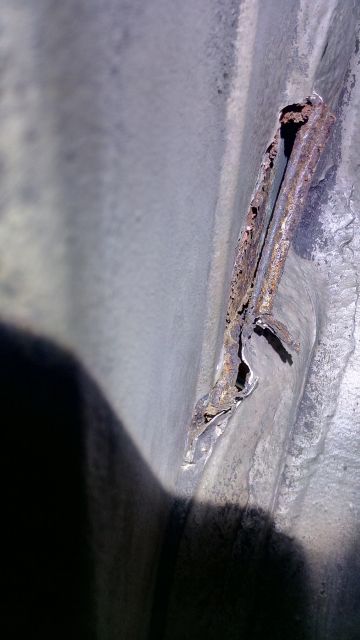
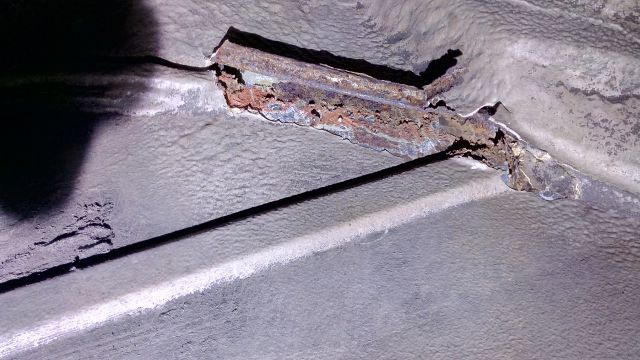
i also decided to poke around the rust spot on the rear side door shut thingy place.. its not good.. but it could be worse.
i sadly dont have the skills to repair it and make it look good. so my plan with that is to pry open the seam, piggle all of the rust out, rust convert it, then cover it all with underseal and then fold it back together. if i make it all waterproof it should not rot out anymore. i can just simply cover the hole with tape. my plan then would be to get a body shop to sort it out. hell i may even have a go at it when i get the car home. its the kinda job i would like to do here. i have a far better welder than the one at work.
oh pictures! yes here is what it looks like..
real shame.. but like i said it could be way worse. it looks like its caused by maybe chassis twist which in time causes the underseal to crack in the wheel arch thus letting water in behind the seam.. the rest speaks for itself.
also i have some rust just above the range extender. theres a little bracket that hold a small breather pipe and valve up. yeah that has rotted one side causing a small hole under the carpet in the little boot cubby hole thingy where the jack crank handle lives.
anyway here is a video of the car which i have taken on my new camera. hope its better than the other ones!
well i have repaired the air recirculation flaps. i have also painted them to stop future corrosion. they have had the rubber stuck back on using simple silicone sealant. not that the rubber would come off anyway its holds itself on pretty good.
i currently have the rear subframe all in bits. the subframe itself is currently at a shock blasters. all of the bits that bolt on to the subframe has gone manual removal of corrosion. many hours of manual removal. everything is pretty much all painted up now and ready to be refitted. i still however need to wait on the shock blasters, then go through the prep and painting process of the actual subframe itself.
the bolts look in good shape and will be reused. inserting the back in with plenty of copper slip.
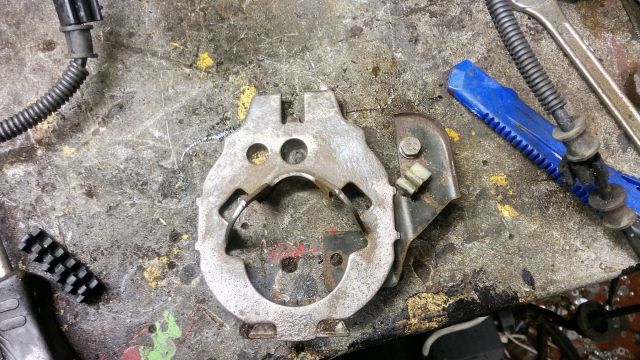
dont you think this part looks like the millenium falcon?
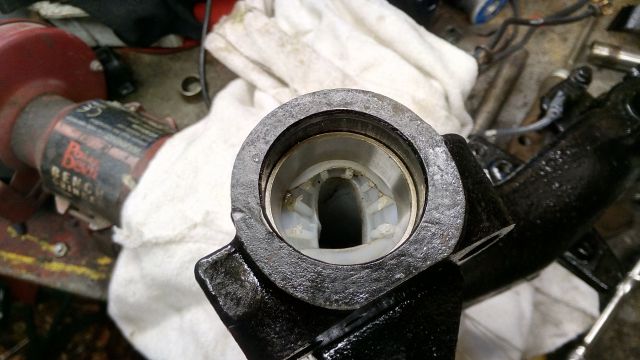
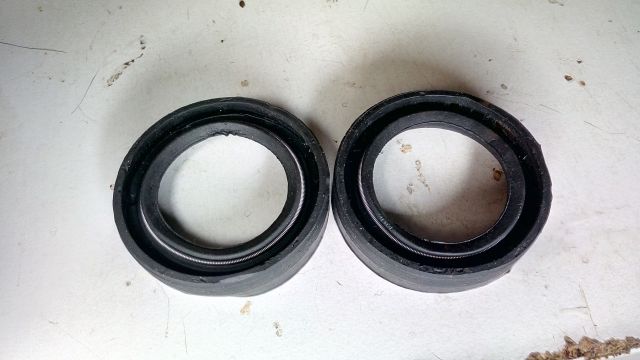
all but one bearing was shot. this is a picture i sent someone showing the condition of one of the good bearings from the outside:
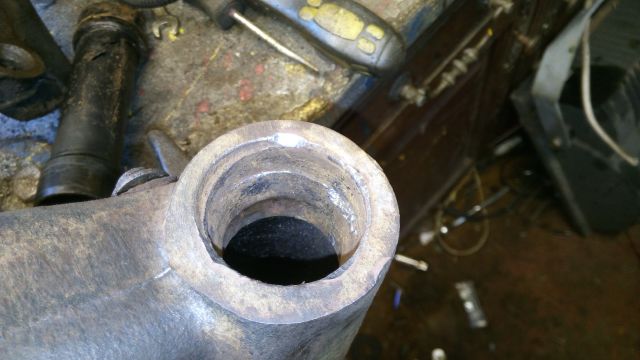
here is another where the seal had failed, just showing the race. no roller bearings anywhere to be found:
i had a little issue with the damn new bearings i bought for the rear arms. the damn plastic just would not go in. i tried everything to get it to fit from heating it up to hammering it in with a socket. in the end i gave up and just tried to press it in while drifting in the new bearing race. it did not go well.
i have not bothered putting the plastic in. my plan is to weld/plug up the hole in the bottom of the rear arms and just leave it filled with a mixture of grease and very thick oil. it should self lubricate every time the car sits on its arse over night. if not, well its not like these are hard to change the second time around.. now i know what i am doing! it may pay to get another set of these rear arms as spare should they go again in the future.
and then theres this. its no wonder these bearings fail. i have never seen such utter crap. calling this a seal is like trying to hold water in a colander. from what i have seen of the original seals.. they are made of the same crap! another part thats designed to fail maybe.
guess which one is the replacement.
thats all for now.. well theres loads more i have done but just have no pictures of any of it.
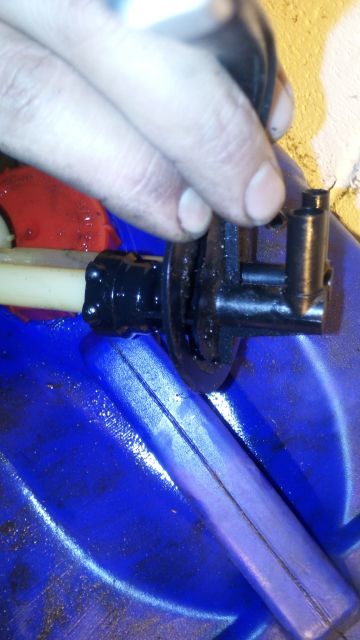
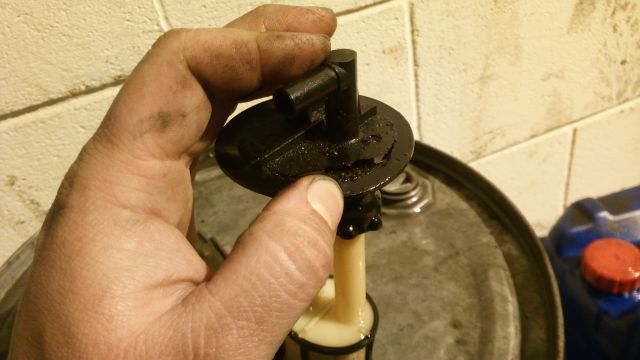
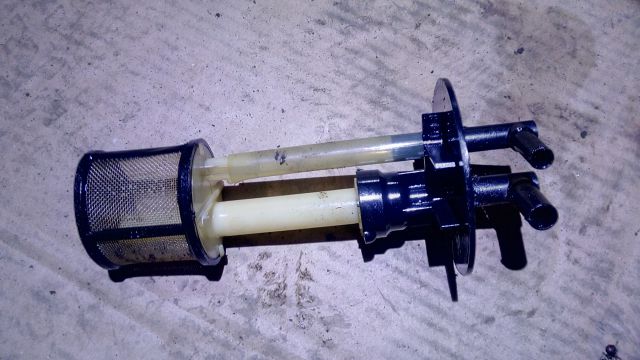
i need to update my "total amount spent" heh. still not yet had the engine running fully. really want to get the fuel tank back on but i still need the fuel pick-er up-er... sadly i think ill have to make one as i cant find one anywhere. should be simple enough to do.
Ditto. I can't even cope with keeping my two BXs just maintained and fault free let alone doing all that impressive refurb work. You give us all hope that these things are achievable.
The Joy of BX with just one Citroën BX to my name now. Will I sing Bye Bye to my GTI or will it be Till death us do part.
Anything is fixable with the right tools, the right man ( or woman), ant a load of cash. And I think lots of love too! I'll do what ever it takes to get the car I want. Just like I did with my Fiats... Though I will admit that they are way more easy to fix haha.
slow progress sadly, what with bank holidays and slow "24 hour" delivery which took 4 working days to get here.. sigh.
at least i have the sub frame at home so i can work on it
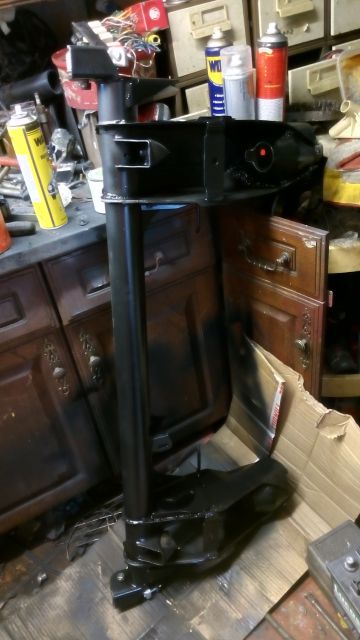
i took the axle to get shot blasted.. this is what it looked like when i collected it when it was done:
so pretty!
i acid etch primed it a few times.. painted it.. many times.. many layers.. and used waxyol where "seams" were just to give it a little more protection. i think i will waxyol the whole thing when its done. shame i cant just dip the whole thing in the stuff!
this js the result:
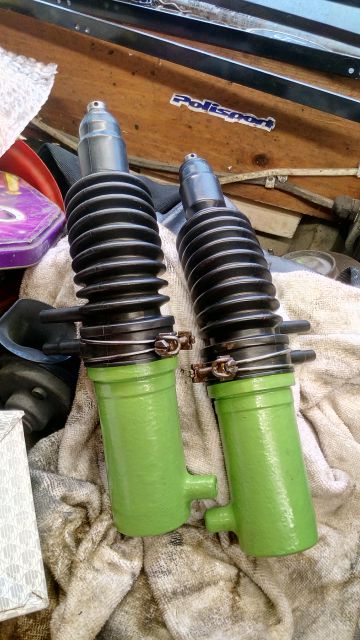
and the 2 rear suspension pistons have been painted and had new seals put in (even though it didnt really need new ones). this is how they look now:
a short update, sadly the car has not had me work on it for a while.. getting on for 4 weeks now!
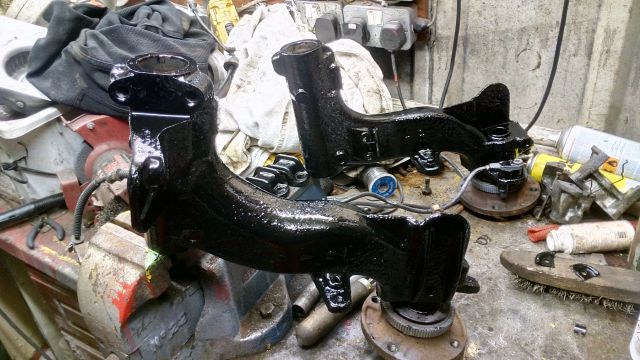
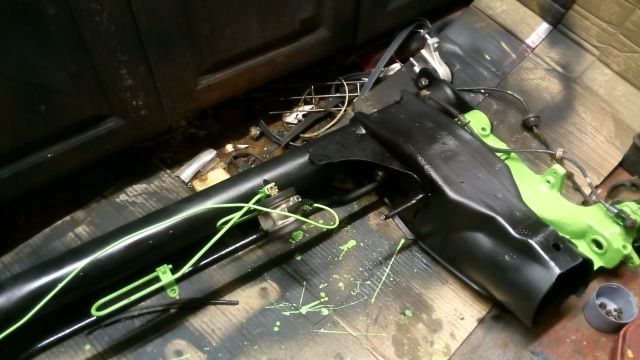
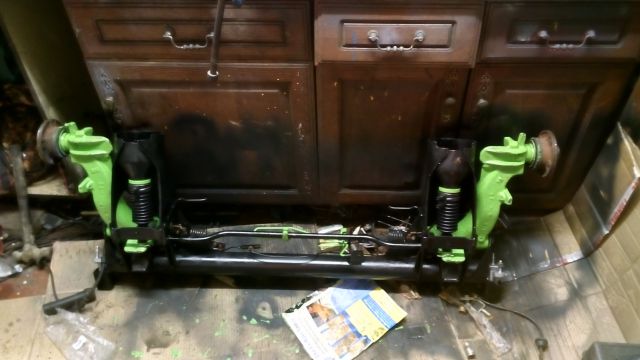
a few weeks later and i have the rear axle bolted to the car!
heres some pictures of it before fitment:
a complete set of new spheres were bought for it (estate rear spheres too). £209.14 in total
the fuel tank is in situ with the replacement fuel sender installed, the rage extender is installed and all fixed up to the fuel filler. i still need to make a replacement metal band
support strap for it as my one is corroding. so i will make one out of some thin stainless sheet. i still have to connect the fuel lines up but i am reluctant as i want to underseal around the clips that hold it to the bottom of the car.
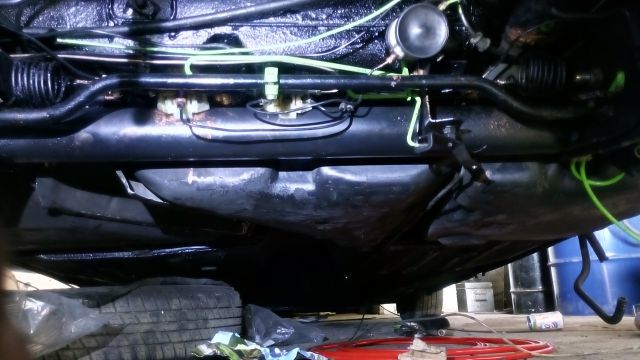
the axle is is all piped up, well at the back anyway. i have to run some returns and the feed for the rear suspension. (the one that goes to a T and then branches off the the pistons/spheres). the plastic pipes are going to be replaced with green nylon pipe like all the others.
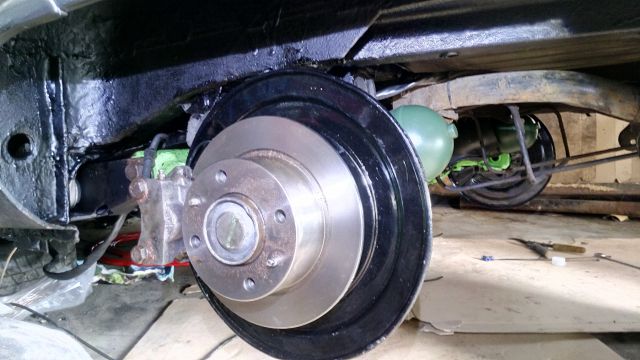
the brakes are all bolted to the axle and should just need bleeding to get them to work.
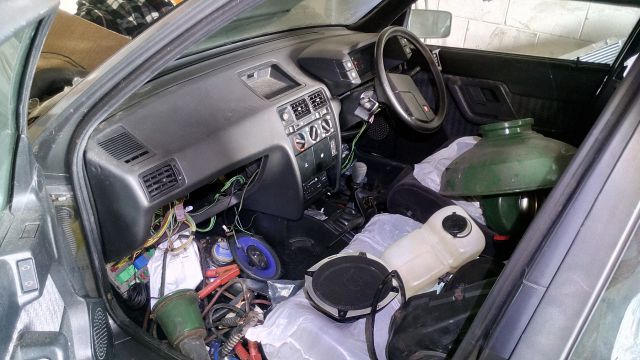
the inside of the car is looking a mess to be fair, its more of a storage place. i need to fix the indicators as they dont work. all other electronics look to be working fine.
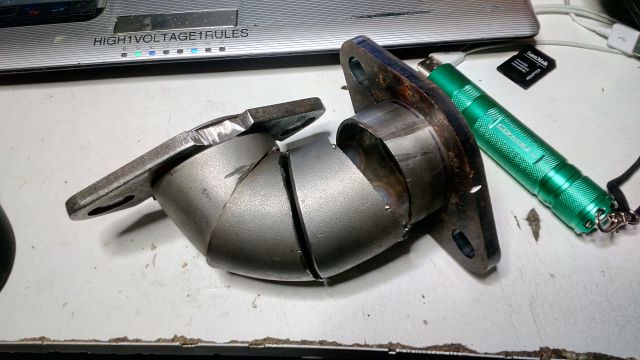
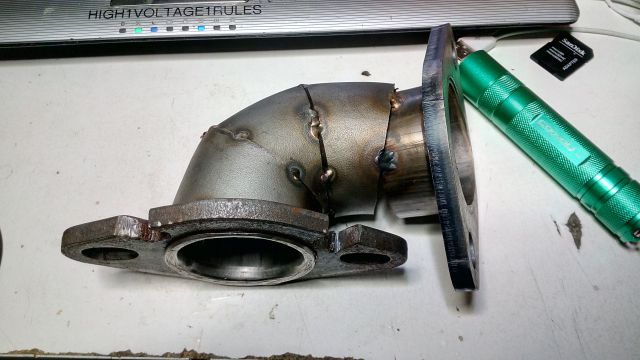
the turbo outlet it coming along too. it just needs to be welded up. the engineering firm that is doing it for me has managed to pretty much get it perfect.. i just need to do some slight modification to it so it fits then it can go back and get finished.
i have finally finished off everything on the rear axle. all high pressure pipes have been connected with just a few return pipes that need connecting at the front.
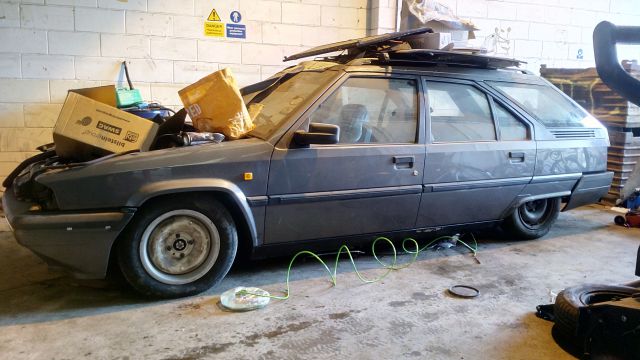
thus the car has finally come off the "safe" supports it was on.
now flat on all 4 wheels.
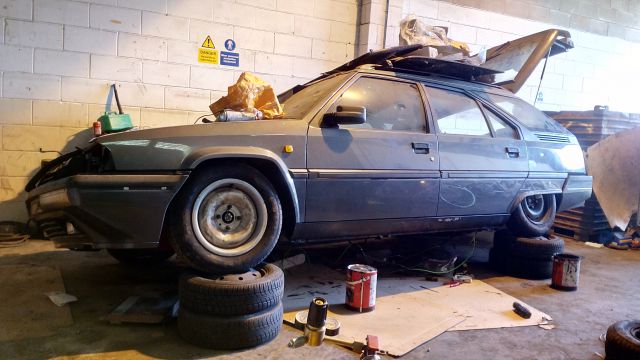
only for it to be jacked up and rested on more "safe" supports so i can take out all of the clips that hold the various pipes to the underside so i can underseal, then put the clips back in and re-hang the pipes.
oh and i also took off the old spheres from the front and put the new ones on. the accumulator sphere i have left off while i work on putting new pipes around the priority valve.
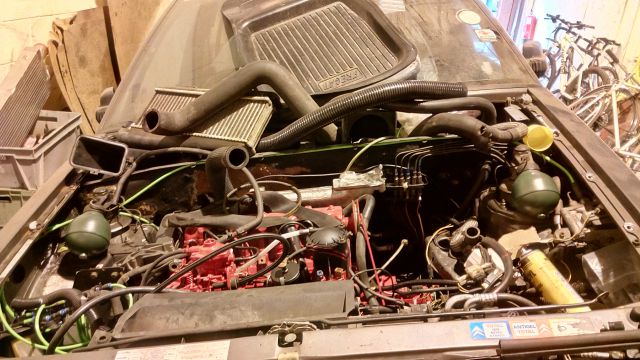
engine still looks a bit of a mess.. i have done nothing on it since i started work on the back of the car.
thats all for now folks, i really need to get the damn turbo piped up! still struggling with that.