C'est Bleriot - 1987 17RD Hatchback

Tell us about life with your BX, or indeed life in general!
Post Reply
User avatar
vulgalour
BXpert
Posts: 553
Joined: Mon Feb 04, 2013 11:30 am
Location: Kent
My Cars: 1980 Austin Princess 1.7 HL
1987 Citroen BX 17RD
x 105

Re: C'est Bleriot - 1987 17RD Hatchback

Post by vulgalour »

It was supposed to rain loads today and didn't, which was really handy for getting through a good few jobs on the BX. I cleaned back the rust and found a hole that was too small to warrant getting the welder machine out and that I could fill with some seam sealant so that's the route I went for. This might even be a better solution since I sealed it after paint which means there isn't any bare metal to rust as a result, I hope.
Image

Image

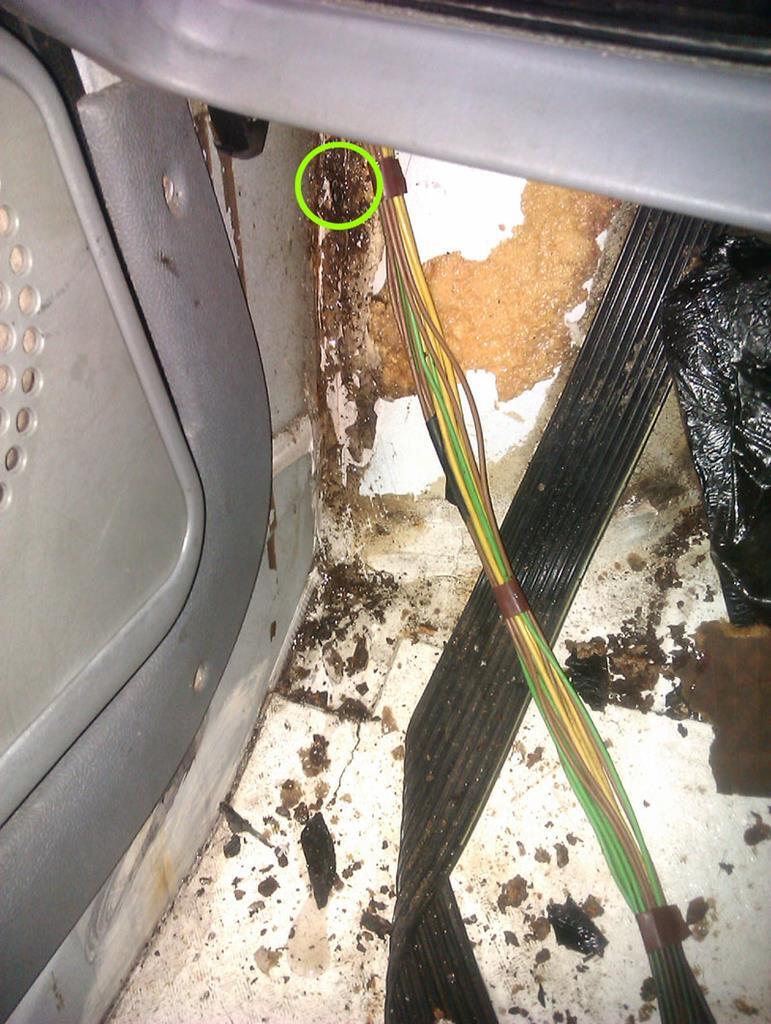
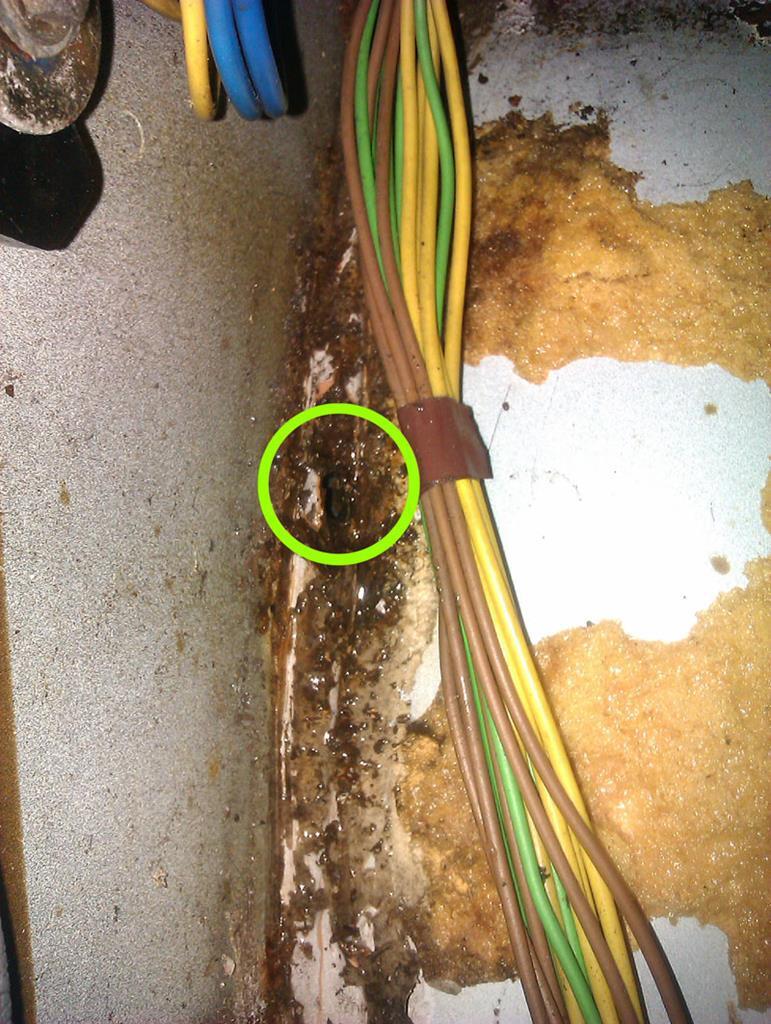
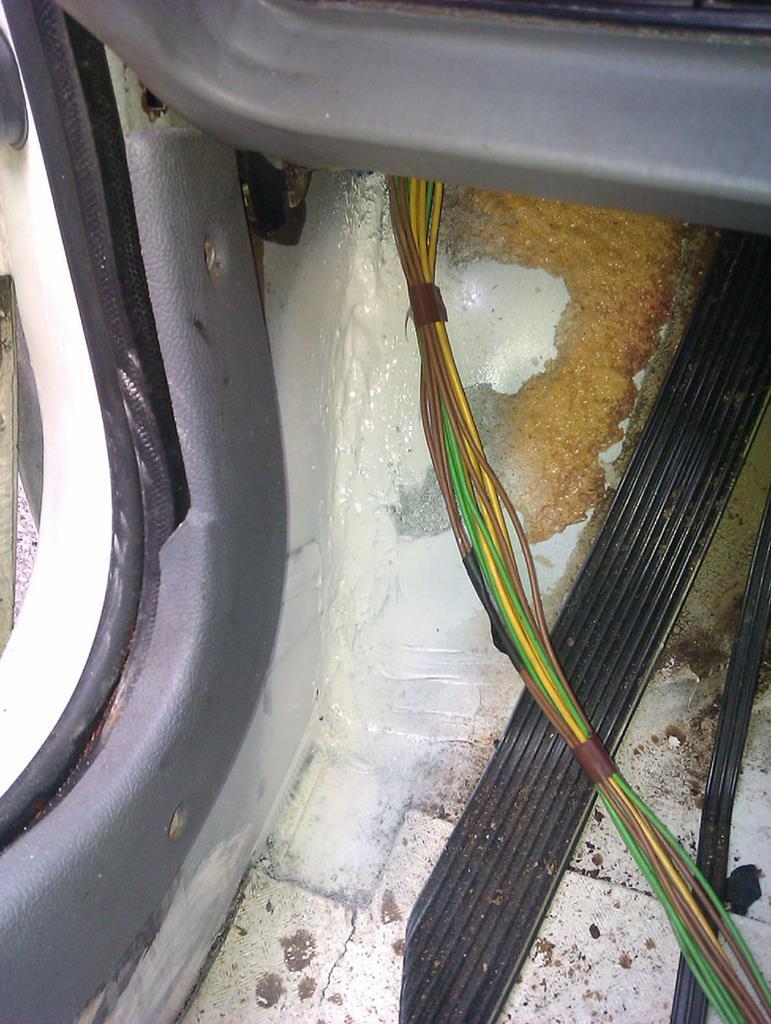
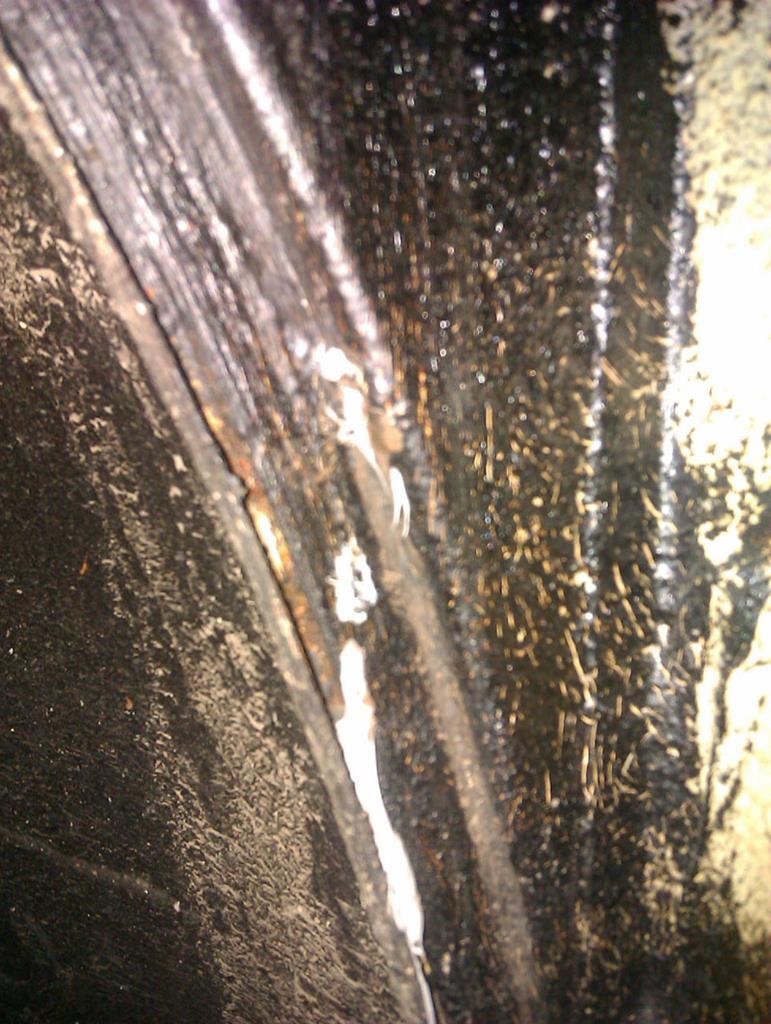
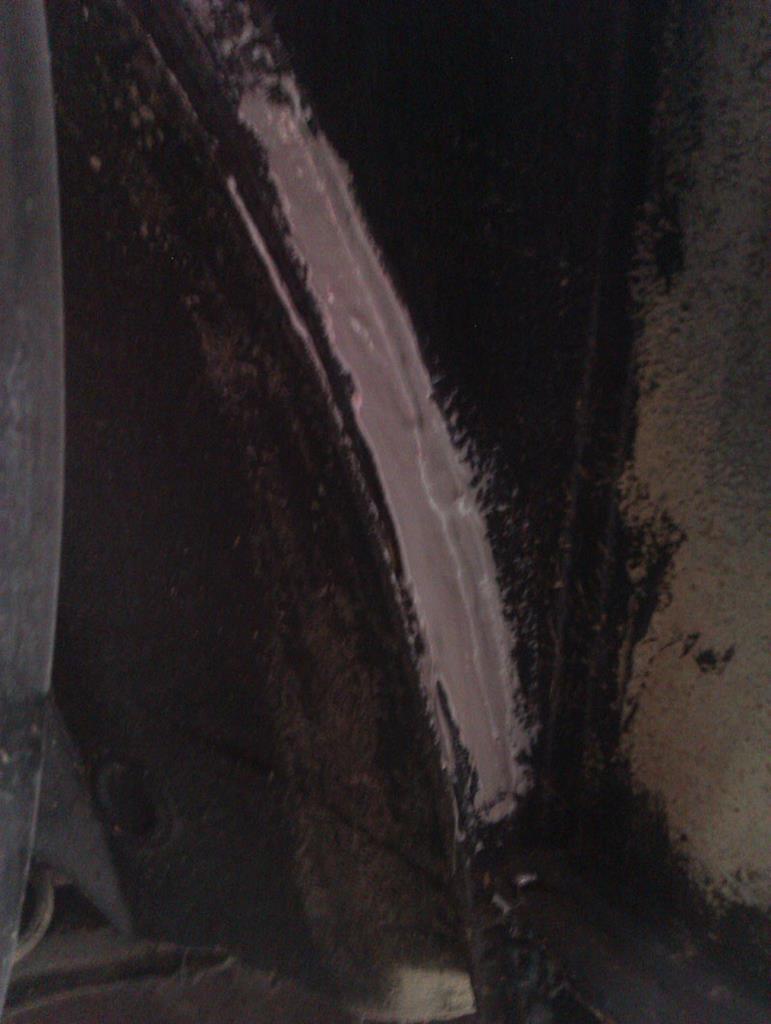
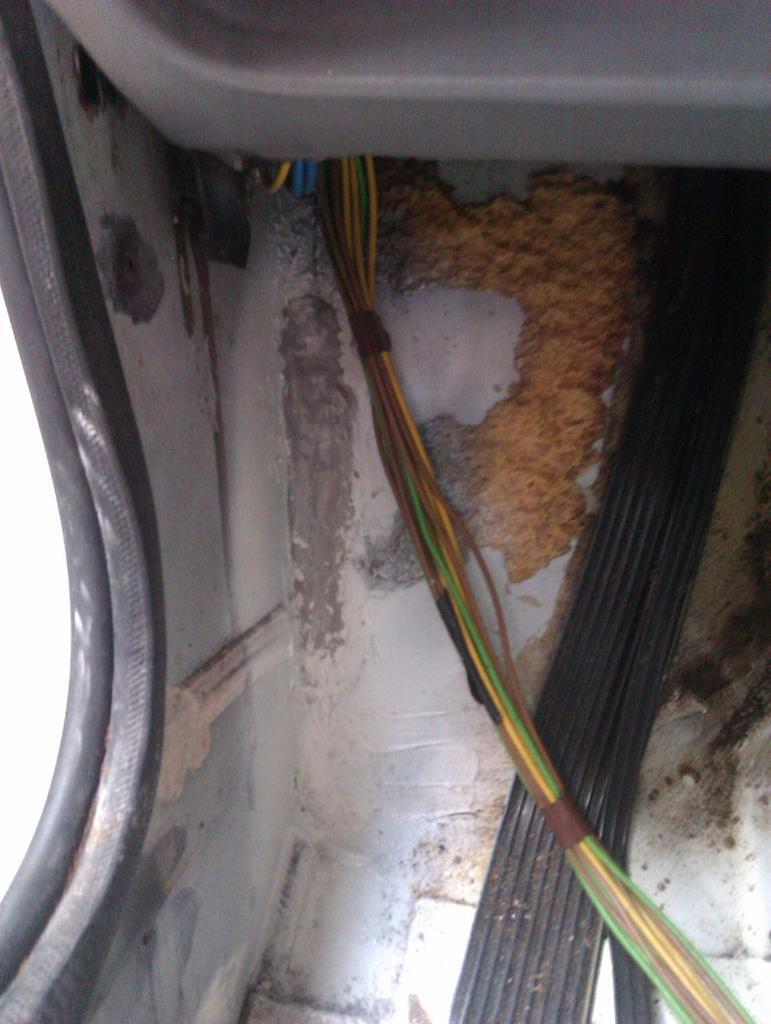
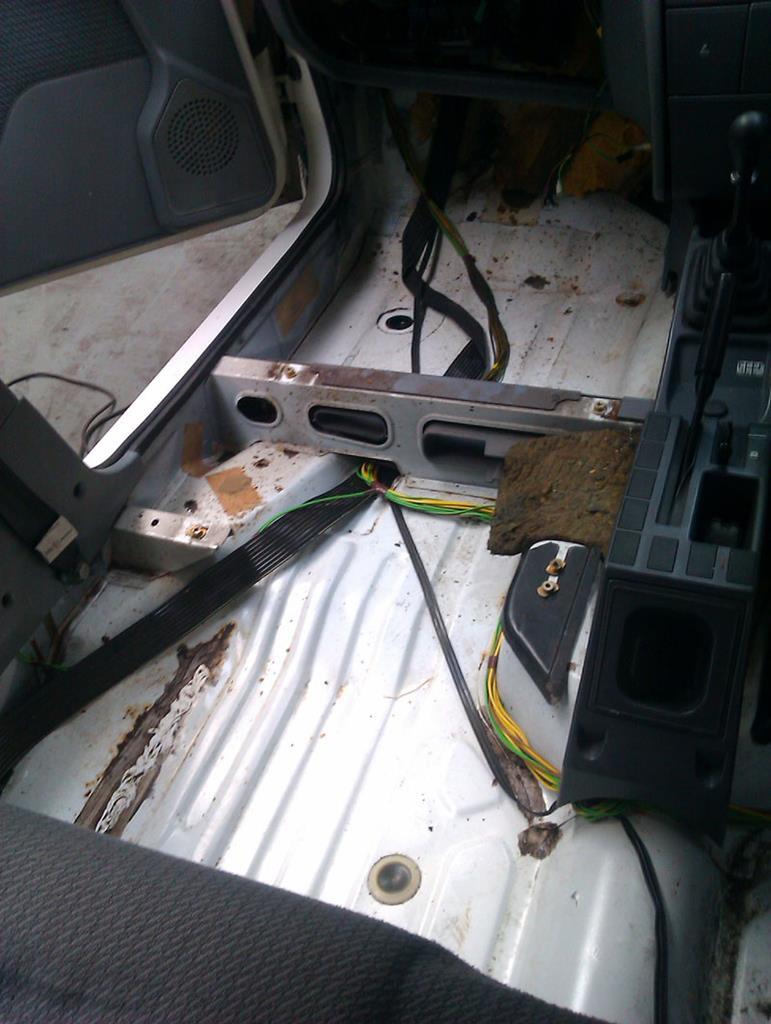
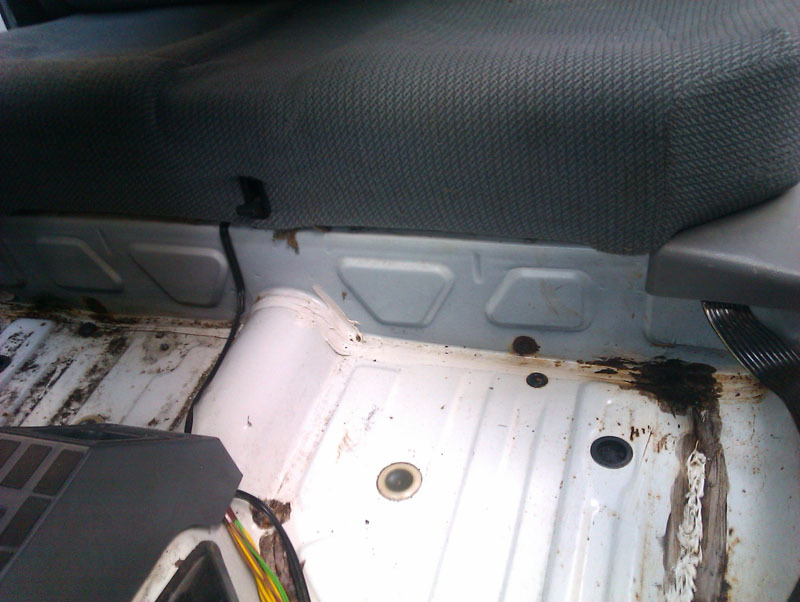
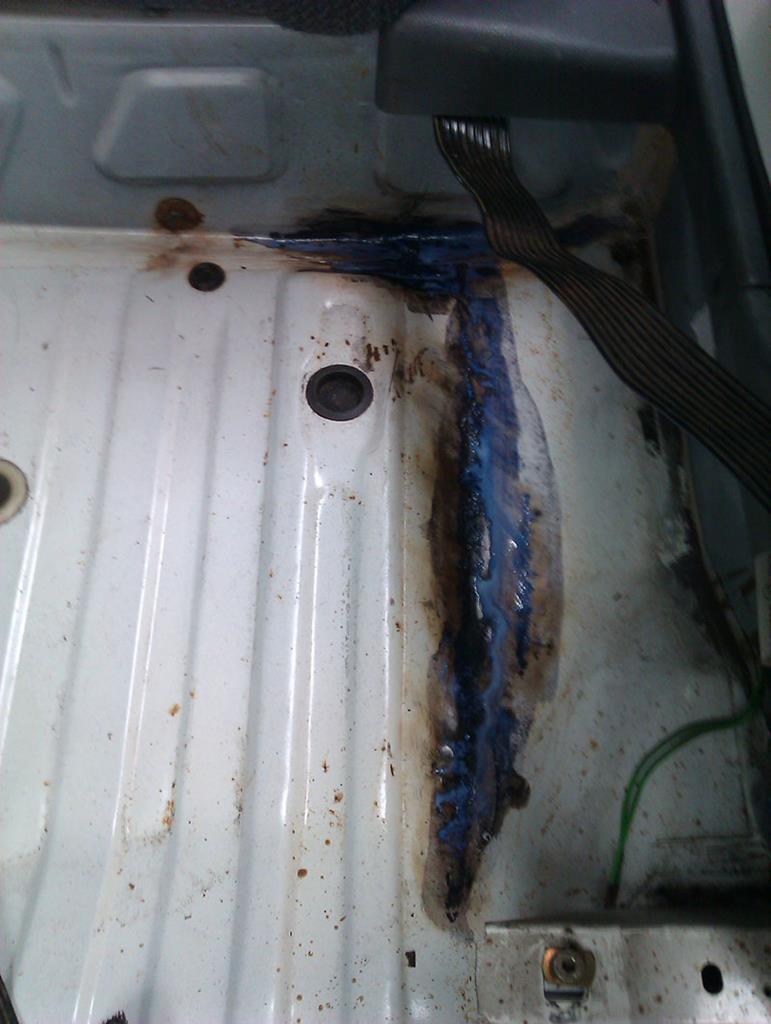
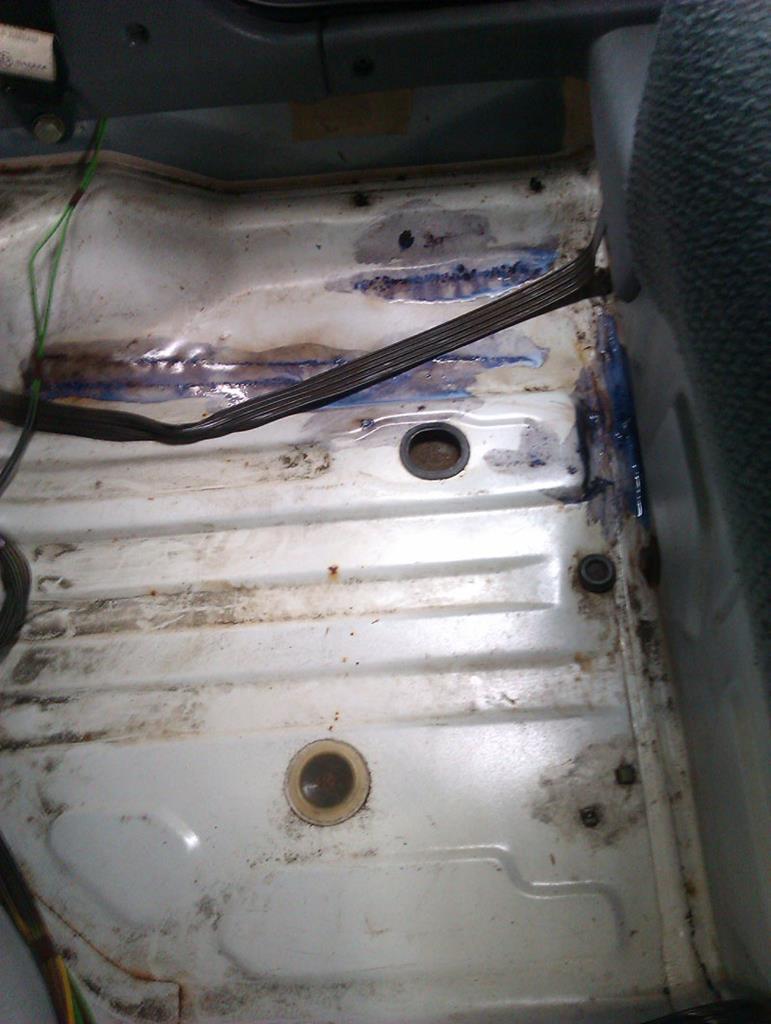
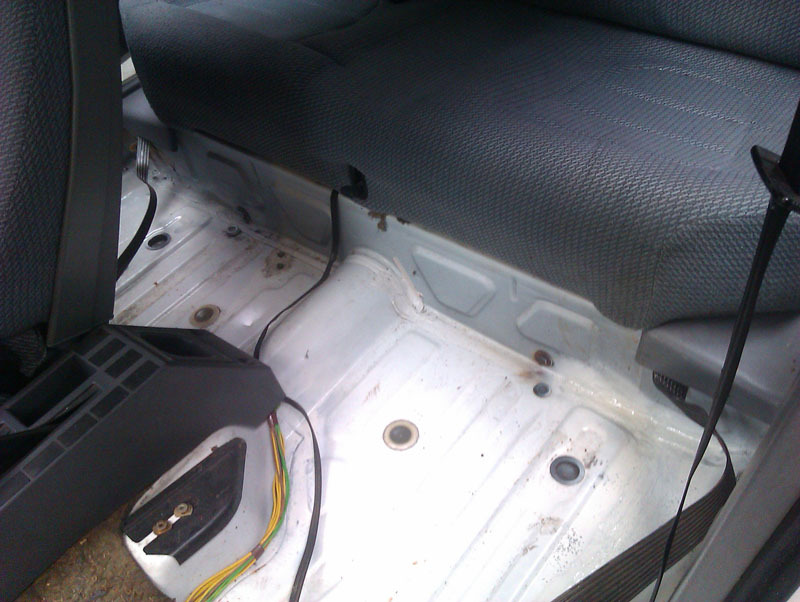
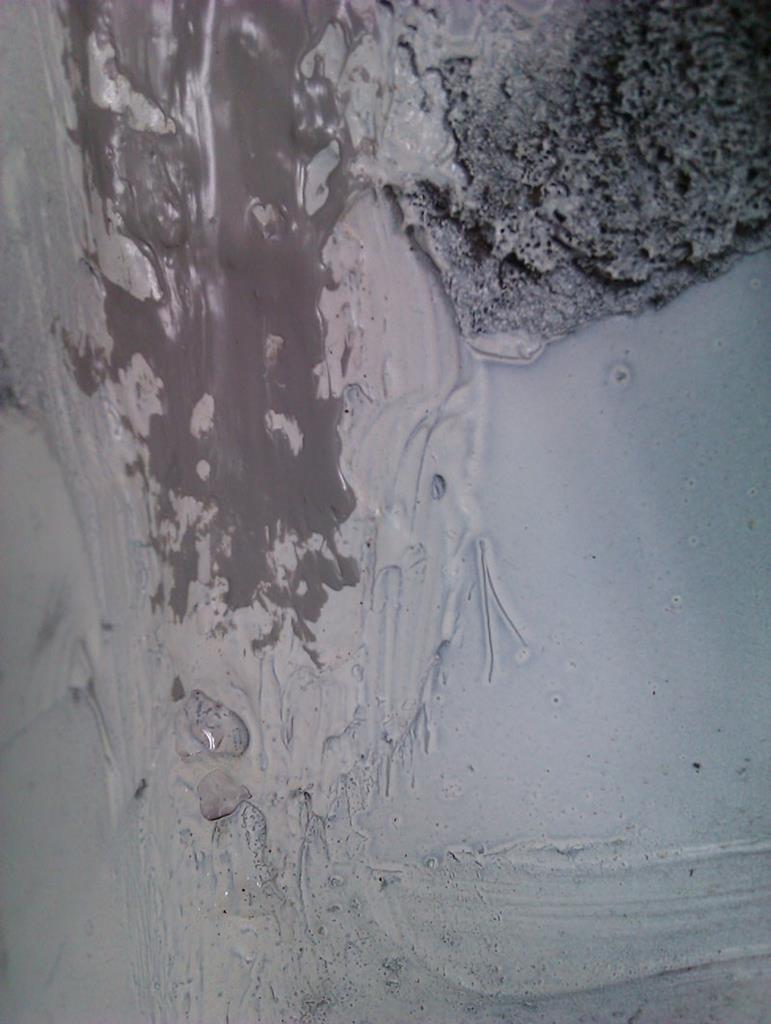
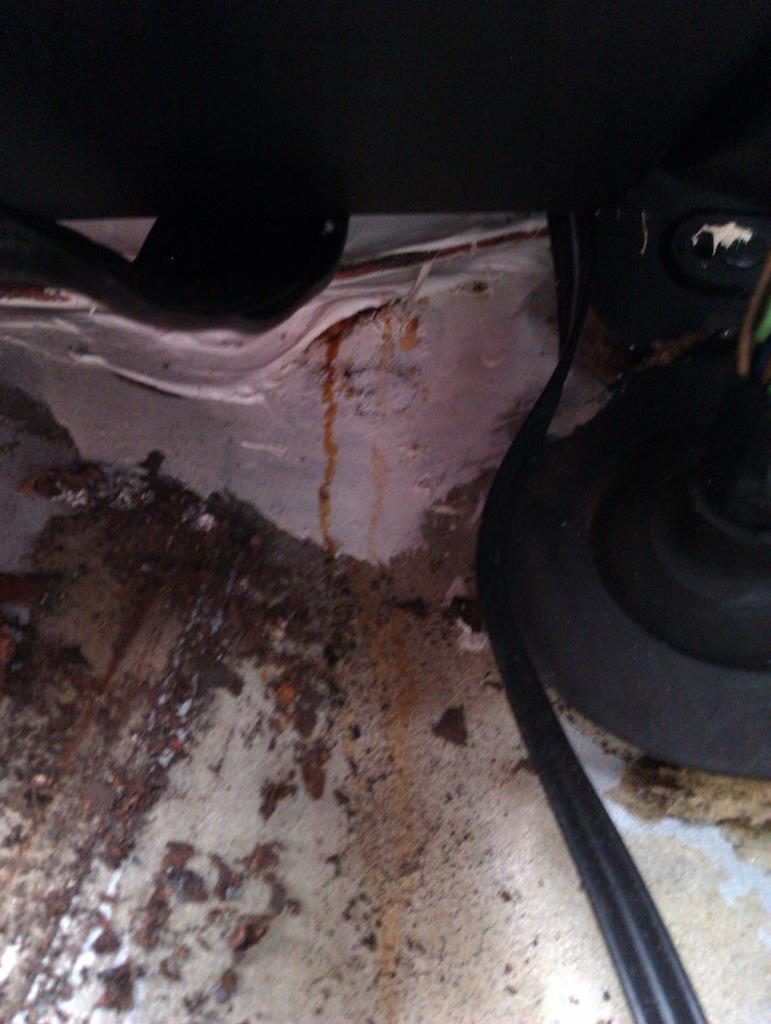
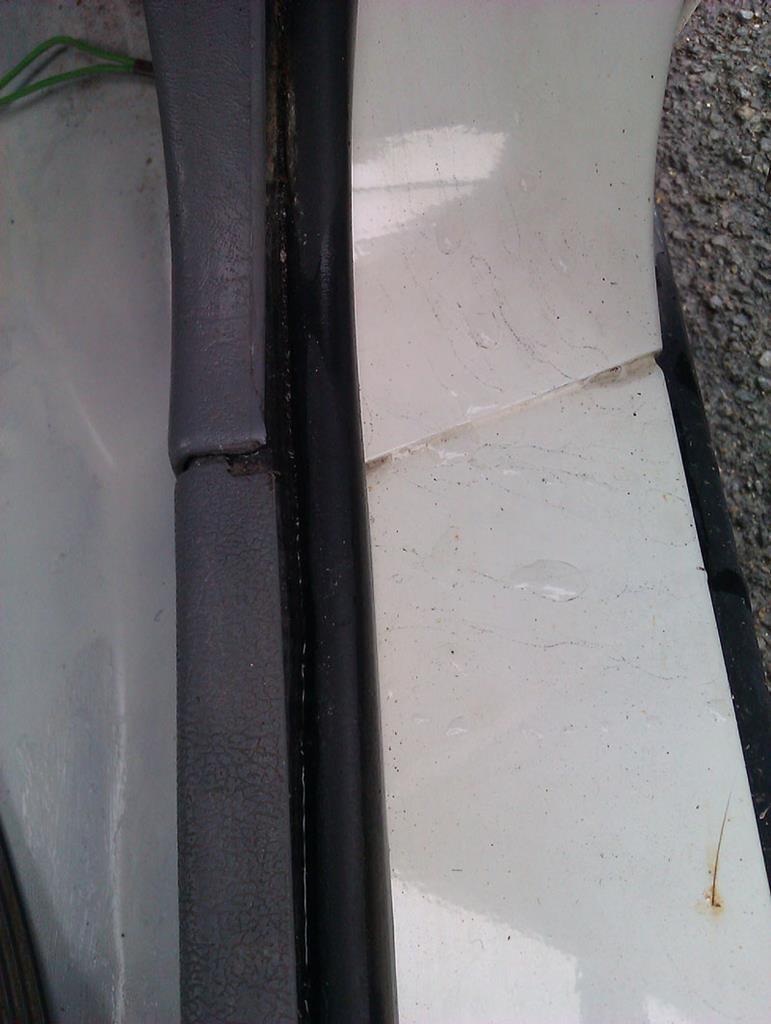
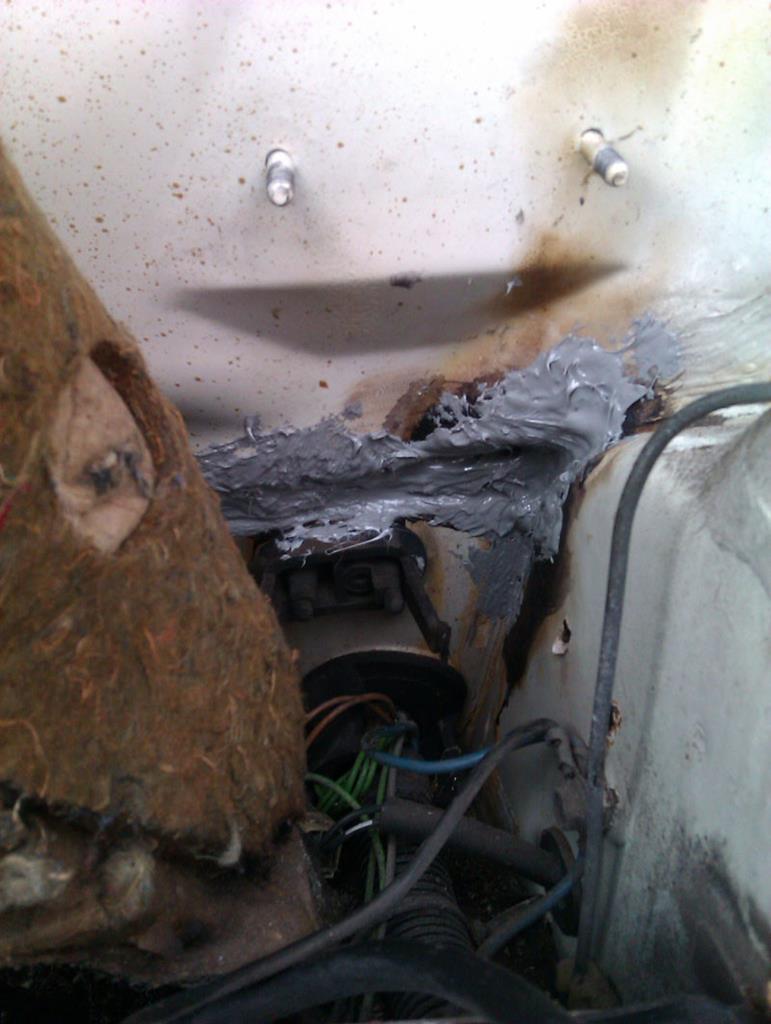
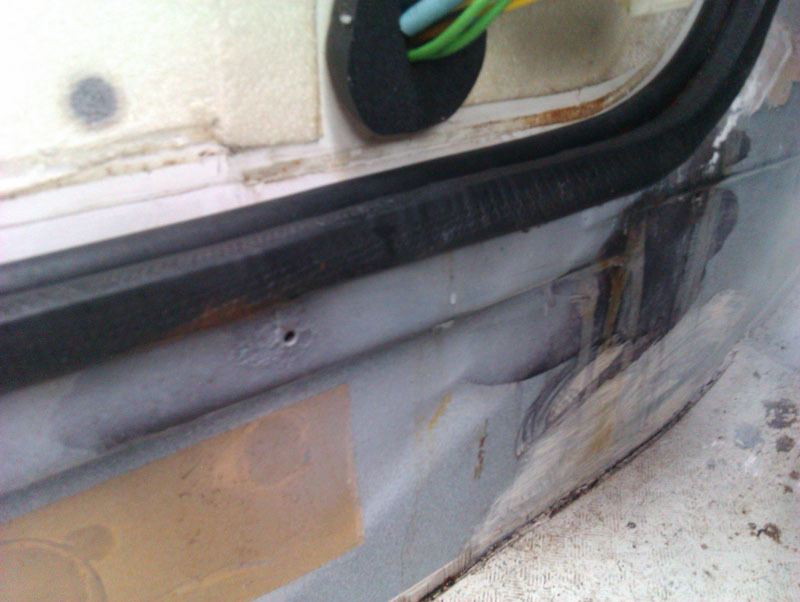
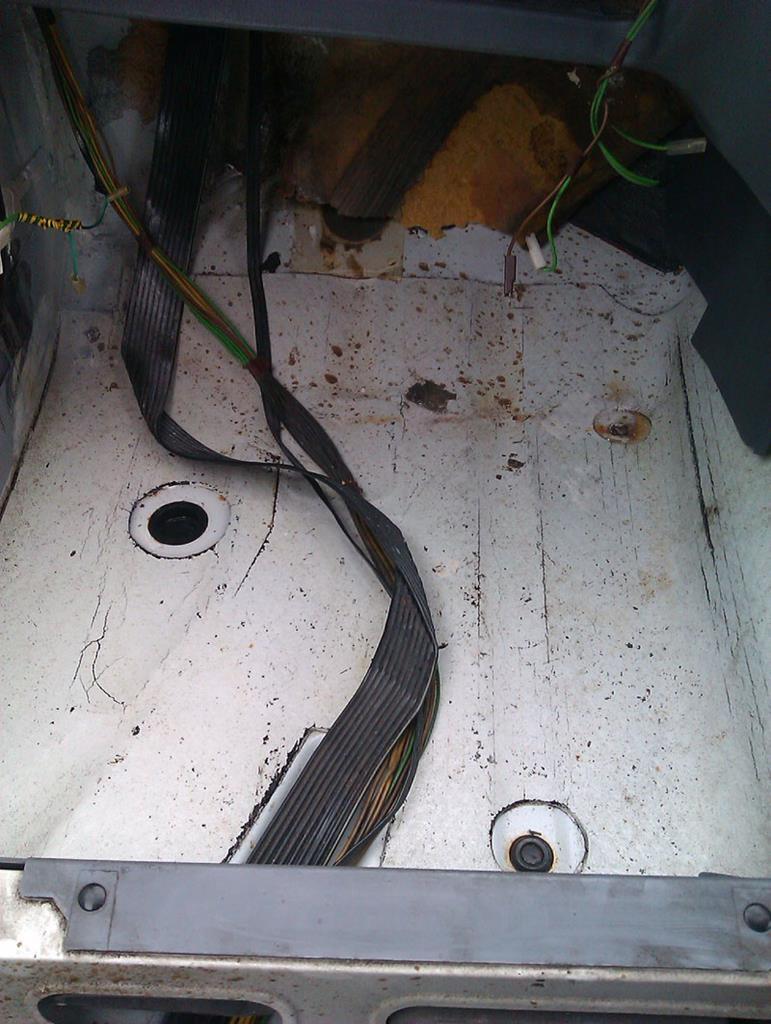
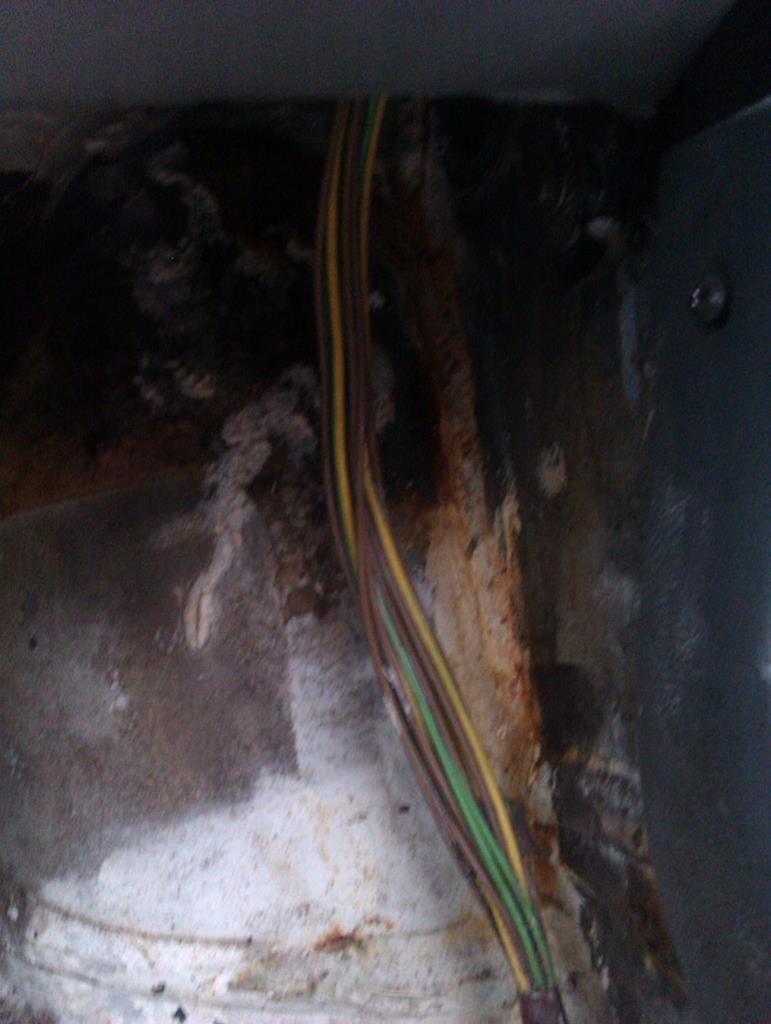
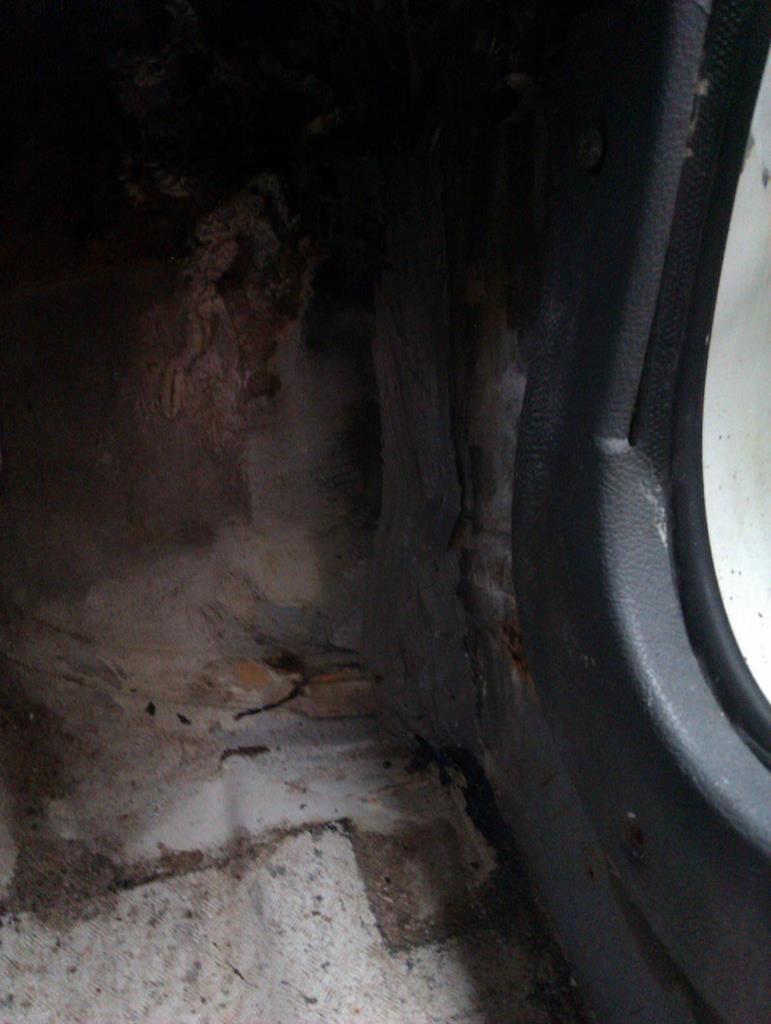
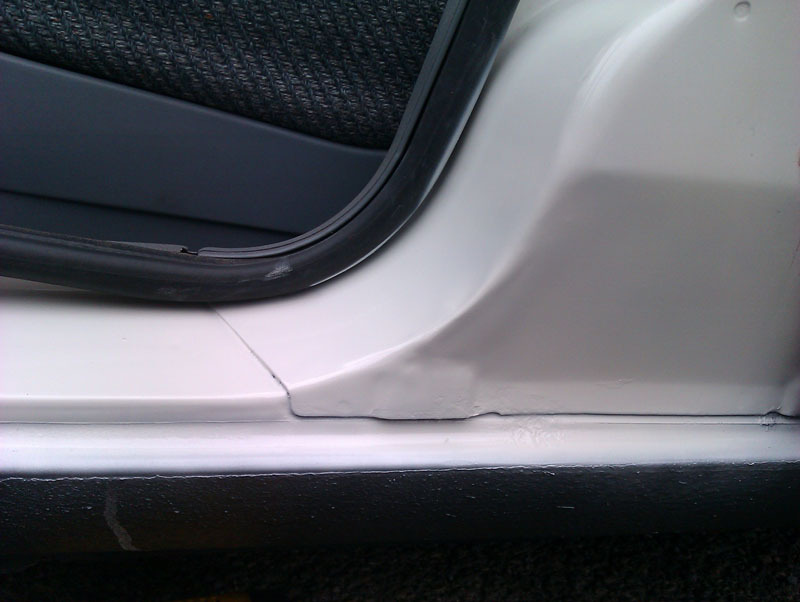
I gave the whole sill top a sand back before laying down a fresh coat of paint and lacquer which has rather dramatically improved the look of the thing and eliminated all of the tiny little grinder speckles and scuff marks from years of shoes being bashed against the sill. Got the seal slotted back on but haven't reinstalled the carpet as I want to be absolutely sure no more water is getting in before doing that. There had been more rain overnight and the water did only seem to be coming through what is no longer a rust spot so I'm cautiously optimistic that things will stay dry now.
Image

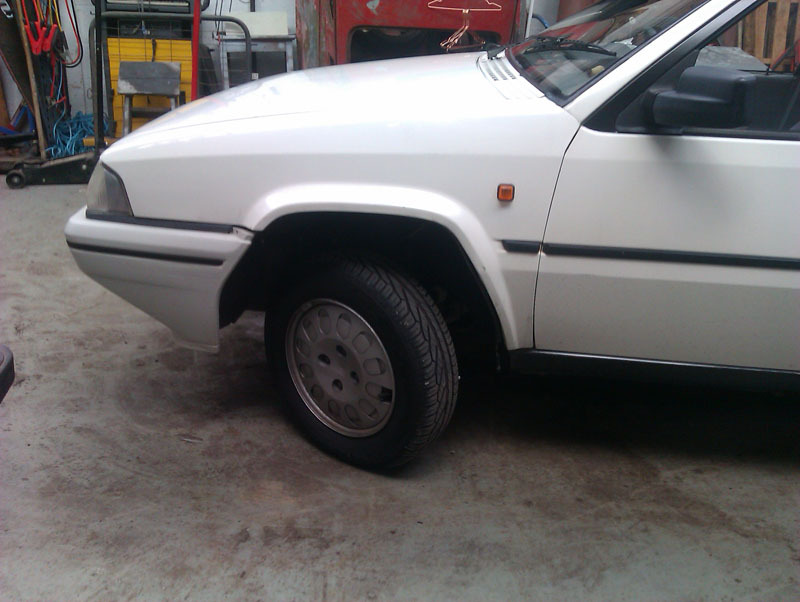
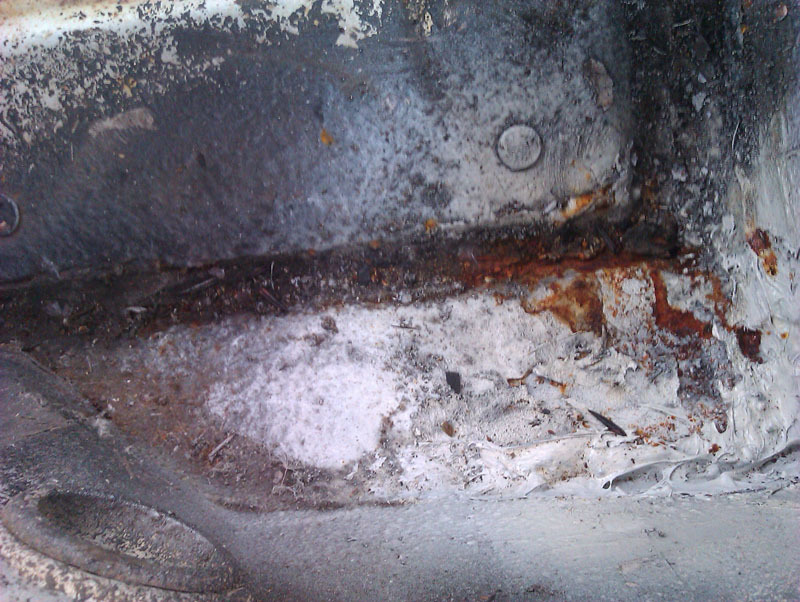
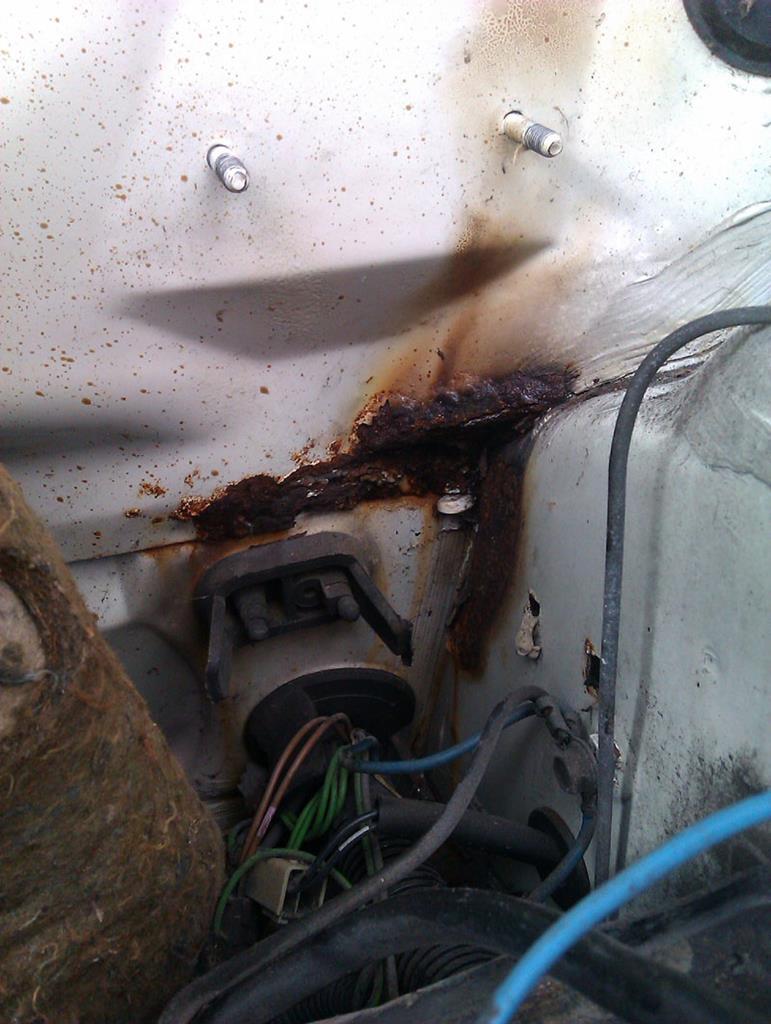
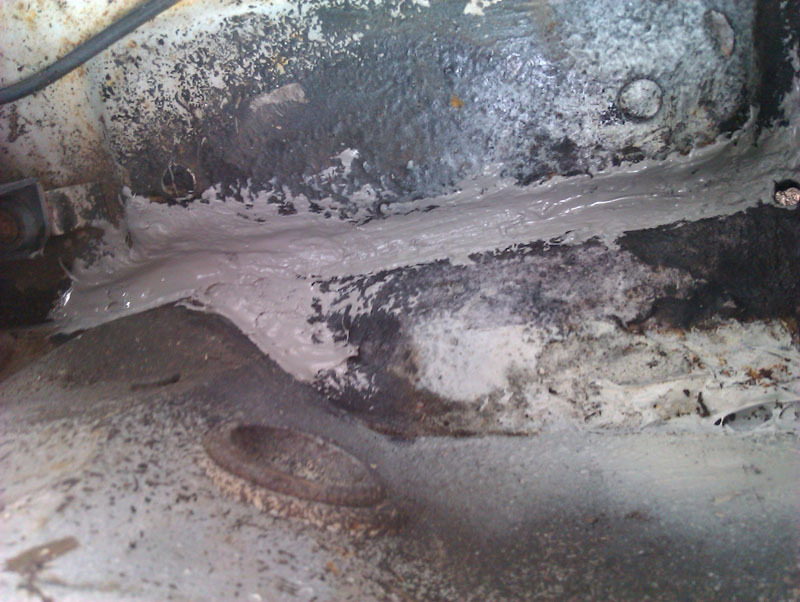
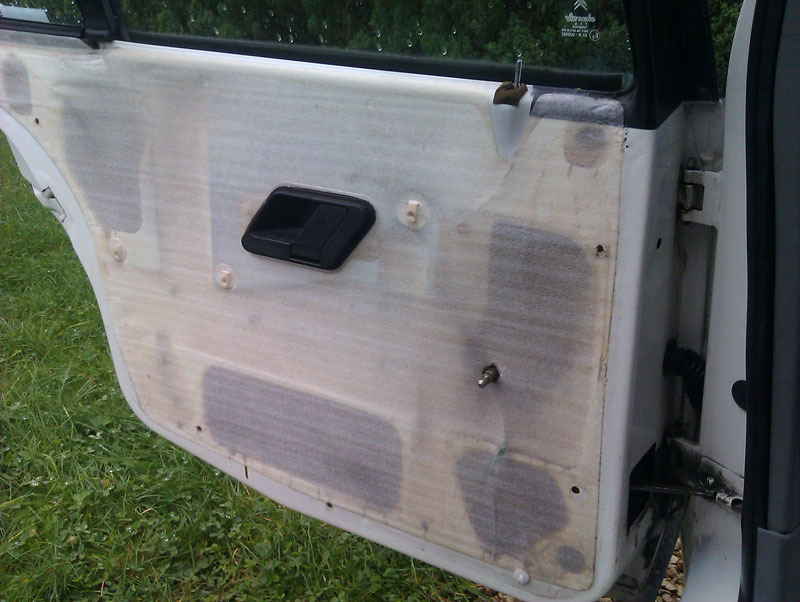
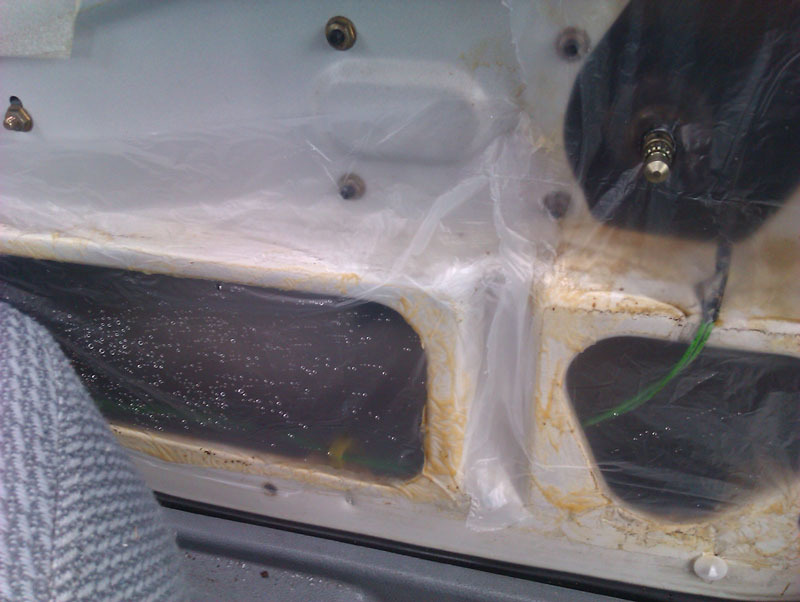
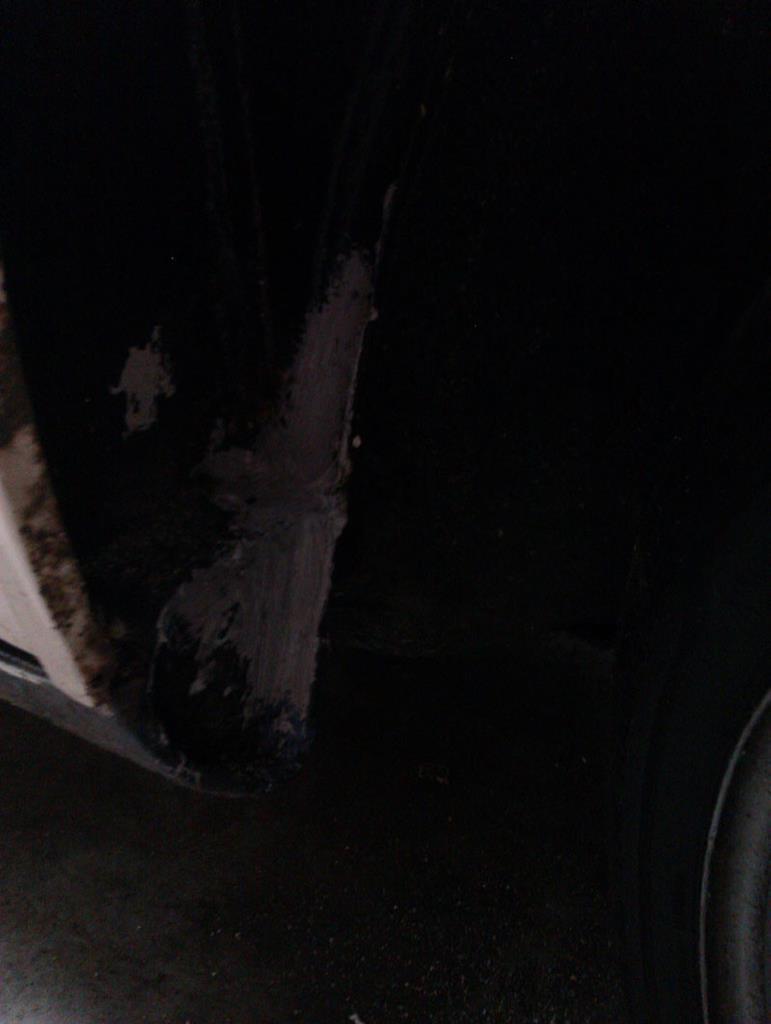
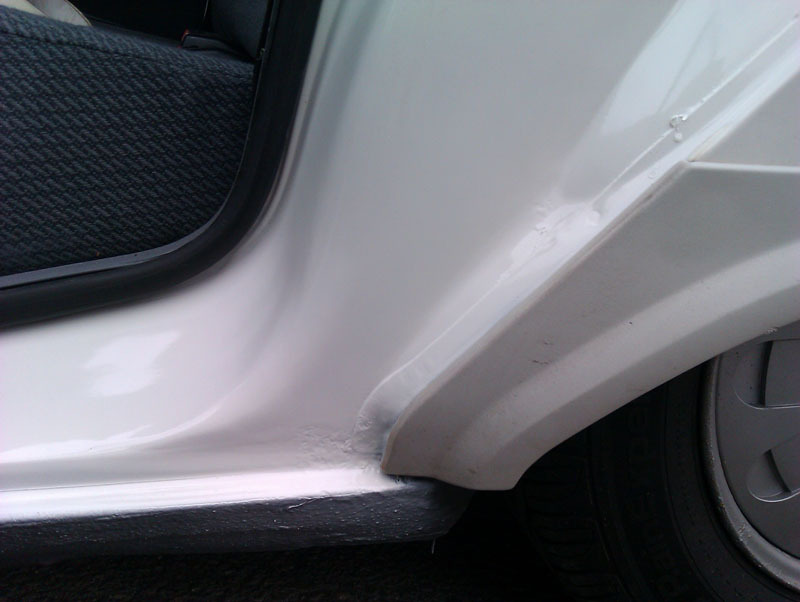
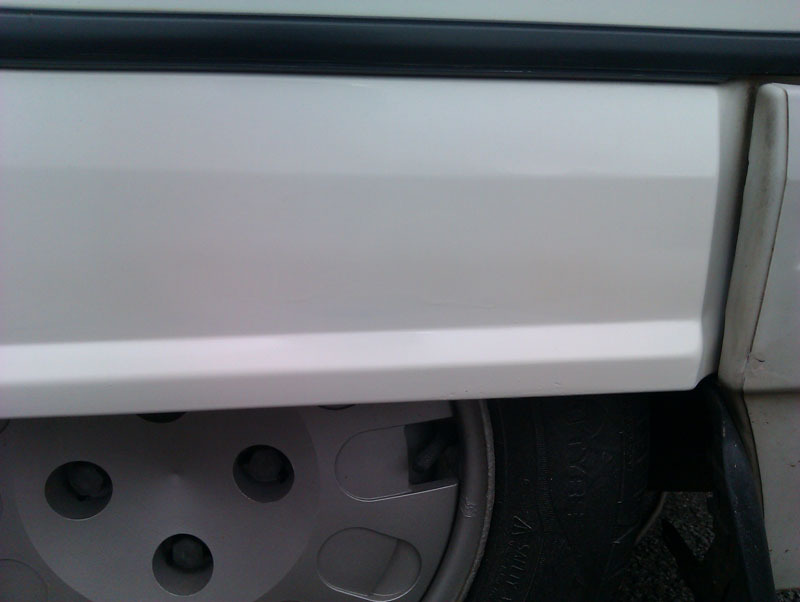
Since that took barely any time at all to sort out, I also tackled the other scruffy bits on this side that I wanted to do. Again, no welding, just a sanding off of the rust blisters, rust treat, and nice fresh paint to stop anything getting any worse than it was. Being a white car, the rust always looks more alarming than it is. I haven't used any filler because it felt a bit pointless, the areas affected simply aren't visible enough for me to faff about with the tiny amount of filler that would be required. It's much nicer to open the doors and be greeted by bright white sills without any orange-brown stains and spots. The area at the bottom of the B pillar, the bottom of the arch where it meets the sill, and the lip of the rear arch were so much more solid than I expected them to be.
Image

Image

Image

Image

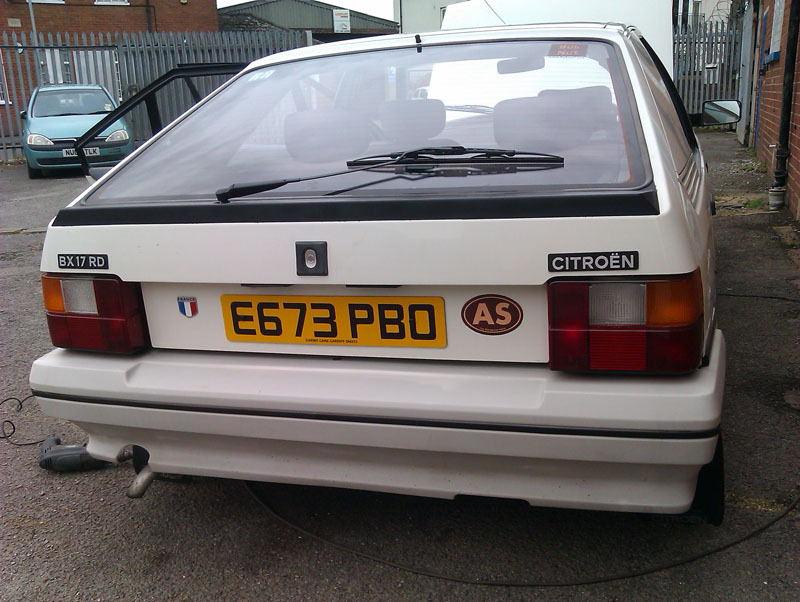
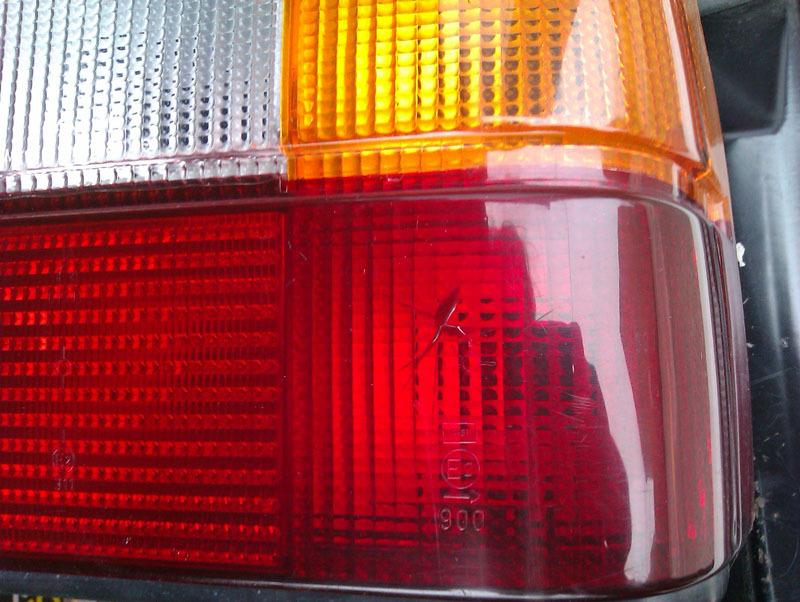
A couple of small improvements were had round the back. One number plate light rubber seal was sagging, it was easy enough to pop the unit out and reseat the seal properly before refitting it. I also replaced the driver's side rear light cluster with one of the new ones due to the old one having a star crack in it I noticed every time I washed the car. The silver on the badges is holding up much better this time around too, I'm pleased with those.
Image

Image

Mike spotted the other day that I had a sidelight out. That's not that unusual for a BX, the sidelight design at the front is pretty rubbish. What was unusual with mine is that a length of wire had broken and fallen off. Mike spent some considerable time faffing with recalcitrant wire to make it the correct length again and get the connector refitted and now I have a working sidelight... when it feels like it. Better than not at all.
Image

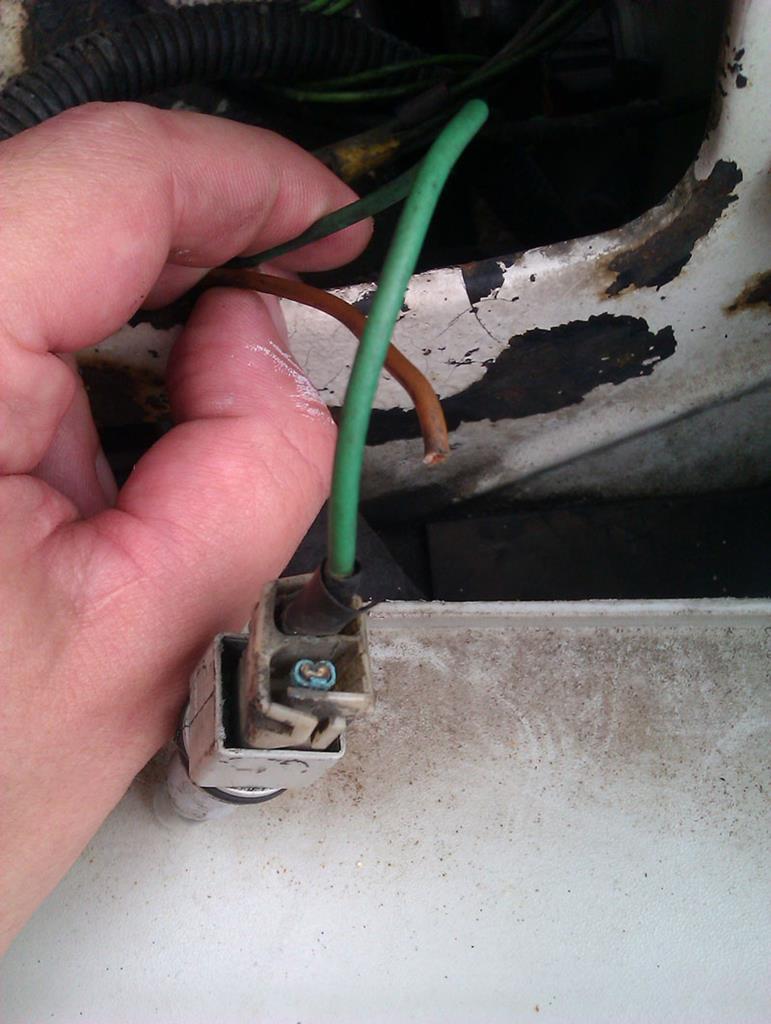
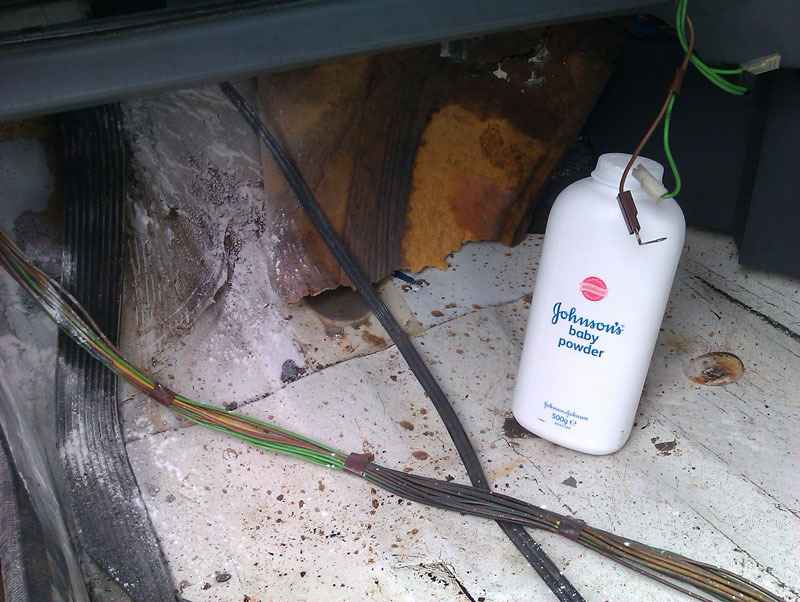
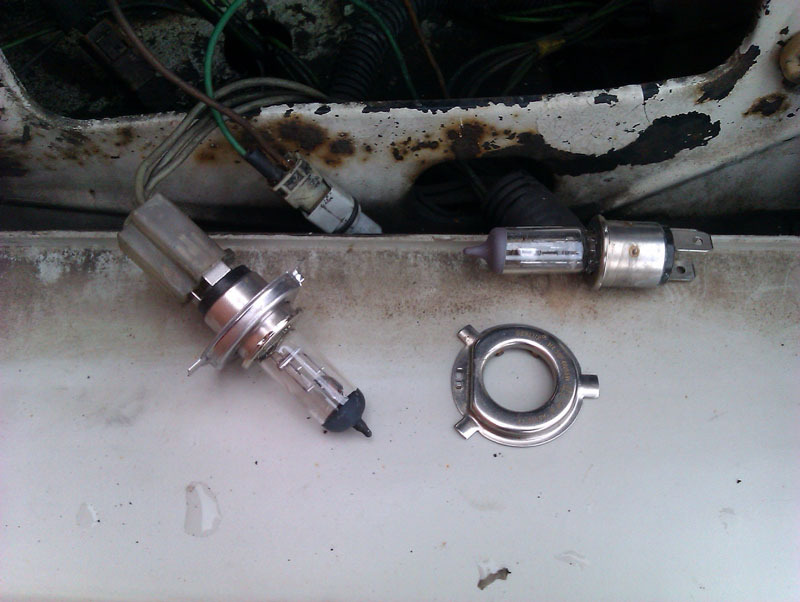
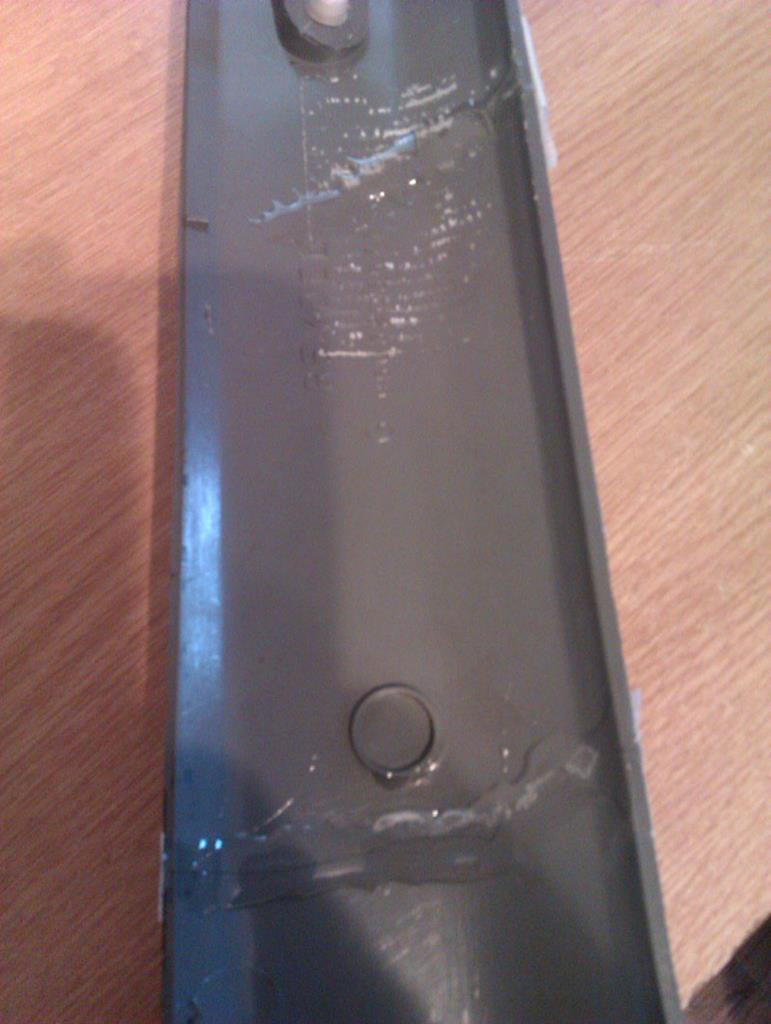
Trying to remove the plug on the back of the headlight bulb - it was easier to remove the whole headlight to repair the wire - wasn't happening either, I ended up having to unclip the bulb to remove it from the headlight to get the headlight out, and then remove the bulb... then this happened. I've never had the collar fall off a halogen bulb before.
Image

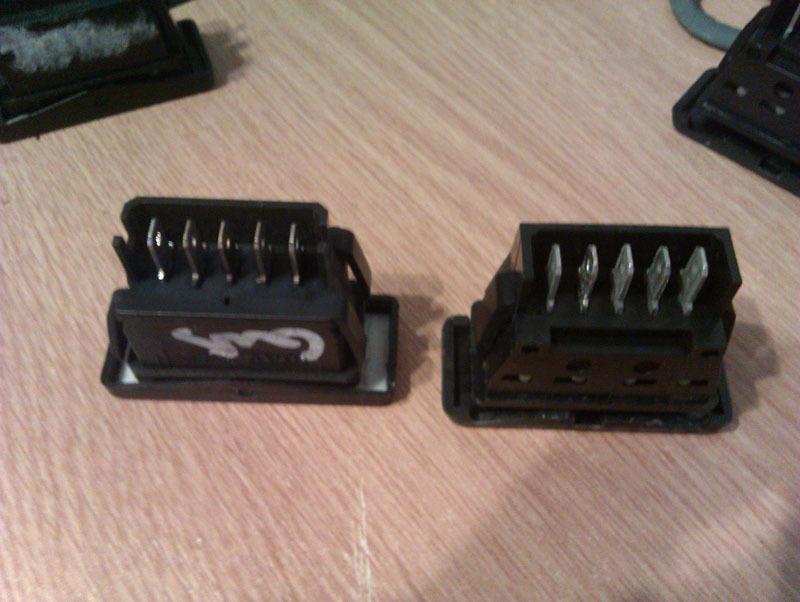
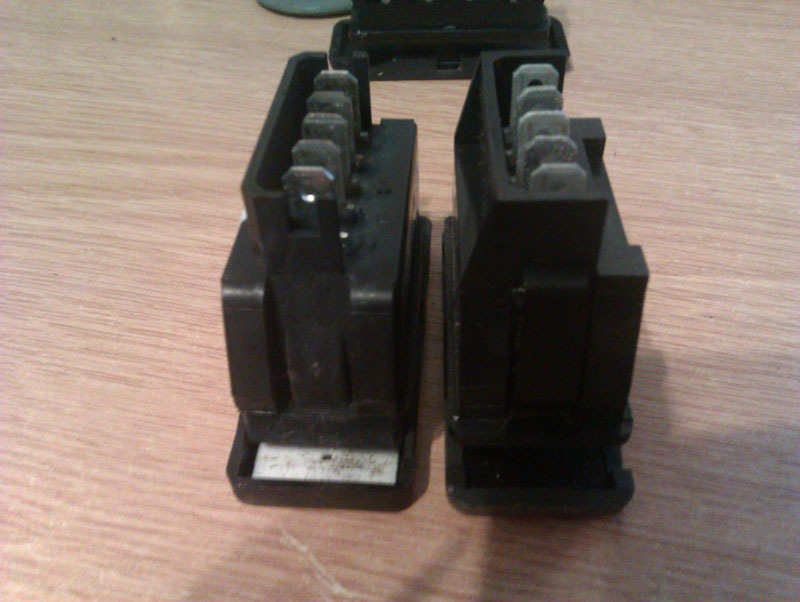
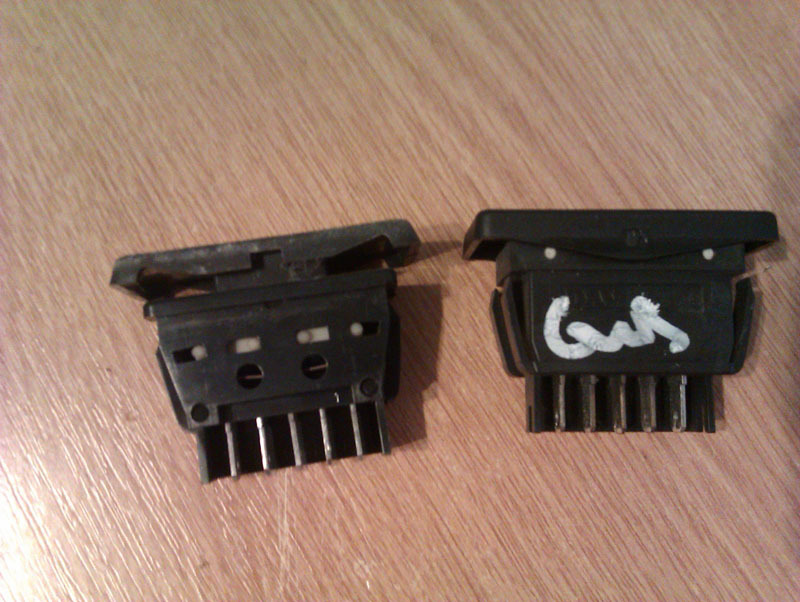
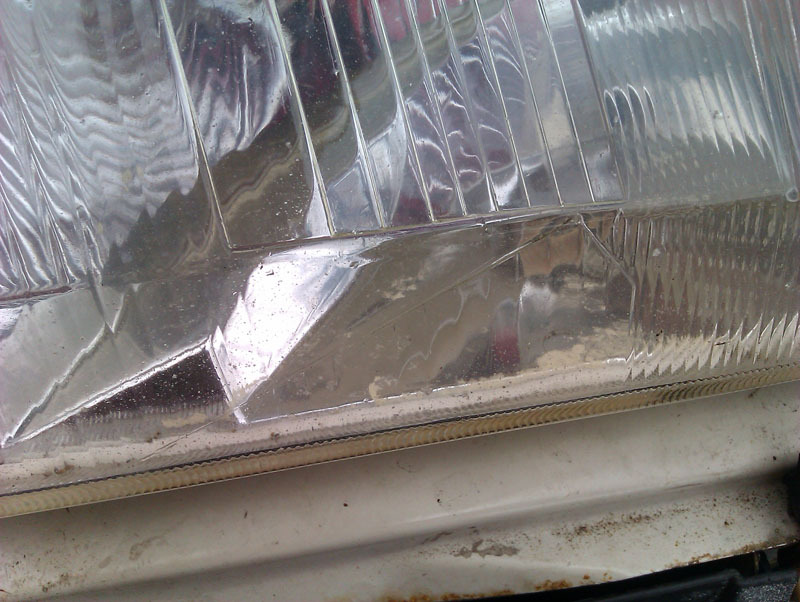
Luckily, there was a good replacement in the headlight I bought so I swapped that in and fitted the new headlight in place of the old one. The silvering is much better on the new one. I'm going to go back and grab a driver's side headlight from the stash when he's back because the silvering on mine is incredibly poor even though the lights are quite bright. Quite difficult to photograph, but here's the passenger side old and new to give you some idea, the driver's side on the car is much worse than the first picture below.
Image

Image

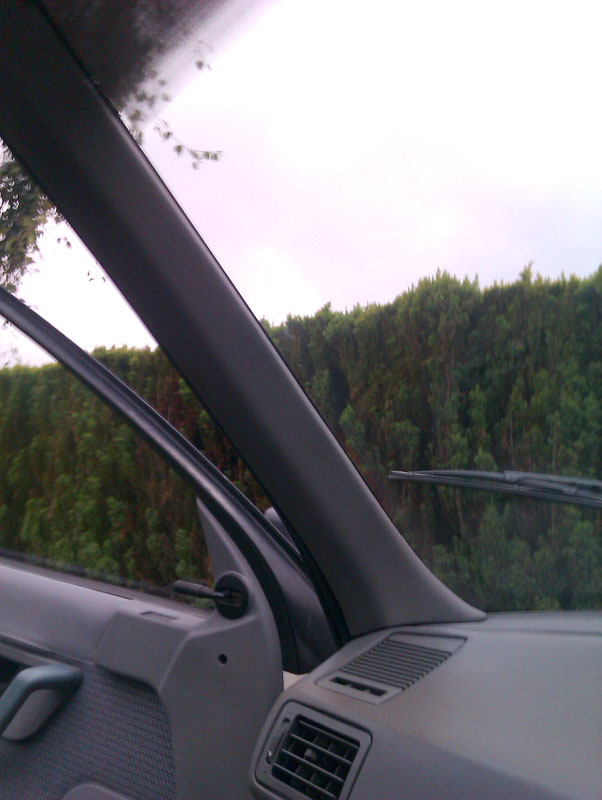
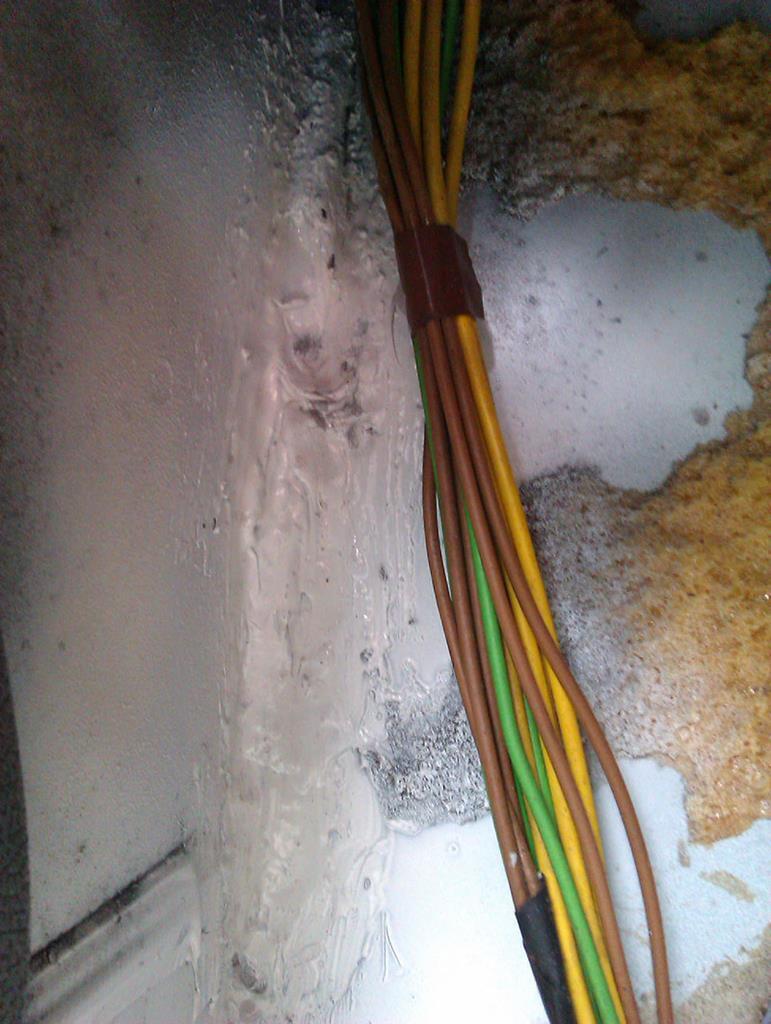
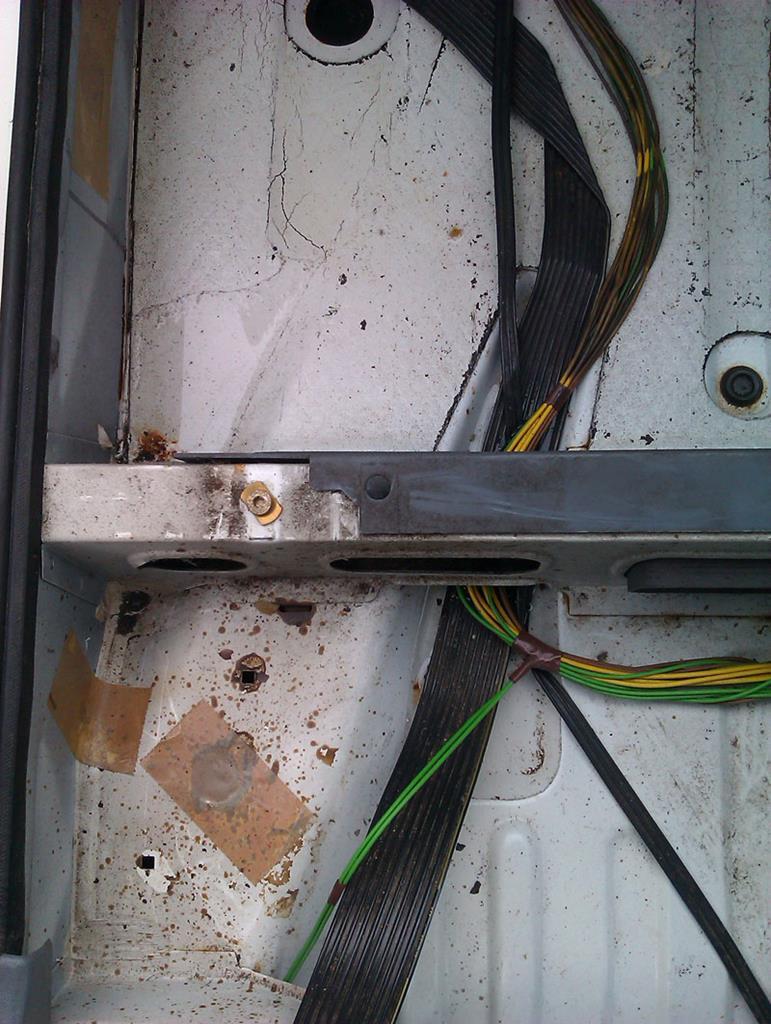
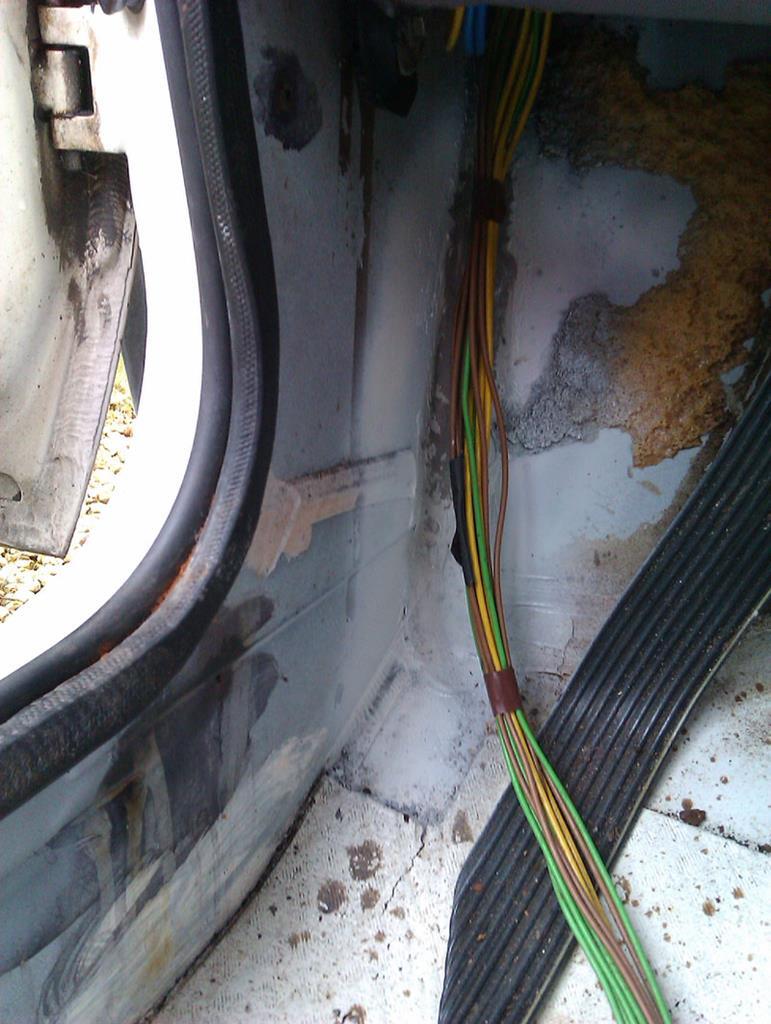
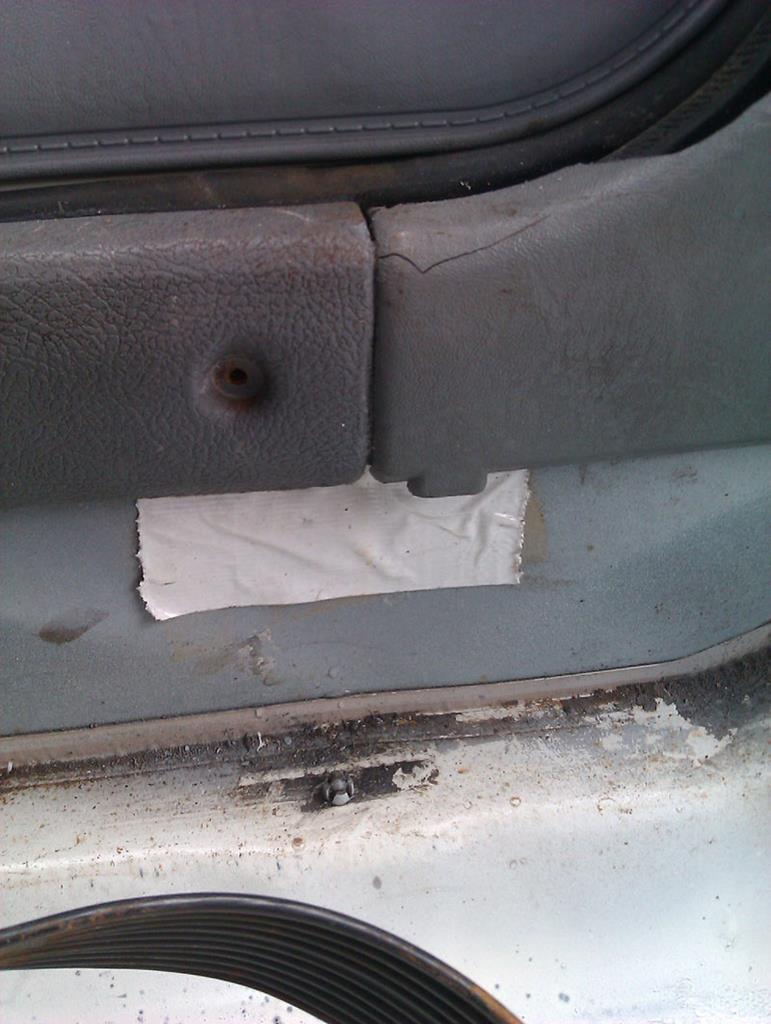
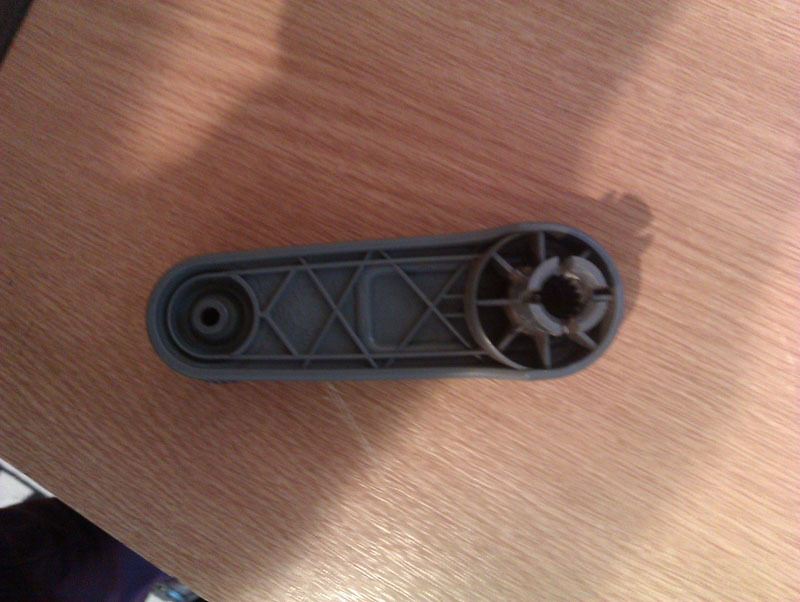
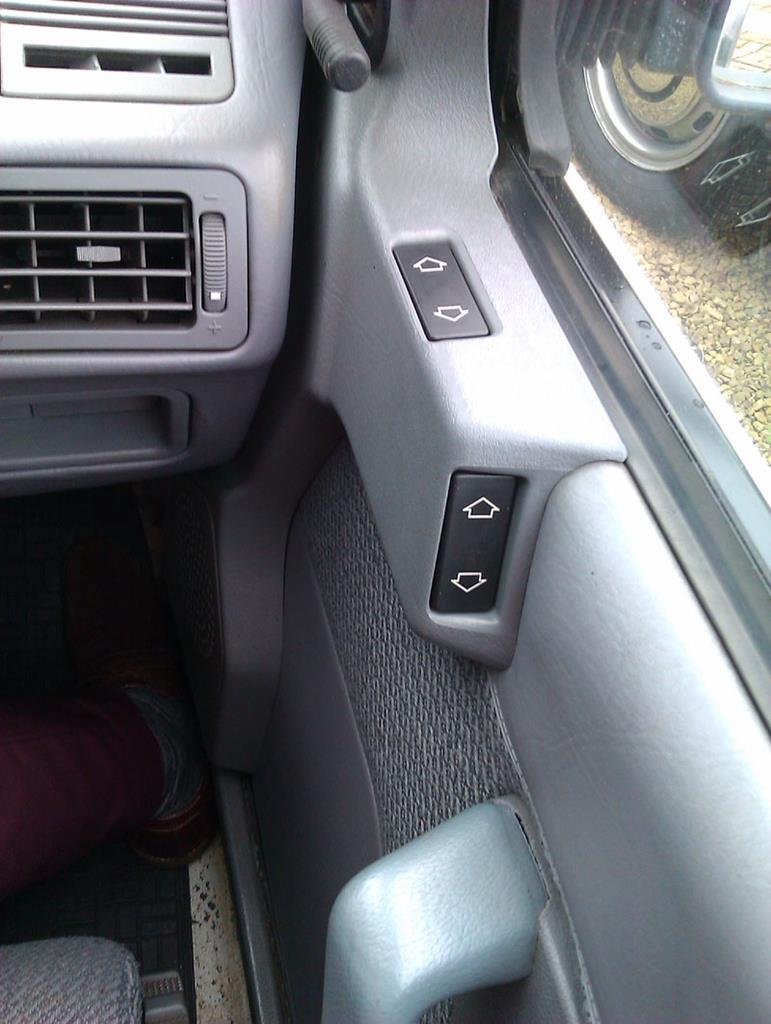
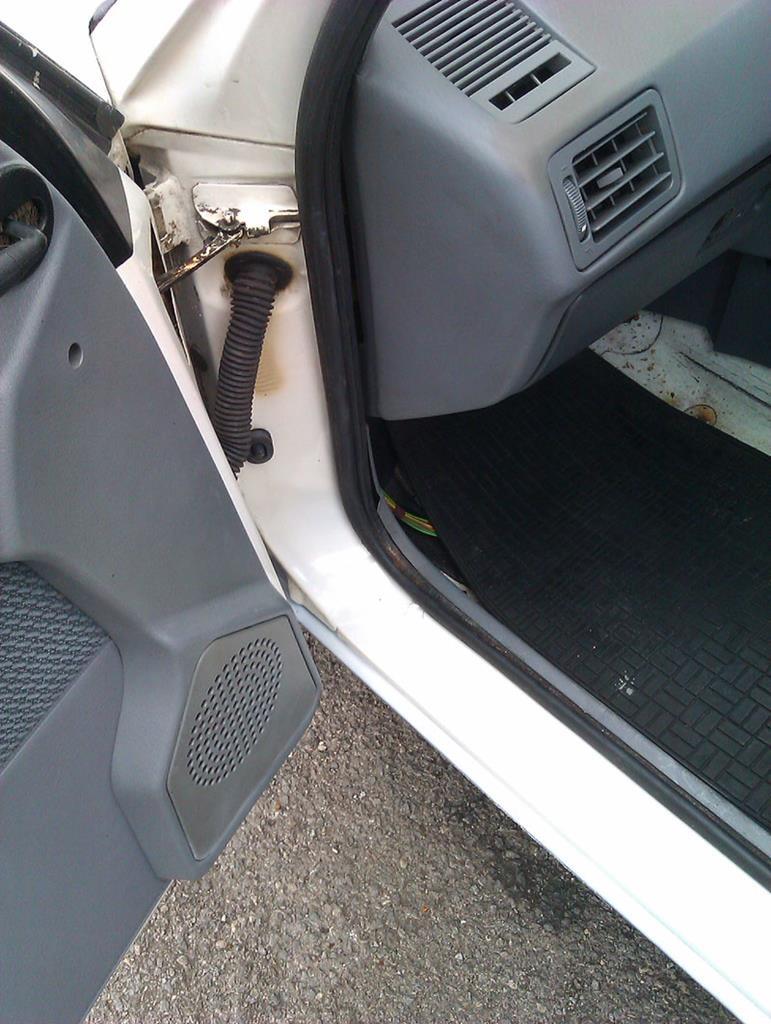
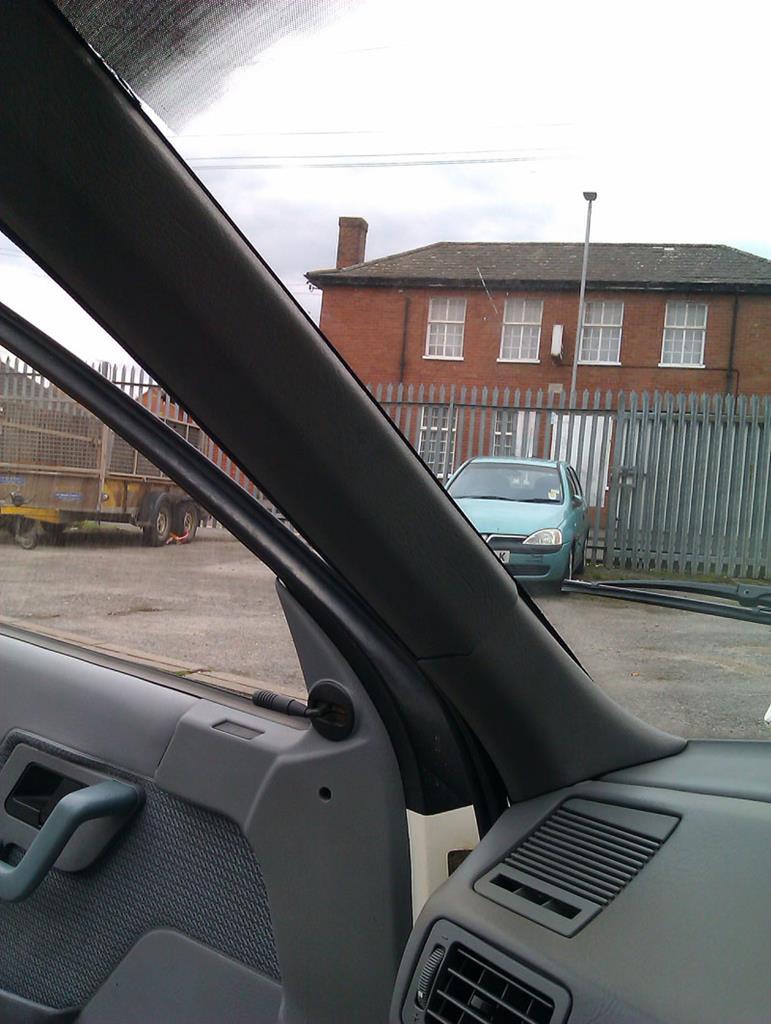
Then I wanted to tackle the loose A pillar trim... and snapped it. I didn't feel too bad, someone has had this off before and cracked it, repairing the back with some good old duct tape. The reason it wasn't sitting right is the two wires that run up the A pillar were snagged in the wrong place by the dashboard, after some finegling I got them situated correctly and the A pillar then fit perfectly fine, if in two pieces. The really irritating thing is that it took no force at all to snap this trim, it just seemed to be incredibly brittle.
Image

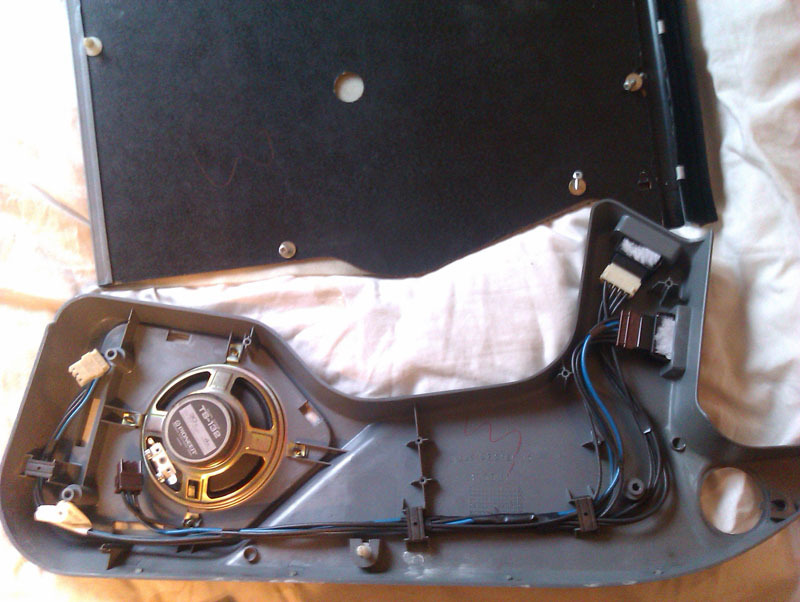
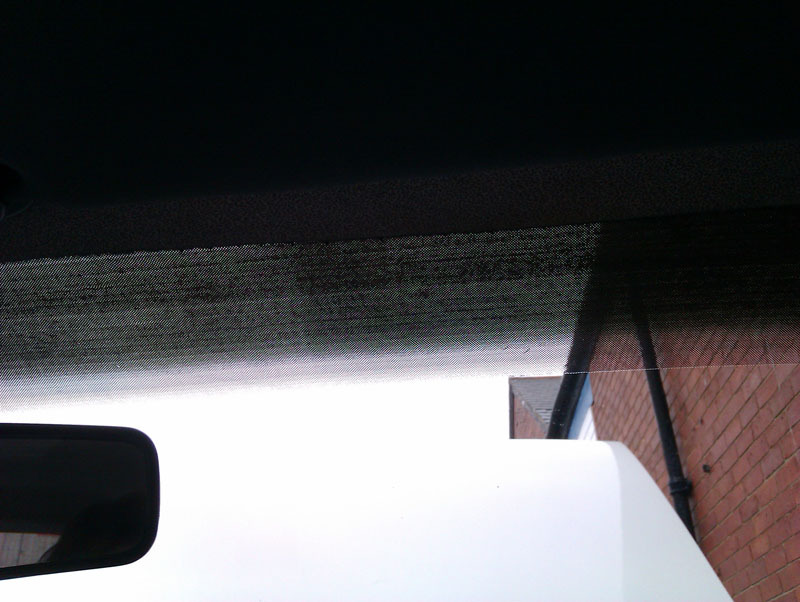
You'll notice I've got a generic sunstrip, I fitted that recently and I'm really glad I did, it helps counter some of the hideous LED streetlight glare at night, and a lot of the high level sun glare on those nice sunny days.
Image

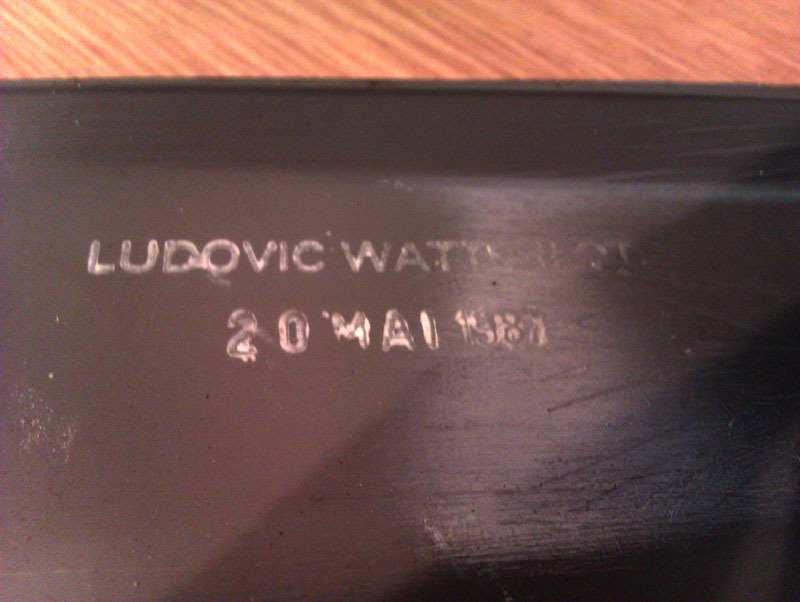
With the A pillar trim at home, I cleaned it up and got it all ready for more Gorilla epoxy. This stuff is great, I highly recommend it for repairing plastics. Luckily both breaks in the trim are clean so the repair will be near invisible. I also noticed it has stamped LUDOVIC WATTERLOT 20 MAI 1987 on the back, I assume this is the person that did the quality control, or fitted it back when the car was built since it looks like it was done with a hand paint stamp, there's REYDEL cast into the part, which I assume is the actual manufacturer.
Image

Image

With the glue cured, I very carefully refitted the trim. The cracks are there when the light hits it just so, it can't be helped. Happily, it fits better now and doesn't stick out at the top like it used to. I'll keep an eye out for a replacement, a non-cracked one would be nice to have.
Image
User avatar
vulgalour
BXpert
Posts: 553
Joined: Mon Feb 04, 2013 11:30 am
Location: Kent
My Cars: 1980 Austin Princess 1.7 HL
1987 Citroen BX 17RD
x 105

Re: C'est Bleriot - 1987 17RD Hatchback

Post by vulgalour »

It started raining quite heavily here and, even though it's dark, I wanted to see if the repair I'd done had stopped the water getting in. I'm happy to report it has! However, water is still getting in. Hmm. Sat patiently in the car with a torch watching for water appearing and it became clear it was coming from behind the soundproof panel somewhere. Happily, it's not coming from high up the bulkhead, so I have to assume the items I thought were waterproof up there still are. A bit more investigation, removing the glovebox (which is a fun* job) and more poking and finally I spotted the water twinkling in the torchlight as it was running into the car through what looked like a blob of factory seam sealer. The area isn't crusty, there just seems to be a gap in the seam here and the sealant has simply failed. It's a tiny hole too and now I've poked it, water is pouring into the car rather more than I'd like.
Image

Image

Plan is to get the wire wheel on this to clean back all the loose sealant in the area, rust treat and/or weld, depending on what's required, and apply fresh paint and sealant to keep the water on the outside. That should hopefully cure the water ingress. At least the windscreen and door seal areas that have been sealed have stayed dry, so I'm happy about that.
User avatar
vulgalour
BXpert
Posts: 553
Joined: Mon Feb 04, 2013 11:30 am
Location: Kent
My Cars: 1980 Austin Princess 1.7 HL
1987 Citroen BX 17RD
x 105

Re: C'est Bleriot - 1987 17RD Hatchback

Post by vulgalour »

There was a break in the weather today and since I couldn't do this repair indoors - clashing schedules, full workshop - I had to do it outdoors so I took my chances. Cleaning off the old sealant was hard work but the water damage was still very localised afterwards and there really was no point hauling the welder out for this so I cracked on with drying everything out while the rust converter did its thing. Weather was still holding, the water I cleared out stayed out, and I set to with the sealant and paint. Then it started raining... this was going to be one of those jobs.
Image

The rain just got heavier and, because of work, I didn't have a huge amount of free time so I knew I was going to have to chance it. A drive about doing what needed to be done and there was no water ingress, even as the rain got heavier. I was feeling hopeful right up until the point I got home and noticed a small spot of water that had bled through the fresh sealant. Prodded it and sure enough, water has started to get behind there so I'll be redoing this. On the positive side the ingress is drastically reduced so hopefully it's not going to be too much of a headache between now and when I can get the car indoors. I'll pull off the arch liner and seal this from both sides, smoothing it out so the water is encouraged to flow over rather than through.
Image

When I have my break later I'll deal with just how much water is still in the car from last night. I really shouldn't have prodded it. It's remarkable how much water has got into the car through such an insignificant little hole, and really quite annoying.
Image

Image

I did check for other leaks, this seems to be the only one. The door seals and the entire driver's side is bone dry. All of that water has come through from that tiny hole because it's right in the path of a drain route, it's like having a gutter directed straight into the passenger footwell. It's okay, I bought a big car sponge to deal with it. Stupid rain. Stupid leaky car.
User avatar
vulgalour
BXpert
Posts: 553
Joined: Mon Feb 04, 2013 11:30 am
Location: Kent
My Cars: 1980 Austin Princess 1.7 HL
1987 Citroen BX 17RD
x 105

Re: C'est Bleriot - 1987 17RD Hatchback

Post by vulgalour »

Today I had some workshop space to monopolise and even though it wasn't raining, I knew it would as soon as I attempted to do the job outside, so I did it indoors instead and of course it then didn't rain at all. Sod's Law at work. Happily, because of the uppy-downy, I didn't need to remove the wheel from the BX or even jack it up to do this job, just stick it in high, full lock to the right and I could ease out the arch liner to find the outside of the hole that was letting water into the car. If I hadn't put the sealant on the inside I wouldn't have found the hole on the outside, it was pretty much invisible. After some clean up (not a lot mind, there wasn't much need), I smeared more than was perhaps necessary with fresh sealant.
Image

Image

Image

For good measure, I cleaned off the sealant on the inside of the car and dried it all out so there wasn't any water trapped in here and daubed some fresh sealant on to keep the water on the outside, where it belongs.
Image

Let's hope that's enough to stop the water getting in and, because it's been dry since doing this job, the sealant should have plenty of time to dry and seal up the problem area nicely. The inside of the car was quite smelly because the old underlay was drenched, so the wet carpets had to come out so I could dry them and stop the car going mouldy. It's amazing how much hassle this one tiny little hole has ended up causing.
Image

It does at least mean I can get everything clean that would otherwise be quite awkward without removing the seats. It also looks like this has been leaking for a very long time time and Dean did say he kept a cover on the car to prevent water getting in when it rained a lot. I don't really have the option of putting a cover on since I use the car every day just about, so my hand has been forced into leak chasing and fixing which is probably no bad thing. Anyway, the rear floor has a couple of spots of concern, it's the lowest point that the water settles and on both sides in the back there's some rust right on a seam, you can see a big black blob where the floor meets the under-seat panel. With everything being so wet I can't really assess it properly, but since there's no crustiness to the areas and the underside looks very good I'm hoping this is just localised and will respond well to a clean and fresh sealant. I'll deal with it once it's dry and before I reinstall the interior since now is as good a time as any. Someone has been here before me anyway, there's evidence of rust treatment there and a line of blobbed on sealant which I'm guessing is to deal with the surface rust spots the other side has in exactly the same place, just a little overkill. From memory, I think there's a strengthening piece that runs on the underside of the floor here which is probably something of a water trap in and of itself.
Image

I'm hoping to tackle this over the weekend, I want to devote a proper day to finegling all of this and making it nice again before the interior goes back in. Also, it isn't half noisy and annoying without the carpet in so I want that back in asap.
User avatar
vulgalour
BXpert
Posts: 553
Joined: Mon Feb 04, 2013 11:30 am
Location: Kent
My Cars: 1980 Austin Princess 1.7 HL
1987 Citroen BX 17RD
x 105

Re: C'est Bleriot - 1987 17RD Hatchback

Post by vulgalour »

I was going to wait until the weekend to sort this job out. Instead, things aligned so that I had free time today instead and some more BX parts arrived to fettle so Mike and I wobbled over to the unit so he could do unit stuff while I did BX stuff. First job was to clean back all the suspect areas on the floor pan, including that big line of blobby sealant. Happily, the rust that was there looks to have been from water sat on top rather than creeping through from underneath, the blobby sealant wasn't hiding anything appalling so everything got cleaned and hit with a good dose of rust treater.
Image

Image

Once that was all cured, it was on with some fresh sealant to replace what had been removed to get the rust out and after that a splosh of fresh primer and paint just to make it look a bit nicer and to make sure that if anything reappears it'll be a lot easier to see.
Image

Because it had been so good on the bodywork front, it got to wear its new present today, that being some nice correct grey head restraints. First problem to address with them is that they're for the front, not the rear, and I suspected that you could just swap the stems over. If you couldn't, it was going to be a bit of a wasted purchase.
Image

The stems on the rear head restraints are much shorter and the plastic holder is a slightly different design. I didn't know what was hiding underneath the screwed on bit since I hadn't checked before impulse buying the replacements, so let's find out what I'm dealing with. Removing the plastic trim was easy, the metal post proved a little more difficult since it's quite a tight fit. With a bit of wiggling, the post does eventually come out.
Image

The padded part of the head restraint is identical, it's just the post length and the plastic trim that differs. Happily, you can just swap them over, which is exactly what I did. Now, it might seem a bit odd I'm replacing these, up to now the pictures make this look quite pointless. The reason is that the new ones simply aren't faded like the old ones and now I've got the new ones installed it's gone and made the fade on the top of the back seat that much more obvious. If I can't find replacement seats for the car in the same fabric I do have links to the correct fabric to retrim them myself, which is exactly what I plan to do. Fitting a different interior would be a lot easier, and likely a lot cheaper, I just want to keep this stock as I really like the grey cloth interior.
Image

Image

The other item I've been trying to track down is replacement carpetting. All of the modern carpets are either much too cheap, or much too plush and fancy. I'm trying to replace the original loop pile carpet in the BX with as close to an exact replacement as I can. The carpet is made from entirely flat pieces sewn together with no need to hem any edges, so if I can get the correct carpetting I can easily make a replacement myself. For the parcel shelf supports that have faded, I'm hoping to skin an unfaded parcel shelf - and I think the one in the local stash could be a good donor for this - and retrim that way so it looks factory, I just need to figure out how to unglue the original fabric without damaging it.

In good news the water leak from that seam appears to now be cured. There was still a tiny bit coming through the door seal so we've added a bit of sealant there in the hope it will stop that happening until I can get hold of a proper replacement door seal. I'm also on the lookout for a carpet underlay that has similar acoustic properties to the original fibrous stuff but which doesn't need to be glued to the floor, something flexible and padded that can be glued to the carpet would be much better, even more so if it's disinclined to absorb water.
User avatar
vulgalour
BXpert
Posts: 553
Joined: Mon Feb 04, 2013 11:30 am
Location: Kent
My Cars: 1980 Austin Princess 1.7 HL
1987 Citroen BX 17RD
x 105

Re: C'est Bleriot - 1987 17RD Hatchback

Post by vulgalour »

Is the BX watertight today? No. No it is not.
Image

On the plus side, even though we had a lot of rain last night the amount that came into the car was vastly reduced and the leaks I had identified and sealed up had stayed sealed up so that must mean water is getting in somewhere else. The driver's side of the car is bone dry, as are the rear floor pans, so that means it's most likely coming in from the passenger side. A scout about highlighted a drop of water at the bottom of that seam I'd sealed up that isn't coming from higher up the seal so I imagine there's a bit more failed sealant here to deal with which I know won't be too difficult.
Image

Image

That will get the same treatment as the area above it since it's probably going to be exactly the same issue of failed sealant and I know access to both sides to sort this is very good. More of a look around highlight a damp spot on the heel board and what I'd previously dismissed as historic rust stains from when the bulkhead was repaired a couple of owners ago. Now, I'm not so sure.
Image

If it is this area, it's not letting a lot in, it's a fairly slow weep into the car. The concern is that to sort this area out it's considerably more difficult due to access with all the other bits of car around it. This could easily end up becoming a dashboard out job to sort. Rather than diving in and stabbing randomly, I got the French chalk out and gave things a liberal dusting with it. It's a bit rainy today so any water that does come in will leave clean tracks in the dust and show where the water is appearing and then a plan of attack can be formulated. Fingers crossed it's just another tiny spot of failed sealant and nothing more serious, I'm a little concerned due to the work that's been done previously in this area and this sort of thing can easily become partial strip down territory.
Image

In happier news, I managed to score a full set of window switches for a reasonable sum online. They will be quite an improvement on the ones in the car which are faded so badly they look dirty.
Image

Image
User avatar
vulgalour
BXpert
Posts: 553
Joined: Mon Feb 04, 2013 11:30 am
Location: Kent
My Cars: 1980 Austin Princess 1.7 HL
1987 Citroen BX 17RD
x 105

Re: C'est Bleriot - 1987 17RD Hatchback

Post by vulgalour »

Small update on this. The leak at the front actually seems limited to a tiny weep from some sealant where the heel board and bulkhead overlap. That'll be loose sealant again so it'll get the wire brush, rust treater, fresh sealant, paint, treatment from both sides. However, it's not the major point of water ingress into the car, that honour is reserved for the rear door seals on both sides that just spew water into the car quite dramatically while driving. When the car is just parked up not moving, the water goes out like it should, but when you're driving for some reason it just comes straight in through the bottom corner of the seal where it meets the B pillar.
Image

Image

Image

Worst of all, this isn't like on the front door seal where the rust mean the water could go underneath. On the back door seals, the water is sitting in the seal itself and then overflowing into the car and I have absolutely no idea how to stop it doing that. The rear door seals seem designed to direct water into the car, which is the exact opposite to what I want them to do. Any suggestions welcome on this one because I have no idea how to fix it.
User avatar
panky
BXpert
Posts: 408
Joined: Mon Jan 22, 2018 4:44 pm
Location: Widnes
My Cars: 1985 BX 19 GT (DKK), 1971 Morris Minor Traveller, 1971 Commer Auto-Sleeper, 1969 Commer Jennings Roadranger.
'88 BX GTi (a long time ago)
x 78

Re: C'est Bleriot - 1987 17RD Hatchback

Post by panky »

Is there any way you can put drain holes on the bottom of the seal itself to direct the water over the outside door step?
Or is the rain getting into the door and getting in that way, possibly drain holes in the door blocked
Image
User avatar
vulgalour
BXpert
Posts: 553
Joined: Mon Feb 04, 2013 11:30 am
Location: Kent
My Cars: 1980 Austin Princess 1.7 HL
1987 Citroen BX 17RD
x 105

Re: C'est Bleriot - 1987 17RD Hatchback

Post by vulgalour »

I'm not sure adding drainholes in the seal would actually help since when the car is stationary the seals are working exactly as they ought. It's only when you're moving that there's a problem, as if the water is being forced through somehow.
User avatar
vulgalour
BXpert
Posts: 553
Joined: Mon Feb 04, 2013 11:30 am
Location: Kent
My Cars: 1980 Austin Princess 1.7 HL
1987 Citroen BX 17RD
x 105

Re: C'est Bleriot - 1987 17RD Hatchback

Post by vulgalour »

I knew from the powder liberally dusted about the place that the rust stains on the bulkhead were indeed current, as well as historic, and the source of the main water ingress at the front. The other small spot at the bottom of the repaired sealant was inconclusive as no more water wanted to appear there. To cure the latter, I just extended the line of sealant on both sides just in case, since it was very easy. I couldn't actually find any extra bits of bad sealant or holes on that particular run, so I suspect the spot of water had come from somewhere else, through an open window maybe, or just from the water that was sloshing about in the car. The other leak was a little more tricky to locate because I'd at first looked in the wrong place, under the washer bottle, which was sort of also the correct place. This is the area that had been repaired professionally for a previous owner and since there'd been issues with the edges of other repairs I really did think the little rust staining here would be it.
Image

On cleaning that back, it proved not to be the leak. The sealant had blown and there was surface rust, but it didn't go through into the car. I chased out the loose sealant, and chased out some more, and then finally I found a hole.

Image

That looks much more like a water ingress point! It's not as alarming as it first appears, in part because white car, and in part because of what you're actually seeing there. Several panels meet and overlap here, on the engine side of it is the seam that's blown and is letting water into the car, and slightly above that where there's what looks suspiciously like a burn mark is one side of the scuttle, which isn't letting water into the car. What's happened is water has got trapped on the scuttle side (probably because of that drain that was filled up that I had to drill out when I did the inner wing repairs) and rotted through the bottom edge. Someone has then applied sealant over the hole without removing the rust, which has then lead to it failing on the actual bulkhead to heelboard seam. This presented something of a quandary for me. I don't have suitable tools to cut out the rot and weld in new metal, nor did I have the time today even if I had the tools, but I needed to get the car sealed up. Since the rot was about the size of a drain hole and not affecting the structal bits negatively I did the only thing that seemed sensible... I bodged it. Well, I say bodge, I did a repair I personally wasn't proud of but that was done out of necessity.

I spent a good amount of time with various shaped wire brushes to clean as much rust off as I physically could back to the best metal I could. I then applied copious amounts of rust treater, twice, and then applied copious amounts of seam sealant, twice, to both sides. To repair this properly I need one of those die grinder things and a couple of days to patiently repair this correctly, neither of which I have, and since the rust isn't galloping I'm hoping this buys me at least a year and saves water getting into the car as much as it has been up front. Damage limitation is the game here.
Image

Image

It is not pretty because access isn't great without dismantling bits of engine bay, I had to remove the battery and horn compressor as it was, as well as manhandling the soundproofing panel out of the way. On the plus side, that means you can't see the repair when everything is put back. To give you some idea of where this is, and I imagine this is the bulkhead rot problem I've been told BX's suffer from, here's a shot of the engine bay from further back to highlight the location.
Image

Honestly, I don't think you'd ever find that without taking the car apart so it's easy to see why this area goes unchecked. The water ingress I did have from here wasn't dramatic and I've been a little overkill with the sealant so hopefully those things combined will cure it. I'll know tomorrow, it's been raining quite a bit here for the past hour or two. I'm eager to get the car back together again inside, especially since I'll be heading to Lincolnshire next weekend, all being well, and don't particularly want to do that drive with no carpets in.
User avatar
jamescarruthers
BXpert
Posts: 571
Joined: Wed Nov 07, 2012 2:11 pm
Location: Cambridge
x 23

Re: C'est Bleriot - 1987 17RD Hatchback

Post by jamescarruthers »

What does that horn sound like?!
1987 Volvo 480 ES
2006 Citroen C6 Exclusive 3.0 petrol/LPG

Previous BX's:
A966 XRL -- BX 16 TRS
H767 BEG -- BX 14 TGE
B316 AMP -- BX 14 E
User avatar
vulgalour
BXpert
Posts: 553
Joined: Mon Feb 04, 2013 11:30 am
Location: Kent
My Cars: 1980 Austin Princess 1.7 HL
1987 Citroen BX 17RD
x 105

Re: C'est Bleriot - 1987 17RD Hatchback

Post by vulgalour »

It sounds like winning. No fancy musical stuff, just a really satisfyingly continental tri-horn parp. It's exactly the sort of noise you'd expect a French car to make.

--

Is it watertight yet? Very nearly. I'm down to 2 leaks I'm aware of, one being the passenger front door seal which ideally needs replacing, and the other being the top of the rear passenger door seal, which I've tried to reduce by attempting to bend the door frame against the car a little to snug things up. The rear passenger door frame does now sit slightly nicer against the car and lines up slightly better with the front door which is an added bonus.

The main water ingress in the back was not, as I'd previously thought, the door seals (for the most part) and was instead the recently suggested door membranes. On all four doors these were intact, unmessed with, and just as Citroen fitted them back in '87.
Image

I really wanted to keep things looking this smart, it was not to be. The material is very fragile and the glue, where it hasn't failed, very strong. Unfortunately the rear membranes are no longer as nice looking. However, needs must because the bottom edge on both rear doors had failed to stay stuck and it was this area that was letting so much water into the car. I didn't really believe it so spent some time sat in the car while it rained, after wiping the doors dry, to see just how much came in. It was remarkable how quickly the water came through the doors and into the cabin.
Image

To cure this, I peeled back the lower portion of the membrane and ended up peeling back most of the window winder portion of it too so that I could expose the problem areas and reseal with contact adhesive and binbags. I've done this before on other cars that had damaged membranes and had great success so I'm optimistic it will cure things here. One useful side effect was because I'd used an almost clear bag, you could actually see where the water was splashing and how it would then run down the membrane and back into the door, or previously, straight onto the seal and into the car.
Image

Image

Happily, after this was sealed up I sat in the car for a while after drying all the seals off and the rain picked up which allowed me to see very clearly that water simply wasn't getting in through here any more.
Image

Just to be on the safe side, I'm leaving all the interior out of the car until tomorrow, by which time I will know just how badly the rain is getting into the car and reseal anything that might need it. Cautiously optimistic for the time being. The front door membranes were completely dry so I saw no need to disturb either of those beyond a good investigation to be sure nothing was coming through. There is an occasional spot getting in through the passenger door seal where it's been deformed by the rust that was there, and there's not really anything at all I can do about this short of replacing the seal. I had considered rotating the seal in the door aperture, since it's a continuous seal with no hard corners, but I imagine that will just allow the water to leak in at a different point and not really cure the problem. This is as bad as the leak gets and now that the bit I sealed up yesterday is also water tight, there's not enough moisture getting in to make the front floor pan wet so I'm not too concerned about it. I might try squidging a good amount of non-setting windscreen sealant into the door seal in the meantime to see if that can pick up the slack.
Image

Image

One thing of note on removing the rear door handles is that the Haynes book is wrong again. In the manual it suggests there's a spring clip that holds the rear winders on, which is also what I expected. There isn't. Nor is there a small trim piece to pry off and get to a bolt or screw. Instead, this type of winder just pushes straight on to the regulator spline. To remove, you get two pry tools of some description under opposing sides and lever until the handle pops off. Refitting requires you line it up and give it a good hard whack to seat properly. They're not something I want to take on and off too many times, I have visions of shattered grey plastic if I do.
Image

Image

Image

Another peculiarity was the window switches up front. The ones I bought recently looked the same, superficially, until I removed the old switches and compared them side by side. Happily, fitting the switches isn't too difficult, the door cards are modular so once you've removed them from the door - 2 screws behind the speaker grille which is levered out with a flat screwdriver, one screw near the window aduster handle, three screws hold the grab handle/arm rest, and a plethora of push fixings, oh and the door lock knob to unscrew - there's just three screws to undo to remove the plastic front portion of the card. You can then simply unplug the old switches and push them up and out of the card.
Image

I suspect one set of the switches is a revision for the other, they're both have the same manufacturer's stamp and both fit exactly the same, and I was sure to check the orientation of the switches was correct by plugging this bit into the door looms, they just seem to have revised the design slightly. On the original switches, the white arrows are painted or heat pressed into the black switch. On the replacements, there seems to be a white plastic insert into the back of the black plastic switch. There's also slight variation in the socket surround and the rocker piece itself. They look like they should have a bulb inside to illuminate them, but none of the switches do. The ones with the white squiggle on are the replacements. The replacement switches seem a little more responsive than the originals and certainly look a good sight better.
Image

Image

Image

Providing things stay as dry as I hope they do overnight, I'll be reinstalling the door cards and carpets and passenger seat tomorrow. In the meantime I've just cleaned everything that's been taken out of the car in preparation for that, nothing was particularly grimy, just a build up of decades of dust and that random sticky residue you get in the inaccessible bits of interiors.
User avatar
vulgalour
BXpert
Posts: 553
Joined: Mon Feb 04, 2013 11:30 am
Location: Kent
My Cars: 1980 Austin Princess 1.7 HL
1987 Citroen BX 17RD
x 105

Re: C'est Bleriot - 1987 17RD Hatchback

Post by vulgalour »

I'll just go and check to see how dry the BX is inside...
Image

... ah well. That's a thing. Why is this carpet suddenly absolutely soaked? It's the only carpet left in the car. The other areas are staying dry. Carpet out then, and then the big pad of foam sound deadening under it, and the problem became apparent pretty quickly. It's been leaking here ages but the foam pad that was underneath the carpet was holding onto the water and it's taken this long with continuous rain for it to become saturated. Under the carpet there wasn't a lot to see once the water was cleaned out, no obvious points of ingress from the door seal, so I looked in the same place as on the other side and oh look, there's a whole load of sealant there and some rusty stains. Well, I guess I know what I'll be doing at the unit tomorrow! At least this is easy to sort. I had a peek behind the bulkhead soundproof panel in the engine bay and that looks nice and clean. I also had a look in the scuttle area and while it does look clean, it does seem to be holding onto the water more than it should this side so I'll hit that with the wire wheel tomorrow too just in case there's some loose sealant there.
Image

No other horrors immediately apparent at least, no gaping rust holes, or water cascading down the bulkhead, so it shouldn't take too long to sort, especially since I'll have indoor space at the unit so it won't matter what the weather is doing. What a nuisance, all the same. At least I found this now and not when I'd reinstalled the interior.
User avatar
panky
BXpert
Posts: 408
Joined: Mon Jan 22, 2018 4:44 pm
Location: Widnes
My Cars: 1985 BX 19 GT (DKK), 1971 Morris Minor Traveller, 1971 Commer Auto-Sleeper, 1969 Commer Jennings Roadranger.
'88 BX GTi (a long time ago)
x 78

Re: C'est Bleriot - 1987 17RD Hatchback

Post by panky »

The leak pixies are strong with this one, but you've got them on the run
Image
User avatar
vulgalour
BXpert
Posts: 553
Joined: Mon Feb 04, 2013 11:30 am
Location: Kent
My Cars: 1980 Austin Princess 1.7 HL
1987 Citroen BX 17RD
x 105

Re: C'est Bleriot - 1987 17RD Hatchback

Post by vulgalour »

I hope so! Pesky pixies.

--

I was very happy for the indoor space at the unit as it's been raining on and off all day today. I was also happy that the interior of the BX was almost completely dry with the exception of the passenger front door seal leak I'm still trying to resolve, and the small sealant leak in the driver's footwell that I was going to sort out today. The rear doors hadn't let anything in at all, nor did they on the drive over to the unit even when it was raining, so that felt like progress.

First job on getting to the unit was to stick the car in high, move the arch liner, and look for the leak. This proved difficult. I knew where the water was appearing and there was some loose sealant, as expected, but there was absolutely no obvious water ingress point at all. I did the only thing I could see to do which was wire brush everything off in the general area, rust treat, and seal both sides. There's not really anything else i can do, so I hope that's enough. I made sure to cover a much larger area than the water was appearing from to blend the sealant out into areas that were staying dry, it's probably excessive but hopefully it works.
Image

Image

Another thing I picked up recently online was a leather dye balm. This is an experiment. Leather dye works usually by soaking into the surface of the leather, which is normally somewhat porous and while it doesn't normally work on plastic, I wondered if it might on my door bins due to how dry and porous they'd gone on the top edge. Nothing ventured, nothing gained, and a small pot being a mere £3 resulted in some improvement, but not a lot. This product isn't suitable for vinyl, it wipes off and leaves nothing behind. It's not really suitable for the plastic either, all it's really done is sat in all the dried out porous bits of the plastic in a way that means you can't rub it off. In this instance, paint is going to be better, or a specific vinyl dye. I'm having some issue finding a UK supplier of vinyl dye at the moment, and I'm not really sure how to get a colour match for the grey in the BX which is ever so slightly blue rather than the standard dead looking greys that you get generically.
Image

The glovebox has a light in it. I didn't know this until I removed the glovebox and today, since it was being refitted, Mike found a suitable LED festoon bulb (I don't mind an LED in this location, though I would have preferred something less bright) and then kindly fitted it because I just found myself getting in my own way trying to fit the bulb into the holder. Works too.
Image

Finally, the new electric window switches having been installed and the doors now sealed, all the door cards got refitted. The new switches make a huge improvement both visually and because of how much nicer they are to touch. You wouldn't think such a small item could make such a big difference.
Image

I've got some new carpet underlay arriving tomorrow (hope I've ordered enough) and I'll be shampooing all the carpets while they're out of the car. To try and cure the leak on the passenger door seal we filled the seal with sealant before pushing it into place. If this doesn't work, I'll get the relevant generic door seal and joiners and replace all the door seals with new ones, it made such a difference doing that on the Princess that it certainly wouldn't hurt doing it to the BX too.
Post Reply