C'est Bleriot - 1987 17RD Hatchback
-
vulgalour
- BXpert
- Posts: 553
- Joined: Mon Feb 04, 2013 11:30 am
- Location: Kent
- My Cars: 1980 Austin Princess 1.7 HL
1987 Citroen BX 17RD - x 105
Re: C'est Bleriot - 1987 17RD Hatchback
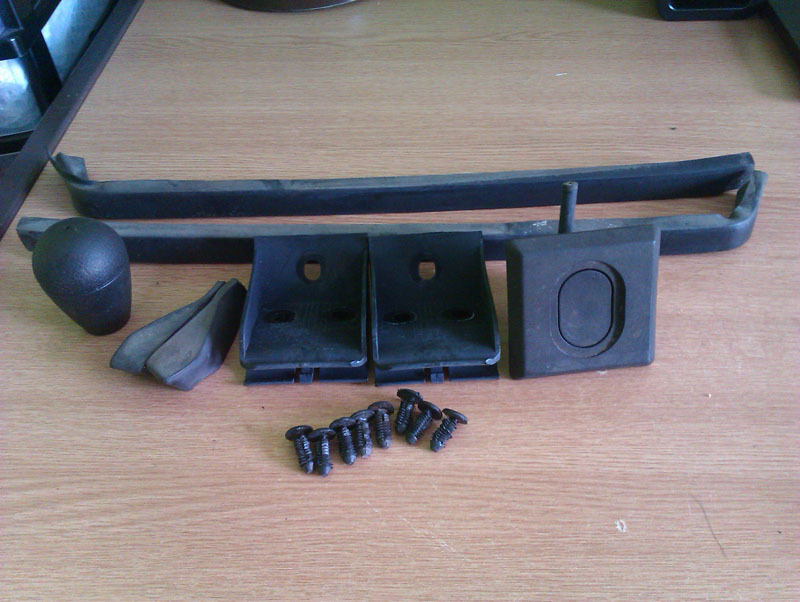
Finally manage to acquire some little bits of plastic for the BX that I've been trying to get for the last year and a bit of ownership. You'd be amazed how difficult these things can be to acquire in any condition and at any price. When I've given them a scrub I'll get them all fitted where necessary. bumper 'ears' (rocking horse poop normally), wing-to-bumper infills, gearknob, parcel shelf brackets, a proper tailgate button, and a bunch of trim buttons.
-
Tim Leech

- Over 2k
- Posts: 15629
- Joined: Tue Apr 15, 2008 11:12 am
- Location: Derbyshire
- My Cars: Various
- x 178
Re: C'est Bleriot - 1987 17RD Hatchback
Yep its all in the detail, took me 5, yes 5 years to find a set of correct Mk1 BX mudflaps for the GT!
Lots of Motors, mostly semi broken....
-
vulgalour
- BXpert
- Posts: 553
- Joined: Mon Feb 04, 2013 11:30 am
- Location: Kent
- My Cars: 1980 Austin Princess 1.7 HL
1987 Citroen BX 17RD - x 105
Re: C'est Bleriot - 1987 17RD Hatchback
Parts hunting is a frustrating business when you're looking for a really specific part. I'm still after a driver's side rear mudflap for mine to replace the broken one (I should add that on the wanted list, now I think on) and so far the only ones I've found are for the passenger side, or are the wrong design. There's a GT being broken for parts on eBay at the moment, you've probably already seen it.
---
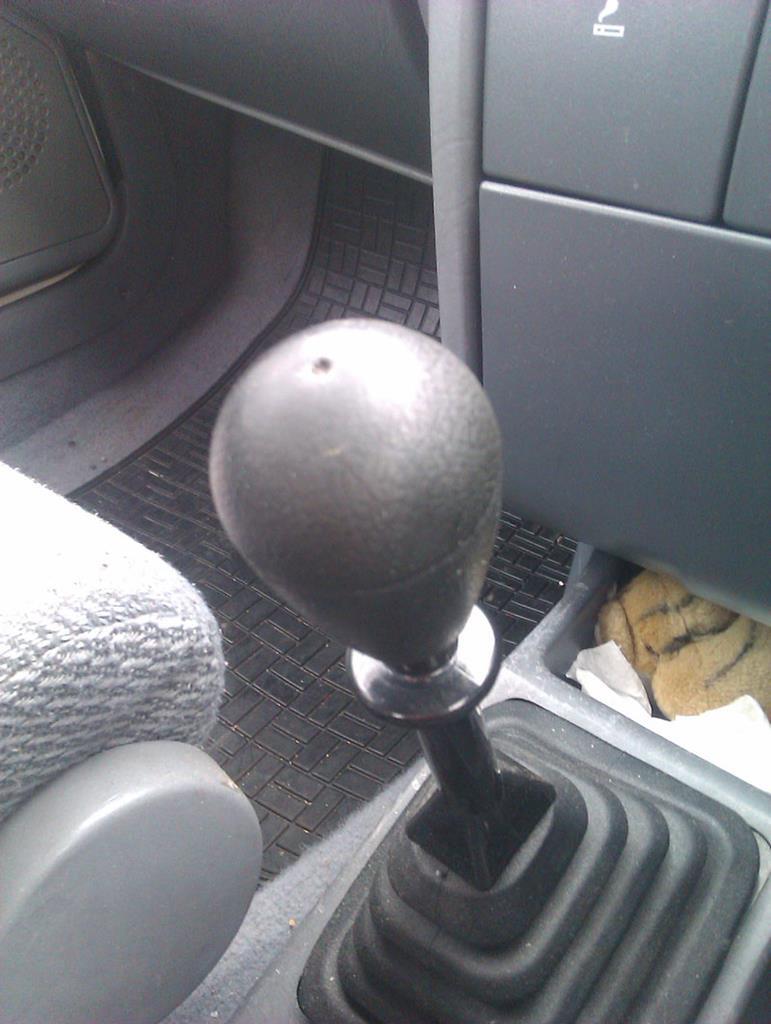
Got the parts all scrubbed and set to fitting them to the car. Gearknob is nice and easy, it simply unscrews, the old one had gone very shiny and recently little black flakes had started to come off on my hand.
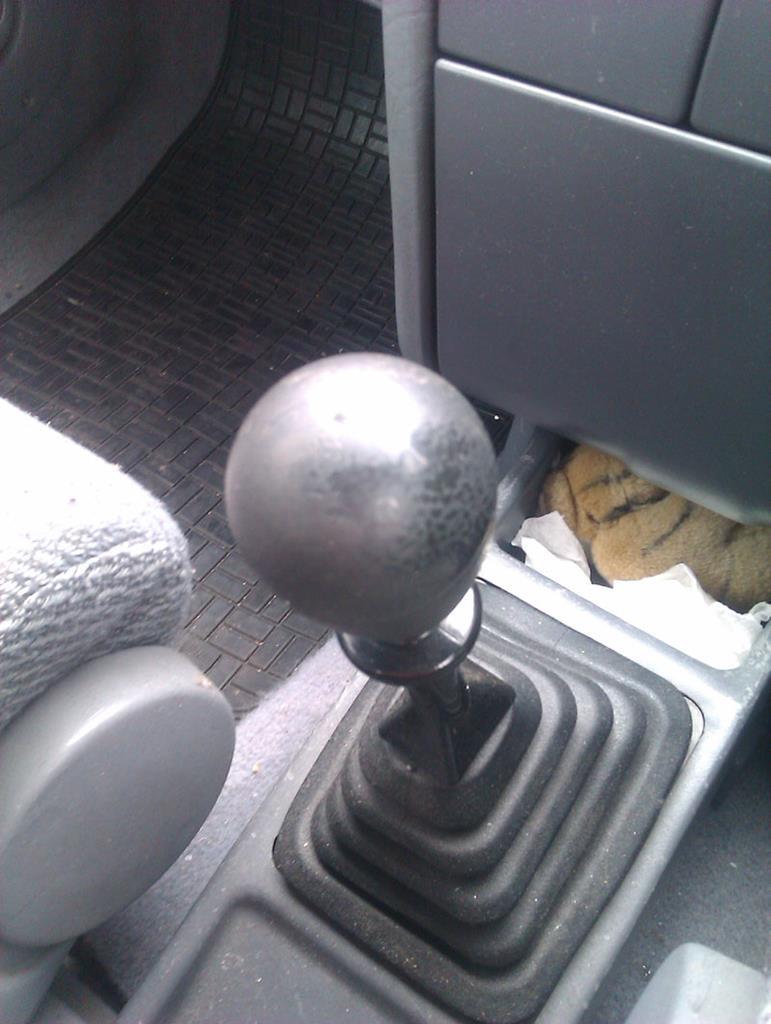
New one has hardly any wear on it so should do the job nicely. I really need to clean the inside of the car, haven't done that since moving in at the end of December and it's looking a bit grubby in there now.
Shortly after getting the car, one of the parcel shelf brackets committed suicide and exploded into a dozen pieces. I'd been trying to track down a replacement ever since. Happily, another easy item to remove since you just undo three bolts...

Remove the broken bracket, and then bolt on the new bracket, easy.
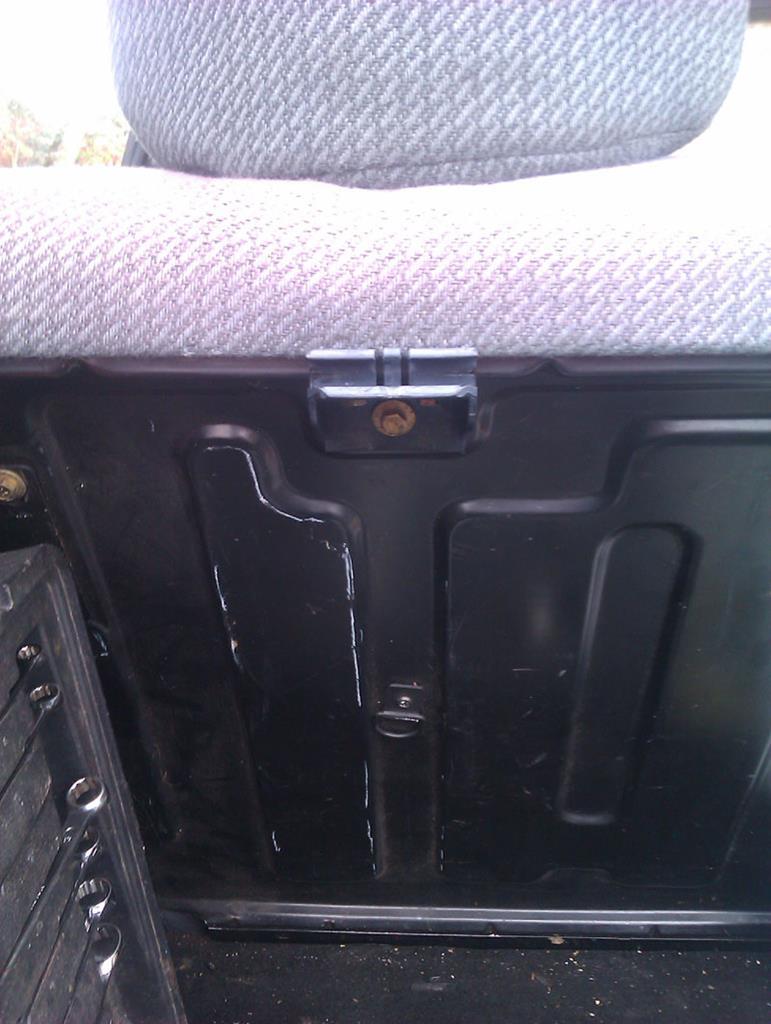
For the tailgate button it's a little bit more involved, but not much. First, pop off the trim buttons holding the tailgate trim on and then you can get a look at the back of the lock. The button itself is held in with a circlip and a fairly weak spring while the lock mechanism is held in with two bolts and a sturdy bracket. The easiest way to change the button is simply to pop the circlip off, pull out the lock button and spring from the other side, and pop the new button in, pushing the circlip home to keep it all secure.
The black button is nicer to use than the lock that was in there, and it looks better to my eye since it now looks like a BX should in that area.
I chickened out doing the bumper infill pieces because it's so bloomin windy today and I suspect I have to either drop the bumper or pull out the lights to do it. I've also not got any glue for holding the ears on and I really don't want to lose those given how difficult they can be to find, and how expensive they can be when you do find them.
---
Got the parts all scrubbed and set to fitting them to the car. Gearknob is nice and easy, it simply unscrews, the old one had gone very shiny and recently little black flakes had started to come off on my hand.
New one has hardly any wear on it so should do the job nicely. I really need to clean the inside of the car, haven't done that since moving in at the end of December and it's looking a bit grubby in there now.
Shortly after getting the car, one of the parcel shelf brackets committed suicide and exploded into a dozen pieces. I'd been trying to track down a replacement ever since. Happily, another easy item to remove since you just undo three bolts...
Remove the broken bracket, and then bolt on the new bracket, easy.
For the tailgate button it's a little bit more involved, but not much. First, pop off the trim buttons holding the tailgate trim on and then you can get a look at the back of the lock. The button itself is held in with a circlip and a fairly weak spring while the lock mechanism is held in with two bolts and a sturdy bracket. The easiest way to change the button is simply to pop the circlip off, pull out the lock button and spring from the other side, and pop the new button in, pushing the circlip home to keep it all secure.
The black button is nicer to use than the lock that was in there, and it looks better to my eye since it now looks like a BX should in that area.
I chickened out doing the bumper infill pieces because it's so bloomin windy today and I suspect I have to either drop the bumper or pull out the lights to do it. I've also not got any glue for holding the ears on and I really don't want to lose those given how difficult they can be to find, and how expensive they can be when you do find them.
-
Tim Leech
- Over 2k
- Posts: 15629
- Joined: Tue Apr 15, 2008 11:12 am
- Location: Derbyshire
- My Cars: Various
- x 178
-
vulgalour
- BXpert
- Posts: 553
- Joined: Mon Feb 04, 2013 11:30 am
- Location: Kent
- My Cars: 1980 Austin Princess 1.7 HL
1987 Citroen BX 17RD - x 105
Re: C'est Bleriot - 1987 17RD Hatchback
Ta 
The cable tie on the low coolant sensor appears to have stopped it coming on erroneously, so that's nice. Just waiting for a decent break in the weather now so I can tackle those front trims and give the car a proper clean rather than the very quick and basic washes its been getting to keep on top of things.
The cable tie on the low coolant sensor appears to have stopped it coming on erroneously, so that's nice. Just waiting for a decent break in the weather now so I can tackle those front trims and give the car a proper clean rather than the very quick and basic washes its been getting to keep on top of things.
-
Tim Leech
- Over 2k
- Posts: 15629
- Joined: Tue Apr 15, 2008 11:12 am
- Location: Derbyshire
- My Cars: Various
- x 178
Re: C'est Bleriot - 1987 17RD Hatchback
Found this!
You do not have the required permissions to view the files attached to this post.
Lots of Motors, mostly semi broken....
-
vulgalour
- BXpert
- Posts: 553
- Joined: Mon Feb 04, 2013 11:30 am
- Location: Kent
- My Cars: 1980 Austin Princess 1.7 HL
1987 Citroen BX 17RD - x 105
Re: C'est Bleriot - 1987 17RD Hatchback
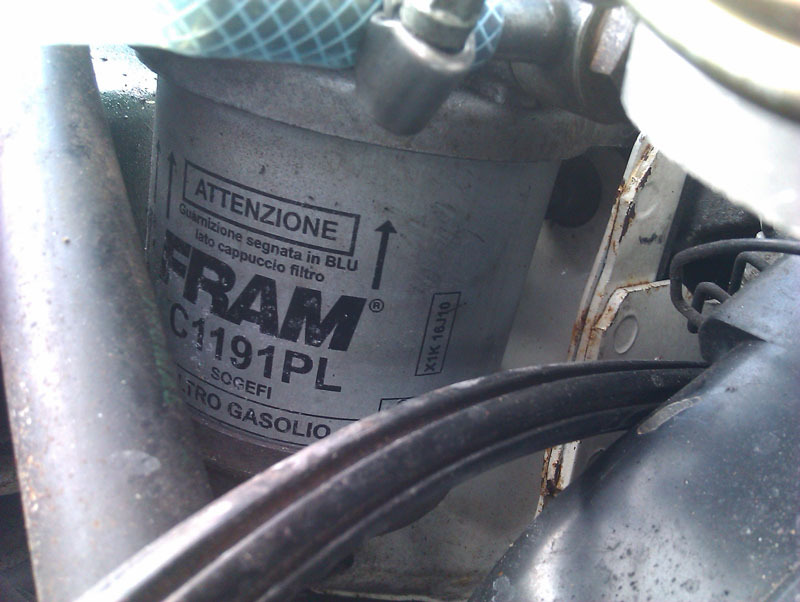
Did a buy recently since even though the mystery starting problem has gone away enough people have said the fuel filter housing is an issue that it seemed sensible to grab a replacement. Couldn't find one in the original style, only these aftermarket universal jobbies, and none had my engine listed for them. I'm pretty certain the filter housing is the same on the 1.9 and the 1.7 and after comparing lots of photographs I took a gamble. A bit of hunting secured this one for about £25 delivered, instead of the up to £85 +P&P some places were asking for an identical item.

Side by side with the original, it looks to be the same size where it needs to be. I did learn that these housings are available in some applications as rhd and lhd versions while these aftermarket ones cater to both by making use of blanking plugs. One thing that was immediately apparent on the new one is that there seems to be a healthier amount of resistance on the primer button, so perhaps the mystery air ingress that isn't always happening is down to the old housing just being worn.
I did forget to order a new fuel filter, because of course I did, so I'll be getting one of those before swapping the new housing on. It looks like it'll be a straightforward enough job.
-
Dave_16v
- BXpert
- Posts: 240
- Joined: Fri Aug 25, 2017 10:20 pm
- Location: Yorkshire
- My Cars: BX 16 Valve Ph 2 Current
BX 16 valve Ph 1 past
BX Gti past
BX Gti Auto past
ZX Volcane keeping others going - x 78
Re: C'est Bleriot - 1987 17RD Hatchback
£25 rather than £85 is very satisfying and even more so when it is in place and doing it's job. Nice find. 

Prefer it to the Lamborghini, like Signor Gandini!

-
vulgalour
- BXpert
- Posts: 553
- Joined: Mon Feb 04, 2013 11:30 am
- Location: Kent
- My Cars: 1980 Austin Princess 1.7 HL
1987 Citroen BX 17RD - x 105
Re: C'est Bleriot - 1987 17RD Hatchback
Especially so when there's no reason for the mark up!
---
In an attempt to eliminate the random bad starting issue and to try and find out where the air was getting into the system, I ordered myself a new pump housing top, as previously mentioned, I was holding off fitting it until the new filter arrived, which it did today. First job was to remove the old filter housing and filter. The diesel that came out had a lot of detritus in it.
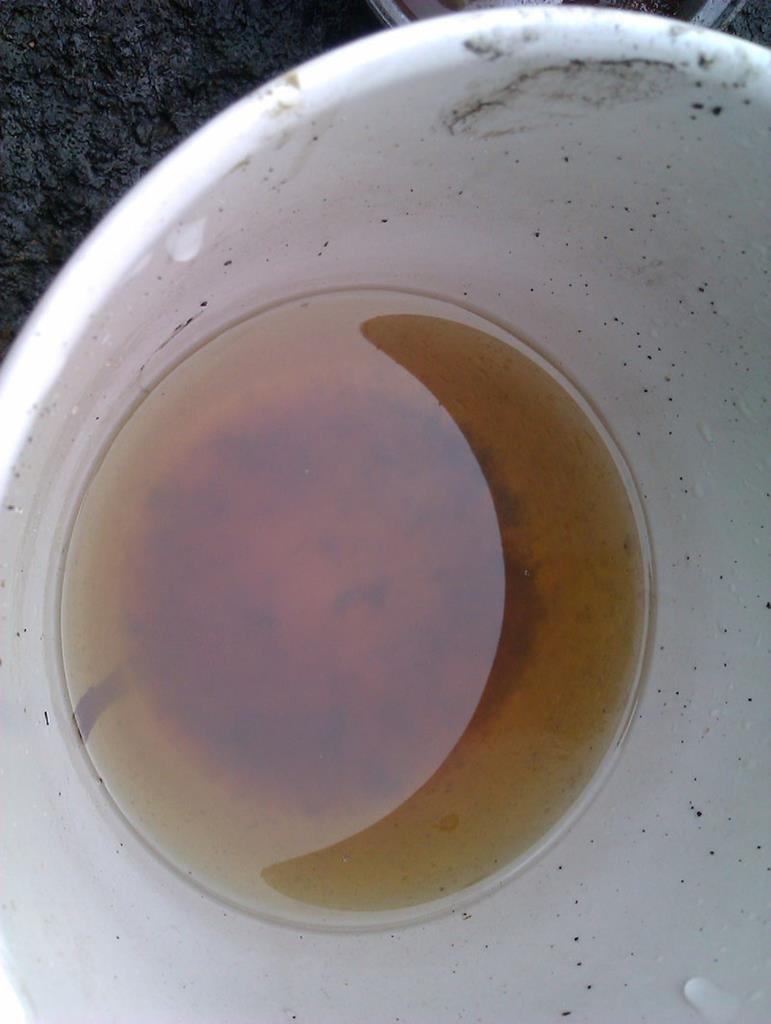
That wouldn't be helping, the bottom of the fuel filter housing was gunged up with lardy chunks and burnt crispy bits so I'd hazard a guess that someone has run this car on chip fat and not taken care to do the filters regularly enough. That would also explain the very occasional whiff of chips early in my ownership and perhaps was contributing to the poor starting.

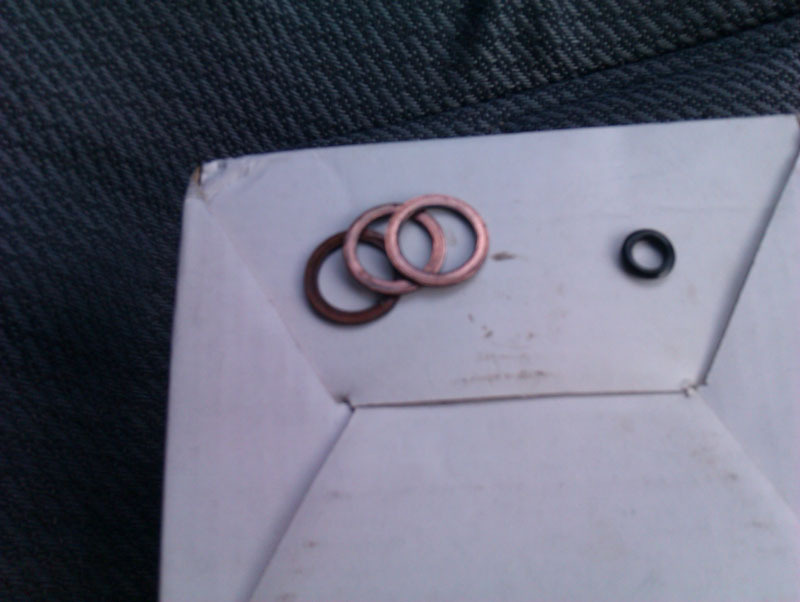
It all cleaned out easily enough. The new filter top came with new washers and o-rings so I fitted all of those as recommended in the scant instructions (there's no instructions for which inlet and outlet is which). The old copper washers and rubber o-rings were quite worn, the rubber components particularly weren't very flexible. Obviously I dropped one of the copper washers, only to find it after finishing the job.
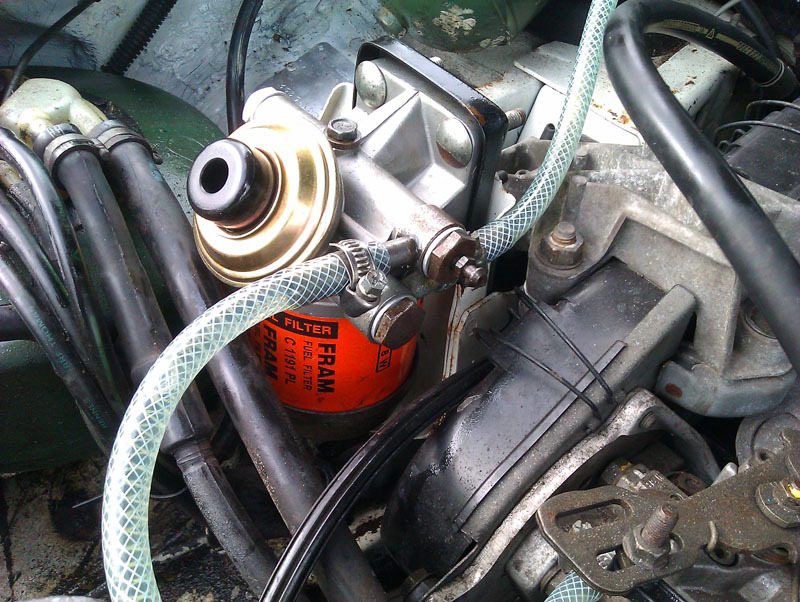
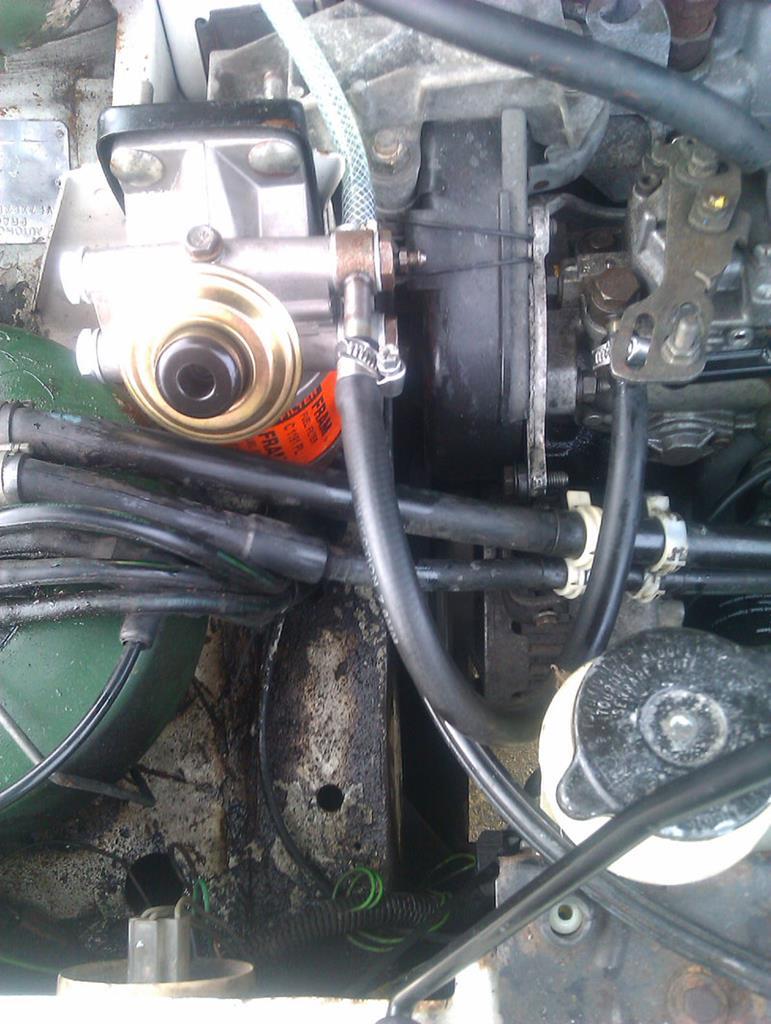
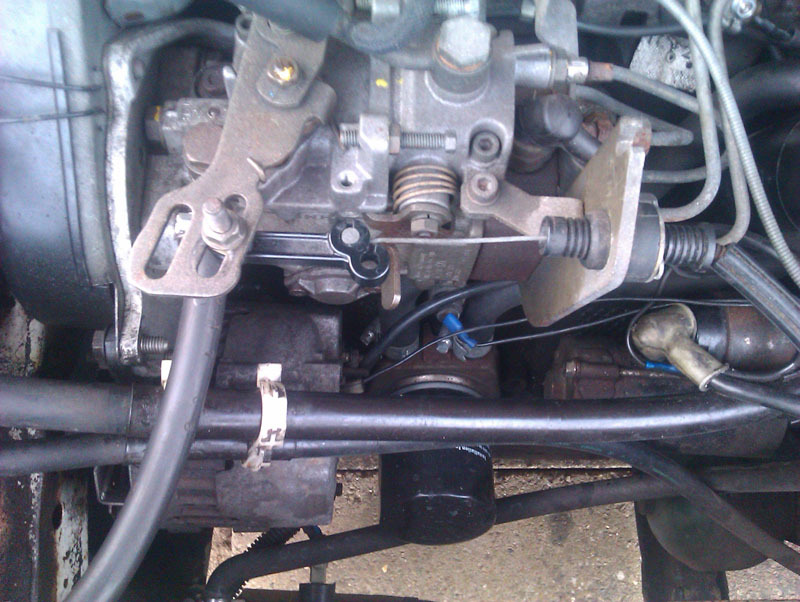
The inlet and outlet on the new filter top is designed so that you use one side or the other, depending on the layout of your engine bay and where the filter is located. I had expected the inlet at the top and the outlet at the bottom, which when I actually thought about it didn't really make sense since you want the filter to fill up and then 'overflow' into the pump, so the first time I set it up I got it wrong and was a bit confused. Below is the correct way of setting it up. The banjo bolts are a direct fit to the new housing and the washers supplied aren't too thick, the overall quality of the piece seems pretty reasonable, in all honesty. You do have to use the coach bolts from your old housing, and the through bolt that holds the bottom of the housing to the top, sandwiching the filter in between. The new filter came with two new o-rings which is good because the old ones were quite hard.
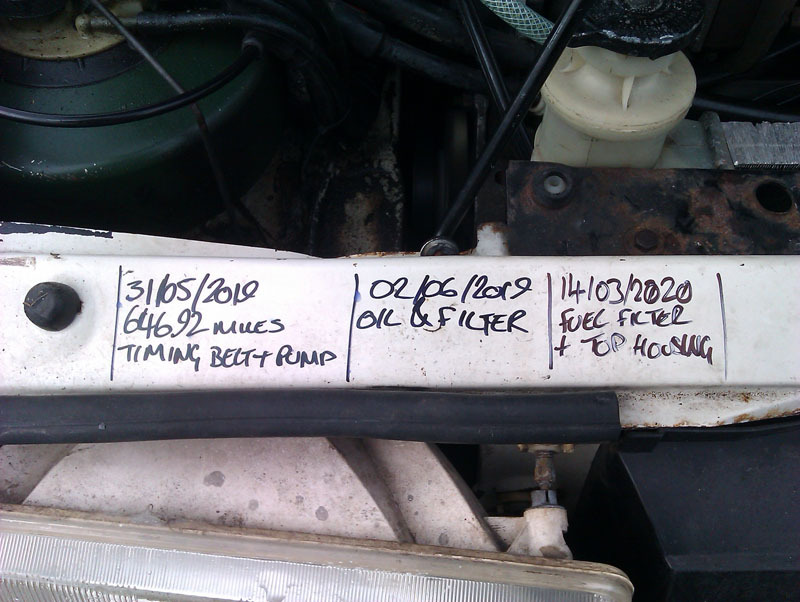
Made sure to update my comprehensive service history.
Then started the car up. It ran for a little bit then stalled at first, a manual prime via the new button - which works much better than the one on the original housing - and it restarted no bother and idled nicely, if a little lower than expected. I'm not sure why the idle speed seemed to have dropped since I didn't adjust any of that. After a while I was confident it wasn't leaking or misbehaving and took it for a test run around the block, at which point it stalled at the first two junctions I stopped at and then tried to stall at every other junction I stopped at but I'd learned how to feather the throttle just so to stop it. It did feel a bit peppier than before, comparatively speaking, not quite as sluggish setting off from a standstill, so perhaps the old filter was a bit clogged and restricting fuel delivery somewhat? I don't know, I'm just guessing. I might even be imagining it, placebo effect from working on the car. Once back home I had another look and sure enough, it was sucking air in from somewhere again, quite a bit more air than before in fact.

The primer on the new housing was doing its job and I didn't want to write off a new part just yet, it certainly primed the system quicker than the old housing. A second pair of eyes appeared in the form of my other half and he asked if it was supposed to have bubbles coming from that clamp. Well, no, it wasn't. Closer inspection revealed that it was indeed pulling air in not from the housing but from the hose under the clamp on the outlet of the filter housing. On attempting to undo the clamp the screw came out but the clamp didn't unfasten. Well, that'll be an issue then. The clear hose wasn't split or damaged in any way, still nice and flexible without being too brittle or too soft, but the clamp just wasn't providing sufficient force to seal.
I pulled the old rubber hose out of the boot where I'd chucked it 'just in case' and reinstalled it after fighting with both clamps which both didn't want to undo properly and that reduced the air ingress judging by the more even idle and how much harder it was to stall the car.
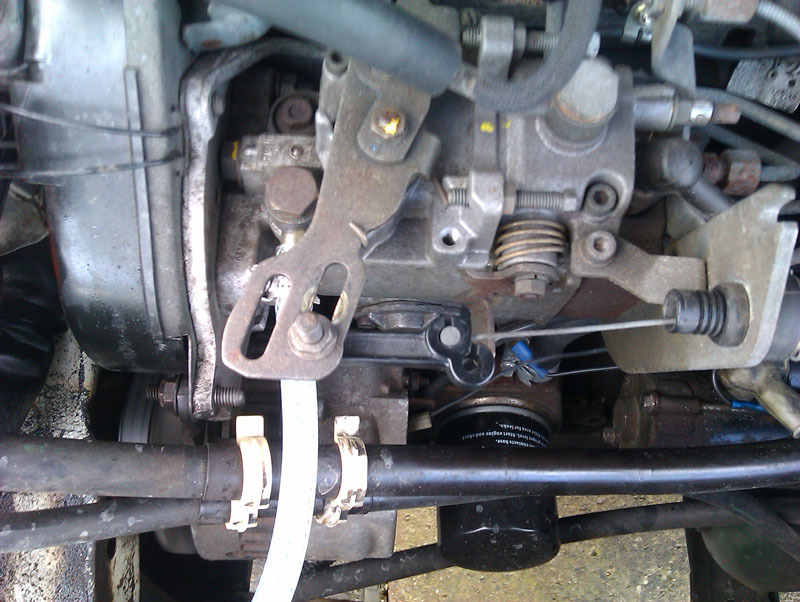
That now done I could at least drive the car without it stalling on me and it does start much quicker now (at least it has today, but we know what it's like about starting predictably) so I do think I'm on the right track here. One thing I did find odd is that the idle had dropped significantly without me touching any of that side of the adjustments, all I did was replace the fuel filter head and the fuel filter, I'm not sure why that would cause the idle to drop. I also had to readjust the throttle cable since that was incredibly slack after this job too, you can see where the nut used to be with the brighter goldish circle and where I've had to move it to. The idle did level out back to something nearer where it was before since fitting the black rubber hose back on so I can only assume that's being affected by the amount of air getting in.
Once the replacement fuel hose and better quality clamps arrive I'll get those fitted and, hopefully, will have cured the random starting issue. My suspicion is that I've had air leaks on the old fuel filter housing due to worn out rubber seals, and another intermittent leak on the fuel hose because of that dodgy clamp. The only other job for me to do after this that I'm aware of is to fit the replacement rear suspension boots which should also cure that intermittent LHM leak on the driver's side which seems directly related to a low pressure return hose.
---
In an attempt to eliminate the random bad starting issue and to try and find out where the air was getting into the system, I ordered myself a new pump housing top, as previously mentioned, I was holding off fitting it until the new filter arrived, which it did today. First job was to remove the old filter housing and filter. The diesel that came out had a lot of detritus in it.
That wouldn't be helping, the bottom of the fuel filter housing was gunged up with lardy chunks and burnt crispy bits so I'd hazard a guess that someone has run this car on chip fat and not taken care to do the filters regularly enough. That would also explain the very occasional whiff of chips early in my ownership and perhaps was contributing to the poor starting.
It all cleaned out easily enough. The new filter top came with new washers and o-rings so I fitted all of those as recommended in the scant instructions (there's no instructions for which inlet and outlet is which). The old copper washers and rubber o-rings were quite worn, the rubber components particularly weren't very flexible. Obviously I dropped one of the copper washers, only to find it after finishing the job.
The inlet and outlet on the new filter top is designed so that you use one side or the other, depending on the layout of your engine bay and where the filter is located. I had expected the inlet at the top and the outlet at the bottom, which when I actually thought about it didn't really make sense since you want the filter to fill up and then 'overflow' into the pump, so the first time I set it up I got it wrong and was a bit confused. Below is the correct way of setting it up. The banjo bolts are a direct fit to the new housing and the washers supplied aren't too thick, the overall quality of the piece seems pretty reasonable, in all honesty. You do have to use the coach bolts from your old housing, and the through bolt that holds the bottom of the housing to the top, sandwiching the filter in between. The new filter came with two new o-rings which is good because the old ones were quite hard.
Made sure to update my comprehensive service history.
Then started the car up. It ran for a little bit then stalled at first, a manual prime via the new button - which works much better than the one on the original housing - and it restarted no bother and idled nicely, if a little lower than expected. I'm not sure why the idle speed seemed to have dropped since I didn't adjust any of that. After a while I was confident it wasn't leaking or misbehaving and took it for a test run around the block, at which point it stalled at the first two junctions I stopped at and then tried to stall at every other junction I stopped at but I'd learned how to feather the throttle just so to stop it. It did feel a bit peppier than before, comparatively speaking, not quite as sluggish setting off from a standstill, so perhaps the old filter was a bit clogged and restricting fuel delivery somewhat? I don't know, I'm just guessing. I might even be imagining it, placebo effect from working on the car. Once back home I had another look and sure enough, it was sucking air in from somewhere again, quite a bit more air than before in fact.
The primer on the new housing was doing its job and I didn't want to write off a new part just yet, it certainly primed the system quicker than the old housing. A second pair of eyes appeared in the form of my other half and he asked if it was supposed to have bubbles coming from that clamp. Well, no, it wasn't. Closer inspection revealed that it was indeed pulling air in not from the housing but from the hose under the clamp on the outlet of the filter housing. On attempting to undo the clamp the screw came out but the clamp didn't unfasten. Well, that'll be an issue then. The clear hose wasn't split or damaged in any way, still nice and flexible without being too brittle or too soft, but the clamp just wasn't providing sufficient force to seal.
I pulled the old rubber hose out of the boot where I'd chucked it 'just in case' and reinstalled it after fighting with both clamps which both didn't want to undo properly and that reduced the air ingress judging by the more even idle and how much harder it was to stall the car.
That now done I could at least drive the car without it stalling on me and it does start much quicker now (at least it has today, but we know what it's like about starting predictably) so I do think I'm on the right track here. One thing I did find odd is that the idle had dropped significantly without me touching any of that side of the adjustments, all I did was replace the fuel filter head and the fuel filter, I'm not sure why that would cause the idle to drop. I also had to readjust the throttle cable since that was incredibly slack after this job too, you can see where the nut used to be with the brighter goldish circle and where I've had to move it to. The idle did level out back to something nearer where it was before since fitting the black rubber hose back on so I can only assume that's being affected by the amount of air getting in.
Once the replacement fuel hose and better quality clamps arrive I'll get those fitted and, hopefully, will have cured the random starting issue. My suspicion is that I've had air leaks on the old fuel filter housing due to worn out rubber seals, and another intermittent leak on the fuel hose because of that dodgy clamp. The only other job for me to do after this that I'm aware of is to fit the replacement rear suspension boots which should also cure that intermittent LHM leak on the driver's side which seems directly related to a low pressure return hose.
-
vulgalour
- BXpert
- Posts: 553
- Joined: Mon Feb 04, 2013 11:30 am
- Location: Kent
- My Cars: 1980 Austin Princess 1.7 HL
1987 Citroen BX 17RD - x 105
Re: C'est Bleriot - 1987 17RD Hatchback
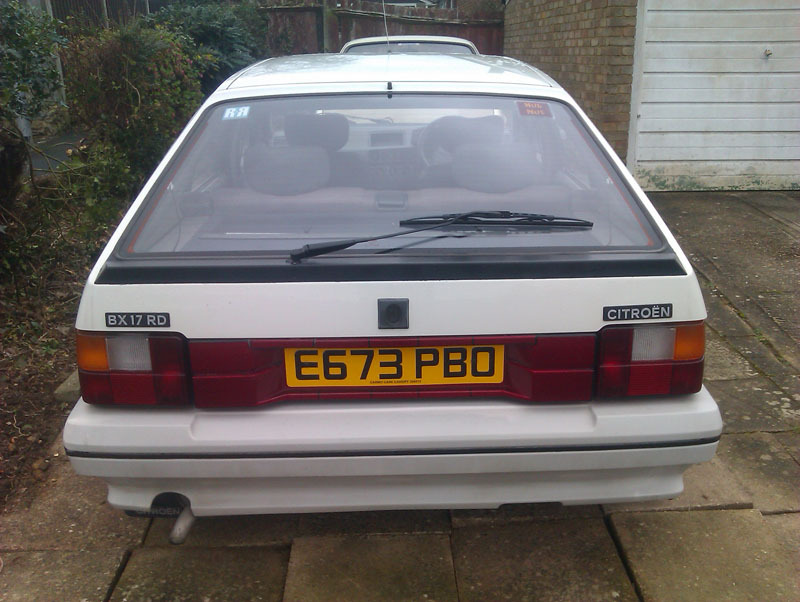
I gave myself another challenge. I've been wanting a high level brake light for the BX, just for peace of mind. I'm told it's a very visible car from behind and the brake lights are nice and big but still, I'd feel happier with an eye line brake light. There was an OEM option available when the car was new, unfortunately finding one has proven incredibly difficult, so instead I looked at other options.
New LED units are available and given my experience with the variable quality of said items I decided to give that a big old pass. Instead, I opted for a high level brake light from another 80s car so it had the right look, this time a Volvo 240. It takes a single ordinary incandescent brake light bulb and has nice simple wiring that even I should be able to connect up and make work. The only problem is that I can't fit it in the same way as it is on the Volvo. Actually, that's not the only problem, the other problem is that I need to mount it to the body rather than the tailgate and I don't want to chop or drill into my trims. I do like making work for myself.
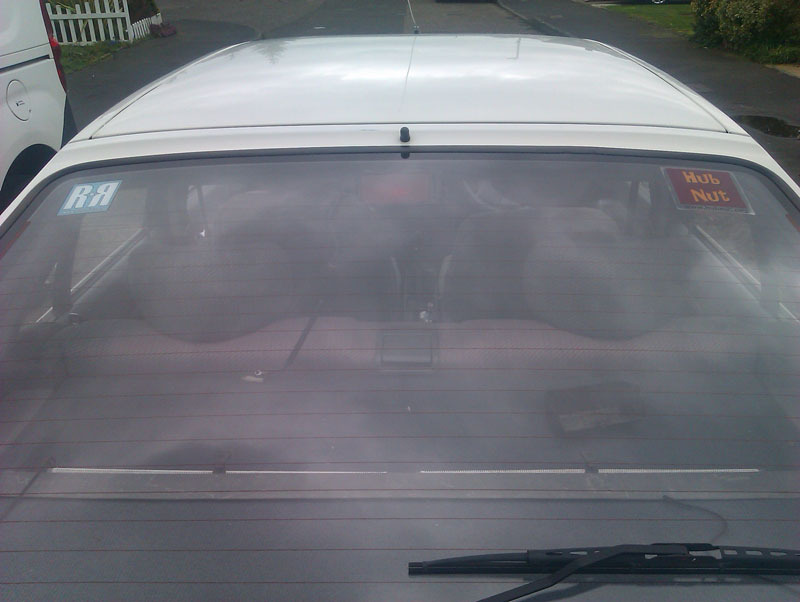
Offered the light up in various places and found the best for outside visibility and minimal interruption of interior visibility was right at the top of the hatch opening in the middle. It can be mounted upside down or right way up, for the purposes of mock-up I mounted it upside down since the bottom has a built-in plastic tang that held the unit where I wanted it.

I'm planning to make a little bracket that clips onto the rail the rubber seal slots onto and holds the light unit. I can then, in theory, run the wiring under the trim surrounds and straight down to one of the rear light clusters where I can piggy back off the wiring for the brake light and make use of an earth point. The wire should run under the headlining trim, down the inside of the C pillar trim and emerge just behind the rear trim in the boot where the wiring for the light cluster is, thus hiding the wiring almost entirely.
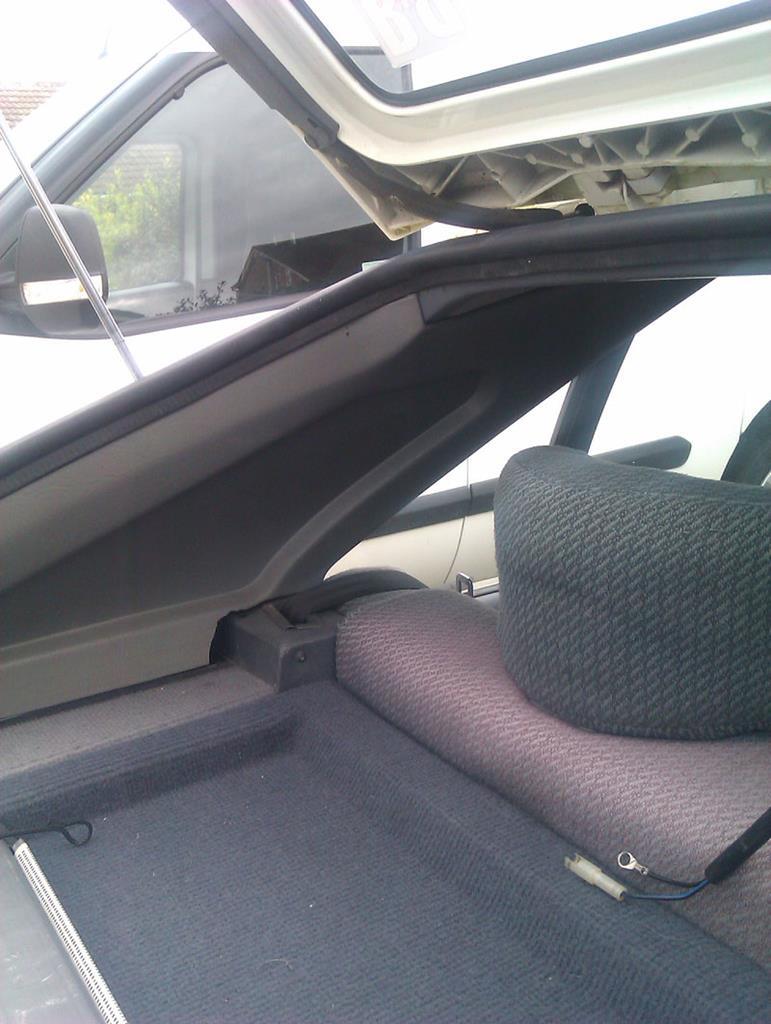
If I mount the brake the correct way up, I can probably even use the original Volvo cover with some minor trimming to fit the contour of the headlining and it should then look entirely factory... once I've carefully shaved the Volvo logo off the back of the housing of course.
New LED units are available and given my experience with the variable quality of said items I decided to give that a big old pass. Instead, I opted for a high level brake light from another 80s car so it had the right look, this time a Volvo 240. It takes a single ordinary incandescent brake light bulb and has nice simple wiring that even I should be able to connect up and make work. The only problem is that I can't fit it in the same way as it is on the Volvo. Actually, that's not the only problem, the other problem is that I need to mount it to the body rather than the tailgate and I don't want to chop or drill into my trims. I do like making work for myself.
Offered the light up in various places and found the best for outside visibility and minimal interruption of interior visibility was right at the top of the hatch opening in the middle. It can be mounted upside down or right way up, for the purposes of mock-up I mounted it upside down since the bottom has a built-in plastic tang that held the unit where I wanted it.
I'm planning to make a little bracket that clips onto the rail the rubber seal slots onto and holds the light unit. I can then, in theory, run the wiring under the trim surrounds and straight down to one of the rear light clusters where I can piggy back off the wiring for the brake light and make use of an earth point. The wire should run under the headlining trim, down the inside of the C pillar trim and emerge just behind the rear trim in the boot where the wiring for the light cluster is, thus hiding the wiring almost entirely.
If I mount the brake the correct way up, I can probably even use the original Volvo cover with some minor trimming to fit the contour of the headlining and it should then look entirely factory... once I've carefully shaved the Volvo logo off the back of the housing of course.
-
Dave_16v
- BXpert
- Posts: 240
- Joined: Fri Aug 25, 2017 10:20 pm
- Location: Yorkshire
- My Cars: BX 16 Valve Ph 2 Current
BX 16 valve Ph 1 past
BX Gti past
BX Gti Auto past
ZX Volcane keeping others going - x 78
Re: C'est Bleriot - 1987 17RD Hatchback
It will fit in nicely when completed. I added one to my previous BX's, I suppose around the time they started to be standard on many cars, a useful modification for a car in regular use. Perhaps better keeping it old style rather than fitting led, that way it will be in keeping.
Afterthought
You will more than likely have considered this but if the light is not flush to glass within a cowl, you may find light escapes. With it not being fixed on the glass, it may be a problem. Just thought to mention it, worth checking if not already addressed.
Afterthought
You will more than likely have considered this but if the light is not flush to glass within a cowl, you may find light escapes. With it not being fixed on the glass, it may be a problem. Just thought to mention it, worth checking if not already addressed.
Prefer it to the Lamborghini, like Signor Gandini!
-
vulgalour
- BXpert
- Posts: 553
- Joined: Mon Feb 04, 2013 11:30 am
- Location: Kent
- My Cars: 1980 Austin Princess 1.7 HL
1987 Citroen BX 17RD - x 105
Re: C'est Bleriot - 1987 17RD Hatchback
The light leak shouldn't be an issue really, the brake light will only be on when I'm on the brake pedal so I'm not really sure how much of an issue it will be. If it proves problematic I can always build a shroud out of black foam or something so it meets the rear screen. We shall see, turns out I don't have any of the electrical bits and pieces I need to install it yet anyway, not even a soldering iron, so that's on my every expanding tools shopping list now.
--
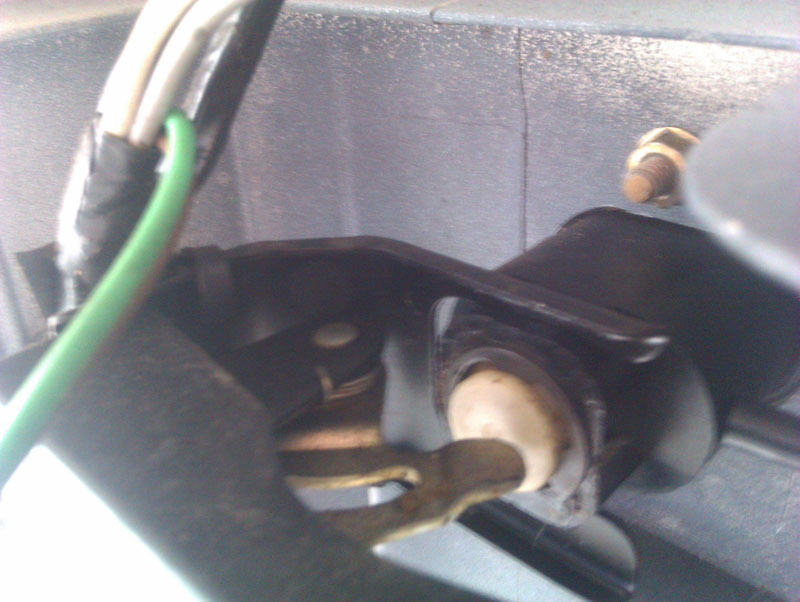
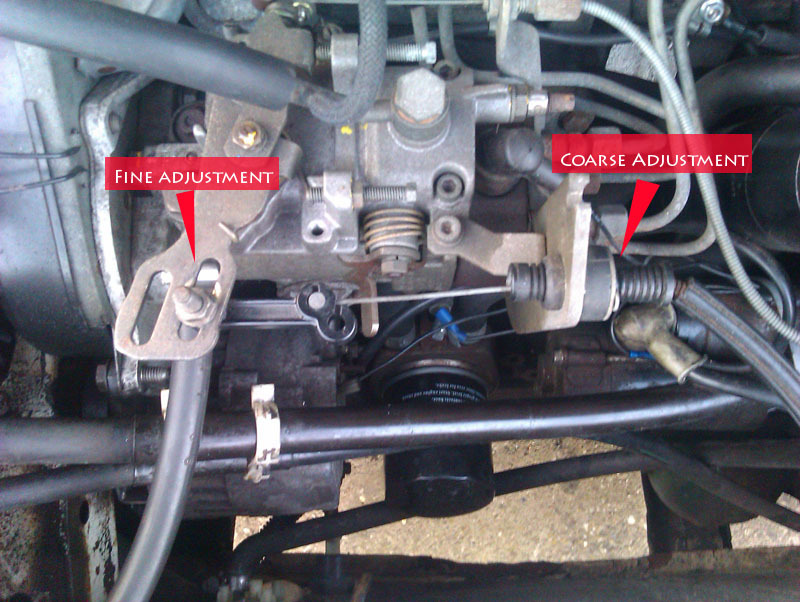
Had another go at adjusting the throttle cable now that I know the cable guide is actually also adjustment (thanks to user spartacus from another forum). Started by resetting the nut I'd previously adjusted back to where it was originally which introduced so much slack into the cable you an actually see it in this photo.
It seemed to work that the little clip (which yes, I did ping off into the engine bay and spent ages with a screwdriver digging it out from behind stuff, because of course I did) is coarse adjustment and the nut I'd previously adjusted was fine adjustment so now I have the cable retensioned as it was the first time I did it but, hopefully, properly this time. I moved the clip out by one ridge and moved the nut on the other part out a little to take up the slack so that things rested on the stop at the other end of the bracket on the left which I hope is the correct way of doing it.
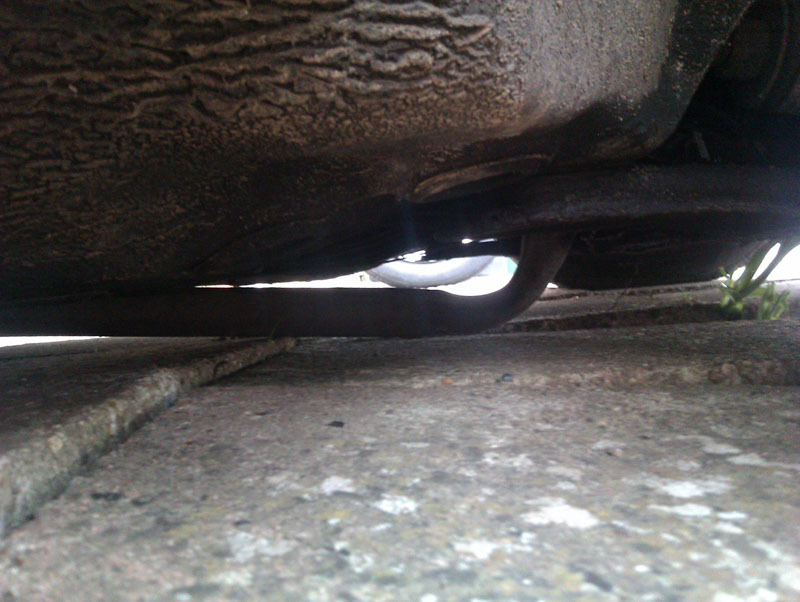
While I was doing that, and digging out the clip that pinged off, I could hear the exhaust tinging on something. Now, the exhaust has been a bit of a nuisance in that sometimes it clatters about but also didn't seem to be loose when I was trying to figure out what it was banging about against. Turns out, when the car has sat long enough to be right down on the floor the exhaust just touches the floor. There's not really anything I can do about that. The car isn't resting any weight on the exhaust, and I suspect if the drive was properly flat it wouldn't touch the exhaust like it is here, but at least that's another issue discovered.
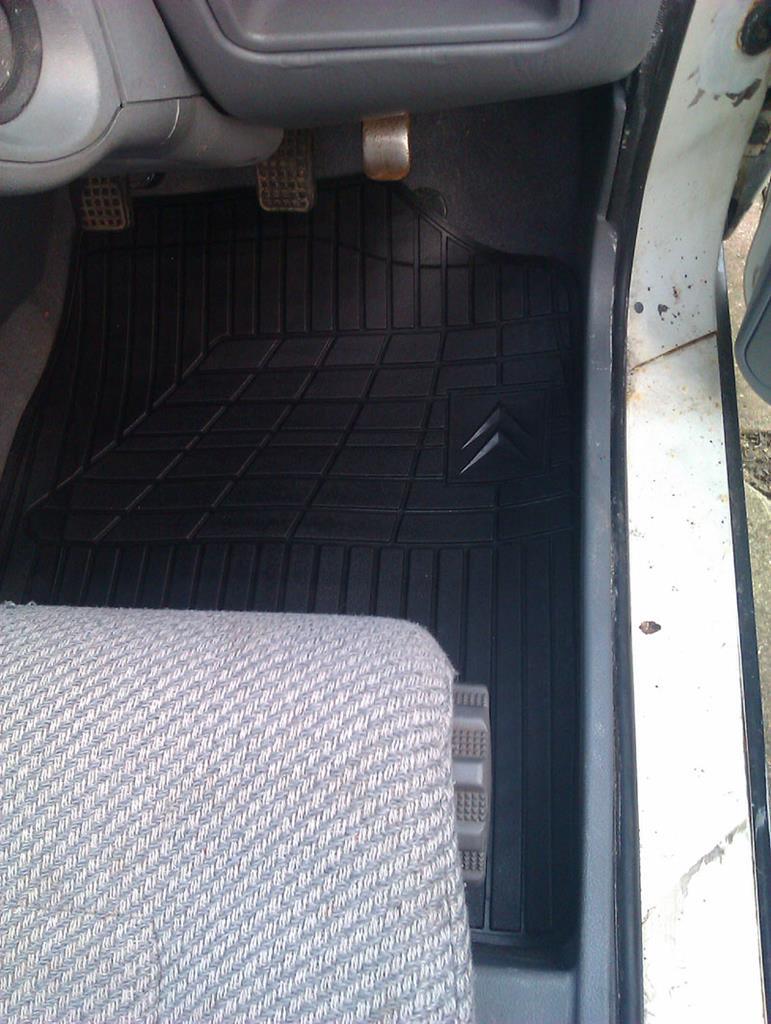
Recently I splashed out on some new Citroen floor mats too. They do look and fit better than the generic ones I had in there and now the inside of the car smells like a tyre shop.
My last point is a question for the Citroen botherers out there which is the rear suspension boots. I'm going to tackle this job soon, I'm hoping the spheres aren't totally seized in place and that my chain strap is going to be up to the task of removing them but, of course, we shall see. As far as I can work out, you do need to remove the spheres to replace the boots but when I do this, do I also need to replace any o-rings on the spheres? I would expect to have to. If I do have to replace them, where do I get them? It's an important component so I want to be sure of getting good quality replacement bits when I do the job.
--
Had another go at adjusting the throttle cable now that I know the cable guide is actually also adjustment (thanks to user spartacus from another forum). Started by resetting the nut I'd previously adjusted back to where it was originally which introduced so much slack into the cable you an actually see it in this photo.
It seemed to work that the little clip (which yes, I did ping off into the engine bay and spent ages with a screwdriver digging it out from behind stuff, because of course I did) is coarse adjustment and the nut I'd previously adjusted was fine adjustment so now I have the cable retensioned as it was the first time I did it but, hopefully, properly this time. I moved the clip out by one ridge and moved the nut on the other part out a little to take up the slack so that things rested on the stop at the other end of the bracket on the left which I hope is the correct way of doing it.
While I was doing that, and digging out the clip that pinged off, I could hear the exhaust tinging on something. Now, the exhaust has been a bit of a nuisance in that sometimes it clatters about but also didn't seem to be loose when I was trying to figure out what it was banging about against. Turns out, when the car has sat long enough to be right down on the floor the exhaust just touches the floor. There's not really anything I can do about that. The car isn't resting any weight on the exhaust, and I suspect if the drive was properly flat it wouldn't touch the exhaust like it is here, but at least that's another issue discovered.
Recently I splashed out on some new Citroen floor mats too. They do look and fit better than the generic ones I had in there and now the inside of the car smells like a tyre shop.
My last point is a question for the Citroen botherers out there which is the rear suspension boots. I'm going to tackle this job soon, I'm hoping the spheres aren't totally seized in place and that my chain strap is going to be up to the task of removing them but, of course, we shall see. As far as I can work out, you do need to remove the spheres to replace the boots but when I do this, do I also need to replace any o-rings on the spheres? I would expect to have to. If I do have to replace them, where do I get them? It's an important component so I want to be sure of getting good quality replacement bits when I do the job.
-
rutter123
- Over 2k
- Posts: 2695
- Joined: Sun Sep 02, 2012 9:54 pm
- Location: South Lincs
- My Cars: 90 Bx Tzd turbo ven red 295k
74 D Super 5 black
05 Volvo V50 2.0d 180k
65 Peugeot Boxer work van 280k - x 138
Re: C'est Bleriot - 1987 17RD Hatchback
Pleaides can supply the sphere seals, I would also recommend to fit new gator clamps as the nut and bolt will most likely be rusted and may break on removal, these are the double wire type clamps available from Chevronics @ £10 each or alternatively I sourced mine from a local aquatic/garden centre for £2
From memory they were 55-65mm
Try a sturdy ratchet strap for undoing the spheres as the handle should give you some leverage also put the car in service high but only just to crack them off, don't undo them any more, as this will hold the spheres rigid preventing any damage to pipes.
I usually reverse up onto some ramps for this to give better access.
90 BX Tzd turbo 294k SORN undergoing major surgery
90 BX Tzd turbo estate 46k awaiting surgery
65 Peugeot Boxer Van the new workhorse
52 Toyota Rav4 180k Bulletproof Jap reliability
90 BX Tzd turbo estate 46k awaiting surgery
65 Peugeot Boxer Van the new workhorse
52 Toyota Rav4 180k Bulletproof Jap reliability
-
vulgalour
- BXpert
- Posts: 553
- Joined: Mon Feb 04, 2013 11:30 am
- Location: Kent
- My Cars: 1980 Austin Princess 1.7 HL
1987 Citroen BX 17RD - x 105
Re: C'est Bleriot - 1987 17RD Hatchback
It's been suggested I don't need to remove the spheres to do the boots which, if true, would be ideal. I've already got the boots and new correct clamps since I expected the old ones to fall apart or need cutting off. I'll be relying on my sturdy axle stands rather than ramps. I really miss having access to a proper shop lift and indoor working space... oh well, we can't have everything.
-
xantia_v6
- BXpert
- Posts: 373
- Joined: Wed Dec 16, 2015 6:13 pm
- Location: here and there
- My Cars: Peugeot 308 CC
Citroen XM V6 ES9
Citroen Xantia V6
Jaguar XJ-S V12 - x 72
Re: C'est Bleriot - 1987 17RD Hatchback
The slotted adjustment that you have labelled "fine adjustment" is actually a range adjustment that varies the length of the crank on the pump so that the range of movement of the pump arm corresponds with the range of travel of the throttle pedal.
Neither of those are the idle speed adjustment, there should always be a little slack in the cable when the pedal is not pressed.
Neither of those are the idle speed adjustment, there should always be a little slack in the cable when the pedal is not pressed.