C'est Bleriot - 1987 17RD Hatchback
-
vulgalour
- BXpert
- Posts: 553
- Joined: Mon Feb 04, 2013 11:30 am
- Location: Kent
- My Cars: 1980 Austin Princess 1.7 HL
1987 Citroen BX 17RD - x 105
Re: C'est Bleriot - 1987 17RD Hatchback
I assume the idle speed is determined by the screw at the opposite end of the bracket to the throttle cable, something I left alone. I'm still learning, of course, and happy to be corrected on any mistakes I might make. I haven't adjusted the cable so that it's as tight as possible, only as far as needed to take up the slack without it moving the bracket off the stop. This mean there's still a little slack in the cable, but not so much it causes a noticeable delay or dead spot on the throttle pedal. I hope I'm explaining that in a way that makes sense.
-
vulgalour

- BXpert
- Posts: 553
- Joined: Mon Feb 04, 2013 11:30 am
- Location: Kent
- My Cars: 1980 Austin Princess 1.7 HL
1987 Citroen BX 17RD - x 105
Re: C'est Bleriot - 1987 17RD Hatchback
Right then, let's have a look at sorting these boots out before I have to go to work. Up we go.
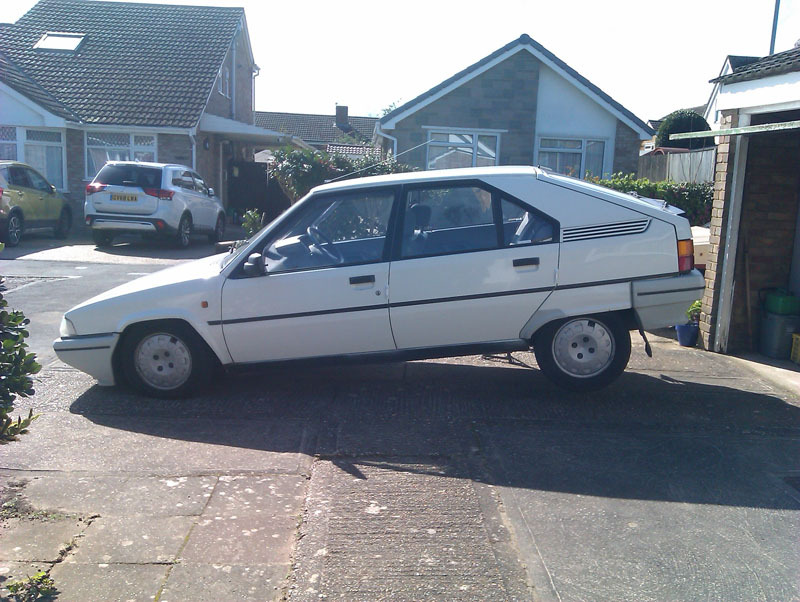
Nice tall axle stands gave me loads of access to see what I was doing for this. I wanted to try and find out what exactly was leaking. All the solid pipes and unions are bone dry, the only LHM is on the rubber bits of the boot and the parts of the suspension arm that hang down. A bit of a squish of the boots revealed a lot of splits and cracks so I'm confident the leak on this side is just the fact that the boot has given up. It's otherwise pretty tidy under here, there's a bit of surface corrosion here and there and it would certainly benefit from a good degrease and a splosh of underseal to keep things nice, which I shall do at a future date.
It had been suggested the boots can come off without removing the sphere. I'm jiggered if I can work out how you do that. Happily, the boot clamp on both sides unfastened with no resistance so at least I know they're not going to fight me when I do replace the boots. I don't have replacement spheres or new o-rings for the old spheres so I left the job at that for today. This is the side that's leaking occasionally, it's mostly getting past the outlets that go to the plastic lines, and the splits at the other end of the suspension unit to the displacer sphere, there's no wetness above the boot or displacer and there's no sign of any LHM being sprayed out at high pressure.
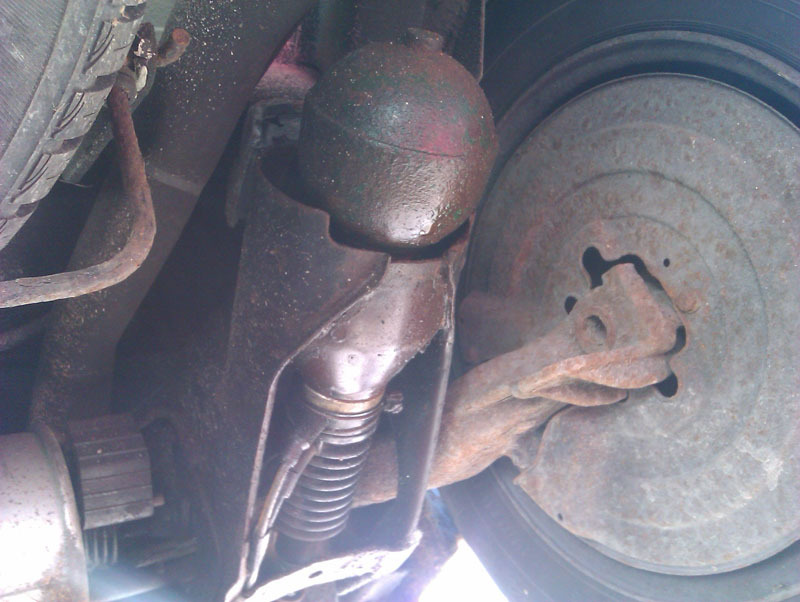
Now I'm wondering if it might be worth just doing the spheres at the same time. The ride is perfectly fine, I've no reason to suspect the rear spheres need replacing, it just feels like it makes sense to do it while I'm in here.

Nice tall axle stands gave me loads of access to see what I was doing for this. I wanted to try and find out what exactly was leaking. All the solid pipes and unions are bone dry, the only LHM is on the rubber bits of the boot and the parts of the suspension arm that hang down. A bit of a squish of the boots revealed a lot of splits and cracks so I'm confident the leak on this side is just the fact that the boot has given up. It's otherwise pretty tidy under here, there's a bit of surface corrosion here and there and it would certainly benefit from a good degrease and a splosh of underseal to keep things nice, which I shall do at a future date.
It had been suggested the boots can come off without removing the sphere. I'm jiggered if I can work out how you do that. Happily, the boot clamp on both sides unfastened with no resistance so at least I know they're not going to fight me when I do replace the boots. I don't have replacement spheres or new o-rings for the old spheres so I left the job at that for today. This is the side that's leaking occasionally, it's mostly getting past the outlets that go to the plastic lines, and the splits at the other end of the suspension unit to the displacer sphere, there's no wetness above the boot or displacer and there's no sign of any LHM being sprayed out at high pressure.

Now I'm wondering if it might be worth just doing the spheres at the same time. The ride is perfectly fine, I've no reason to suspect the rear spheres need replacing, it just feels like it makes sense to do it while I'm in here.
-
xantia_v6
- BXpert
- Posts: 353
- Joined: Wed Dec 16, 2015 6:13 pm
- Location: here and there
- My Cars: Peugeot 308 CC
Citroen XM V6 ES9
Citroen Xantia V6
Jaguar XJ-S V12 - x 61
Re: C'est Bleriot - 1987 17RD Hatchback
You should also check the possibility that the cylinder flange that the sphere seals against has corroded, causing the seal to be displaced and leaking. This is not unusual of Xantias in the UK and probably also possible on BXs.
-
vulgalour

- BXpert
- Posts: 553
- Joined: Mon Feb 04, 2013 11:30 am
- Location: Kent
- My Cars: 1980 Austin Princess 1.7 HL
1987 Citroen BX 17RD - x 105
Re: C'est Bleriot - 1987 17RD Hatchback
Can that be checked with the sphere in situ, or does it need to be removed? Everything under the boot looked very clean, no signs of corrosion on the bits I could see.
-
xantia_v6
- BXpert
- Posts: 353
- Joined: Wed Dec 16, 2015 6:13 pm
- Location: here and there
- My Cars: Peugeot 308 CC
Citroen XM V6 ES9
Citroen Xantia V6
Jaguar XJ-S V12 - x 61
Re: C'est Bleriot - 1987 17RD Hatchback
You need to take the sphere off and look at the edges of the recess that the sphere sits in.
Here is a link to one on FCF with a photo of the problem https://frenchcarforum.co.uk/forum/view ... 42#p361442
Note that sphere seals are almost always reusable, I can't remember one leaking after swapping spheres.
Here is a link to one on FCF with a photo of the problem https://frenchcarforum.co.uk/forum/view ... 42#p361442
Note that sphere seals are almost always reusable, I can't remember one leaking after swapping spheres.
-
vulgalour

- BXpert
- Posts: 553
- Joined: Mon Feb 04, 2013 11:30 am
- Location: Kent
- My Cars: 1980 Austin Princess 1.7 HL
1987 Citroen BX 17RD - x 105
Re: C'est Bleriot - 1987 17RD Hatchback
Right then, loads of useful tips and info were got since the last post on various fora so today I felt I could have another go at this job. It's not actually too terrible a job apart from one bit of it, we'll come to that momentarily. The job is, of course, changing the rear suspension boots. Fairly simple on the face of it since you've only actually got to disconnect 4 items, and one of them isn't the suspension sphere/displacer.
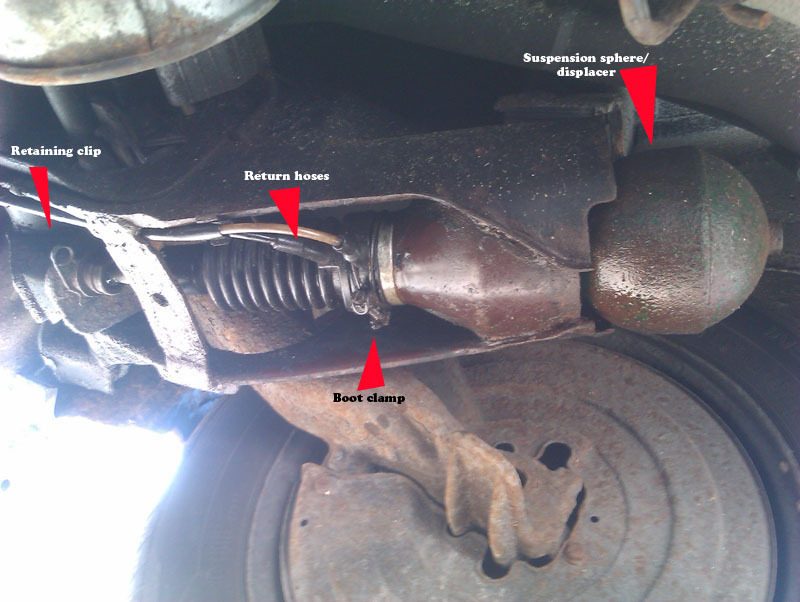
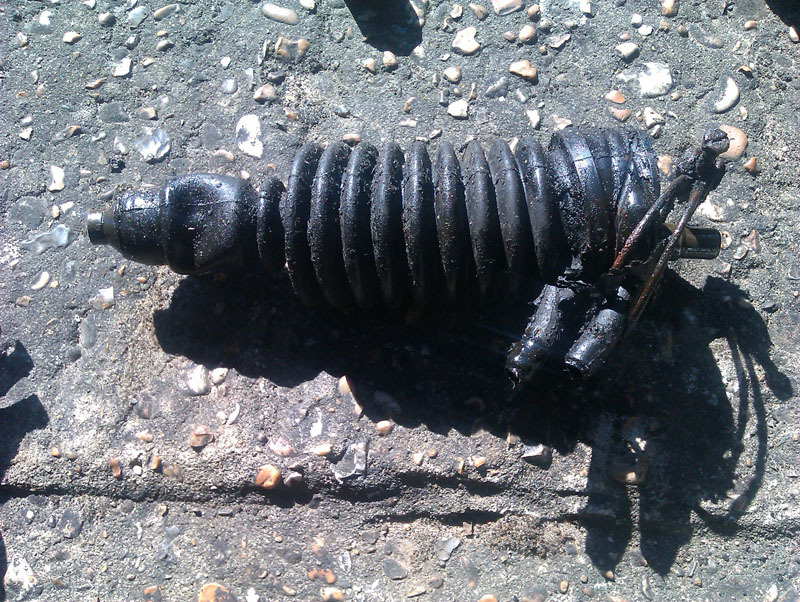
I had got differing information from owners, manuals, and online guides on how to do this job and expected to have to remove the suspension sphere, happily this isn't the case. The problem I was addressing is that the boot on the driver's side particularly was leaking from various splits and cracks in the rubber. The passenger side one had been gummed up with sealant in the past. The first job is to undo the boot clamp, fortunately both boot clamps on my car weren't rusted solid and undid really easily. Likewise the retaining clip at the other end which just pulls out (the passenger side one was in much better condition). The bit I was getting stuck with was getting the long rod out of the cup it pushes into on the suspension arm, with gentle application of a bolster chisel and hammer, I got it unseated and then the rod, boot, and clamp could all be wiggled free. Happily, all the bits that need to not be rusty looked nice and rust free and while there was some evidence of moisture ingress here, it wasn't severe enough to have done more than turn the LHM a bit brown.
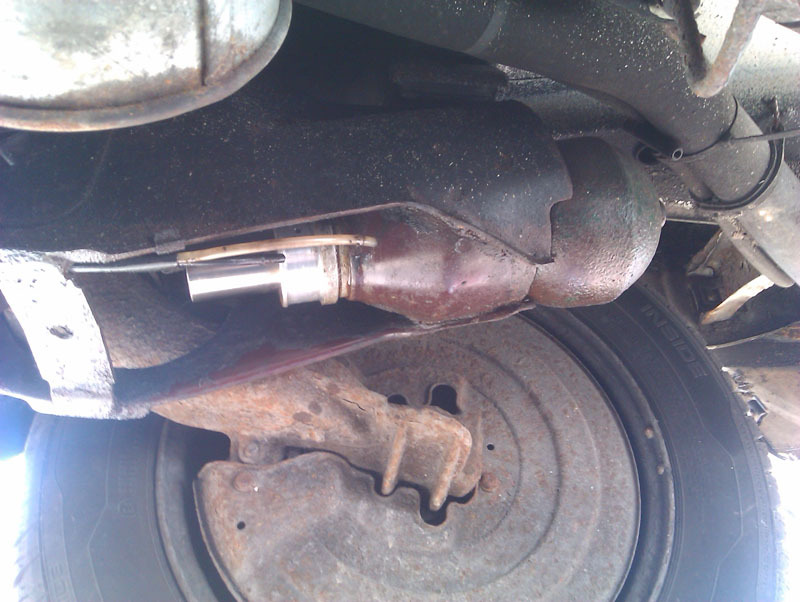
On the rod, the hole is what the retaining clip pushes through to hold it in place, with the conical section sitting in a cup on the suspension arm on the car. The conical portion gets stuck sometimes, so by giving it a tap on any of the ridged section, putting the force back towards the displacer rather than trying to rotate this part in its housing, it comes unstuck and you can remove it.
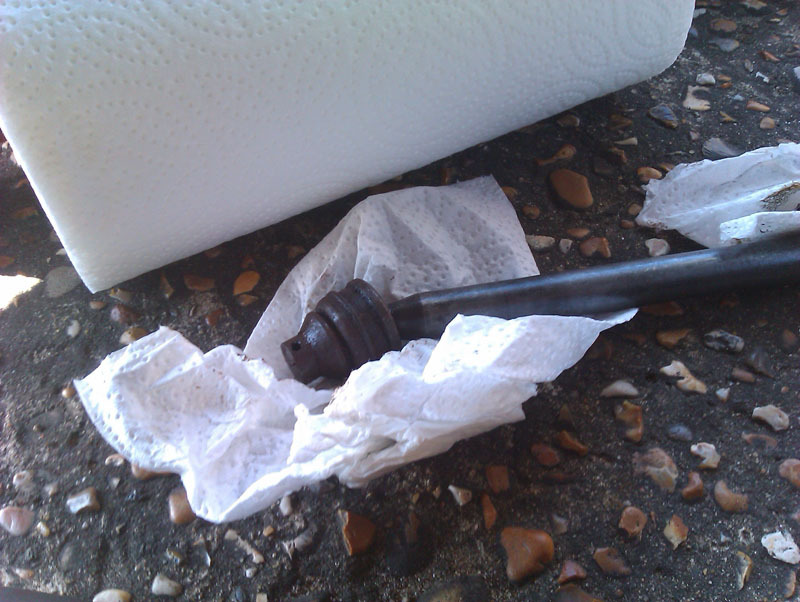
It was in pretty good shape too and I gave it a good clean before reinstalling so I didn't introduce any unwanted grit or dirt into the system. Cleanliness is vital with the LHM system and another reason for me wanting to do these boots since they make sure everything stays clean. The old boot on the driver's side was much worse when removed than it looked on the car, even without squishing it to expose all the cracks and splits you could still see some fairly serious ones.
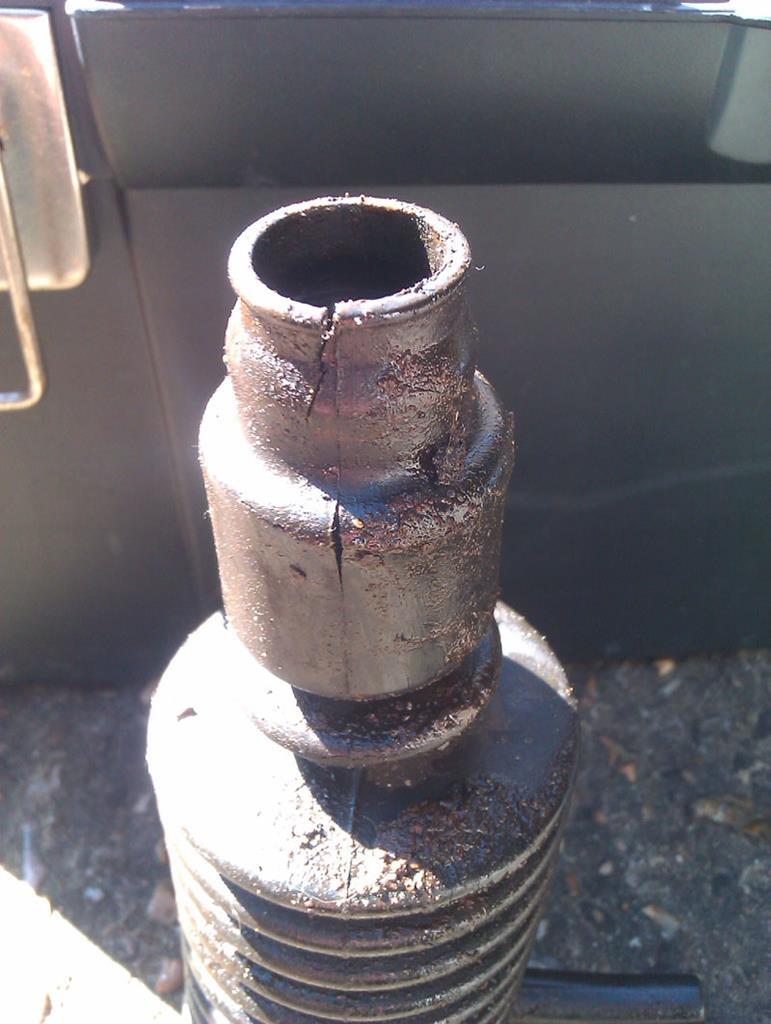
Then I came unstuck. To fit the new boot I need to get the rod seated properly in it. Standing the rod on a cloth to protect it from damage, I slid the boot over the conical end and, with a good amount of force, got the boot almost fully seated. The issue then was I didn't have enough hands to pull the boot down and ease out the tiny collar into the recess it needs to sit in so had to employ the other half to pull down on the boot while I extremely carefully used a flat bladed screwdriver to ease the small collar of the boot into place. I had tried to do the boot various different ways and this was the only approach I found that worked and it was the only difficult part of the whole job. On the passenger side I learned that if you do a little bit of forward planning you can line up the outlets for the return hoses with the hole for the retaining clip so it's easier to install back on the car... I learned that after getting the driver's side one slightly out of alignment.
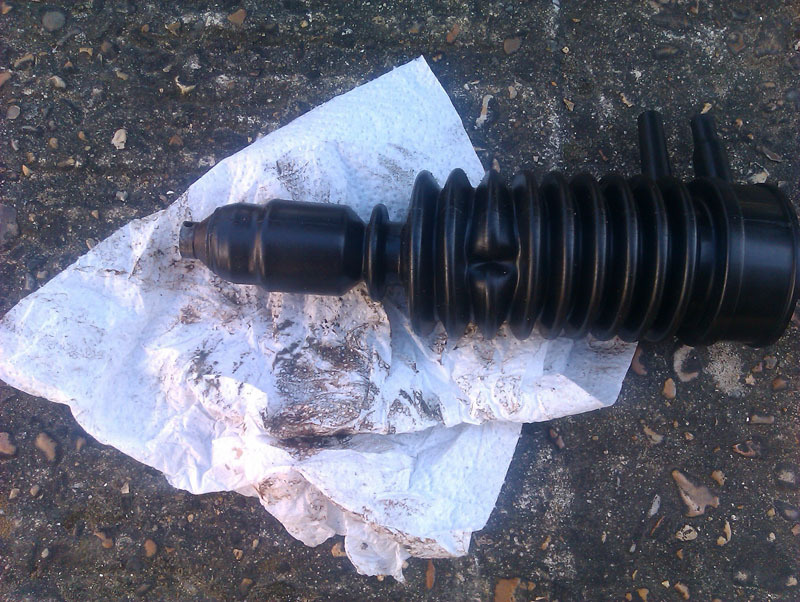
Installing is a case of wiggling the whole thing back into place, being sure to keep the hose clamp on the boot as you feed everything in because once the rod is in place you cannot get the clamp in. Also remember to put one of the outlet stubs through between the two wires of the clamp. A bit of gentle persuasion gets the big end of the boot to seal over the large metal collar before tightening the clamp. For the return hoses, I found them easier to locate by gripping them with some blunt nose pliers, any amount of LHM on anything was just making the plastic and rubber impossible to manipulate otherwise. Then slot the rod back into it's cup and finegle it round so the R clip can be pushed home. Job done. Then repeat the whole thing on the passenger side. The boot on the passenger side wasn't leaking but had been gummed up in places with black sealant so presumably was leaking at some point, it was also in far better condition than the passenger side one and the LHM inside the boot was much greener and more copious so clearly this side the boot was doing its job properly.
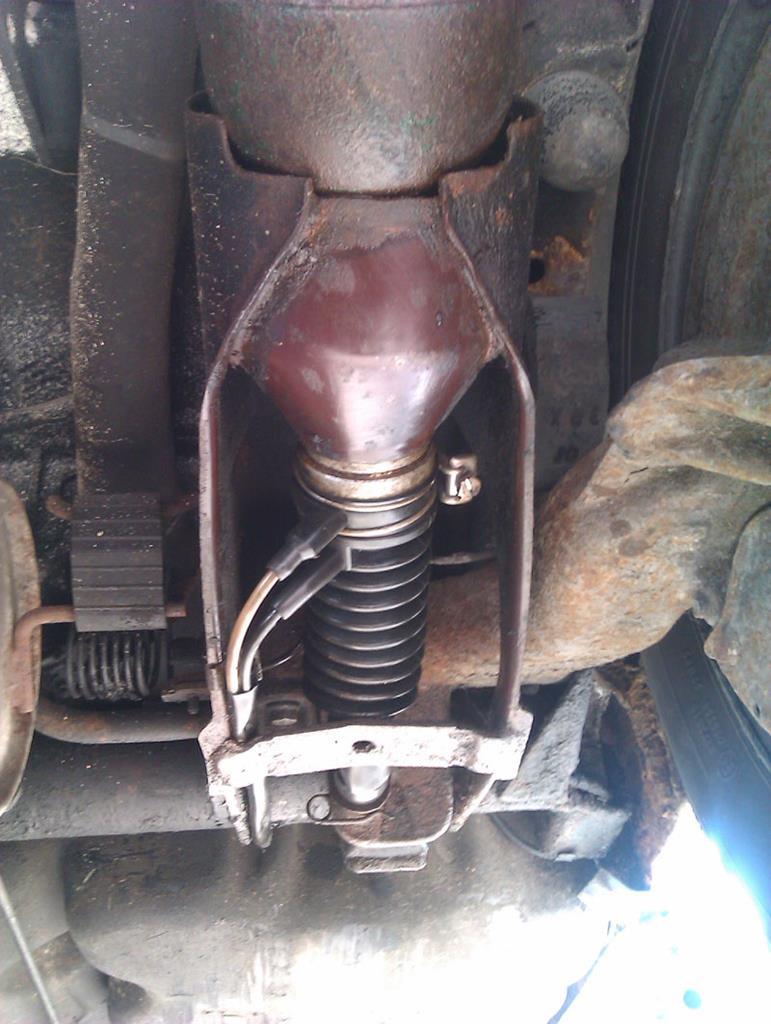
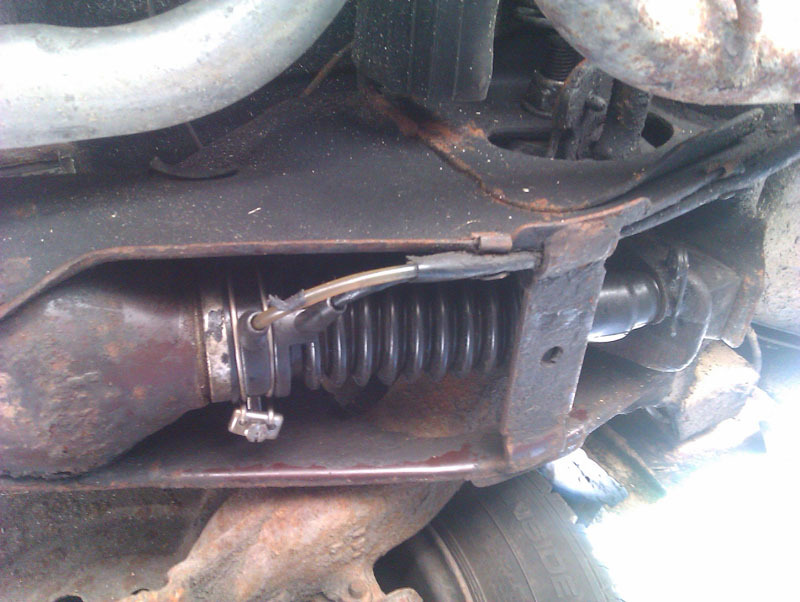
With the boots installed, I wiped away any fluid and loose dirt and watched to see if anything reappeared. Initial signs are promising.
Ran the car for a little while, put it back in its usual spot, and so far there's been no reappearance of any LHM so I'm cautiously optimistic about that. I know I've cured at least some of the LHM leak on the driver's side now and if it turns out the displacer seal or sealing face is damaged and leaking, we'll soon find out. Initial signs are quite promising. As soon as the new clamps arrive I can get the new hose fitted properly and hopefully that'll be an end of the air ingress into the fuel system and will mark the curing of all the known issues on the car.

I had got differing information from owners, manuals, and online guides on how to do this job and expected to have to remove the suspension sphere, happily this isn't the case. The problem I was addressing is that the boot on the driver's side particularly was leaking from various splits and cracks in the rubber. The passenger side one had been gummed up with sealant in the past. The first job is to undo the boot clamp, fortunately both boot clamps on my car weren't rusted solid and undid really easily. Likewise the retaining clip at the other end which just pulls out (the passenger side one was in much better condition). The bit I was getting stuck with was getting the long rod out of the cup it pushes into on the suspension arm, with gentle application of a bolster chisel and hammer, I got it unseated and then the rod, boot, and clamp could all be wiggled free. Happily, all the bits that need to not be rusty looked nice and rust free and while there was some evidence of moisture ingress here, it wasn't severe enough to have done more than turn the LHM a bit brown.

On the rod, the hole is what the retaining clip pushes through to hold it in place, with the conical section sitting in a cup on the suspension arm on the car. The conical portion gets stuck sometimes, so by giving it a tap on any of the ridged section, putting the force back towards the displacer rather than trying to rotate this part in its housing, it comes unstuck and you can remove it.

It was in pretty good shape too and I gave it a good clean before reinstalling so I didn't introduce any unwanted grit or dirt into the system. Cleanliness is vital with the LHM system and another reason for me wanting to do these boots since they make sure everything stays clean. The old boot on the driver's side was much worse when removed than it looked on the car, even without squishing it to expose all the cracks and splits you could still see some fairly serious ones.

Then I came unstuck. To fit the new boot I need to get the rod seated properly in it. Standing the rod on a cloth to protect it from damage, I slid the boot over the conical end and, with a good amount of force, got the boot almost fully seated. The issue then was I didn't have enough hands to pull the boot down and ease out the tiny collar into the recess it needs to sit in so had to employ the other half to pull down on the boot while I extremely carefully used a flat bladed screwdriver to ease the small collar of the boot into place. I had tried to do the boot various different ways and this was the only approach I found that worked and it was the only difficult part of the whole job. On the passenger side I learned that if you do a little bit of forward planning you can line up the outlets for the return hoses with the hole for the retaining clip so it's easier to install back on the car... I learned that after getting the driver's side one slightly out of alignment.

Installing is a case of wiggling the whole thing back into place, being sure to keep the hose clamp on the boot as you feed everything in because once the rod is in place you cannot get the clamp in. Also remember to put one of the outlet stubs through between the two wires of the clamp. A bit of gentle persuasion gets the big end of the boot to seal over the large metal collar before tightening the clamp. For the return hoses, I found them easier to locate by gripping them with some blunt nose pliers, any amount of LHM on anything was just making the plastic and rubber impossible to manipulate otherwise. Then slot the rod back into it's cup and finegle it round so the R clip can be pushed home. Job done. Then repeat the whole thing on the passenger side. The boot on the passenger side wasn't leaking but had been gummed up in places with black sealant so presumably was leaking at some point, it was also in far better condition than the passenger side one and the LHM inside the boot was much greener and more copious so clearly this side the boot was doing its job properly.

With the boots installed, I wiped away any fluid and loose dirt and watched to see if anything reappeared. Initial signs are promising.


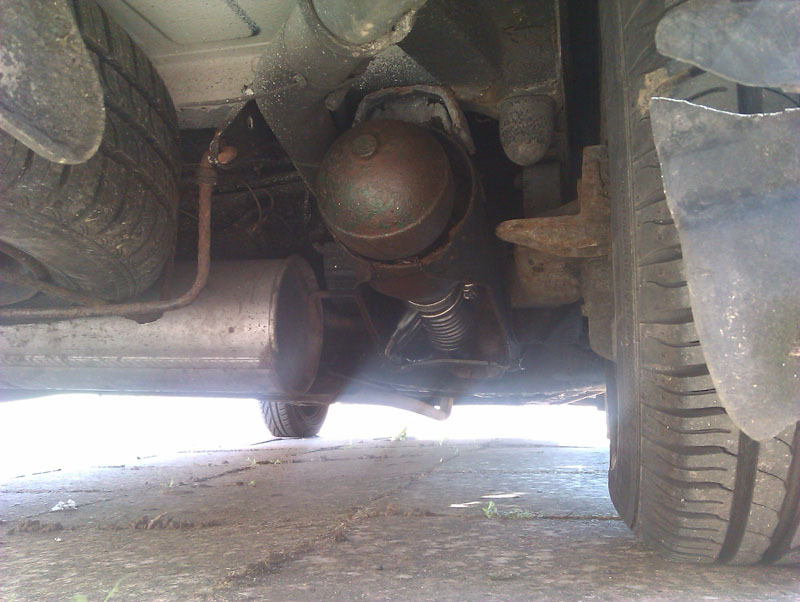
Ran the car for a little while, put it back in its usual spot, and so far there's been no reappearance of any LHM so I'm cautiously optimistic about that. I know I've cured at least some of the LHM leak on the driver's side now and if it turns out the displacer seal or sealing face is damaged and leaking, we'll soon find out. Initial signs are quite promising. As soon as the new clamps arrive I can get the new hose fitted properly and hopefully that'll be an end of the air ingress into the fuel system and will mark the curing of all the known issues on the car.

-
Tim Leech

- Over 2k
- Posts: 15625
- Joined: Tue Apr 15, 2008 11:12 am
- Location: Derbyshire
- My Cars: Various
- x 174
-
vulgalour

- BXpert
- Posts: 553
- Joined: Mon Feb 04, 2013 11:30 am
- Location: Kent
- My Cars: 1980 Austin Princess 1.7 HL
1987 Citroen BX 17RD - x 105
Re: C'est Bleriot - 1987 17RD Hatchback
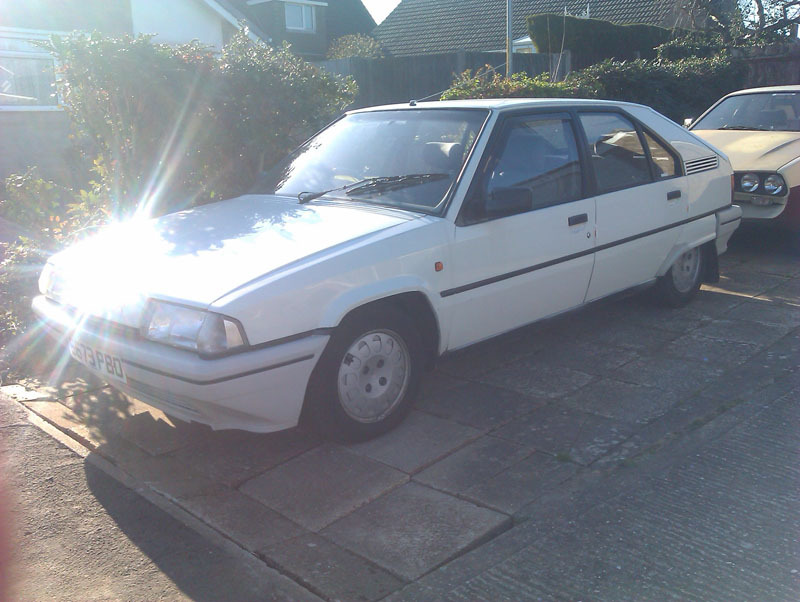
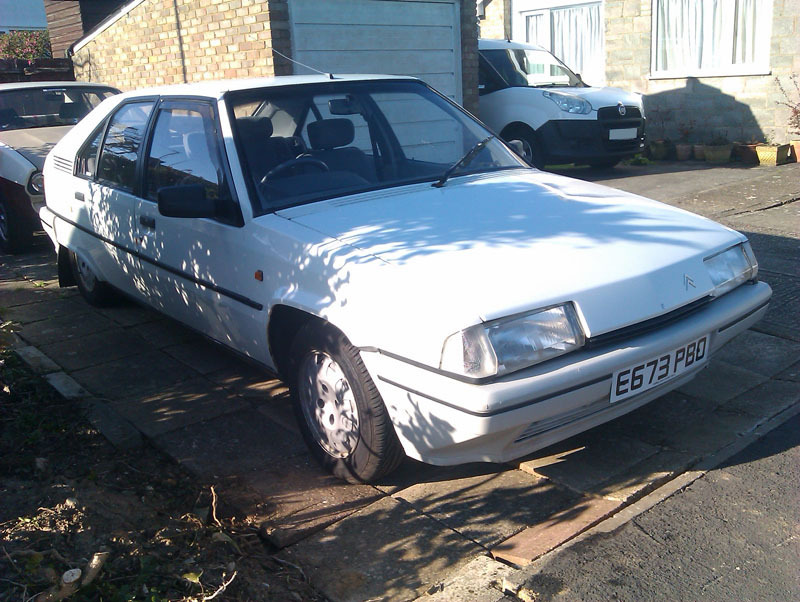
Was at a loose end so did another job on the BX, this time fitting the new front bumper trims. I can see why the ears pop off, they don't fit particularly well and glue wouldn't improve that. Still, it's nicer looking now than it was with the missing ears and the dull, split, grey trims that were on there.


-
Dave_16v

- BXpert
- Posts: 217
- Joined: Fri Aug 25, 2017 10:20 pm
- Location: Yorkshire
- My Cars: BX 16 Valve Ph 2 Current
BX 16 valve Ph 1 past
BX Gti past
BX Gti Auto past
ZX Volcane keeping others going - x 68
Re: C'est Bleriot - 1987 17RD Hatchback
Well done fitting the boots. What you said earlier about a lift compared to stands is right, looking after these old cars is a lot better with the correct set up. Working with stands is OK but when it comes to awkward sized bolts in tricky places as well as other tasks, a lift is so much nicer. It can make an easy job of many things, fitting an exhaust for example. You may have slightly tender neck muscles for a day or so depending in how long you spent holding your head up.
Prefer it to the Lamborghini, like Signor Gandini!


-
vulgalour

- BXpert
- Posts: 553
- Joined: Mon Feb 04, 2013 11:30 am
- Location: Kent
- My Cars: 1980 Austin Princess 1.7 HL
1987 Citroen BX 17RD - x 105
Re: C'est Bleriot - 1987 17RD Hatchback
Do you know what, I have had a sore neck after doing that job. It's been a few years since I did spannering on the floor outside so there's certain aches and pains I forgot it generates.
--
New clamps arrived today so I could get the new hose fitted to replace the clear stuff.
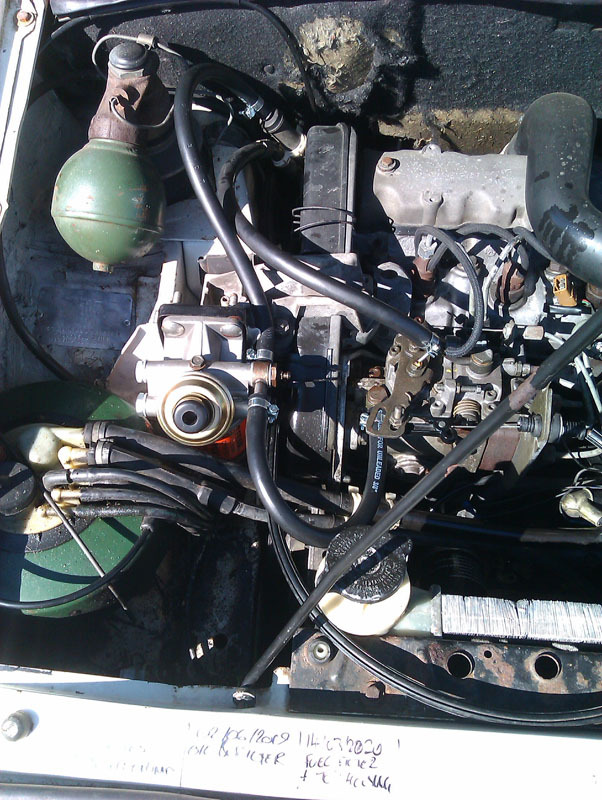
The new clamps are those that have an offset bolt, rather than the worm-drive type that was on there. I added a clamp to the return hose too though I'm not sure that will make any difference. Gave the car a couple of starts with rests in between and it seems much more willing to start, it also seems to idle a little more evenly. Hopefully this has cured the air ingress issue. Checked under the back of the car and am pleased to report there's no sign of fresh LHM leaking out. At the moment that means all of the outstanding running issues on the BX are fixed. Cosmetic fettling will be next, there's a few blemishes on the bodywork I'd like to have sorted while they are just blemishes, and I'm hunting for a few plastic trim items.
In fact, here's what I'm after on this car:
- Non-faded seats in the correct grey tweed
- Better quality grey carpet
- Grey grab handles/arm rests
- Passenger side interior A pillar trim
- Passenger side interior lower B pillar trim
- Passenger side interior C pillar trim
- Passenger front door seal
- Headlining, non-sunroof type
- Headlight protectors
- Door handle scratch protectors
- Headlight adjusters, the round threaded plastic part that the adjuster rod screws into
Any period Citroen original accessories would be neat too. My goal with this car is still to keep it factory and any additions made to it are in period and, ideally, actual Citroen options.
--
New clamps arrived today so I could get the new hose fitted to replace the clear stuff.

The new clamps are those that have an offset bolt, rather than the worm-drive type that was on there. I added a clamp to the return hose too though I'm not sure that will make any difference. Gave the car a couple of starts with rests in between and it seems much more willing to start, it also seems to idle a little more evenly. Hopefully this has cured the air ingress issue. Checked under the back of the car and am pleased to report there's no sign of fresh LHM leaking out. At the moment that means all of the outstanding running issues on the BX are fixed. Cosmetic fettling will be next, there's a few blemishes on the bodywork I'd like to have sorted while they are just blemishes, and I'm hunting for a few plastic trim items.
In fact, here's what I'm after on this car:
- Non-faded seats in the correct grey tweed
- Better quality grey carpet
- Grey grab handles/arm rests
- Passenger side interior A pillar trim
- Passenger side interior lower B pillar trim
- Passenger side interior C pillar trim
- Passenger front door seal
- Headlining, non-sunroof type
- Headlight protectors
- Door handle scratch protectors
- Headlight adjusters, the round threaded plastic part that the adjuster rod screws into
Any period Citroen original accessories would be neat too. My goal with this car is still to keep it factory and any additions made to it are in period and, ideally, actual Citroen options.
-
Tim Leech

- Over 2k
- Posts: 15625
- Joined: Tue Apr 15, 2008 11:12 am
- Location: Derbyshire
- My Cars: Various
- x 174
Re: C'est Bleriot - 1987 17RD Hatchback
Finding the correct seats will be a real pain, as they were only fitted to the Mk2 from 86-87.
I know of a 19RD estate with some in , but they may be just as faded.
if you haven't already look up "rust in peace" on this forum.
Are the carpets worn, or just dirty? I find taking them out and jet washing them does the trick
Cheers
I know of a 19RD estate with some in , but they may be just as faded.
if you haven't already look up "rust in peace" on this forum.
Are the carpets worn, or just dirty? I find taking them out and jet washing them does the trick
Cheers
Lots of Motors, mostly semi broken....
-
vulgalour

- BXpert
- Posts: 553
- Joined: Mon Feb 04, 2013 11:30 am
- Location: Kent
- My Cars: 1980 Austin Princess 1.7 HL
1987 Citroen BX 17RD - x 105
Re: C'est Bleriot - 1987 17RD Hatchback
My back-up plan for the seats is to retrim them myself if I can't find replacements and one thing I've learned with this car is that correct trim for it is quite difficult to acquire. The rarity of it is why I'm trying my best to return it all to really nice condition and factory, even though I'm fully aware it's not a particularly valuable car. Even if I could find seats that were slightly faded it would be an improvement over the ones I've got which have gone a purple-blue in places where the sun has hit them hardest.
Had a good look through the Rust In Peace https://www.bxclub.co.uk/forum/viewtopic.php?t=17904 thread just now and that's a lot of lovely BX spares. I imagine the interior plastics I'm after are in one or more of those cars, possibly even a non-warped white plastic bonnet too and a driver's door window that doesn't have welder splatter in it...
My carpets are mostly suffering from fading with the exception of the driver's footwell that has some greeny-yellow stains that won't shift. The carpet has been jetwashed and shampooed a couple of times which did improve them, but nicer ones would be, well, nicer. The rubber mats hide the worst of the appearance issues so they're fine for now.
It also looks like this one might have a self-coloured white bumper rather than a painted one, that's another big item on my wishlist.
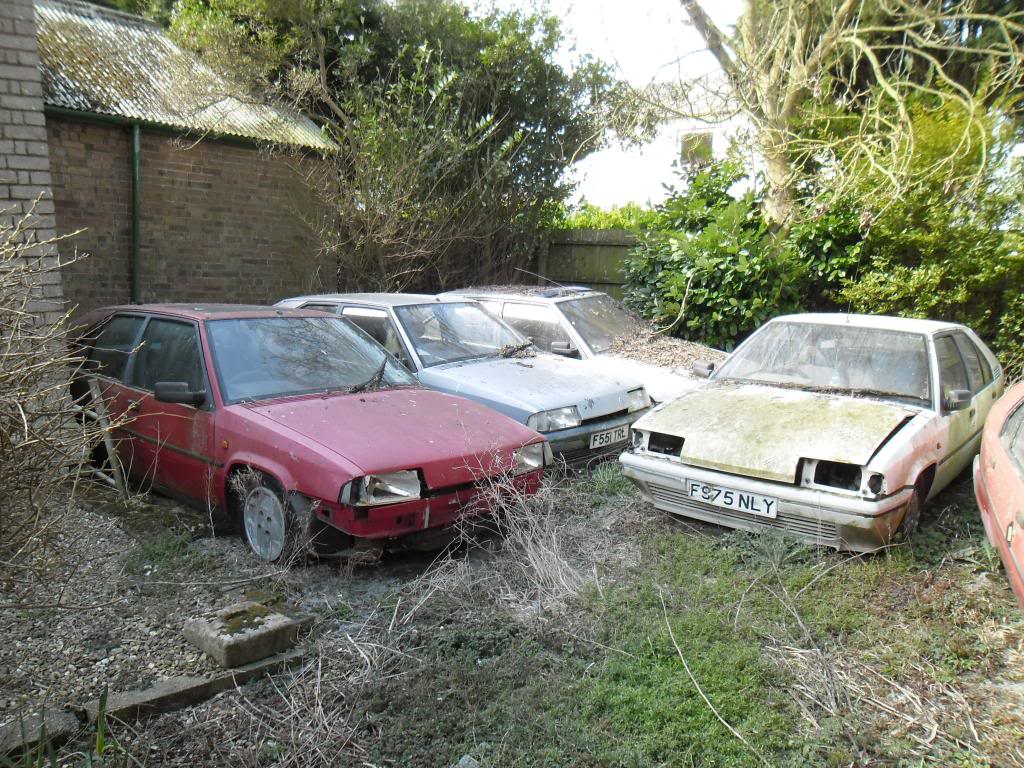
Bit of a treasure trove that place and the prices from the thread, while a few years ago, don't seem too horrendous really. The best course I expect is to get in touch and make a trip in my own BX and see what can be acquired, it would certainly make life easier to be able to swap things like bonnets and bumpers while I was there if possible so I didn't have to try and squeeze everything into the car.
Had a good look through the Rust In Peace https://www.bxclub.co.uk/forum/viewtopic.php?t=17904 thread just now and that's a lot of lovely BX spares. I imagine the interior plastics I'm after are in one or more of those cars, possibly even a non-warped white plastic bonnet too and a driver's door window that doesn't have welder splatter in it...
My carpets are mostly suffering from fading with the exception of the driver's footwell that has some greeny-yellow stains that won't shift. The carpet has been jetwashed and shampooed a couple of times which did improve them, but nicer ones would be, well, nicer. The rubber mats hide the worst of the appearance issues so they're fine for now.
It also looks like this one might have a self-coloured white bumper rather than a painted one, that's another big item on my wishlist.

Bit of a treasure trove that place and the prices from the thread, while a few years ago, don't seem too horrendous really. The best course I expect is to get in touch and make a trip in my own BX and see what can be acquired, it would certainly make life easier to be able to swap things like bonnets and bumpers while I was there if possible so I didn't have to try and squeeze everything into the car.
-
vulgalour

- BXpert
- Posts: 553
- Joined: Mon Feb 04, 2013 11:30 am
- Location: Kent
- My Cars: 1980 Austin Princess 1.7 HL
1987 Citroen BX 17RD - x 105
Re: C'est Bleriot - 1987 17RD Hatchback
Had a nosey underneath the BX after tidying away the gardening tools. Slightly disappointed to see LHM weeping from the displacer union, presumably where it screws in since that's where the LHM looks to be collecting. The boot itself is nice and LHM-tight and there's only the tiniest spot of LHM on the floor, this is after 5 days of the car being sat idle which is when it leaks the most. Previously, it was leaving a much more obvious puddle at rest. The issue was also intermittent previously, it seems to stop leaking when the suspension is under pressure, it only leaks when it's depressurised, so I assume whatever damage there is on the sealing surface is getting filled by the rubber o ring when the system is under pressure. 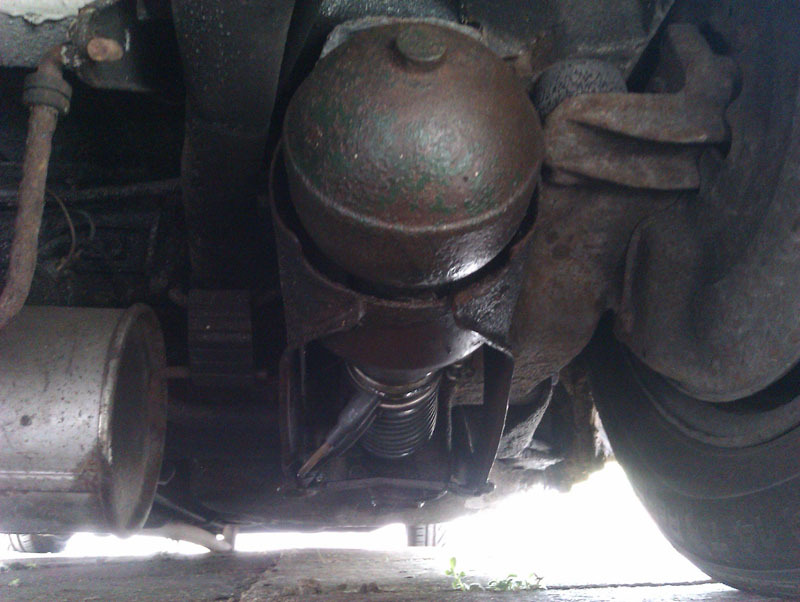
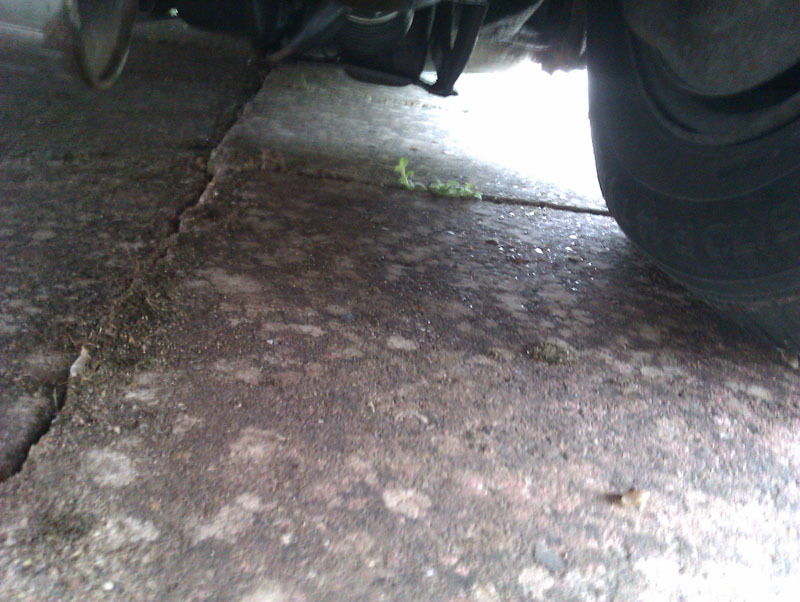
Slightly disappointing that one. At best I will need to fit a new o-ring, at worst it's going to need a new one of the bits the displacer screws into and possible new displacers. At least I can now see the issue since replacing the boots.


Slightly disappointing that one. At best I will need to fit a new o-ring, at worst it's going to need a new one of the bits the displacer screws into and possible new displacers. At least I can now see the issue since replacing the boots.
-
vulgalour

- BXpert
- Posts: 553
- Joined: Mon Feb 04, 2013 11:30 am
- Location: Kent
- My Cars: 1980 Austin Princess 1.7 HL
1987 Citroen BX 17RD - x 105
Re: C'est Bleriot - 1987 17RD Hatchback
Had to do an essential run in the BX, first time I've taken a car out in a month. It was a bit slow to fire up, which I expected given the time it's been sat idle, and was then fine until heading home. At one junction while waiting for a gap in the traffic the idle started dropping and then, when I tried to set off, the car just stalled. Fired up no bother and we carried on until a couple of junctions later when it tried to do it again. Did it a third time when I stopped so I could three-point-turn into the drive. Perplexed, I had a look under the bonnet for leaks both with the car running and at idle and couldn't find anything. I also couldn't get the car to repeat this stalling trick.
Could it be residual air working out of the system? Could it be another problem? Is this a thing they do when they've been stood a while? Answers on a postcard, please.
Could it be residual air working out of the system? Could it be another problem? Is this a thing they do when they've been stood a while? Answers on a postcard, please.
-
vulgalour

- BXpert
- Posts: 553
- Joined: Mon Feb 04, 2013 11:30 am
- Location: Kent
- My Cars: 1980 Austin Princess 1.7 HL
1987 Citroen BX 17RD - x 105
Re: C'est Bleriot - 1987 17RD Hatchback
Had another look at this today to see if I could find anything amiss. The car isn't keen on starting, or restarting, and the injection pump is now making a wubbawubba sort of a noise so I guess that means something in the pump is on its way out. The wubbawubba gets quieter the longer the car is running, but it required two attempts to start with or without priming, as though the pump wasn't pulling fuel through quickly enough. The wubbawubba noise is similar to the one that a mechanical fuel pump diaphragm makes, that sort of wobble board meets air sucked through a straw type of noise. I couldn't capture it on my phone because the engine drowns out the rest of the noise.
No diesel leaking out anywhere and while I'd like to say there was no air getting in, since I don't have see-through fuel hoses I can't say that for certain. Once running the car is fine and try as I might I can't get it to repeat the stalling issue.
So I guess at a minimum an injection pump rebuild is on the cards to try and resolve this issue. My concern is that the badly filtered used veg oil remains I found in the bottom of the fuel filter housing has perhaps but excessive strain on the pump and simply worn it out, which would mean replacement is the only option. I don't know though, I'm learning as I go here on this one and not entirely sure what the wisest course of action is from here.