C'est Bleriot - 1987 17RD Hatchback

Tell us about life with your BX, or indeed life in general!
Post Reply
User avatar
vulgalour
BXpert
Posts: 553
Joined: Mon Feb 04, 2013 11:30 am
Location: Kent
My Cars: 1980 Austin Princess 1.7 HL
1987 Citroen BX 17RD
x 105

Re: C'est Bleriot - 1987 17RD Hatchback

Post by vulgalour »

It would if I knew where that lived. There is a metal cylinder thing on the return line near the bulkhead on the timing belt side so I imagine it could be that? There's certainly nothing lower down on the back of the engine, and nothing on the feed line that I've replaced. Also, I don't think that even if that is the fuel preheater I've been told about that it's the problem here, because an air leak on a return line surely wouldn't make any difference to the running since the air is going to get back to the fuel tank and just float to the top and not be fed back to the front.

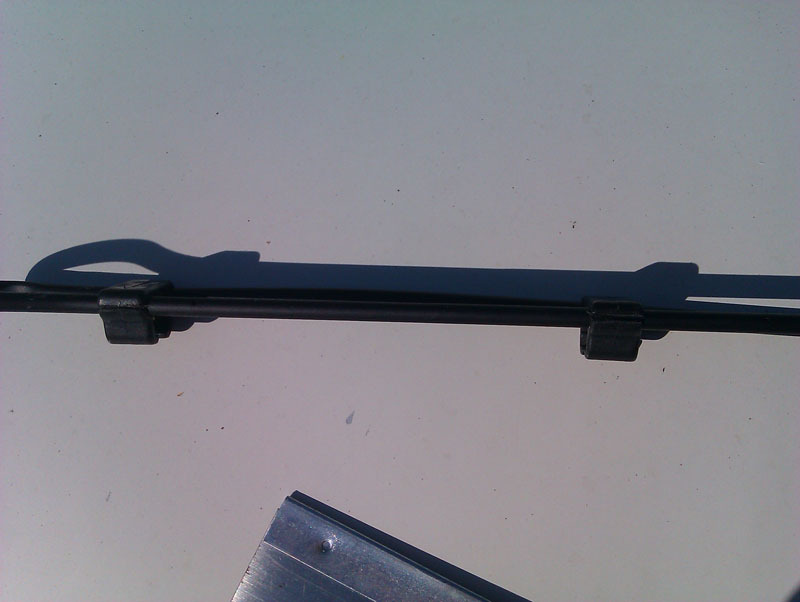
I'll come back to the leak finding in a moment because one thing that arrived today was a new washer spray bar that was kindly donated by another forum user since he had a spare. Optimistically I thought this would be a straight swap, instead it needed a little adjustment. This is the aluminium type rather than the original fitment plastic hose type. My original spray bar had already been given some gaffer tape on the bend by a previous owner which had worked okay, but now it had split in another place and wasn't doing its job so well. Removal is straightforward, it's held on with three plastic clips to the wiper arm itself. Here they are side-by-side.
Image

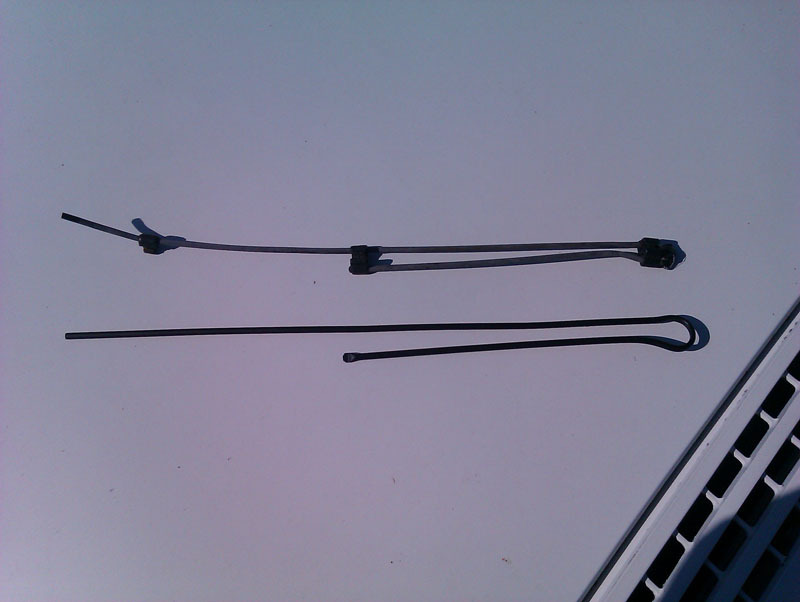
The aluminium one is slightly thicker in diameter and because of how the end is capped off, it won't fit through the plastic clips. I couldn't reuse the end cap from my original spray bar as it was incredibly brittle and would probably have broken up if I just trimmed off the and of the aluminium pipe and inserted it. I didn't have any other suitable end cap so I looked for an alternative option.
Image

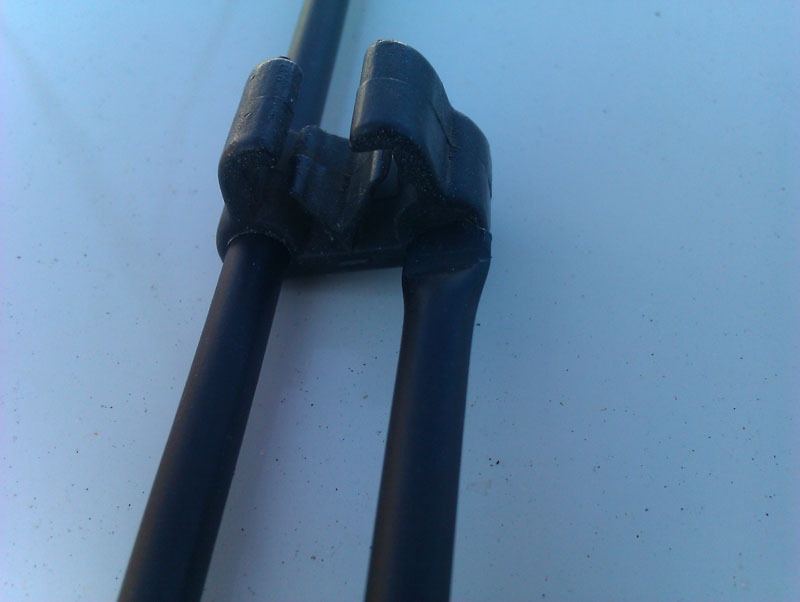
The answer was to use a fine tooth saw to carefully cut a slot in the side of the clip. I chose the side since it would line up with the squashed end of the new pipe and it shouldn't compromise the strength of the plastic clip too badly. The clips didn't seem very brittle, so I felt confident they'd be springy enough to push the new pipe into place and not break.
Image

Image

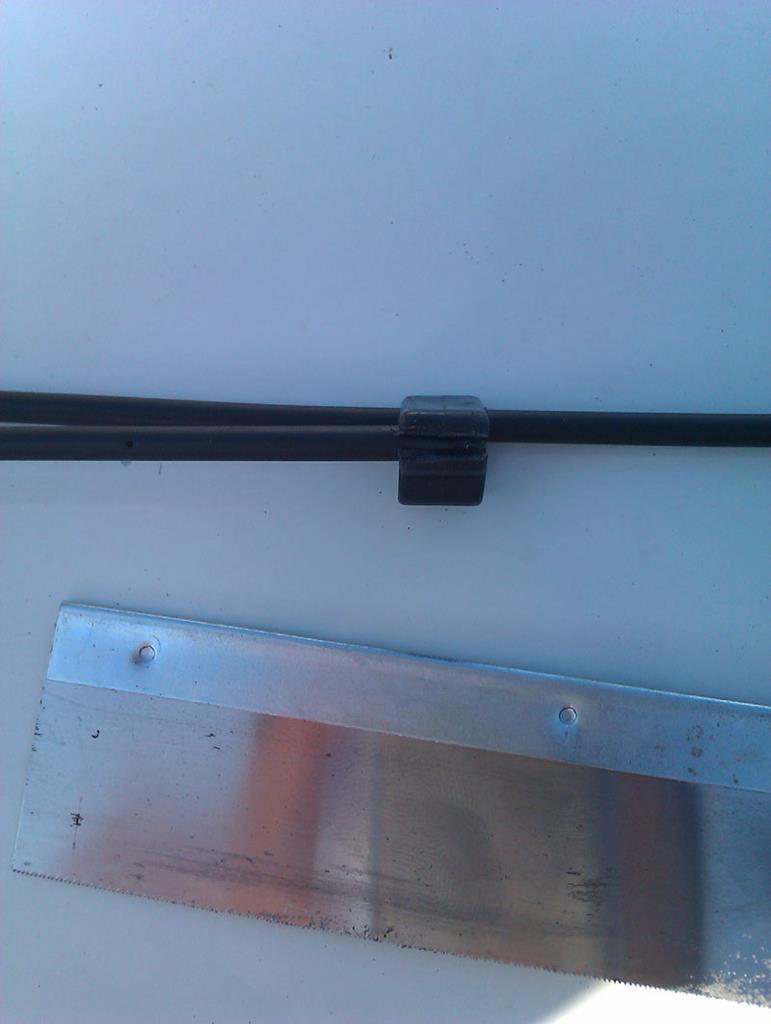
Yep, that worked okay. The third clip is a U shape so didn't need any modification, the only issue with that one is that the outer diameter of the aluminium bar is fractionally larger than the original spray bar so it was a bit of a fight to get the clip to lock in place on the wiper arm. It was otherwise fairly plain sailing.
Image

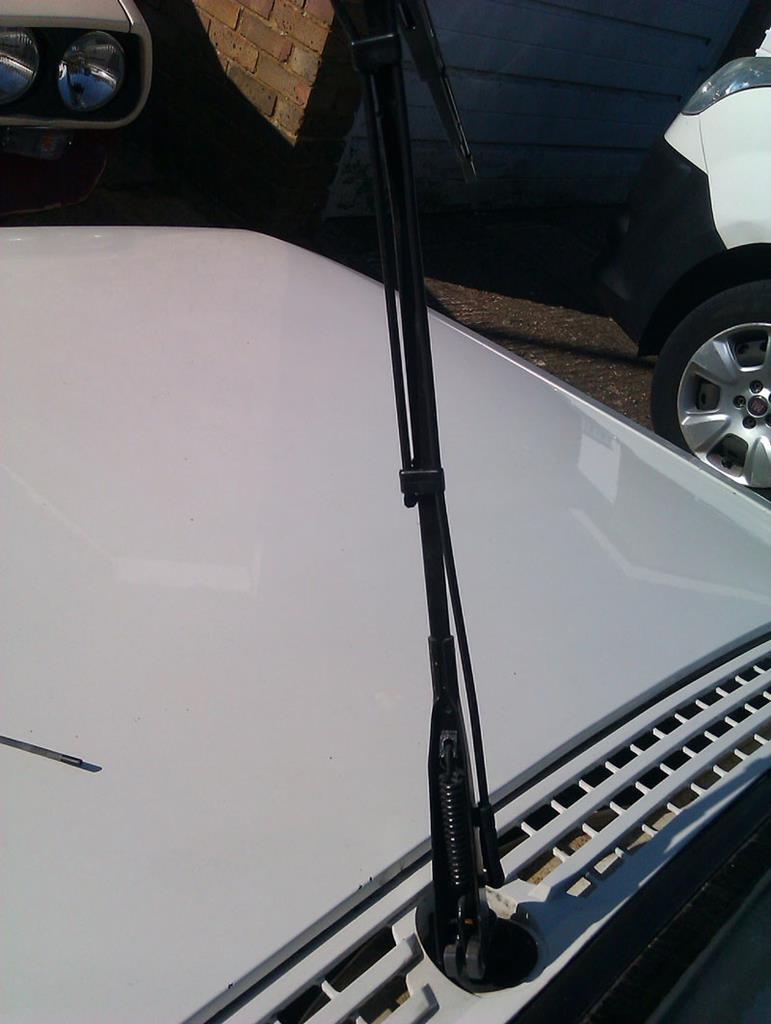
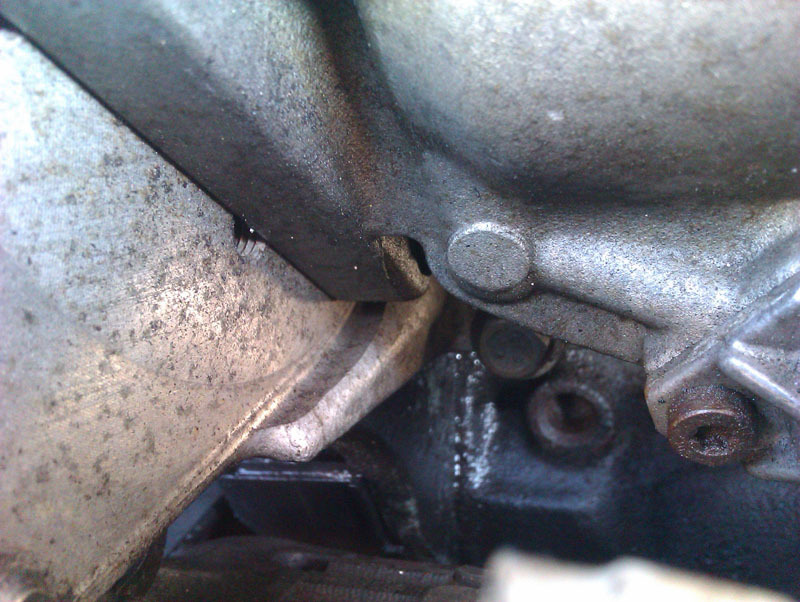
I'm happy to report the new spray bar works much better than the old one, putting screen wash down of sufficient quantity for the whole length of the blade that it no longer drags the blade along a dry screen when you hit the washers. That's a satisfying little job to have done and since I had some more lunch break free I thought I'd see about tracking down that air leak. What I did learn is that my car doesn't actually have a fuel preheater, which is the item I've been told repeatedly is what's likely at fault. I had a right job trying to even find a picture of what one of the preheaters looks like since it's on the side of the engine hardly anyone photographs and it's not even mentioned in the manuals I've got. Anyway, my car not having one rules out that being the problem doesn't it?

I did eventually get the car to start with a big cloud of smoke and it stank of veg oil, something it hasn't done since I first got the car on the road and which was a bit surprising. I just about got the car to idle long enough to start looking and listening for the air leak and found I was having to use the fuel primer button almost constantly just to keep the engine idling while I was looking for the issue. Eventually I noticed the diesel appearing under the pump again so I hoped I'd see some diesel from another location to show me where that was coming from.
Image

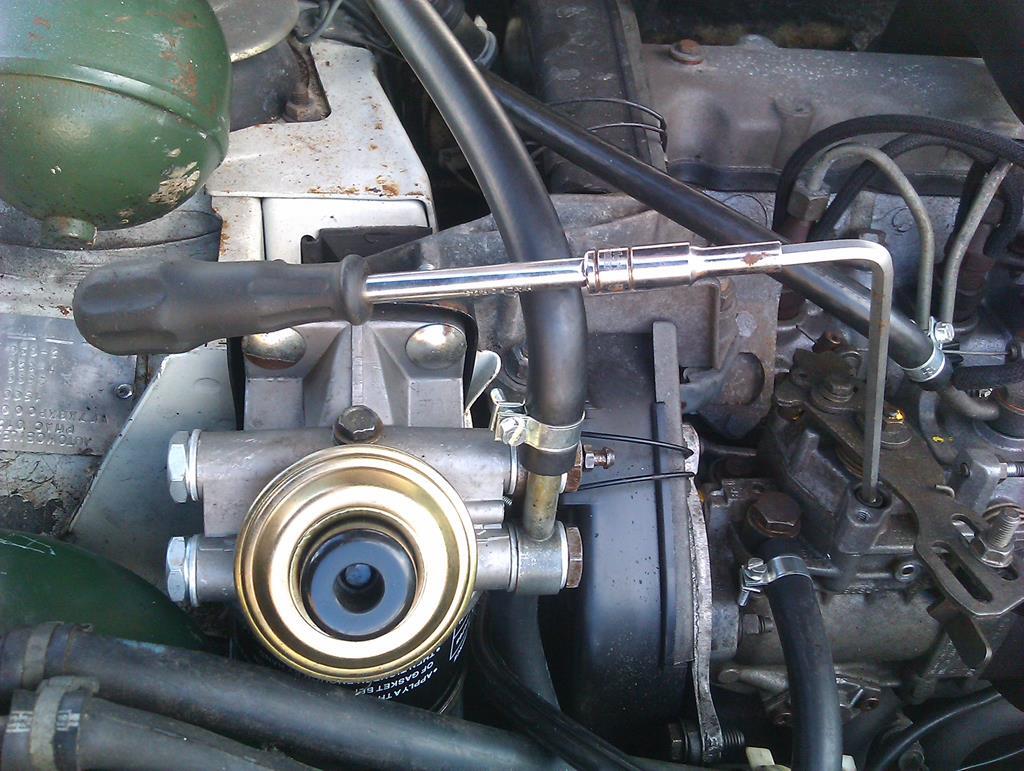
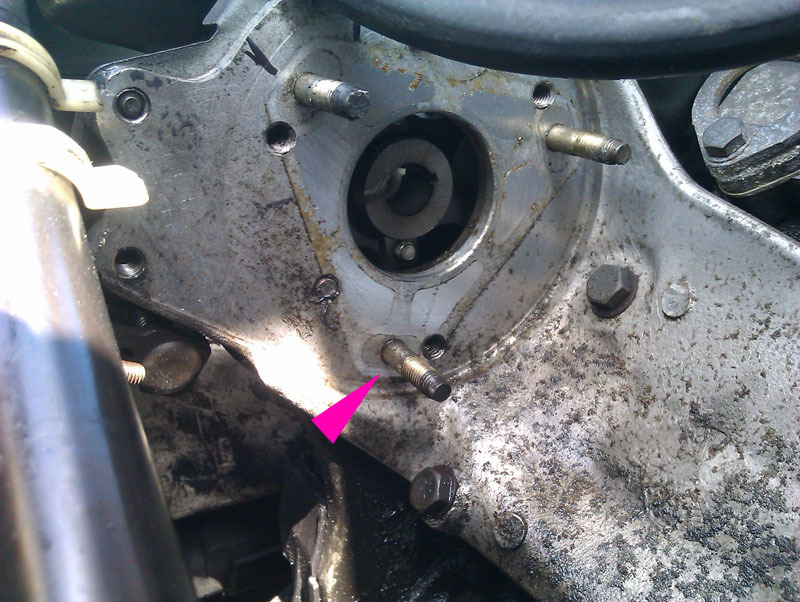
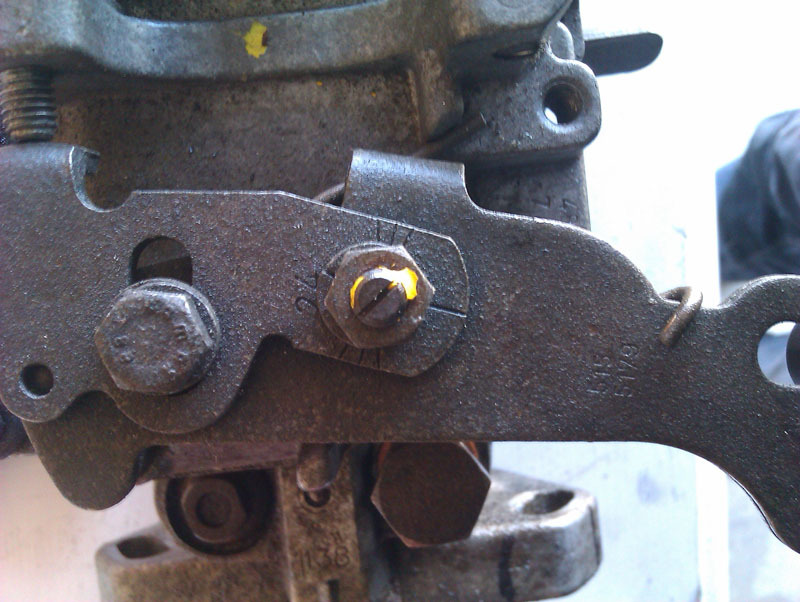
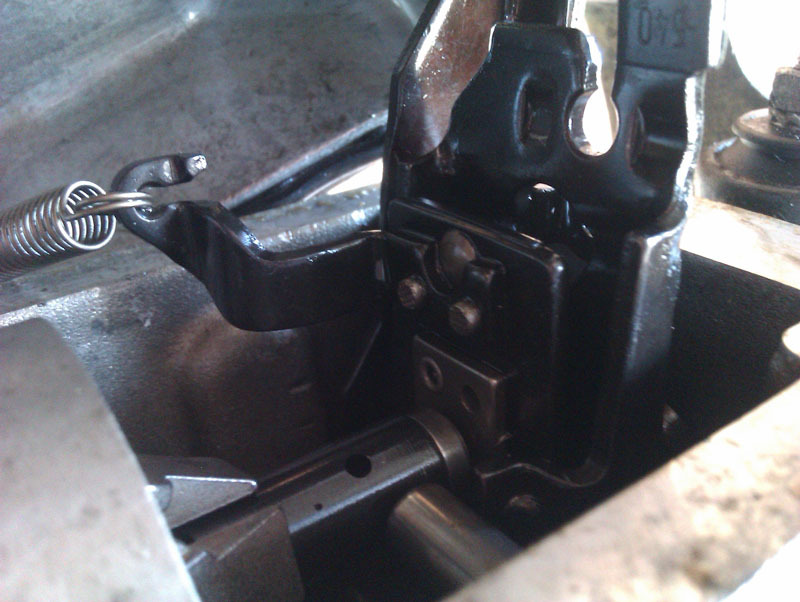
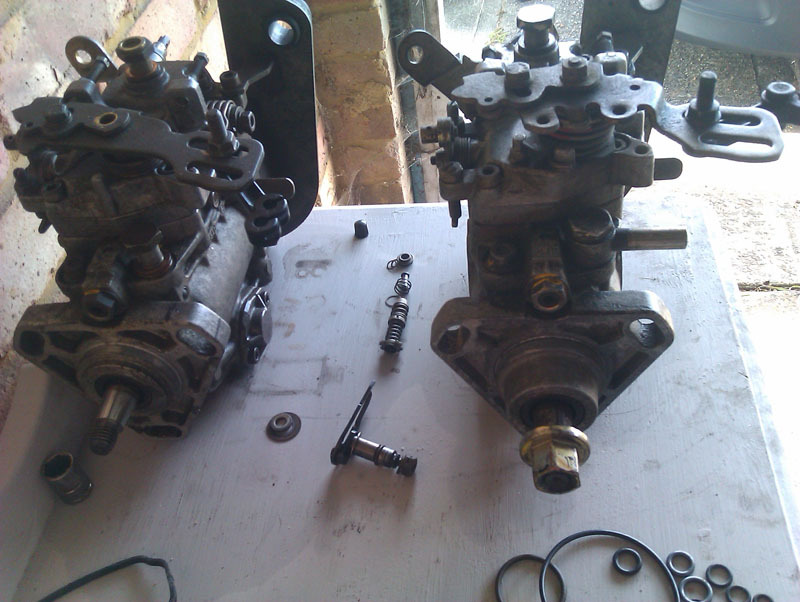
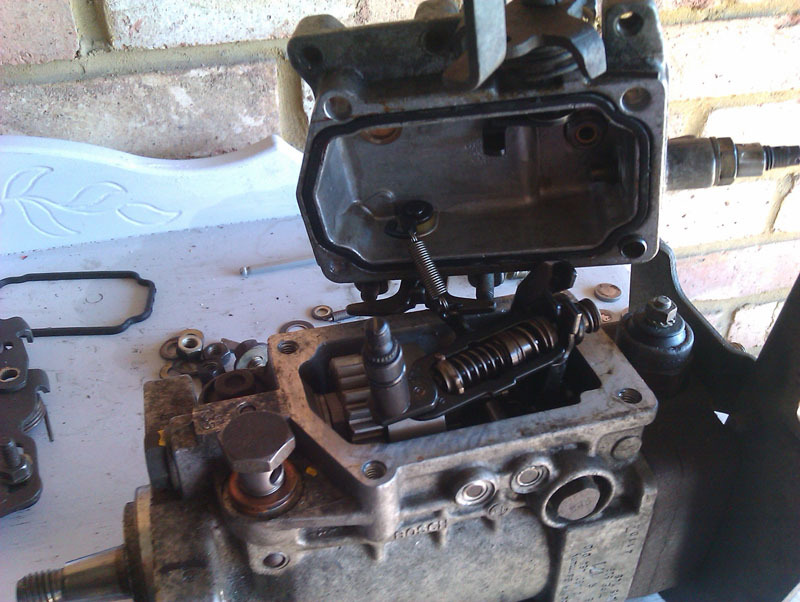
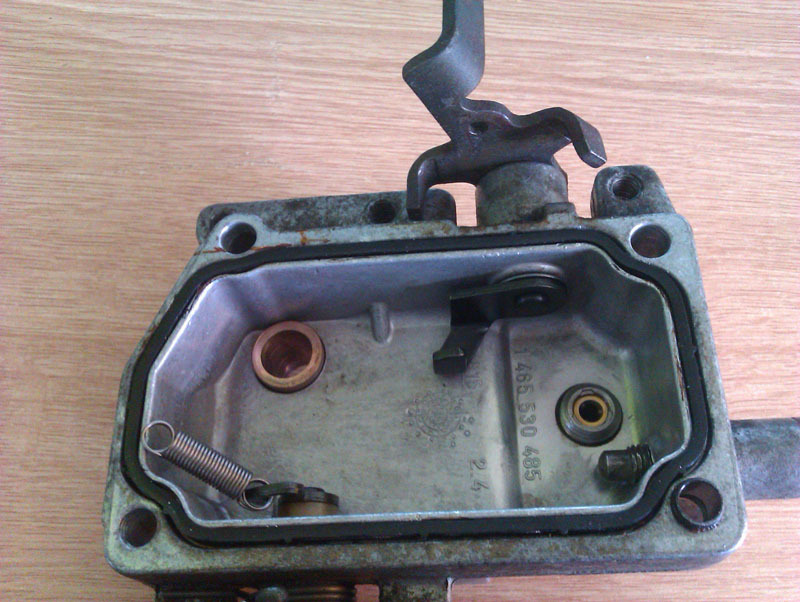
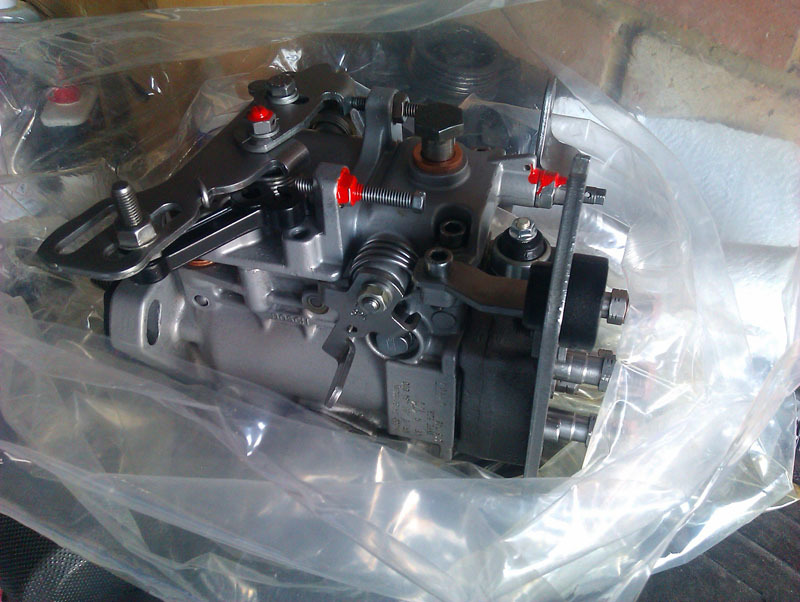
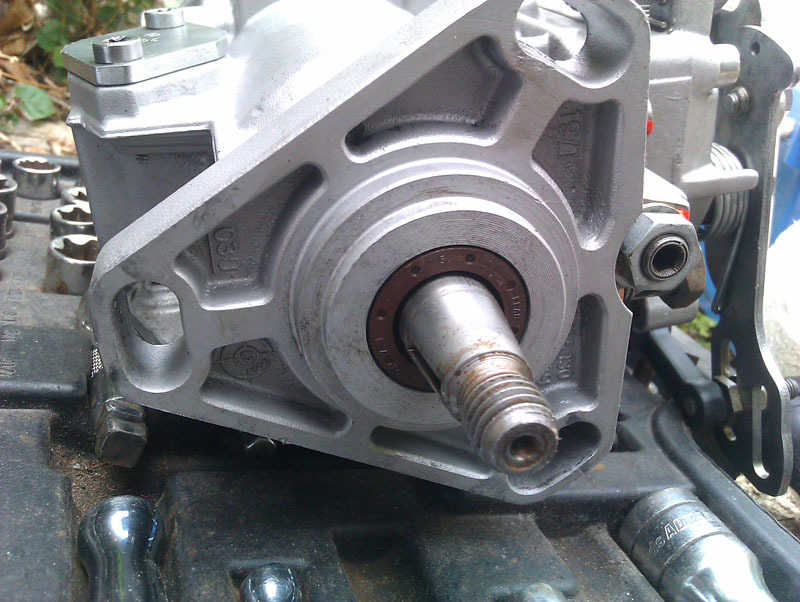
I knew the diesel leak was no higher than the injection pump, I knew it was on that side of the engine, and I knew it was at the front of the engine, just from where the diesel was present. Then finally I saw where it was coming from. Every time I primed the fuel with the button to get it idling properly I noticed the top of the injector pump where the throttle bracket fixes was wet. Some tissue at the joint after drying it off confirmed the suspicion of a leak.
Image

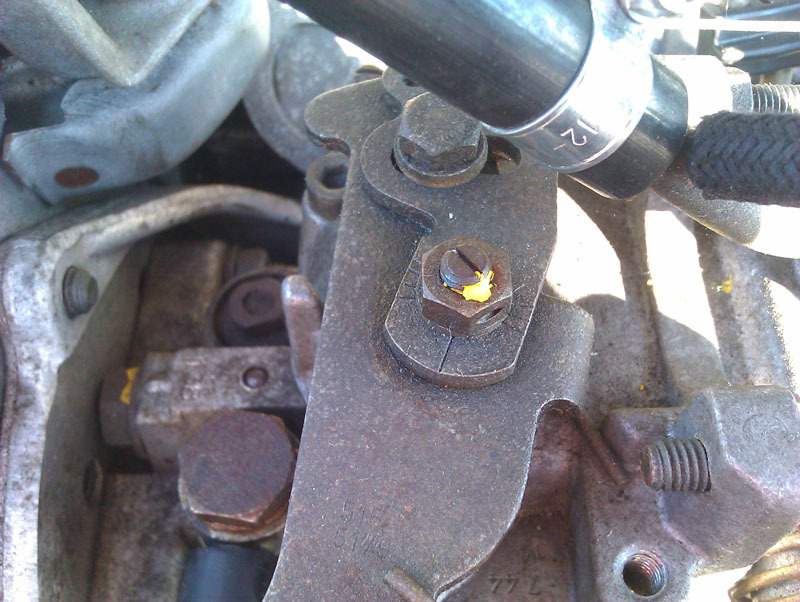
It's not a big leak, but when you get this area to actually start leaking diesel you can then trace the route it takes which is to go down the spring under this bracket, down the front of the injector pump, underneath it to the bracket, and then down the block on the timing belt side. It then runs down the sump, to the engine mount, and drips on the floor. Interestingly, with the car turned off, when you prime the fuel system you can hear air being sucked into the injection pump, presumably at the same location, and when you stop hearing the air and go back to the primer button there's absolutely no resistance to it until you reprime and the symptom repeats.

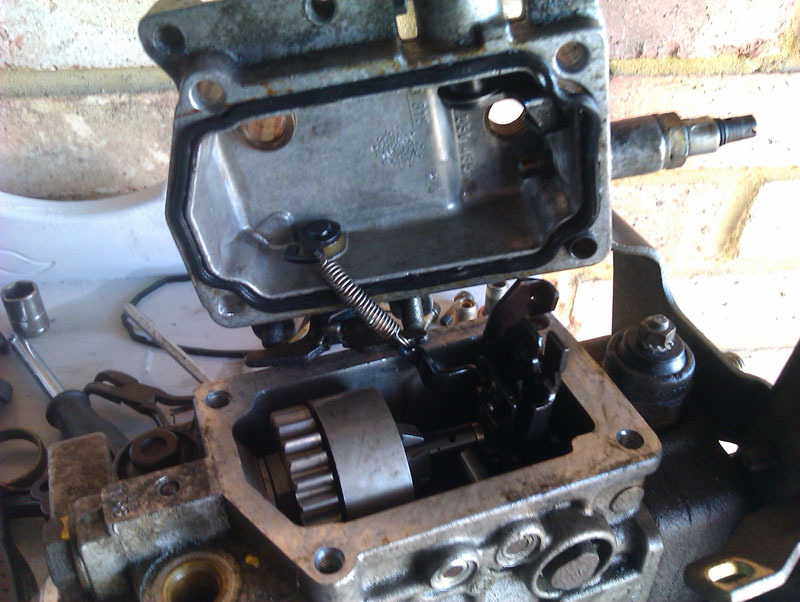
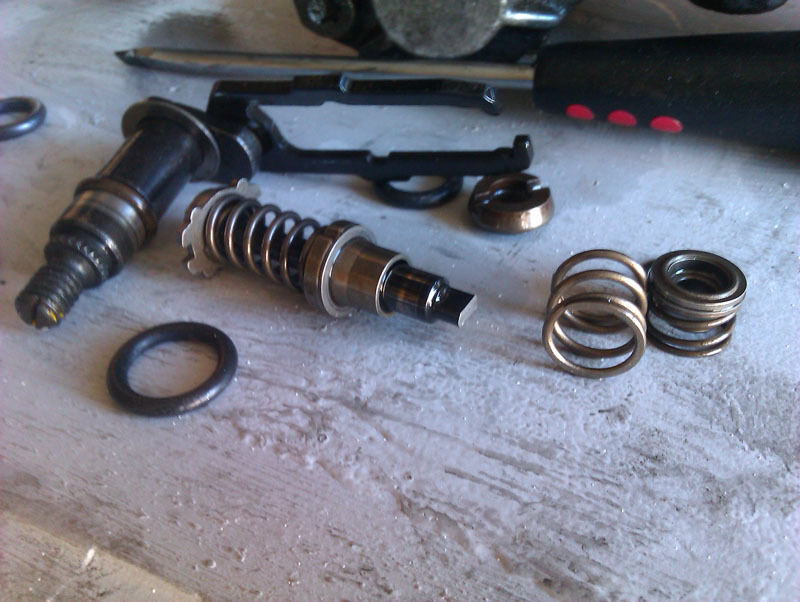
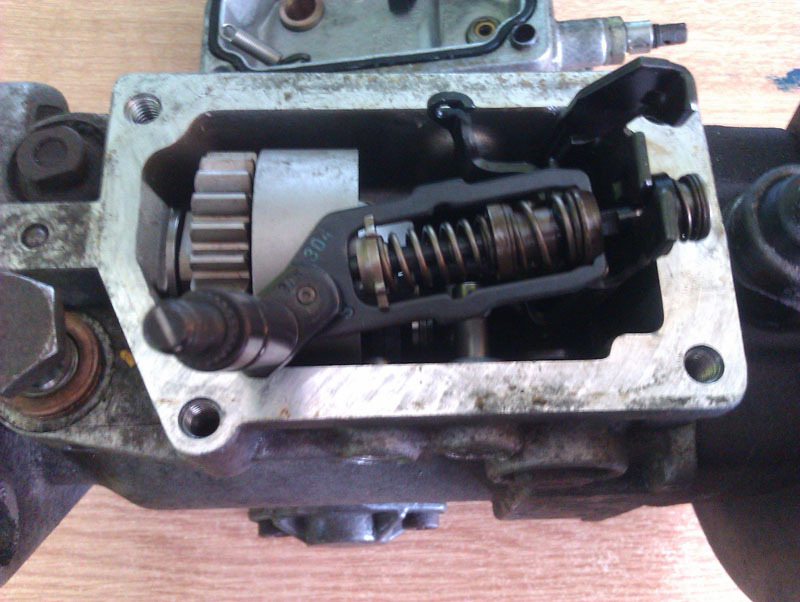
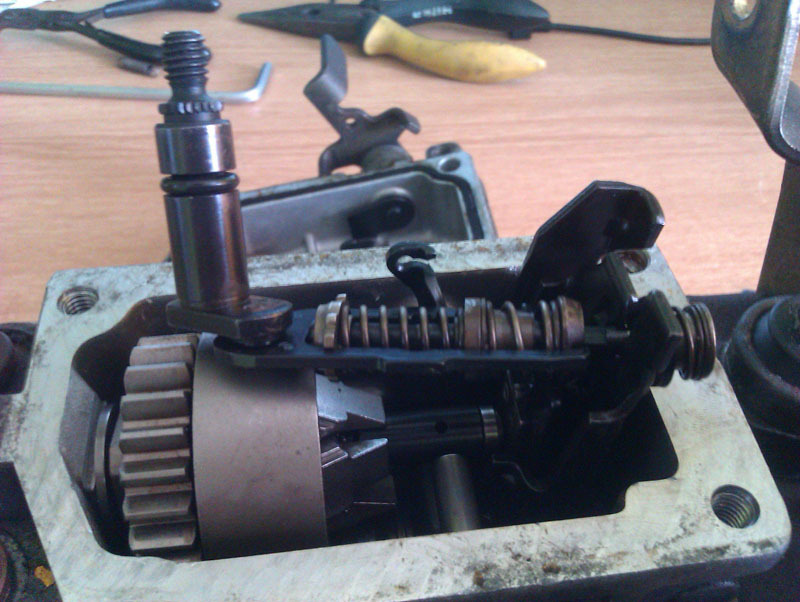
I hope this is actually the air leak and that there isn't another one waiting somewhere. I'm hoping that I can redo the seals myself with one of the kits that you can get for just this purpose rather than having to try and arrange getting the car to a specialist to sort it out. The pump seems a fairly straightforward mechanical thing providing you heed the warnings on setting it up correctly if it does need to come off the car to be done. I also suspect that this issue is down to the car having been run on used veg oil in the past without the proper care taken over filtration.
User avatar
Jaba
1K Away
Posts: 1893
Joined: Tue Jul 05, 2005 7:54 am
Location: Usually in the garage
My Cars: BX GTi, C3 Auto
x 80

Re: C'est Bleriot - 1987 17RD Hatchback

Post by Jaba »

I hope you can sort it yourself as I had running problems with a similar pump on a TD a few years back. I took it to a diesel specialist for some TLC. He said afterwards that it just needed a thorough cleaning and recalibrating and charged me £300 for that.
The irony is that in the meantime I had scrapped another TD and put that engine into the TD off the road and as that ran well I still have the pump on the shelf unfitted and unused ever since.


BTW that is the fuel preheater, the silver one where the radiator and heater return hose goes. Beats me how this could let in air as its full of coolant. Perhaps it is the fuel connecting pipes going porous. The fuel pipe from the tank goes to it first and then another pipe up to the filter. There were two designs one of them needed a longer heater hose to connect it up to. But if you don't have one in use then as you say that's one more problem area eliminated.
The Joy of BX with just one Citroën BX to my name now. Will I sing Bye Bye to my GTI or will it be Till death us do part.
User avatar
vulgalour
BXpert
Posts: 553
Joined: Mon Feb 04, 2013 11:30 am
Location: Kent
My Cars: 1980 Austin Princess 1.7 HL
1987 Citroen BX 17RD
x 105

Re: C'est Bleriot - 1987 17RD Hatchback

Post by vulgalour »

I decided today would be a good time to replace the O-ring that was suspected as having failed on the BX injector pump. This should be a straightforward job.

The first attempt was to use the guide and information from another forum for removing the pump top plate without removing the pump from the car. This would be the idea if it was the throttle shaft o-ring at fault since I should in theory be able to do that with minimal risk. While this did work, once I'd figured out which combination of tools was needed...
Image

There was something holding the plate on that I couldn't see, possibly just an o-ring since it had that sort of springy-rubbery feel to it. Rather than risk breaking something, I opted to screw the top back on and remove the pump. This is a much more involved proceedure. It also means if other seals are damaged I can deal with them all in one go if just doing the top o-ring wasn't going to cut it and, given that I have a full seal kit, I might as well. Next challenge was jacking the BX up when you can't get it running. Fortunately there was just enough of a dip in the paving slabs where the jacking point is that I could get a jack under if the other half lifted the car as far as he could (which was about 2mm, cars are heavy!) and I could get it on an axle stand. Jacking up the BX is one of the things I hate the most, there just aren't enough strong points on the car's structure to lift it that you can get a jack to when its sat on its bum.
Image

Handbrake off, car in fifth, rotate the front driver's side wheel until the bolt holes in the end pulley line up with the holes in the injection pump mounting plate. Then hope that you've actually got two M10 bolts (I did) and that your tools will fit in the gap (they did, but as you'll learn later this is not always the case with stupid French cars). That done, mark the pump location against the mounting plate to ensure (hopefully) the timing doesn't get buggered up later. Oh, I forgot to mention, make sure that when you remove the cambelt cover that you somehow jam it between the components in the gap and one bit of it snaps off, pinging into the heavens, never to be seen again.
Image

Then disconnect the throttle cable, the other cable the name of which I've forgotten once you mark that to make sure you know where it goes, mark the two screw things on top of the pump for the throttle bracket thingy so you don't mess up that setting, disconnect the four injection lines, the bottom back one of which has separation anxiety and likes to hide behind the other pipes, disconnect the stop solenoid wire, and the battery at some point in these proceedings too, and then try and undo the three bolts holding the pump in place. Go on, have a go, it's great, you'll love it.
Image

You will not love it. A spanner is the only tool that fits and if your hands are too big and/or don't dislocated, you can't actually get a tool on the bottom bolt that you can't see no matter how hard you try without removing the alternator. Great. At one point when trying to remove the alternator it was refusing so steadfastly to come out of its bracket that I thought I was going to have to remove the radiator to get purchase on the alternator... and then it popped out no drama because cars like to cause stress like that.
Image

Then, you simply undo the bolt on the pulley you locked earlier with the two m10 bolts so that you can sImpLy ReMOvE the injector pump. SIMPLY. Grr. Many swears later after finding the ONLY tool I had that would fit in the gap between the car body and the nut I needed to undo was a frigging ring spanner I had it undone. Then I had to fight with that injector pipe that kept reconnecting itself, and then the pump which did not want to be separated from the car until all at once it did. Magnetic screwdriver to the rescue to save the woodruff key that tried to join the cambelt cover fragment from earlier too. I have highlighted the troublesome nut that I needed to remove the alternator for (I seriously have no idea how anyone does this with the alternator in situ) so you'll know what to look for when you do this job.
Image

It's a big old thing this pump, leaves a massive hole in the engine bay when it's out.
Image

Set it on the bench, checked the time and realised this had taken me nearly 3 hours! That's absurd.
Image

I then had a break to regroup and gain a bit of confidence before tackling the next bit. For reference, took a snapshot of how the bracket is set on the top before removing it, this would allow me to get to the throttle spindle.
Image

I'd already marked the pump position before removing it, as instructed in the manual and on fora variously. The o-ring on the throttle spindle was quite loose and discoloured. No particularly obvious signs of wear otherwise so I was moderately hopeful this was the cause of the air ingress given other symptoms presented as documented in recent posts.
Image

I figured out that what was stopping me removing the top plate while it was on the car was the throttle bracket assembly that bolts to the spindle, once you unbolt that, the spindle can be pushed out and the top plate lifted free. I would have found this very difficult to do on the car since I dwasn't entirely sure what I was looking at even with instructions. On the bench it was much easier to work out. Happily got the top plate off and decided not to strip it down further than that since it looked a bit beyond my skill set so I kept myself to the comfort zone. The top plate gasket did look fine but since I had a new one in the kit I'd bought, I decided to fit it. The new seal doesn't seem to fit very well, perhaps there's a knack to it, perhaps it's a rubbish seal, I don't know. I also had trouble finding which of the supplied o-rings was the correct one for the spindle, none of them seemed a better fit than what was already on there being either a shade too large or a shade too small. I was beginning to have misgivings about this job. Undeterred, I started reassembly.
Image

I don't know why but it just felt wrong going back together. I didn't force anything, I was very careful to make sure things went back together the way they came apart, as much as I could tell at any rate. But it just felt... I don't know... off. Gut feeling was that something was perhaps not properly aligned so I gently eased the top plate off again and discovered that the plastic piece that supports all the complicated little springs in the top of the pump had snapped. I will reiterate, and no doubt some readers will ignore, that I used the absolute minimum force here, I hadn't even got the top plate bolts more than a couple of turns in, nothing was tight.
Image

So that's buggered that. I do not have the relevant skill to rebuild this and what should have been simple o-ring replacement has now become a bit of a nightmare. Not really sure how to fix this at this point. The pump was fine apart from sucking air in, presumably through the top o-ring (I guess we'll never know for sure now) and now it's broken and there's no point putting it back on the car.
User avatar
vulgalour
BXpert
Posts: 553
Joined: Mon Feb 04, 2013 11:30 am
Location: Kent
My Cars: 1980 Austin Princess 1.7 HL
1987 Citroen BX 17RD
x 105

Re: C'est Bleriot - 1987 17RD Hatchback

Post by vulgalour »

Right, I've figured out what I did after finding a useful resource with exploded diagrams. It is part #68 on this diagram: https://injectionpumps.co.uk/interactiv ... iagram.htm and what I've broken is both the rod that holds the springs and the two pronged fork bit. The reason I've managed to do that is I didn't seat the rod correctly on reassembly, which is why it felt wrong going back together, but by the time I realised that the parts are so delicate that I'd already broken them. Lesson learned.
Image

Image

Image

I'm not going to attempt this myself, I need to find a specialist to give it an overhaul and repair. While I probably could DIY it, I'd rather quit while I'm ahead.
User avatar
vulgalour
BXpert
Posts: 553
Joined: Mon Feb 04, 2013 11:30 am
Location: Kent
My Cars: 1980 Austin Princess 1.7 HL
1987 Citroen BX 17RD
x 105

Re: C'est Bleriot - 1987 17RD Hatchback

Post by vulgalour »

Bit of luck in that I found and bought a Bosch VE pump that looks the same as mine online which should have the parts I need inside. There seems to be as many pump variants as there are vehicles that it was fitted to. That should then allow me to send off my original pump, with the spare parts, to get the whole thing rebuilt. Happily I also found the small bit of the rod that broke off and it hadn't fallen deep inside the pump, to my great relief.

In the meantime the BX will have a little rest while I save up the requisite funds for the rebuild of the injector pump. There's not really anything for me to do on the car while I wait, everything else is sorted.
User avatar
vulgalour
BXpert
Posts: 553
Joined: Mon Feb 04, 2013 11:30 am
Location: Kent
My Cars: 1980 Austin Princess 1.7 HL
1987 Citroen BX 17RD
x 105

Re: C'est Bleriot - 1987 17RD Hatchback

Post by vulgalour »

Good news! Sort of. The second hand pump arrived today, it wasn't listed as being for my car specifically but looked similar enough that I hoped it would at least yeild the parts I needed. Original pump is the one nearest the wall.

Image


Image


Image

Whatever route I took from here, I knew that I wouldn't just be putting the second hand one on the car and hoping it worked. It's expensive to get the pump rebuilt and it would be cheaper to just throw the second hand one on the car and see if it worked, but if it's rebuilt I stand the best chance of whatever pump I refit actually working and not leaking. Fundamentally, both pumps do look the same. There's a slight difference in the throttle mechanism on the top, and a slight difference in the lower casing where the second hand one has a big flat area that the original doesn't. Otherwise, everything that connects looks similar enough that I hoped it would work. Unfortunately, the second hand pump has had a fall at some point which has bashed part of the top casing off and bent the bracketry on the injector line side so even if I did want to fit it to my car that wasn't going to happen without some parts swapping. Whatever I did, I was going to have to open up the second hand pump so that's exactly what I did next.

Happily, the broken piece with the springs on was intact and now I understand better how things go together, it remained that way when I removed everything. This was the main reason for getting this particular pump. I had also hoped the throttle shaft would be the same.

Image

Unfortunately, the throttle shafts are completely different and, as far as I can tell, not interchangable. That means I'll have to get a new throttle shaft which is another £40ish, providing I can get the one that my pump needs.

Image

They do both at least have part numbers on them, so replacement should be easier. It's worth noting too that removing the throttle shaft from the second hand pump was much more difficult, the o-ring was providing a much better seal than on my original pump, which lends credence to the theory that it was that o-ring that was leaking on my original pump. I need a 777 throttle shaft, the second hand pump is equipped with a 716 throttle shaft, so it's shorter but otherwise the same. There's also additional plastic bits on the throttle shaft spring that my original pump doesn't have.

Image


Image

Oh well, one step closer at least. I'll call some injection pump rebuilders and see what they suggest, it may be more cost effective for them to get the throttle shaft my original pump needs, or it may be possible to make one good pump out of the two I've got here. It's also worth noting that the pump I bought we didn't know exactly which engine or car it fitted, so this was always a bit of a gamble. There are a lot of variations on the Bosch VE pump for whatever reason and like many things mechanical on French cars, it's just part of the fun of ownership when trying to find the correct bit.

Now, I just need to save up a good chunk of cash to get this moved along to the next stage.
User avatar
vulgalour
BXpert
Posts: 553
Joined: Mon Feb 04, 2013 11:30 am
Location: Kent
My Cars: 1980 Austin Princess 1.7 HL
1987 Citroen BX 17RD
x 105

Re: C'est Bleriot - 1987 17RD Hatchback

Post by vulgalour »

Happy days, the new pump parts arrived! They're even correct, so that's nice. I used https://injectionpumps.co.uk and can't fault them.

Image

Unfortunately, I've come unstuck. To save me going from garage to house I brought the pump indoors, surprisingly it doesn't really smell of diesel now. I've got the throttle spindle, o-ring, and governer spring assembly all assembled correctly as far as I'm aware. The problem is, every time I line everything up and go to put the lid on, I can feel that something is stopping the lid lining up. I'm not forcing this for fear of breaking internal components again.

Image

The larger black lever (for want of a better term) on the top right of the internals is I think what's stopping the lid sitting down. Of the two levers, the one the spring assembly goes into is the weaker and much easier to move, the larger lever is very difficult to move. I suspect the larger lever has sprung back against the side of the case and I need to push on it as I put the lid on somehow.

Image


Image

My other suspicion is that I've got the black lever that goes in the top of the case misaligned. I removed this when dismantling the pump, I probably didn't have to, and now I'm not sure which way or position it should go on reassembly. I'm concerned that if I get it wrong it will press on the throttle shaft fork and break it.

Image

Advice sought on this one. I feel like I'm really close to having this back together and it's my trepidation on getting it wrong that's the only thing stopping me.
User avatar
panky
BXpert
Posts: 408
Joined: Mon Jan 22, 2018 4:44 pm
Location: Widnes
My Cars: 1985 BX 19 GT (DKK), 1971 Morris Minor Traveller, 1971 Commer Auto-Sleeper, 1969 Commer Jennings Roadranger.
'88 BX GTi (a long time ago)
x 78

Re: C'est Bleriot - 1987 17RD Hatchback

Post by panky »

I've never worked on an oil burner so only going from your pics. The large lever looks like it's supposed to come up against the screwed plug in the lid, can't this be screwed back so the lever can just sit against the side of the lid until it's all assembled then adjusted back to where it was?
Image
User avatar
vulgalour
BXpert
Posts: 553
Joined: Mon Feb 04, 2013 11:30 am
Location: Kent
My Cars: 1980 Austin Princess 1.7 HL
1987 Citroen BX 17RD
x 105

Re: C'est Bleriot - 1987 17RD Hatchback

Post by vulgalour »

Other half had a look and suggested the same thing, so I unscrewed that bit (after marking location) and it made no difference. Had a bit more of a fiddle about and if I remove either the black lever inside the lid, or the throttle shaft assembly, the lid sits down like it should. What I can't figure out is how the two components are supposed to fit together.

New parts and old are identical and there's no sign of distortion or damage on the black lever in the lid so I'm stumped on this one.
User avatar
vulgalour
BXpert
Posts: 553
Joined: Mon Feb 04, 2013 11:30 am
Location: Kent
My Cars: 1980 Austin Princess 1.7 HL
1987 Citroen BX 17RD
x 105

Re: C'est Bleriot - 1987 17RD Hatchback

Post by vulgalour »

A no-contact collection was done today for a BX bonnet I got for £20. It's the wrong colour, and it's from a turbo model. At the price, all I was hoping is that it was as straight and tidy as it looked in the photographs and happily, I was not disappointed. On getting it home I first checked fit, which was good, and then set about swapping the insulation pads on the bonnet since they're different and I can't actually shut the bonnet with the turbo insulation pad fitted. Very easy to remove, you just gently ease the pad over the metal clips that hold it against the bonnet. If anyone needs this insulation pad it's yours if you can collect it from Kent, it would get destroyed if posted, I'm sure.

Image

The pad from my old bonnet was transferred to the new one, which involved removing a lot of trim clips since the turbo pad needs more clips to hold it in place.

Image


Image

On the back of the original soundproof pad was this little hand-written sticker. I left it in place, it was fairly firmly attached.

Image

The silver bonnet does fit a lot better than the old white one, it isn't exhibiting the same signs of being twisted. There is still an issue with the passenger side headlight area, which is mostly down to the lower outer peg the headlight pushes onto being loose and bent. This also means the headlight is pushed slightly too far to the middle and just touches the bonnet, which is annoying.

Image

Other than that, the overall fit of the bonnet is much better and I could even get it to fit the hole evenly with the adjustment available at the bonnet latch, which I can't with the original white one.

Image


Image

In person, it's a big improvement over the other bonnet. The main issue at the front is that wonky headlight now. Did my best to line up a shot from my previous efforts to get the alignment correct and while there does appear to be a slightly lift to the silver bonnet over the headlight in the photo, it's mostly down to the way the headlight has drooped a lot more and the angle of the photograph with the car currently being on ramps because of the injector pump issue. In person, it's quite a large improvement. Alignment along the wings is much better too, without the big rise on one side and dip on the other.

Image

I'd say that was £20 well spent. Once I've got the car running again I'll see about getting this bonnet repainted and see if I can find some way of straightening out that headlight.
User avatar
vulgalour
BXpert
Posts: 553
Joined: Mon Feb 04, 2013 11:30 am
Location: Kent
My Cars: 1980 Austin Princess 1.7 HL
1987 Citroen BX 17RD
x 105

Re: C'est Bleriot - 1987 17RD Hatchback

Post by vulgalour »

Got a welcome delivery the other day. Work deadlines and the heat are preventing me from actually fitting it just yet.

Image

It's the original pump fully rebuilt so it should have no air ingress issues and will, I hope, cure the air ingress issue that I've been having since I'm at a bit of a loss as to what else it could be at this point. Once this is fitted and I've got things working again, I'm on the lookout for someone to paint the bonnet and one wing, and deal with a few other paint blemishes around the car. Doesn't really need a full respray, just a tidy up to get rid of some historic chips and parking dings.
User avatar
vulgalour
BXpert
Posts: 553
Joined: Mon Feb 04, 2013 11:30 am
Location: Kent
My Cars: 1980 Austin Princess 1.7 HL
1987 Citroen BX 17RD
x 105

Re: C'est Bleriot - 1987 17RD Hatchback

Post by vulgalour »

Had a go at installing the pump today and found out quite quickly that I couldn't do it. For one thing, I don't have a dial indicator so I need to get one of those to set up the pump in relation to the engine so that the timing is correct. However, that shouldn't stop me installing the pump itself, that should be a nice straight forward job. The most difficult bit is getting the woodruff key slots lined up. There's a slot in the pulley, like so. Note one of the mounting studs is removed here, I'll come to that in a moment.
Image

There's another slot on the pump shaft that goes through the pulley and bolts from the other side.
Image

However, the two slots are misaligned quite a lot. I didn't set the engine to TDC when I removed the pump because that wasn't in the instructions. Rather, the engine was rotated to the point that the bolts could be put through the pulley and into the pump mounted plate which means you don't have to remove the timing belt, etc. and, in theory, makes for a quicker job if you're just dropping the old pump back on. The problem here, is that I'm dropping what is effectively a new pump on and that's why there's this alignment issue.
Image

I got one of the pump mounting studs out fairly easily, the other two don't want to budge. My thought there was to line up the pump with the pulley without the studs and then rotate the pump to the correct position while the pulley was still locked which, in theory, should allow everything to line up nicely and I can then order the tool I need and be done. However, because I can't get those two studs out with the tools at my disposal, this option is a no go. Also, I can't figure out how to rotate the pump off the car to make the key slot line up, and I daren't force anything since I've only just forked out a considerable sum to get it made nice again.

Either way it's faff to fix. I either need to get the tools to remove those two mounting studs so I can fit the pump in the wrong orientation and then rotate it to the correct orientation, or I can remove the timing belt and pump pulley, fit the pump and then fit the pulley to the pump, after which I'd have to make sure the timing was correct, etc. Third option is to save up some more cash and just get someone else to do it which honestly, is my preference at this point. I'm fed up of working on engines, I don't understand how anyone derives any joy from any of it.
User avatar
panky
BXpert
Posts: 408
Joined: Mon Jan 22, 2018 4:44 pm
Location: Widnes
My Cars: 1985 BX 19 GT (DKK), 1971 Morris Minor Traveller, 1971 Commer Auto-Sleeper, 1969 Commer Jennings Roadranger.
'88 BX GTi (a long time ago)
x 78

Re: C'est Bleriot - 1987 17RD Hatchback

Post by panky »

I've got a stud extractor similar to these and it's never failed me

https://www.ebay.co.uk/itm/Stud-Extract ... eQmEC#rwid

Don't know how long this one will last but it should shift the two studs you need to remove.
Have you tried the two nuts tightened on the stud method?
Image
User avatar
vulgalour
BXpert
Posts: 553
Joined: Mon Feb 04, 2013 11:30 am
Location: Kent
My Cars: 1980 Austin Princess 1.7 HL
1987 Citroen BX 17RD
x 105

Re: C'est Bleriot - 1987 17RD Hatchback

Post by vulgalour »

Tried the two nuts method first and both just unfastened together. Even tried three nuts, which was the most I could get on the thread, and it still undid the nuts before undoing the stud. I might get the extractor if a better solution doesn't present itself.
User avatar
vulgalour
BXpert
Posts: 553
Joined: Mon Feb 04, 2013 11:30 am
Location: Kent
My Cars: 1980 Austin Princess 1.7 HL
1987 Citroen BX 17RD
x 105

Re: C'est Bleriot - 1987 17RD Hatchback

Post by vulgalour »

Right then, idiot boy here to give you another update on these stupid cars.

Attempted to fit the fuel injection pump to the BX again. This time, I had a stud extraction tool so I could, in theory, extract the studs, fit the pump in line with the pulley and use that to turn the pump to the correct orientation. Fell at the first hurdle in that I'm simply not man enough to undo the studs, even with a longer bar.

Second option then is to 'simply turn the pump'. Yeah, good one. It's incredibly difficult to turn because you can't easily get purchase on the pump shaft, especially when you don't want to actually damage it. I got almost far enough but it simply refuses to turn any further without the tool I'm using slipping. I just can't get sufficient purchase to turn it and it's just out of alignment with the pulley, so I'm stuck. If I could remove the studs or turn the pump shaft by hand just a few millimetres I could have this together.

But I can't, so that's that. I'm currently in the 'sell the ungrateful lumps' stage of the job, skirting the edge of 'scrap the fekkers' so it's definitely time to down tools and have a think about this for a while.


Image


Image
Post Reply