Operation wake up GT! (no one has 56k anymore, right?!)
-
citsncycles

- Over 2k
- Posts: 3224
- Joined: Sun Aug 08, 2010 9:14 pm
- Location: Dursley, Gloucestershire
Re: Operation wake up GT! (no one has 56k anymore, right?!)
Timex has done something similar - strangely the better looking side was bad while the one with all the bent panelwork (and gutter spray) was solid.
I managed to weld it up reasonably well with the subframe in situ - some of it through the aperture for accessing the bolts, but I regard it as a temporary repair and as soon as either the GS or 4x4 are on the road I'll be dropping the subframe to do it all properly.
I managed to weld it up reasonably well with the subframe in situ - some of it through the aperture for accessing the bolts, but I regard it as a temporary repair and as soon as either the GS or 4x4 are on the road I'll be dropping the subframe to do it all properly.
Mike Sims
BX 19RD Estate Mk1 - Timex!
BX 4X4 Estate - Oh god, I've done it again!
BX 17RD MK1 - it called to me!
BX14 TGE, - SOLD
XM Turbo SD,GS Club Estate,Visa 17D Leader,HY Pickup,Dyane Nomad,Dyane 6,2CV AZL,Falcon S,Trabant P50,3x Land Rovers (88" series 1,109" series 2a FFR,series 2a Marshall ambulance),DKW F7, Lambretta LD150 x 1.5,Mobylette SP93,Ural Cossack,Ural M63,CZ 250 Sport,Honda Varadero 125,lots of bicycles & tricycles including (but not only) Sunbeams,Higgins & Bates!
-
Van gogh

- Confirmed BX'er
- Posts: 52
- Joined: Wed Oct 16, 2013 12:17 pm
- Location: Ukraine
Re: Operation wake up GT! (no one has 56k anymore, right?!)
I take off my hat to you, good work.
-
Kitch
- Over 2k
- Posts: 6432
- Joined: Sun Jul 03, 2005 9:36 pm
- Location: Fareham, Hants
- My Cars: Too many to list
- x 91
Re: Operation wake up GT! (no one has 56k anymore, right?!)
Thanks, been more work than I was expecting now though!Van gogh wrote:I take off my hat to you, good work.
One third of a three-spoke BX columnist team for the Citroenian magazine.
CCC BX registrar: The national BX register - click to submit a car!
CCC BX registrar: The national BX register - click to submit a car!
-
Kitch
- Over 2k
- Posts: 6432
- Joined: Sun Jul 03, 2005 9:36 pm
- Location: Fareham, Hants
- My Cars: Too many to list
- x 91
Re: Operation wake up GT! (no one has 56k anymore, right?!)
Well, I've been posted blog updates on other websites, so it seems silly not to paste to the forum dedicated to the model itself! This lifted from one of the other forums I post on, taken from around the time I found all the grot in the rear end. Some of it may overlap this thread slightly, but the car's moved on (a bit) since:
So, it seems I might have missed some more rust:
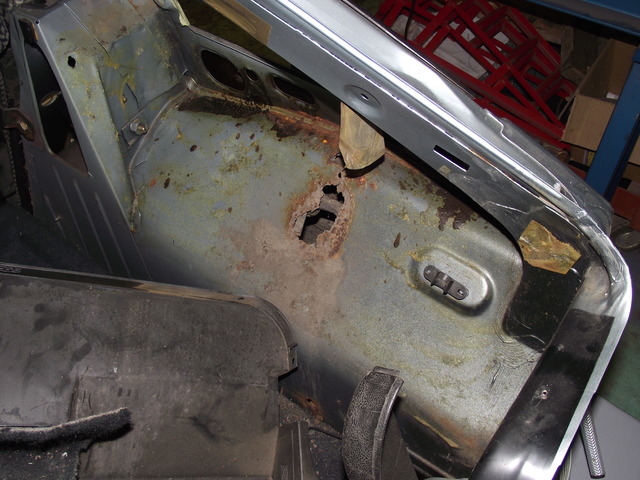
That's the offside inner rear wing. They like to rot here on BXs, as underneath there is a clip retaining a breather tube from the fuel filler neck. The clip posts onto a threaded stud, kind of like a self-tapping screw thread. And, being that cars tend to be undersealed using a rubberised spray-on adhesive, it only needs one fitting of the retaining clip to threaded stud to remove all traces of underseal from said thread, et voila! Bare metal, ripe for rusting! The rust begins, spreads underneath the underseal and works its way both through the metal, and up to the bonded seam the rear quarter panel attaches to. What this means is that when it lets go, it REALLY lets go:
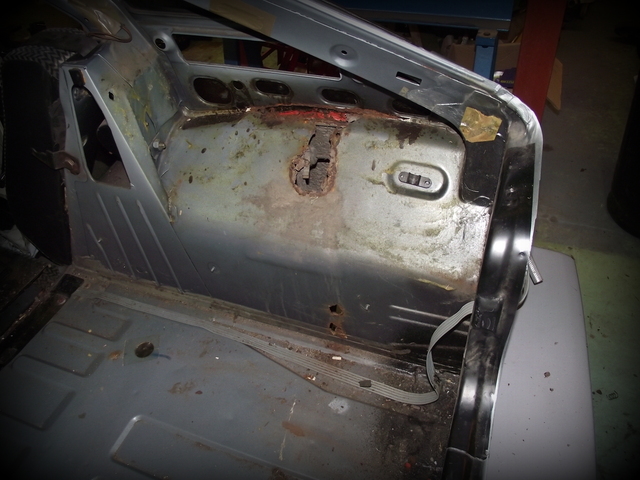
That's without poking, that's as it was found. Anybody knows if you find a hole 30mm across, the metal you'll need to cut out will be 60mm across. Great!
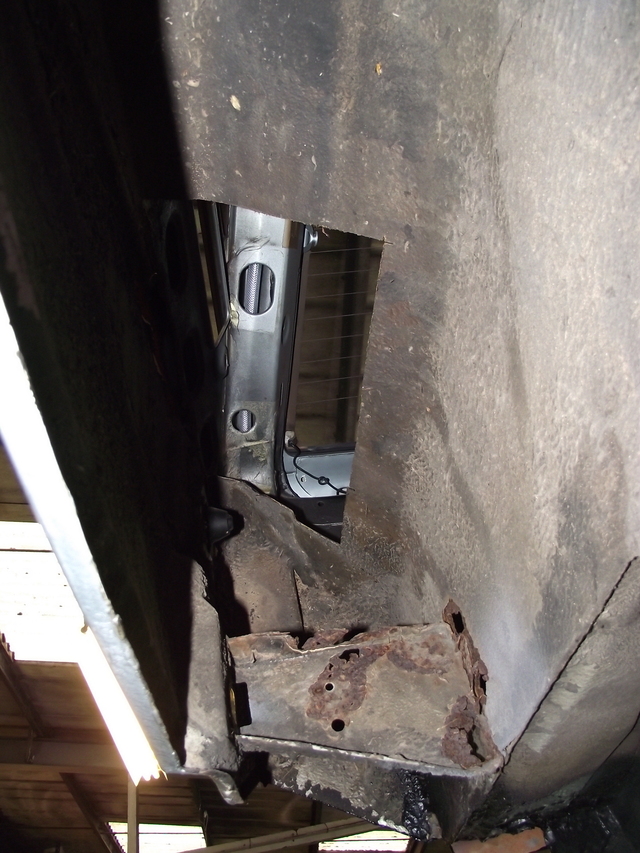
So then I thought, "Maybe I should poke around a little bit more." And so I did, and rapidly wished I didn't:
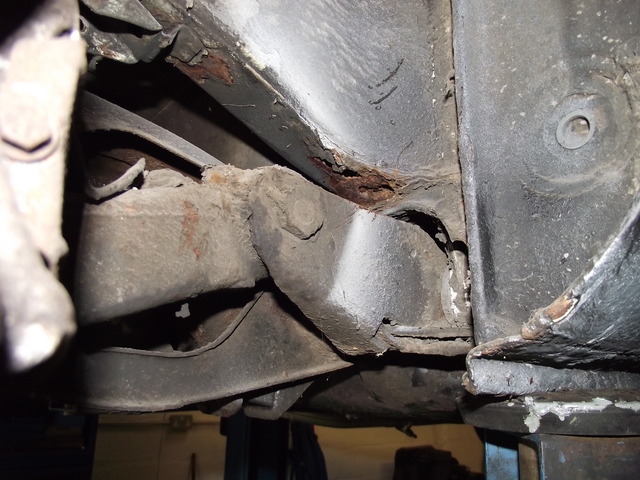
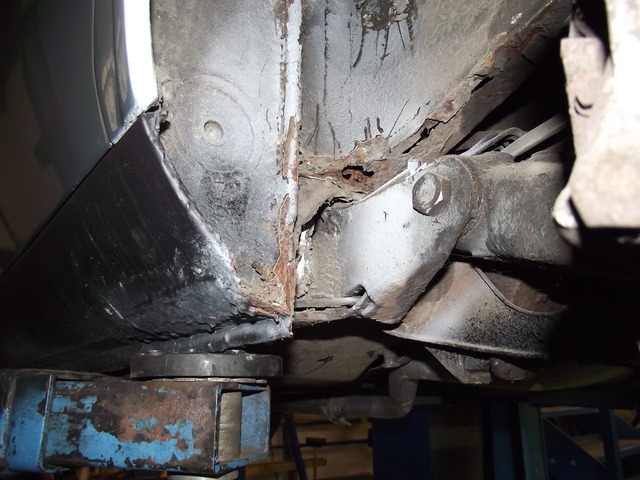
Those are the rear chassis rails near the subframe mounts. To this day, I cannot believe I managed to miss all that! The only excuse I can come up with is that I inspected the car on a 4-poster, with all the wheels still attached. With the wheels on, it's much harder to see those areas, though not impossible. I'm normally so anal about that kind of thing, and I also tend to be the type who welds in new sections just because the old ones look bad, rather than have actually rotten through. Completely and utterly pissed off at this point, and finding this rot completely turned the tables on timescales, hence why it's still going today!
So, thanks to the new chassis rail issues, the rear axle and fuel tank had to be dropped:
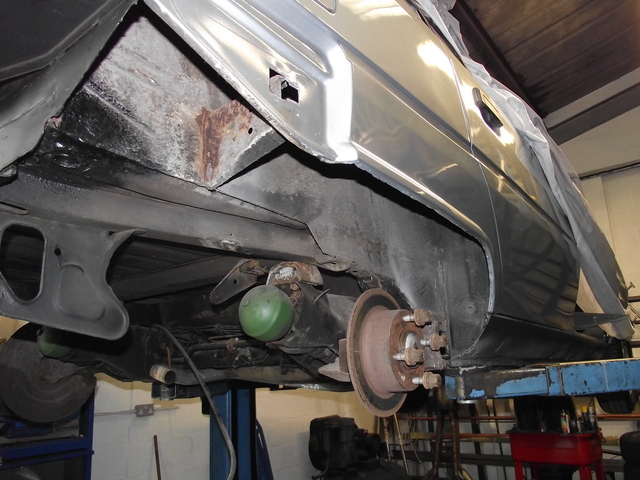
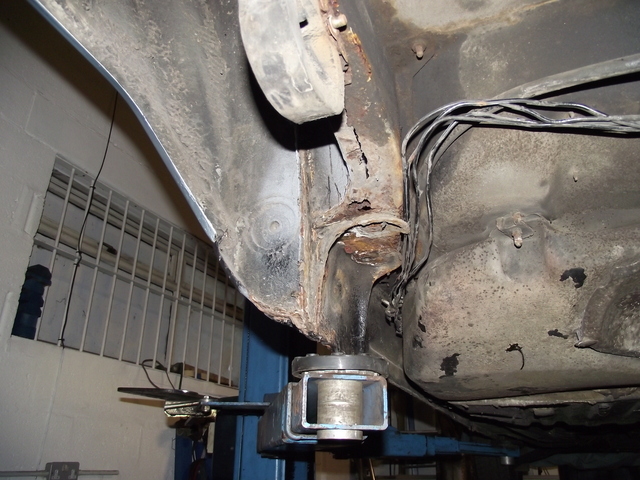
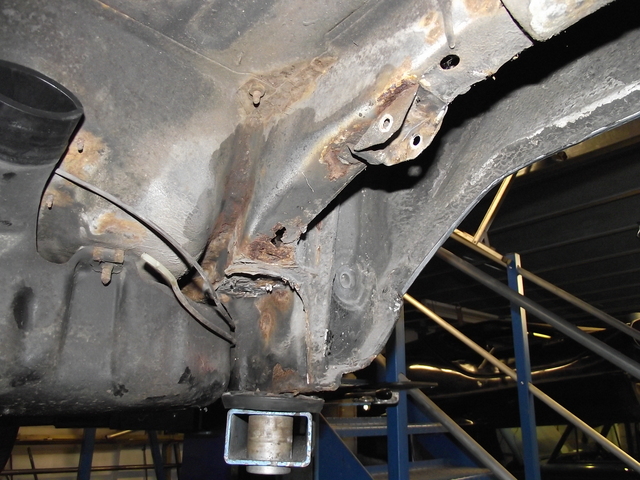
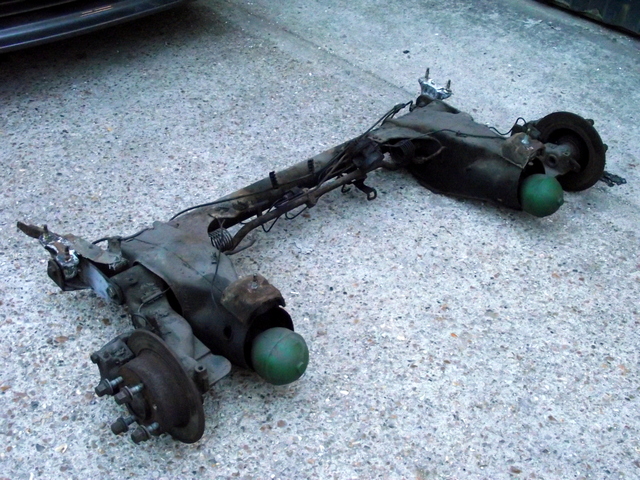
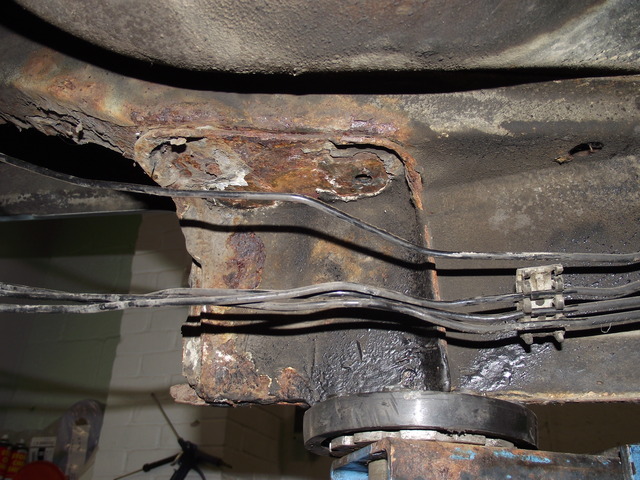
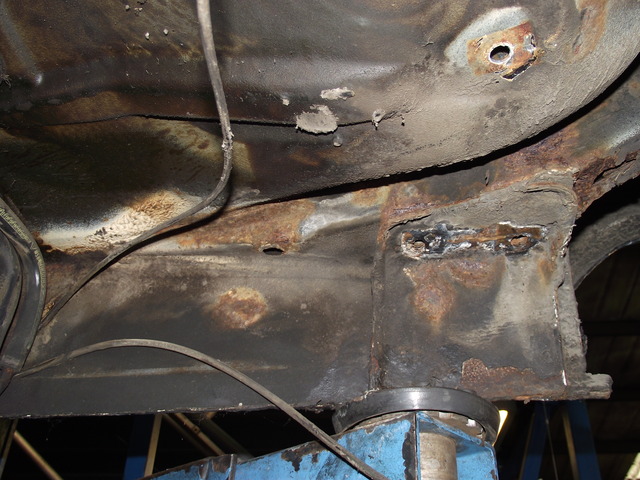
At least with all that out of the way, I've got access to really get in there and protect everything properly for years to come!
So then the fabrication started:
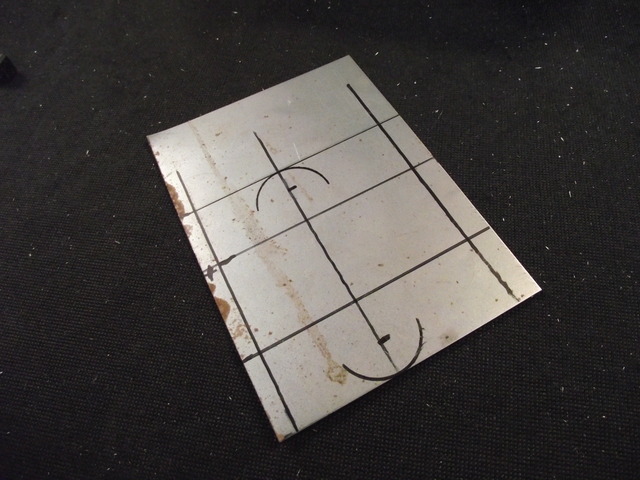
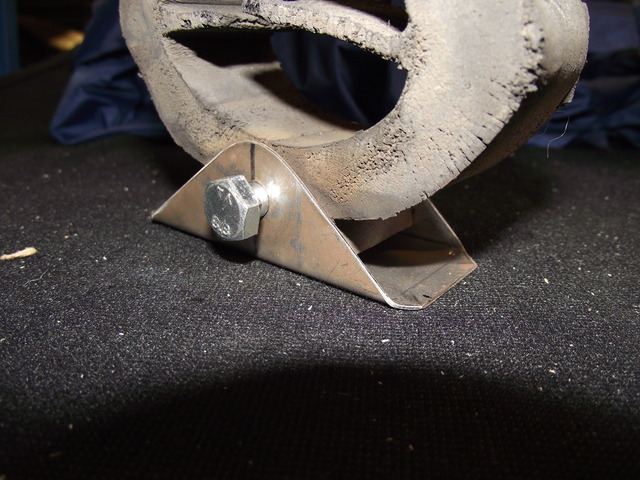
Old metal cut away, new sections going in:
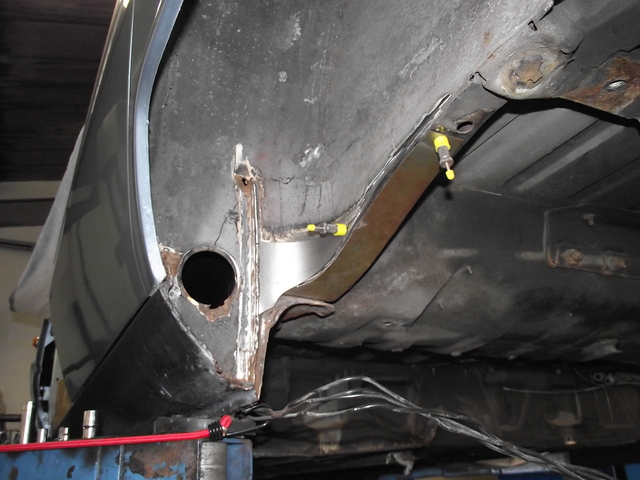
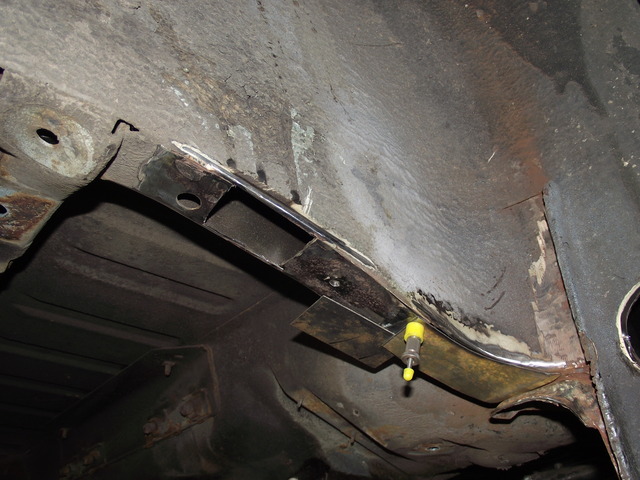
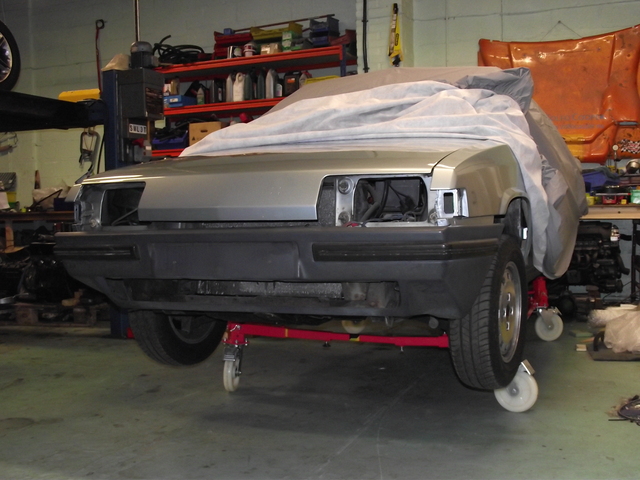
And then it was down on a dolly to free the ramp up for paying jobs! Back axle on the floor, loads of metal cutting still to do, LOADS of rusted areas to weld up, and I haven't even started the engine bay yet!
So, it seems I might have missed some more rust:

That's the offside inner rear wing. They like to rot here on BXs, as underneath there is a clip retaining a breather tube from the fuel filler neck. The clip posts onto a threaded stud, kind of like a self-tapping screw thread. And, being that cars tend to be undersealed using a rubberised spray-on adhesive, it only needs one fitting of the retaining clip to threaded stud to remove all traces of underseal from said thread, et voila! Bare metal, ripe for rusting! The rust begins, spreads underneath the underseal and works its way both through the metal, and up to the bonded seam the rear quarter panel attaches to. What this means is that when it lets go, it REALLY lets go:

That's without poking, that's as it was found. Anybody knows if you find a hole 30mm across, the metal you'll need to cut out will be 60mm across. Great!

So then I thought, "Maybe I should poke around a little bit more." And so I did, and rapidly wished I didn't:


Those are the rear chassis rails near the subframe mounts. To this day, I cannot believe I managed to miss all that! The only excuse I can come up with is that I inspected the car on a 4-poster, with all the wheels still attached. With the wheels on, it's much harder to see those areas, though not impossible. I'm normally so anal about that kind of thing, and I also tend to be the type who welds in new sections just because the old ones look bad, rather than have actually rotten through. Completely and utterly pissed off at this point, and finding this rot completely turned the tables on timescales, hence why it's still going today!
So, thanks to the new chassis rail issues, the rear axle and fuel tank had to be dropped:


At least with all that out of the way, I've got access to really get in there and protect everything properly for years to come!
So then the fabrication started:


Old metal cut away, new sections going in:


And then it was down on a dolly to free the ramp up for paying jobs! Back axle on the floor, loads of metal cutting still to do, LOADS of rusted areas to weld up, and I haven't even started the engine bay yet!

One third of a three-spoke BX columnist team for the Citroenian magazine.
CCC BX registrar: The national BX register - click to submit a car!
CCC BX registrar: The national BX register - click to submit a car!
-
Kitch
- Over 2k
- Posts: 6432
- Joined: Sun Jul 03, 2005 9:36 pm
- Location: Fareham, Hants
- My Cars: Too many to list
- x 91
Re: Operation wake up GT! (no one has 56k anymore, right?!)
So naturally, with the rear end of the car a total mess, it seemed to logical thing to do was to attack the front. I'd already had to hoist the car up onto a dolly to wheel it around the workshop as I'd removed the rear subframe, and now it was at perfect height to commence removing parts from the front of the car. In my haste to get the car painted, due to the deal I'd been offered being a limited-time offer, I'd planned to do something about the front end for some time. It wasn't on the original list of jobs though (most of this stuff wasn't - it was only supposed to be a blow-over!) and though my Dad's already told me it doesn't fuss him too much, it does bother me when it looks like this:
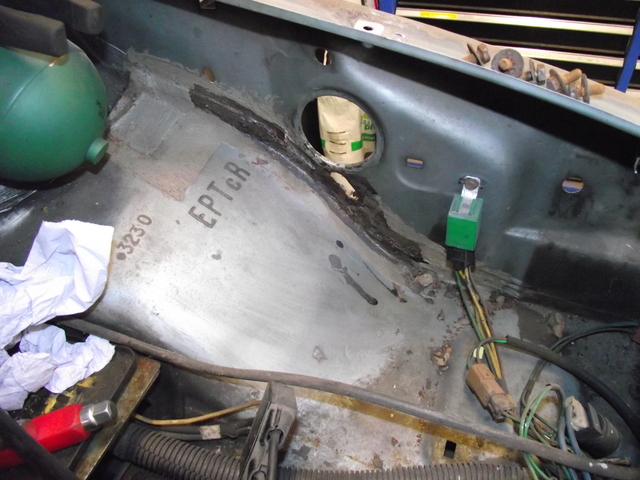
You've got a mix of minor holing, some dubious previous repairs and a variation of paint. Something had to be done.
So, engine out:
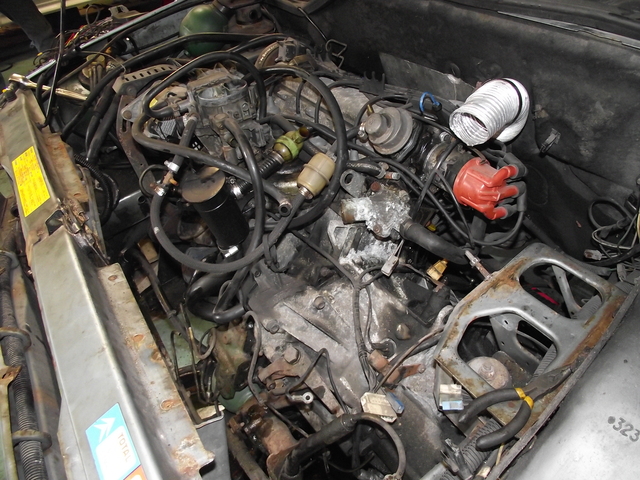
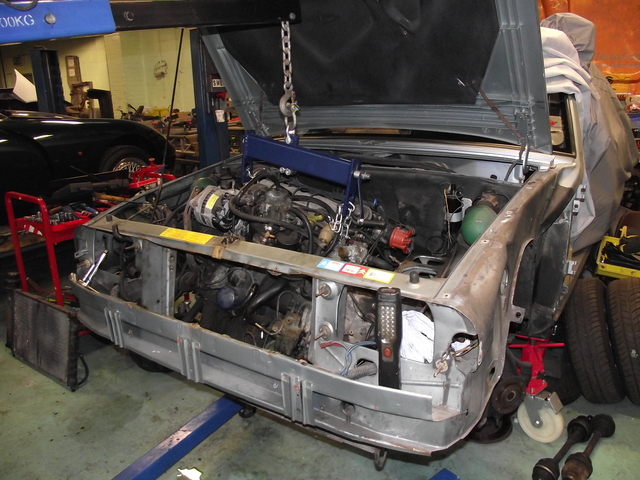
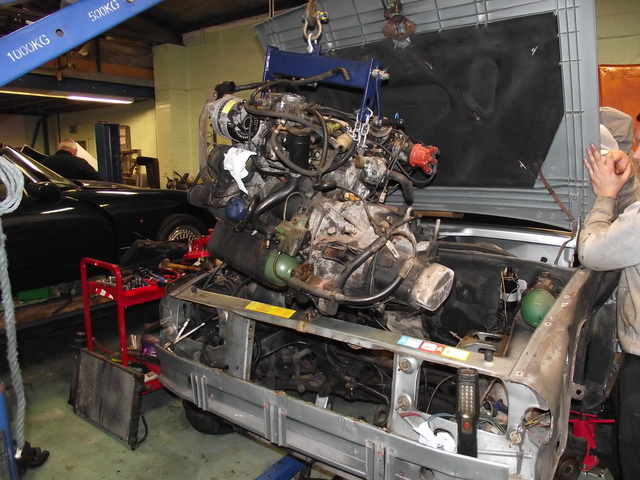
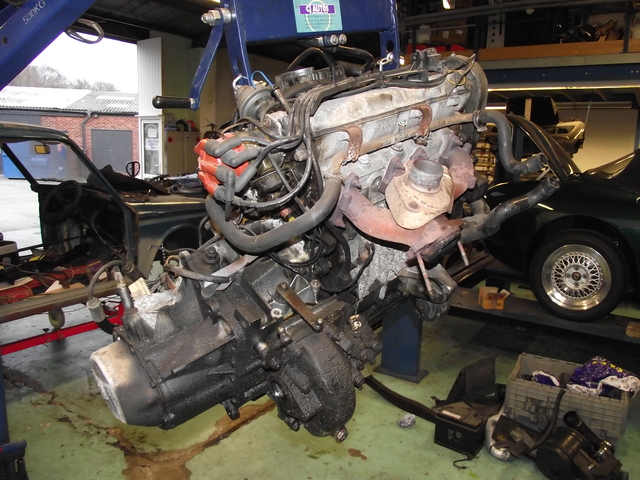
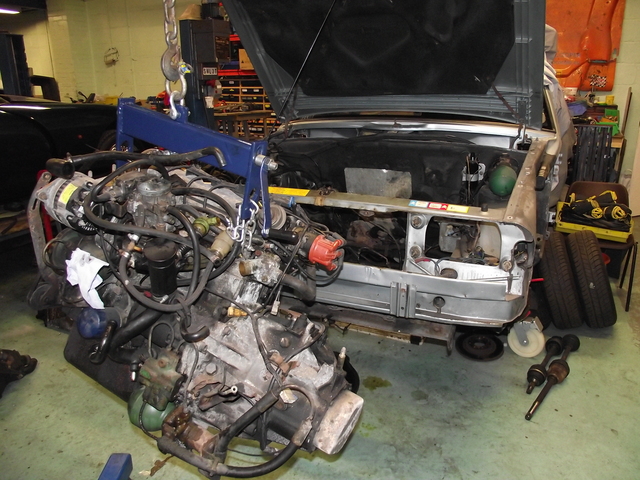
I'll carry out some minor repairs on the engine later.
Access now gained:
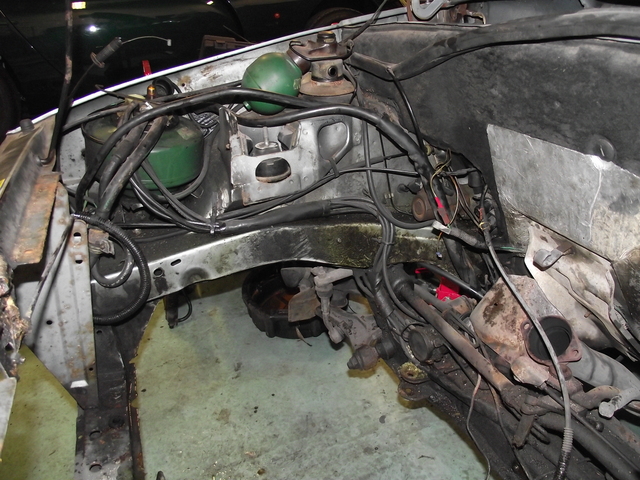
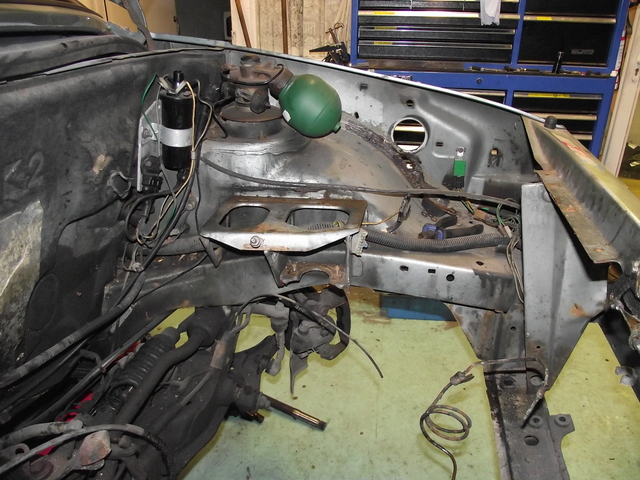
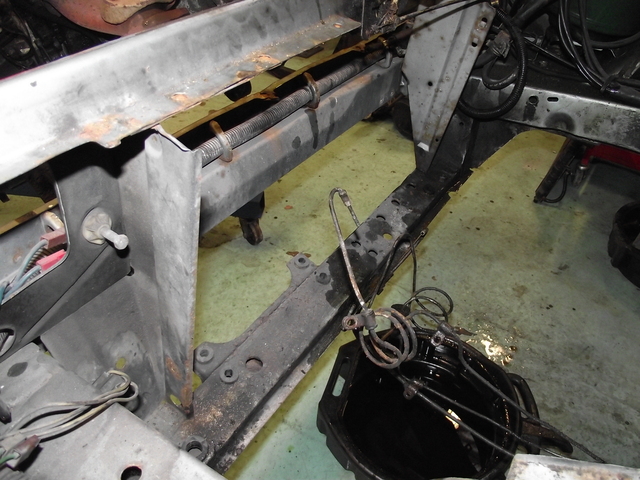
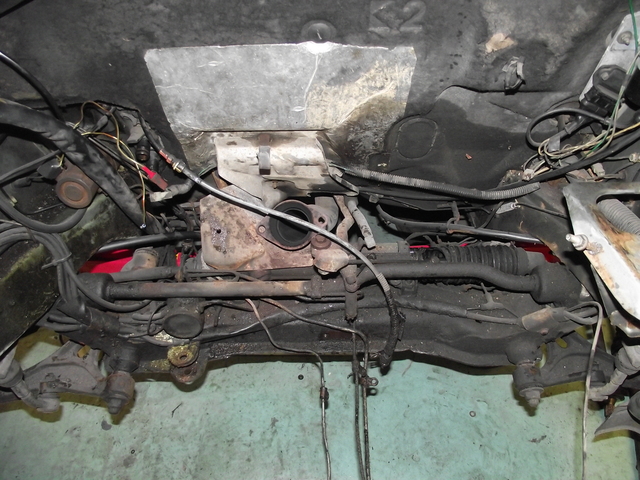
Of course, anyone who's delved into an old, well-used car like this (nearly 200k remember, and I don't think it's seen much in the way of cleaning!) will know the pain of the grime. You want to crack on and get it repaired and painted, but you know you can either clean one small patch, repair it and then paint the patch, or you can do it properly. With so little free time, so many other projects and massively running behind on timescale, I decided to go the whole hog and do the full job. Obviously.
Clearing down the inner wings. Sadly we're going to lose the OE paint code and RP number, but then we're not going concours or anything daft:
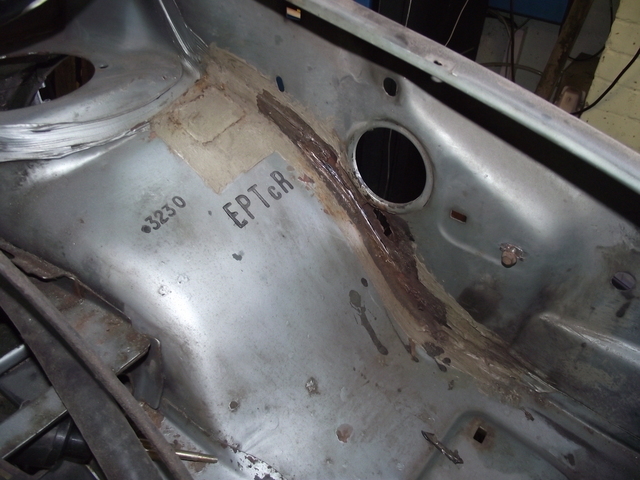
Nice:
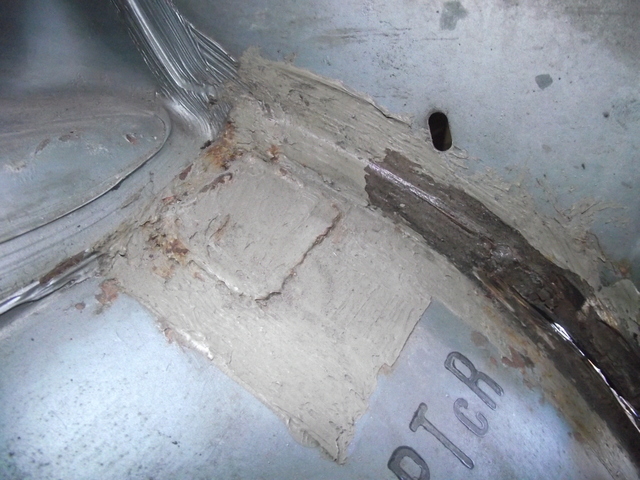
Rust through to the inner wing, so the decision to tackle the whole front end is looking justified already. There's every chance that more rot would have cropped up in a year or two if I'd just sorted the obvious stuff alone:
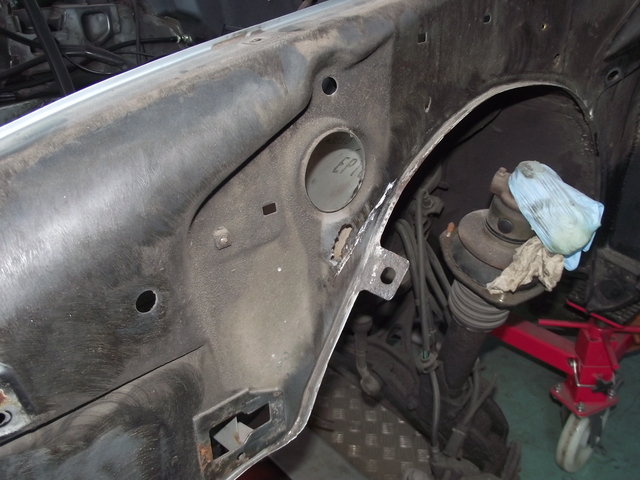
In for a penny:
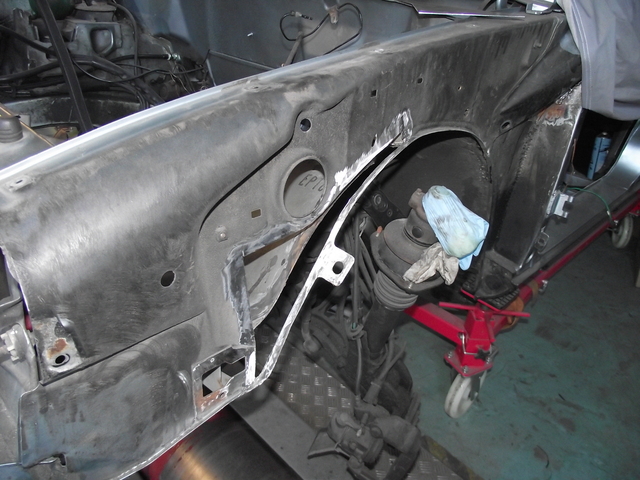
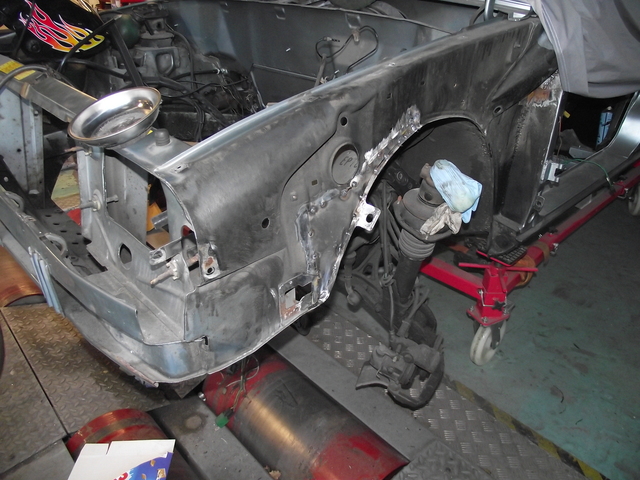
(I wanted to keep that lip around the edge as the plastic shit shield attaches to it)
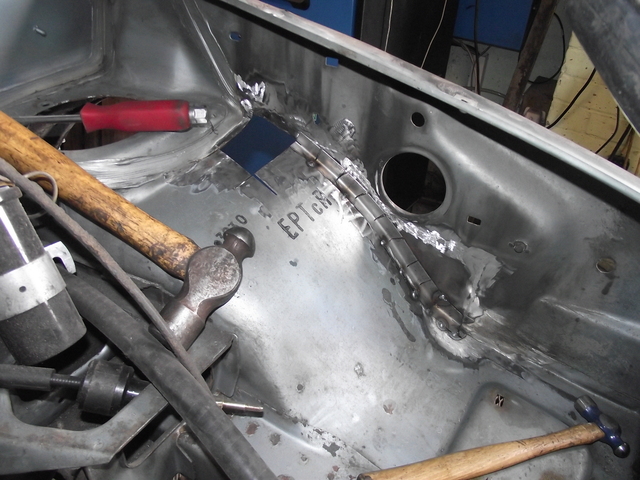
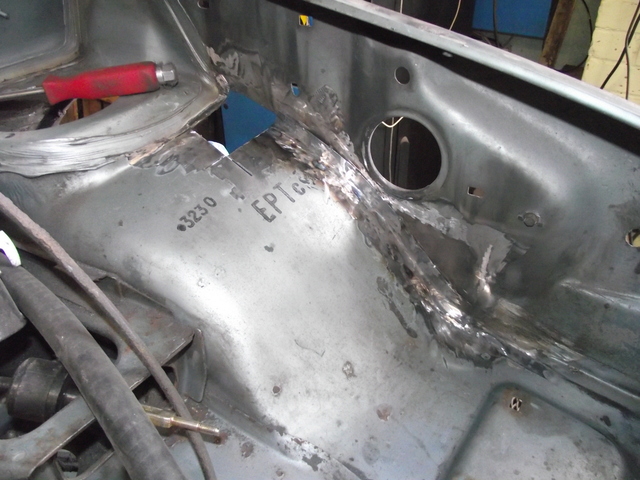
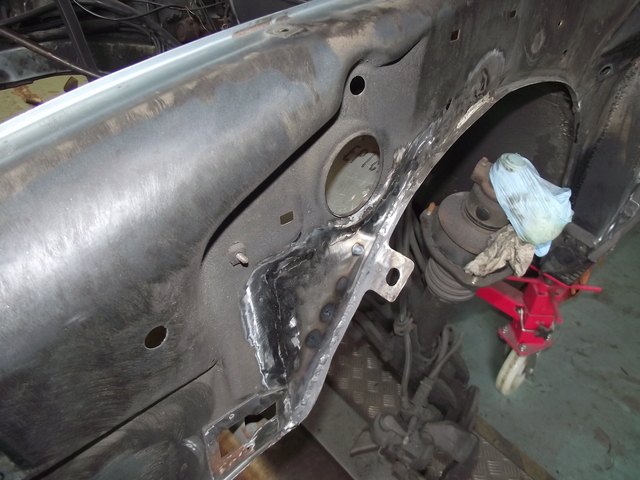
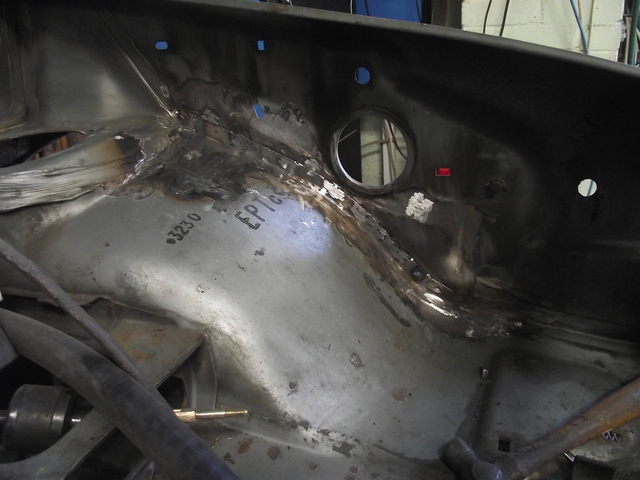
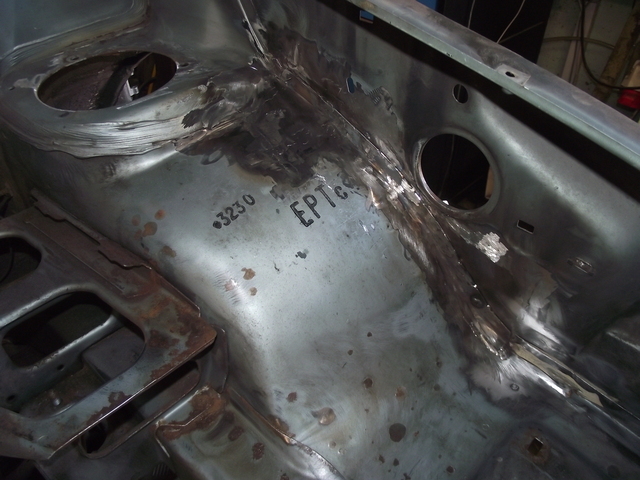
Desperately trying to replicate all the original seams! A quick coating of POR15 to keep it sound while I muck around in other corners of the engine bay:
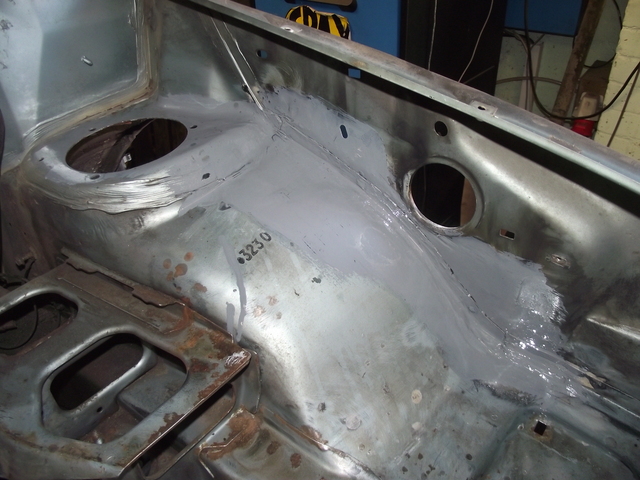
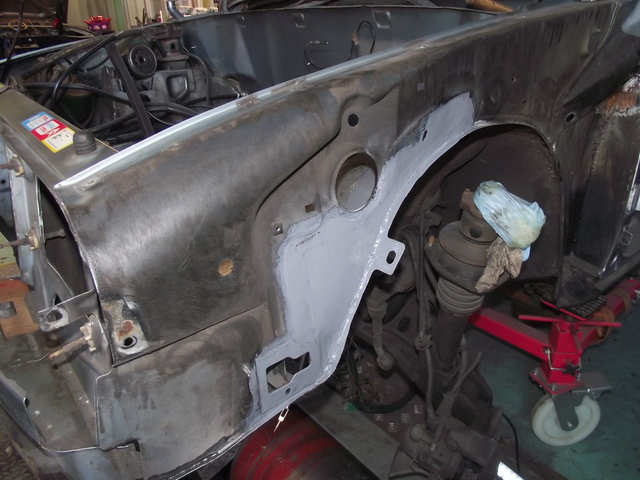
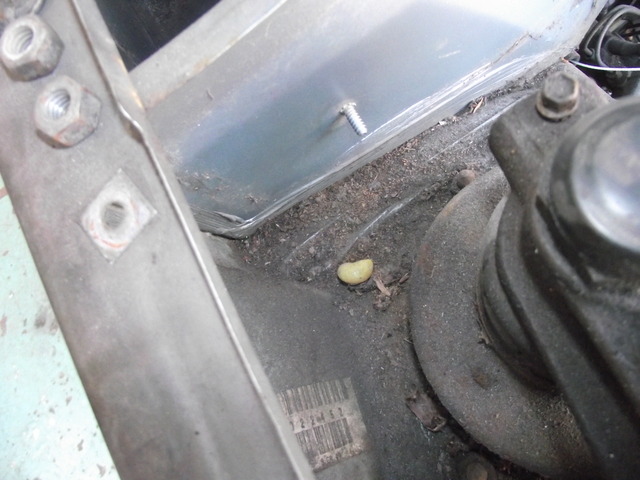
Found some grub:
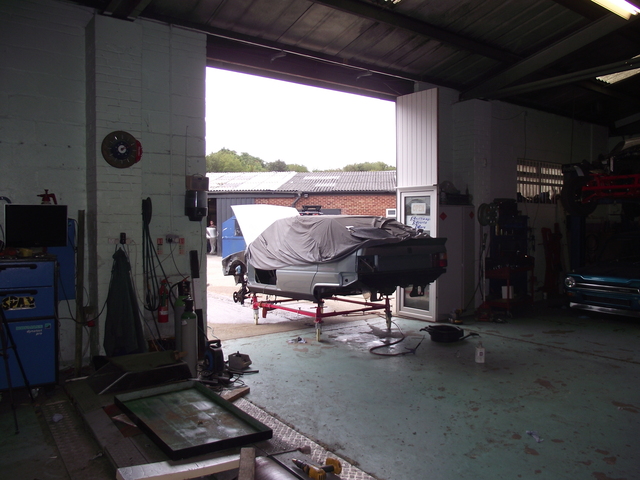
Wanted to repair all rot first, then clean using thinners, carb cleaner and brushes, but it was too far gone with the oil/grease/LHM! So for the opposing side, degreasing was the order of the day first before a session with the jet wash:
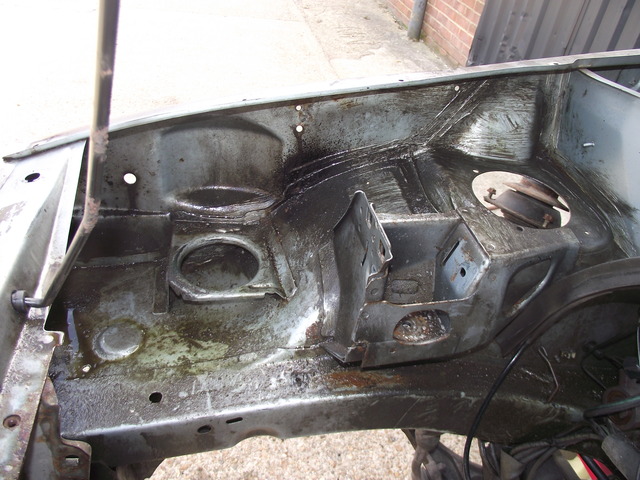
Spent AGES agitating the degreaser all over the bay. 3 hours or so just of scrubbing, but when the hose hit it, it made it all worth it:
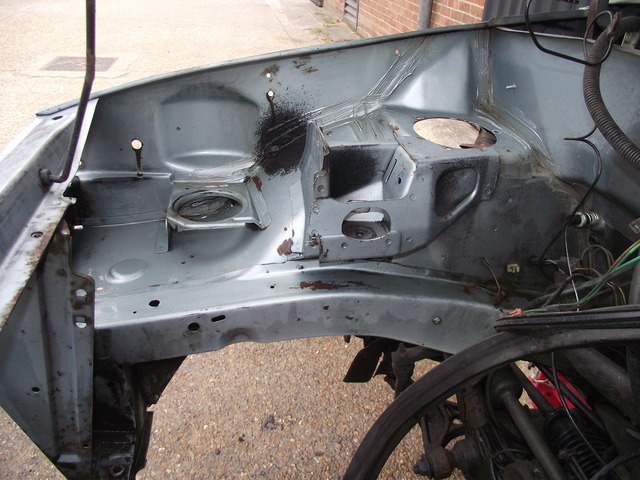
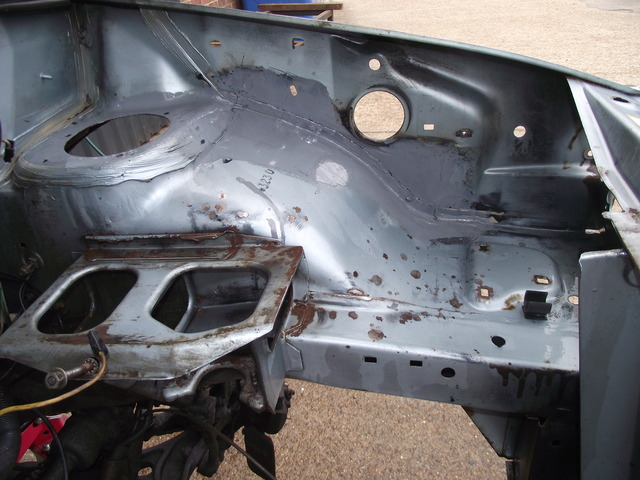
Nice application of Schutz there! I'm sure there's nothing bad underneath whatsoever:
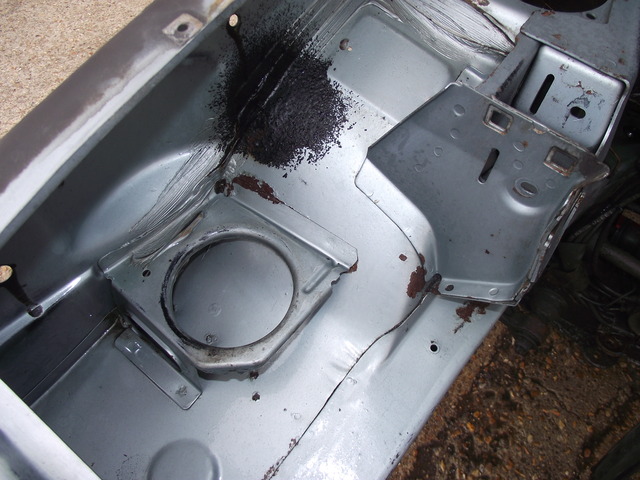

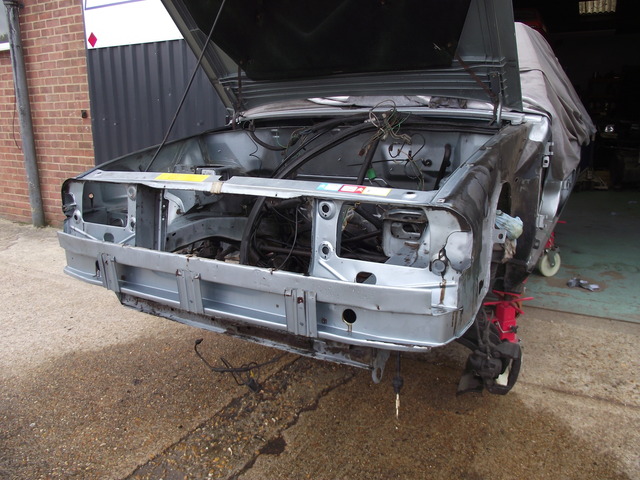
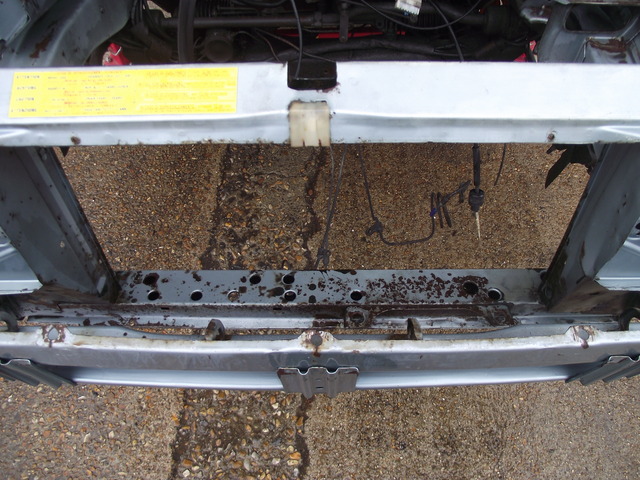
Schutz was hiding a dodgey patch. I was so shocked I nearly had to sit down!:
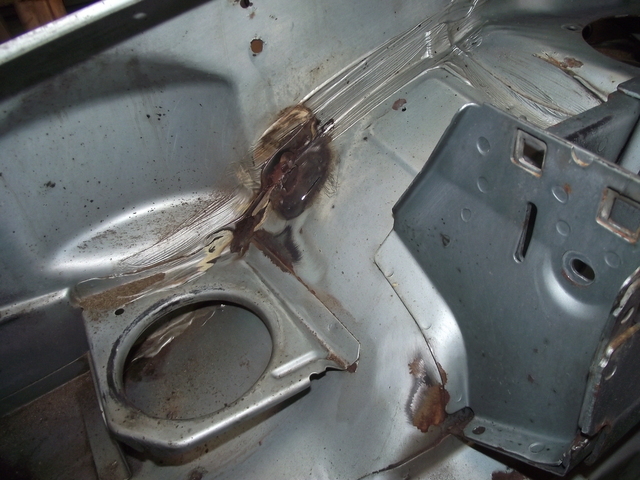
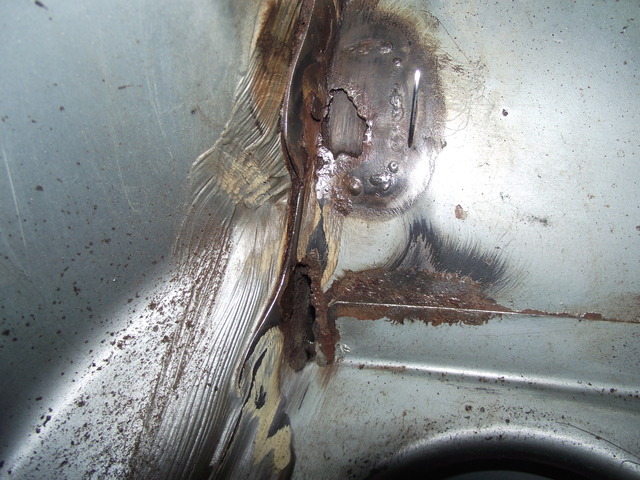
Tricky one to begin cutting out:
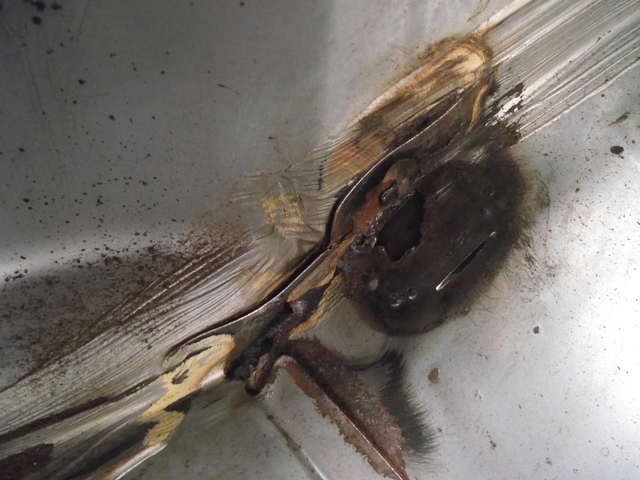
Got there though:
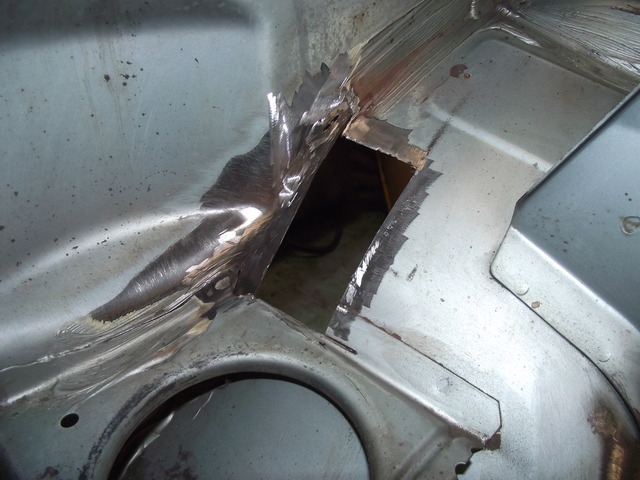
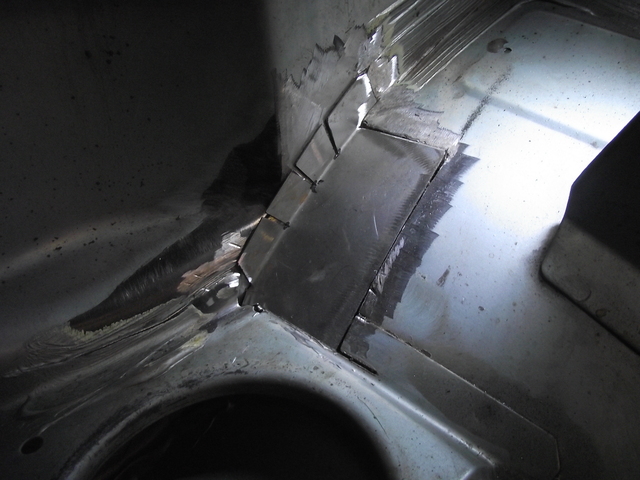
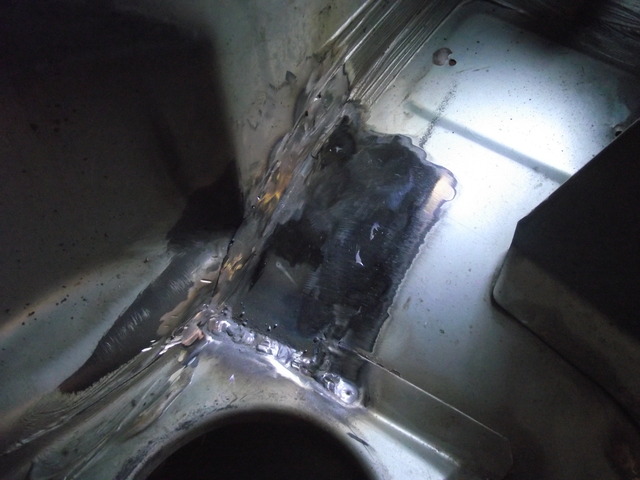
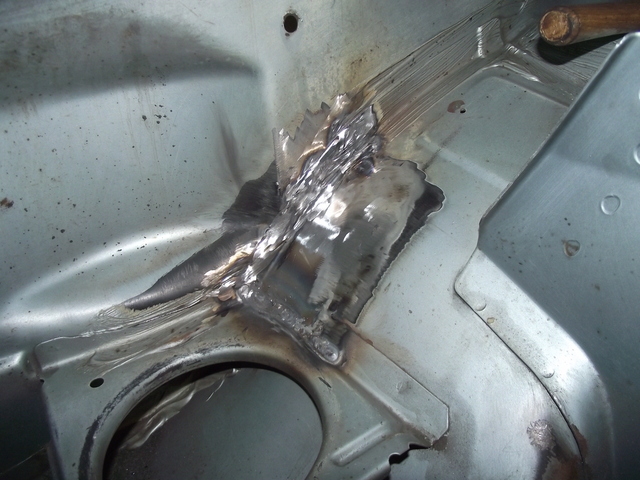
Should be pretty well disguised. Certainly enough for me!:
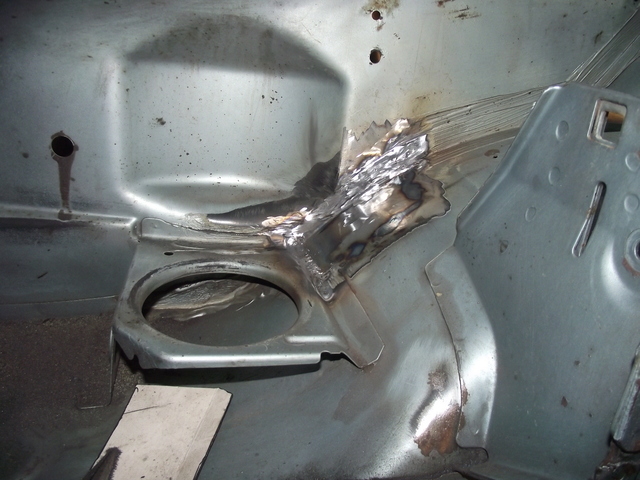
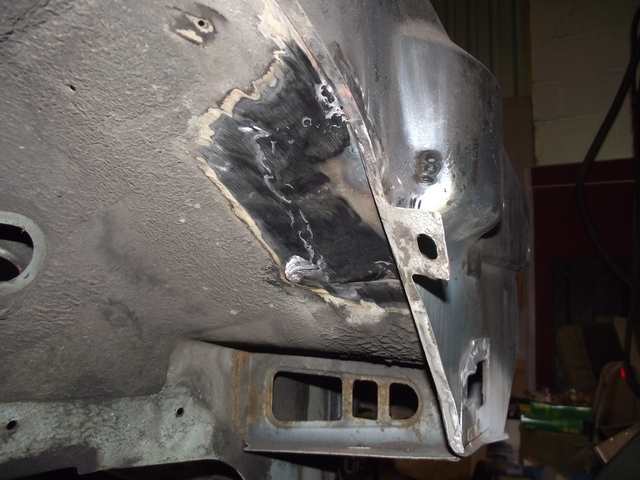
Earlier on, while removing the engine, I found another section down at the bottom of the front panel. Looked like rust had got in behind a panel:
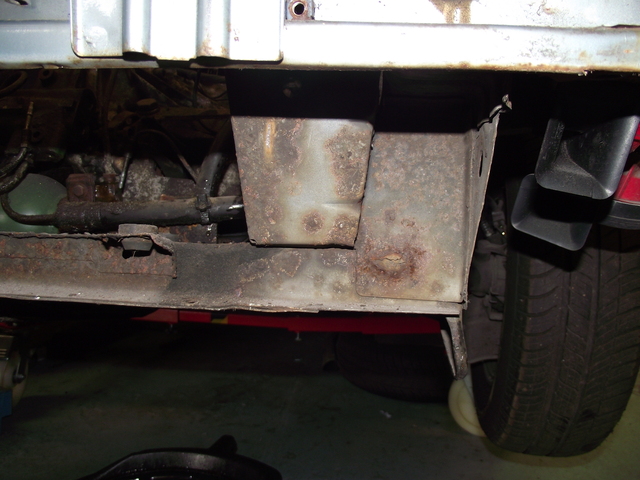
Well, I dug deeper and it turned out rust had gotten in behind a panel. So that panel had to be repaired too. Spot welds drilled, panel chopped:
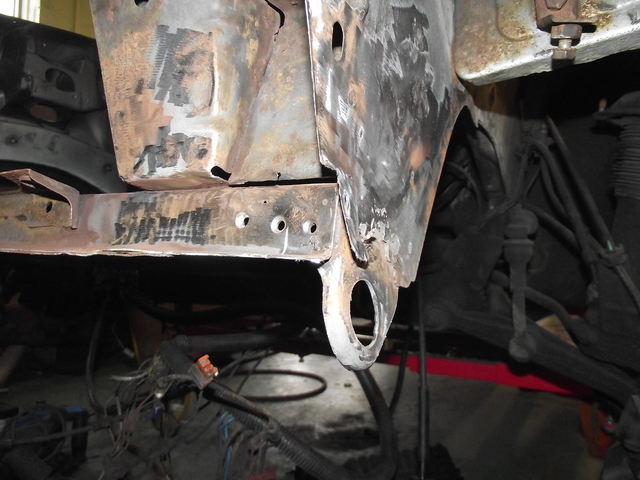
Closing piece on the end was also frilly around the bottom due to a previous poor repair, so that was chopped too:
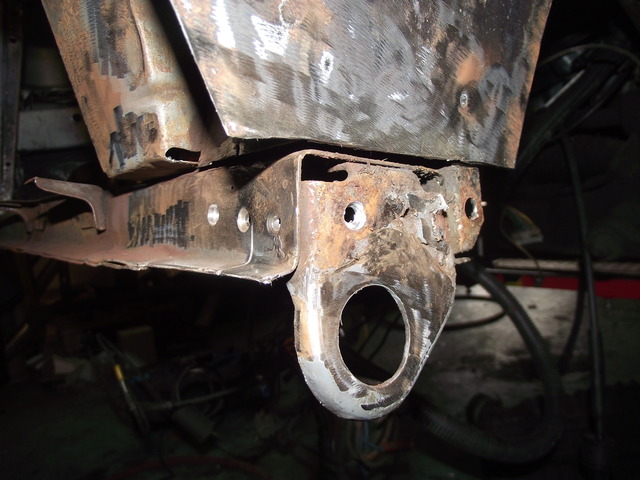
(Looks grim, but it's actually really thick material as it's part of the toe eye. The rust is all surface, happily it's all really strong underneath.)
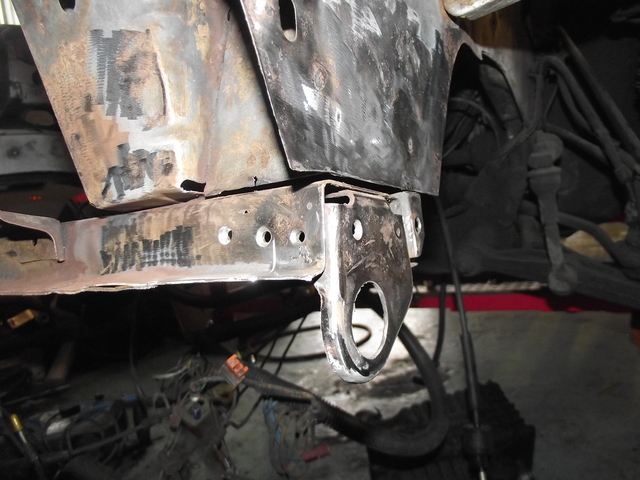
Finished repair section, Shreddies style!:
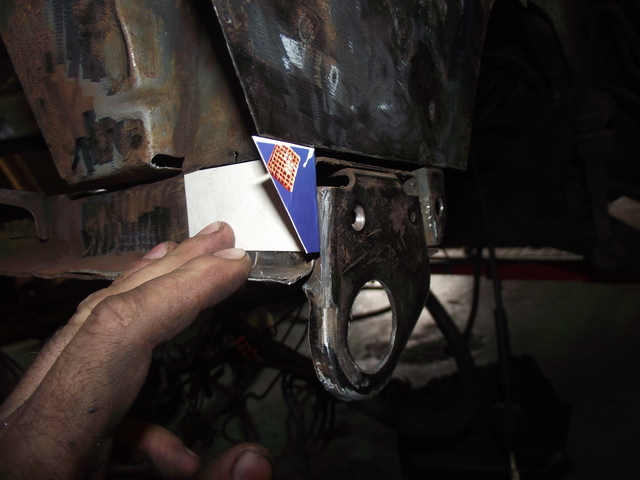
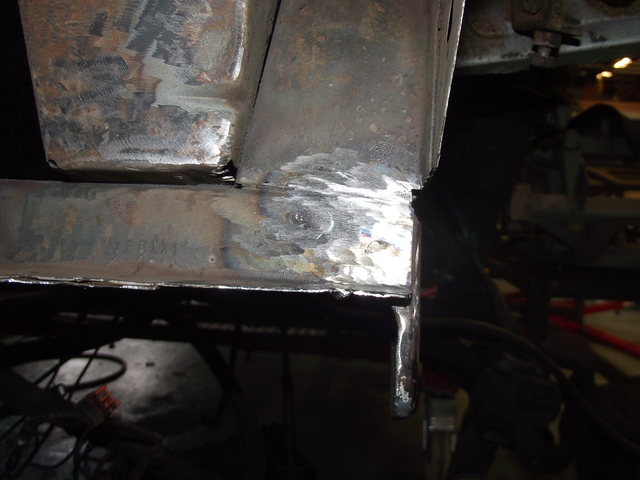
Needs some more tidying up (grinder doesn't fit in there, so it has to be a die grinder, and they don't leave the best finished - lucky this is all hidden!)
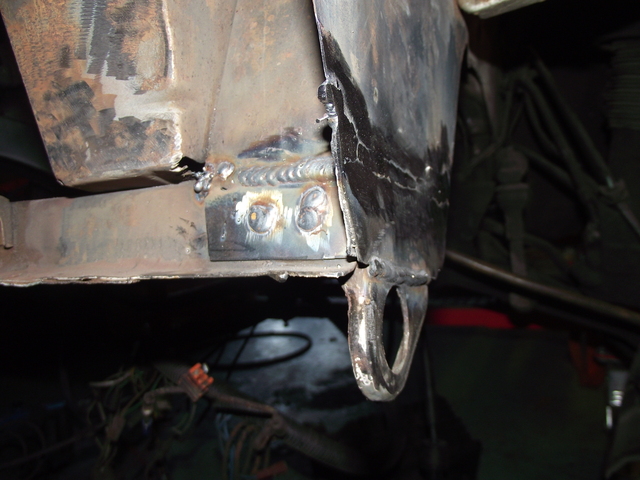
Getting inside the engine bay to attack all the surface rust I can find. Prevention over cure, and all that:
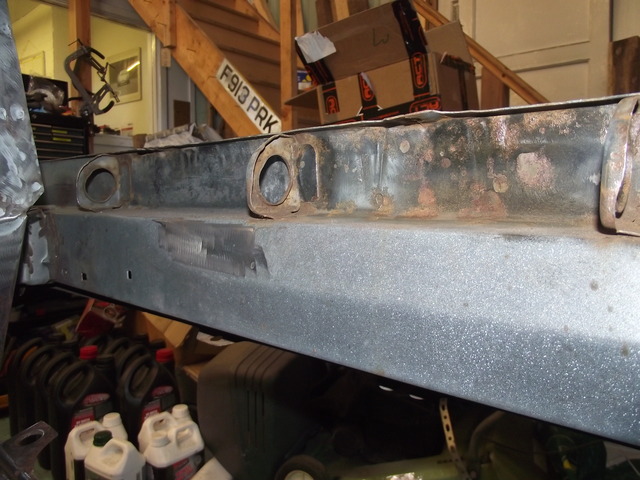
Spent ages removing most layers of paint. For every 20sq cm you cover, you'll find 1sq cm of surface rust, burrowing away under the paint and underseal. It's a painstaking job, hunting it all out, but it just seems worth doing now.
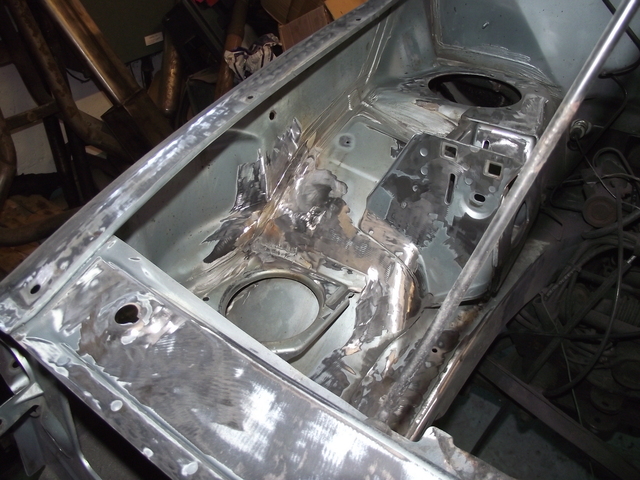
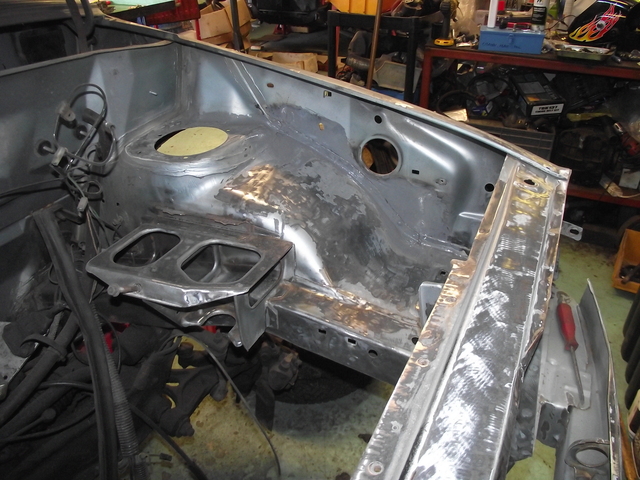
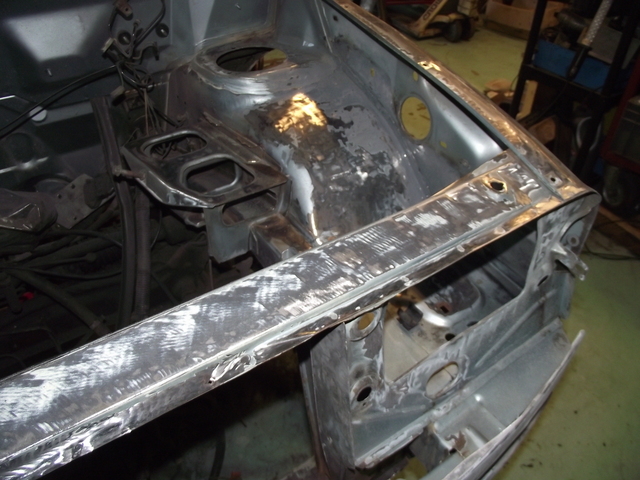
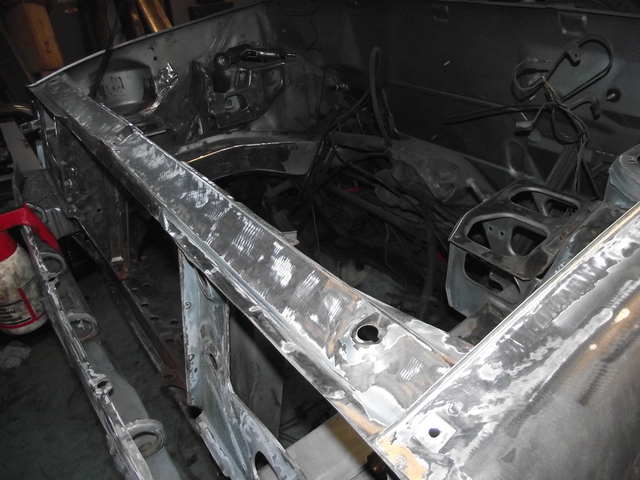
Anything that had specs on, near or under it was ground back:
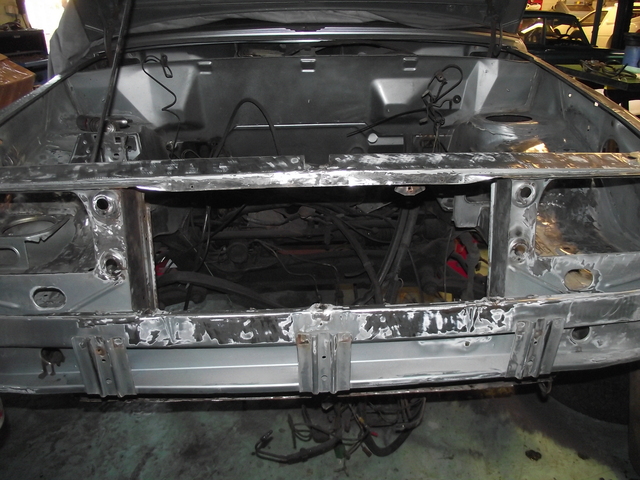
Then the entire section was degreased, washed, treated with Metal Prep (POR15 pre-treatment, zinc-phosphate wash-off stuff) before I coated all visible un-coated surfaces with grey POR15:
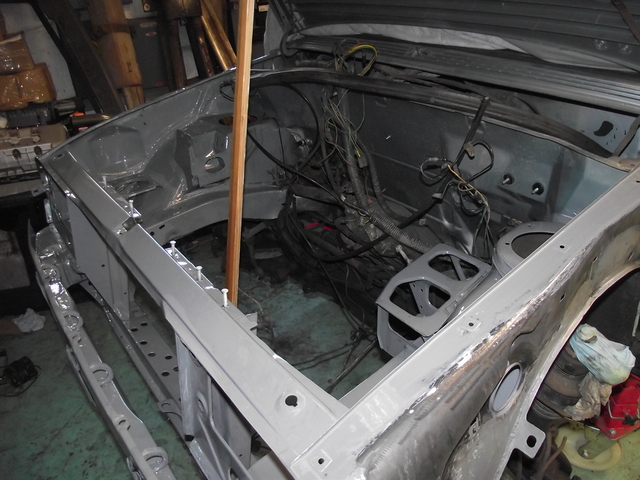
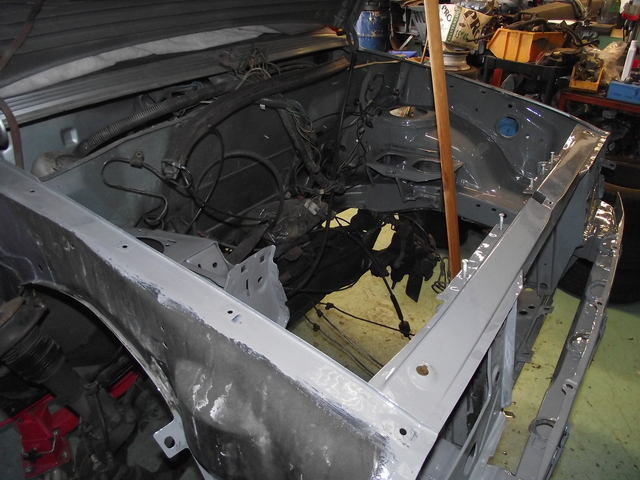
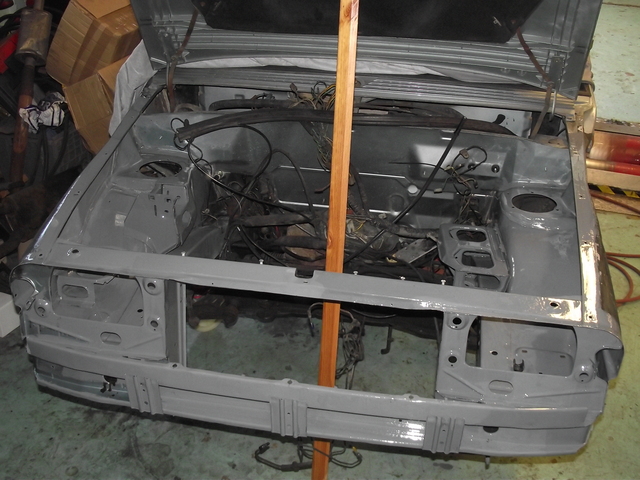
POR15 is evil stuff when it's on your hands, or up your nose. But when it's on a prepared surface, it's brilliant. It goes on very thin, and can be used as a primer, which is good, as I'll be rattle-can spraying the engine bay body colour before the engine goes back in.
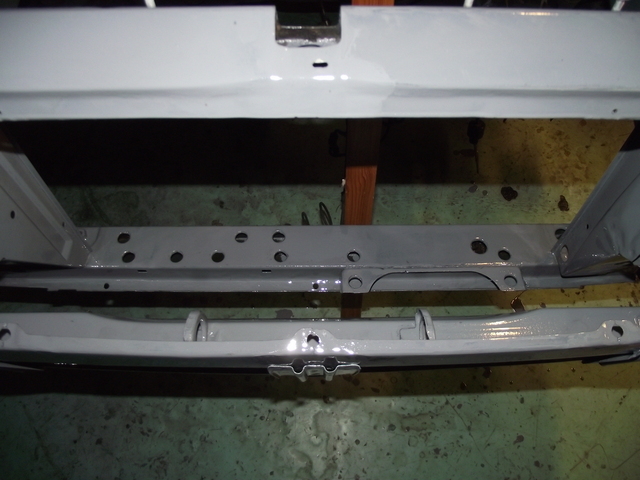
Everything up top that wants to be semi-pretty (engine bay pretty, not bodywork pretty) will be POR15 underneath, then the normal paint colour, possibly with lacquer (original finish didn't have lacquer, though later BXs did).
Everything underneath will be repaired and treated, but this time coated with Rustbuster 2-pack epoxy. Originally the BX would have been bodycolour underneath too, but to get that there on this car would add much more time, so that's where I'm drawing the line. The Epoxy, by it's nature, is no where near as pretty as the POR15, but it is as tough - probably more so. It'll do a job no problem.
As work moves around to the arches, which will be Epoxy mastic (but with some casual colour overspray!) I begin removing more layers of original underseal. And guess what I find?
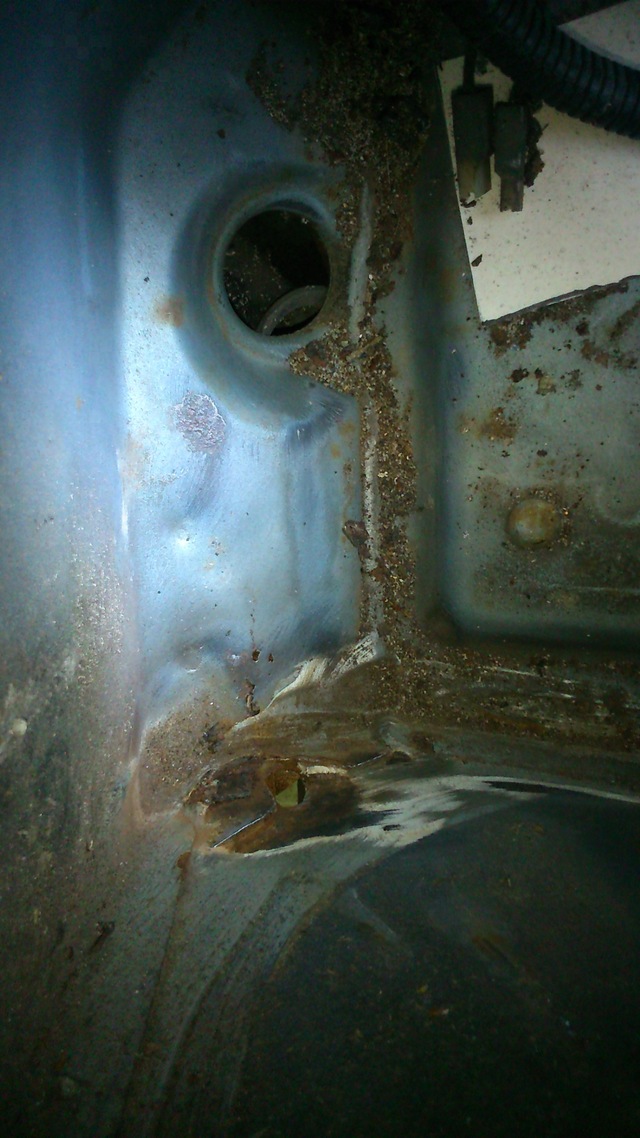
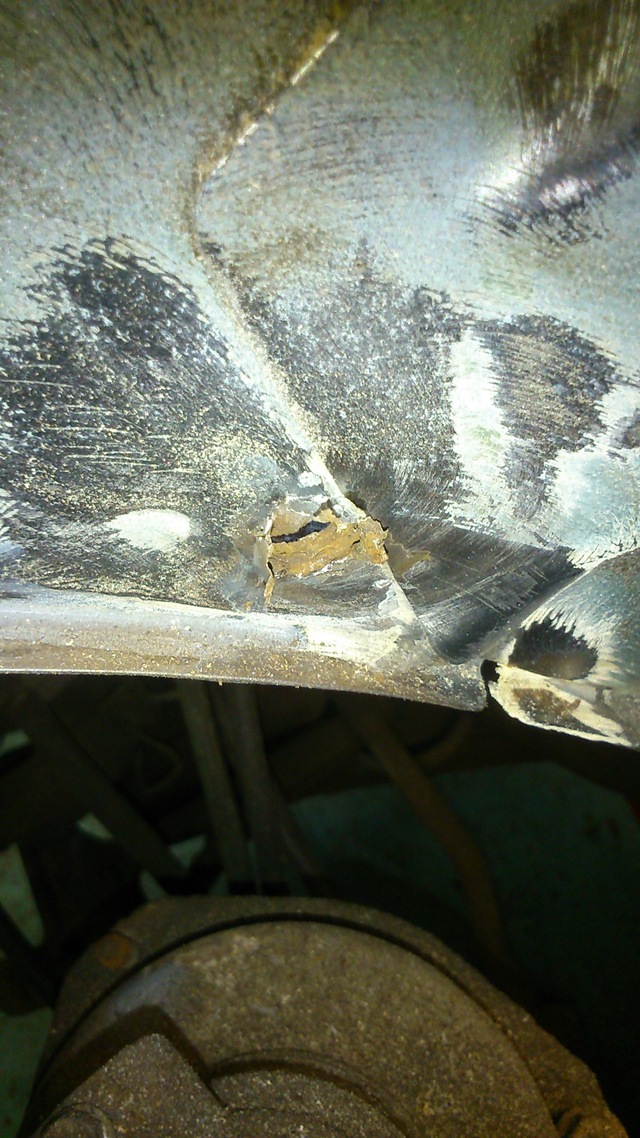
I know, what are the odd right?!
And it got better:
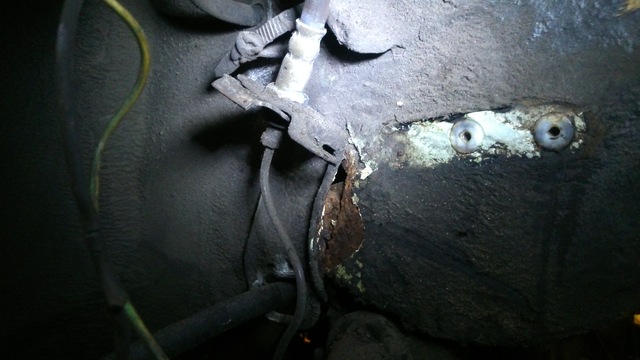
That, is the side of the chassis rail inside the OSF arch, behind the mount for the front brake hose. Nice big hole. Joy.
So, the mount has to come off:
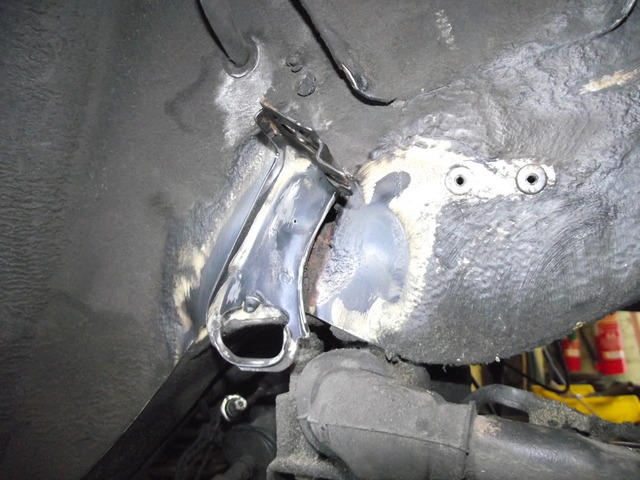
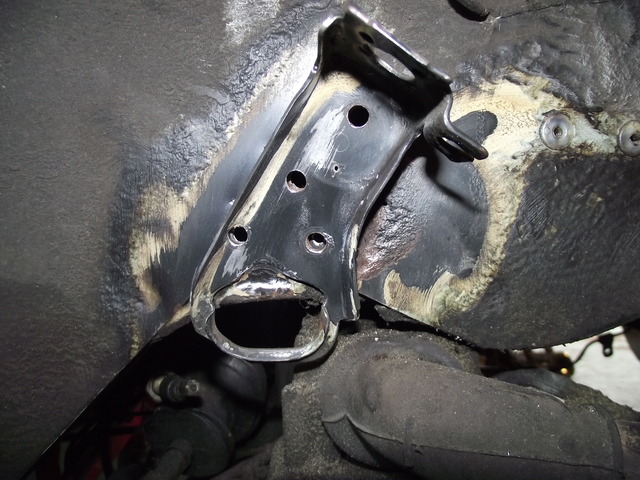
To reveal the water-trapped mess underneath:
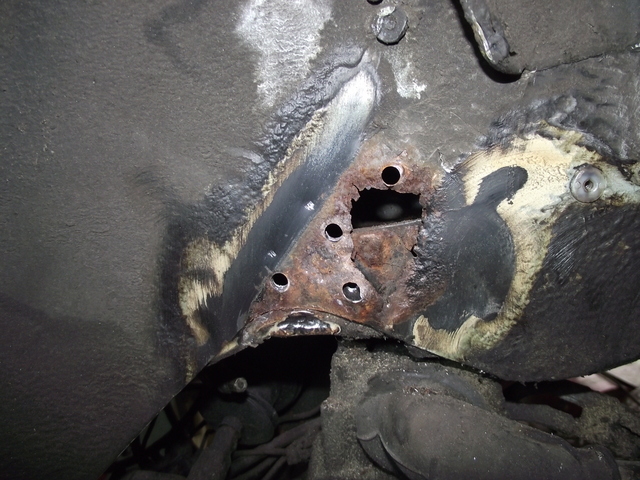
While I'm digging around, I find another patch on the lower front chassis rail. Luckily, this time it's been caught, and it's a perfect example of how cars rot. Bare in mind, this car has been kept indoors for the last 5 years or so. The only water to go near it was when the inner wings were hosed down, which was actually 3 months previous (I'm running out of sync here). That surface rust, found under some underseal, was DAMP. Number one solution to stopped your car rusting? Keep on top of cracked underseal!:
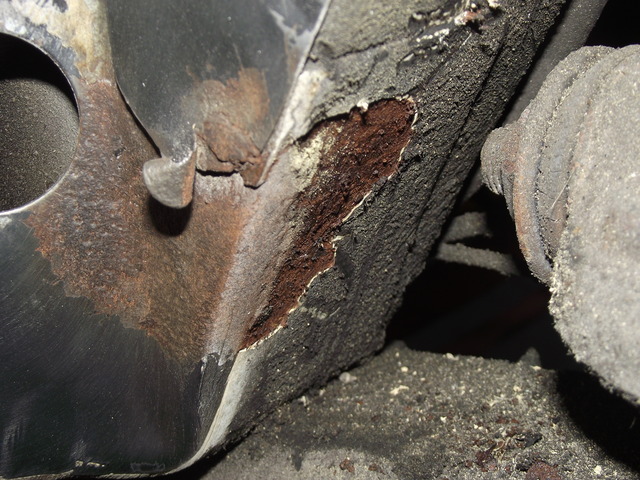
Anyway, I carry on digging out the messy arch:
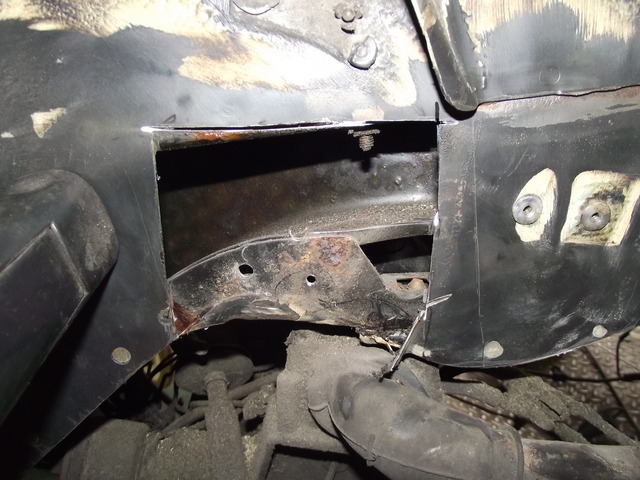
Luckily Citroen got the underseal right in the box section, and internally it's mint.
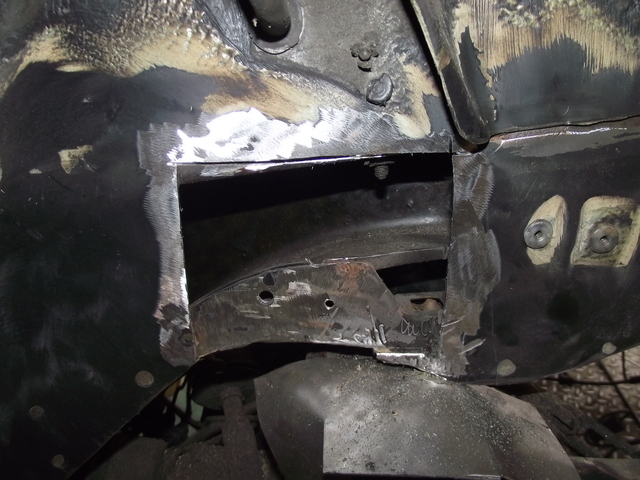
Treated and plated:
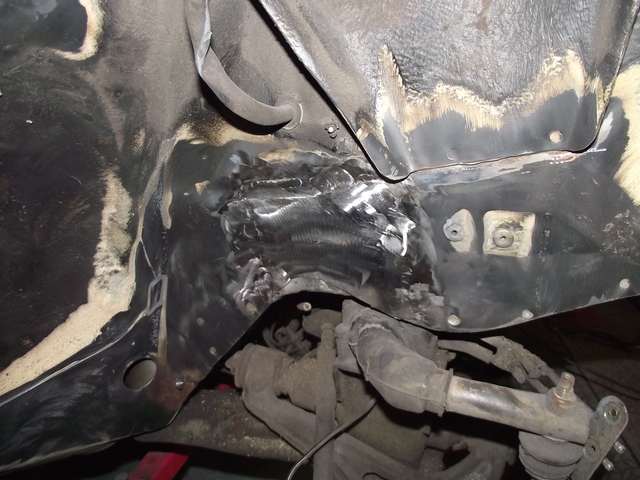
Refitted the mount (and beefed it up as it was suffering a bit on the back) using a jig I made from more discarded Shreddies boxes (someone at our place eats LOTS of Shreddies. Not even frosted ones, either!)
And that's where we are now. Need to continue with the stripping/prepping of the front arches, before I get the metal treatment out and slap some sticky black paint on them!

You've got a mix of minor holing, some dubious previous repairs and a variation of paint. Something had to be done.
So, engine out:


I'll carry out some minor repairs on the engine later.
Access now gained:


Of course, anyone who's delved into an old, well-used car like this (nearly 200k remember, and I don't think it's seen much in the way of cleaning!) will know the pain of the grime. You want to crack on and get it repaired and painted, but you know you can either clean one small patch, repair it and then paint the patch, or you can do it properly. With so little free time, so many other projects and massively running behind on timescale, I decided to go the whole hog and do the full job. Obviously.
Clearing down the inner wings. Sadly we're going to lose the OE paint code and RP number, but then we're not going concours or anything daft:

Nice:

Rust through to the inner wing, so the decision to tackle the whole front end is looking justified already. There's every chance that more rot would have cropped up in a year or two if I'd just sorted the obvious stuff alone:

In for a penny:


(I wanted to keep that lip around the edge as the plastic shit shield attaches to it)


Desperately trying to replicate all the original seams! A quick coating of POR15 to keep it sound while I muck around in other corners of the engine bay:


Found some grub:

Wanted to repair all rot first, then clean using thinners, carb cleaner and brushes, but it was too far gone with the oil/grease/LHM! So for the opposing side, degreasing was the order of the day first before a session with the jet wash:


Spent AGES agitating the degreaser all over the bay. 3 hours or so just of scrubbing, but when the hose hit it, it made it all worth it:


Nice application of Schutz there! I'm sure there's nothing bad underneath whatsoever:


Schutz was hiding a dodgey patch. I was so shocked I nearly had to sit down!:


Tricky one to begin cutting out:

Got there though:


Should be pretty well disguised. Certainly enough for me!:


Earlier on, while removing the engine, I found another section down at the bottom of the front panel. Looked like rust had got in behind a panel:

Well, I dug deeper and it turned out rust had gotten in behind a panel. So that panel had to be repaired too. Spot welds drilled, panel chopped:

Closing piece on the end was also frilly around the bottom due to a previous poor repair, so that was chopped too:

(Looks grim, but it's actually really thick material as it's part of the toe eye. The rust is all surface, happily it's all really strong underneath.)

Finished repair section, Shreddies style!:


Needs some more tidying up (grinder doesn't fit in there, so it has to be a die grinder, and they don't leave the best finished - lucky this is all hidden!)

Getting inside the engine bay to attack all the surface rust I can find. Prevention over cure, and all that:

Spent ages removing most layers of paint. For every 20sq cm you cover, you'll find 1sq cm of surface rust, burrowing away under the paint and underseal. It's a painstaking job, hunting it all out, but it just seems worth doing now.


Anything that had specs on, near or under it was ground back:

Then the entire section was degreased, washed, treated with Metal Prep (POR15 pre-treatment, zinc-phosphate wash-off stuff) before I coated all visible un-coated surfaces with grey POR15:


POR15 is evil stuff when it's on your hands, or up your nose. But when it's on a prepared surface, it's brilliant. It goes on very thin, and can be used as a primer, which is good, as I'll be rattle-can spraying the engine bay body colour before the engine goes back in.

Everything up top that wants to be semi-pretty (engine bay pretty, not bodywork pretty) will be POR15 underneath, then the normal paint colour, possibly with lacquer (original finish didn't have lacquer, though later BXs did).
Everything underneath will be repaired and treated, but this time coated with Rustbuster 2-pack epoxy. Originally the BX would have been bodycolour underneath too, but to get that there on this car would add much more time, so that's where I'm drawing the line. The Epoxy, by it's nature, is no where near as pretty as the POR15, but it is as tough - probably more so. It'll do a job no problem.
As work moves around to the arches, which will be Epoxy mastic (but with some casual colour overspray!) I begin removing more layers of original underseal. And guess what I find?


I know, what are the odd right?!
And it got better:

That, is the side of the chassis rail inside the OSF arch, behind the mount for the front brake hose. Nice big hole. Joy.
So, the mount has to come off:


To reveal the water-trapped mess underneath:

While I'm digging around, I find another patch on the lower front chassis rail. Luckily, this time it's been caught, and it's a perfect example of how cars rot. Bare in mind, this car has been kept indoors for the last 5 years or so. The only water to go near it was when the inner wings were hosed down, which was actually 3 months previous (I'm running out of sync here). That surface rust, found under some underseal, was DAMP. Number one solution to stopped your car rusting? Keep on top of cracked underseal!:

Anyway, I carry on digging out the messy arch:

Luckily Citroen got the underseal right in the box section, and internally it's mint.

Treated and plated:

Refitted the mount (and beefed it up as it was suffering a bit on the back) using a jig I made from more discarded Shreddies boxes (someone at our place eats LOTS of Shreddies. Not even frosted ones, either!)
And that's where we are now. Need to continue with the stripping/prepping of the front arches, before I get the metal treatment out and slap some sticky black paint on them!
One third of a three-spoke BX columnist team for the Citroenian magazine.
CCC BX registrar: The national BX register - click to submit a car!
CCC BX registrar: The national BX register - click to submit a car!
-
Kitch
- Over 2k
- Posts: 6432
- Joined: Sun Jul 03, 2005 9:36 pm
- Location: Fareham, Hants
- My Cars: Too many to list
- x 91
Re: Operation wake up GT! (no one has 56k anymore, right?!)
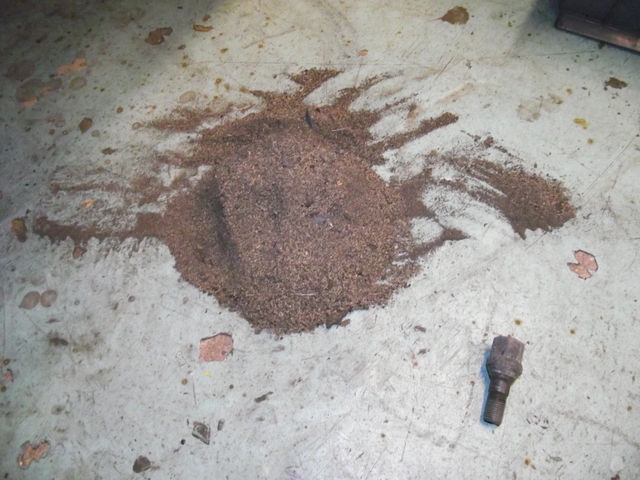
Oh, and if anyone wonders where the weight in cars really comes from, this pile weighed 1kg, and came from the O/S/F arch alone. It's about 40% of what's on there!


One third of a three-spoke BX columnist team for the Citroenian magazine.
CCC BX registrar: The national BX register - click to submit a car!
CCC BX registrar: The national BX register - click to submit a car!
-
Philip Chidlow

- Over 2k
- Posts: 11594
- Joined: Fri Oct 07, 2005 1:08 pm
- Location: Chelmsford, Essex
- x 25
Re: Operation wake up GT! (no one has 56k anymore, right?!)
There're a few words that might summarise this: Titanic effort, heroic even... But in a word: epic!
• 1992 Citroen BX TZD Turbo Hurricane
• 2006 Xsara Picasso 1.6 16v
• 2006 Xsara Picasso 1.6 16v
-
Tinkley
- 1K Away
- Posts: 1502
- Joined: Sat Jun 06, 2009 11:27 am
- Location: N Hants England
- x 8
Re: Operation wake up GT! (no one has 56k anymore, right?!)
All that sand - is there still a beach at Hayling?.... 
I could easily match the extra 'weight' with the crap inside my rear wheel arches......all mud, horse sh**, etc etc don't even ask about the fuel filler surround....rust. Weird thing is only one of 3 cars has gone bad there!.
Fortunately I've managed to salvage a lot at the front by getting it early enough, grinding in with Dremel, Multitool etc and getting 2k epoxy on there. I can't weld (well, no kit) but it's so much easier to glass/carbon/epoxy all those curved surfaces even if it's not 'kosher' ie within 300mm of a suspension mount hehehe! Still a good coat of 2k epoxy and 2k matching acrylic and only a magnet can find the exact spot. Maybe a very strong light, but hell, the structural integrity has not been impaired one iota - it's only a general 'rule' which is applied even if not relevant to a specific vehicle.
Brilliant job Kitch. Have to say that you at least get a lot of room when the engine is out (your 1.9 is only a bit taller than the 1.6) especially at the cambelt end and to the lower bulkhead.
Of course as i can't actually unbolt the wings properly - you can hear the weld spotted nut(s) grating ie the weld starting to give on the wheel arch nuts I might have some fun getting in there....guess the only way is to grind the heads off?
Mighty impressive though, I think you've caught her early enough she'll do a LOT more miles.
-
Tim Leech

- Over 2k
- Posts: 15625
- Joined: Tue Apr 15, 2008 11:12 am
- Location: Derbyshire
- My Cars: Various
- x 174
Re: Operation wake up GT! (no one has 56k anymore, right?!)
Well done Kitch
Lots of Motors, mostly semi broken....
-
bxzx16v
- BXpert
- Posts: 312
- Joined: Wed May 04, 2011 5:07 pm
- Location: Sheffield
Re: Operation wake up GT! (no one has 56k anymore, right?!)
Sterling work Kitch, fantastic read .
Mark
Mark
-
Kitch
- Over 2k
- Posts: 6432
- Joined: Sun Jul 03, 2005 9:36 pm
- Location: Fareham, Hants
- My Cars: Too many to list
- x 91
Re: Operation wake up GT! (no one has 56k anymore, right?!)
Suppose I should update the blog! Not a huge amount has happened since the last one, and what has happened has mostly been confined to rust removal, treatment and prevention. I'm getting pig-sick of wire brushes, paint, welding....you name it! Friday just gone I didn't have a great day, and actually downed tools and just stood there for a while at one point. I pondered digging the engine out of the corner and getting on with rebuilding that, but there wasn't enough time left to start all that, though it would have provided the change of scenery I think I badly need!
Anyway, we did get somewhere at least!
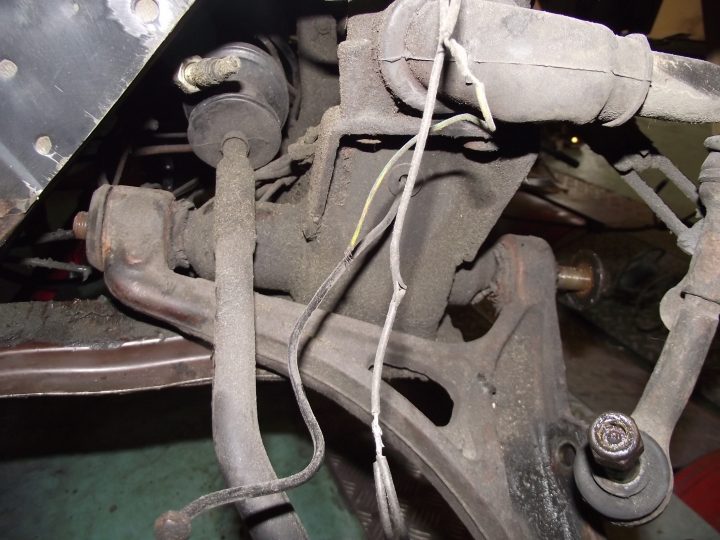
First off, I went on and removed the wishbones. The bushes are royally shagged, and because of the suspension arrangement on the BX, knackered bushes make quite a big impact on stability and handling:
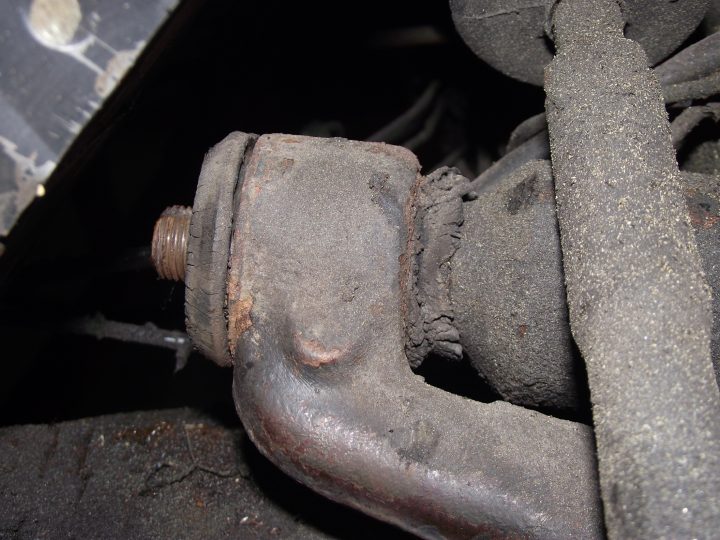
The wishbones pivot on a spindle, which was nicely rusted into the wishbone bush sleeves:
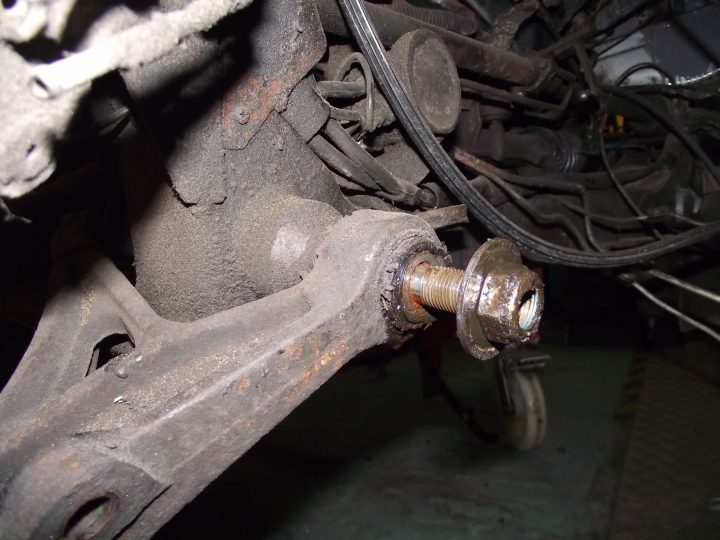
Unlike the BX in my other thread (the TRS one) the GT uses a conventional bush arrangement, rather than the addition bearings etc fitted in the subframes on the earliest BXs. The bushes are easy to find, and happily the wishbones are still in plentiful supply, and complete with bushes:
http://www.ebay.co.uk/itm/Citroen-BX-XB ... Sw-dBTsqn6
Though it wasn't without drama extracting that information from Euro Parts' online advisor:
Me: Hi, could you confirm these wishbones come with the bushes already fitted please? Thanks
ECP advisor L****l: Hi. Thank you for the message. For some they do come with bushes. Reagrds
Me: Hi, Ok. If I purchase a pair of wishbones from this listing, will they come with the bushes fitted? Thanks.
ECP advisor L****l: Hi, Thank you for the message. Please can we have your car registration. Regards
Me (getting the 'ump): Hi L****l, You don't need my car registration. This is the correct part for my car. All I want to know is whether these arms will come with bushes already fitted, as is shown on the picture (and is hinted at on the listing). If they come with bushes, I'll buy them. If they don't, I won't. It's really as simple as that. Thank you.
ECP advisor S**n: Hello, Thanks for your message, I can confirm that the item will be coming with the bushes, Regards
SUCCESS! It was so painless too!
Anyway, a good price and the arms arrived, indeed complete with bushes. Spot on, worth the hassle after all!
In the meantime, my foraging for tinworm had uncovered some ugly spots, and these were treated with Rustbuster's pre-treatment (kinda like Kurust, only it actually seems to work):
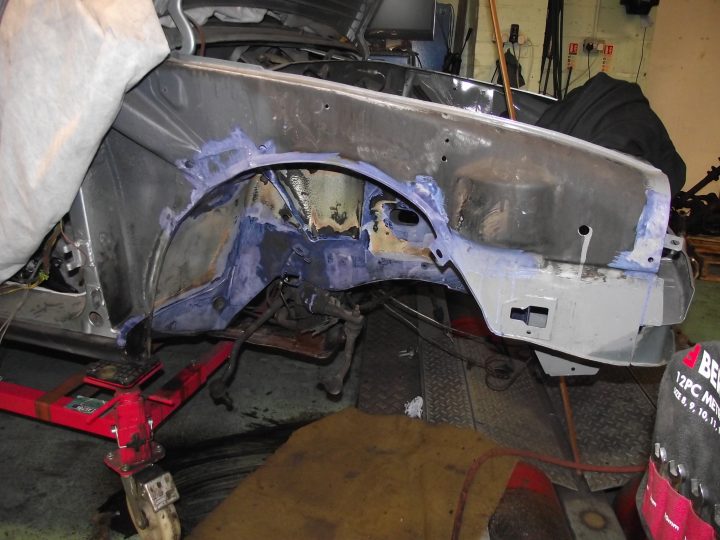
The whole offside inner arch/wheelarch was then finished off with Rustbuster black 2k epoxy mastic paint, with the original treated inner wing finished in grey stonechip, which overlaps the POR15 at the top:
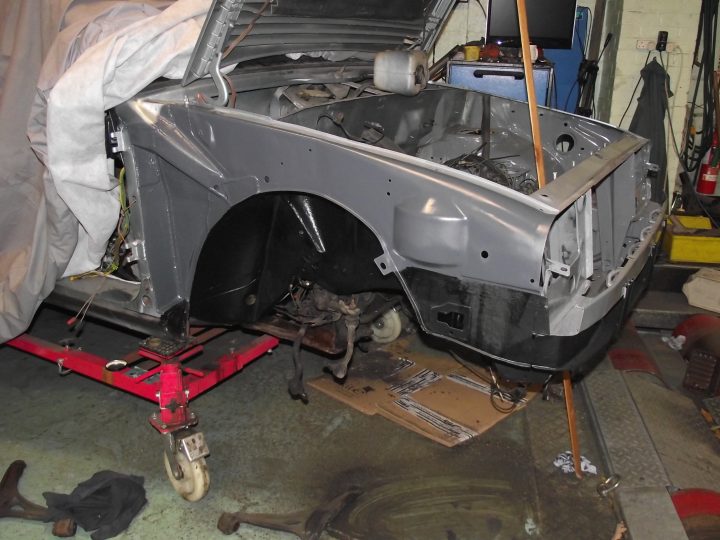
I'd like to see it try and rust like it did before!
Actually I wouldn't, I'd cry!
Anyway, nearside continues from where I left off some weeks back. Any Family Guy friends here? You know Cleveland's catchphrase? Not the nasty one, the one he usually says when the front of his house gets wiped out and his bathtub falls out the front of his house. Imagine him, saying that while looking at these pics. That's what I was doing:
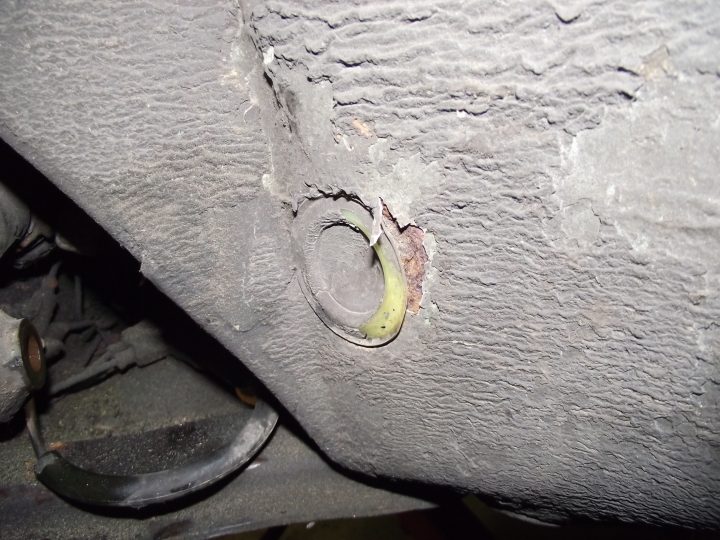
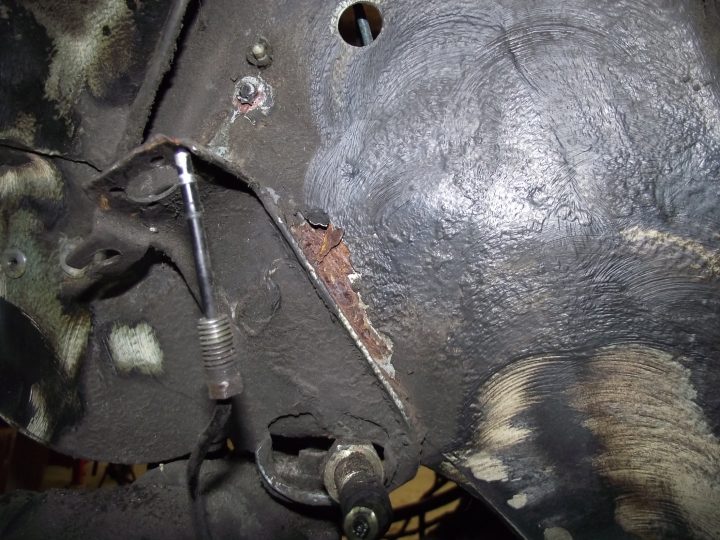
Luckily we got away with it, just some surface corrosion to treat:
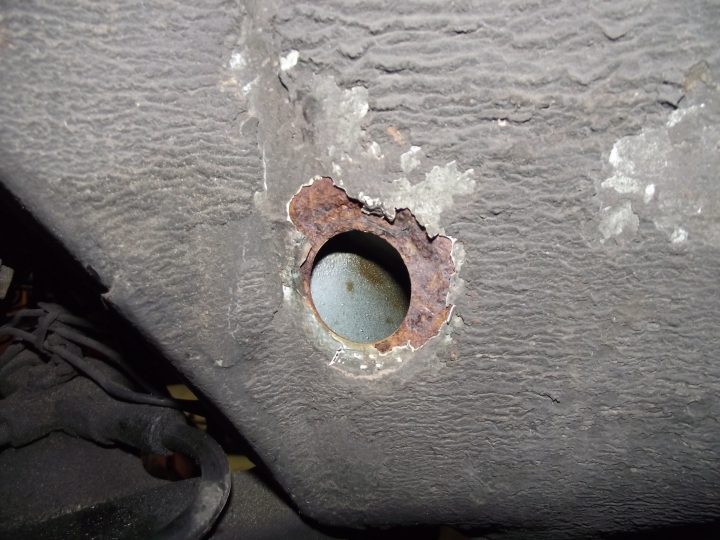
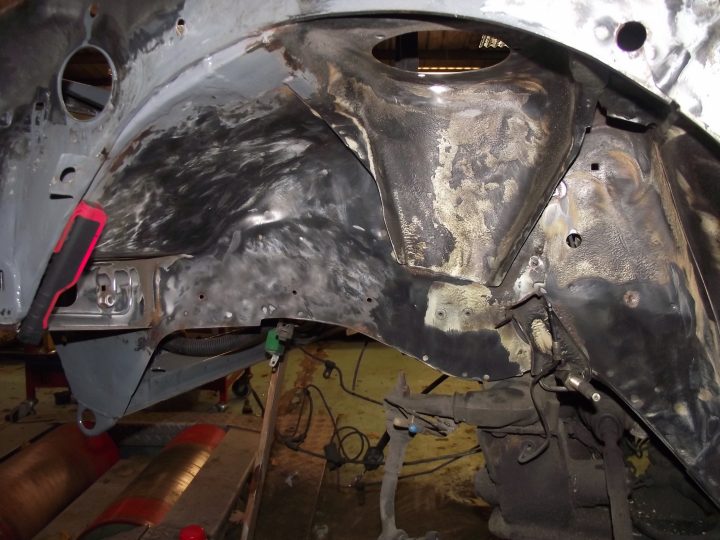
So the nearside front arch currently looks like this, and I've lost the will to live:
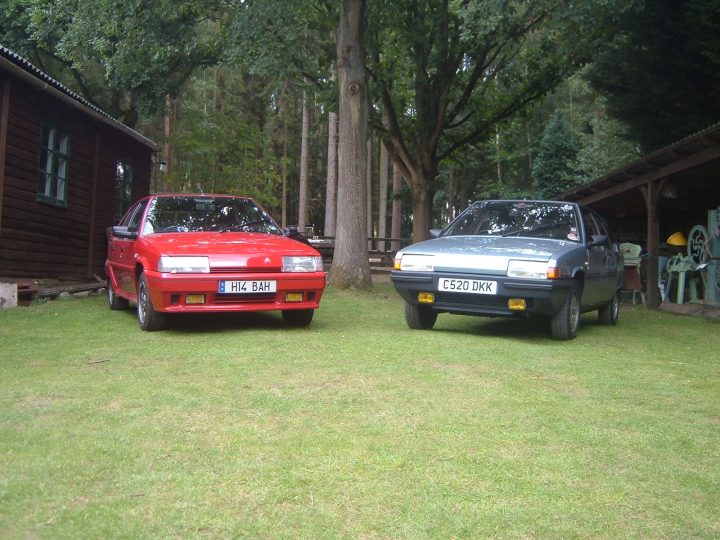
So in the meantime, a picture of the GT in happier times at a museum in Surrey, along with my 16v (and yes, I know the number plates are gash etc - I was going through a phase!)
Anyway, we did get somewhere at least!
First off, I went on and removed the wishbones. The bushes are royally shagged, and because of the suspension arrangement on the BX, knackered bushes make quite a big impact on stability and handling:


The wishbones pivot on a spindle, which was nicely rusted into the wishbone bush sleeves:

Unlike the BX in my other thread (the TRS one) the GT uses a conventional bush arrangement, rather than the addition bearings etc fitted in the subframes on the earliest BXs. The bushes are easy to find, and happily the wishbones are still in plentiful supply, and complete with bushes:
http://www.ebay.co.uk/itm/Citroen-BX-XB ... Sw-dBTsqn6
Though it wasn't without drama extracting that information from Euro Parts' online advisor:
Me: Hi, could you confirm these wishbones come with the bushes already fitted please? Thanks
ECP advisor L****l: Hi. Thank you for the message. For some they do come with bushes. Reagrds
Me: Hi, Ok. If I purchase a pair of wishbones from this listing, will they come with the bushes fitted? Thanks.
ECP advisor L****l: Hi, Thank you for the message. Please can we have your car registration. Regards
Me (getting the 'ump): Hi L****l, You don't need my car registration. This is the correct part for my car. All I want to know is whether these arms will come with bushes already fitted, as is shown on the picture (and is hinted at on the listing). If they come with bushes, I'll buy them. If they don't, I won't. It's really as simple as that. Thank you.
ECP advisor S**n: Hello, Thanks for your message, I can confirm that the item will be coming with the bushes, Regards
SUCCESS! It was so painless too!
Anyway, a good price and the arms arrived, indeed complete with bushes. Spot on, worth the hassle after all!
In the meantime, my foraging for tinworm had uncovered some ugly spots, and these were treated with Rustbuster's pre-treatment (kinda like Kurust, only it actually seems to work):

The whole offside inner arch/wheelarch was then finished off with Rustbuster black 2k epoxy mastic paint, with the original treated inner wing finished in grey stonechip, which overlaps the POR15 at the top:

I'd like to see it try and rust like it did before!
Actually I wouldn't, I'd cry!
Anyway, nearside continues from where I left off some weeks back. Any Family Guy friends here? You know Cleveland's catchphrase? Not the nasty one, the one he usually says when the front of his house gets wiped out and his bathtub falls out the front of his house. Imagine him, saying that while looking at these pics. That's what I was doing:


Luckily we got away with it, just some surface corrosion to treat:

So the nearside front arch currently looks like this, and I've lost the will to live:

So in the meantime, a picture of the GT in happier times at a museum in Surrey, along with my 16v (and yes, I know the number plates are gash etc - I was going through a phase!)

One third of a three-spoke BX columnist team for the Citroenian magazine.
CCC BX registrar: The national BX register - click to submit a car!
CCC BX registrar: The national BX register - click to submit a car!
-
Kitch
- Over 2k
- Posts: 6432
- Joined: Sun Jul 03, 2005 9:36 pm
- Location: Fareham, Hants
- My Cars: Too many to list
- x 91
Re: Operation wake up GT! (no one has 56k anymore, right?!)
And then today:
Another update, though not as momentous as I'd hoped it would be. Original plan was to have the front end all back together, painted and buttoned up by the turn of the New Year. That, ain't gonna 'appen.
What has 'appened, is more rust. Yeah, I know!
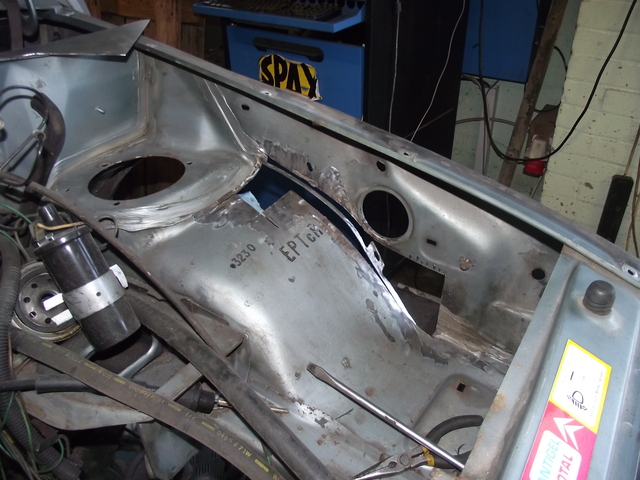
With the offside front arch done, I moved to the nearside to finish removing the majority of the old underseal that I thought might be concealing corrosion. Turns out, it was. So, on a day where a regular man from country went into space, I welded more bits of new metal into an old French heap:
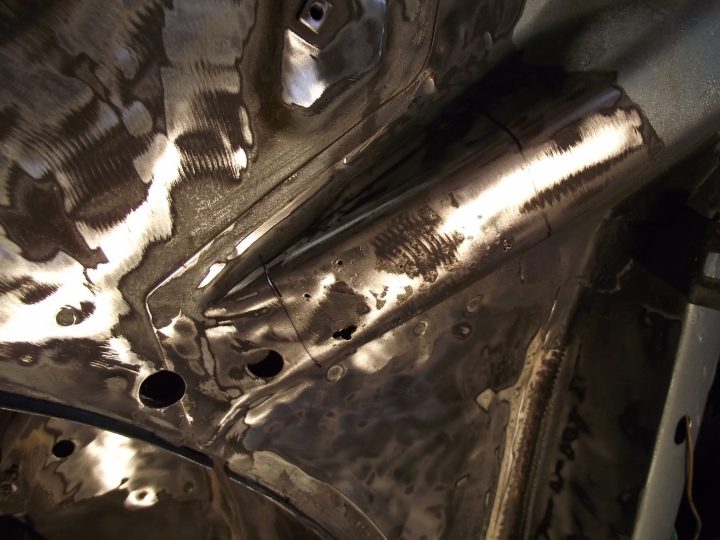
So, again, what should have been a couple of hours prepping for paint, turned into another weldathon:
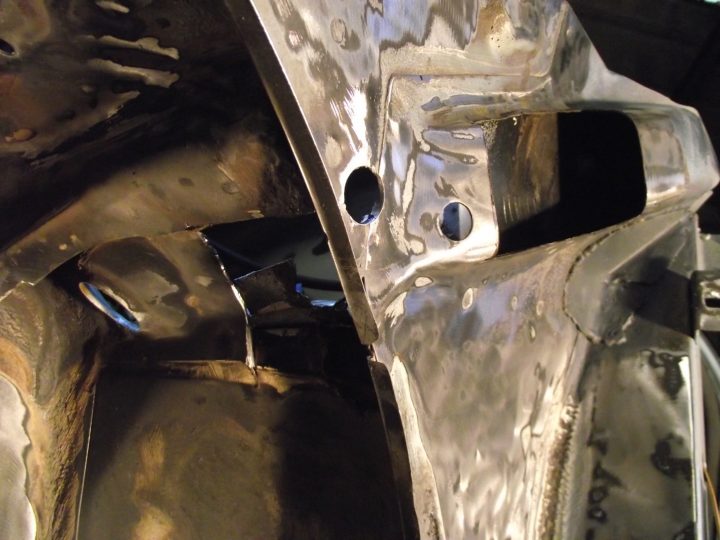
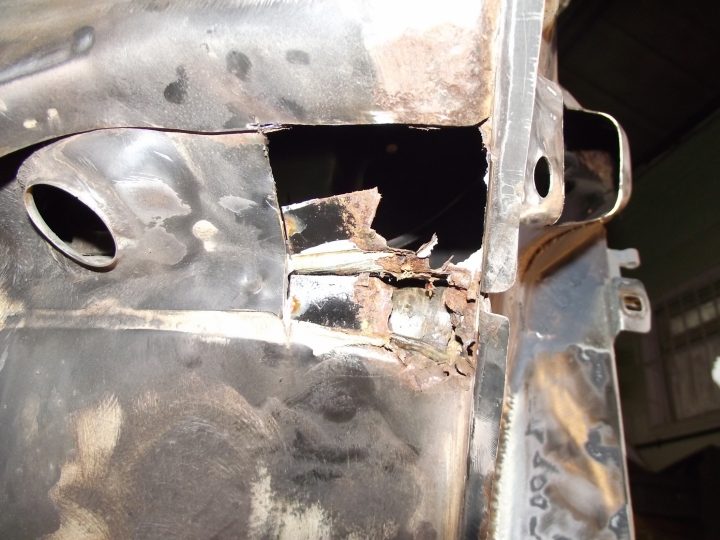
That's the sound insulation behind wear the dash goes, just in there....
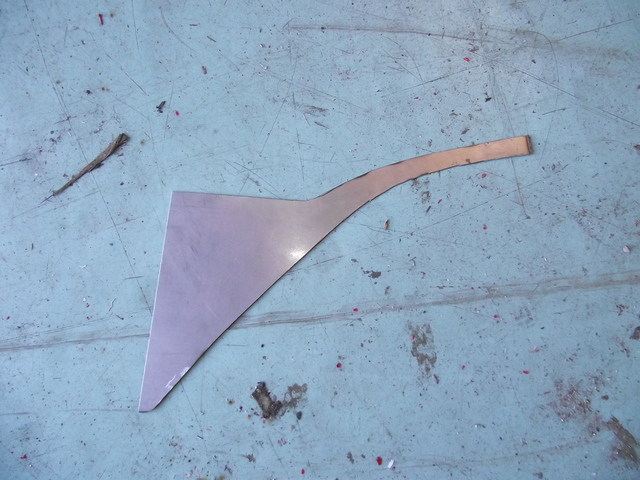
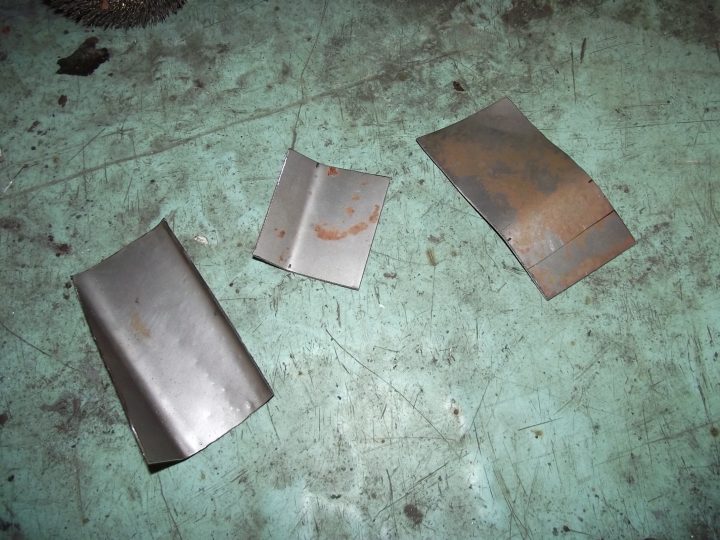
So I made some bits of metal, which look like scrap on the floor....
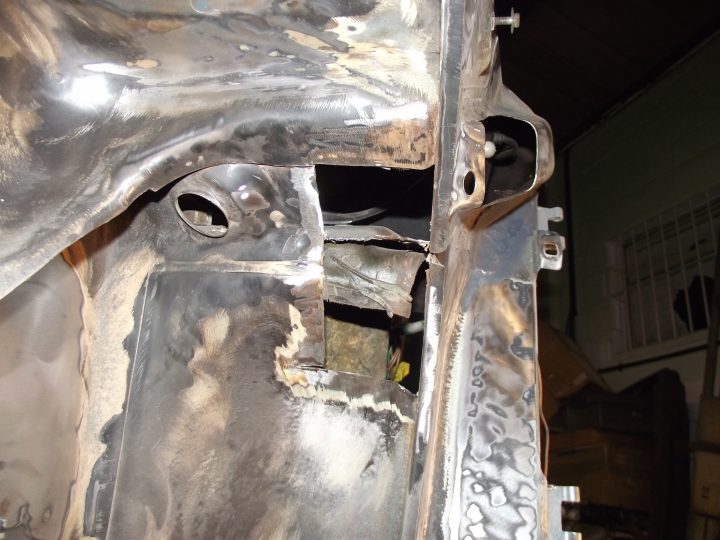
....and proceeded to weld them into the arch:
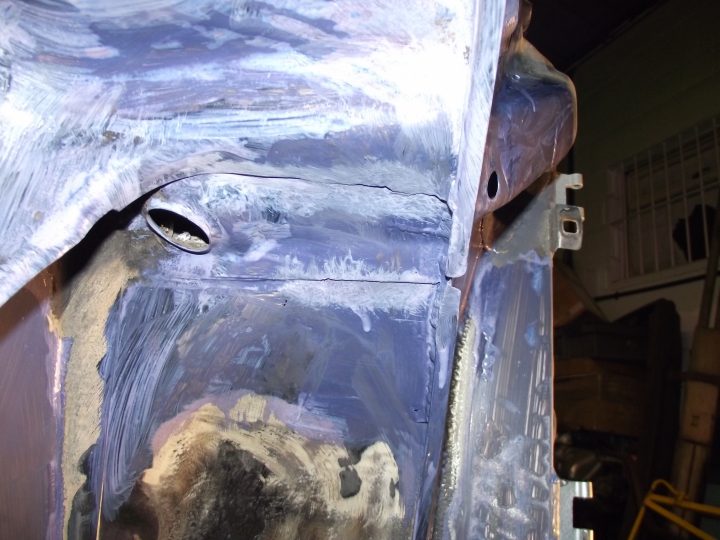
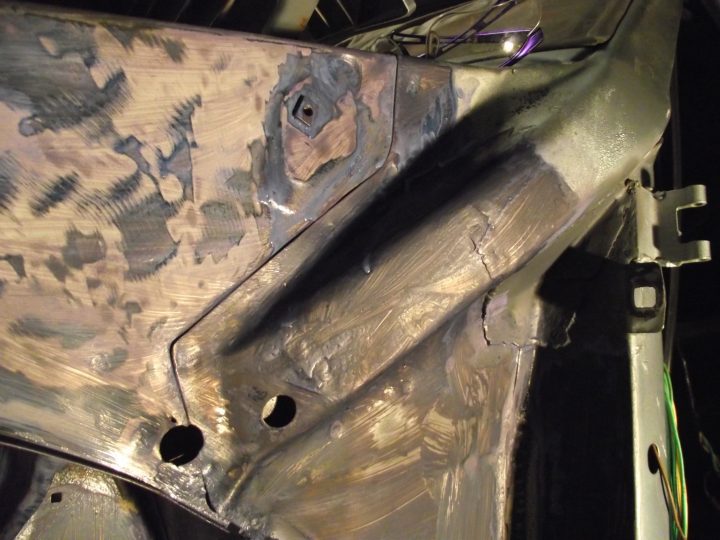
They were then treated with Rustbuster fe-123 rust converter, in part to attack the bits of rust I can't get to, or are already on the surface, and also to prevent the rest of the surface from rusting overnight, as I've left a lot of bare metal surfaces there.
I'm trying to keep the standard high and make it hard to tell there was every any work carried out, but my patience is starting to wear thin! It's starting to be a case of get it done, as opposed to show it off! This is the nearside arch now ready for paint, which I'll then follow by flatting back the engine bay and painting that body colour (had the paint mixed the other day). Then I'll put back all the gear I'd already planned to have put back by now!
Another update, though not as momentous as I'd hoped it would be. Original plan was to have the front end all back together, painted and buttoned up by the turn of the New Year. That, ain't gonna 'appen.
What has 'appened, is more rust. Yeah, I know!
With the offside front arch done, I moved to the nearside to finish removing the majority of the old underseal that I thought might be concealing corrosion. Turns out, it was. So, on a day where a regular man from country went into space, I welded more bits of new metal into an old French heap:

So, again, what should have been a couple of hours prepping for paint, turned into another weldathon:


That's the sound insulation behind wear the dash goes, just in there....

So I made some bits of metal, which look like scrap on the floor....

....and proceeded to weld them into the arch:


They were then treated with Rustbuster fe-123 rust converter, in part to attack the bits of rust I can't get to, or are already on the surface, and also to prevent the rest of the surface from rusting overnight, as I've left a lot of bare metal surfaces there.
I'm trying to keep the standard high and make it hard to tell there was every any work carried out, but my patience is starting to wear thin! It's starting to be a case of get it done, as opposed to show it off! This is the nearside arch now ready for paint, which I'll then follow by flatting back the engine bay and painting that body colour (had the paint mixed the other day). Then I'll put back all the gear I'd already planned to have put back by now!
One third of a three-spoke BX columnist team for the Citroenian magazine.
CCC BX registrar: The national BX register - click to submit a car!
CCC BX registrar: The national BX register - click to submit a car!
-
Tim Leech

- Over 2k
- Posts: 15625
- Joined: Tue Apr 15, 2008 11:12 am
- Location: Derbyshire
- My Cars: Various
- x 174
Re: Operation wake up GT! (no one has 56k anymore, right?!)
Impressive work mate, do you do the welding yourself?
Lots of Motors, mostly semi broken....
-
Kitch
- Over 2k
- Posts: 6432
- Joined: Sun Jul 03, 2005 9:36 pm
- Location: Fareham, Hants
- My Cars: Too many to list
- x 91
Re: Operation wake up GT! (no one has 56k anymore, right?!)
Yeah, the only bit I haven't done is paint the body. I'm painting the engine bay though.
One third of a three-spoke BX columnist team for the Citroenian magazine.
CCC BX registrar: The national BX register - click to submit a car!
CCC BX registrar: The national BX register - click to submit a car!
-
Tinkley
- 1K Away
- Posts: 1502
- Joined: Sat Jun 06, 2009 11:27 am
- Location: N Hants England
- x 8
Re: Operation wake up GT! (no one has 56k anymore, right?!)
Excellent job, Kitch. I will admit having new wishbone bushes a couple of years ago certainly was worth it. Not too hard to change IF the bolt/pin comes out.....  Just need a big F***off vice to press in the new ones. Impressive welding, have you thought of MIG brazing? it might flow better and is acceptable MOT wise and for most structural areas of the car. Just gives you better clean up and flow. just wish you could silver solder....it works on my bandsaw blades....
  then I might be tempted to start some proper sheet metal work. God knows this wreck (current car) could use it, I dare not clean it properly underneath because I know what I will find - at least the structural bits are OK. Will have to be done some time though, lets hope next summer is decent weather wise and I'll give it a go.
At least the work you've done will see it in good stead for a LONG time. Did it come from 'oop north or live by the sea? The Auto I have is almost rust free on a J plate, just a trace or two at the rear ie exhaust hanger.
At least the work you've done will see it in good stead for a LONG time. Did it come from 'oop north or live by the sea? The Auto I have is almost rust free on a J plate, just a trace or two at the rear ie exhaust hanger.