Ta dah . . ! My new foglights . . .
-
- Over 2k
- Posts: 3483
- Joined: Wed Nov 03, 2010 10:39 pm
- Location: Newark Nottinghamshire
- My Cars: Citroen BX 17 TZD Hurricane
Citroen BX 17 TGD
Ta dah . . ! My new foglights . . .
. . . and the repair to my rusty rear door shut.
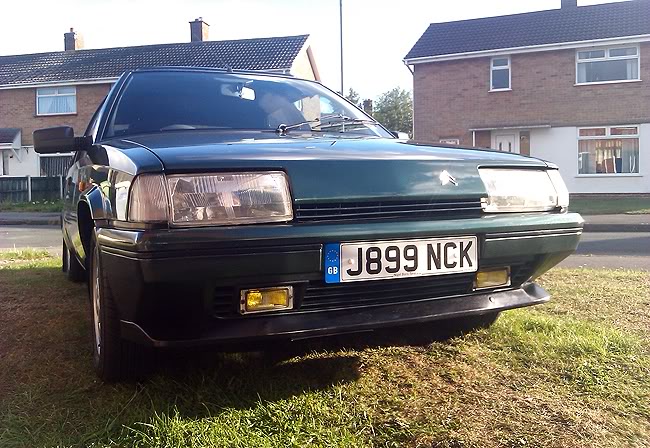
I replaced my non original (but not entirely inappropriate) foglights today, with some long awaited proper ones (courtesy of KevR) I think they look rather nice and I'll now be able to get a good nights sleep Unfortunately the splitter had been drilled to accept the old lights but I managed to get some trim . . . er trimmers from a motor factors that fit very snuggly and look the part (I think)
I also finished the lacquering of my repair to the rear door shut which I've been trying to get done before the bad weather gets here. There's no blistering or bleeding through after a couple of weeks so fingers crossed! Just need to wait a couple more weeks to polish the lacquer and it should look luvlee! Here's my car parked in my spacious and well equipped workshop . . .
. . . my Mums' front lawn! (everyone in her street thinks I'm a car polishin' fool)
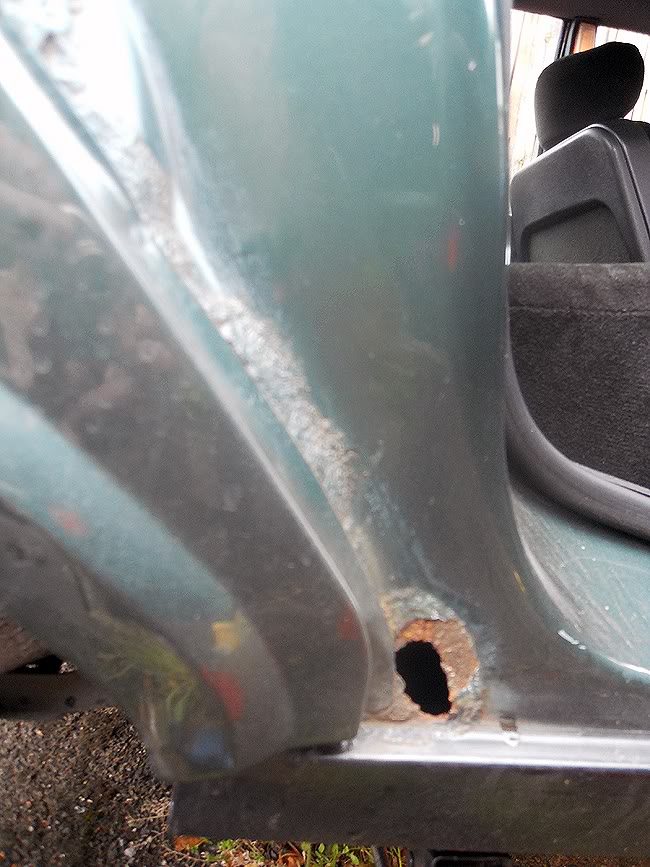
Before
After
Just have the other door shut to do now - which isn't nearly as bad
-
- BXpert
- Posts: 185
- Joined: Thu Jun 23, 2011 7:50 pm
- Location: Chateau du Wirral
-
- 1K Away
- Posts: 1000
- Joined: Mon Dec 17, 2007 12:02 am
- Location: Burton Latimer
-
- Over 2k
- Posts: 3483
- Joined: Wed Nov 03, 2010 10:39 pm
- Location: Newark Nottinghamshire
- My Cars: Citroen BX 17 TZD Hurricane
Citroen BX 17 TGD
'anaconda' said how do you do that etc. . . .
I've had a few 'old bangers' in my time so had a bit of a chance to practise body work/paint repairs and general 'tartin' up', but even if you haven't done any before as long as you're VERY methodical and work slowly I've found you can get pretty good results. But SLOWLY is the key i.e. not moving on to the next stage until the previous stage is as perfect as you can get it.
I jacked up the car, removed the rear wheel and cleaned out the rear wheel arch first (which was pretty clean) then treated it with 'Kurust', painted it with Hammerite and coated it in waxoyl ( belt and braces is good when it comes to rust!)
Then all the rust in the door shut was ground off with a dremel multitool and the hole bridged with car body mesh. The filling was done with Isopon two part car filler fibreglass stuff (they sell it in motor factors). I applied it in successive layers with lots of sanding and refilling until I had as perfect a finish as I could get.
Then I used a high build primer which revealed lots of imperfections in the finish so more filling and sanding until the primer coat I had was good enough to paint. The primer coat was sanded with 400,600 and 800 grit wet and dry (I've found that's as fine as you need to go with primer) then painted.
I got the paint from Halfords who mix it to the paintcode for your car. Because it's metallic I needed a paint coat and a lacquer coat. Do the painting on as warm and windless a day as possible if you havn't got a workshop (I havn't) and apply the paint in lots of very thin layers (I applied about 20 or 30 with 5 minutes or so between each coat) this avoids runs and other paint faults and don't point the aerosol at the area to be painted but paint 'across' it ( I use a bit of mdf to 'limber up' before I paint onto the car.
When you have a perfect paint coat it needs to dry for 24hrs then matted back with 1200 grit (the lacquer won't look really glossy if it's applied to shiny paint) The lacquer is applied in thin layers like the paint but a few more coats. That's it in a nutshell - but a bit easier said than done perhaps. If you screw up as long as you don't panic and start rushing everything can be sanded back and rescued! Here's a couple of pics . . .
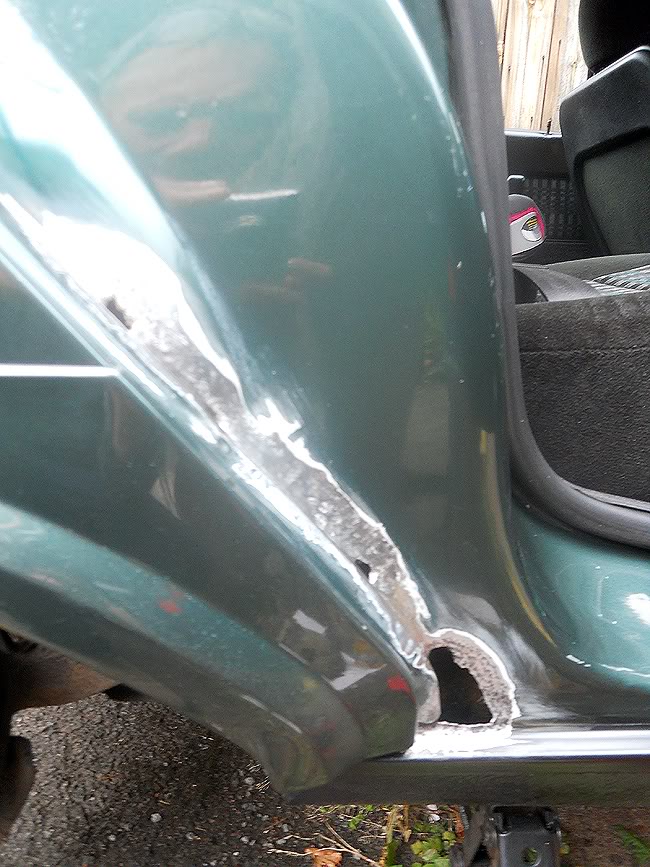
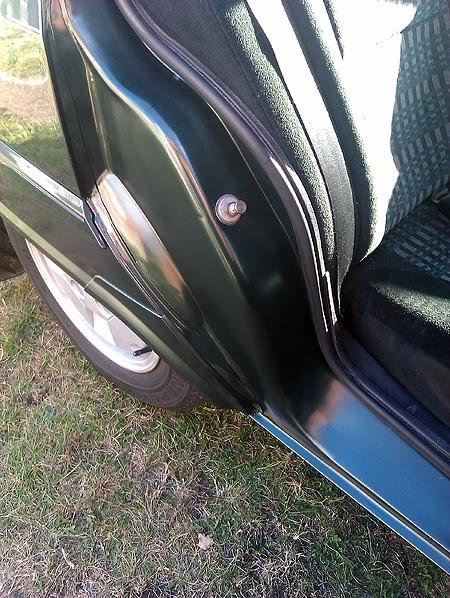
All the rust removed and sanded (it was then treated with 'Kurust')
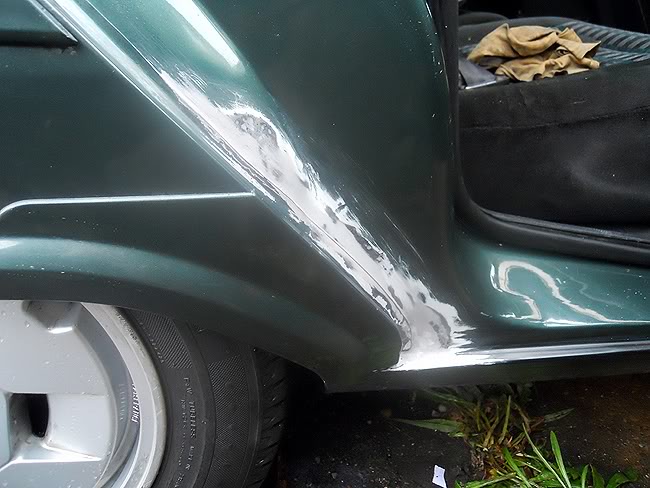
The filling finished (until you prime it and find it's not as good as you thought! - then MORE sanding) I painted the repair with motor oil - to protect it then left it for a couple of weeks to see if the rust returned - my experience is that if it's going to return it does so pretty quickly - usually overnight.
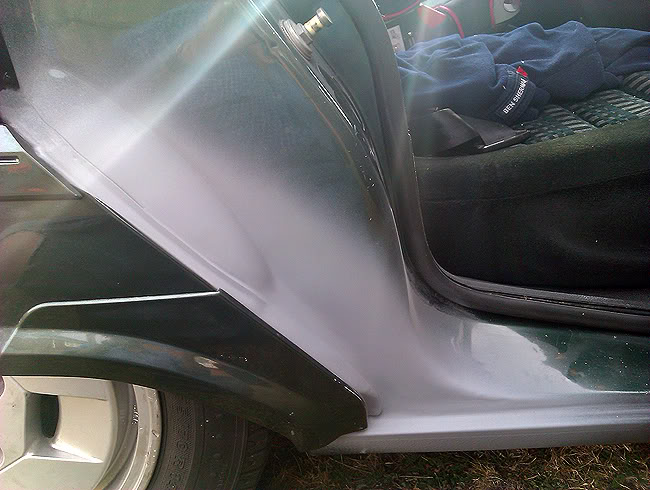
The final primer coat which was sanded into the old paint with 800 grit (if you use a high build primer it will get rid of some imperfections - but don't rely on it) Also, when sanding the primer be very careful on leading edges as you'll quickly sand back to the metal and have to start again!
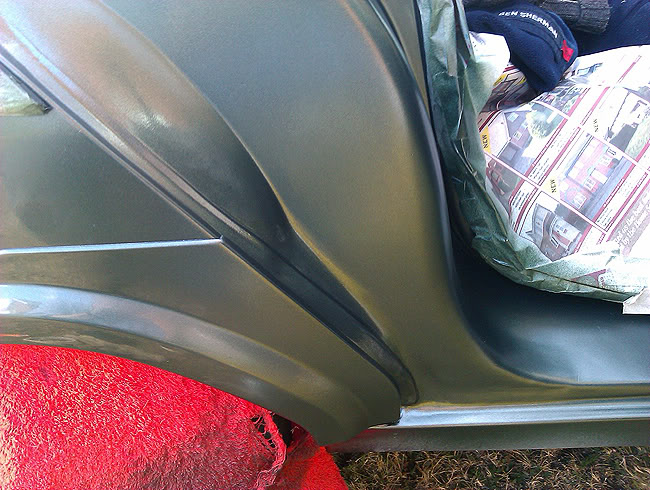
The paint coat before it was matted back with 1200 grit. I repainted the whole of the rear wheel arch so that the new paint could be keyed into the old paint and it was pretty scratched anyway!
There's loads of good info on car body repairs on the internet (masking off and were you mask off is an art itself) Hope that's useful? Good luck - slowly and methodically is the key!
Last edited by Paul296 on Sat Oct 08, 2011 2:05 am, edited 1 time in total.
-
- Over 2k
- Posts: 5288
- Joined: Sat Jul 31, 2010 1:26 am
- Location: Lancaster
- x 9
Brilliant job Paul looks really professional.
Mark Smith
Is it just me or is everything shit?
1989 BX GTi 16 valve. Blanc Alpine. Completed the Citroen Classic Challenge Ecosse and 1337 miles without a hitch.
2000 XM VSX 2.1 td Auto. Rouge Magenta.
TGD saloon many years ago.
1990 Swift 'Corniche' 12/2 aka BXClub HQ.
Honda Firestorm. Gone, but not forgotten.
2015 Triumph Tiger Explorer XC.
-
- BXpert
- Posts: 185
- Joined: Thu Jun 23, 2011 7:50 pm
- Location: Chateau du Wirral
-
- BXpat
- Posts: 2833
- Joined: Fri Jan 12, 2007 5:01 pm
- Location: The Hegau
-
- Over 2k
- Posts: 15618
- Joined: Tue Apr 15, 2008 11:12 am
- Location: Derbyshire
- My Cars: Various
- x 160
-
- Over 2k
- Posts: 3483
- Joined: Wed Nov 03, 2010 10:39 pm
- Location: Newark Nottinghamshire
- My Cars: Citroen BX 17 TZD Hurricane
Citroen BX 17 TGD
-
- Over 2k
- Posts: 15618
- Joined: Tue Apr 15, 2008 11:12 am
- Location: Derbyshire
- My Cars: Various
- x 160
-
- Over 2k
- Posts: 6428
- Joined: Sun Jul 03, 2005 9:36 pm
- Location: Fareham, Hants
- My Cars: Too many to list
- x 91
Fog lamps look pretty swish, are they the Renault ones?
With that C-pillar, sorry in advance etc, but isn\'t filling over rust holes a bodge? Surely you want to at least spot weld some plating in there first? What\'s the filler supported with, mesh or fibreglass?
One third of a three-spoke BX columnist team for the Citroenian magazine.
CCC BX registrar: The national BX register - click to submit a car!
-
- Over 2k
- Posts: 6428
- Joined: Sun Jul 03, 2005 9:36 pm
- Location: Fareham, Hants
- My Cars: Too many to list
- x 91
Its a grey area for MOT. Needs to be within 300mm of a major component mounting point (so rear axle front bush mounts) BUT.....I know sometimes if a panel is deemed non-structural and the rot can\'t easily spread they\'re sometimes ok. Initially I reckon it\'d fail though. Mines bubbling round there, so I\'ve got some grinding and welding to do before long. Don\'t think I\'ll resort to taking the whole panel off, but I should think the rot spreads behind the dogleg into the wheel arch too.
One third of a three-spoke BX columnist team for the Citroenian magazine.
CCC BX registrar: The national BX register - click to submit a car!
-
- Over 2k
- Posts: 11594
- Joined: Fri Oct 07, 2005 1:08 pm
- Location: Chelmsford, Essex
- x 25