The Final Chapter of the Stripey Saga - RIP supermachine

Tell us about life with your BX, or indeed life in general!
Post Reply
User avatar
vulgalour
BXpert
Posts: 553
Joined: Mon Feb 04, 2013 11:30 am
Location: Kent
My Cars: 1980 Austin Princess 1.7 HL
1987 Citroen BX 17RD
x 105

Re: The Stripey Saga Continues

Post by vulgalour »

I had suspected the weird knob on the dash was the heater control. What's the missing panel in the centre console?

----

Five and a half hours of cleaning and fettling today and I've still got a very long way to go. First job was to attempt removal of the pedal box.

Removed these two bolts.
Image

Then there's two more allen bolts that I don't know if I'm supposed to remove or not, I can't get my allen keys or screwdriver heads to get enough purchase to remove them so I'm hoping they can stay put. So... I'm a bit stuck on this one as I can't find instructions online and the Haynes manual is next to useless. I shall be asking in the technical section.
Image

Put the dashboard back together so I don't lose any bits and gave the driver's area a proper scrub, vacuum and clean. Still have to repair and shampoo the seat, but it's good enough.
Image

Image

Turned my attention to the outside after that, starting with scrubbing the rear bumper with a stiff brush and some Cillit Bang that has listed 'wheel rims' as one of the cleaning uses. It's very good.
Image

Gave the front wing and door a claybar workover, being able to put the suspension to where I want it makes those lower areas much easier to work on.
Image

There's one or two dents appearing on the bodywork as I work through it as is to be expected, but they are difficult to photograph.
Image

Image

Suspension down to do the roof, best gadget ever.
Image

The whole roof has black tree sap spots on it. This comes off with the claybar and G3 just like everything else. I need to get some tar remover for the stubborn bits lower down the bodywork. I did get a good portion of the roof done.
Image

I can't quite shift this bit of muck, I need to figure out how to do it.
Image

I'm also not sure what to do about this damage to the fibreglass, can it just be sanded back and touched in like you would on stonechips?
Image

Getting there, it's going to take a while to get everything tip-top but it will get there.
User avatar
Paul296
Over 2k
Posts: 3483
Joined: Wed Nov 03, 2010 10:39 pm
Location: Newark Nottinghamshire
My Cars: Citroen BX 17 TZD Hurricane
Citroen BX 17 TGD

Re: The Stripey Saga Continues

Post by Paul296 »

Why Cinderella! You shall go to the ball! :D

That's scrubbing up lovely - good work! =D>
User avatar
mat_fenwick
Moderator
Posts: 7326
Joined: Tue Sep 20, 2005 4:08 pm
Location: North Wales
x 19

Re: The Stripey Saga Continues

Post by mat_fenwick »

Easiest thing to do regarding the dirt around the roof bars is to undo the 4 allen bolts holding them on, then you can clean away! Two in the middle and one at each end - they may be under rubber plugs but they've probably turned to mush by now.

The chips can be touched up as normal.
Image

1993 1.9 TZD Turbo Estate
1996 3.9 V8 Discovery
1993 VW LT35 campervan
1985 Hyundai Stellar V8
2016 Hyundai iLoad
User avatar
Tim Leech
Over 2k
Posts: 15565
Joined: Tue Apr 15, 2008 11:12 am
Location: Derbyshire
My Cars: Various
x 141

Re: The Stripey Saga Continues

Post by Tim Leech »

The old girl is really getting some love! I spot a Princesss in the background!
Lots of Motors, mostly semi broken....
User avatar
vulgalour
BXpert
Posts: 553
Joined: Mon Feb 04, 2013 11:30 am
Location: Kent
My Cars: 1980 Austin Princess 1.7 HL
1987 Citroen BX 17RD
x 105

Re: The Stripey Saga Continues

Post by vulgalour »

You do spot a Princess in the background, she's my baby and I've had her just over a year now. Ready and waiting for an MoT and some road tax, but I'm skint after purchasing the stripey one. Eventually she'll be Aconite purple and sporting these lovely Lotus alloys.
Image

She had a bit of a bump in October that I since mostly fixed. It's yet another thing to save up for, since I want to get her booked in at a bodyshop to get properly finished off so I can get on with the paint. Looks rather like this at the moment.
Image

Tomorrow I'm going to remove the BX pedal box, or else. I'm not looking forward to it, but it has to be done.
User avatar
Tim Leech
Over 2k
Posts: 15565
Joined: Tue Apr 15, 2008 11:12 am
Location: Derbyshire
My Cars: Various
x 141

Re: The Stripey Saga Continues

Post by Tim Leech »

Lovely, I have a similar age 70's BL product albeith with V8 (factory built) under the bonnet, i liek beige.....aconite purple????
Lots of Motors, mostly semi broken....
User avatar
vulgalour
BXpert
Posts: 553
Joined: Mon Feb 04, 2013 11:30 am
Location: Kent
My Cars: 1980 Austin Princess 1.7 HL
1987 Citroen BX 17RD
x 105

Re: The Stripey Saga Continues

Post by vulgalour »

Aconite purple, like the rear wing on the other side. Here's a link to the Princess' story: http://autoshite.com/phpbb3/viewtopic.php?f=1&t=13257" onclick="window.open(this.href);return false; and a picture of Aconite purple, a short-run BL colour.
Image
____
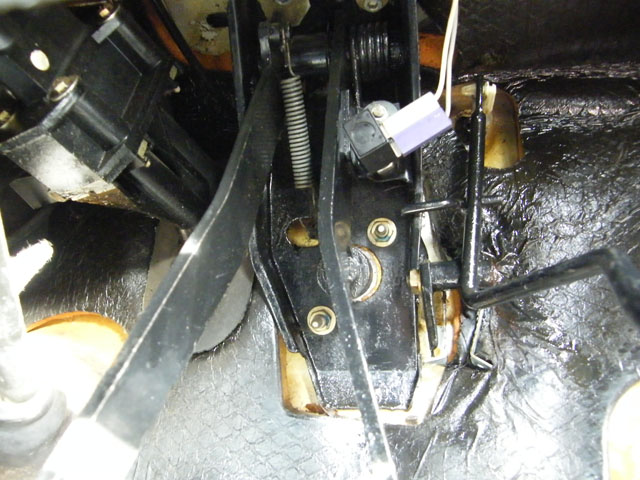
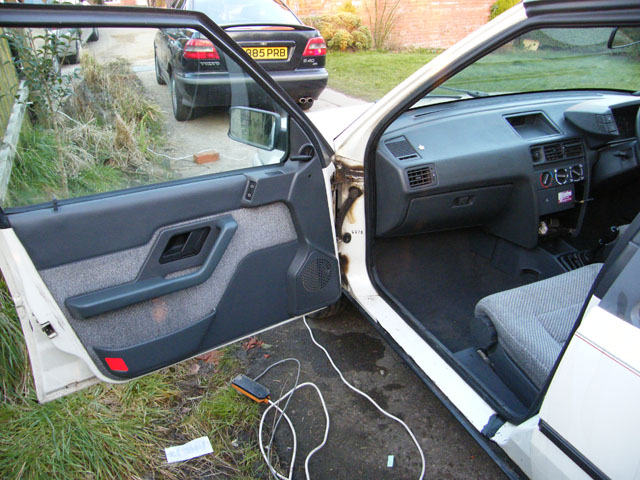
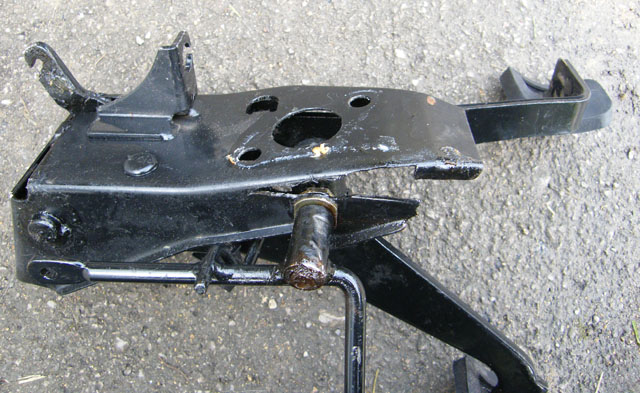
Today's challenge was to remove the pedal box so that I can get it repaired. Doing the repair in situ was not going to be possible, access is severely limited and there are too many meltable things that could melt too near the pedal box. Last night I hit the allen bolts a couple of times with a hammer and doused them in WD40 so that they might soak overnight. This is a method I've used on other stubborn bolts to good effect.

The two bolts that wouldn't budge yesterday put up no fight at all today and were a doddle to remove.
Image

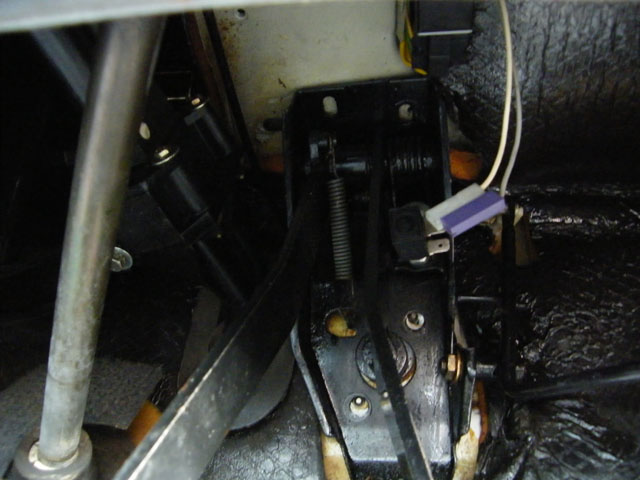
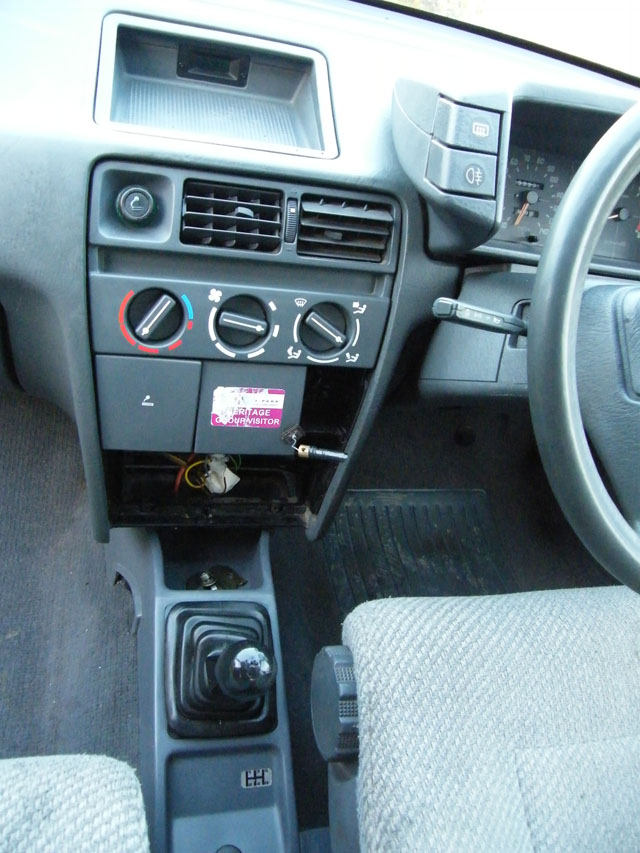
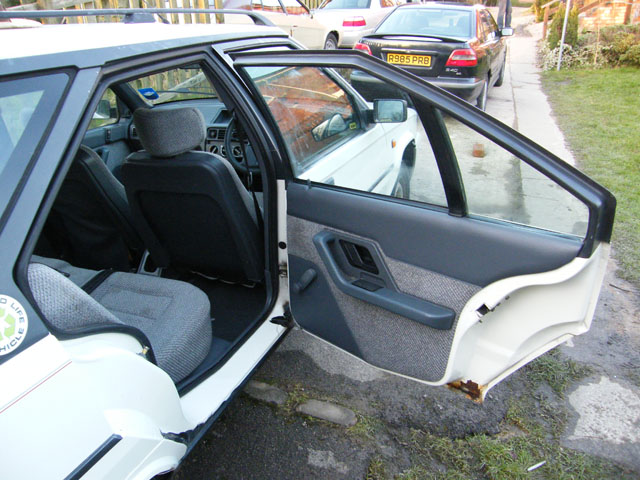
I couldn't find any definitive information on how to proceed from this point. The pedal box was now loose, but wouldn't come out and I couldn't see what was still attached. Dad disconnected the clutch cable (I didn't look to see exactly how he did this) in the engine bay which gave me a bit more play and then I just wiggled and the box carefully until it eventually came free. The plastic 'arrow' clip on the throttle cable came out very easily and cleanly, but then pinged one of the tines off without me touching anything so I'm going to have to fix or replace that now.
Image

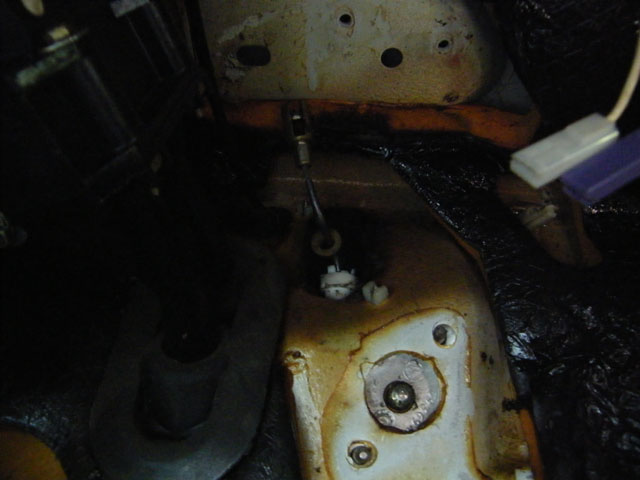
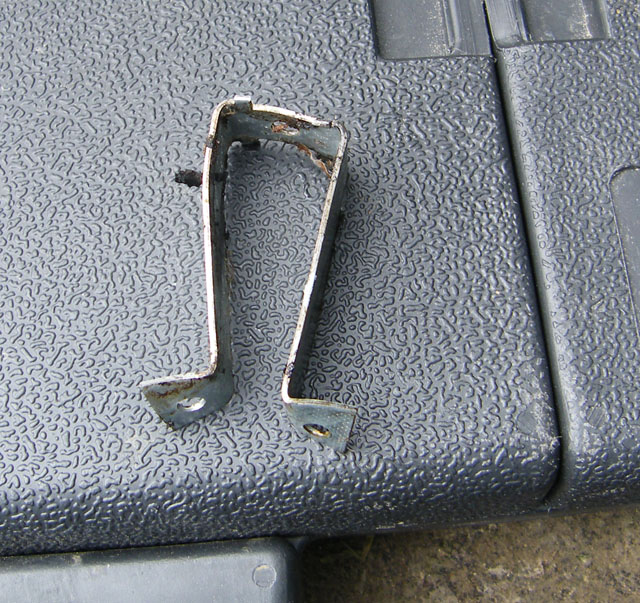
This little metal bracket was squished into the soundproofing under the accelerator pedal and I don't know where it should live. Any ideas?
Image

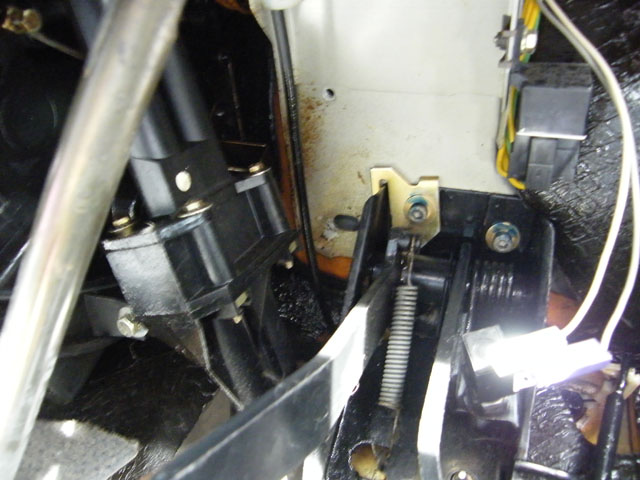
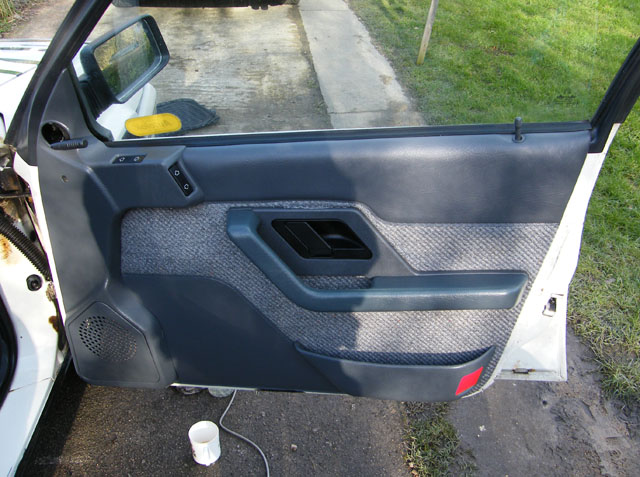
One liberated pedal box, finally! I'd like a rubber tread for the accelerator pedal too, always feels nicer than plain metal.
Image

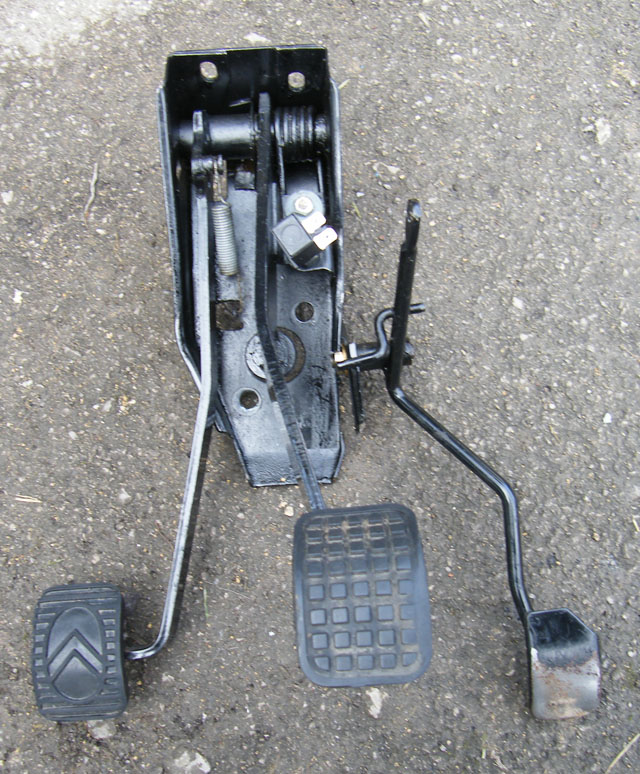
It's quite badly damaged, there's no wonder you couldn't get any pedal travel on it. I've got some suitable bracing material after having seen someone else repair a pedal box this way and thinking that was a very good idea.
Image

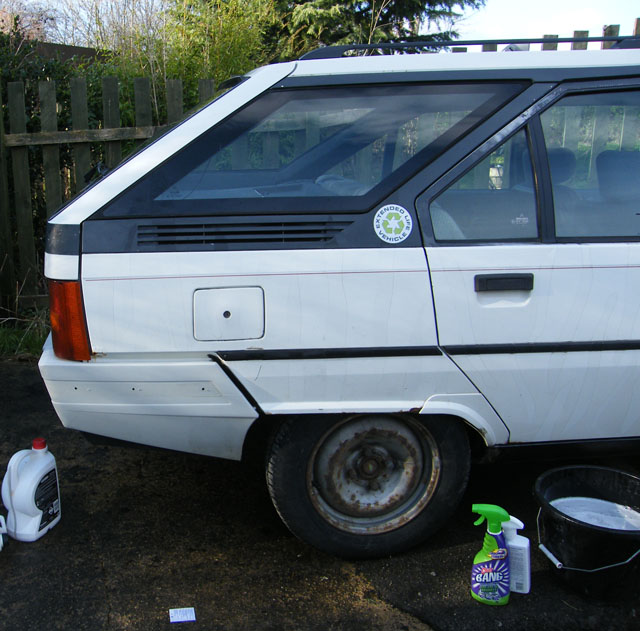
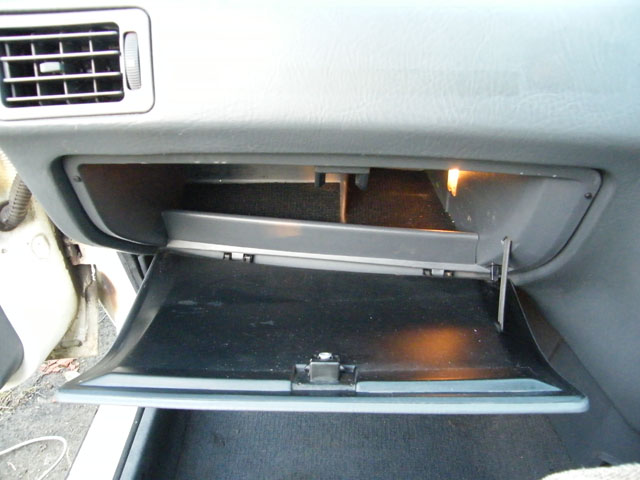
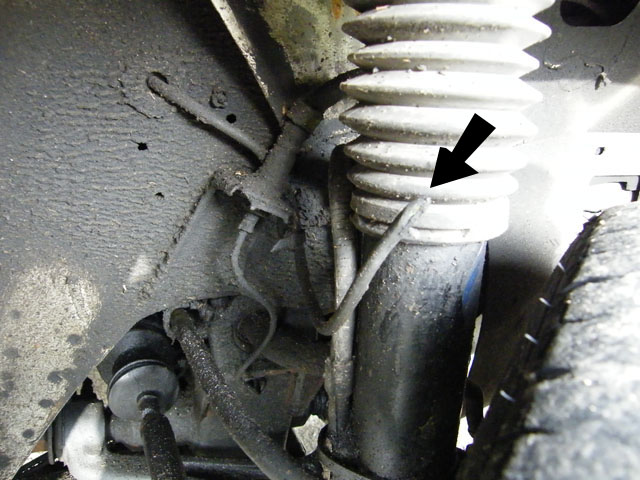
I had the car up on the highest setting with the trolley jack under the factory sill jacking point to gain a bit more access. The trolley jack is a bit poorly so I couldn't get things high enough to put an axle stand underneath so I was very careful about what I did and didn't do as I don't fancy getting squished. I made a bit of a booboo when I tried to use the trolley jack on one of the chassis rails which, though solid and not rusty, is apparently made of Emmental. On both sides I found a wire with nothing on the end, the passenger side one tucked away neatly and the driver's side sticking out, any idea what it's for? Dad suggested it might be a brake warning wire with the sensor removed.
Image

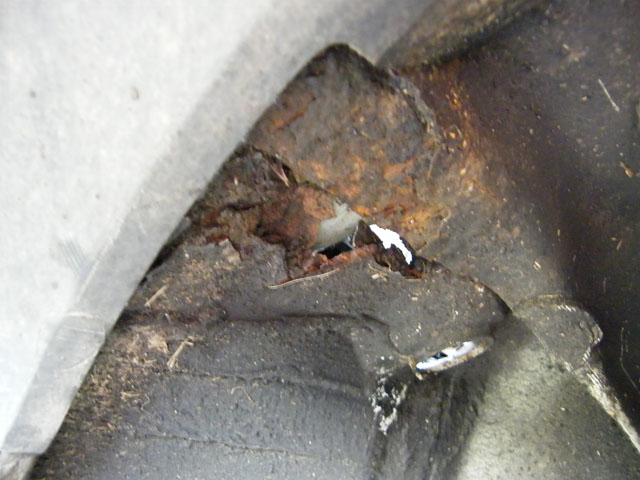
I wanted to have a look at the inner arches too, they're bubbling in the engine bay in the usual place. Some loose underseal had flaked off to reveal a couple of small holes, one each side, in a different place to the bubbling up top. I anticipated this so it's no great surprise, but the holes don't look as big as I was worried they might. In the meantime, they'll get cleaned up and Kurusted until I can get the welding paid for in a few weeks.
Image

Image

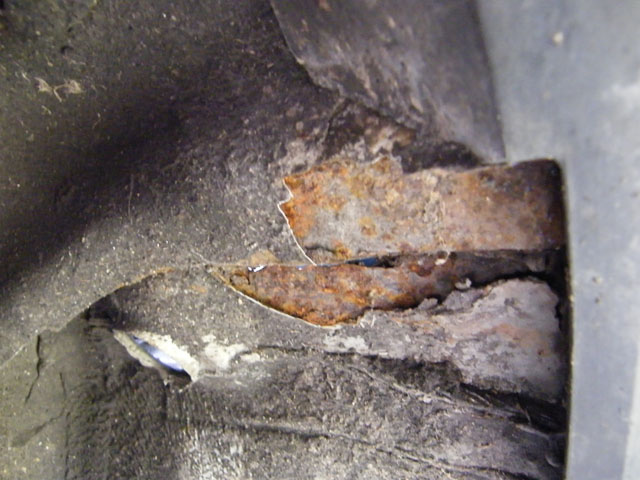
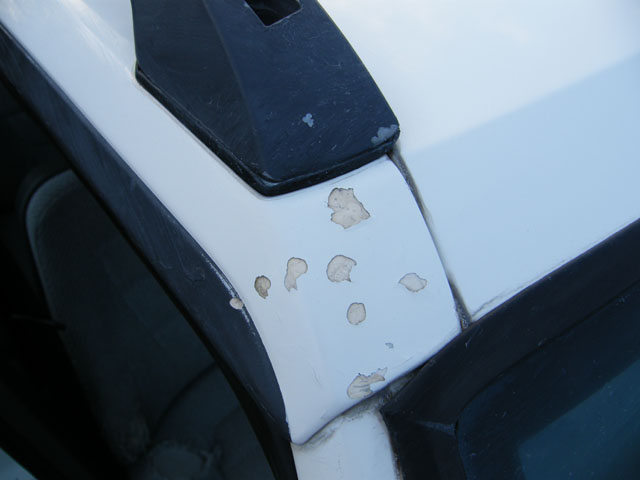
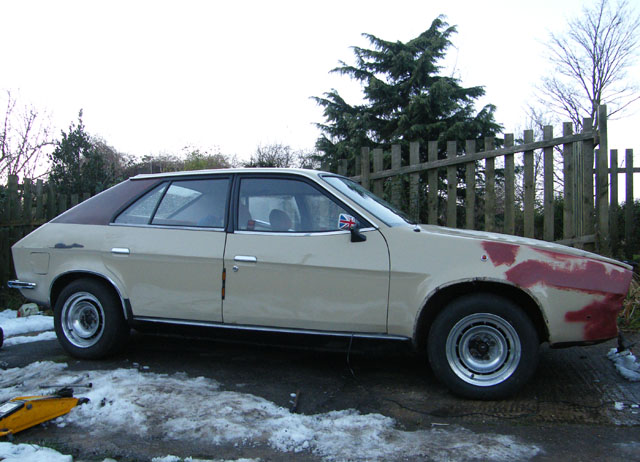
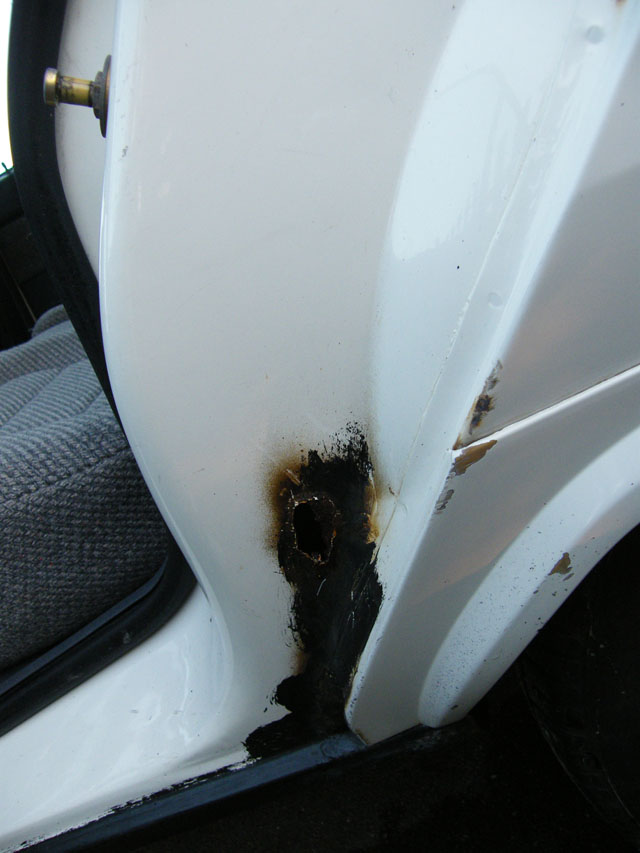
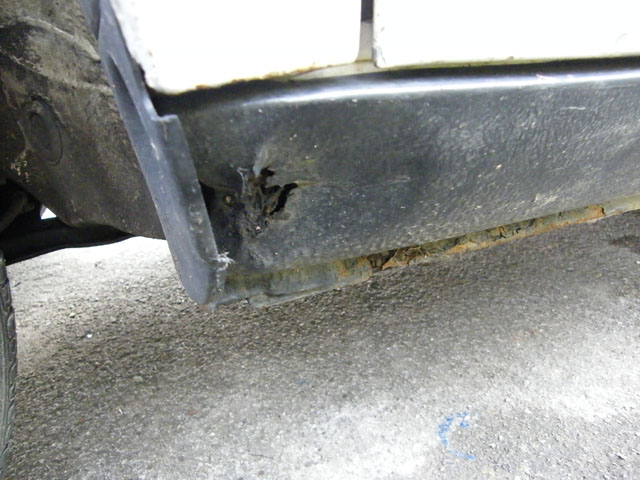
The only other bit of damage of note is to the leading edge of the passenger sill. Looks like it's had a bump here but isn't particularly rusty or soft so it'll probably just be a repair job. Another bit to add to the list. Many of these areas will be dealt with when I can afford the welding to be done and have some paint to cover up the repairs, I'm in no huge rush providing it gets done before the MoT is due in June.
Image

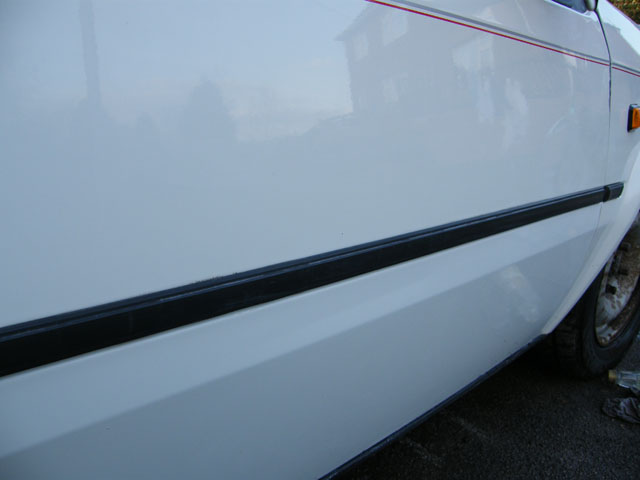
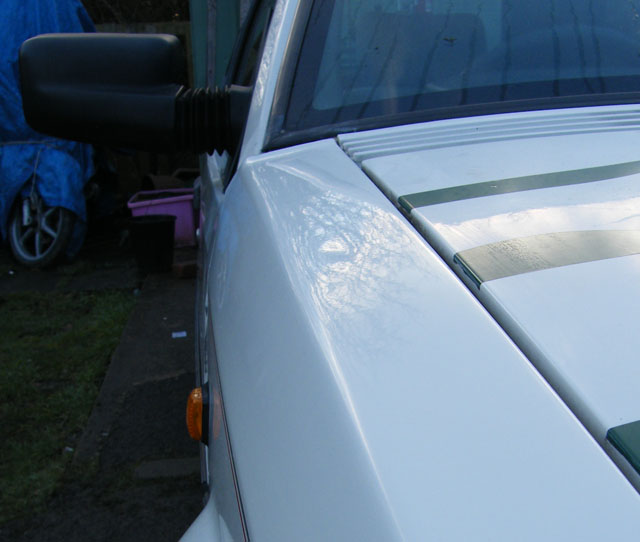
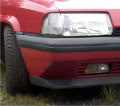
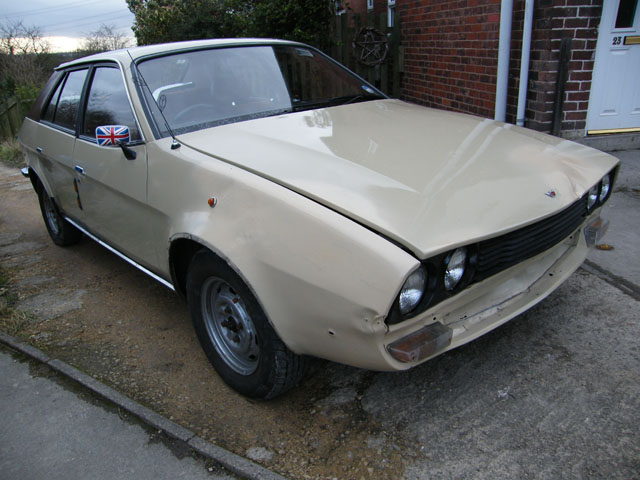
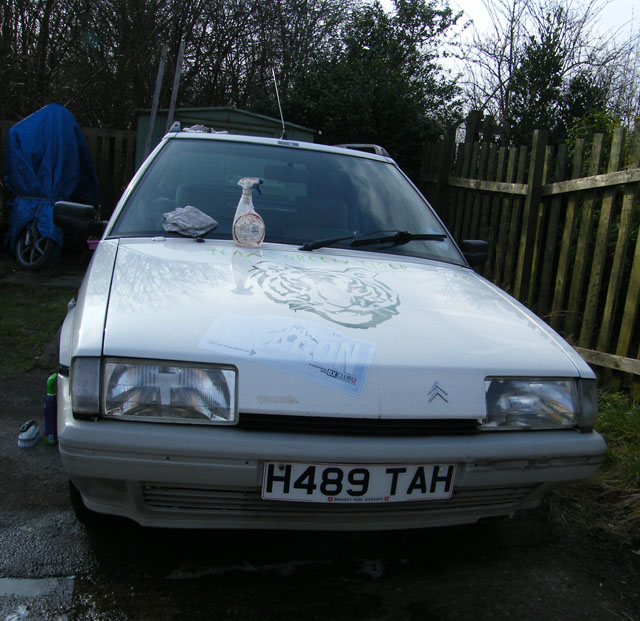
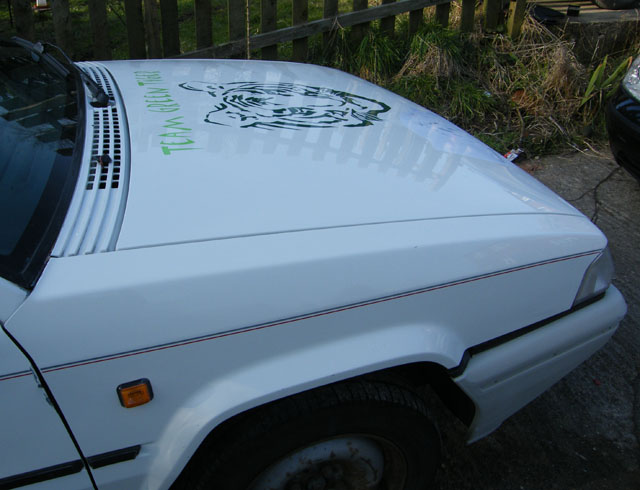
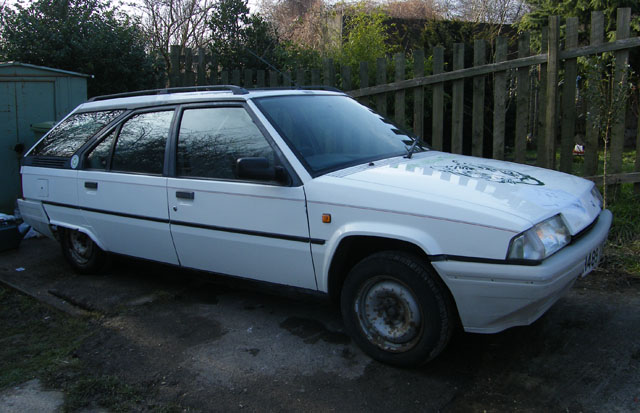
After all that, it was cleaning time. On making a started with the bonnet I found that some of the tiger stripes were loose around the edges so I removed them. Tiger face, 'Team Green Tiger' and the BXagon charity sticker are all pretty firmly attached, particularly the latter, so I'm working around them. You can very clearly see where I have and haven't scrubbed that front bumper too. I wonder, should there be trims under the headlights?
Image

I was quite surprised at how well the bonnet came up. I only managed about a third of it, there's only so much you can do in one sitting, but it's looking rather respectable.
Image

Rear driver's side door shut likewise cleaned up very easily needing little more than a quick wipe over with a soapy cloth.
Image

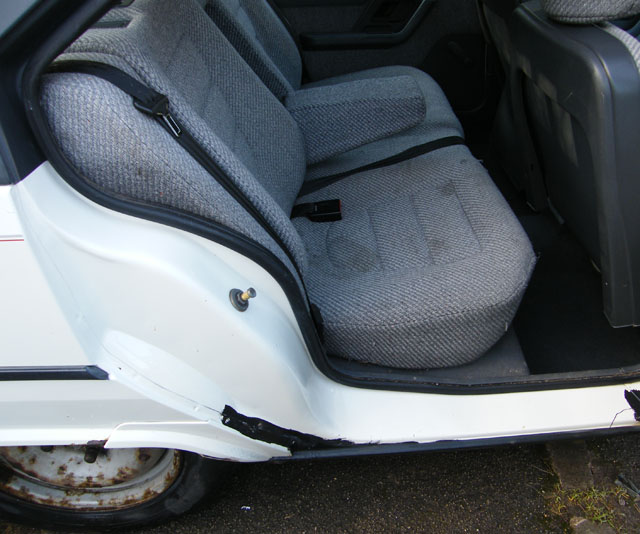
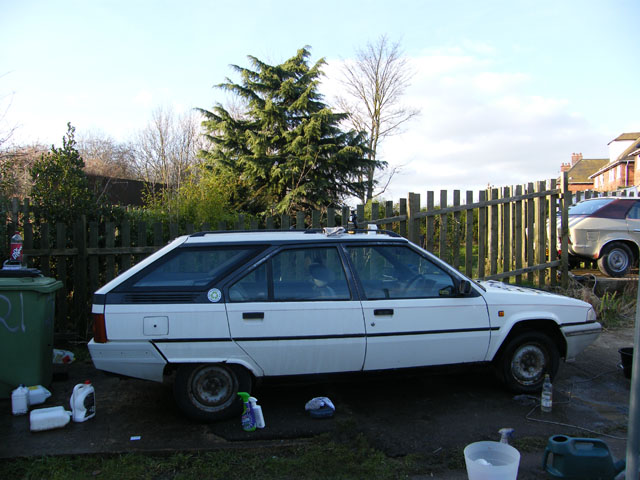
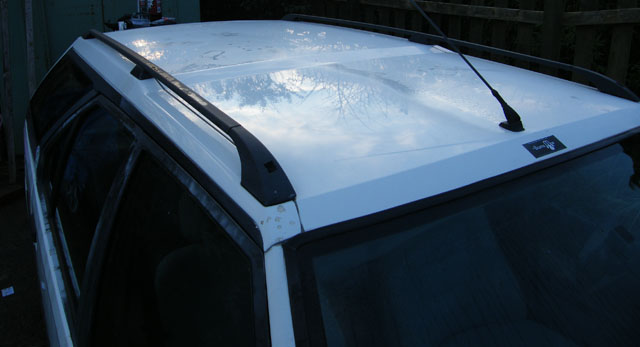
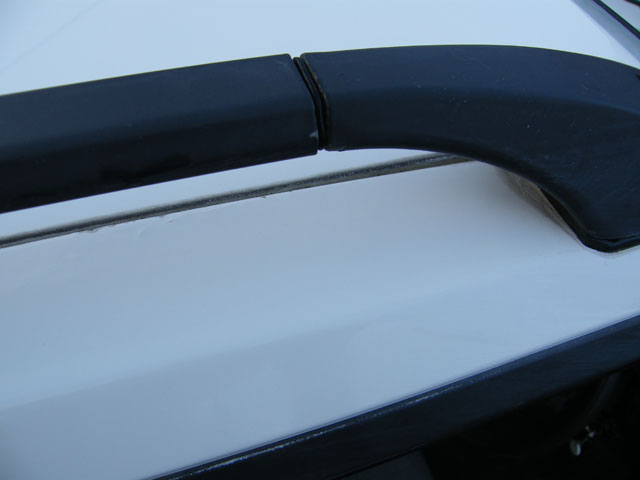
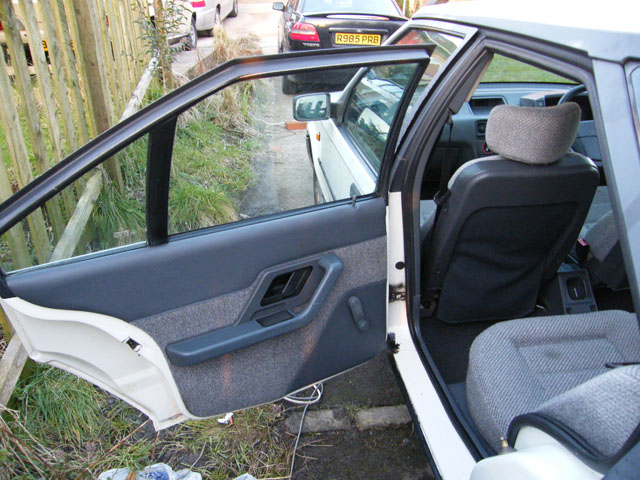
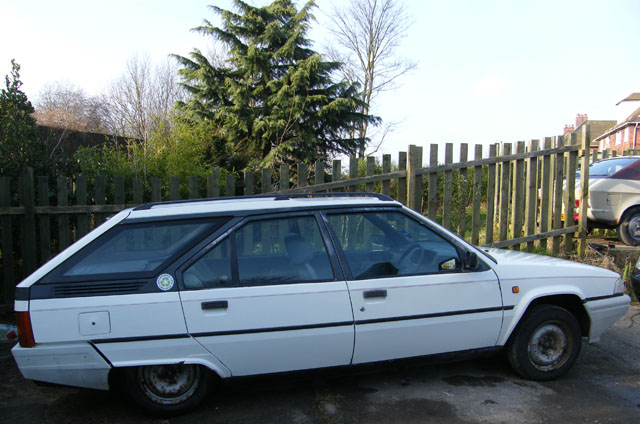
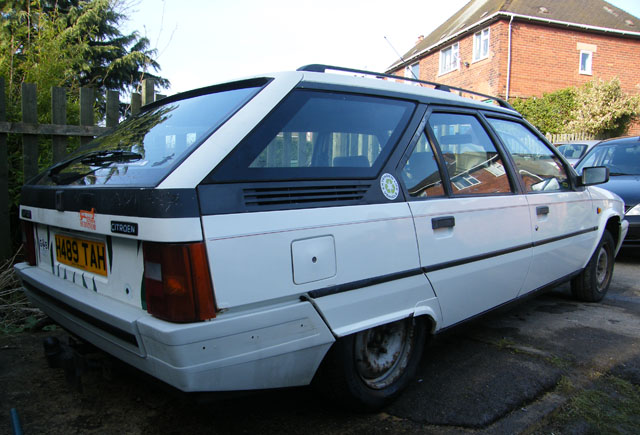
Here are some pictures of one (almost) finished side of the car. There is a lot more cleaning to do, but the stripes are gone and the true length of the car is much more apparent. The window surrounds (I'll be repainting those) and the wheels let things down a bit now.

Image

Image

Image

Finally, tried out the Skoda wind deflectors to find that while they are indeed an extremely similar profile to the BX window, they're far too small. These are up for grabs now if anyone is interested.
Image
User avatar
Tim Leech
Over 2k
Posts: 15565
Joined: Tue Apr 15, 2008 11:12 am
Location: Derbyshire
My Cars: Various
x 141

Re: The Stripey Saga Continues

Post by Tim Leech »

OOoh factory colour, like it!

Are you coming to the pride of longbridge then? I shall be in my SD1 V8.

No trims under the headlamps no, are you reattching the bumper inserts when the bumper is all clean?
Lots of Motors, mostly semi broken....
User avatar
vulgalour
BXpert
Posts: 553
Joined: Mon Feb 04, 2013 11:30 am
Location: Kent
My Cars: 1980 Austin Princess 1.7 HL
1987 Citroen BX 17RD
x 105

Re: The Stripey Saga Continues

Post by vulgalour »

Probably shan't be at PoL, I don't know how I'm fixed for it yet, though I am hoping the BX will be sorted out enough for me to make the Brooklands Austin Morris Day which I was going to attend in the Princess. The bumper inserts won't be going back on because they're shot, most of the clips are missing and the corners of some of the inserts are split, the whole lot held on with an assortment of screws. I'll probably use some reflective tape instead, it's in keeping.
User avatar
Tim Leech
Over 2k
Posts: 15565
Joined: Tue Apr 15, 2008 11:12 am
Location: Derbyshire
My Cars: Various
x 141

Re: The Stripey Saga Continues

Post by Tim Leech »

Okidokey, you can fit normal BX hatch bumper inserts on the front.
Lots of Motors, mostly semi broken....
User avatar
vulgalour
BXpert
Posts: 553
Joined: Mon Feb 04, 2013 11:30 am
Location: Kent
My Cars: 1980 Austin Princess 1.7 HL
1987 Citroen BX 17RD
x 105

Re: The Stripey Saga Continues

Post by vulgalour »

The old inserts were, in a word, knackered. Full of extraneous screws to hold them into the bumper after most of the clips had wandered off and broken on some of the corners, they looked unpleasantly scruffy and can't really be repaired. I'm keeping hold of them 'just in case', but I expect I will bin them eventually. Worth knowing that the hatch inserts fit, I expected they might give that the two cars share the same face.

Image

This makes me wonder if I should leave the bumpers plain and try and source a Mk1 nose, there's lots of little styling queues I prefer on this over the Mk2, like the matching bumpers and the little bit of black infill between bumper and body. I particularly like the roof rubbing strips, but I can live without the round side repeaters (clear square ones, for preference), the mud guards and the wheel trims, which are one of my least favourite BX trims.

Pedal box fixer is here later tonight, I'm looking forward to that. Since it's such a glorious day, I'm going to put my work away for a bit and do some more on the interior I think. Update later.
User avatar
vulgalour
BXpert
Posts: 553
Joined: Mon Feb 04, 2013 11:30 am
Location: Kent
My Cars: 1980 Austin Princess 1.7 HL
1987 Citroen BX 17RD
x 105

Re: The Stripey Saga Continues

Post by vulgalour »

Mr Cobblers came and took my pedal box away today so it can be fixed. Doesn't matter than I'm grounded, I've still got a lot to clean before I want to hit the road. I've almost got the interior cleaned out now.

Image

Glovebox hinges that still work! Apparently, these are usually constructed entirely of cheese.
Image

The centre cubby thing has the heater control bodged onto it, I need to take this apart to fix it properly. That cubby also doesn't touch-open like the ashtray does. The right hand cubby is completely missing, I don't know what should be there. Oh, and there's no radio but I do have one to go in.
Image

Back isn't too shabby now. I'm not sure how to reattach the vinyl cover on the front seat, it's come away somehow and has two rubber bands on it that I presume are to fix it in place. I'll remove the seat at some point to sort this out.
Image

Image

Ideally, all the seats need a shampoo and some loose threads catching, but overall they actually responded very well to a vigorous vacuum. The seats now smell a lot more like my Dad's old Peugeot that was similarly upholstered rather than like trees.
Image

Cavernous loading area fully scrubbed. There's some areas that could do with further attention and some minor damage here and there as is to be expected so it's not perfect, but is tidy.
Image

The dash had some stickers on that have left ghosting on the vinyl, The ghosting reduces every time I wipe the vinyl over so I'll just see what happens with that. I like the little star so that's staying.
Image

One thing I didn't clean was the headlining. The fabric of the headlining appears to be a patterned flock over polystyrene board so I don't want to scrub it or get it too wet. There's some black mould on the headlining which could do with being removed for the sake of aesthetics, and possibly health, but I'm not sure of the best course of action.
Image

While cleaning the rear arch I found another hole that had been treated. It's quite small so should repair okay, just another little bit to add to the list of small holes that need plugging.
Image

A good look under the rear revealed that the metalwork holding the bumper on is pretty fragile, but the outrigger/chassis rails, cross member, tow bar and even the rear exhaust hanger are all in reasonable order but could do with a scrub and fresh underseal to make things really tidy. The floor was wet and it was getting cold so I didn't take any pictures (I know, I'm a great big pansy) but I will when conditions are better.

On the cleaning front I've got to do more work on the paint, clean the glass properly and make a start on the engine bay. Only spent about 3 hours on the car today and I reckon there's probably another 7-8 hours left in getting the paintwork and glass up to standard.
User avatar
Caffiend
Reluctant BXpert
Posts: 1222
Joined: Tue Jul 19, 2011 1:39 pm
Location: Hertfordshire

Re: The Stripey Saga Continues

Post by Caffiend »

=D> Amazing progress, glad you're keeping some of the stickers or we wouldn't recognise the car
Diagonally parked in a parallel universe
1991 TZD hatch (Triton Green)
1992 Hurricane
User avatar
mat_fenwick
Moderator
Posts: 7326
Joined: Tue Sep 20, 2005 4:08 pm
Location: North Wales
x 19

Re: The Stripey Saga Continues

Post by mat_fenwick »

The rubber bands on the seat back covering attach to hooks on the underneath of the seat base, near the front. Looking forwards to more updates!
Image

1993 1.9 TZD Turbo Estate
1996 3.9 V8 Discovery
1993 VW LT35 campervan
1985 Hyundai Stellar V8
2016 Hyundai iLoad
User avatar
Tim Leech
Over 2k
Posts: 15565
Joined: Tue Apr 15, 2008 11:12 am
Location: Derbyshire
My Cars: Various
x 141

Re: The Stripey Saga Continues

Post by Tim Leech »

The panel missing from the dash next to the coin tray is just a blank, on the top spec cars theres door opening display etc which you could fit but not wire up. Howevere I expect theres plenty of blanking plates knocking about.
Lots of Motors, mostly semi broken....
Post Reply