GT mediated Awesomeness
-
saintjamesy89

- Over 2k
- Posts: 2096
- Joined: Tue May 04, 2010 8:01 pm
- Location: Somerset
- My Cars: 1985 Citroen BX19 GT
1985 Citroen BX16 TRS 'SE' auto
1988 Volvo 740 2.0 GL Hearse
1990 Volvo 740 2.3 GLE Estate
2013 Nissan Leaf Acenta 24Kw - x 196
Re: GT mediated Awesomeness
I just spent an hour writing a witty and detailed blog update, and it has gone.
I'm not a Saint, or a James, but a Tom Saint-James!
Mes voitures:
1985 Citroen BX19 GT
1988 Volvo 740 2.3 HPT GL Hearse
2007 Lexus RX 400h SE hybrid
2007 Citroen C6 Lignage 2.2HDI manual
2013 Lexus RX 450h Luxury
Mes voitures:
1985 Citroen BX19 GT
1988 Volvo 740 2.3 HPT GL Hearse
2007 Lexus RX 400h SE hybrid
2007 Citroen C6 Lignage 2.2HDI manual
2013 Lexus RX 450h Luxury
-
panky

- BXpert
- Posts: 666
- Joined: Mon Jan 22, 2018 4:44 pm
- Location: Widnes
- My Cars: 1985 BX 19 GT (DKK), 1971 Morris Minor Traveller, 1971 Commer Auto-Sleeper, 1969 Commer Jennings Roadranger.
'88 BX GTi (a long time ago) - x 169
Re: GT mediated Awesomeness
There seems to be a problem with the board. I get an error message if I try and access the full editor or try to send a PM - maybe something to do with that. I've emailed Admin.
-
xantia_v6
- BXpert
- Posts: 373
- Joined: Wed Dec 16, 2015 6:13 pm
- Location: here and there
- My Cars: Peugeot 308 CC
Citroen XM V6 ES9
Citroen Xantia V6
Jaguar XJ-S V12 - x 72
Re: GT mediated Awesomeness
One of the software extensions on the board seemed to be causing that crash after the last software update. I have disabled that extension, and the crash does not happen for me now (no significant functionality is lost by disabling that one).
Please try posting again and let me know if there is still a problem.
Please try posting again and let me know if there is still a problem.
-
panky
- BXpert
- Posts: 666
- Joined: Mon Jan 22, 2018 4:44 pm
- Location: Widnes
- My Cars: 1985 BX 19 GT (DKK), 1971 Morris Minor Traveller, 1971 Commer Auto-Sleeper, 1969 Commer Jennings Roadranger.
'88 BX GTi (a long time ago) - x 169
Re: GT mediated Awesomeness
saintjamesy89 wrote: Fri Mar 03, 2023 4:13 pm I just spent an hour writing a witty and detailed blog update, and it has gone.
The night is still young
-
panky
- BXpert
- Posts: 666
- Joined: Mon Jan 22, 2018 4:44 pm
- Location: Widnes
- My Cars: 1985 BX 19 GT (DKK), 1971 Morris Minor Traveller, 1971 Commer Auto-Sleeper, 1969 Commer Jennings Roadranger.
'88 BX GTi (a long time ago) - x 169
Re: GT mediated Awesomeness
That worked 
-
saintjamesy89
- Over 2k
- Posts: 2096
- Joined: Tue May 04, 2010 8:01 pm
- Location: Somerset
- My Cars: 1985 Citroen BX19 GT
1985 Citroen BX16 TRS 'SE' auto
1988 Volvo 740 2.0 GL Hearse
1990 Volvo 740 2.3 GLE Estate
2013 Nissan Leaf Acenta 24Kw - x 196
Re: GT mediated Awesomeness
I've been meaning to update this blog properly for ages, I had a go yesterday but failed to save or copy the text before I pressed submit and it all disappeared!
Ok, back in November I wanted to address the worsening blow of the middle parts of the exhaust system, waaay back I had jotted down that the hockey stick pipe needed replacing so one was ordered and as I went to fit it I realised that actually, this pipe was OK and it was the cross box silencer that had been damaged (probably in the same event as the sump).It was quite busted! Much quieter now. Whilst I was on a winning exhaust streak I also changed the rusted out centre silencer on the Saab - it was a struggle bashing the old one off!

I'd noticed the engine was not running at it's best, not as quick or smooth as it was and starting was more difficult than when I fitted the manual choke back along. I've not looked at the carb or ignition system for many many years (pre-2015 challenge) so it was high time for that. Lo and behold, on removing HT lead no.3 the wire came off of the spark plug connector! You can see the plugs above and that no.3 is carbon fouled, I guess this could be one reason! New set of HT leads ordered.
I also gave the carb a good dose of carb cleaner, this combined with new HT leads made a nice difference. Whilst I was wielding the carb cleaner I gave the inlet and carb base gaskets a good dose and noticed a slight change in engine note from the carb base.

Moving on from the above I wanted to change the carb to inlet manifold gaskets to eliminated any 'unmetered' air coming in here. I found no less than FIVE old crusty gaskets attached to the spacer! Two on the spacer-inlet and three on the spacer-carb, two came off in one piece so these must be the most recent but the others had to be picked off in bits and lumps.


It took an unreasonable amount of time to get all of the old petrol soaked card lumps and bumps off of the spacer and inlet manifold, even with a razor blade, but I got there. I also noticed that the vacuum line to the distributor advance was perished and that the hose that performs the crankcase ventilation function was so loose it came off all by itself when I moved the carb. I went through all the Saab's vacuum lines last year to solve idling issues (LH2.4 jetronic is very sensitive to vacuum issues) so had some spare 3.2mm ID silicone hose, the PCV hose I popped a clip on to secure it properly, further down the PCV system was a similar case - no hose clips and loose hoses - perhaps another unmetered input of air to upset the mixture.


In relation to this I noticed that the air filter and housing were quite oily and sludgy in places - especially from the crank breather hose, so with secured hoses perhaps this will also be resolved! I've cleaned with box and rotated the filter so we'll see. I also checked the spark plugs in this instalment after cleaning them back along, all were fine except for no.3 which was carbon fouled again (post new HT leads). Hmm, more investigations.

I'm not sure if it is the same with all XU's, but this one is a bit rattly - especially at certain rev's. That paired with the fact that the cambelt snapped at starter motor turn over speed not long after I go the car has made me suspicious of valve damage, it runs well enough but it sure could be better! So it is time to measure the valve clearances. I've not long finished grinding and reassembling the valvetrain in a freshly reconditioned head for the hearse (cut valve seats, welded, skimmed and pressure tested), it has also had new studs/bolts/core plugs the whole lot. It is a turbo conversion so a new IPD turbo cam with higher lift and longer duration has also gone in, it needed 3 stages of shim shuffling to get the clearances right...!
Interesting how Citroen bunched up the inlet valves/ports in this head, they alternate in the Volvo head - I wonder if it has any impact on smoothness or efficiency of running.
Haynes suggested a cold clearance of 0.15-0.25 for the inlet which seems quite tight and 0.35-.45 for the exhaust which is the same as both for the Volvo head.
E1 - 0.40 - bang in the middle
I1 - 0.25 - at the top end of tolerance
I2 - 0.26 - out
E2 - 0.46 - out
E3 - 0.52 - way out
I3 - 0.26 - out
I4 - 0.39 - waaay out!
E4 - 0.42 - ok
So cylinder 1 is within spec, but 2, 3 and 4 are outside of spec. I wonder if this explains some of the carbon fouling on cylinder 3 - if the valves aren't opening enough and for a shorter duration. All of the valves except E1 are at the top end of the spec, which could explain the noisy engine. In the Volvo I aimed for the lower end of spec for quietness, it mostly worked but with 0.05 shim increments there are limits!
The cambelt is probably coming up for changing, this would be a good time to whip the head off and inspect, I plan to get the head skimmed, pressure tested, valves/guides/seats checked and adjust the clearances to spec.
The next instalment was to look into some electrical gremlins that have surfaced, the red DANGER ENGINE MELTING temperature light had been on for some time, the temp gauge was behaving normally so I wasn't worried. However, the charging light started coming on in the first 5 minutes of running and when this went out, the reverse lights came on! I posted on the FB page for help and had some amazing replies from the BX community
The plan was to test and inspect the battery and alternator, reverse switch, temperature sender and the wires in this little loom. It turned out to be the 8 pin connector under the battery, the pins inside the connector were so corroded and crusty they had started touching each other, allowing current to leak across the pins to where it wasn't supposed to go!


It was so corroded that I almost couldn't separate the connector and had to resort to force! I cleaned what I could get to and the problems were all resolved, however as of yesterday I am getting the charging light and hokey reverse lights again so I plan to order a new connector and make up a new loom for these 8 wires, the current loom is borderline too short already, some of the wires are under strain so I think this connector has been replaced before.
Sometime in January I replaced the olive gasket between the downpipe and exhaust manifold due to a blow right at the front, I think this was damaged when I replaced the centre exhaust sections back along as this union surprised me by being flexible! This made the exhaust quiet again. However, over the last few weeks I have noticed yet ANOTHER exhaust blow, a sporting raspy blow from the back box and a blow from the weld on the downpipe where it goes 2 into 1... So I have bitten the bullet and booked it in for a full stainless system, I had planned this for the future but ideally it could have waited until next year. I was recommended to a guy in Taunton and I was impressed when he had a look at the BX, he reckons he can make the exhaust almost silent, which will be a first for a BX I think! I'm happy with that, it'll depend on the cost of course but I'd love a twin exit system with rectangular tail pipes (think letterbox)
The GT is also booked into Mr Kitchen's fine establishment for the next round of work, mostly suspension stuff. He is a busy man though so I am eagerly awaiting his call, it'll be a transformed car once the clutch, struts, bearings etc are all sorted
Ok, back in November I wanted to address the worsening blow of the middle parts of the exhaust system, waaay back I had jotted down that the hockey stick pipe needed replacing so one was ordered and as I went to fit it I realised that actually, this pipe was OK and it was the cross box silencer that had been damaged (probably in the same event as the sump).It was quite busted! Much quieter now. Whilst I was on a winning exhaust streak I also changed the rusted out centre silencer on the Saab - it was a struggle bashing the old one off!
I'd noticed the engine was not running at it's best, not as quick or smooth as it was and starting was more difficult than when I fitted the manual choke back along. I've not looked at the carb or ignition system for many many years (pre-2015 challenge) so it was high time for that. Lo and behold, on removing HT lead no.3 the wire came off of the spark plug connector! You can see the plugs above and that no.3 is carbon fouled, I guess this could be one reason! New set of HT leads ordered.
I also gave the carb a good dose of carb cleaner, this combined with new HT leads made a nice difference. Whilst I was wielding the carb cleaner I gave the inlet and carb base gaskets a good dose and noticed a slight change in engine note from the carb base.
Moving on from the above I wanted to change the carb to inlet manifold gaskets to eliminated any 'unmetered' air coming in here. I found no less than FIVE old crusty gaskets attached to the spacer! Two on the spacer-inlet and three on the spacer-carb, two came off in one piece so these must be the most recent but the others had to be picked off in bits and lumps.
It took an unreasonable amount of time to get all of the old petrol soaked card lumps and bumps off of the spacer and inlet manifold, even with a razor blade, but I got there. I also noticed that the vacuum line to the distributor advance was perished and that the hose that performs the crankcase ventilation function was so loose it came off all by itself when I moved the carb. I went through all the Saab's vacuum lines last year to solve idling issues (LH2.4 jetronic is very sensitive to vacuum issues) so had some spare 3.2mm ID silicone hose, the PCV hose I popped a clip on to secure it properly, further down the PCV system was a similar case - no hose clips and loose hoses - perhaps another unmetered input of air to upset the mixture.
In relation to this I noticed that the air filter and housing were quite oily and sludgy in places - especially from the crank breather hose, so with secured hoses perhaps this will also be resolved! I've cleaned with box and rotated the filter so we'll see. I also checked the spark plugs in this instalment after cleaning them back along, all were fine except for no.3 which was carbon fouled again (post new HT leads). Hmm, more investigations.
I'm not sure if it is the same with all XU's, but this one is a bit rattly - especially at certain rev's. That paired with the fact that the cambelt snapped at starter motor turn over speed not long after I go the car has made me suspicious of valve damage, it runs well enough but it sure could be better! So it is time to measure the valve clearances. I've not long finished grinding and reassembling the valvetrain in a freshly reconditioned head for the hearse (cut valve seats, welded, skimmed and pressure tested), it has also had new studs/bolts/core plugs the whole lot. It is a turbo conversion so a new IPD turbo cam with higher lift and longer duration has also gone in, it needed 3 stages of shim shuffling to get the clearances right...!
Interesting how Citroen bunched up the inlet valves/ports in this head, they alternate in the Volvo head - I wonder if it has any impact on smoothness or efficiency of running.
Haynes suggested a cold clearance of 0.15-0.25 for the inlet which seems quite tight and 0.35-.45 for the exhaust which is the same as both for the Volvo head.
E1 - 0.40 - bang in the middle
I1 - 0.25 - at the top end of tolerance
I2 - 0.26 - out
E2 - 0.46 - out
E3 - 0.52 - way out
I3 - 0.26 - out
I4 - 0.39 - waaay out!
E4 - 0.42 - ok
So cylinder 1 is within spec, but 2, 3 and 4 are outside of spec. I wonder if this explains some of the carbon fouling on cylinder 3 - if the valves aren't opening enough and for a shorter duration. All of the valves except E1 are at the top end of the spec, which could explain the noisy engine. In the Volvo I aimed for the lower end of spec for quietness, it mostly worked but with 0.05 shim increments there are limits!
The cambelt is probably coming up for changing, this would be a good time to whip the head off and inspect, I plan to get the head skimmed, pressure tested, valves/guides/seats checked and adjust the clearances to spec.
The next instalment was to look into some electrical gremlins that have surfaced, the red DANGER ENGINE MELTING temperature light had been on for some time, the temp gauge was behaving normally so I wasn't worried. However, the charging light started coming on in the first 5 minutes of running and when this went out, the reverse lights came on! I posted on the FB page for help and had some amazing replies from the BX community
The plan was to test and inspect the battery and alternator, reverse switch, temperature sender and the wires in this little loom. It turned out to be the 8 pin connector under the battery, the pins inside the connector were so corroded and crusty they had started touching each other, allowing current to leak across the pins to where it wasn't supposed to go!
It was so corroded that I almost couldn't separate the connector and had to resort to force! I cleaned what I could get to and the problems were all resolved, however as of yesterday I am getting the charging light and hokey reverse lights again so I plan to order a new connector and make up a new loom for these 8 wires, the current loom is borderline too short already, some of the wires are under strain so I think this connector has been replaced before.
Sometime in January I replaced the olive gasket between the downpipe and exhaust manifold due to a blow right at the front, I think this was damaged when I replaced the centre exhaust sections back along as this union surprised me by being flexible! This made the exhaust quiet again. However, over the last few weeks I have noticed yet ANOTHER exhaust blow, a sporting raspy blow from the back box and a blow from the weld on the downpipe where it goes 2 into 1... So I have bitten the bullet and booked it in for a full stainless system, I had planned this for the future but ideally it could have waited until next year. I was recommended to a guy in Taunton and I was impressed when he had a look at the BX, he reckons he can make the exhaust almost silent, which will be a first for a BX I think! I'm happy with that, it'll depend on the cost of course but I'd love a twin exit system with rectangular tail pipes (think letterbox)
The GT is also booked into Mr Kitchen's fine establishment for the next round of work, mostly suspension stuff. He is a busy man though so I am eagerly awaiting his call, it'll be a transformed car once the clutch, struts, bearings etc are all sorted
Last edited by saintjamesy89 on Sat Apr 01, 2023 11:06 pm, edited 1 time in total.
I'm not a Saint, or a James, but a Tom Saint-James!
Mes voitures:
1985 Citroen BX19 GT
1988 Volvo 740 2.3 HPT GL Hearse
2007 Lexus RX 400h SE hybrid
2007 Citroen C6 Lignage 2.2HDI manual
2013 Lexus RX 450h Luxury
Mes voitures:
1985 Citroen BX19 GT
1988 Volvo 740 2.3 HPT GL Hearse
2007 Lexus RX 400h SE hybrid
2007 Citroen C6 Lignage 2.2HDI manual
2013 Lexus RX 450h Luxury
-
saintjamesy89
- Over 2k
- Posts: 2096
- Joined: Tue May 04, 2010 8:01 pm
- Location: Somerset
- My Cars: 1985 Citroen BX19 GT
1985 Citroen BX16 TRS 'SE' auto
1988 Volvo 740 2.0 GL Hearse
1990 Volvo 740 2.3 GLE Estate
2013 Nissan Leaf Acenta 24Kw - x 196
Re: GT mediated Awesomeness
In other car news a buddy has helped me replace the springs and struts (front and rear) and ball joints on the Saab 900. There is more to do though as the lower front strut bolts both have some stripped thread - irritatingly these bolts are integral to the lower wishbones so the whole wishbone needs replacing because of one stud! The lower ball joints need doing anyway, so i'll do those together, I need to get on with it though as I haven't used it for 3 weeks because of the studs.
The Lexus is also in need of suspension work, the clunking rear ARB bushes were replaced in November for the MOT and there is now another clunk back there which needs investigating. The front tyres have never aligned properly and there is a worsening clunk at the front, I know the wishbone bushes need doing from MOT advisories, not such a simple job on this as the two side engine mounts need removing (front and back just loosening) and the engine jacking up to reveal a hidden wishbone bolt, instead of paying over £1000 for a garage to do it, I'll have a go myself. It is recommended to do the ball joints here as well, but it means removing the driveshafts to get the ball joint castle nut off, you can't remove the nut as it fouls the CV joint housing and according to the Lexus forms the ball joints on these are about as tight as they get - this I think is beyond me. Theoretically it is just undoing bolts, but I'm not looking forward to this job.
The Lexus is also in need of suspension work, the clunking rear ARB bushes were replaced in November for the MOT and there is now another clunk back there which needs investigating. The front tyres have never aligned properly and there is a worsening clunk at the front, I know the wishbone bushes need doing from MOT advisories, not such a simple job on this as the two side engine mounts need removing (front and back just loosening) and the engine jacking up to reveal a hidden wishbone bolt, instead of paying over £1000 for a garage to do it, I'll have a go myself. It is recommended to do the ball joints here as well, but it means removing the driveshafts to get the ball joint castle nut off, you can't remove the nut as it fouls the CV joint housing and according to the Lexus forms the ball joints on these are about as tight as they get - this I think is beyond me. Theoretically it is just undoing bolts, but I'm not looking forward to this job.
I'm not a Saint, or a James, but a Tom Saint-James!
Mes voitures:
1985 Citroen BX19 GT
1988 Volvo 740 2.3 HPT GL Hearse
2007 Lexus RX 400h SE hybrid
2007 Citroen C6 Lignage 2.2HDI manual
2013 Lexus RX 450h Luxury
Mes voitures:
1985 Citroen BX19 GT
1988 Volvo 740 2.3 HPT GL Hearse
2007 Lexus RX 400h SE hybrid
2007 Citroen C6 Lignage 2.2HDI manual
2013 Lexus RX 450h Luxury
-
Jugostran
- BXpert
- Posts: 216
- Joined: Fri Sep 10, 2021 6:22 pm
- Location: Osijek, Croatia
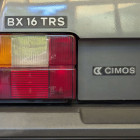
- My Cars: 1989 Cimos-Citroën BX 16 TRS
2007 BMW 318d (the "company car") - x 51
Re: GT mediated Awesomeness
Excellent work!saintjamesy89 wrote: Sat Mar 04, 2023 9:27 am I've been meaning to update this blog properly for ages, I had a go yesterday but failed to save or copy the text before I pressed submit and it all disappeared!
Ok, back in November I wanted to address the worsening blow of the middle parts of the exhaust system, waaay back I had jotted down that the hockey stick pipe needed replacing so one was ordered and as I went to fit it I realised that actually, this pipe was OK and it was the cross box silencer that had been damaged (probably in the same event as the sump).It was quite busted! Much quieter now. Whilst I was on a winning exhaust streak I also changed the rusted out centre silencer on the Saab - it was a struggle bashing the old one off!
I'd noticed the engine was not running at it's best, not as quick or smooth as it was and starting was more difficult than when I fitted the manual choke back along. I've not looked at the carb or ignition system for many many years (pre-2015 challenge) so it was high time for that. Lo and behold, on removing HT lead no.3 the wire came off of the spark plug connector! You can see the plugs above and that no.3 is carbon fouled, I guess this could be one reason! New set of HT leads ordered.
I also gave the carb a good dose of carb cleaner, this combined with new HT leads made a nice difference. Whilst I was wielding the carb cleaner I gave the inlet and carb base gaskets a good dose and noticed a slight change in engine note from the carb base.
Moving on from the above I wanted to change the carb to inlet manifold gaskets to eliminated any 'unmetered' air coming in here. I found no less than FIVE old crusty gaskets attached to the spacer! Two on the spacer-inlet and three on the spacer-carb, two came off in one piece so these must be the most recent but the others had to be picked off in bits and lumps.
It took an unreasonable amount of time to get all of the old petrol soaked card lumps and bumps off of the spacer and inlet manifold, even with a razor blade, but I got there. I also noticed that the vacuum line to the distributor advance was perished and that the hose that performs the crankcase ventilation function was so loose it came off all by itself when I moved the carb. I went through all the Saab's vacuum lines last year to solve idling issues (LH2.4 jetronic is very sensitive to vacuum issues) so had some spare 3.2mm ID silicone hose, the PCV hose I popped a clip on to secure it properly, further down the PCV system was a similar case - no hose clips and loose hoses - perhaps another unmetered input of air to upset the mixture.
In relation to this I noticed that the air filter and housing were quite oily and sludgy in places - especially from the crank breather hose, so with secured hoses perhaps this will also be resolved! I've cleaned with box and rotated the filter so we'll see. I also checked the spark plugs in this instalment after cleaning them back along, all were fine except for no.3 which was carbon fouled again (post new HT leads). Hmm, more investigations.
I'm not sure if it is the same with all XU's, but this one is a bit rattly - especially at certain rev's. That paired with the fact that the cambelt snapped at starter motor turn over speed not long after I go the car has made me suspicious of valve damage, it runs well enough but it sure could be better! So it is time to measure the valve clearances. I've not long finished grinding and reassembling the valvetrain in a freshly reconditioned head for the hearse (cut valve seats, welded, skimmed and pressure tested), it has also had new studs/bolts/core plugs the whole lot. It is a turbo conversion so a new IPD turbo cam with higher lift and longer duration has also gone in, it needed 3 stages of shim shuffling to get the clearances right...!
Interesting how Citroen bunched up the inlet valves/ports in this head, they alternate in the Volvo head - I wonder if it has any impact on smoothness or efficiency of running.
Haynes suggested a cold clearance of 0.15-0.25 for the inlet which seems quite tight and 0.35-.45 for the exhaust which is the same as both for the Volvo head.
E1 - 0.40 - bang in the middle
I1 - 0.25 - at the top end of tolerance
I2 - 0.26 - out
E2 - 0.46 - out
E3 - 0.52 - way out
I3 - 0.26 - out
I4 - 0.39 - ok
E4 - 0.42 - ok
So cylinder 1 and 4 are within spec, but 2 and 3 are outside of spec. I wonder if this explains some of the carbon fouling on cylinder 3 - if the valves aren't opening enough and for a shorter duration. All of the valves except E1 and I4 are at the top end of the spec, which could explain the noisy engine. In the Volvo I aimed for the lower end of spec for quietness, it mostly worked but with 0.05 shim increments there are limits!
The cambelt is probably coming up for changing, this would be a good time to whip the head off and inspect, I plan to get the head skimmed, pressure tested, valves/guides/seats checked and adjust the clearances to spec.
The next instalment was to look into some electrical gremlins that have surfaced, the red DANGER ENGINE MELTING temperature light had been on for some time, the temp gauge was behaving normally so I wasn't worried. However, the charging light started coming on in the first 5 minutes of running and when this went out, the reverse lights came on! I posted on the FB page for help and had some amazing replies from the BX community
The plan was to test and inspect the battery and alternator, reverse switch, temperature sender and the wires in this little loom. It turned out to be the 8 pin connector under the battery, the pins inside the connector were so corroded and crusty they had started touching each other, allowing current to leak across the pins to where it wasn't supposed to go!
It was so corroded that I almost couldn't separate the connector and had to resort to force! I cleaned what I could get to and the problems were all resolved, however as of yesterday I am getting the charging light and hokey reverse lights again so I plan to order a new connector and make up a new loom for these 8 wires, the current loom is borderline too short already, some of the wires are under strain so I think this connector has been replaced before.
Sometime in January I replaced the olive gasket between the downpipe and exhaust manifold due to a blow right at the front, I think this was damaged when I replaced the centre exhaust sections back along as this union surprised me by being flexible! This made the exhaust quiet again. However, over the last few weeks I have noticed yet ANOTHER exhaust blow, a sporting raspy blow from the back box and a blow from the weld on the downpipe where it goes 2 into 1... So I have bitten the bullet and booked it in for a full stainless system, I had planned this for the future but ideally it could have waited until next year. I was recommended to a guy in Taunton and I was impressed when he had a look at the BX, he reckons he can make the exhaust almost silent, which will be a first for a BX I think! I'm happy with that, it'll depend on the cost of course but I'd love a twin exit system with rectangular tail pipes (think letterbox)
The GT is also booked into Mr Kitchen's fine establishment for the next round of work, mostly suspension stuff. He is a busy man though so I am eagerly awaiting his call, it'll be a transformed car once the clutch, struts, bearings etc are all sorted
Anyway, I have a question.
You mentioned changing the hose going from the carb to the timing advance.
This hose, together with the timing advance, is leaking on my car. This causes quite poor starts.
What do I need to fix this system? Thanks!
(my car is also an XU so it should be the same)
Proud owner of a 1989 Yugoslavian Domestic Market Cimos-Citroën BX 16 TRS

-
saintjamesy89
- Over 2k
- Posts: 2096
- Joined: Tue May 04, 2010 8:01 pm
- Location: Somerset
- My Cars: 1985 Citroen BX19 GT
1985 Citroen BX16 TRS 'SE' auto
1988 Volvo 740 2.0 GL Hearse
1990 Volvo 740 2.3 GLE Estate
2013 Nissan Leaf Acenta 24Kw - x 196
Re: GT mediated Awesomeness
First off, pop on anew vacuum hose if it looks suspect. I had some 3.0 mm ID silicone stuff left over and it fitted nicely - you want it to be properly tight so you may need to dip the end in hot water before trying to put it on the end.
If that doesn't solve the issue, I think there is a diaphragm in the advance unit on the distributor, years ago I was lucky to find a NOS distributor on leboncoin, but its probably easier to send yours off to be refurbished these days. Good luck!
If that doesn't solve the issue, I think there is a diaphragm in the advance unit on the distributor, years ago I was lucky to find a NOS distributor on leboncoin, but its probably easier to send yours off to be refurbished these days. Good luck!
Last edited by saintjamesy89 on Sat Apr 01, 2023 11:25 pm, edited 1 time in total.
I'm not a Saint, or a James, but a Tom Saint-James!
Mes voitures:
1985 Citroen BX19 GT
1988 Volvo 740 2.3 HPT GL Hearse
2007 Lexus RX 400h SE hybrid
2007 Citroen C6 Lignage 2.2HDI manual
2013 Lexus RX 450h Luxury
Mes voitures:
1985 Citroen BX19 GT
1988 Volvo 740 2.3 HPT GL Hearse
2007 Lexus RX 400h SE hybrid
2007 Citroen C6 Lignage 2.2HDI manual
2013 Lexus RX 450h Luxury
-
Jugostran
- BXpert
- Posts: 216
- Joined: Fri Sep 10, 2021 6:22 pm
- Location: Osijek, Croatia
- My Cars: 1989 Cimos-Citroën BX 16 TRS
2007 BMW 318d (the "company car") - x 51
Re: GT mediated Awesomeness
Thanks for the advice!saintjamesy89 wrote: Sun Mar 05, 2023 3:43 pm First off, pop on anew vacuum hose if it looks suspect. I has some 3 mm ID silicone stuff left over and it fitted nicely.
If that doesn't solve the issue, I think there is a diaphragm in the advance unit on the distributor, years ago I found a NOS dizzy on leboncoin but its probably easier to send yours off to be refurbished these days. Good luck!
Proud owner of a 1989 Yugoslavian Domestic Market Cimos-Citroën BX 16 TRS
-
Jugostran
- BXpert
- Posts: 216
- Joined: Fri Sep 10, 2021 6:22 pm
- Location: Osijek, Croatia
- My Cars: 1989 Cimos-Citroën BX 16 TRS
2007 BMW 318d (the "company car") - x 51
Re: GT mediated Awesomeness
I just replaced the vacuum hose. The old one was quite bad.saintjamesy89 wrote: Sun Mar 05, 2023 3:43 pm First off, pop on anew vacuum hose if it looks suspect. I has some 3 mm ID silicone stuff left over and it fitted nicely.
If that doesn't solve the issue, I think there is a diaphragm in the advance unit on the distributor, years ago I found a NOS dizzy on leboncoin but its probably easier to send yours off to be refurbished these days. Good luck!
However, it isn't 3 mm, instead being 4 mm. This is a Solex 2 barrel carb, so I guess it is different than on Weber cars.
However, I may have to refurbish the advance on the distributor. It has been leaking in that area since I bought the car.
Proud owner of a 1989 Yugoslavian Domestic Market Cimos-Citroën BX 16 TRS
-
saintjamesy89
- Over 2k
- Posts: 2096
- Joined: Tue May 04, 2010 8:01 pm
- Location: Somerset
- My Cars: 1985 Citroen BX19 GT
1985 Citroen BX16 TRS 'SE' auto
1988 Volvo 740 2.0 GL Hearse
1990 Volvo 740 2.3 GLE Estate
2013 Nissan Leaf Acenta 24Kw - x 196
Re: GT mediated Awesomeness
You want the vacuum hose to be properly tight, did you use rubber or silicone? Either way it should be difficult to get on and may need the hose end heating up (dip it in hot/boiled water for example). My carb is a 34/34 Solex, yours should be a 32/34 but they are almost the same carb IIRC. What you don't want is air getting in through a bad seal on the vacuum hose - it'll lean out the mixture and make starting even harder!Jugostran wrote: Sat Mar 18, 2023 12:17 pmI just replaced the vacuum hose. The old one was quite bad.
However, it isn't 3 mm, instead being 4 mm. This is a Solex 2 barrel carb, so I guess it is different than on Weber cars.
However, I may have to refurbish the advance on the distributor. It has been leaking in that area since I bought the car.
I'm not a Saint, or a James, but a Tom Saint-James!
Mes voitures:
1985 Citroen BX19 GT
1988 Volvo 740 2.3 HPT GL Hearse
2007 Lexus RX 400h SE hybrid
2007 Citroen C6 Lignage 2.2HDI manual
2013 Lexus RX 450h Luxury
Mes voitures:
1985 Citroen BX19 GT
1988 Volvo 740 2.3 HPT GL Hearse
2007 Lexus RX 400h SE hybrid
2007 Citroen C6 Lignage 2.2HDI manual
2013 Lexus RX 450h Luxury
-
Jugostran
- BXpert
- Posts: 216
- Joined: Fri Sep 10, 2021 6:22 pm
- Location: Osijek, Croatia
- My Cars: 1989 Cimos-Citroën BX 16 TRS
2007 BMW 318d (the "company car") - x 51
Re: GT mediated Awesomeness
I used silicone, and it was quite tight. However, I am going to replace it with a 3.8/4 mm rubber one. Thanks for the warning though! The vacuum on the distributor side is definitely good, so its fine for now. I'll post an update when I get a rubber hose.saintjamesy89 wrote: Sat Apr 01, 2023 11:31 pmYou want the vacuum hose to be properly tight, did you use rubber or silicone? Either way it should be difficult to get on and may need the hose end heating up (dip it in hot/boiled water for example). My carb is a 34/34 Solex, yours should be a 32/34 but they are almost the same carb IIRC. What you don't want is air getting in through a bad seal on the vacuum hose - it'll lean out the mixture and make starting even harder!Jugostran wrote: Sat Mar 18, 2023 12:17 pmI just replaced the vacuum hose. The old one was quite bad.
However, it isn't 3 mm, instead being 4 mm. This is a Solex 2 barrel carb, so I guess it is different than on Weber cars.
However, I may have to refurbish the advance on the distributor. It has been leaking in that area since I bought the car.
Proud owner of a 1989 Yugoslavian Domestic Market Cimos-Citroën BX 16 TRS
-
saintjamesy89
- Over 2k
- Posts: 2096
- Joined: Tue May 04, 2010 8:01 pm
- Location: Somerset
- My Cars: 1985 Citroen BX19 GT
1985 Citroen BX16 TRS 'SE' auto
1988 Volvo 740 2.0 GL Hearse
1990 Volvo 740 2.3 GLE Estate
2013 Nissan Leaf Acenta 24Kw - x 196
Re: GT mediated Awesomeness
Fingers crossed Jugostran, I hope that sorts it out for you. BTW it is worth checking for air leaks on your inlet gasket, mine starts an awful lot easier after doing that job. Carb cleaner is your friend.
I have ticked off the next round of jobs last week, two half days of tinkering as I got a little carried away with things! I got in trouble for leaving the BX incapacitated on the drive where the 'family' car is usually parked (i.e. the one that the other half uses daily). Oops! I got very lucky with some nice sunshine on day one, but got quite wet on day two - ho hum.
There were a few things I wanted to get done, I got some done and even some extra bits that weren't planned! The first was to address the inlet manifold, I was worried about a rusty stain on the front of the engine block, my first worry was the head gasket leaking - but then I remembered that most carb inlet manifolds have coolant passages, paired with lacklustre performance checking out the gasket was a lot easier than doing the head when I am relying on using this car just now! This is what I was presented with, yuk!

Well it looks like the inlet gasket was likely the coolant leaking culprit! I'll monitor it going forward anyway - you can see the rusty stains down the front of the block that had me worried! The coolant needs changing I think - another job to do.

It certainly took a while to clean all that up, I went through three Stanley blades scraping away all the crap but the face came up nicely with a little bit of corrosion around the coolant passages, I will pop a smidgen of copper RTV around to help the gasket seal properly. When I inspected the inlet manifold ports I noticed they were square, this got me thinking... Square inlet manifold, rhomboid gasket holes and a third different shape for the cylinder head ports - why on earth?!
To explain myself a little for my next actions ( ), I'm building a breathed on turbo engine for our Volvo 740 hearse, hybrid turbo, upgraded cylinder head etc and have decided to gasket the inlet/exhaust ports on the manifold and head on the new engine to the gaskets - there is a restriction that with a little work can be removed. SO, I have a spare BX inlet manifold and thought i'd have a practice run as it didn't matter if I cocked it up. I'd planned ahead and bought some carbide grinding drill bits of several different shapes and sizes and I had mixed results
A Volvo exhaust port for reference (these are genuine Volvo gaskets), I want minimal turbo lag so maximum exhaust gas velocity, especially at low revs.

Inlet manifold on the car

Gasket and spare manifold marked up

First ports attempted, no finishing - just grinding.


The last port is where I had issues, I ran out of metal! I was grinding quite close to where the inlet runners meet the manifold-head mounting face on the other side, so I will see if my friendly fabricator can add some metal to the back of this for me to finish it or if it's a write off. If it can be saved, I need to go over all the ports with a flap wheel of different grits to even it out - but I am aware that it doesn't want to be too smooth or polished to promote some turbulence for decent fuel/air mixing.
I next put my big boy pants on and very anxiously had a go at taking the marked areas off of the inlet ports on the cylinder head, I'm hoping this isn't a huge mistake as it is too late now... I took off as little as possible to get a smoother transition from the inlet-to-head ports, it'll need further finishing when the inlet manifold that matches it is put on - but as I made a hole in that mani the original still square port manifold has gone back on. The pictures don't show it but the ports were carefully stuffed full with paper roll to stop any shavings going anywhere near the valves, I hoovered as I removed the paper and the whole area afterwards as well for the same reason.

Here we go, corners taken off and fairly well gasket matched You cannot believe how nervous I was doing this...

Before I got into the wiring that needed to be done, I noticed some antifreeze crystals around the thermostat housing - so that came off to be cleaned and inspected too. I'm not sure if there should be a gasket between the housing and block face, as well as the rubber seal that sits inside the housing on the thermostat itself (it looks like there may have been one in the past) but I didn't have one, so I put a bit of RTV on there to help seal it up. The stat hose is also leaking a bit where it meets that stat housing, but the original clip is still on there, I didn't have a replacement hose clip either so left that alone for now.

Clean!

A benefit of having the inlet out of the way was to create much more elbow room for me to replace the engine loom, all 10 wires of it Both battery cables have dodgy terminals that have turned into a very soft putty-like metal, I spotted this hugely overpriced new genuine cable on eBay and couldn't quite help myself... The negative is a more conventional cable so I'll order one once I've measured up.

Old loom vs new loom.

The two unconnected wires go onto the positive battery cable.

If you've read my ramblings above, congratulations! I can go on a bit I know... Anyway, I've been getting all sorts of engine warning lights, charging issues, bizarre reverse lights etc which were all due to the engine loom connector being corroded and current jumping across the pins on the connector, there may even have been a leaking battery in the past to accelerate the corrosion. I ordered three different sizes of heat shrink to nicely protect the new loom, but genius that I am went ahead and put all the ends on before I remembered that heat shrink needs to go on first... D'oh! I tried to reuse the old spade connectors and housings for originality but I didn't have time to fiddle around removing the old connectors etc, so just used generic spades - it doesn't look original but that doesn't bother me too much.
That's pretty much it, I idled the engine until the stat opened and the fan came on and topped up the coolant bit by bit. The test drive was nice, there was a marked improvement in top end shove from the few times I gave it the beans, so it was worth doing! I also hope it'll improve the 28mpg I have been getting
The exhaust is still needing doing and is blowing quite a lot now, because I was a fussy bugger with the tail pipe tips the guy had to use a non-regular supplier and they aren't due to be delivered till early next week. So once the exhaust is done and gasket-matched manifold on, I'll get the mixture checked and any carb rejetting or adjusting done to account for changes in airflow, the last thing I want is to melt something by it running lean. There is a local-ish garage that has a good reputation for this and a decent rolling road too, it'll be interesting to see the figures. Before we get too far into the summer I'd like to get the windows tinted, it is a very warm car inside, as it is an early BX there is no factory window tinting at all!
There are still a few jobs that need doing, in fact every time I tick a job off I find a few more that need doing.
-Drain the hydraflush and replace with LHM, making sure to bleed all the brakes.
-Clean and lubricate the front brake sliders
-New spark plugs
-Replace the engine bay rubber fuel hoses (ethanol resistant types)
-Buy hose clips and clean stat housing coolant hose connections
-At some point drain and renew the coolant
-At some point have the head off and adjust the valve clearances, whilst I'm at it I'll try not to get too carried away with the head (e.g. EFI cam and EFI valve conversion, these are bigger than the 105hp carb head valves )
)
I have ticked off the next round of jobs last week, two half days of tinkering as I got a little carried away with things! I got in trouble for leaving the BX incapacitated on the drive where the 'family' car is usually parked (i.e. the one that the other half uses daily). Oops! I got very lucky with some nice sunshine on day one, but got quite wet on day two - ho hum.
There were a few things I wanted to get done, I got some done and even some extra bits that weren't planned! The first was to address the inlet manifold, I was worried about a rusty stain on the front of the engine block, my first worry was the head gasket leaking - but then I remembered that most carb inlet manifolds have coolant passages, paired with lacklustre performance checking out the gasket was a lot easier than doing the head when I am relying on using this car just now! This is what I was presented with, yuk!
Well it looks like the inlet gasket was likely the coolant leaking culprit! I'll monitor it going forward anyway - you can see the rusty stains down the front of the block that had me worried! The coolant needs changing I think - another job to do.
It certainly took a while to clean all that up, I went through three Stanley blades scraping away all the crap but the face came up nicely with a little bit of corrosion around the coolant passages, I will pop a smidgen of copper RTV around to help the gasket seal properly. When I inspected the inlet manifold ports I noticed they were square, this got me thinking... Square inlet manifold, rhomboid gasket holes and a third different shape for the cylinder head ports - why on earth?!
To explain myself a little for my next actions (
A Volvo exhaust port for reference (these are genuine Volvo gaskets), I want minimal turbo lag so maximum exhaust gas velocity, especially at low revs.
Inlet manifold on the car
Gasket and spare manifold marked up
First ports attempted, no finishing - just grinding.
The last port is where I had issues, I ran out of metal! I was grinding quite close to where the inlet runners meet the manifold-head mounting face on the other side, so I will see if my friendly fabricator can add some metal to the back of this for me to finish it or if it's a write off. If it can be saved, I need to go over all the ports with a flap wheel of different grits to even it out - but I am aware that it doesn't want to be too smooth or polished to promote some turbulence for decent fuel/air mixing.
I next put my big boy pants on and very anxiously had a go at taking the marked areas off of the inlet ports on the cylinder head, I'm hoping this isn't a huge mistake as it is too late now... I took off as little as possible to get a smoother transition from the inlet-to-head ports, it'll need further finishing when the inlet manifold that matches it is put on - but as I made a hole in that mani the original still square port manifold has gone back on. The pictures don't show it but the ports were carefully stuffed full with paper roll to stop any shavings going anywhere near the valves, I hoovered as I removed the paper and the whole area afterwards as well for the same reason.
Here we go, corners taken off and fairly well gasket matched
Before I got into the wiring that needed to be done, I noticed some antifreeze crystals around the thermostat housing - so that came off to be cleaned and inspected too. I'm not sure if there should be a gasket between the housing and block face, as well as the rubber seal that sits inside the housing on the thermostat itself (it looks like there may have been one in the past) but I didn't have one, so I put a bit of RTV on there to help seal it up. The stat hose is also leaking a bit where it meets that stat housing, but the original clip is still on there, I didn't have a replacement hose clip either so left that alone for now.
Clean!
A benefit of having the inlet out of the way was to create much more elbow room for me to replace the engine loom, all 10 wires of it
Old loom vs new loom.
The two unconnected wires go onto the positive battery cable.
If you've read my ramblings above, congratulations! I can go on a bit I know... Anyway, I've been getting all sorts of engine warning lights, charging issues, bizarre reverse lights etc which were all due to the engine loom connector being corroded and current jumping across the pins on the connector, there may even have been a leaking battery in the past to accelerate the corrosion. I ordered three different sizes of heat shrink to nicely protect the new loom, but genius that I am went ahead and put all the ends on before I remembered that heat shrink needs to go on first... D'oh! I tried to reuse the old spade connectors and housings for originality but I didn't have time to fiddle around removing the old connectors etc, so just used generic spades - it doesn't look original but that doesn't bother me too much.
That's pretty much it, I idled the engine until the stat opened and the fan came on and topped up the coolant bit by bit. The test drive was nice, there was a marked improvement in top end shove from the few times I gave it the beans, so it was worth doing! I also hope it'll improve the 28mpg I have been getting
The exhaust is still needing doing and is blowing quite a lot now, because I was a fussy bugger with the tail pipe tips the guy had to use a non-regular supplier and they aren't due to be delivered till early next week. So once the exhaust is done and gasket-matched manifold on, I'll get the mixture checked and any carb rejetting or adjusting done to account for changes in airflow, the last thing I want is to melt something by it running lean. There is a local-ish garage that has a good reputation for this and a decent rolling road too, it'll be interesting to see the figures. Before we get too far into the summer I'd like to get the windows tinted, it is a very warm car inside, as it is an early BX there is no factory window tinting at all!
There are still a few jobs that need doing, in fact every time I tick a job off I find a few more that need doing.
-Drain the hydraflush and replace with LHM, making sure to bleed all the brakes.
-Clean and lubricate the front brake sliders
-New spark plugs
-Replace the engine bay rubber fuel hoses (ethanol resistant types)
-Buy hose clips and clean stat housing coolant hose connections
-At some point drain and renew the coolant
-At some point have the head off and adjust the valve clearances, whilst I'm at it I'll try not to get too carried away with the head (e.g. EFI cam and EFI valve conversion, these are bigger than the 105hp carb head valves
I'm not a Saint, or a James, but a Tom Saint-James!
Mes voitures:
1985 Citroen BX19 GT
1988 Volvo 740 2.3 HPT GL Hearse
2007 Lexus RX 400h SE hybrid
2007 Citroen C6 Lignage 2.2HDI manual
2013 Lexus RX 450h Luxury
Mes voitures:
1985 Citroen BX19 GT
1988 Volvo 740 2.3 HPT GL Hearse
2007 Lexus RX 400h SE hybrid
2007 Citroen C6 Lignage 2.2HDI manual
2013 Lexus RX 450h Luxury
-
Jugostran
- BXpert
- Posts: 216
- Joined: Fri Sep 10, 2021 6:22 pm
- Location: Osijek, Croatia
- My Cars: 1989 Cimos-Citroën BX 16 TRS
2007 BMW 318d (the "company car") - x 51
Re: GT mediated Awesomeness
I never thought about touching the inlet gasket. Gaskets are really hard to get in Serbia, so I'm not sure I should take it off. The carb is coming off though, it needs to be rebuilt. I get horrible mileage (around 16 MPG on a good day), so it is a definite issue. The vacuum on the starter actuatior/distributor is also good, so the carb is probably to blame.saintjamesy89 wrote: Fri Apr 07, 2023 10:32 pm Fingers crossed Jugostran, I hope that sorts it out for you. BTW it is worth checking for air leaks on your inlet gasket, mine starts an awful lot easier after doing that job. Carb cleaner is your friend.
I have ticked off the next round of jobs last week, two half days of tinkering as I got a little carried away with things! I got in trouble for leaving the BX incapacitated on the drive where the 'family' car is usually parked (i.e. the one that the other half uses daily). Oops! I got very lucky with some nice sunshine on day one, but got quite wet on day two - ho hum.
There were a few things I wanted to get done, I got some done and even some extra bits that weren't planned! The first was to address the inlet manifold, I was worried about a rusty stain on the front of the engine block, my first worry was the head gasket leaking - but then I remembered that most carb inlet manifolds have coolant passages, paired with lacklustre performance checking out the gasket was a lot easier than doing the head when I am relying on using this car just now! This is what I was presented with, yuk!
Well it looks like the inlet gasket was likely the coolant leaking culprit! I'll monitor it going forward anyway - you can see the rusty stains down the front of the block that had me worried! The coolant needs changing I think - another job to do.
It certainly took a while to clean all that up, I went through three Stanley blades scraping away all the crap but the face came up nicely with a little bit of corrosion around the coolant passages, I will pop a smidgen of copper RTV around to help the gasket seal properly. When I inspected the inlet manifold ports I noticed they were square, this got me thinking... Square inlet manifold, rhomboid gasket holes and a third different shape for the cylinder head ports - why on earth?!
To explain myself a little for my next actions (
A Volvo exhaust port for reference (these are genuine Volvo gaskets), I want minimal turbo lag so maximum exhaust gas velocity, especially at low revs.
Inlet manifold on the car
Gasket and spare manifold marked up
First ports attempted, no finishing - just grinding.
The last port is where I had issues, I ran out of metal! I was grinding quite close to where the inlet runners meet the manifold-head mounting face on the other side, so I will see if my friendly fabricator can add some metal to the back of this for me to finish it or if it's a write off. If it can be saved, I need to go over all the ports with a flap wheel of different grits to even it out - but I am aware that it doesn't want to be too smooth or polished to promote some turbulence for decent fuel/air mixing.
I next put my big boy pants on and very anxiously had a go at taking the marked areas off of the inlet ports on the cylinder head, I'm hoping this isn't a huge mistake as it is too late now... I took off as little as possible to get a smoother transition from the inlet-to-head ports, it'll need further finishing when the inlet manifold that matches it is put on - but as I made a hole in that mani the original still square port manifold has gone back on. The pictures don't show it but the ports were carefully stuffed full with paper roll to stop any shavings going anywhere near the valves, I hoovered as I removed the paper and the whole area afterwards as well for the same reason.
Here we go, corners taken off and fairly well gasket matched
Before I got into the wiring that needed to be done, I noticed some antifreeze crystals around the thermostat housing - so that came off to be cleaned and inspected too. I'm not sure if there should be a gasket between the housing and block face, as well as the rubber seal that sits inside the housing on the thermostat itself (it looks like there may have been one in the past) but I didn't have one, so I put a bit of RTV on there to help seal it up. The stat hose is also leaking a bit where it meets that stat housing, but the original clip is still on there, I didn't have a replacement hose clip either so left that alone for now.
Clean!
A benefit of having the inlet out of the way was to create much more elbow room for me to replace the engine loom, all 10 wires of it
Old loom vs new loom.
The two unconnected wires go onto the positive battery cable.
If you've read my ramblings above, congratulations! I can go on a bit I know... Anyway, I've been getting all sorts of engine warning lights, charging issues, bizarre reverse lights etc which were all due to the engine loom connector being corroded and current jumping across the pins on the connector, there may even have been a leaking battery in the past to accelerate the corrosion. I ordered three different sizes of heat shrink to nicely protect the new loom, but genius that I am went ahead and put all the ends on before I remembered that heat shrink needs to go on first... D'oh! I tried to reuse the old spade connectors and housings for originality but I didn't have time to fiddle around removing the old connectors etc, so just used generic spades - it doesn't look original but that doesn't bother me too much.
That's pretty much it, I idled the engine until the stat opened and the fan came on and topped up the coolant bit by bit. The test drive was nice, there was a marked improvement in top end shove from the few times I gave it the beans, so it was worth doing! I also hope it'll improve the 28mpg I have been getting
The exhaust is still needing doing and is blowing quite a lot now, because I was a fussy bugger with the tail pipe tips the guy had to use a non-regular supplier and they aren't due to be delivered till early next week. So once the exhaust is done and gasket-matched manifold on, I'll get the mixture checked and any carb rejetting or adjusting done to account for changes in airflow, the last thing I want is to melt something by it running lean. There is a local-ish garage that has a good reputation for this and a decent rolling road too, it'll be interesting to see the figures. Before we get too far into the summer I'd like to get the windows tinted, it is a very warm car inside, as it is an early BX there is no factory window tinting at all!
There are still a few jobs that need doing, in fact every time I tick a job off I find a few more that need doing.
-Drain the hydraflush and replace with LHM, making sure to bleed all the brakes.
-Clean and lubricate the front brake sliders
-New spark plugs
-Replace the engine bay rubber fuel hoses (ethanol resistant types)
-Buy hose clips and clean stat housing coolant hose connections
-At some point drain and renew the coolant
-At some point have the head off and adjust the valve clearances, whilst I'm at it I'll try not to get too carried away with the head (e.g. EFI cam and EFI valve conversion, these are bigger than the 105hp carb head valves
Really nice work on the inlet gasket by the way. The new wiring also looks stellar. Good luck with those other repairs as well!
Oh, and doing a head off job. At some point I'll take the head off and take it to a machine shop so it can get done. I think that'll greatly improved engine performance (hopefully it'll make it super smooth).
Proud owner of a 1989 Yugoslavian Domestic Market Cimos-Citroën BX 16 TRS